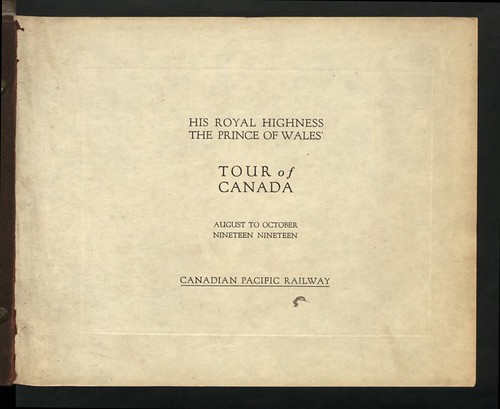
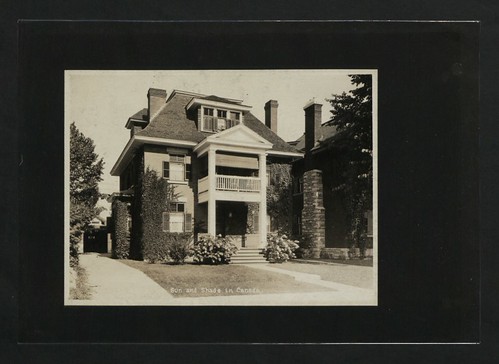
In commemoration of Canada Day, our former colonial masters have found some pictures of that place formerly known as their colony of Canada and very kindly shared them with us via flickr.
I haven’t been doing much wargaming stuff the last couple of weeks, for a variety of bad reasons, so things have definitely been quieter here on the Warbard than usual. Nevertheless, here’s some links of possible interest for your weekend!
The Pulp Magazines Project describes itself as “…an open-access digital archive dedicated to the study and preservation of one of the twentieth century’s most influential literary & artistic forms: the all-fiction pulpwood magazine.”. It has sample issues in PDF format, a cover gallery, and articles on pulp magazines. Well worth a visit; the sample issues you can download are complete including all their advertising, which is often as interesting as the stories themselves.
Via Miniature Wargaming, Wargaming for Grownups has a set of square-based Russian Civil War rules. I’ve only skimmed them, but they’re higher-level than some (basic units seem to be infantry regiments and cavalry squadrons) and look to have some interesting ideas. Red Army, White Guard is over on Google Docs, where you can also grab a PDF version (File->Download PDF inside Google Docs).
Also via MW and on the RCW theme, Dave Waxtel’s RCW Rules, which are interesting mostly for the pre- and post-game sequences, which use political and other background maneuvering to influence the game. Again I’ve only skimmed these, but that pre- and post-game stuff would be fairly easy to adapt to any other rules system you cared to use for the actual game.
Finally, on the spectacular David Rumsey Map Collections website, South-West Russia from 1912 and Russia & Finland 1922, just to round out the Russian Civil War theme of several of today’s links.
Brian already gave a nice little AAR of our last game, but I thought I would make it a little interesting. Sadly my primary machine has been on the fritz for a bit now, so photo editing is a slow process (I own a Canon 40D and shot in RAW). But given I just bought a new 60mm macro lens, I figured I just needed to share:
Early in the game, the Red armoured car:
The Red armoured car
My Lledo truck with Brian’s armoured car and Model T in the background, about to unload Red Sailors:
Red trucks before unloading sailors
…who promptly get chopped apart by my White cavalry.
The White cavalry runs down the Red Sailors
The White baggage train (my Copplestone Yaks and Brian’s White infantry), right before…
The baggage train
…the Red armoured car chopped with up with its twin machine guns. It was ugly.
The Red armoured car and infantry
The end result fo the game is that we each massacred one part of the other force, but I got the General off, so a (very) minor White victory.
I have some Copplestone Chinese on the painting table, so soon we will have a fourth side
The Sunday gaming club was pretty much at capacity today! We meet up at the University of Victoria and have a classroom reserved every Sunday, and this Sunday we had Corey and I playing Russian Civil War, three of the regulars playing 1879 Anglo-Zulu War with Two Hour Wargames’ colonial rules, and a game each of WHFB & 40K to round it out.
Our RCW game was intentionally light and quick; we had both my new armoured car and the half-painted cavalry on the table and wanted to see how these new-to-us forces ran in Through the Mud & the Blood before we got stuck into another larger game. Corey had a White cavalry squadron and a single section of White infantry, intent on rescuing the retired (but widely admired) General Alzheimerski; I took a Red Guard/partisan section, two small sections of Red sailors on trucks, and the armoured car, all under the nominal command of the hapless Commisar Blotski.
The Whites needed to get Alzheimerski to the nearest open patch of ground a British DH9 could land on, so they could bundle the old general onboard and get him to safety; getting his valuables off the table would be a bonus. The Reds were trying to capture Alzheimerski, as part of some scheme of Blotski’s to help him gain influence in Moscow.
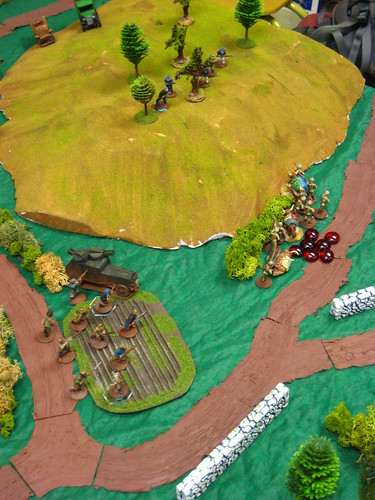
Late in our game, the Red Guard and armoured car catch the White caravan guards while they attempt to flee!
To represent the various Red forces involved not really wanting anything to do with Blotski’s scheme, we threw a Hesitant Troops card into the mix for the Reds. The Whites also had a card for Alzheimerski, such that if his card came up before the actual officers of a unit he was attached to, he had a chance to lead that unit off on a death-or-glory charge — or he might do nothing at all…
The game started with the White cavalry, having gathered up the old man and gotten him on a horse, taking off cross country on a direct line to the planned landing zone of the British aircraft. This left the Red trucks and armoured cars at a disadvantage, as they move slower offroad than horses do. The armoured car took off to meet up with the local Red Guard, while the sailors pushed their trucks uphill a bit then began to get out, intending to get into the woods to fend off the White cavalry.
Unfortunately, that ended badly when the White horse came through the woods and down the hill much faster than the sailors were expecting. The cavalry didn’t even slow down, sabering half the sailors dead and thundering onward toward the rendezvous with the escape aircraft. (When cav catch infantry in the open in M&B, they get to double their melee dice… this lead to the cavalry having about two dozen dice in melee to the sailor’s ten or so… it was ugly.)
On the other side of the hill, the Red armoured car and Red Guard did manage to catch up to the White infantry guarding the pack train with the old General’s valuables. Two heavy machine guns and some rifle fire drove the White infantry off in short order and scattered the pack animals, who ran up the hill into the waiting arms of the surviving half of the Red sailors, who discovered that General Alzheimerski’s valuables were very valuable indeed!
We had a few questions about vehicles in M&B, which I’ll take up with the very helpful folks on the TooFatLardies mailing list, but it was a good quick game overall. The armoured car is slow, clumsy but deadly (which feels about right) and cavalry are fast and lethal when they’re able to run over unsupported infantry. I’m looking foward to more varied games now that we’ve got something other than just infantry on the table!
I don’t normally post work in progress shots of figures, but things have been quiet around here lately, so here’s my latest project, ten Russian Civil War cavalry. More details later, prepping for a game tomorrow! (as usual, click the photo for larger…)
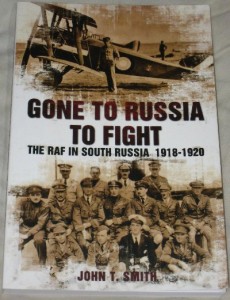
The international intervention into the Russian Civil War — basically, the Western Entente (Allies) attempting to first keep Russia in the fight against Germany, and then to defeat the Bolsheviks and assist the anti-Bolshevik Whites — is not an area that gets a lot of attention, being overlooked as a sideshow both to the Great War and even to the larger Russian Civil War. Gone To Russia To Fight: The RAF in South Russia 1918-1920 is a look at a unique (and even more overlooked…) piece of that sideshow: the involvement of a couple of Royal Air Force squadrons in Southern Russia and the Caucasus/trans-Caucasus/Caspian Sea area during the Russian Civil War.
“Very little has been written about the RAF in south Russia and much of what has been written has been inaccurate. Several myths have been accepted as truths and written into the histories. This book is an attempt to set the record straight by going back, where possible, to the primary sources.”
— Introduction, Gone to Russia To Fight
The book opens with a couple of chapters giving a brief overview of the entire Russian Civil War, the background to sending the RAF and other forces into Russia, and the adventures of Dunsterforce around the Caspian early in the RCW, then goes through the entire RAF deployment one month per chapter. The author, John T. Smith, goes right back to squadron diaries and both published and unpublished memoirs for his material, in several cases pointing out where previous popular histories (or even published memoirs) clash with the squadron diary records and are likely or even provably incorrect.
One unexpected connection to local Canadian history I learned through this book: Raymond Collishaw, a fairly well known RAF WW1 ace who was born in the same region of Canada I live in, was one of the RAF officers in charge of the South Russia expedition. Our very own local connection to the events of this book — who knew?
Cover of Gone To Russia To Fight.
The book has some neat period photographs from a variety of archives, including some fished out of the Russian archives in recent years. The writing is clear and readable, although Smith’s writing style, especially in the first few chapters, is staccato and choppy at times, with lots of short sentences, sometimes to the point where it seems like a grade-school textbook instead of an adult history book. The one major disappointment are the maps. There are only four in the whole book, none of which adequately cover the area discussed in the text. The detail map of one harbour on the Caspian repeatedly attacked by the RAF forces seems kind of pointless, given that a clear, full-page annotated aerial photograph is also included. Given the unfamiliarity of the theatre, the sometimes difficult Russian place names, and the fact that many place names have changed in the intervening 90-some years (making modern atlases or Google Maps unreliable), a few good detailed maps would have been a huge help.
The maps aside, this is an interesting and clearly written look at an oft-forgotten theatre, and Smith does a great job of going right back to primary documents to provide the clearest possible narrative of events 90+ years ago.
Gone to Russia To Fight: The RAF in South Russia 1918-1920 by John T. Smith, published 2010 by Amberley Press. £5.95 from Naval & Military Press. (normally £14.99, no idea how long the discount from NMP will last, but grab it while you can!)
The Shortest Possible Review: A fascinating look at an overlooked piece of RAF history, and a unique perspective on the Russian Civil War.
As a wargamer, I’m now fighting the urge to get some aircraft and some river boats and barges to try and recreate some of the actions from Gone to Russia. Maybe the 1/600 RCW ships from PT Dockyard and some 1/600 WW1 aircraft from Tumbling Dice or elsewhere? Must resist, not got the time or budget right now for a new scale!
“The importance assumed by trench warfare… have rendered necessary special instructions in the details of trench construction and trench fighting.” — Ch1:1, Notes
This is a modern facsimile reprint of an official 1916 British War Office publication, published by Naval & Military Press. You can find scanned PDF versions of this document online, but I took advantage of NMP’s Easter sale to get a printed version very, very cheaply. It’s a small paperback, roughly 7″x5″ and 78 pages long. (I talked about my experience ordering from NMP previously.)
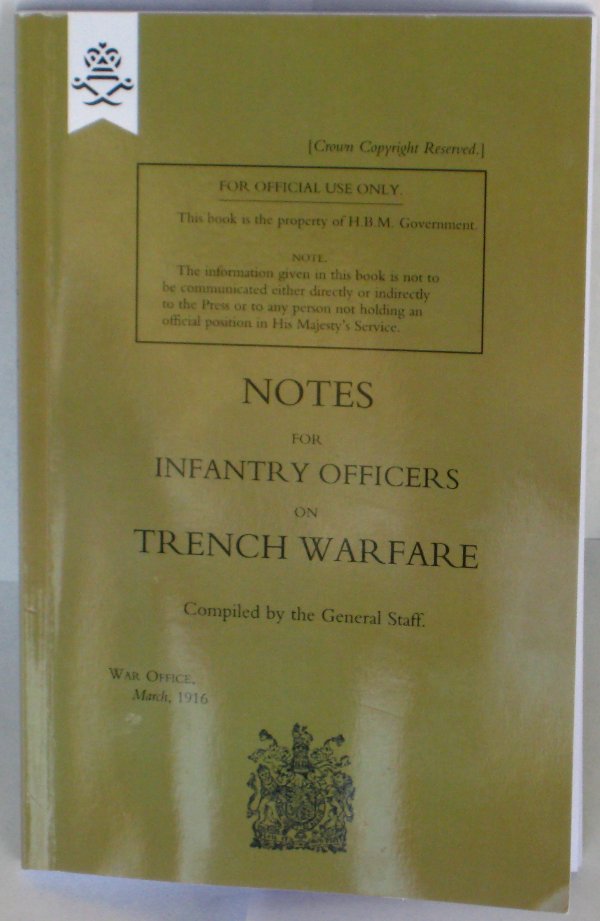
It was compiled by the British General Staff in March 1916 as a training and reference guide for, as the title says, officers in the trenches of the Western Front. The five chapters comprise an introduction, a long chapter on the construction and maintenance of trenches, the daily routine of trench warfare, defending trenches, and finally the attack in trench warfare. The book finishes off with a couple of appendices, thirty-five diagrams, and a short index.
Cover of NMP’s reprint of “Notes for Infantry Officers on Trench Warfare” of 1916.
The writers repeatedly remind the reader that trench warfare is “only a phase of operations“, and that “(t)he aim of trench fighting is, therefore, to create a favourable situation for field operations, which the troops must be capable of turning to account.” While this is technically true, it took until the last few months of the war in late 1918 to come true, and remember that Notes was published in March of 1916 — that trench-bound “phase of operations” lasted nearly two and a half years…
From a wargamer’s point of view, there are two major ways that books like this are valuable. The first is for period flavour and scenario inspiration; something as simple as knowing how a trench network was laid out or the basics of how it could be attacked or defended can inspire a scenario. Small details like the note in the appendix on communication on not routinely taking field telephones right up to the forwardmost trenches, lest the trench be rushed and the enemy able to tap into the field telephone network without anyone being the wiser back at headquarters could inspire quite detailed trench-raid scenarios, with more detailed and more interesting objectives than simply “kill the other guy”.
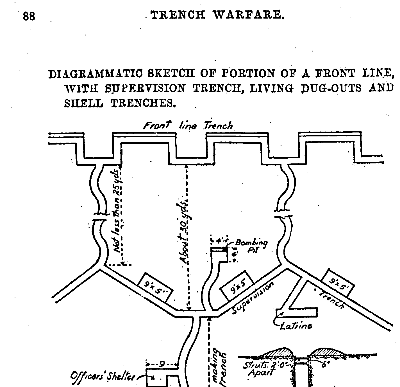
Sample illustration from Notes, showing part of a basic front line and support trench setup.
The second (and related, of course) way this type of book is useful to wargamers comes mostly in those 35 or so diagrams in the back of this little booklet. If you’re considering building trench scenery or fieldworks of any sort, knowing the “standard” ways the British Army expected things to be done is obviously valuable. The diagrams cover frontline, support, and communication trenches, various sorts of dugouts, several types of machine-gun nest, wire and obstacles, and more. If you’re going to pull a Roundwood and build up a bunch of trench boards, this inexpensive little booklet could be a valuable starting point.
The Shortest Possible Review: If you want a basic WW1 Western Front reference, get this.
Note that there is also a May 1917 version of this booklet, with exactly the same title, but printed by the American War Department as they geared up to finally join the Great War. As far as I can tell the text is largely identical to the earlier British edition discussed above, but the value of the later American version is the hugely expanded number of diagrams in the back. The book has gone up to about 160 pages from 75 or so, and a huge amount of that is new diagrams. You can download a good, complete PDF of the War Department version over on the US Army’s Combined Arms Research Library website – Notes for Infantry Officers on Trench Warfare 1917. To get the PDF version easily, use the blue “Download” button on the far right-hand side of the screen.
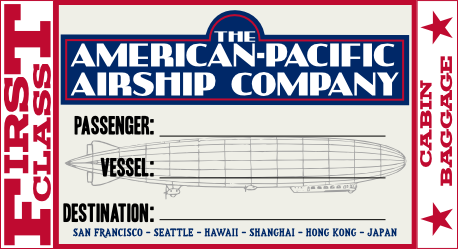
I haven’t posted one of my “World More Pulpy” graphics in ages, but here’s something that’s been lurking on my harddrive for ages and needs some fresh air.
Here we have the luggage label for a piece of First Class Cabin Baggage on the American-Pacific Airship Company’s famous “Luxury Airship to the Orient” routes.
Luxury zeppelin to the Orient! Well, in an alternate world, maybe. One without a fireball at Lakehurst, perhaps.
There were supposedly American companies considering trans-Pacific airship routes at one point; the Great Depression scuttled the first round and then there was that fireball at Lakehurst…
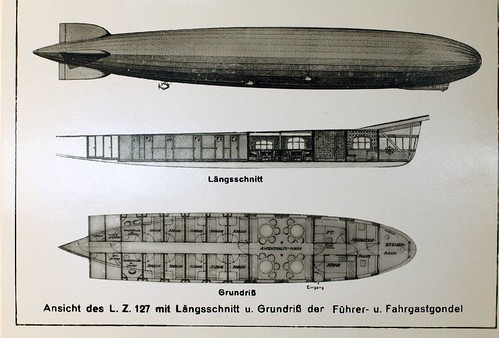
Here’s a couple of real photos from the actual Graf Zeppelin herself just as bonus content. These are once again from the spectacular Flickr Commons account of the San Diego Air & Space Museum Archives. The GZ’s cabin in profile and plan, from a postcard:
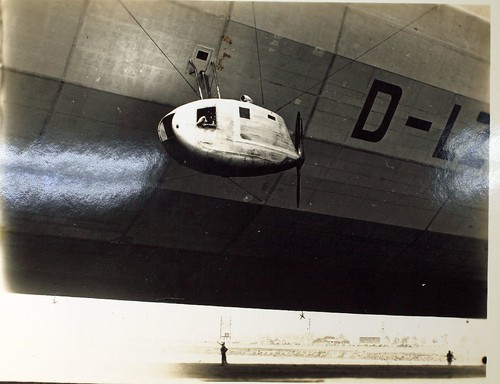
…and a detail shot of the elegantly streamlined engine gondolas of the Graf Zepp:
I actually have a couple of pulp figures on the painting table currently, the first in far too long, so perhaps I’ll get back to some pulp-flavoured posts here soon, in amongst the blizzard of Russian Civil War material recently!
Been a bit quiet around here recently; blame a very strange and fractured work schedule for that, mostly, as well as the fact that I’ve got a whole bunch of projects (RCW sailors and cavalry, among other things) in the fairly early stages of development and thus not suitable for showing off here! Progress is being made, though, and I have another Russian Civil War game planned for later this month, so that’s my deadline for the horses and sailors, at least!
To tide you over (and because they relate closely to an upcoming terrain project I’m planning…) here’s a pair of useful links, both from the Empire of Ghosts blog.
The second and related is Tutorial: Making Realistic Barbed Wire Cheaply, which results in good looking barbed wire with the aid of a couple of sizes of thin wire and a drill. I’m not sure I’m going to be using this technique (I have another plan that might be even easier…) but it looks good.
More actual content soon, I promise, and Corey has several projects underway that he has promised to write up as well.
Enjoying the now-disappeared sunshine that we had here a week or so ago, I went for a bike ride and came across a fairly common sight in any city: boxes of stuff left on the curb. These boxes were of a slightly different breed. Rather than the usual pile of broken student stuff, these looked awfully like my grandfather’s basement once did. My curiosity led to me root around a little, and lo did I find but this: A blank telegraph form from around 1931.
Front of the Telegraph
Back of the telegraph
(I have the full form scanned at 300 DPI but it is more than 50mb large in that size. The above images are smaller but still at 300 DPI)
Dating is a little hazy, but I surveyed the few others I could find online. These facts quickly became clear:
1. Canadian National Railways (parent of Canadian National Telegraphs) came into existence in 1918 but didn’t truly exist as a railway until when they took over Canadian Northern Railway in 1922, who had previously taken control of Great North Western Telegram. Notice the similar logo?
Great North Western Telegram after the 1917 Halifax Explosion.
2. W. G. Barber was appointed General Manager at some point in 1923 or 1924. Canadian National Railways Systems 1923 Annual Report listed C. E. Davies as Acting General Manager, Telegraphs, and the 1924 report lists W. G. Barber. (All can be found on McGill University’s excellent Canadian corporate annual reports)
3. The 1930 Report is the last to list Barber as General Manager, but the 1931 is missing the executive list and by 1932, D. E. Galloway is now listed as Vice-President in charge of Telegraphs
4. Also in 1924, CN acquired some telegraph lines here in British Columbia. This is likely what led to the advertisement on the bottom of this form
5. In 1926, the form looked almost the same (source):
1926 Canadian National Telegraph Form
6. However, by the 1940’s the form cited D. E Galloway rather than our now forgotten Barber (source): 7. All of this lead me to the holy grail: an identical copy of the telegram form I have (source):