Links of Interest, 28 March 2013

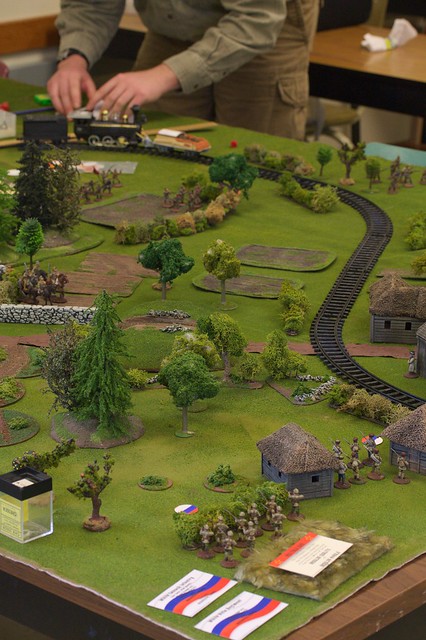
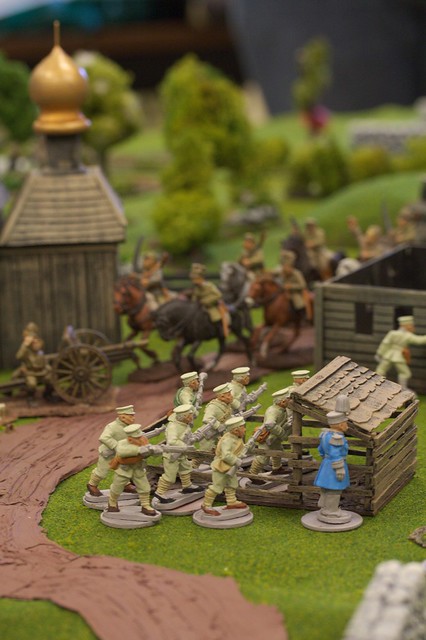
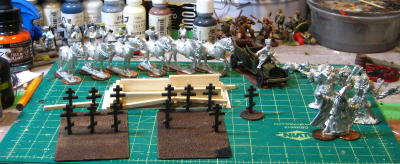
Short links of interest post while I buckle down and get more cavalry painted for our Russian Civil War games — why is it that six damn horses take as much effort as two dozen infantry, anyway?

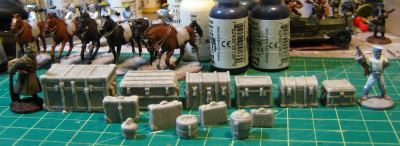
Burn In Designs do paint racks, buildings and other laser cut stuff. I rather like the vertical paint racks that minimize the footprint they take up.

Mad Mecha Guy do more lasercut stuff, this time 15mm science fiction buildings and bits. The chap behind MMG is also apparently the sculptor of Ground Zero Games’ awesome new engineering mechs.

Terrain For Hippos is an entertaining blog with loads of photo tutorials of short, straightforward terrain projects, all presented by a semi-literate cartoon hippo named “Grot”.

Speaking of painting horses, I just discovered this huge infographic JPG via DeviantArt, which goes into all the many variations of horse colour, including useful information like which colour of mane, tail or hoof is usually seen with which coat colour.

Finally, the interesting folks over at Naval & Military Press have just started their Easter Sale which means 20% off across the board on a huge and fascinating array of specialized military history titles! I’m saving this quarter’s gaming budget for Trumpeter Salute in ten days, but NMP’s booklists are always full of tempting items!

When the Chinese met the train, a RCW game

In a cavalcade of firsts this Sunday, my (mostly) freshly-painted Chinese met their match in our new armed train, all being played on our new gaming mat, some 6′ by 9′ of fully flocked canvas drop cloth.

The game, a preview of Brian’s Trumpeter Salute convention game, was  the defense of a small Russian town by a combined White and Chinese force. Thankfully for the Whites, they had managed to scrounge up a field gun plus a machine gun. The wealthy Chinese warlord Wu Do also brought one along to the party. Facing against them were a large Red force, including the newly-built armed train and the armoured car.

Opening shot. Red armed train the back, Whites in the foreground. Chinese are out of shot to the left.

Due to a lot of luck, the Chinese ended up being the central troops in the game. They had lots of officers and their cards kept coming up, so they quickly occupied the central building and started taking fire. Another squad rushed up a hill, only to discover what happens when a HMG opens up on you when you cannot respond.

The maddest moment of the game came when Sean’s Reds cavalry attempted to run down the White field gun. The gun was right in the middle of town, which meant that his close assault was rudely interrupted by two squads of Chinese, including the Warlord’s aggressive Household troops. This did not end well for the Red cavalry, which were slaughtered to a man (and horse).

Red cavalry attempt to run down the White gun. Chinese infantry and Wu Do in the foreground.

By the end the train had done its job and had cleared a route into the town. We called it when it became clear that the Chinese would retreat (having no interest in defending this particular muddy bit of Russia to the death) and the Whites were too weak to hold back the largely untouched Red infantry (even if they couldn’t move due to bad card luck.)

(As usual, we used Through the Mud and Blood from Too Fat Lardies. An excellent rule set all ’round)

Chinese Warlord Cards & Blinds

Corey recently started painting up a Chinese Warlord force from Copplestone 28mm figures to extend our Russian Civil War gaming in a more Back of Beyond direction, and he’s actually getting units painted and ready for the tabletop (normally I bug him about being the world’s slowest painter…) so I sat down with Inkscape and created a basic set of cards so his Chinese Warlord forces can run in our Through the Mud & the Blood-powered games.

This isn’t quite the full set I made for the Red & White Russian forces; it’s currently missing a LOT of the cards needed for a full M&B game. It works just fine for a Chinese force allied with a White Russian force, though, which is how they’ll be appearing in the next while, until the force gets bigger.

The PDF is four pages long. The first two pages are the cards, set up to match the earlier Russian cards. Page three has the basic graphic needed for colourful markers for a Warlord force – we use these to mark units that are activated or units that are on overwatch (what M&B calls “Wait For It”). The last page is a pair of blinds.

RCW_Warlord_complete_24March2013 — PDF, 349Kb — this file is Copyright 2013 Wirelizard Design/Brian Burger; permission granted to copy or print for personal use.

I’ll do up a full set of Warlord Chinese cards eventually. When I redid all my Russian cards in January I reconfigured the SVG file in Inkscape to make it a LOT easier to edit and create new versions. I’ll also be producing a set of British cards, so my long-neglected Brits in tropical kit can join the Back of Beyond madness in proper style.

28mm Pulp Baggage Review

Phil of Slug Industries (and Adventures in Wargaming, his personal blog) has recently released a set of 28mm pulp luggage. Cast in resin, you get six steamer trunks, four suitcases and three hatboxes, a nice selection to dress up any pulpish scene, provide objectives for your skulking players to try to locate, or just provide cover on a dock or train station platform!

This plethora of options is especially broad when you decide, as I did, to order three full sets of this luggage! Counting the three miscasts Phil threw into my order, I now have 42 individual pieces of baggage. Douglas Adams would have approved of this number, and so do I.

baggage
Thirteen pieces of baggage from 6mmPhil/Slug Industries. Scale provided by a Copplestone Bolshevik on the left and a Pulp Figures US Navy sailor on the right. The grid on the cutting mat is half-inch. Click for larger.

The baggage pieces are all cleanly cast in a light grey resin, and I didn’t see a single air bubble or miscast on my sets. The largest of the steamer trunks is just over waist high on a 28mm figure; the smallest hat box just slightly bigger than a typical 28mm figure’s head. Most of the flash rubbed off with my thumbnail; a couple of the smaller pieces had a bit of more solid flash around the bottom edge that needed a moment’s work with knife and sandpaper to deal with. Even two of the three “miscasts” I got with my order are perfectly usable, with just a bubble or two around the handles on the sides marking them as “miscasts” – I’ve paid full price for resin pieces with bigger casting flaws in the past!

The largest of the steamer trunks is 1.5″ long, 7/8″ wide and 3/4″ tall (37mm x 23mm x20mm); the smallest trunk on the far right of the photo above is 5/8″ x 1/2″ x 7/16″ (16mm x 12mm x 12mm).

I’m busy getting ready for the Trumpeter Salute convention in two weeks and contemplating a run at LAF’s Lead Painter’s League 7 which starts just after that, so I can’t promise I’ll have painted examples of this baggage to show off terribly soon, but I will get some of it done after Trumpeter and post pictures here. It should be fun to paint, the details are nice and crisp. Metal steamer trunks can come in a wide variety of colours, and battered, worn leather for most of the suitcases is also easy and fun to paint.

I should add, in closing, that Phil doesn’t currently have the luggage listed on his Slug Industries website, but purchase details can be found at this thread on LAF’s Bazaar forum. Everyone needs more baggage to haul around!

Trying A Wet Palette

I’d heard of “wet palette painting” before, but for no particular reason hadn’t sought out information on the technique or looked into it at all. Then a few nights ago I was rummaging around among YouTube’s wargaming-related videos, as one does, and this wet palette howto video from Corvus Miniatures caught my attention.

Turns out to be pretty straightforward – an old container lid from the recycling bin, paper towel, water, baking parchment. We had all those things knocking around the kitchen, so I set up a wet palette and tried it out while doing the main blocking colours on six Cossack horses from Brigade Games and a swamp-monster thing from Reaper.

Compared to the dry palette I’m used to (an old CD!) you get hugely extended working time with your paints, which is especially useful when you’re block-coating six 28mm horses and a highly textured monster. I forsee fewer sad little blobs of half-dry unusable paint in my future! Blending is also easier, which is nice when you want slight variations to make your horses (or whatever else) look more interesting.

A Pulp Alley Game

We’ve been playing a lot of Pulp Alley recently; this photo is actually from ten days ago, not our most recent game, but it’s better than any of my snapshots from the more recent game!

pa1
Russians & others crowd around a Plot Point Marker in a backwoods jungle hamlet! Click to view larger over on Flickr.

I’ve whipped up half a dozen teams (Pulp Alley refers to them as Leagues) that we’re swapping back and forth between actual players as the spirit moves us. Being pulp, we’re well off into stereotypes, I’m afraid! There’s the stiff-upper-lip Sir Charles, who denies being an agent of the British Crown; the Teutonic schemer Stahlmaske, as dangerous to his underlings as he is to his enemies; the sinister but intoxicated General Vodkanovich, White Russian exile; the mercenary Captain B., and various other gangs of pulpish skulkers.

I’ve even brought back crowd favourite Red Lily, International Women of Mystery, although she and her crew haven’t yet appeared in a game.

We’re having a lot of fun with Pulp Alley, as should be obvious. The printed, softcover book has just been published, along with the Fortune/Challenge cards in playing-card style. I’ve got copies of both enroute, and I’ll do a proper review here on the Warbard of both when they arrive!

The Workbench This Week, 15 March 2013

Quiet by our usual standards here on the Warbard this week of both Pi Day and the Ides of March, but I’ve been busy with a couple of small projects leading up to my Russian Civil War game in a few weeks at Vancouver’s Trumpeter Salute convention.

bench15mar13
Russian graveyard pieces and other bits. See text for details, click for larger.

Centre foreground and most obvious, some of the Russian Orthodox crosses Archeotech made for me, going into a small graveyard to go alongside my onion-domed church. The wooden thing behind the crosses is the start of a rough wood-and-sandbag-protected train car, as a low-tech armoured train for my Russian games takes place. Behind them, six 28mm horses from Brigade Games; the RCW Cossack riders are mostly lying down in the top right corner of my cutting mat, except for the one who is currently “riding” the hood of the RAFM staff car I painted ages ago and am currently touching up.

Finally, lower right has a random scatter of Reaper fantasy figures for my next “distraction” painting project, the small side project I always have going in case I need a change of pace!

I also learned this week that the Trumpeter Wargame Club, who run the annual Trumpeter Salute convention, mentioned my RCW game as a “Featured Game” in their most recent email newsletter to members… no pressure, then!

Wargamers With Frickin’ Lasers, Part II

Exactly seven days after I ordered some Orthodox crosses and a few other laser-cut bits from Archeotech, a small padded envelope arrived from the UK. Tucked into a pipe-tobacco tin were 20 of the Orthodox crosses and a pair of small rowboat kits. Amusingly, the tin still smells strongly of pipe tobacco, which combines with the faint burnt-wood smell common to laser-cut MDF in an odd but not unpleasant way.

pewpewpew
Orthodox crosses and such from Archeotech. Click for larger, as usual

Andy of Archeotech designed them in pairs out of 1mm MDF, so you glue them back-to-back to get a squarer, cleaner edge than you’d get with a single piece of 2mm MDF. This means that you get a mixed batch of fronts and backs. It’s fairly obvious which is the front and which the back with the MDF Andy uses; one side is noticeably shinier and smoother than the other.

I’ve assembled two of the crosses already, and tacked one of them onto a penny just to get it upright. Scale is provided by a Pulp Figures 28mm U.S. Navy gunboat sailor, also on a penny base.

The other part of my small Archeotech order was a pair of their little rowboat kits. The laser-cut 1mm MDF bits here provide the frame and detail bits (oars and oarlocks) for a small 2″ long rowboat; you provide a strip of light card or heavy paper about 7mm wide for the sides of the boat, as detailed in the well-illustrated instructions on Archeotech’s website. This isn’t a serious figure-carrying vessel, more a small detail piece to appear alongside a dock or as a tender, to provide nautical flavour. It’s a well-designed little kit, though, and the basic idea could easily be scaled up to make a small launch or powerboat that was capable of carrying three or four 28mm figures on small bases.

As I mentioned in my first “Frickin’ Lasers” post, Archeotech is set up to do custom/semi-custom lasercutting specifically for wargamers, and to work with wargamers on designs. I’ve certainly got some things I’ll be approaching Andy about in the future!

All Flocked Up

I’ve been housesitting a relative’s place since last week, which explains the lack of posts here, but we (my brother and I) have also taken advantage of access to working space to crank out a project we’ve talked about for several years – a good, big gaming mat!

I’ve done hills, trees, buildings and all sorts of scenery bits, but they’ve always been put on top of borrowed mats, a lot of which clashed with the scenery we’d built. The base is a 6 foot by nine foot canvas painter’s dropcloth from Home Depot; we then used latex caulking tinted with brown paint and scraped on thin, then dumped generous amounts of mixed Woodland Scenics flocking on top of that and pressed it down gently.

After the caulking dries (overnight), we shook the loose flock off and gathered it for re-use. The surviving flock seems pretty solidly attached, although we’re looking into some sort of fixative to solidify it. Spray adhesive or cheap, scent-free hairspray have been suggested; some experimentation might be in order. In the meantime, the mat is usable as-is!

I’ll do a proper tutorial-style posting when I’m home and on my own computer, but here’s two photos of the beast! The figure is a 28mm Artizan pulp heroine, chosen for her red dress so she stands out at least a bit on the huge green expanse!

mat1
Most of a six by nine flocked gaming mat, drying on the garage floor. The tiny fleck at the centre of the photo is a 28mm figure!

28mm figure in the vast green expanse.