Category Archives: Pulp

Posts about 28mm 1920s-30s pulp gaming using .45 Adventure rules from Rattrap Productions and other rules.

Weird Fantasy Terrain

If you’re going to do fantasy battles, why restrict yourself to normal-looking trees and such? If you want to fight a battle in a pine forest, go do Romans vs Germanics or WW2 Ardennes or something. For fantasy, we should have properly fantastical terrain!

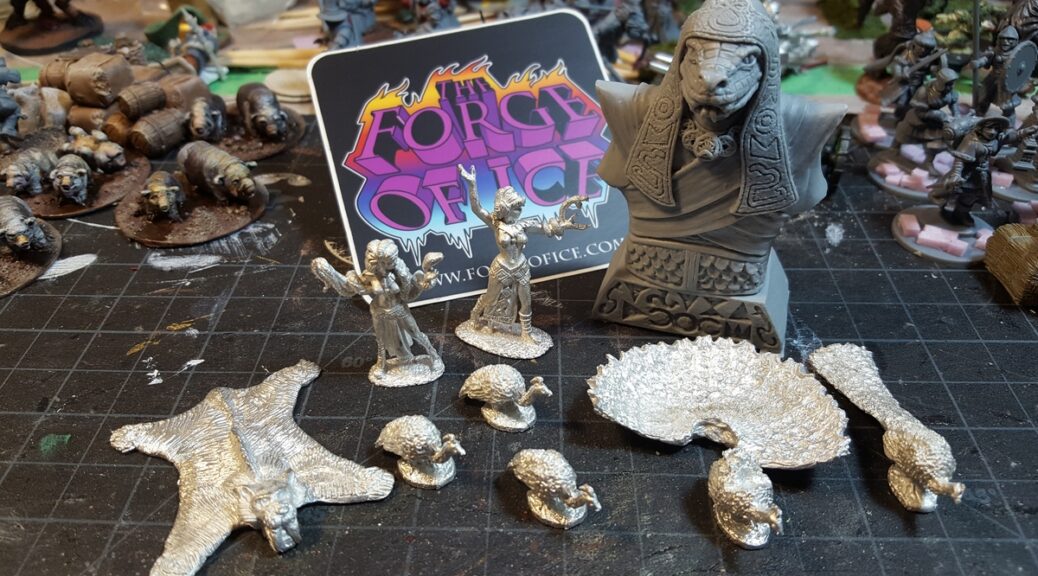
To that end I recommend Dark Fantastic Mills terrain (but more of them in a longer future post!) and the Fantastic Rocks & Plants STL Kickstarter which concluded back in September and which now appears to be available for purchase (or late pledges? I can’t tell) over on MyMiniFactory.

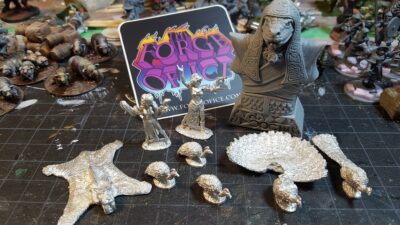
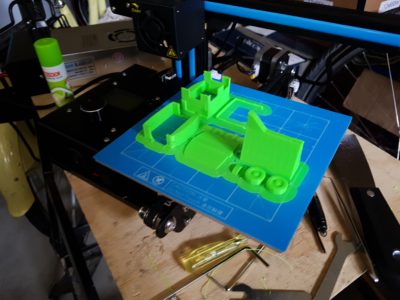
I don’t have a 3d printer but Corey does, so I pay him in beer and snark and (when his tempermental 3d printer cooperates) get 3d printed nifty things back from him.

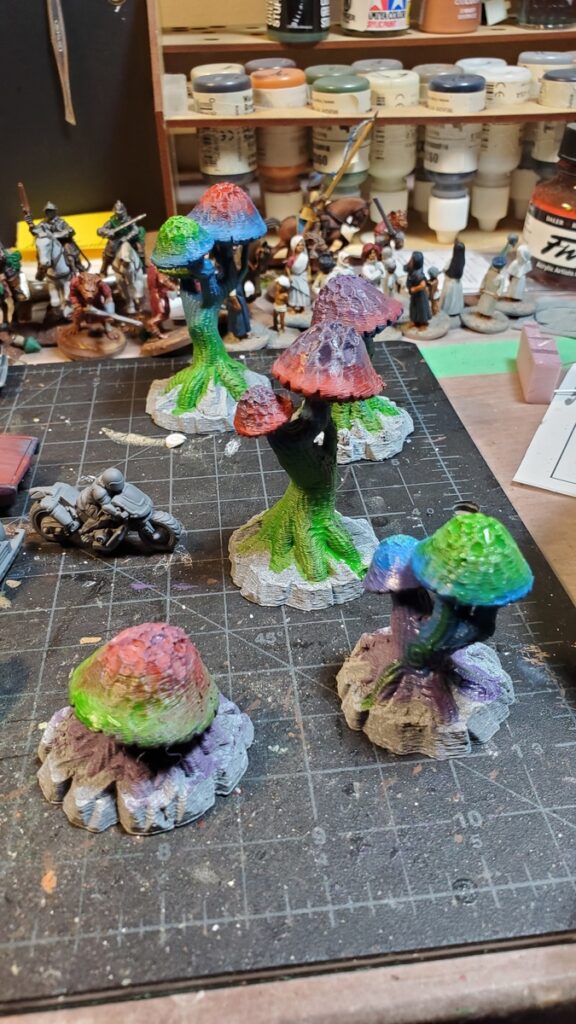
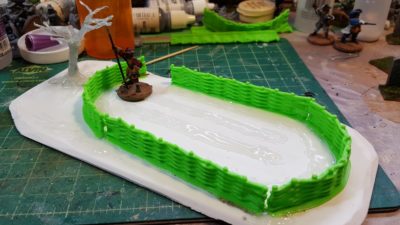
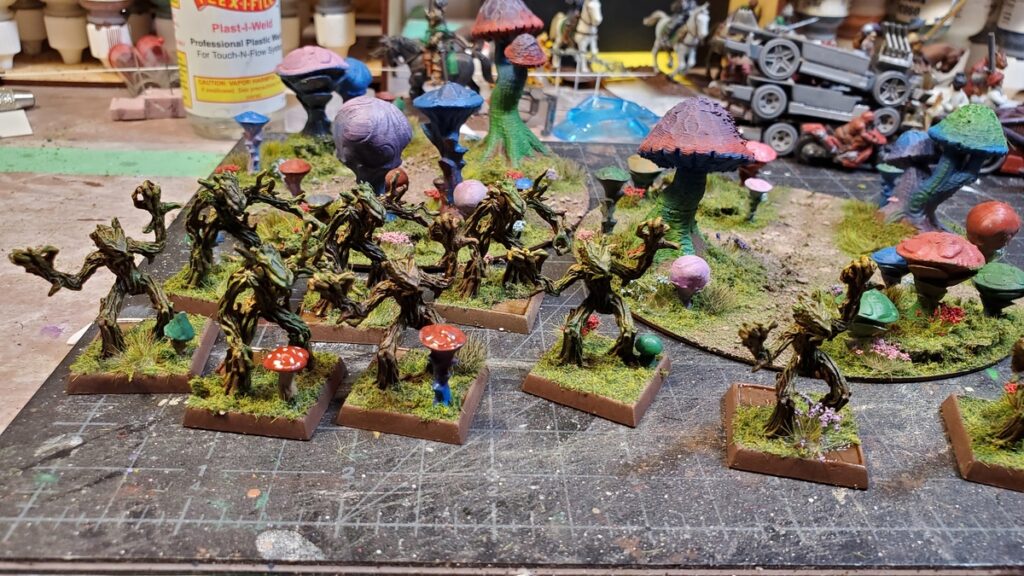
Using a couple of junk CDs (best scenery bases ever!) I put together this trio of fungal thickets to add proper fantastical flavour to our fantasty skirmish games.

All three mushroom thicket bases together, plus nine Reaper tree-kin to lurk in the thickets! Click for larger.

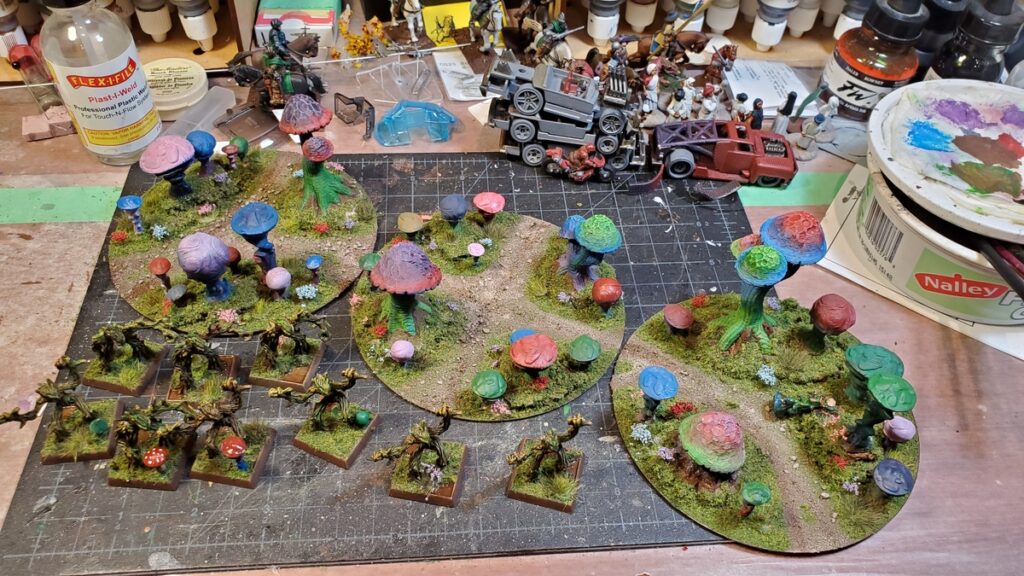
These thickets use half a dozen big 3d printed mushrooms from the FR&P KS and a bunch of resin and 3d printed smaller mushrooms from Dark Fantastic. Scraps of cork board about 1/4″ thick add some height here and there, and sand, flock, and lots and lots of flower tufts finish them off.

More mushroom madness. The tree-critters in the foreground are Reaper Miniatures saporlings. Click for larger.

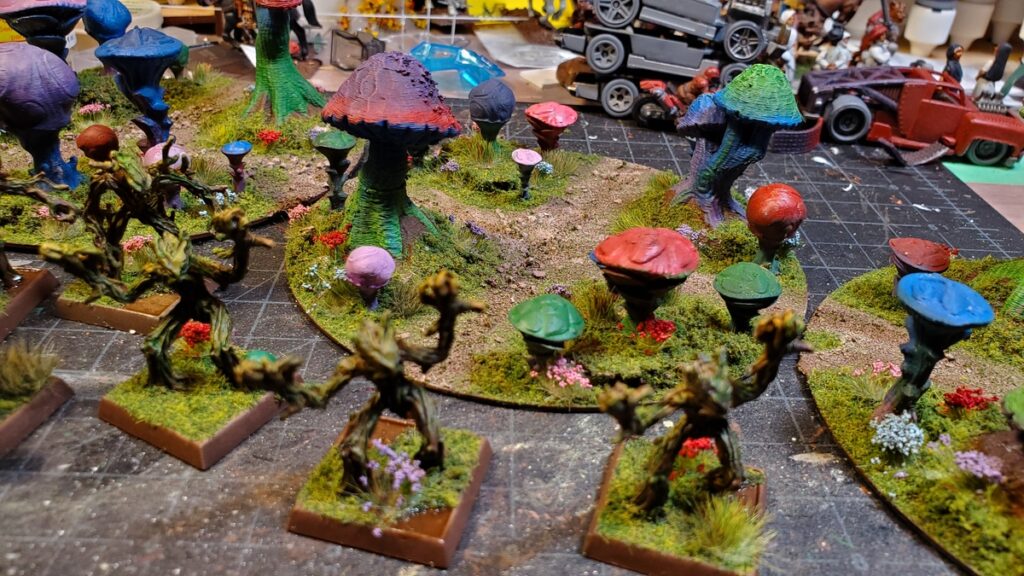
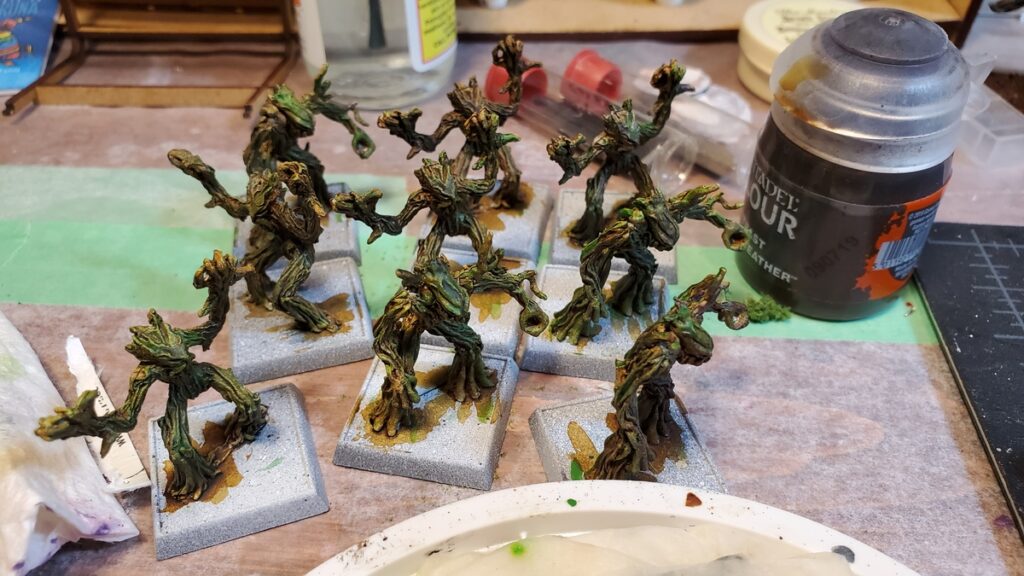
The tree-dudes are Reaper Saporlings, available in a batch of nine, as a single, or in Bones plastic. They’re about human sized and great figures. They’re going to star as zombie stand-ins in a fantasy pulp game sometime soon, and will no doubt find other roles to play in future games.

More Saporlings, and two of the mushroom thicket bases. Click for larger.

I have the Doomcap Deeps bundle from Dark Fantastic all painted up in the same bright colour blending scheme as these mushrooms, and I’ll get some decent photos of them soon for that longer review post I hinted at at the start of this post.

Stay well in our second wave of COVID world, stay safe, and try to get some gaming in if you are able. If we isolate now, it is so that there isn’t a gap on the other side of the gaming table when we do gather again in safety.

The Workbench This week, 30 October 2020

No posts for a month? Sorry! The irony is that I’ve been gaming more regularly than ever, as our little COVID-compliant pod of gamers are now meeting every Monday daytime (all three of us are on reduced work hours, again due to COVID…) and on Thursday evenings due to my lovely wife’s heartfelt desire to kick me out of the house every so often.

We have gotten into Gaslands, and been running through the Perilous Island campaign for Pulp Alley with a fantasy flavour to it instead of the classic early 20th C pulp we’ve done in the past.

Gaslands cars in progress. Mostly stock and no weapons for now. Click for larger.
28mm Saproling from Reaper Minatures. Really neat figures, roughly human sized. Click for larger.
Giant weird mushrooms for fantasy scenery. From a recent Kickstarter. I’ll do a review of that KS sometime soon, I promise. Click for larger.

Anyway, I’m going to try to get back to August’s regular blogging schedule, or something like it. I spent September and most of October gaming but hardly doing any painting or scenery building, and have now painted or built more stuff in the past week than in the previous two months!

Forge of Ice Serpent Idol

Painted this guy up fairly quickly over a couple of days, after getting it a few weeks ago from Forge of Ice. I wasn’t sure if I wanted to do the statue up in bare stone, painted, or a mix, but it wound up being mostly painted. Basecoat in black, and then lots of drybrushing in various tans up to a bit of pure white, and then I used inks and washes to add the colour while keeping the drybrushed highlighting visible.

snake statue 1
Snake idol, front view. The base is about 1.5″ wide, and the whole thing is just under 2.75″ tall. Click for larger.

The final product looks like an ancient statue painted a very, very long time ago, which seems right for something either in a ruin somewhere or populating an unimaginably old Lost World temple complex!

snake statue back
Rear of the snake idol, nice sculpted folds in the hood and robe. Click for larger.
snake head
Closeup of the upper half of the snake statue, just for fun. Click for larger.

I also have this fun sabretooth tiger skin rug in progress, and I like the blends I’ve been getting so far on the fur, thanks partially to using glaze medium. Just a few details to finish up on this one.

sabretooth tiger skin rug
Just the right decoration for a timetraveler’s study or somewhere in a Lost World. Forge of Ice sabretooth tiger skin rug! Click for larger.

The Beast on the Moor

Rummaging through one of my boxes of random figures last week (as one does…) I came across one of the random Reaper fantasy figures I’d picked up on clearance over the years, the massive wolf-like Warg. No modern Bones resin-plastic lightweight here, this is a solid pewter beast nearly as big as a 28mm horse!

overhead warg
Reaper Warg in the middle, flanked by a 28mm Frostgrave witch on a 25mm base, and a 28mm Warlord mounted officer on 20mm by 40mm base to the right. Click for larger.

The base was assembled from three pennies and a bunch of Milliput, the warg got primed, and then it went into storage sometime in early 2014 (when the first paragraph above was written…) until just after New Years 2020, when I said to myself, as I was painting other demon dogs and werewolves, “Self, don’t you have a massive great pewter warg somewhere, bought many years ago?”, and after more rummaging in more boxes of miniatures than I’d like to admit to, the warg saw the painting bench for the first time in six years or so, and it was good.

The thing is even bigger than I remembered it being, over head high at the shoulder next to a similarly based 28mm figure and taller and bulkier than a warhorse. The base is roughly 20mm wide and 45mm long, and muzzle and tail stick out over both ends.

big mean warg
Big warg, demon dog, or some sort of hell-wolf! 28mm Frostgrave plastic witch on the left, mounted 17th C officer from Warlord on the right. Click for larger.

Looking forward to seeing this guy loping across the playing field, eating people and stealing souls, or perhaps the other way around! You never know with demonic canines…

Not a waggy tail, probably. Click for larger.

Loot from Forge of Ice

Forge of Ice is one of those one-person companies that makes all sorts of cool stuff, and after knowing about them for several years I finally got around to making a small order from them a few weeks ago. Most of the fascinating little one person companies are British, but Forge of Ice is in fact based in Fairbanks, Alaska.

Alex, who is the entirety of Forge of Ice, still doesn’t have an actual website but he’s got a Forge of Ice Facebook page, is very responsive by FB Messenger, and has an illustrated catalog thread over on the awesome Lead Adventure Forum as well, which is frankly easier to navigate than Facebook’s chaotic unsearchable nonsense.

Forge of Ice mostly does Lost World style stuff, small dinosaurs, oddball caveman-style accessories and stuff. I’m not doing much Lost World style pulp at the moment, but I have in the past and I’m certain I will in the future. Besides, I could always cross-pollinate my current weird 17th Century stuff with Lost World, couldn’t I? Hmmm…

Anyway, what did I get from the frozen depths of central Alaska? A pair of Snake Priestesses, a batch of five peacocks, a sabertooth tiger rug, and the centrepiece of this little collection, a resin Doom Serpent Idol.

Forge of Ice stuff
My little Forge of Ice order – peacocks, priestesses, a rug (it’ll really tie a room together), a Doom Serpent Idol, and a cool sticker! Click for larger.

The serpent priestesses are elegantly slim 28mm figures, both slender women with large snakes wrapped around their arms and shoulders. I have no immediate plans for them, but they’re awesomely pulpy and clearly need some sort of group of underpriestesses, guards, and temple lackeys to order about in their sneaky attempts to do whatever it is snake priestesses from a Lost World plot to do.

The peacocks are some of the first figures Forge of Ice released, several years ago, and I’m thinking that as well as being just general fancy set dressing, with a couple of house rules they could be mobile alarm units in a Pulp Alley scenario where players are trying to sneak up on a fancy house and don’t dare disturb the peafowl least the damn things scream the place down and alert guards or something! (if you’ve never heard a peafowl scream, they have a glorious bloodcurdling horror movie shriek. It’s awful.) The smaller female peahens and the male peacock with his tail down are both single piece castings; the peacock in full display mode is two pieces. There will need to be a bit of filing and puttying to get the body of the peacock and his tail to match up nicely, but nothing outrageous.

The saber tooth rug was just too much fun to pass up, I suspect I’ll use it as weird decoration in someone’s study or something!

Doom Serpent ido
The gloriously Egyptian-esque Doom Serpent idol, just the thing to be guarded by a couple of serpent priestesses and their flunkies! Click for larger.

The Doom Serpent idol is a fairly serious chunk of fine grey resin, about 3″ tall and just over 2″ wide at the shoulders. I’m really looking forward to painting this one up, I’m thinking a sort of blond/tan sandstone look like we see in Egyptian statues, with some coloured painted bits here and there, will look great.

Hopefully one of these days Alex gets around to getting Forge of Ice an actual website, but in the meantime go have a look at his Lead Adventure thread (you don’t need a LAF account to see it) and ping him by email, by the message service at LAF, or via Facebook Messenger to get your cool weird Lost World loot from the distant north!

A Graveyard (Much Delayed)

File this one under “long neglected projects finally finished”, I guess. I’ve finally based, painted, and finished the last of the Renedra gravestones I started way back in February 2013, which were actually purchased in December 2012.

Back in 2013 half of them (one of the two identical sprues) got cleaned up, based, sand added to the bases, and grey primed, and that was it. For more than five years.

graves13Feb13
The original 2013 batch of graves, based but not yet primed. Click for slightly larger.

In early 2018 I pulled the 2013 bits out of storage and got them painted up and flocked fairly quickly for the game I ran at Trumpeter Salute 2018.

The paintjob was pretty simple. I hit all of them with a wash (GW Nuln Oil or Earthshade), then drybrushed and scrubbed various other colours across the stones. Two different shades of grey, some dark green, two shades of tan, and two shades of off-white applied in different amounts to different stones give a bit of variation to each stone.

Finally, this week I’ve pulled the second sprue out and got them all based up.

Latest graveyard stuff all based up. Click for larger.

The bases are all leftovers from various Warlord ECW plastic box sets. I think the newer stuff is from the Firelock Infantry box and the older from either the regular infantry or cavalry box. Waste not, want not, and I wasn’t ever going to use them for figures! The freshly dug graves (great potential plot points!) are just scrap styrofoam glued down and then sanded.

Latest graveyard bits. Fresh graves in front, regular gravestones behind. On the left is a base of chickens from Warbases, just for fun. Click for larger.

I’ve used the Celtic cross and some of the base pedestal bits to create a roadside cross or shrine. Just the thing to lurk on a dark and misty moor or something!

The roadside cross, still in progress. Complete with ominous raven! Click, as usual, for larger.

Finally, I used Rain City Hobbies tufts and flowers to add some detail and interest over my usual mix of flock. I really like the little pops of colour the flowers provide, and they’re becoming a standard feature on my scenery, especially the English Civil War items.

Finished, all these years later! I’ll get some photos of the full graveyard setup soon. Click for larger.

Should you want your own gravestones the two-sprue set is still available from Renedra which is definitely not always the case when coming back to some products after this long. Hopefully you take less than seven years to get yours ready for the tabletop!

Hovels & Gardens

With the clock running on toward Trumpeter Salute 2018, I need to get serious about producing the new scenery the linked pair of games I’m running there need!

I’ve got more than enough hedges, dirt roads, and other greenery bits from previous scenery projects, but the farmhouse/manor, dovecote, and barn I’ve built previously need more buildings to hit the table along with them if I want to do a 17th Century English hamlet up properly.

This weekend I sat down and cranked out a trio of little (tiny, really!) thatched and half-timbered cottages or hovels, along with a pair of fenced gardens.

Three cottages underway. 28mm Warlord officer on a 25mm base for scale. Click for larger.

These are simple little buildings of 1/16th” mattboard with half-timbering from wooden coffee stirrers and thatch from towel. The windows are lasercut from Warbases in the UK. For a bit more bulk the roofs have a substructure of corrugated cardboard with the towel hot-glued to that and then further stiffened with white glue. All three roofs are removable.

Towel thatch roofs in place. Click for larger.

For the gardens I started with 1/8th” foamed PVC board as a base, then used some of the 3-d printed wattle fencing from Thingiverse that Corey has run off from me the new 3d printer he’s also using for the tricycle truck project.

Large fenced garden with a tree. 28mm Warlord officer on 25mm base for scale. Click for larger.

The tree has a core of paperclip wire, bulked out with soft iron craft wire, then covered in hot glue to fill in between the wires. The garden beds are also just hot glue “sculpted” into place with the hot tip of the glue gun.

Painted cottages and painted and flocked garden. Click for larger.

I’ve also done a second garden piece, slightly smaller, but haven’t gotten a photo of it yet. The cottage roofs need one more drybrush to really pop the thatch texture, but the cottages themselves are all done, and the gardens are fully painted and flocked outside the fence. The tree needs some foliage, and the gardens inside the fences need greenery and detail, but not bad for part of a weekend’s focused effort!

BSC 2018: Correcting some too thin errors

As I am fairly new to 3D printing, I am learning a tonne about what not to do. One of the biggest issues I have discovered is that things that look good in CAD can look absolutely terrible once printed, given the resolution of the printing or the limitations of FDM 3D printing. Today I wanted to talk about three different, but similar errors I made: making a part too thin to print correctly.

Back corner of the cab

First up – the back corner of the cab. As the backside of the cab is curved, it thins quite a bit at the very back corners.

Back corner of cab in blue. See the thin joint at the very end

When you bring this into Cura to slice it for printing, the problem becomes obvious.

Back corner of the cab, showig that when printed, it will only be two layers thick (~0.8mm)

The solution to this is to thicken the back wall of the cab, which I did by adding a flat piece to it:

Back corner corrected with additional piece (in red)

Once you bring that into Cura, you see that the narrowest part is now at least 1mm thick, so the piece shouldn’t be so weak.

Thicker corner sliced in Cura

Fenders

The next piece I tackled was the fenders. They were originally 0.25mm thick, which means that they were just over one layer thick when printed at 0.2mm and only two layers thick at 0.1mm. This meant they basically didn’t print at all.

Fender dimensions

Fender sliced, showing no overlap

The solution to this problem is two-fold: thicken the fender up to 0.5mm and also only print at 0.1mm (considered Fine quality).

New fender, now 100% thicker!

New sliced fender, showing overlap

Top of the windshield

This is actually entirely my error. I made the windscreen and frame around it taller than the sides or back of the cab. This meant when I cut up the model to slice, the top of the windscreen disappeared. Oops.


Top of the windscreen, showing the height difference


Top of the cab when sliced. That grey area is supposed to have yellow lines for printing

BSC 2018: First print of 1956 PANG

The new printer board for my 3D printer finally showed up, so I got to printing the first print of my 1956 PANG. It was less than a full success. As you can see in the pictures below, I have a bunch of work to do.

Printed truck on build plate. Printed without the side compartments. Excuse my messy garage

As can be seen on the build plate, a bunch of details didn’t come out right – the biggest of which was the top of the cab for some reason completely failed to print correctly. I also accidentally selected brim intead of skirt, so I had lots of cleanign to do.

Front & side view. Lledo Model A, Copplestone Chinese and Infinity Ariadna for scale

The sides of the truck aren’t very smooth, and a bunch of the finer details simply didn’t print.

Side rear view of the truck
Side rear view of the truck with Lledo Model A, Infinity Ariadna and Copplestone Chinese for scale

Front and side view of the truck

So what next? First of all,my printer needs some upgrades:

  • A part cooling fan (the Ender 2 lacks it by default)
  • Belt tighteners (and the belts replaced with metal-core of some kind)
  • A more modern Marlin (the firmware that runs the printer)
  • A lot more tuning

On the truck, the first thing I am going to do is shrink it by 25 to 30%. It is too large for what I want. Then I need to some work on the model itself

  • Thicken some of the walls so that they print, especially the fenders, which didn’t print at all
  • Clean up some of the smaller details, possibly removing them for now
  • Re-cut up the cab so it prints correctly

Anyway, I have my work cut out for me!

BSC 2018: PANG print layout

I finally got around to laying out the 1956 PANG for the first printing. As you can see from the pictures below, I am trying to remove the need for supports which will mark the surface of the final print.

Final draft for reference

Laid out in TinkerCAD for printing

I chose not to break out the rear section or the bins for initial printing. I likely will in the final version, as it will speed up print time and make it cleaner.

Cura print layout
Cura layout, with approx. print time. Note that my printer (Ender 2) has a fairly small print bed, so this will fit on it


One final note: I am certain that there will be tweaks needs to be this and I am missing things, namely an interior and side mirrors to start.