Crashed Shuttle, Part One

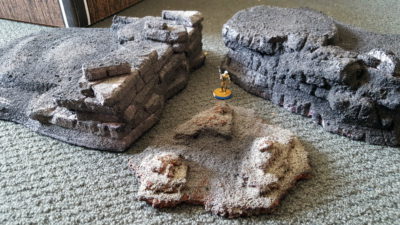
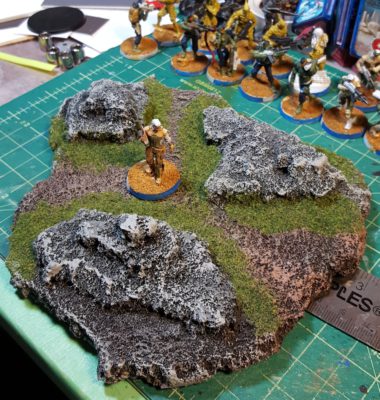
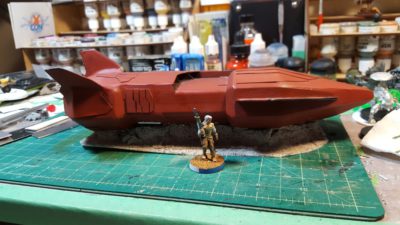
Doing a bit of cleaning up in my boxes of wargaming supplies I rediscovered a shuttle I built at least ten years ago. It was nominally for 15mm science fiction gaming, but was built without visible windows or any other really obvious scale indicators, and it’s big enough to look like a small craft in 28/32mm SF scenery!

Shuttle retrieved from the box it's been half-forgotten in for ages. Landing gear next to it; Infinity figure on 25mm base for scale. Click for larger, as usual.
Shuttle retrieved from the box it’s been half-forgotten in for ages. Landing gear next to it; Infinity figure on 25mm base for scale. Click for larger, as usual.

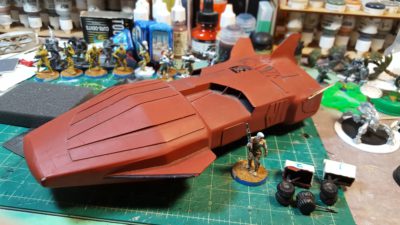
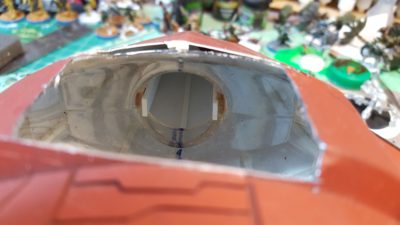
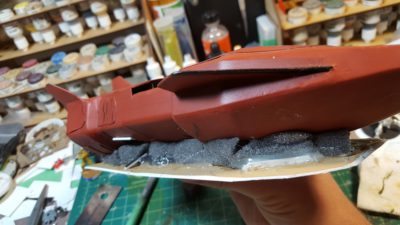
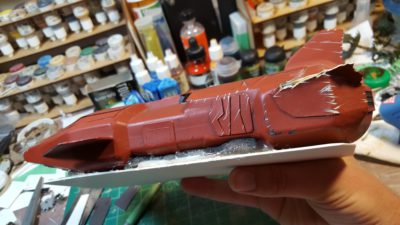
It’s suffered some damage in storage; one of the stabilizer fins is missing and the landing gear was loose and damaged. Rather than fix it up I figured I’d run with it as a damaged crashlanded shuttle that’s suffered a hard landing but is still basically intact. I added some more damage with a file, then chopped part of the underside away so it would sit slightly nose-down.

Hole in the nose. The original shape was a mouthwash bottle built up with styrene plastic sheet and putty. Click for larger.

I used hot glue to stick the shuttle down to the base, then packed the gap between the ground and the shuttle with a few bits of scrap card, slices of foam from a miniatures blister, and a lot more hot glue.

Shuttle with foam and scraps packed into the gap between the body and the ground. Click for larger.
Other side of the shuttle, also showing the missing tail fin and the extra damage I scratched into it. Click for larger.

Finally I put a layer of white glue over the foam and base then dumped sand over it. It might need another layer of sand to touch everything up; we’ll see in a day or two once everything dries!

Sand in place; Infinity Daylami on 25mm base for scale. Click for larger.

More soon once I get the base painted up and touch up the damaged parts of the shuttle!

Yet Another Hill

I mentioned in the last post that I’ve been working on a third large hill, with a roughly 12″x15″ footprint, that being the maximum interior size of a banker’s box. This one is a more complex outline than the previous two and was a fair bit more work to assemble, as I wound up using a lot of smaller pieces of styrofoam to piece the hill together.

Most recent hill in progress, missing the top couple of layers of foam. Infinity Daylami on 25mm base for scale. Click for larger.

The “gully” up the centre of this hill is designed to allow 40mm wide based figures – many of the mid-sized or larger Infinity figures – to access it. There are a number of other areas on this hill that will allow 25mm based figures to stand and access.

Construction finished. 40mm base in the centre, 25mm base to the right, and a 25mm-based figure in the foreground. Click for larger.
Sloped end of the latest hill, with Daylami on a 25mm base for scale. Click for larger.

The sloped end of this hill still needs to be sanded, then I need to mix up a new batch of glue/sand/paint/plaster “goop” to texture the thing before proceeding with painting and flocking.

I’m not planning any more hills this large right now, but I do want to do a group of smaller hills, including some half hills that are explicitly designed to go against the edges of the table to help break up the long lines of sight that can happen on the sides or back edges of too many tables.

A Pair of Hills, Part Two

I’ve finished the first two hills I started a while back, and built a third large hill to finish up the set for now.

After the first coat of glue/sand/paint “goop” dried I added a second layer to a few areas of both hills, just to smooth out a few seams and such.

After the second coat of "goop". Click for larger, as usual.
After the second coat of “goop”. Click for larger, as usual.

I mentioned in the first hill post that I was piecing these hills together out of pieces of styrofoam instead of using solid sheets for every single layer, to stretch my current supply of the stuff just that little bit further. Here’s what the underside of the two hills looks like:

Underside of the two hills, showing layers and pieces of styrofoam. Click for larger.

Before I started painting, here’s what the two hills and the smaller cork piece looked like.

All three initial pieces together, with an Infinity figure on a 25mm wide base for scale. Click for larger.

Painting

Painting these was pretty straightforward. I started with a flat black basecoat, to thoroughly hide any hints of pink styrofoam that managed to peek through the texture goop layer(s).

Black basecoat done and drying. Click for larger.

The earth areas got a heavy brown drybrushing, then a sloppy wash of thin brown paint, and finally a drybrush of brown mixed with a bit of white.

Brown done on the earth sections. Click for larger.

After that I did a couple of layers of grey drybrush on the rock areas; the initial drybrush was grey mixed with a bit of black, then straight grey, and finally grey mixed with a good dollop of white. The final drybrush mostly got applied on the upper edges of the rocks and on protruding corners and such.

Grey drybrushing done. Click for larger.

Grey drybrushing done. Click for larger.

Finally I flocked random areas of the earth parts, let everything dry, and called it all done!

Smaller cork piece with flocking and Daylami on 25mm base for scale. Click for larger.

Larger hills all flocked and finished. Click for larger.

I’ve started making a third large hill, and I’ll get photos of that up in the next day or so!

A Pair of Hills

Still quiet around here this summer, but wargaming has been taking place, as has figure painting, and finally, just for a change, a bit of scenery building!

I broke out my stockpile of half-inch insulation board last week and spent and couple of hours with a razor knife, hot glue gun, and the styrofoam. I wanted a pair of relatively large hills that were tall enough and complex enough to make for an interesting game of Infinity, a game that tends to be very demanding of cover and alive to the tactical possibilities of good, complex scenery.

Each hill is roughly 15″ long, 12″ wide, and about 4 or 5″ tall. The footprint means they’ll fit in a banker’s box, my standard unit of terrain storage and transport, and the height means they’ll provide total cover to even the biggest units in an Infinity game.

Basic construction finished, with standard sized CD for scale.

To save on foam I cut the bottom layer or two of each hill as a ring instead of a solid slab of foam, and quite a lot of the upper sections of each hill are pieced together from random sized foam chunks.

As a base layer before painting, I mixed a “goop” of white glue, fine sand, and paint and slathered it on with a small housepainting brush that was already beat to heck.

With "goop" on as a base layer to protect and strengthen the foam.
With “goop” on as a base layer to protect and strengthen the foam.

The goop layer isn’t quite dry, it’s going to need about 24 hours to dry out entirely before I proceed with the final painting.

The hills with a trio of Infinity figures on 25mm wide bases for scale.

The third piece of scenery in the photos is a small hill/rocky area I made years ago from a half inch thick cork kitchen hot mat. I was never happy with the colour and flocking I’d put on it, so it got covered in leftover texture goop as well and will be re-finished in the same style as the two new big hills.

Now the next question: go with a conventional Earth-like paint and flock covering, with grey rocks, brown earth, and green foliage, or go with a stark foliage-free moon- or asteroid-like look? Decisions, decisions…