Warbases Skirmish Movement Trays

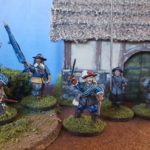
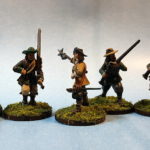
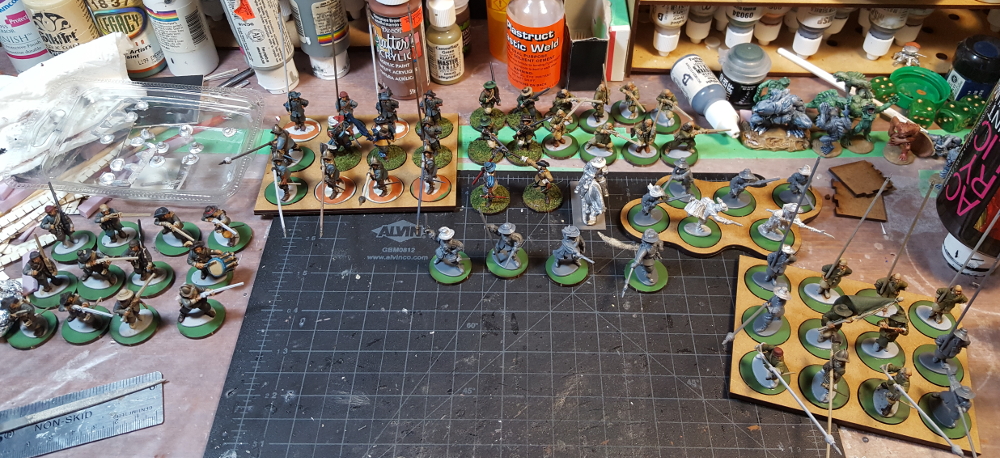
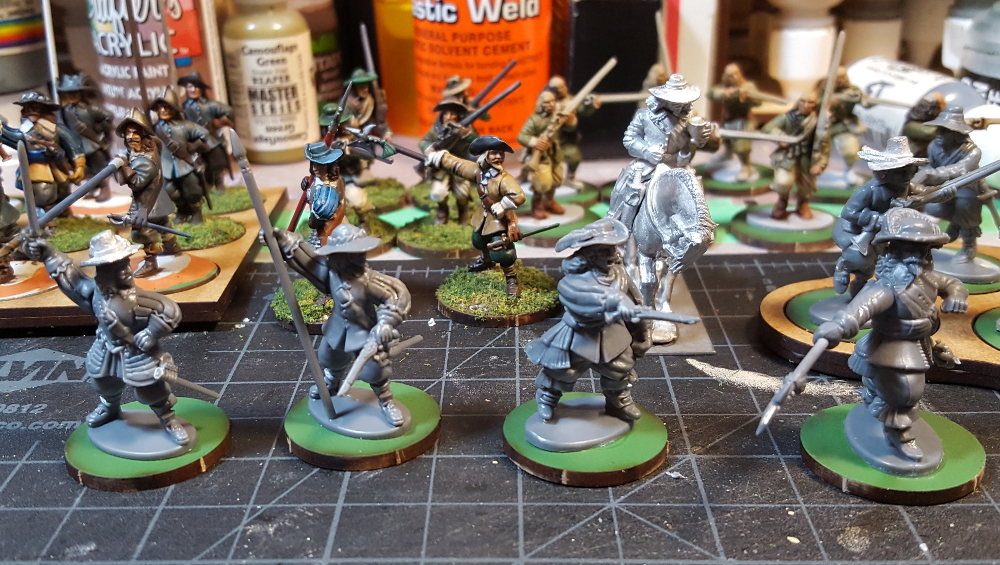
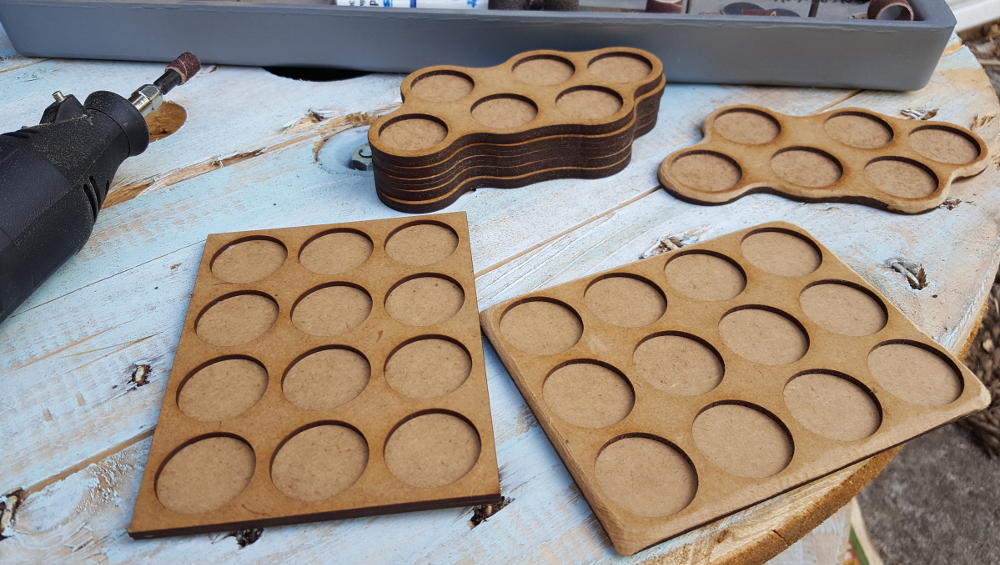
I picked up a batch of simple lasercut MDF trays sized for 25mm bases on one of my recent Warbases order. Pikeman’s Lament uses either six or twelve figures per unit as standard, so I bought a batch of six-base skirmish trays (listed on Warbases’ site as “Dux Brit/Zombie Trays“) and a pair of twelve-base three by four regiment trays for when a PL pike unit is in Close Order, both cut for the 25mm MDF bases I’m using for my English Civil War/Pikeman’s Lament project.

Each tray is two layers of 2mm MDF, lasercut and with the two layers already glued together straight from Warbases. I’d been thinking of replacing the bottom solid layer of 2mm MDF with something thinner (probably .030 plastic card) as I am not a huge fan of big thick bases, so having them arrive pre-assembled forced me to consider different options.

As an aside, if you really did want un-glued movement trays, or even just the tops so you could do your own base layers, I’m fairly sure Martin and Warbases crew can set you up that way. Chuck them an email and ask!

I finally broke out my grossly underused Dremel tool, poured a pint of excellent beer, and sat down on the back patio with this unwise combination to modify my movement trays to my liking!

Beer and power tools, an excellent combination! Also pictured, grumpy cat wondering why it’s so damn hot and why her human servant is insane. Click for larger.

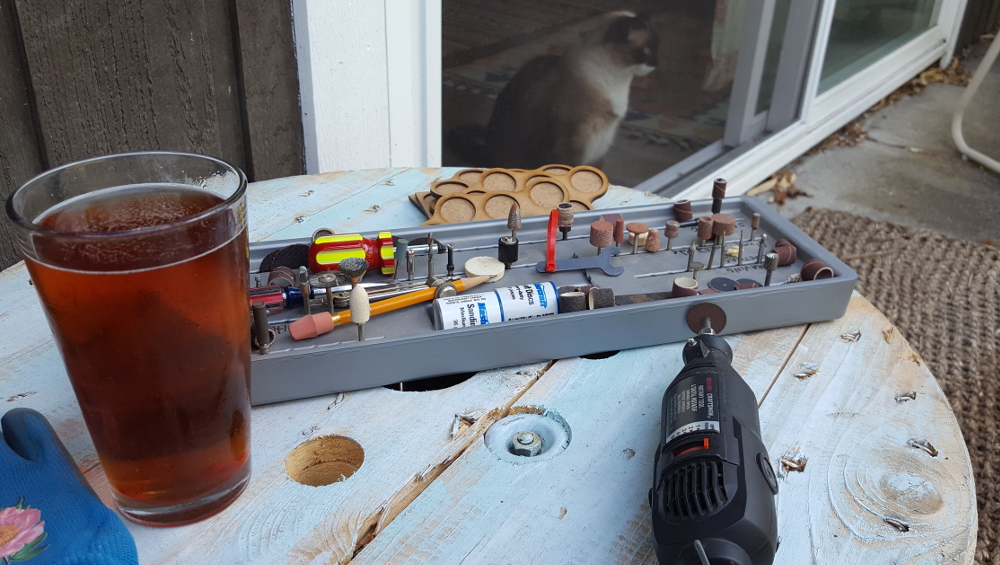
A Note Of Warning: Power tools capable of 30,000 RPM and alcohol is not a recommended combination. Sanding MDF without wearing some sort of filter mask is also not recommended. Even though I was outside while doing this, I can still taste MDF dust on the back of my mouth over a day later. Wear a dust mask of some sort. Don’t combine power tools and beer, even very good beer. Dear readers, be smarter than me. Thank you. Also, should you not be smarter than me, don’t send lawyers after me. They’re scary. Thank you again.

Anyway…

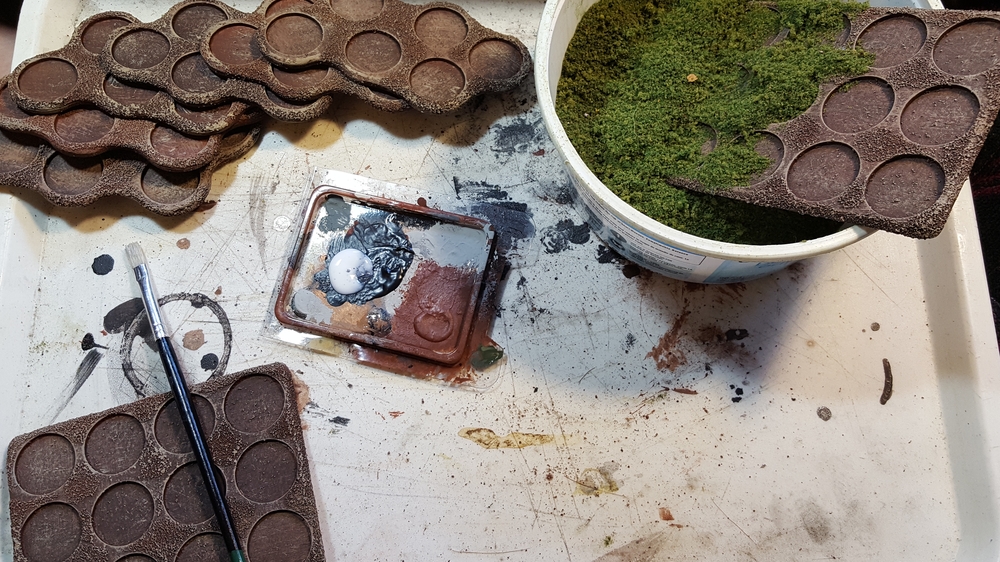
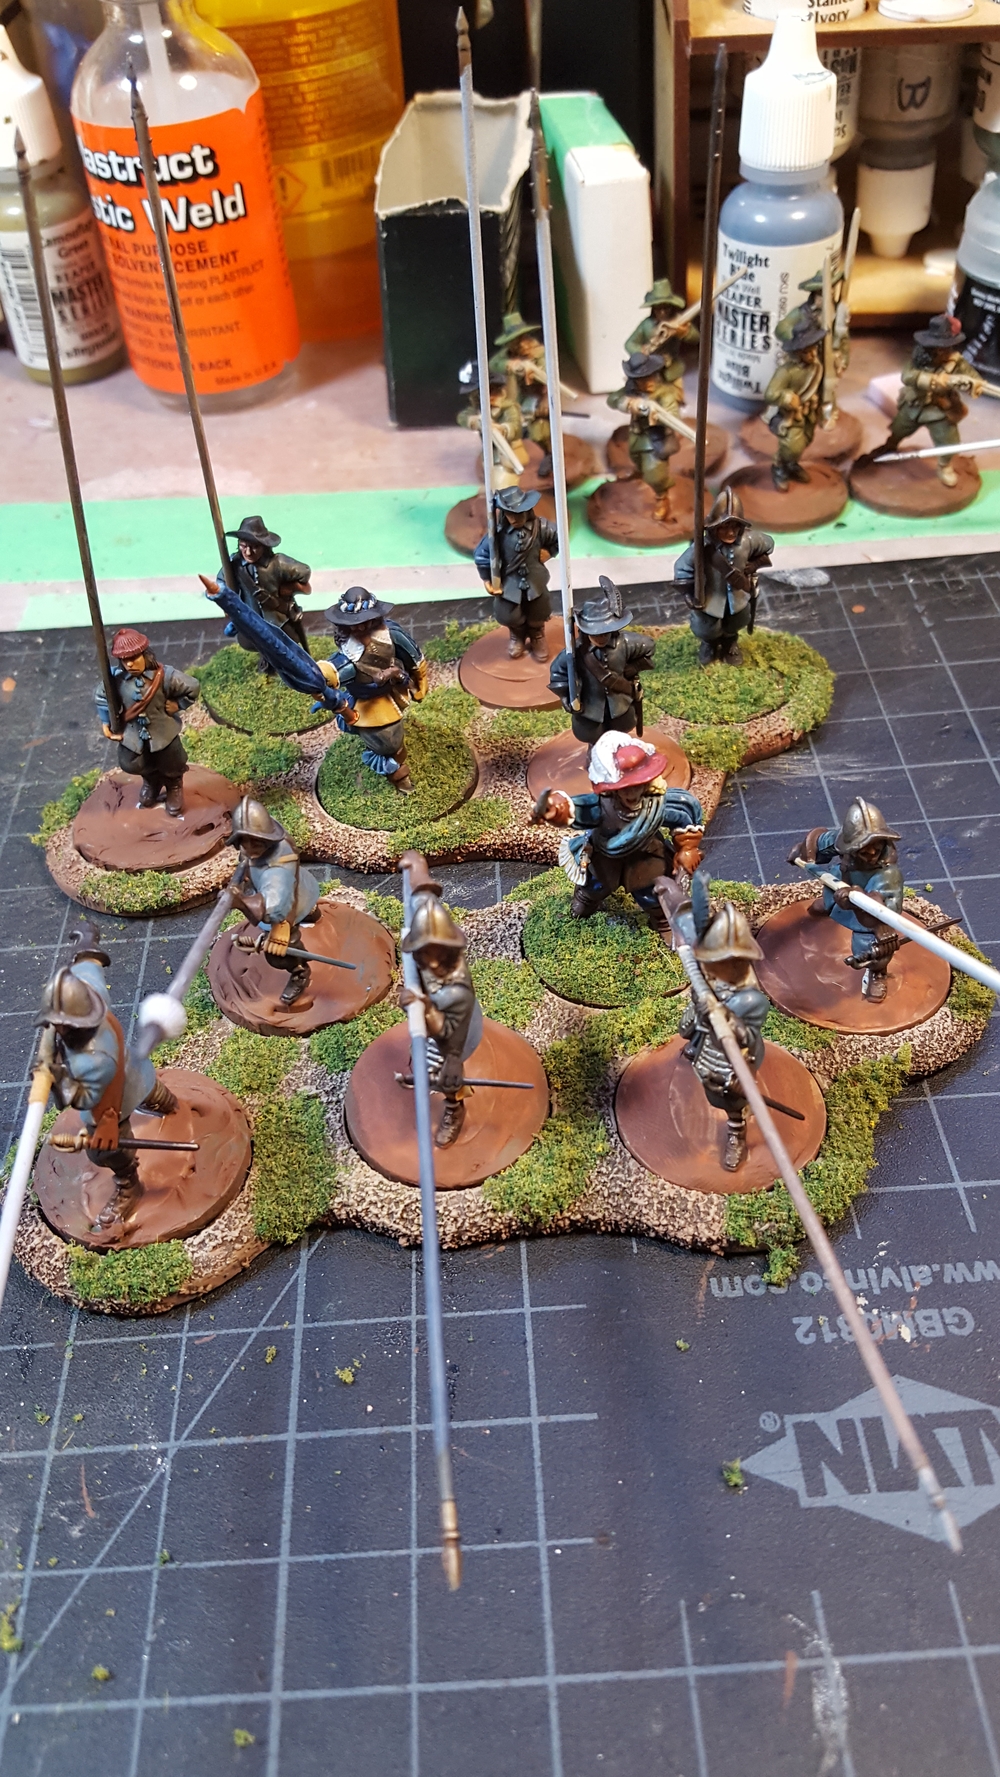
A couple of minutes with a sanding drum on the Dremel per base rounded the top edges off nicely, and the corners of the regiment bases. I touched up a few scuffs from the Dremel by hand with regular sandpaper, knocked the nasty MDF dust off, and then brought everything – including the beer – inside to my workbench to add a bit of sand here and there to the trays.

First two bases done on the right, untouched ones on the left. Click for larger.

With that done, I put the Dremel away, poured another pint of beer, and put a bit of sand around the edges of the trays, being careful to keep it out of the holes. Dark brown base paint followed, then some drybrushing after that was dry, and finally some of my usual flock/turf mix here and there to help blend everything together.

Sand, base paint, and drybrush done, starting flock. Click for larger.
Flock all done. I might add some tufts or other detail bits eventually, but this will do nicely for now! Click for larger.
The bases in use with Warlord pike in various stages of completion. Click for larger.

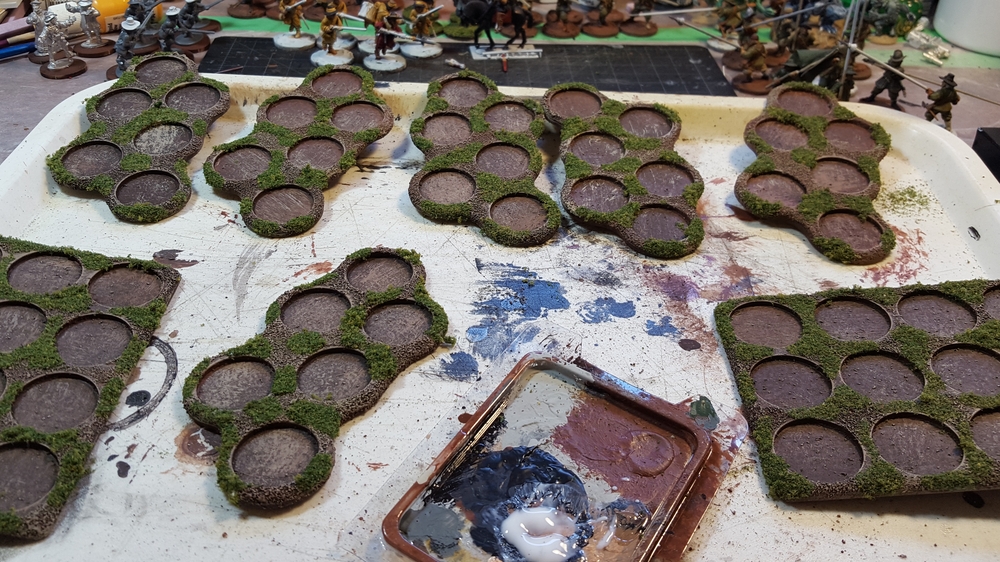
These movement trays are a great value and will make “big” skirmish games a bit easier to manage! I’ll definitely be getting more, especially of the six-base irregular trays, and might contact Warbases about some custom irregular trays for my cavalry, who are mostly on 20mm by 40mm rectangular bases, or my artillery, when I add some guns to my Pikeman’s Lament forces. Having the entire force on similar movement trays would look really sharp and make games a bit more streamlined, especially if I’m running convention games for other people.

Lead Painters League 11 Gallery

I posted my Round 1 entry for the recently concluded Lead Painters League 11 (run over on the awesome Lead Adventure Forum) way back in mid-April but never got around to posting my other entries.

So here they are all at once, including Round 1 again for completeness sake.

Note that I repeated one entry in a later round, so there are only nine entries here instead of ten. My Round 2 entry, Patients of Ward 13, were re-run as my Round 9 entry after the English Civil War musketeers I’d hoped to run didn’t get finished in time. Interestingly, the Patients lost their initial round but won their re-appearance, which is unusual as repeat figures rarely win LPL rounds in my experience!

There’s captions for each photo with more details, including manufacturer info for all the figures.

If you want to see all 300+ entries (30+ participants, 10 rounds!) you can head over to the LPL 11 forum on Lead Adventure Forum. I highly recommend it, loads of awesomely talented painters participate, not just hacks like me!

Links of Interest, 22 June 2017

A handful of links I thought were worth sharing this week.

Historical Enterprises, Inc are a historical reenactors garb/costuming company with all sorts of great articles on their website. If you need plausible colours for your Medieval, Renaissance, ECW, etc figures, this article on fabric, dyes, and colours is based on practice up to the 14th or 15th C but almost certainly applicable before and after that.

John Bond created a great looking pond from teddy bear fur. I’d never considered using fake fur for water features, but it looks pretty good!

I’m considering creating an imaginary English shire to set my ongoing English Civil War project in. There’s a long tradition of “imagi-nations” in wargaming, especially Seven Year’s War or Napoleonic gaming, so an imagi-shire seems like a reasonable thing! In that vein, I found a couple of English place/village name generators to help populate an imagi-shire with plausible-sounding names; The English Village Name Generator and English Place Names Generator being two among many!

A Small Stone Circle

Not every stone circle is a gigantic trilithon monument like Stonehenge. Some of them might be barely recognizable as stone circles, in fact, until you realize that plants grown in strange patterns around the stones, or you wander past on certain very specific nights of the year…

This little project started out as a way to use up leftover putty; whenever I had excess greenstuff or Milliput I’d squish it into a rough stone shape and let it dry on one corner of my bench. This weekend I wanted a quick project as a distraction, so I grabbed four of these stones, hot-glued them to a scrap CD, and added sand. That got left to dry overnight, then I basecoated it dark brown, let that dry a few hours, and drybrushed the sand to bring up the texture with various shades of pale brown, tan, and very pale grey.

The stones got a black basecoat, the drybrushed with various shades of grey, tan, and finally white.

The flocked areas are my usual mix of ground foam and static grass, and then I added various tufts from Army Painter and the flowers from Rain City Hobbies. The flowers form a ring around the outside of the stones, and I kept the foliage inside the stones to a minimum.

Stone circle, overhead view, with a 28mm Warlord pike & shot officer for scale on a 25mm base. Click for larger.

The circle from something close to model eye level or just above, with the same Warlord officer. Click for larger.

My ongoing English Civil War project might well shade over into some sort of gunpowder fantasy version of the ECW or TYW, in which case the circle will be right at home, and in the meantime it can add a little touch of strangeness to some lonely corner of my tabletops… who meets in the centre of this flower’d circle, with it’s well-trodden paths? Be ye for King, Parliament… or some far older Power?!

Alien Dog Monsters!

A few days ago Corvus Belli, the company behind Infinity, had a tweet and FB post asking their fans which of two alien “werewolf” varieties they liked better. For those not familiar, one of the interstellar colonies in the game’s background, Ariadna, has dog-like natives who have managed (don’t ask for details, it’s pure anime genetics) to crossbreed in a few cases with humans, resulting in alien-human werewolves of several different types!

This seems like the sort of thing that would cause wild comment and speculation in the rest of the human cultures when Ariadna is rediscovered. The background fluff is full of gloriously over-the-top tabloid style reporting, so I channelled that and used CB’s photo to create the following street ad that will be appearing on a billboard on my Infinity scenery in due course.

Are Ariadnans still REALLY HUMAN or are they ALIEN DOG MONSTERS? Tune in to find out, and click to get the full-size 1500px wide version suitable for printing at good resolution!

I apologize for nothing!

The Workbench This Week, 12 June 2017

Much chaos in my non-gaming life, so time and brainpower to actually paint is kind of hard to come by, but this weekend I sat down and organized my pike & shot foot figures for Pikeman’s Lament and other English Civil War or Thirty Year’s War gaming.

I now have exactly 60 figures assembled, based, and in progress for this project; I know it’s exactly 60 because the 4Ground 25mm bases I’m using come in batches of 60 and I just finished the first batch of two that I’ve bought!

All the pike & shot foot so far. See text for details, and click for larger.

Starting from the far left, there’s a unit of musketeers in blue uniforms, then a pike unit in blue (on the close-order base from Warbases). To the right off the back edge of the cutting mat is another dozen musketeers, this time in green. In front of them is six foot characters/officers/leaders and one mounted officer, and on the skirmish base to the right is the first six forlorn hope firelock musketeers. Finally in the front right corner is another dozen pikemen, in green uniforms. All the figures are from the Warlord Games Pike & Shotte range, all plastic from their infantry regiment box. This is one full infantry regiment box plus a couple of extra sprues picked up separately, except for the firelock/forlorn hope figures who are the first of the Forlorn Hope/Firelock Storming Party box I’ve assembled.

The blue pikes are closest to being done, and a few of the green musketeers got finished as part of LPL11 recently. Most of the bare grey plastic figures were assembled just this weekend to fill out various units and add some more leader/officer/character figures to fill out some units.

Unassembled, I’ve got another 14 musketeers, enough for a second full unit of “blue” musketeers. That will give me a “full” pike and shot unit of 2:1 shot:pike ratio, which will look good on the table! There’s also another 12 firelock musketeers, and a dozen cuirassier heavy cavalry. Finally I’ve got another dozen regular cavalry fully assembled but not shown above; six of them are fully painted and the other six have been almost finished for… about four years now, or maybe longer…

Four new foot characters, and some finished ones behind. Click for larger.

The four new officer/character figures are made with arms from the Warlord plastic pike & shot infantry command sprue, and a mix of pikeman bodies and bodies from the command sprue. The two on the left are pike bodies; the two on the right are command sprue bodies. The two completely finished and based figures in back alongside the mounted officer are also made the same way, with two spare pike bodies. I have more command or character type figures than I’m ever likely to need for Pikeman’s Lament, but they’re fun to assemble and there’s lots of single-figure small skirmish games out there like Pulp Alley that I could see tweaking for an ECW setting!

As soon as I saw how the figure on the far right came together I thought about cutting the head of the halberd off and turning it into a magic-user’s staff of some sort! Hmmm, mix and match the fantasy Dragon Rampant with Pikeman’s Lament? Dragon’s Lament? Pikeman Rampant? The two games use the same basic core rules, so it might be possible, and gunpowder/Renaissance fantasy (vs more standard medieval fantasy) has always been an interest of mine!

I haven’t actually sat down with the Pikeman’s Lament rules to put together some companies, but the figures assembled and based here are enough for a full size 24pt force with some different build options. I’m going to try to get one or two of the almost-finished units actually pushed through to completion this week, and hopefully get a PL game of some sort in next Sunday, but we shall see…

Warbases Church, Part Two

More progress on detailing the lasercut MDF church from Warbases that I started previously.

Stonework & Doors

Buttresses and a double row of foundation stonework have been added with pink styrofoam insulation cut with a new Xacto knife. I used scrap card to create a small jig to keep the angle of the front of the buttresses the same across the fourteen buttresses around the outside of the church. The buttresses are roughly a quarter inch wide, two inches tall, and about half an inch deep at the base of each.

Styrofoam stonework in place on the church; Warlord 28mm pikeman on 25mm base for scale. Click for larger.
Buttresses and stonework on the other two sides of the church. The extra stone partway down the side disguises a join in the foundation strips. Click for larger.

The front door is card with planks scored into it, with more light card for the hinges and handles. The door arch is more pink styrofoam. Inside the church I’ve added an interior wall of 1/16th matt board on the tower end to hide the tabs where the tower walls slot into the end wall. That’s had some added detail with matt board and card, and the door was done with offcuts of coffee stir stick wood and card.

On the left, both doors at once, with the porch walls in position but not glued. Right, close-up of the front door. Click for larger.

All of the styrofoam was glued down then carved and textured after the glue had dried; I used a ball of tin foil to add a stone texture, then my usual knife-and-pencil stone carving technique.

Priming & Painting

The whole building got a coat of black paint as primer. Rather than the default grey stone that I always seem to use I took some inspiration from churches I’ve seen online from Shropshire county in England and decided to do mostly reddish stone with some grey stone used as accents, similar to the Cound Church of St Peter

I started with brown paint drybrushed heavily on, then a fairly light grey paint, and finally a drybrush of red oxide/burnt umber. I’ve done a bit of edge highlighting so far, but will do more and might yet do another paler drybrush over the whole building to pop some more details out.

The capping stones on each buttress were done in dark grey then drybrushed a paler grey, as was the arch around the main door. I might yet do more stones in grey, just to add some variation to the building. I also glued the porch walls and front down, and added more strips of styrofoam for the foundation of the porch.

Black primer paint drying, with some weight inside the building to keep the base from warping. Click for larger.
Tower end of the church all painted, and with the porch glued down and stonework added around the base of it. Click for larger.
Altar end of the church all painted. Click for larger.

The Roof(s)

Both the main roof and the porch roof got covered in Warbases’ very nice lasercut slate tiles and primed black like the rest of the building. So far the main roof is painted more or less the same as the rest of the building, with an extra grey drybrush to pop the texture a bit more and make it look a bit different from the walls.

Main roof, painting in progress. Click for larger.

The porch comes with MDF panels for the roof, but they look quite thick so I cut a strip of light card the same size, folded it, and glued it into place. Before gluing the roof down I added strips of card against the stone wall to hide the slots where the MDF roof panels should slot in; they’ll be painted to look like lead flashing eventually. As mentioned, the porch roof got more of the Warbases lasercut slate tiles, and will get bargeboards on the front edges eventually to hide the edges of the slate.

Porch roofed and primered, with Warlord pikeman for scale. Click for larger.

Up on the roof of the tower I doubled the thickness of the walls with matt board, then put down a wooden floor using styrene plank sheet, with a roof hatch from a bit more styrene. The upper edges of the walls got a bit of GW Liquid Greenstuff to help disguise the line between the MDF wall and the matt board additions, and painting is in progress.

Tower roof and main roof from overhead. Click for larger.

Still To Do…

The outside edges of the base has a layer of fine scenery grit – coarse sand – glued down and mostly painted black; I’ll paint it up dark brown with a bit of a drybrush, then put various kinds of flock and turf around.

The porch still needs work, mostly paint, and a bit of detailing on the roof. The tower roof also needs painting, and I’m not entirely happy with the colours on the main roof.

Inside is still the big job. The Warbases kit comes with solid lasercut windows that look good from the outside but will make the accessible interior look a bit odd. I might use square grid plastic mesh – the same stuff you use in screen doors – to fill the windows, with inside walls of more matt board, like I did with the inside of the wall between the tower and church proper. Still, with the exterior done including scenic groundwork I’ll be happy to put the church on the table and put finishing the interior off for a bit!