… is 40-some hours before a convention starts, right?
No?
Fortunately, this is actually a small and achievable project. Earlier this evening I declared “major painting operations” done on the bulk of my latest Russian Civil War figures, except the last two figures of the gun crew, which will need an hour or so of attention tomorrow. Needing a distraction from fiddling with figures, I broke out a couple of offcut pieces of pink 1″ styrofoam, nabbed a serrated knife from the kitchen, and started a new hill.
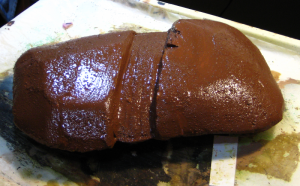
New hill carved, sanded, covered in sand, and basecoated. Click for larger, as usual.
Sizing the hill to space remaining in my Russian terrain box, I wound up with a roughly 10″ long by 7″ wide hill, with a dirt road climbing up and over it. The road fits with my existing caulk roads. There’s three scrap pieces of styrofoam as the structure, pinned together with snapped off toothpicks and glued with hot glue. I used Milliput to fill the gaps on the top surface of the hill and to add some detail to the banks on either side of the road.
While the Milliput was still tacky I dumped sand over the road and a few other patches of the hill, let that dry an hour or so, and slopped on the brown basecoat you can see above. As usual, there was a generous portion of white glue mixed into the paint.
Milliput is apparently able to dry underwater, so I don’t see a layer of wet paint & glue as a major impediment. If I wake up in the morning and the stuff is still tacky, I’ll have guessed wrong, I suppose…
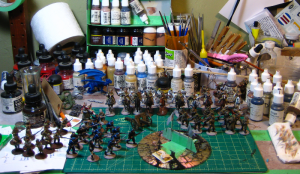
A quick look at my painting bench as a I get ready for Saturday’s Russian Civil War game at GottaCon. On the right, 15 Bolsheviks, a mix of regulars and militia/Red Guard types. Behind them across the back of the cutting matt, a unit of Russian horse. Behind them and currently being ignored, 10 American gunboat sailors from Pulp Figures. On the left of the mat, 14 Bolshevik sailors. Off the mat to the left, a batch of finished Whites from ages ago just waiting to be re-housed as I (yet again) reorganize my figure storage. Centre, a field gun — the crew are lurking behind the Red sailors. The CD has some new greenstuff banners I just primed, and a small pile of ready ammo that will form part of a loaded/unloaded marker for the field gun.
All sorts of things, mostly Russians, being painted. See text for details, and click for larger!
In other convention-related news, I’ve submitted my RCW game to Trumpeter Salute; haven’t had the event confirmed by the organizers yet but it’s nice to have it submitted.
Right, back to the painting mines! Four days to the game!
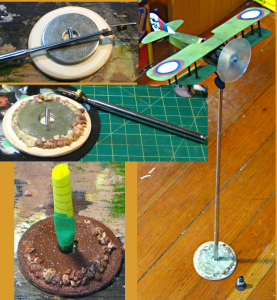
…it’s a bird, it’s a plane… well, actually, it’s a flying stand to get my existing SPAD and Nieuport fighters onto the table properly!
Flying stand construction. See text for details, and do click for larger!
The lower part of the base is two 3″ plywood circles from Micheal’s craft store, the lower one with a hole drilled in it wide enough to accommodate the head of the M4 20mm long bolt. The top circle has a smaller hole to let the bolt through, and I used a woodworking rasp to bevel off the edges. The two washers are fairly heavy 2″ fender washers. I used superglue to tack them in place, then ran a bead of Gorilla Glue around the edges to lock them in place and round off the base. The gravel imbedded in the Gorilla Glue adds nicely to the weight of the base, as well.
The base will get a quick paintjob to match the rest of my terrain, then some lichen or foam foliage to break up the outline a bit.
The actual flying stand is a cheap mechanic’s extending inspection mirror from a local auto parts store. The base unscrews and is threaded for a metric M4 bolt – that’s a 20mm bolt coming up from the centre of the base. Once the mirror at the top was removed, the round ball it swivelled on turned out to be easy to shape with 120 grit sandpaper, so I sanded it roughly cubical and tacked the alligator clip (also cheap from the electrical section of a hardware store) on with superglue just to hold it. Then I used fine wire to lash the clip into place, saturating the lashings with superglue after I was done. The result is low profile and more than solid enough to be gamer-proof. I did nearly glue the hinge of the alligator clip shut, though… try not to do this!
The small square of basswood on the handle of the alligator clip is just to make it easier to open all the way; the way it’s mounted on the telescoping rod centres the airplane over the stand – which is a good thing – but the rod gets in the way of your fingertip when you try to open the clip to it’s widest point. The screw I put in the belly of the SPAD turns out to be almost too big for these clips; if you look closely you can see I bent the handle of the clip outward to allow the clip to open just a bit wider. The whole clip has also been bent forward slightly to improve the angle the planes sit at when they’re clamped in.
Total cost of the whole thing is about $10 or $12. The extending inspection mirror is the most expensive part at about $8; four alligator clips were $2 total; four 20mm M4 bolts were about the same; the 2″ fender washers are about 50 cents each; and a package of six 3″ plywood craft discs was $3. If you had a workshop area full of random stuff (which I don’t) and could scrounge bits you could build these for not much more than the basic cost of the inspection mirror.
The whole assembly is just over 20″ tall to the tip of the alligator clip, more than tall enough for my purposes. The telescoping post will still unscrew from the bolt in the base, which I will probably maintain as being able to take it apart makes it much easier to transport, and the telescoping rod and alligator clip is the part most likely to be damaged and need to be swapped out.
My brother has a big 1/48 DH4 that we’re not sure will balance securely on this stand; I might wind up making a larger flying stand, probably based on CDs, for that plane. I’ll eventually make one or two more flight stands this size, too, but given that for the near future there’s never going to be more than one plane over the table at a time, we’re good to go and it was easier than I thought it was going to be to construct a solid flying stand.
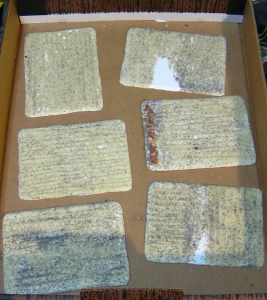
As a break from painting up Russians, last night I broke out the scenery supplies and started in on a new set of plowed field pieces. I like fields of various sorts, they provide interesting texture on the table while being easy to make and easy to transport, being largely flat!
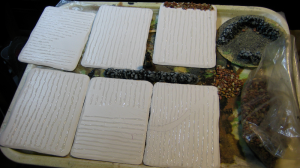
These six are based on the last large piece I have of white 3mm thick plastic. It was salvage from the workshop of a non-profit I occasionally volunteer at, and I have no idea what sort of plastic it is, but it won’t glue with regular solvent cement and not even superglue holds it gracefully, so it’s useless for buildings. Hot glue and white glue will stick to it, though, and being plastic and relatively thick it won’t warp, so we’ve used most of it up as scenery bases of various sorts. The double handful of small scrap pieces (none much bigger than 4″ in any dimension) are being saved to appear under various small bits of filler and detail scenery in the future, but these six 6″x4″ fields are from the last 12″x12″ piece I had left.
Six new 6″x4″ fields, with the plow furrows made from lines of hot glue. Top right is one of my Gorilla Glue experiments – see text. Click for larger image.
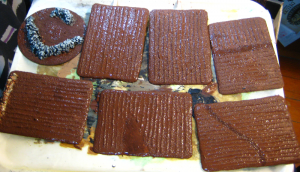
For the plowed ridges and furrows in the fields, I broke out my trusty hot glue gun and ran thin lines of hot glue for the plow ridges. A couple of the fields got different or interrupted plowing patterns, just for interest.
The scruffy drystone wall on one end of one of the fields, the larger drystone wall assembly on the CD base, and the freestanding wall on a tongue depressor tucked in between the fields in the above photo are all made from decorative gravel and Gorilla Glue, a technique I first saw over either on Maiwand Days or Rabbits in my Basement, although it was apparently pioneered by TMP stalwart John the OFM.
Gorilla Glue has the fascinating properties of being water-activated and expanding 2- to 4-times as it cures — the stuff foams as it hardens, basically. Lay a thin bead of it down, dump a line of damp gravel over it, and it’ll fill some of the gaps between the gravel as it expands, and even lift and fill your wall out. Pretty cool, and I’ll be using it for producing a lot more scruffy stone walls, blast craters and similar terrain in the near future!
The fields with sand glued down for texture. Click for bigger, as usual.
Next step was a layer of white glue, then sand. My sand mix is actually about four different kinds of “decorator” sand, model railway ballast and similar, so it isn’t totally uniform.
Base coat and a bit of darker brown for some muddy bits. Click for larger.
The base coat is a medium brown, with a bit of a much darker brown mixed in. I wound up having to repeat the base coat, as I’d applied it quickly right at the end of the night, so it was patchy and too thin in spots. I used a bit more dark brown and even a bit of well-thinned black in the second coat, for better contrast with the eventual drybrushing. The ragged rock wall along the one end of one field was basecoated straight black at the same time.
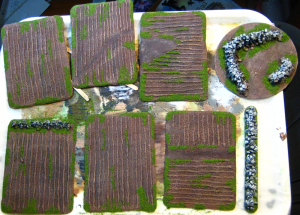
Drybrushed (two passes) and basic flock added. Click for larger.
The day after the basecoat, I did two drybrushing passes, the first with a mix of the same base brown lightened with a pale brown/dark tan colour, mixed roughly 1:1. The second drybrush, even lighter, was a fairly pale tan colour. The stone wall got a fairly heavy dark grey drybrush, a lighter pale grey pass, then a final pass with pale grey mixed with white on just the tips of the rocks. Then it was back to the white glue to add bits of flocking, mostly around the edges. I might go back and add some sprouting crops or something low to some of the fields, but for now they’ll be empty and weedy, mostly because it’s easier to move troops over them this way.
I’m declaring these done for now and moving them out of the way to get back to Russian Civil War figures! Total time on this project, not including photos and writing it up, was a couple of hours over a couple of evenings, all in short bursts, interrupted by figure painting, the Internet, and other distractions!
It covers the whole world, but with larger and more detailed maps for the British Empire/Commonwealth and Europe. It also includes details on transport infrastructure and routes, travel times and similar which might be of interest for those planning a tabletop game campaign or RPG in the interwar era, and a number of maps of World War One (the Great War) and it’s aftermath.
Even better, the site owner points out that all his maps are from before 1923, therefore as far as he can tell, they’re public domain (out of copyright, that is) so there are no restrictions on what we can do with them.
Well worth looking at; I’ll probably get the files at work and print a few out too!
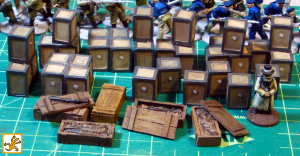
Painted up the first bits from my December Ainsty order, the rifle crates and tea crates.
Rifle and tea crates from Ainsty, painted. Click for full size.
The rifle crates are really nice pieces, with well sculpted rifles and crates; the tea crates are plain but well made and look great. The whole lot is (as you’d expect from Ainsty) perfectly cast, with scarcely any visible bubbles or casting flaws.
Scale provided by a 28mm Brigade Games Russian priest.
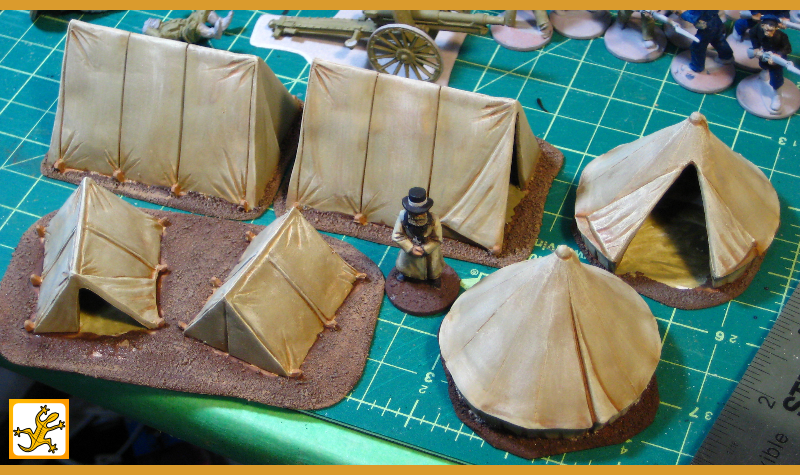
As a diversion from painting Russians, I’ve painted up the first part of my recent Renedra plastics order from J&M Miniatures. I ordered two sprues of the mixed tents, and as I mentioned in my review, was very pleased with them. They’re solidly and cleanly cast and well proportioned, and they’ll suit a huge range of genres and eras.
Here’s the first sprue of tents painted up. The colours are a variety of khaki shades from the Reaper Master Series line, plus GW Gryhonne Sepia ink.
One sprue’s worth of Renedra tents all painted up. Once again Father Vodkanov of the White Russians provides scale. Click for larger.
I’ve got another sprue of tents still untouched (same six again), as well as the barrel and graveyard sprues still to do something with. They’re going to wait until after our local gaming convention the first weekend of February, though.
I realized I had an increasing number of review posts here at the Warbard, but no category or single point of reference for them, so I’ve created a Reviews page and a corresponding WordPress category to gather all the reviews up. So far it’s mostly books, but there’s some miniatures, some terrain and some rules in there, and more of all of those to come.
You can also find a link to the Reviews page in the menu up above, in the dropdown below Inspiration.
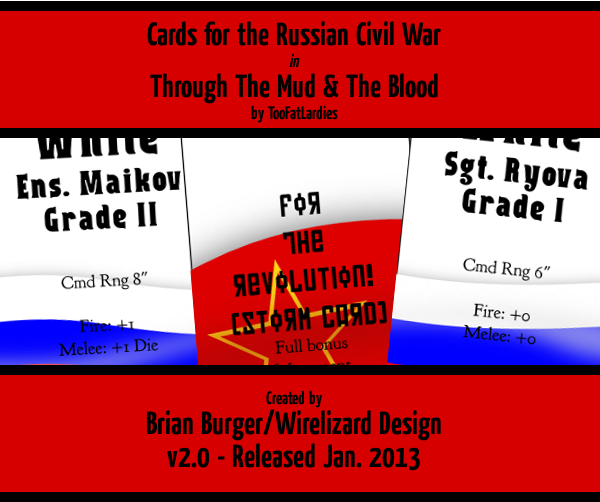
As I mentioned a few weeks ago, I’ve been rebuilding the entire deck of cards needed for Through the Mud & the Blood-powered Russian Civil War large skirmishes. I first made these cards back in November 2011, and after a year of use, we realized we’d wound up scribbling extra notes and other edits all over the cards we used, so I sat down and rebuilt the entire deck to incorporate the changes and edits we’d made while using the cards.
There are four pages for Reds and four for Whites, with ten Big Man cards per side, ten Command Initiative cards, a full set of the basic “National Characteristic” cards as laid out in the main M&B rules, and ten more Support or blank cards so you can customize your deck and add scenario-specific cards. The front page also has two Snifter and one Blank card per the main M&B rules, so one printing of all nine pages should give you everything you need for quite large M&B games.
Feedback in the comments, if you’re having problems, find a typo, or have ideas for the next edition of these cards!
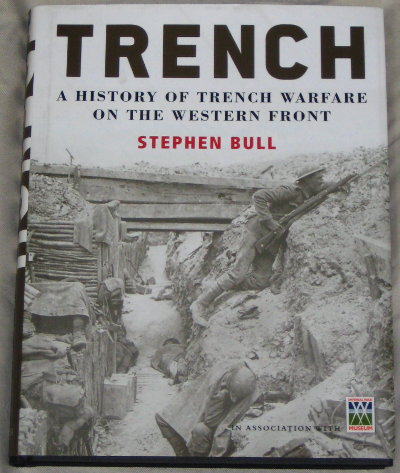
Trench: A History of Trench Warfare on the Western Front by Stephen Bull. This is a joint publication by Osprey Publishing and the Imperial War Museum, so in addition to being well written it’s lavishly illustrated, with period photographs on every page (the Imperial War Museum being famous for it’s photograph archives), map reproductions, and Osprey’s well known illustrations where needed as well.
The cover of Trench.
Trench is a big coffee-table style book, full colour throughout. The 270-some pages are broken up into ten chapters; the first few are a roughly chronological look at the evolution of trenches in the early part of WW1. The rest are focused on one particular aspect of trench warfare — gas, patrolling, sniping, tanks and armoured vehicles, new weaponry, trench and bunker construction, the evolution of tactics, and so on.
Stephen Bull is well known, and he does well in Trench, with a mix of his own writing, some excerpts from Osprey publications, and frequent bits of period writing, often letters or diary entries from actual front-line soldiers, including translations of French and German material. There are also frequent short articles inside the book focusing on a specific battle or engagement, with discussion of the strategic and tactical significance of this particular engagement and maps, photographs or period writing specific to that engagement.
If you’re interested in the Western Front at all, especially as a subject for wargamers, get yourself a copy of Trench. It’s an excellent mix of written and visual resources; the captions to the various photographs and other visuals are especially well done, instead of being just an afterthought.
The Shortest Possible Review: A good introduction to the Western Front of WW1, especially strong on photographs and other visuals
Incidentally, as I write this (Jan. 2013) the Imperial War Museum London is in the middle of a massive renovation/rebuilding effort, which will (among other things) give them a completely rebuilt World War One exhibit before the 100th anniversary of the start of WW1 in 2014. They have a fascinating Transforming IWM London blog with lots of articles on what’s involved in renovating a large museum.