Onion Domes, Part One

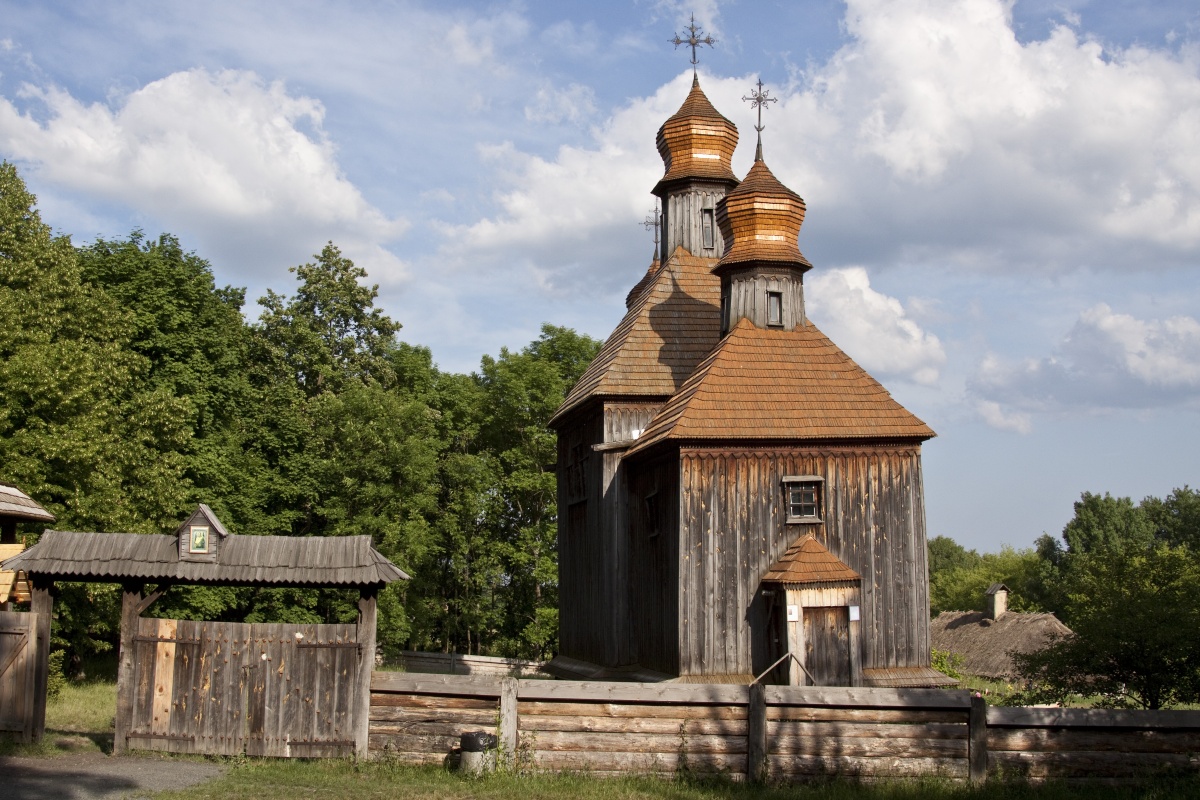
Finally made it up to the local branch of Micheal’s craft store after work Wednesday to hunt down material for the two domes of the Russian church. I had planned on using 1″ wooden spheres, but the shelves of random wooden shapes were fairly well picked over and they had no wooden spheres of that size at all.

They did have 1″ wide turned wooden shapes advertised as “decorative rod ends”, though, and I realized they’d make much more interesting onion domes than the simple spheres I’d been planning on.

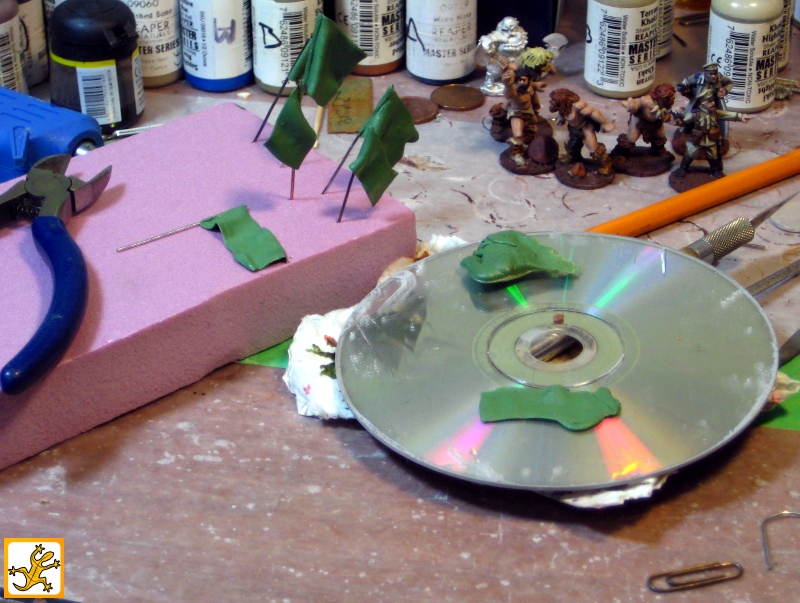
When I got them home I drilled holes in the top and inserted lengths of wire. One useful thing about turned wood shapes, it’s usually fairly easy to find the centre point, as the lathe tools always leave small ring impressions on the wood. The wire got superglued in, then I used a twist of tinfoil to form the core of the uppermost section of the onion shape. Terracotta Milliput is cheap, sure, but tinfoil is even cheaper!

After that I mixed a small batch of terracotta Milliput and worked it around the wire and foil. I used a 1″ circle I’d cut out of styrene as a rough guide to keep the upward concave curve consistent, and smoothed things down with a wet fingertip. I didn’t fuss with the surface finishing much, a bit of wet sanding after the milliput is dry and another thin layer of putty will finish everything off nicely in due course.

So, behold the domes of the Church of St. Boris the Intoxicated, with the putty still setting on them!

ruschurch_domes1
The onion domes take shape. Click for slightly larger, see text for details!

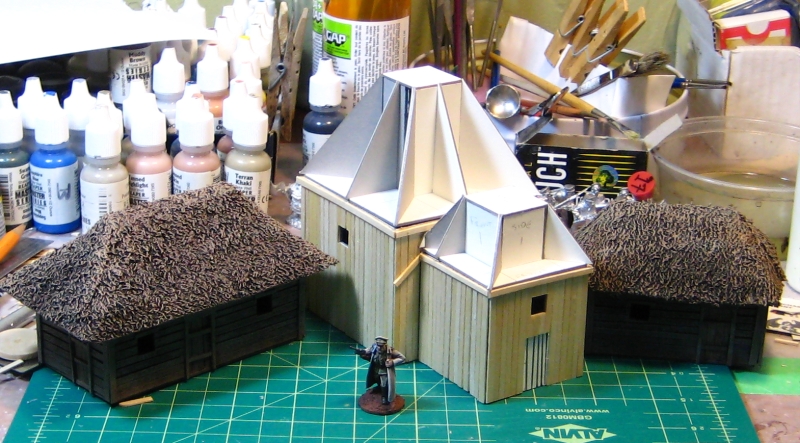
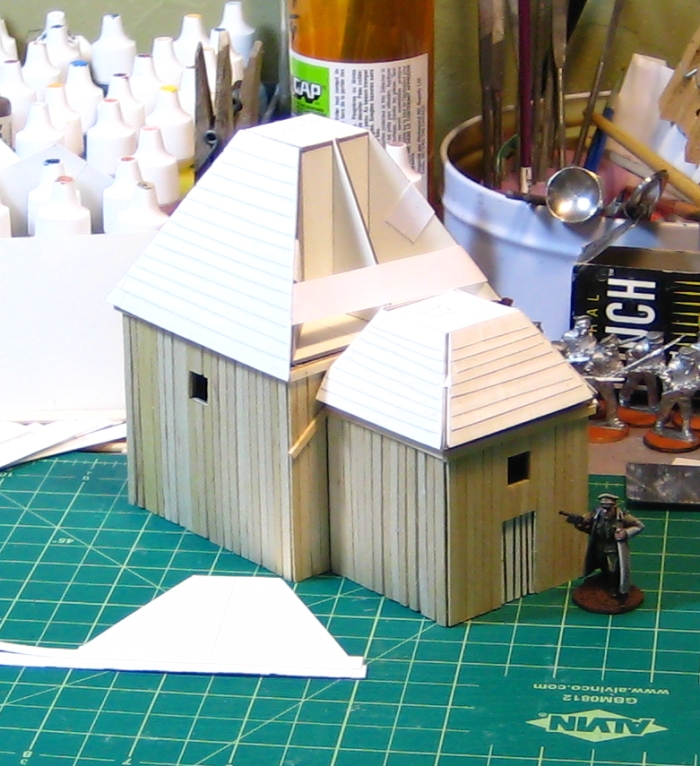
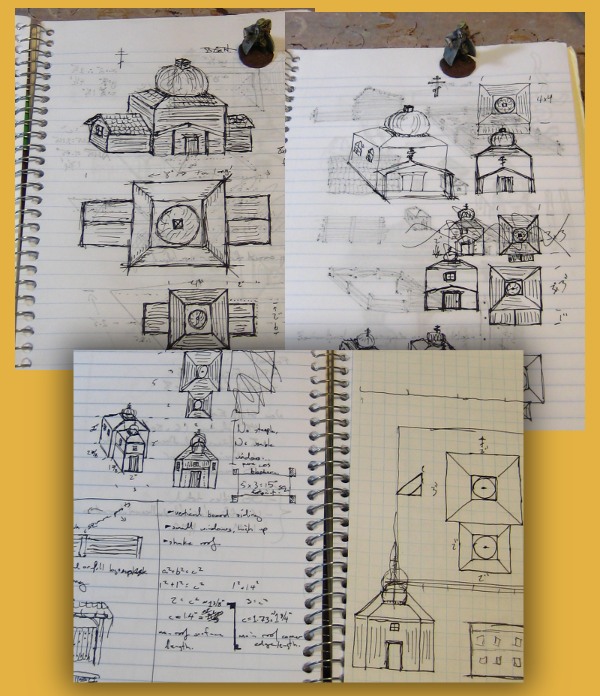
Aside from the domes, the roofs are finished structurally, all shingles and trim in place. I still have to finish the trim around the door and windows, then it’s off to painting.

Small Russian Church WiP

A quick pair of photos of the small Russian church I’m building for Russian Civil War gaming in 28mm. Earlier in January I discussed some planning and thoughts I had for a wargame-scale small church, and while it isn’t going as fast as I had hoped progress is being made!

ruschurchwip
My work-in-progress Russian church, alongside the two earlier Russian huts.

As with the huts, the basic structure is mattboard with coffee stirsticks providing the woodwork.

ruschurchwip2
A slightly more recent work-in-progress shot. Shingle roofs are slow going…

The roofs of the church are going to be shingled rather than thatched, and while doing shingles with built-up strips looks good, it is frankly tedious… The smaller roof is done except for trim, though, and the main roof is about half done, then it’s on to the domes to provide that very Russian look that’s so distinctive.

Russian Huts Finished

It’s been a bit of a slow ten days or so on the wargaming front around here; I wish I could say there was a proper reason, but I just haven’t spent much time at the workbench. One of those weeks.

Regardless, earlier this month I did finish both small Russian huts/farmhouses that I started over Christmas, and the Russian church is coming along nicely.

Here they are together, with a pair of Brigade Games’ 28mm White Russian officers for scale. The walls are mattboard and wood from coffee stirsticks, the roofs are towel with cardboard structure underneath.

rusbldg_jan12
The fronts of a pair of Russian rural buildings – huts, small barns, possibly small farmhouses.

The smaller one on the left is 3″x2″ and roughly 2″tall, the slightly larger one on the right is 4″x2″and about 3″ tall.

rusroof1
Removable thatch roofs from towel.

The hipped roofs are mattboard and light card underneath with towel soaked in diluted white glue as the thatch.

The roofs removed, showing their structure slightly.

Here you can see the roofs removed and flipped over. The structure of the roofs is all just cardboard and I’ve had no warping at all despite the towel for thatch being fairly liberally soaked in diluted white glue after it’s glued down.

Both buildings got a basecoat of black paint mixed with white glue (my standard scenery basecoat), the woodwork was drybrushed with a grey mixed with some tan followed by a second drybrush of paler grey. The thatch got the same black/white glue base then a couple of drybrushings with various brown/tan/grey mixes. The towel soaks up paint and glue as well as you expect towel to, even during drybrushing — expect to go through paint like crazy.

I have vague plans for a couple more buildings for a Russian hamlet, maybe something in whitewashed plaster more suited to the southern portions of the country, and of course the Russian church is nicely underway. More about that tomorrow!

Paint It Black

This is a wargaming website run by a pair of Canadians. It’s hosted on a Canadian server (a very deliberate decision, I should point out). So why is this post about American politics?

Because SOPA (the Stop Online Piracy Act) and it’s evil twin PIPA (the Protect IP Act) currently being debated by American legislators are so mind-bogglingly stupid, badly thought out and vile, frankly.

And because, especially under our current Conservative government up here, Canada has a bad habit of following our giant southern neighbour happily over whatever stupid policy cliff it’s just launched itself. SOPA/PIPA is a really, really big cliff. One that could wind up with the wreckage of much of the Internet as we know it splattered at the base of it.

Michael Giest has a great article on Why Canadians Should Participate in the SOPA/PIPA Protest. Read it before he blacks out his site.

I also know from the site stats we keep here that significant number of our visitors are American. Unlike those of us from overseas, who just have to watch in horrified astonishment and make what protests we can, our American visitors have Senate and Congressional Representatives they can, and should, be contacting to hammer home just what bad laws SOPA/PIPA are.

Wikipedia is going black. So are WordPress.org, BoingBoing, Reddit and a host of tech and geeky sites. Closer to wargaming, TGN and parent site CMON are going black.

We”ll be blacking out Warbard in solidarity from 0800-2000 PST Wednesday the 18th.

We’ll be back that evening, and so will all those much, much larger sites I mentioned above. But if SOPA/PIPA are rammed through, huge swathes of the Internet as we presently know it could wind up black for good, wrecked by bad laws passed by idiots.

Flags & Banners from Greenstuff

This is not really a new idea, but it’s one that I only twigged to in mid-2011, so it’s fairly new to me. The idea of using greenstuff for flags and banners came to me one evening as I was experimenting with a small blob of greenstuff putty. I sculpt about as well as whales fly, and I find the rubbery used-bubble-gum consistency of greenstuff quite frustrating to actually do anything with (the clay-like feel of Milliputt is far more agreeable) so I was messing around wondering what I could do with the 36″ roll of greenstuff lurking in one corner of my desk.

Pressed out very thin, I discovered greenstuff is actually strong enough to hold itself up even before it cures. Once it’s cured it’s still moderately flexible, with a springiness to it. You can actually gently press folds flat to paint them, which is a bonus. It takes three dimensional folds and ripples better than paper, and unlike lead foil it won’t crease easily. A quick shot of primer and it paints up nicely.

The excellent Brushthralls website has a great Greenstuff Gizmos article with more detail, including the use of light vegetable oil to keep greenstuff from sticking to things, which I must admit I hadn’t heard of before. (link dead, alas, the entire Brushthralls site is no more – Sept 2020)

gs_flags
Greenstuff flags in progress. Click for full size.

Above, my greenstuff flags in progress. Squash greenstuff into thin sheets on the back of a CD, cut flag-shapes with a knife, wrap around lengths of wire donated by paperclips, gently prod some folds and ripples in with a sculpting tool or just a fingertip, stab into a scrap of foam to cure. Done, pretty much.

Incidentally, I love big paperclips as a source of wire. Not as strong as piano wire, true, but far, far easier to work with and more than strong enough for most modelling purposes.

So, there you have it, flexible, good looking flags from greenstuff, and a use for greenstuff even a non-sculptor like me can manage!

The Next Building Project

I don’t usually like to talk about plans and ideas before there’s at least some progress to show off, but while I was away over the New Year I had time to do some quick sketching and thinking about a building that would be at the centre of any Russian village or hamlet during the Russian Civil War, and which really is iconic when you want to remind players the game is, in fact, set in Russia.

notebook_jan2011
Some pages from my notebook – possible plans for a feature building for my RCW table!

Google Image Search is really indispensable when looking for prototypes and inspiration, although it’s very easy to get a building that’s just too big for the table. The church at top left would have been over 8″ long and 4 wide, far too big for a scenery piece that is basically just a Line of Sight blocker. The design shrank from there (top right page) then grew slightly on the bottom page and I’m fairly confident the finished result will be something like the two-part double-dome design on those pages, with a footprint roughly 5″x3″ and an overall height somewhere around 6″.

I saved this image from the web but forgot to write down where I found it or any details of the actual building, but it’s become my main reference. I also can’t currently find this picture again via GIS…anyway, it’s a perfect-sized building for my purposes and should help me get a lot of details right.

rus_church
Russian Church found via Google Image Search, except I didn’t save any info on where I found the image… sorry.

A 2011 Review

Happy New Year! Just back from a week away from my computer and my workbench, spent visiting the folks inland, and counting down the hours until it’s back to work and such.

Although this website has been around on various hosts and under other names since 1998, 2011 was our first full year in this relaunched blog format, powered by the awesome WordPress and a renewed and expanding interest in wargaming! So how did that first year go, anyway?

Random Stats of Possible Interest

We started rebuilding the site back in September 2010, officially relaunched in January 2011, and we’ve been going steadily since then! According to the web statistics package we run, there were just under 17,000 visits to the site, with just over 20,000 pageviews (just over 1 page per visit, in other words). Most of our visitors are from (top 5, in order) the US, UK, Canada, Australia, and Germany.

April 2011 was the busiest month we’ve had so far, with just under 2,000 visits.

In terms of posting, this post is the 149th posted to Warbard, with the vast majority — roughly 130 — being from 2011, giving us a rough average time between posts of under 3 days. Not bad!

The most popular single article was the review of .45 Adventure 2nd Edition, with various terrain articles and gallery posts filling most of the rest of the top ten. We talked about Inkscape quite a bit, lots of pulp adventure, and more recently the Russian Civil War.

Going into 2012, expect more RCW, more pulp, more terrain & buildings, and of course the two main gaming conventions locally are rapidly approaching in February and March/April 2012! 2011 was a great year, and I expect 2012 to be even better!