Sarissa CityBlock Buildings, Part The Third

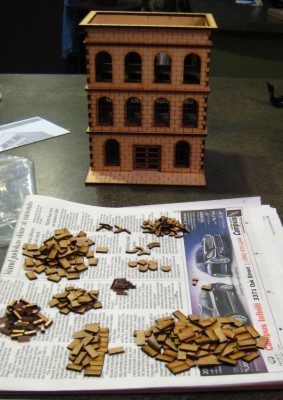
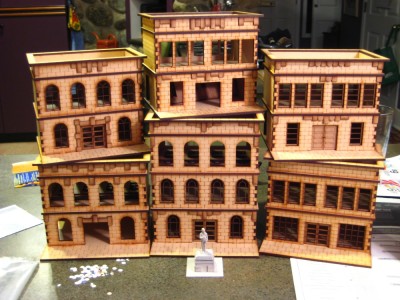
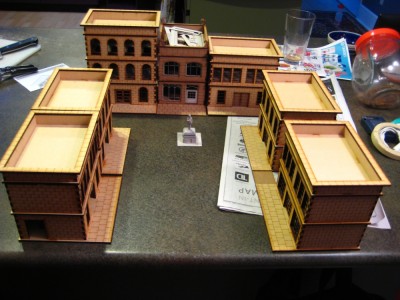
Progress continues on my seven Sarissa Precision buildings, albeit at a slower pace than I’d intended!

Basecoat and drybrushing is done on all seven buildings, gravel roof details likewise in place on all seven, most of the doors and windowframes are painted, and I’ve started cleanup and finishing.

I’ve always liked the looks of the big hand-painted signs and advertisements on the sides of older buildings, so given the wide blank side walls of the Sasrissa CityBlock buildings, it seemed natural to break out the smaller paintbrushes and go to it!

hotel_at
Newly-painted Hotel Atlantic sign on the side of the three-storey Sarissa Precision CityBlock building. Click for larger, as usual!

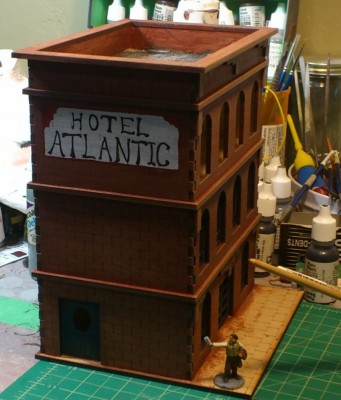
Still some cleanup to be done on the basic lettering, and I might yet redo the red ornamenting in both top corners, but the basics are done and I like how it turned out. This was all done freehand with a brush over some light pencil lines for guides, after I used Inkscape on the computer initially to play with letter sizes and spacing and figure out some basic guides. The “Hotel Atlantic” seemed like a good generic name, likely to occur anywhere in the English-speaking world, or even in non-English-speaking areas as the hotel set up to cater to English-speaking travellers.

One of the other buildings has a blank white square on it currently; later this week I’ll figure out what sort of sign or ad I want on it, too.

Sarissa CityBlock Buildings, Part The Second

Having assembled my new Sarrisa Precision lasercut buildings, it was time to consider adding some extra details to really make these buildings “pop” and bring them to life. One of the things I wanted to do was add detail to the fronts of the buildings, especially the cornices at the roofline, which are often quite elaborate on brick or stone urban buildings built in the late 19th or early 20th Century.

As I’d assembled these buildings I’d reflexively kept the bits of MDF from inside the windows and other openings in the models, and looking at the little pile of lasercut leftovers, I realized they’d be perfect for basic detailing and adding some relief to the fronts of my new buildings.

sarissa2
The three-storey Sarissa Precision building, and the sorted offcut bits of MDF. Click for larger, as usual.

There were more than enough bits and pieces to do the fronts of five of the seven buildings, with leftovers to keep going on the remaining two if I decide, although I’d like to use some light card in layers for a slightly different look on the last CityBlock building and the Gaslamp Alley townhouse.

Here’s all six of the CityBlock buildings stacked up, five of them with basic ornamentation added with “scrap” MDF.

sarissa3
All six CityBlock buildings stacked up, five of them with front details added. The statue is roughly 28mm tall, just for scale. Click for larger.

Next step is chimmneys and other rooftop detail. I’ll use basswood and plastic tubing for chimmneys, and create roof hatches, vents and roofwalks from basswood and card. Masking tape for tarpaper or paint and fine gravel will complete the roofs, then there’s painting to be done!

Sarissa CityBlock Buildings, Part The First

In my last post (two+ weeks ago!) I mentioned I’d bought a bundle of Sarissa Precision’s lasercut 28mm CityBlock buildings to bring our pulp gaming into an urban realm. I’ve finally got all seven buildings assembled; here they are on the counter.

sarissa1
All seven Sarissa Precision 28mm lasercut buildings. Click for larger, as usual.

The six similar buildings are from Sarissa’s CityBlock bundle, with one extra floor purchased to give me five two-storey buildings and one three-storey building. The seventh building is the Narrow Townhouse from Sarissa’s Gaslamp Alley Victoria SF line.

The CityBlock buildings go together quickly and easily; the walls and floors are 3mm MDF, and the window frames are seperate sheets of 2mm MDF designed to slot in behind the walls. The first several buildings I put together with more enthusiasm than consideration and glued the windows in right away; for the ones I’ve finished more recently have had the windows left out for now to make them easier to paint.

The floors and roof all come apart to allow access to the interiors of the buildings during games, and the simple tab-and-slot system should survive many games with no issues. The buildings all feel very solid once assembled.

The Narrow Townhouse from the Gaslamp Alley range is one of Sarissa’s most recent releases, and there’s a number of tweaks, refinements, and added details compared to the older CityBlock buildings. The interior floors have wood planking engraved on them, some of the etched and cut detail is a bit finer, and instead of 3mm & 2mm MDF, the Gaslamp buildings use 2mm MDF and laser-cut light cardstock, called “greyboard” on Sarissa’s website. This makes the Gaslamp buildings lighter than the CityBlock ones (although just as solid) and somewhat more detailed. The windows have both inner and outer frames lasercut from cardstock, for example.

Having assembled the basic buildings, I’m now turning toward detailing them before painting. I want to add some details and bits on the front facades and cornices of the buildings, and to the roofs. I’ll use fine modelling gravel on some roofs for a tar-and-gravel roof, and narrow masking tape on others for tarpaper roofs, and add details like chimmneys, roof walks and possibly even rooftop signs.

After that it’ll be time for paint. The engraving on the CityBlock walls is too large to “realistically” be brick, but I’ll likely paint several of them up in traditional red bricks anyway, as well as some as stone.

Detailing photos and writeup in the next couple of days!

Breaking Radio Silence…

I’ve been out of town on a work project for the last seven weeks, after rushing through the last couple rounds of my Lead Painter League entries before I left. While I was gone I was stupidly busy and had no time to game, paint or even really keep up on hobby news!

However, I’m back home now as of Sunday night and can’t wait to get back to my painting bench and some gaming!

I did order some things while I was away — the magic of Paypal and the internet at work — so I have the new Pulp Alley expansion waiting for me to read it and try it in a game, a big bundle of 28mm buildings from Sarissa Precision to start assembling and painting, and another order from Pulp Figures incoming to add to my painting queue.

I had a quick first look at the Sarissa Precision CityBlock 28 buildings earlier this evening, and they look great. They’ll be easy to assemble and paint, but should also reward a bit of extra effort to add detailing and personality to them. Expect a review and a series of build articles here on the Warbard in the near future.