The last of this project’s posts until I can show off the painting work in progress photos and all the extra finished photos I didn’t use for the Lead Adventure Forum Build Something Contest 2025!
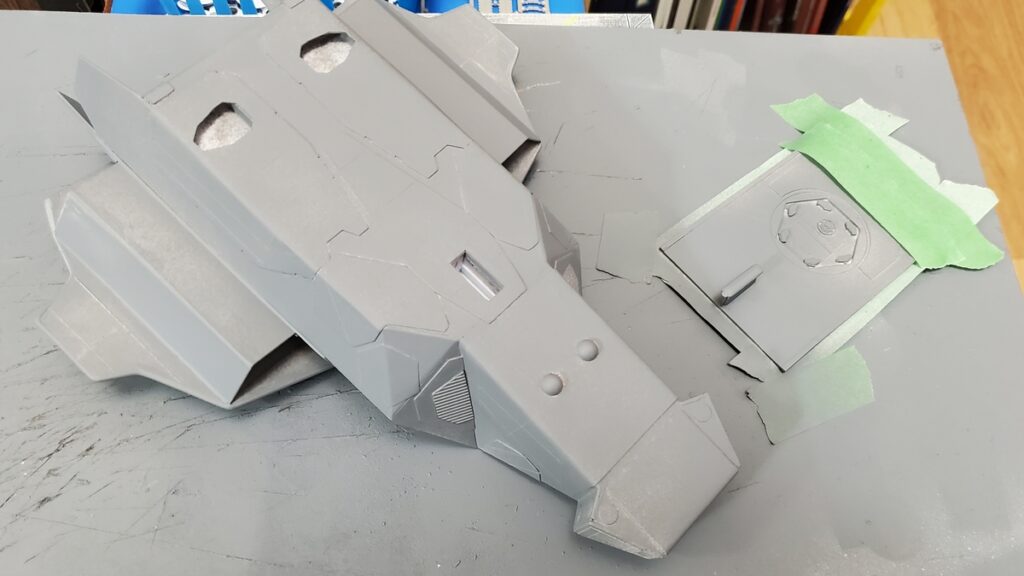
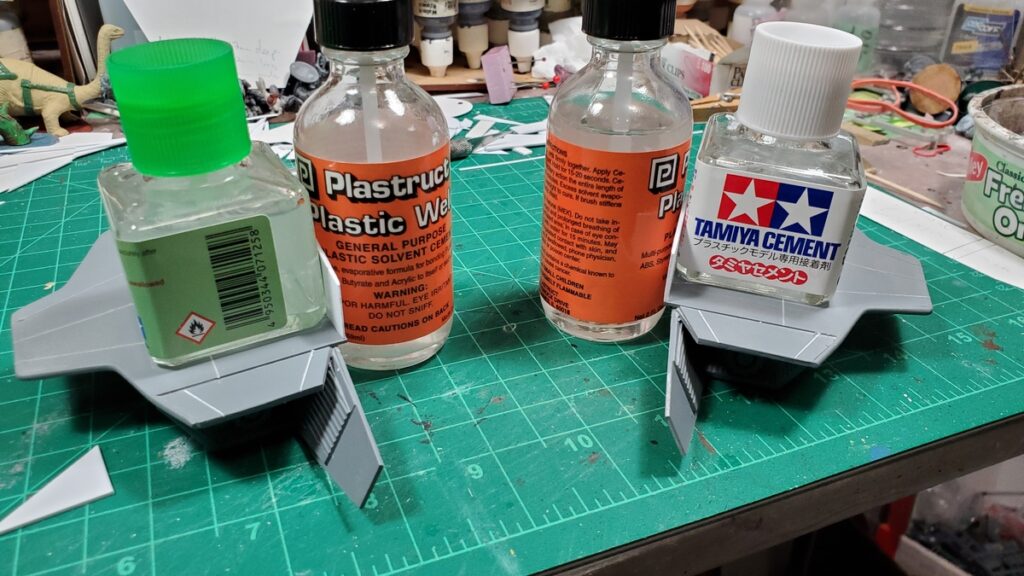
There was a bunch of pre-priming sanding, puttying and fiddling. The side walls of the fuselage pulled slightly skew during construction somehow, so the side rails that hold the roof panel in place had to be custom-fitted on each side.
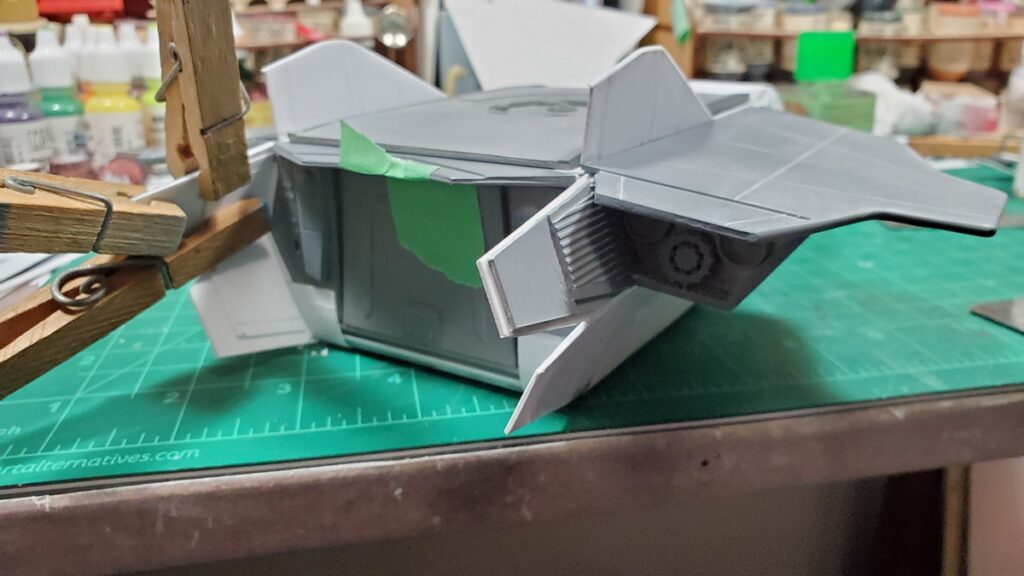
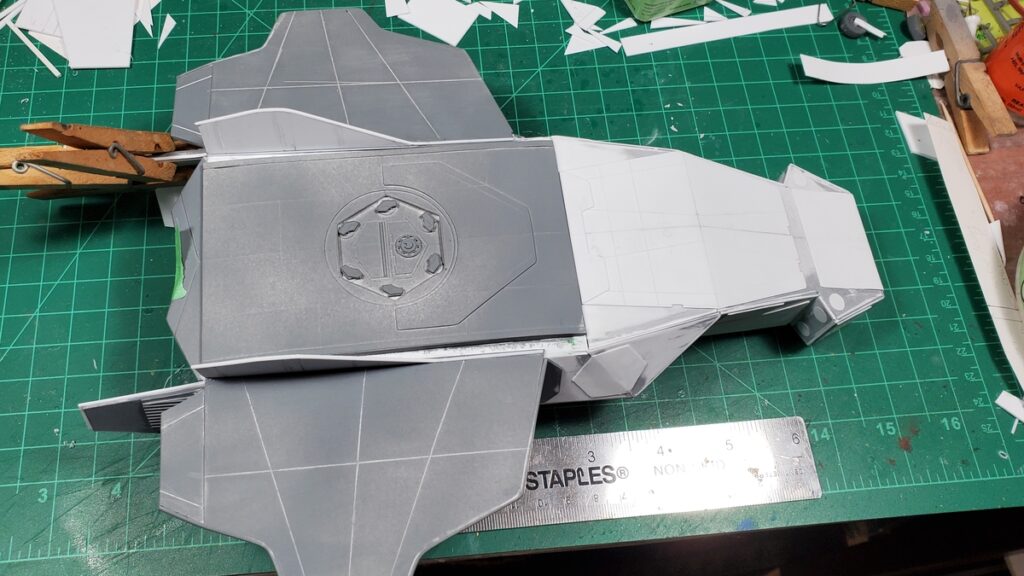
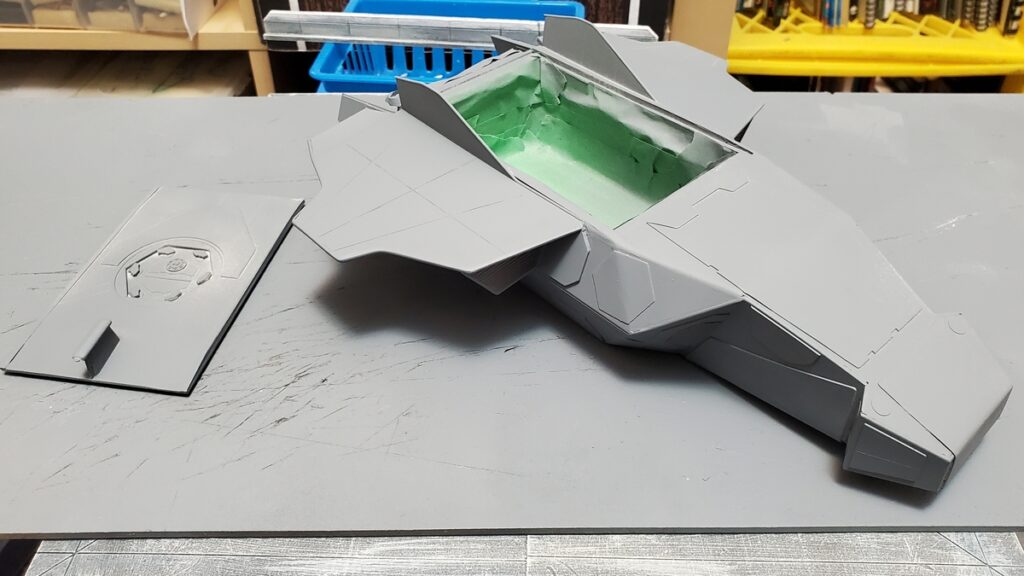
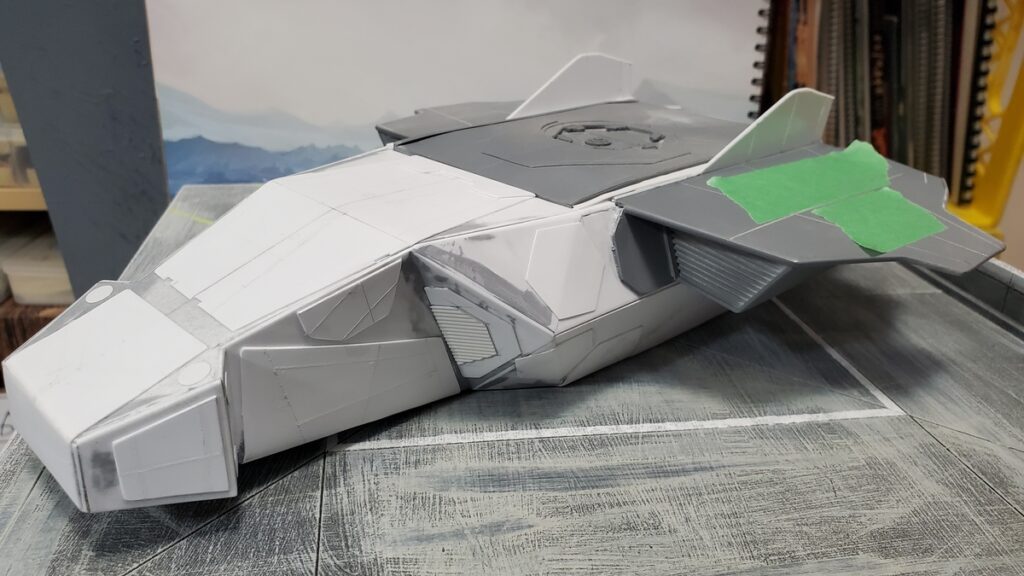
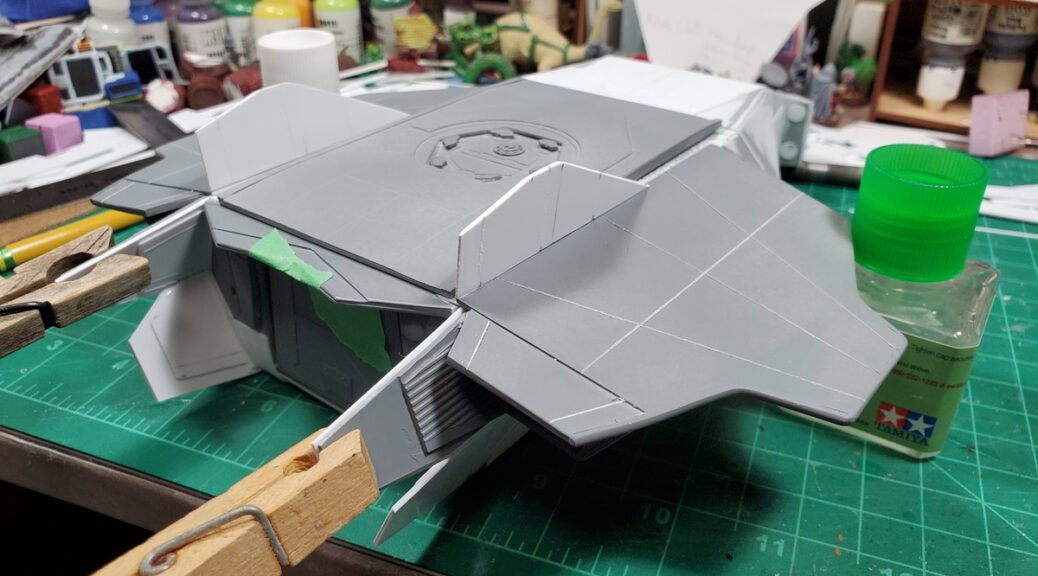
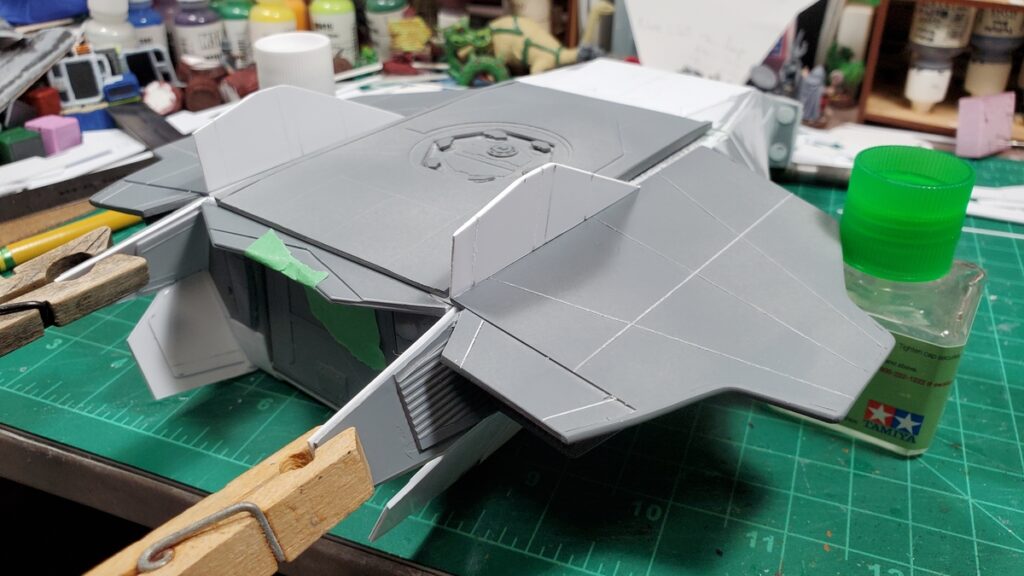
The shuttle, complete except for landing gear and roof rails, front quarter view.Rear view of the shuttle, with some final glueup of one of the rear baffle panels in progress.Top view, showing the engraved panel lines in the wings nicely.PRIMER! Here’s the underside, complete except for landing gear, all primered.Primer, top view, with the already finished, painted, and decaled cargo bay masked off.Proper supervision is essential to all well run projects. Sophie la Floof spent quite a bit of time on the rug under my project bench making sure things went smoothly.
The landing gear only went on after painting, decals, and weathering were all done, so I don’t have any photos of that to show off yet.
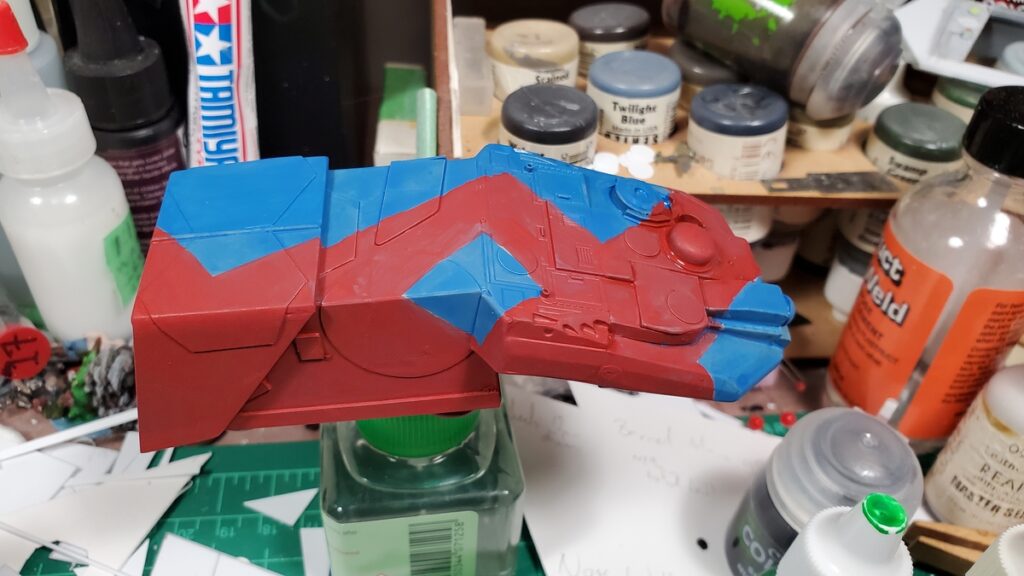
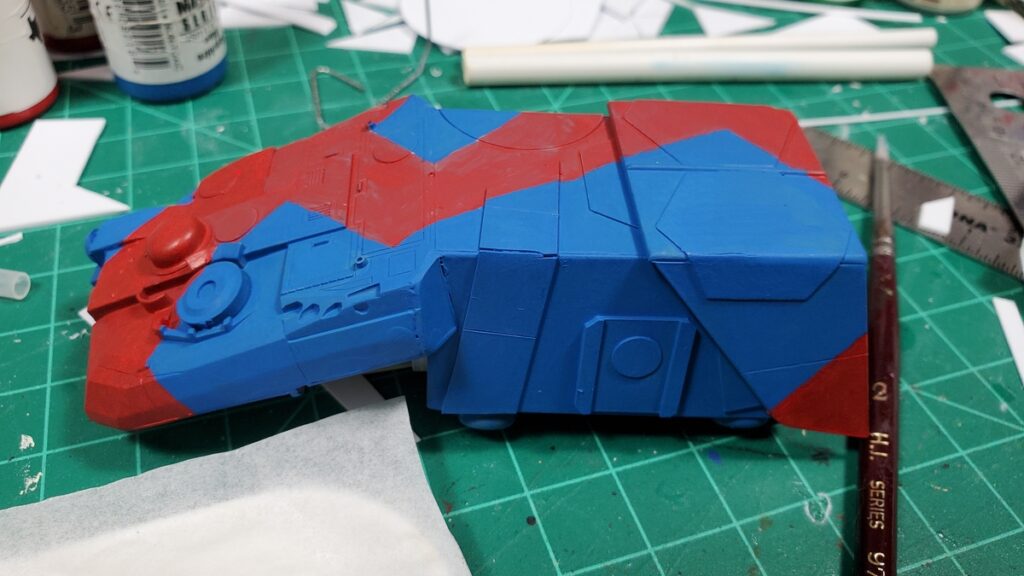
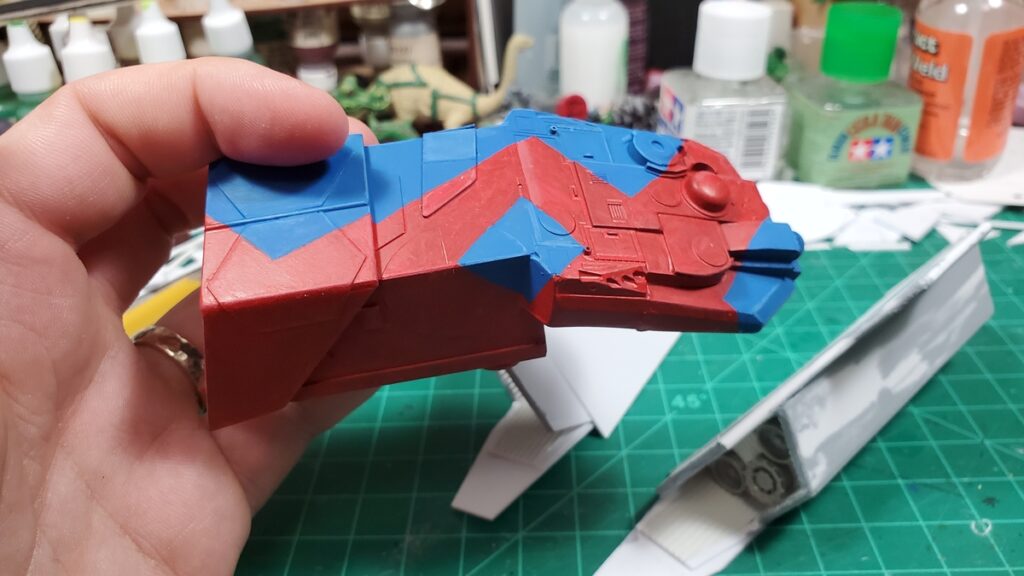
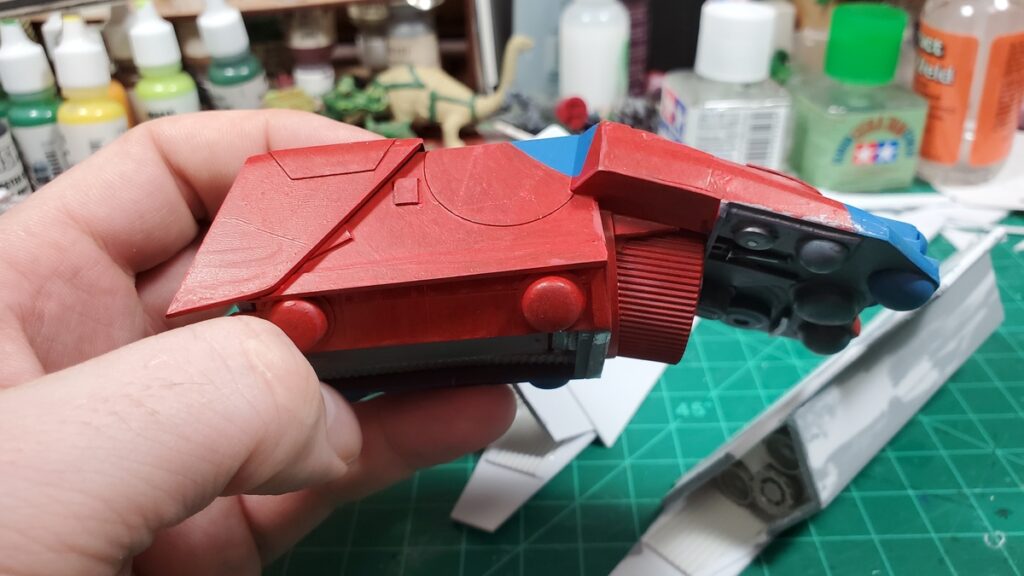
By the time this posts audience voting on Build Something Contest 2025 should have started over on Lead Adventure! Go check out all the great entries! BSC rules say no sharing WIP or finished painted pictures until either the contest is over or you’re eliminated from it, so there will be a bit of a pause in shuttle pix here, but I do have a gallery fully of painting photos to show eventually.
If you want something done, give it to a busy person to do is a saying that floats around. It’s often true that when you’re in a certain creative groove, you can spin off other projects much faster than you might otherwise get to them!
I had extra plastic kits parts around from the 1/72 LeClerc MBT kit I bought to pillage for kitbashing parts, I had some rather cool pieces of offcut styrene around, and I wanted a landing pad to stage photos of the shuttle on, so it all came together in a trio of related projects.
The Drone
This started life with the top of the LeClerc turret, the cap off an Angosturna bitters bottle rescued from the recycle bin, some googly eyes and other bits from the dollar store, and various styrene bits.
The angosGMBH Distraction-class Autonomous Sensor Drone is set up for planetary and space surveying and exploration, with various sensor loadouts depending on mission. No crew space is available, although the tiny cargo/sample bay on the port side could accommodate a human-sized sophont in a space suit for a very short, very uncomfortable ride, if it hasn’t been adapted into a drone bay for auxiliary sub-drones. Some Distraction-class are themselves autonomous intelligent citizen-drones, although most have only limited-ML minds, and some platforms are old-fashioned remotely operated vehicles.
The drone went together in a single evening and was primed and painted the next day. I got zero photos of it in raw styrene.
Drone primed, side/top view.Primed, underside view.Primed, rear quarter view.Paint in progress.Paint in progress.Paint finished, no decals or weathering yet.Side profile with paint finished.
The Distraction-class has since been decaled and weathered; I’ll try to remember to get some proper finished photos of it soon and post them.
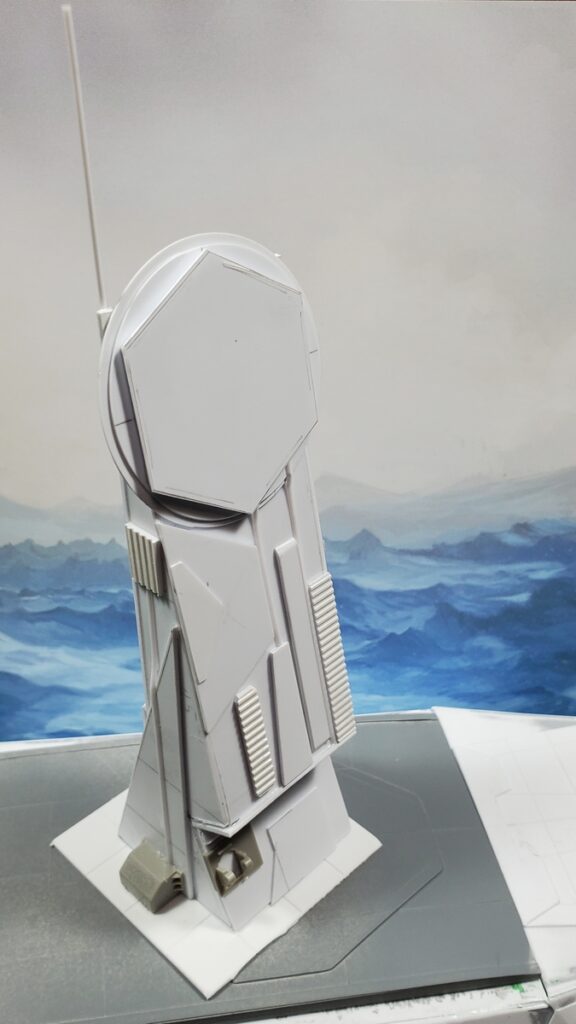
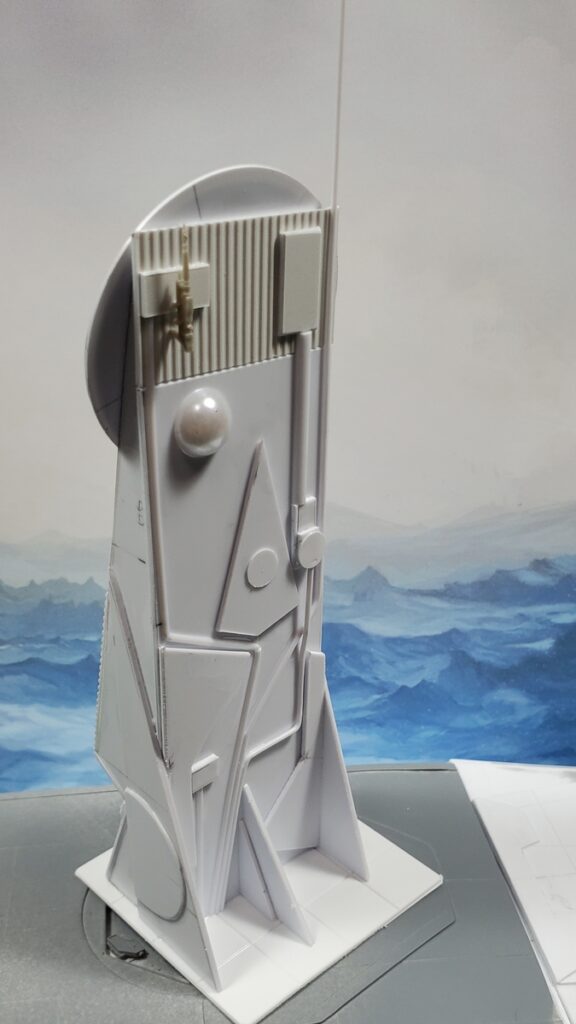
The Sensor/Comms Tower
This started with the increasing amount of styrene offcuts piling up around the edges of my workbench. Many of them were too large and too interesting in shape to just throw away, so I started fiddling around while waiting for solvent cement to cure on the shuttle and built this little tower in a couple of evenings.
It’s about 5″ tall to the top of the actual tower. The side profile is the offcuts from the nose skin of the shuttle, the various circles and hexagons are from building the docking port in the roof of the shuttle. The rest of the thing are either random offcuts from shuttle building or just stuff from my raw materials stash.
The tower, front view, bare styrene.The tower, rear view, in bare styrene.
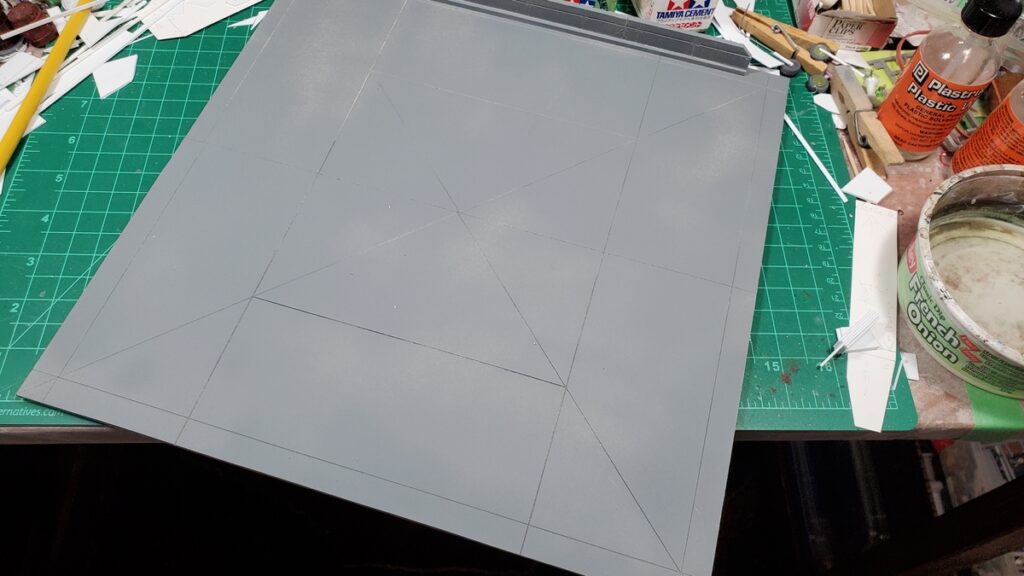
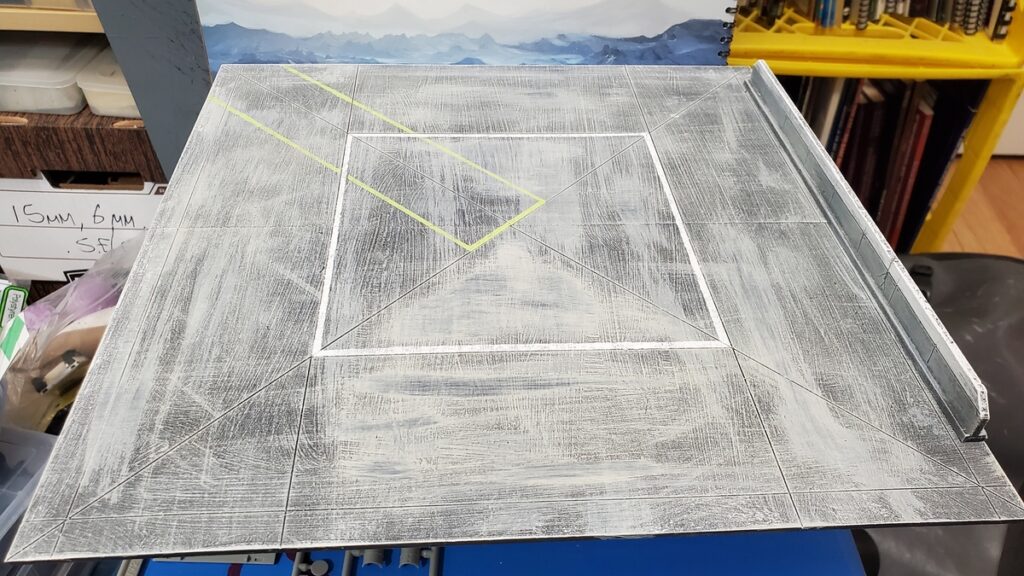
The Landing Pad
This is from the last big piece of 1/8″ foamed PVC in my stash; I’m going to have to go get more from our local signmaking/plastic supply shop because it’s wonderful to work with. Stronger, cleaner, and easier to cut than foamcore, it can be embossed and engraved easily and cleanly, and it’s less murderous on knives too.
The whole thing is 12 inches by 12 inches, assembled from two 12×6 pieces with some connection strips underneath. It got grey primered, then a messy dampbrush/drybrush combo of various tans and greys over that, followed by a few washes in black, grey, and dark blue. There’s expansion cracks engraved right into the PVC, and after the main paint had dried I did a couple of marking lines with tape and a stippling brush in white and bright yellow-green. (Reaper’s Dungeon Slime paint. Highly recommended if you want an obnoxiously bright hazard warning colour!)
I also did a low wall piece with PVC offcuts. It’s 10″ long and about half an inch high. It got the same paint as the pad, with the top third or so painted white when I did the pavement markings on the pad.
Primed and waiting for paint.Painted and marking lines done. Nice and simple, just a few minutes work over a couple of days. Painted wall piece off to the right.The mostly-complete shuttle posing on the finished landing pad.
I’ve got a few final complete primered shuttle photos to show off soon, and after the Build Something Contest rules allow, I have a bunch of painting progress photos to post. The shuttle was a big painting project and painting took most of March and the first week of April!
The long-overdue fifth installment of my Build Something Contest blog posts! This one takes us from the end of Part Four, where we had the start of detail panels, no wings yet, and the cargo bay just primed.
Per BSC rules I can’t share WIP or finished painted photos yet, so there’s still going to be gaps in this build log. I have a bunch of WIP paint photos taken and will share them when the contest has begun.
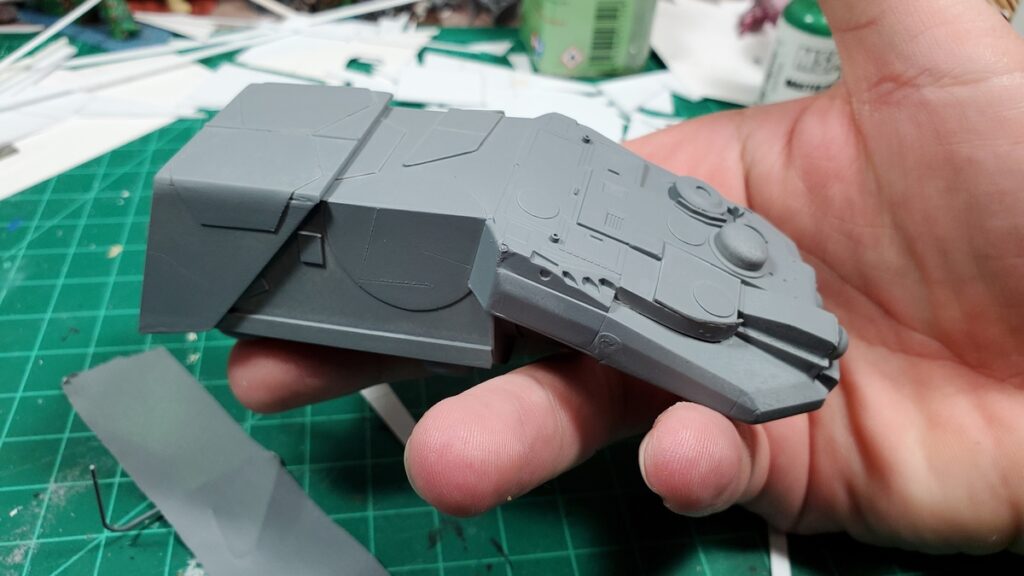
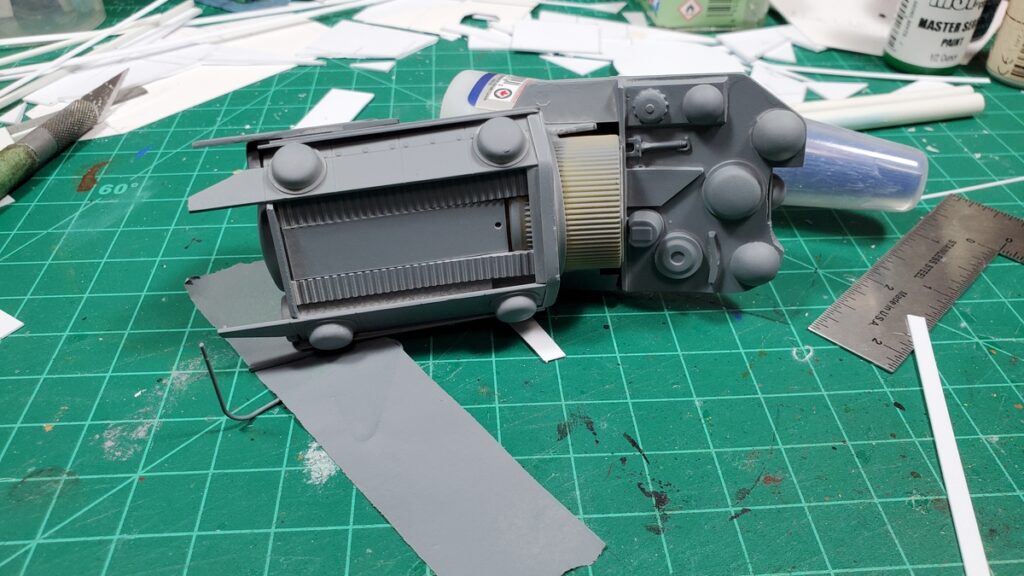
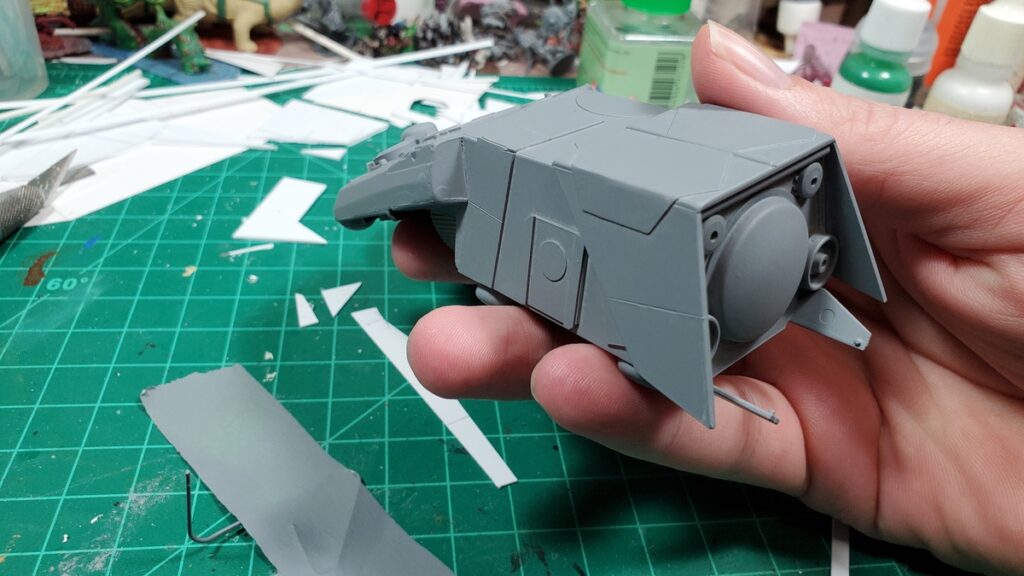
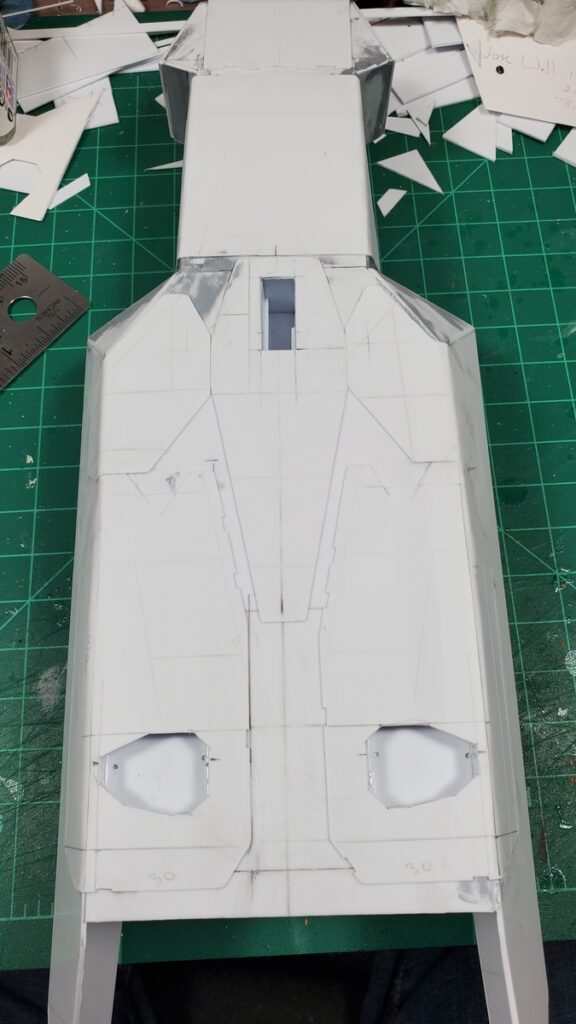
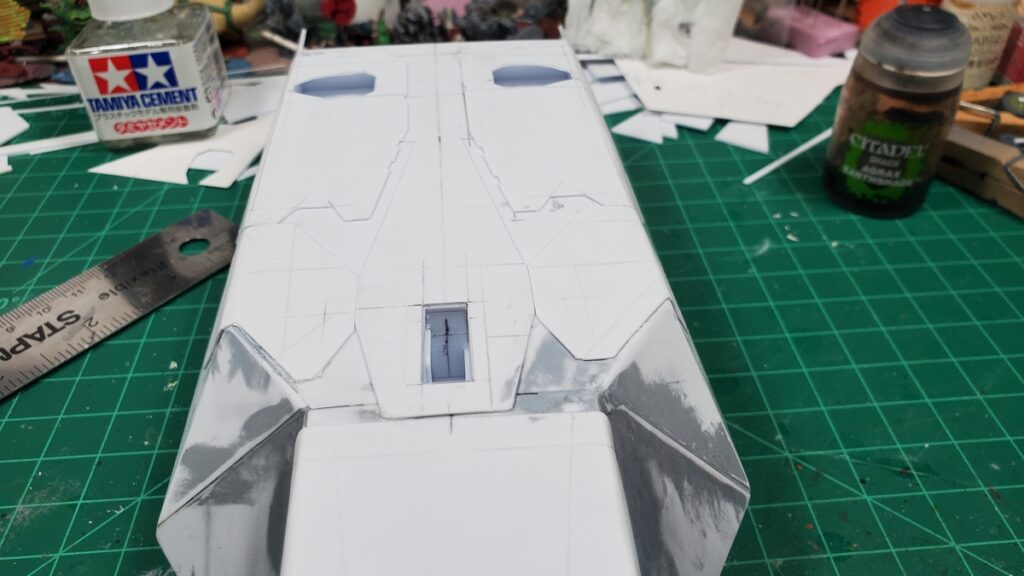
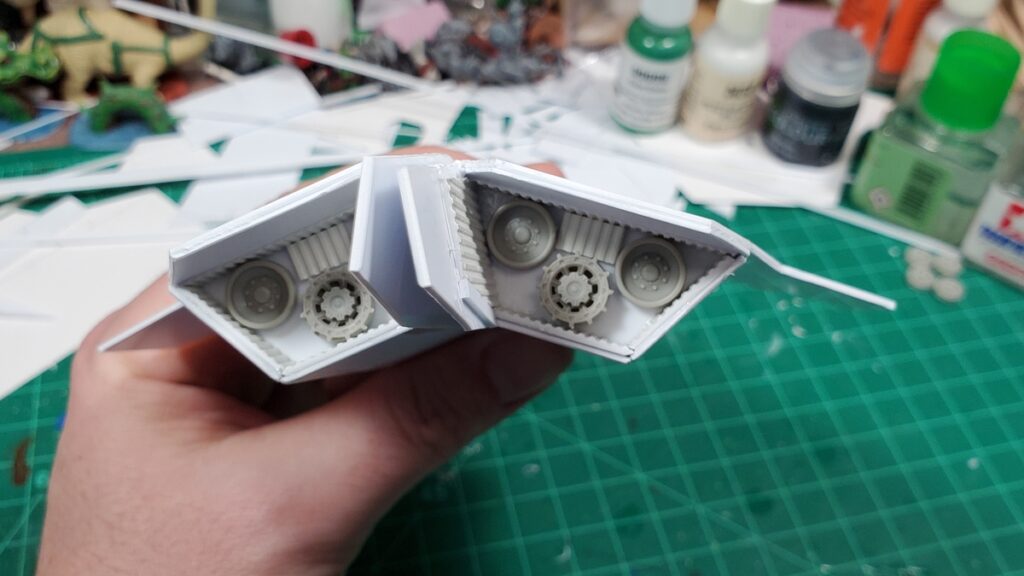
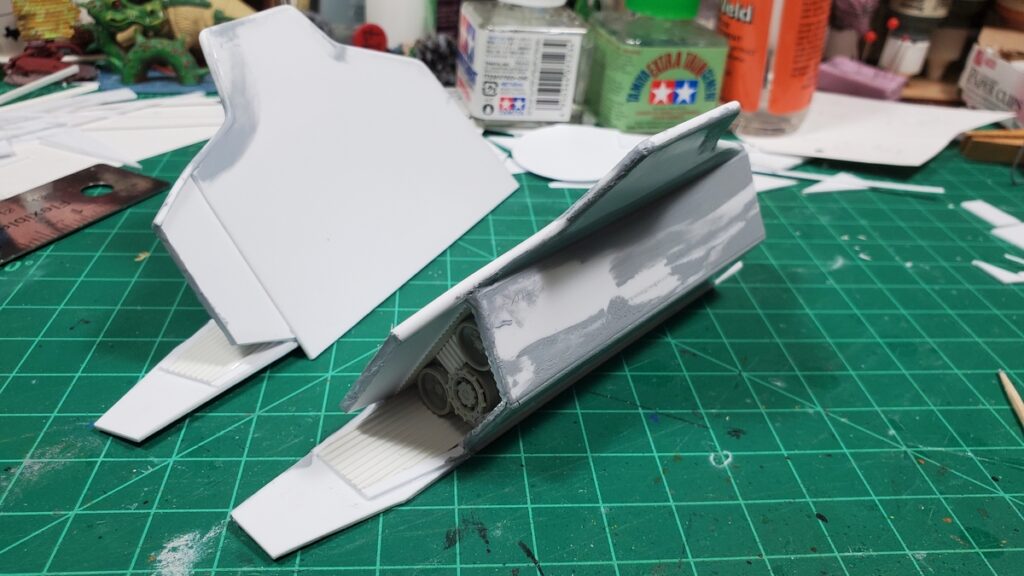
Feb 22 – the underside gets detail panels.Feb 22 – underside detail panels, looking aft.22 Feb – the engine pod assembly begins.22 Feb – layout of the two wings on 1mm styrene sheet.22 Feb – engine and wing subassembly taped in place on the fuselage.22 Feb – wings taped to fuselage.22 Feb – wings temporarily mounted to fuselage, overhead view.24 Feb – wings and engine pod details.. Front view, showing the intake grilles.24 Feb – wing and engine subassembly, rear view with jet/rocket nozzles.24 Feb – another view of the rear of the engine pods.2 March – putty work on the engines and wings.3 March – putty and test fit of roof and wings on the fuselage.3 March – decal sheets assembled. There are almost three dozen decals in the cargo bay and another twenty or so on the outside of the finished shuttle.9 March – final test fit of the wing/engine subassemblies9 March – the wings get the vertical stabilizers added.9 March – rear ramp view with detail panels on the insides of the rear fuselage extensions.9 March – the wings finally get glued on! Major construction is finished, on to priming and painting!
Along the way while finishing the shuttle, I built a 12″x12″ landing pad as a photo prop and gaming scenery, a small ‘drone’ using some of the LeClerc MBT parts that hadn’t be used in the shuttle build, and a 6″ tall sensor tower that used up a bunch of the offcut styrene from the shuttle that was too interesting to just throw away. I’ll share photos of them in another post.