Having recently picked up a copy of TooFatLardies’ Great War large skirmish rules Through The Mud and the Blood, I went looking for further reading. The Internet Archive (Archive.org) is, it turns out, a treasure-trove of period manuals, books and documents for the Great War/World War One era.
If you’ve never heard of the Internet Archive, it’s a huge and sprawling website full of all sorts of material. Probably the most famous section is the “Wayback Machine“, an attempt to collect, curate and archive huge swathes of the internet. Looking for an interesting old wargaming website, perhaps one hosted on Geocities or another vanished host? Fire the old URL into the Wayback Machine, you’ll probably find something!
What I’m focusing on for this article, though, is the Texts side of the Archive. It’s an attempt to preserve, digitize and distribute huge numbers of old and new books, and make them available in as many formats as possible. Google (through Google Books), Microsoft and dozens of university, public and national libraries are involved. The collection is already millions of books and still growing rapidly. It can be hard to find things, though, which is one of the reasons I started writing this article — it began simply as a list of interesting Archive.org URLs I wanted to save for future reference in case I couldn’t find the same books again!
The Great War On Archive.org
I make no claims to have here a comprehensive list of the era’s books and publications available on the Internet Archive, but what follows is a sometimes arbitrary list of items that caught my eye!
You can, first of all, find some interesting stuff just by doing a search for “trench” amongst the texts on Archive.org.
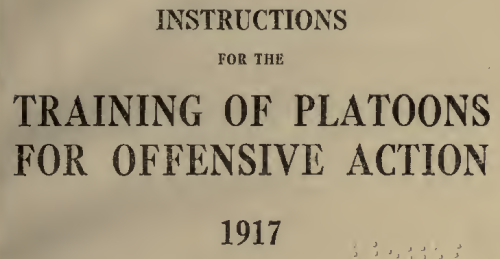
There’s a whole bunch of official publications of various sorts, mostly American but a few British as well. Of particular note for Great War gamers is Instructions for the Training of Platoons for Offensive Action, 1917 – this is an American re-publication of a famous British military manual. Straight from the source, as it were. A good chunk of the British background material in the back of Mud & Blood is straight from Training of Platoons, as are several of the scenarios presented in the Stout Hearts & Iron Troopers supplement.
Infantry in the Defense (1917) is short pamphlet from the US Army War College, a translation of a French publication. Not as comprehensive as the British booklet above, but an interesting counterpart. There’s also the longer Instructions for the defensive combat of small units : infantry: platoon to regiment (1918), another US Army publication, for more defensive reading material.
Notes on the Construction and Equipment of Trenches (1917) is a US Army publication; lots of notes, diagrams and plates if you’re thinking of trench scenery.
Many of the rest of these books are published by civilian publishers; the main market seems to have been American officers in the newly-raised American Expeditionary Forces and to a lesser extent new officers of other nations. There was a certain amount of repetition and even flat-out plagarism in this market; some of the authors also regurgitate chunks of Training of Platoons straight into their own books.
Trench Fighting (1917) is a British book, noteworthy mostly for lots of good diagrams.
Elements of trench warfare (1917) – more good diagrams, although of even more idealized trenches than normal in some of them!
Tactics and Duties for Trench Fighting (1918) – One French and one American author, both infantry officers, longer book but written to be easy to read, lots of interesting details that could inspire scenarios.
The Attack in Trench Warfare (1917) – another French book translated by an American officer.
Trench Warfare; A Manual for Officers and Men (1917) – another British author. Interesting period details in this one.
Notes on Camouflage (1917) – a very short US Army pamphlet. Could well inspire some interesting terrain-building for the wargaming table.
Vocabulary of German Military Terms and Abbreviations (1917) — don’t know your trichter from your zug? This American republication of an official British War Office publications might assist.
It’s not all late-war material available, either. Here, just for contrast, is a 1914 edition of The Training of an Infantry Company.
Finding the PDFs
Probably the most useful format to get these books in is PDF, especially as that preserves the original diagrams, illustrations and page layout better than any of the other formats the Internet Archive offers. Most books have a link straight to the PDFs on the left of the page; some (especially the ones via Google Books) don’t. The Google Books ones are especially frustrating, as going to the Google Books page does not actually give you an obvious link to the PDF file. Those PDFs are still in the Internet Archive, though – instead of going to Google Books, click the “All Files: HTTP” link at the bottom of the left-hand box, then look for the .pdf file on the resulting basic index page. Voila, the PDF, without messing around!
The US Army Obsolete Military Manuals Collection
The US Army’s Command and General Staff College has a Combined Arms Research Library (CARL) with an Obsolete Military Manuals collection. It’s at least as awkward a website to use as the Internet Archive, though…. lots of good material, some of which is also in the Internet Archive but much that isn’t yet.
The prize find there, at least for a Mud & Blood player, has to be Instructions for the Offensive Combat of Small Units (Direct PDF link), which is a mid-1918 American adaptation of a French tactical guide. Training of Platoons, way up at the top of this article, was a British publication simply reprinted by the Americans; this one is extensively rewritten to use American tactical formations (the AEF used much larger units than either the French or British did by 1917/1918). Nice illustrations and diagrams, too.
Infantry and Tank Co-operation And Training is a very short British pamphlet reprinted by the Americans, discussing tactical co-operations of tanks and infantry forces, with some very useful tactical diagrams.
There are almost certainly other interesting resources tucked away in the CARL files; I’ll keep looking and either update this articele or write a followup at some point in the future.
Other Links
There’s also Druid_ian on Scribd but all his content is straight from the Internet Archive or the US Army sources listed above, just uploaded into Scribd’s sometimes useful but mostly frustrating interface. He has discovered some interesting documents buried in these sources, although note that only people who sign up for Scribd accounts may download from Scribd. Search for the same titles at IA or CARL and you won’t have to sign up for yet another website…
A number of these books are available on paper from various sources – search Amazon for them. I have no idea of the quality of these reprints; I prefer to keep my money for figures and scenery where I can! There are a number of good collections of trench maps and of course Great War/WW1 photography out there, but that’s for another article, this one is already long enough!
Found something interesting on the Internet Archive, the Obsolete Military Manuals collection or elsewhere? Leave me a comment below and I’ll add it to the article!