Tag Archives: buildings

Warbases Church, Part Two

More progress on detailing the lasercut MDF church from Warbases that I started previously.

Stonework & Doors

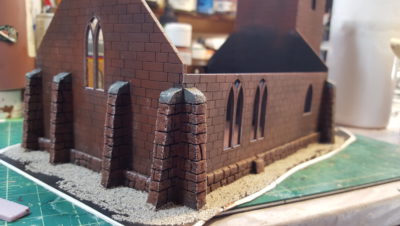
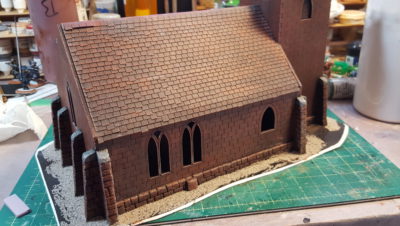
Buttresses and a double row of foundation stonework have been added with pink styrofoam insulation cut with a new Xacto knife. I used scrap card to create a small jig to keep the angle of the front of the buttresses the same across the fourteen buttresses around the outside of the church. The buttresses are roughly a quarter inch wide, two inches tall, and about half an inch deep at the base of each.
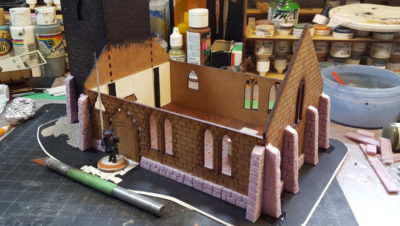
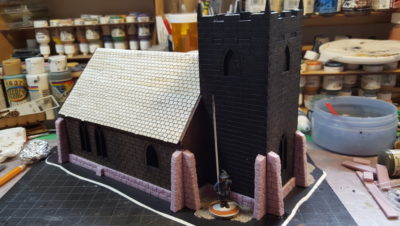
Styrofoam stonework in place on the church; Warlord 28mm pikeman on 25mm base for scale. Click for larger.
Buttresses and stonework on the other two sides of the church. The extra stone partway down the side disguises a join in the foundation strips. Click for larger.

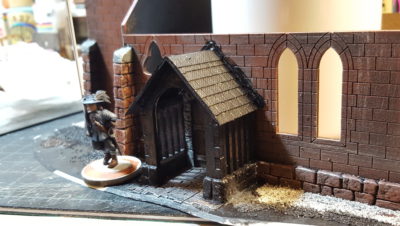
The front door is card with planks scored into it, with more light card for the hinges and handles. The door arch is more pink styrofoam. Inside the church I’ve added an interior wall of 1/16th matt board on the tower end to hide the tabs where the tower walls slot into the end wall. That’s had some added detail with matt board and card, and the door was done with offcuts of coffee stir stick wood and card.
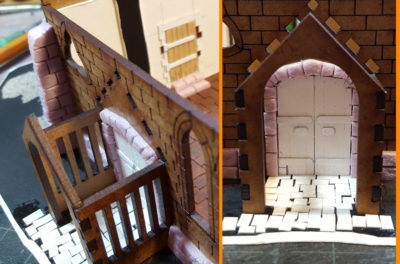
On the left, both doors at once, with the porch walls in position but not glued. Right, close-up of the front door. Click for larger.

All of the styrofoam was glued down then carved and textured after the glue had dried; I used a ball of tin foil to add a stone texture, then my usual knife-and-pencil stone carving technique.

Priming & Painting

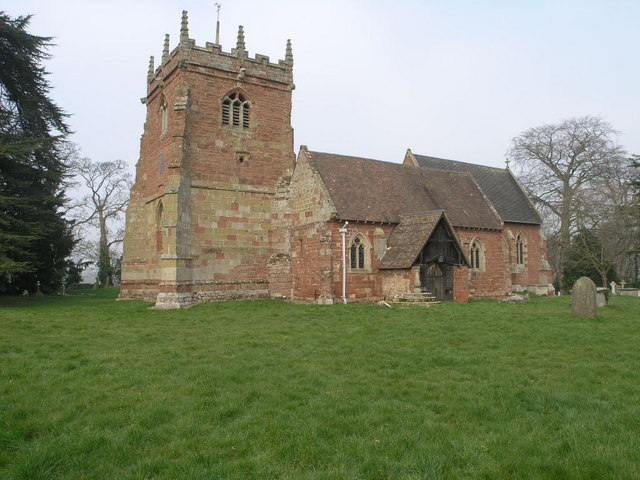
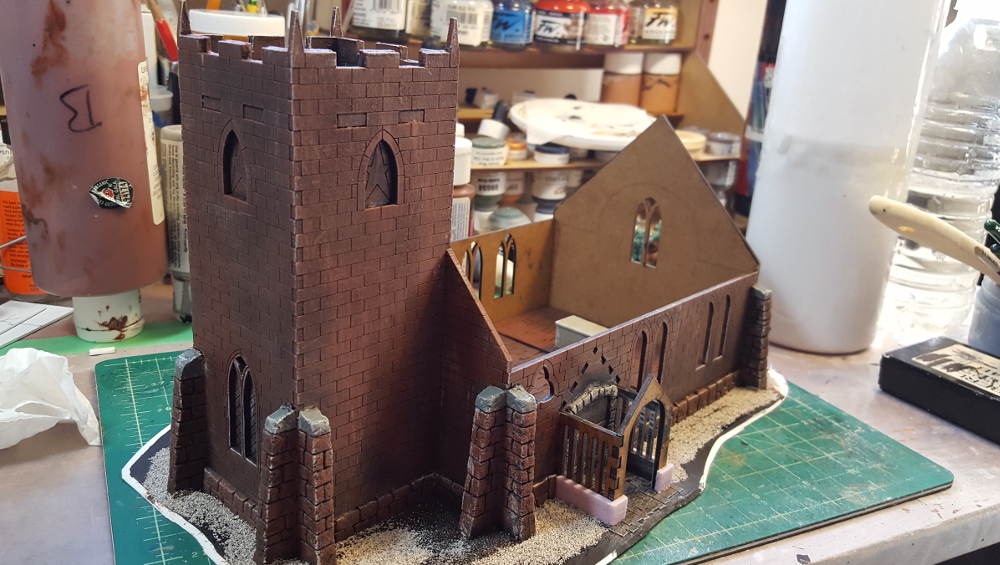
The whole building got a coat of black paint as primer. Rather than the default grey stone that I always seem to use I took some inspiration from churches I’ve seen online from Shropshire county in England and decided to do mostly reddish stone with some grey stone used as accents, similar to the Cound Church of St Peter

I started with brown paint drybrushed heavily on, then a fairly light grey paint, and finally a drybrush of red oxide/burnt umber. I’ve done a bit of edge highlighting so far, but will do more and might yet do another paler drybrush over the whole building to pop some more details out.

The capping stones on each buttress were done in dark grey then drybrushed a paler grey, as was the arch around the main door. I might yet do more stones in grey, just to add some variation to the building. I also glued the porch walls and front down, and added more strips of styrofoam for the foundation of the porch.
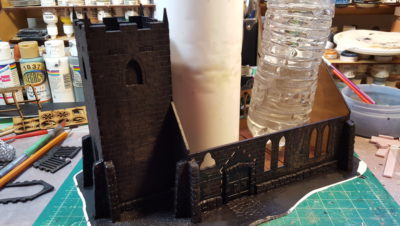
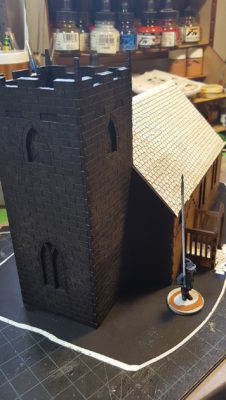
Black primer paint drying, with some weight inside the building to keep the base from warping. Click for larger.
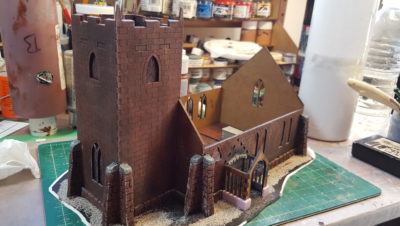
Tower end of the church all painted, and with the porch glued down and stonework added around the base of it. Click for larger.
Altar end of the church all painted. Click for larger.

The Roof(s)

Both the main roof and the porch roof got covered in Warbases’ very nice lasercut slate tiles and primed black like the rest of the building. So far the main roof is painted more or less the same as the rest of the building, with an extra grey drybrush to pop the texture a bit more and make it look a bit different from the walls.

Main roof, painting in progress. Click for larger.

The porch comes with MDF panels for the roof, but they look quite thick so I cut a strip of light card the same size, folded it, and glued it into place. Before gluing the roof down I added strips of card against the stone wall to hide the slots where the MDF roof panels should slot in; they’ll be painted to look like lead flashing eventually. As mentioned, the porch roof got more of the Warbases lasercut slate tiles, and will get bargeboards on the front edges eventually to hide the edges of the slate.

Porch roofed and primered, with Warlord pikeman for scale. Click for larger.

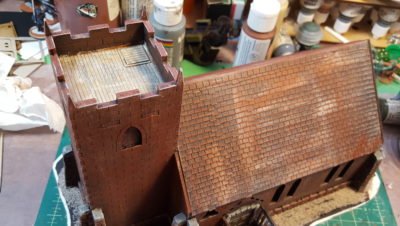
Up on the roof of the tower I doubled the thickness of the walls with matt board, then put down a wooden floor using styrene plank sheet, with a roof hatch from a bit more styrene. The upper edges of the walls got a bit of GW Liquid Greenstuff to help disguise the line between the MDF wall and the matt board additions, and painting is in progress.

Tower roof and main roof from overhead. Click for larger.

Still To Do…

The outside edges of the base has a layer of fine scenery grit – coarse sand – glued down and mostly painted black; I’ll paint it up dark brown with a bit of a drybrush, then put various kinds of flock and turf around.

The porch still needs work, mostly paint, and a bit of detailing on the roof. The tower roof also needs painting, and I’m not entirely happy with the colours on the main roof.

Inside is still the big job. The Warbases kit comes with solid lasercut windows that look good from the outside but will make the accessible interior look a bit odd. I might use square grid plastic mesh – the same stuff you use in screen doors – to fill the windows, with inside walls of more matt board, like I did with the inside of the wall between the tower and church proper. Still, with the exterior done including scenic groundwork I’ll be happy to put the church on the table and put finishing the interior off for a bit!

Warbases Church In Progress

Not much activity on the wargaming front in the last couple weeks, for a variety of mostly-irritating reasons, but I have made a bit of progress on the Warbases church I first mentioned in a post a few weeks back.

This is a nicely proportioned building, not so big as to dominate the table, and it’s of a basic design that can literally be found all over the world, anywhere Europeans (especially the Brits) hung out long enough to build churches. You could assemble the basic church in just a few minutes, paint it up quickly, and have a solid and respectable piece of wargaming terrain to use for years. Inspired by the really nicely upgraded example shown on the Warbases website, though, I’ve decided to do some extra detailing and really make this building pop.

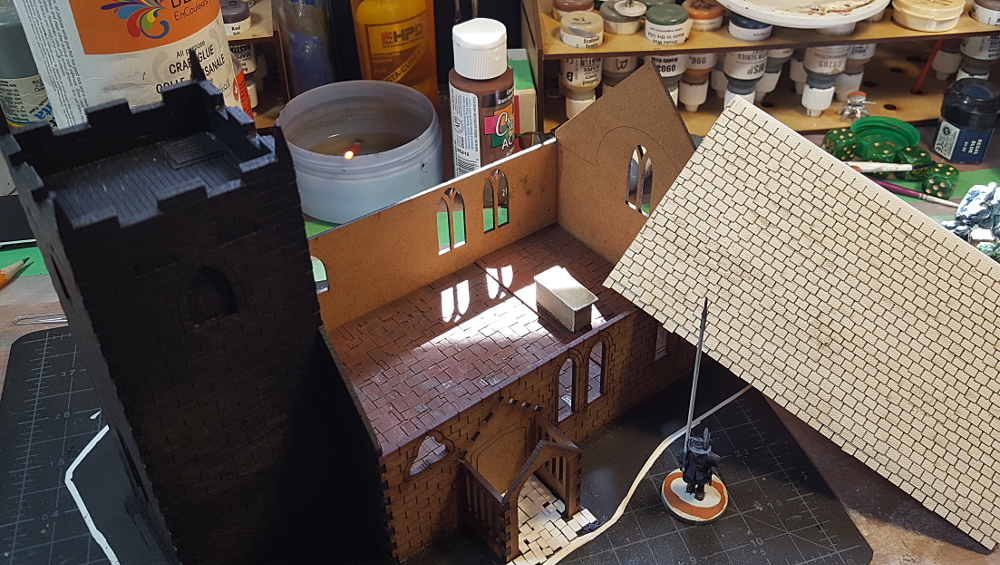
I started by assembling the tower, then glued it and the floor to a piece of matt board roughly 11″ long by 7″ wide. I used light card to put flagstones on the floor, with another piece of mattboard at one end of the floor to raise the altar just a bit. The altar itself is more bits of matt board assembled into a rectangle about 1″ wide and half an inch deep. The altar got a coat of GW Liquid Greenstuff for texture, then painted grey with various washes, and a quick edge highlight of much lighter grey.

Warbases church assembled, roof on the right. 28mm Warlord pikeman for scale on a 25mm wide base. Click for larger.

The floor was primed black, then heavily drybrushed with a couple of shades of brown, red oxide, and burnt umber craft paints to get a good reddish stone colour. Most of the church is going to be that colour, with grey stone trim, as a change from the default grey stone!

The entry way on the side of the church has similar flagstone laid down and will eventually be painted the same as the inside floor.

It’s kind of hard to see on the photo above but at the top of the tower I’ve added wood plank flooring from sheet styrene, a trap door in one corner (more sheet styrene), and added matt board to the inside surfaces of the crenelated tops of the walls to double the thickness and make it look more like stonework.

Tower end of the church with the roof properly in place. Click for larger.

The roof got covered in Warbases slate tiles, sold in sheets lasercut from heavy paper (light card? Hard to say, really) with an interesting texture to it. Certainly easier than cutting my own tiles, I got the entire roof covered in just over half an hour of work!

Next up will be adding stone piers to the corners of the building from pink styrofoam, and adding some other stonework detailing with either styrofoam or greenstuff putty.

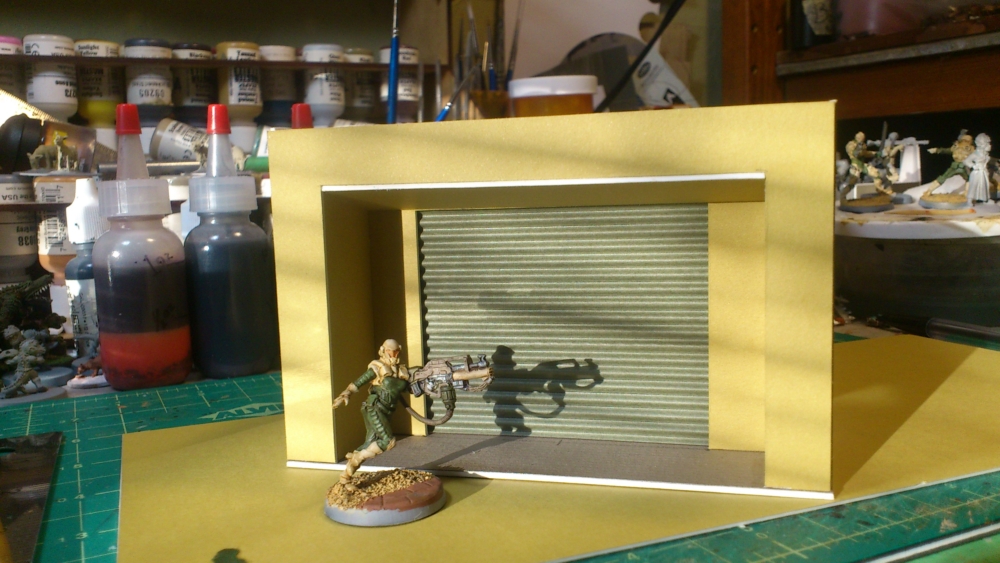
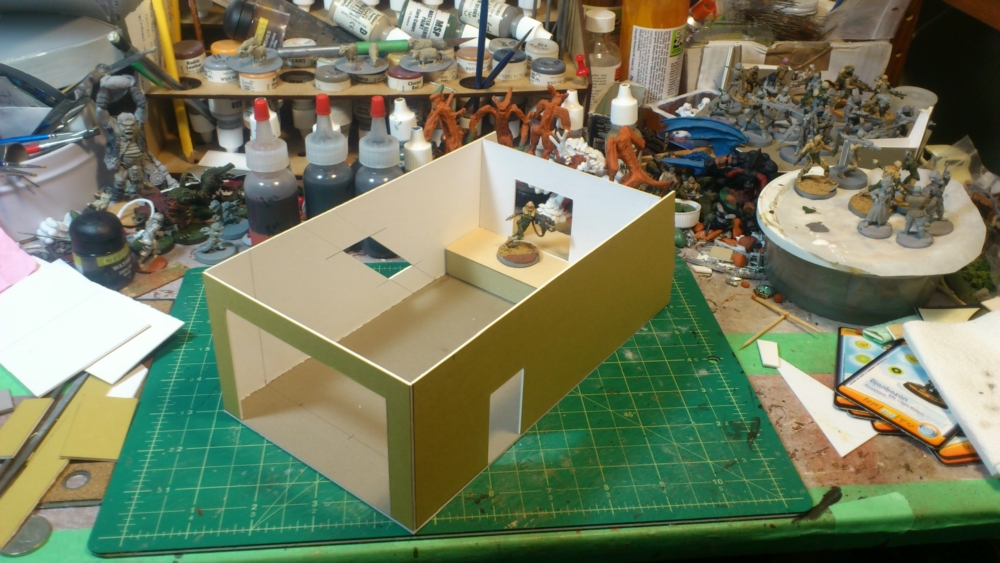
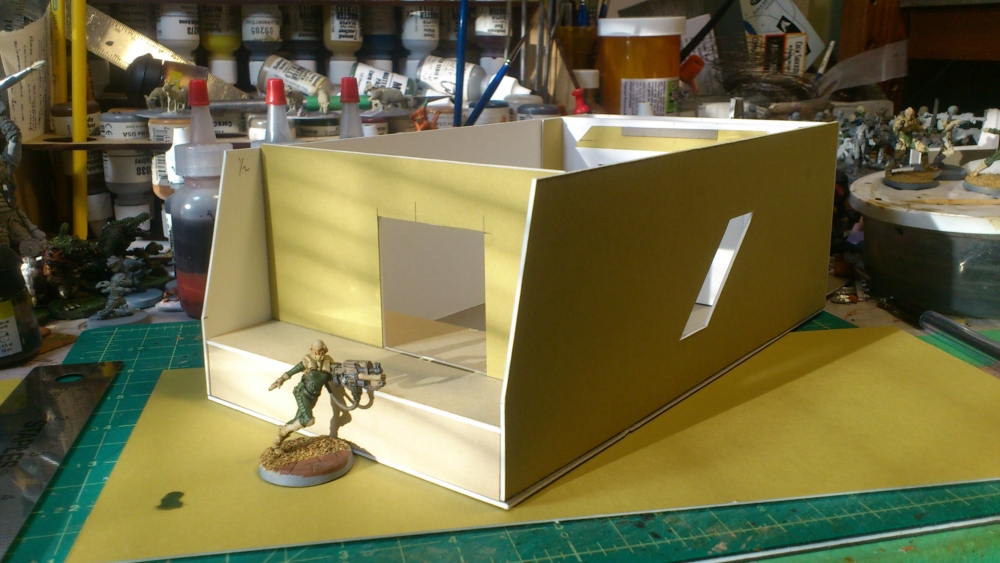
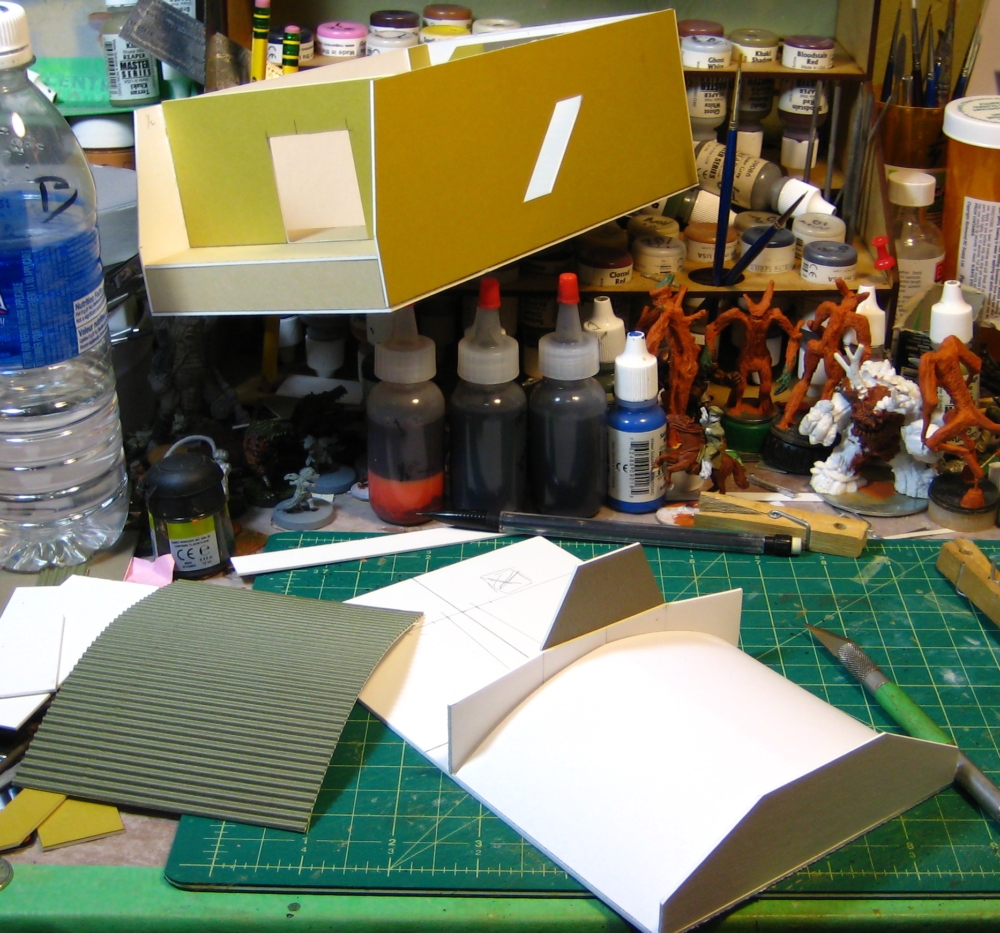
Sci-Fi Warehouse for Infinity

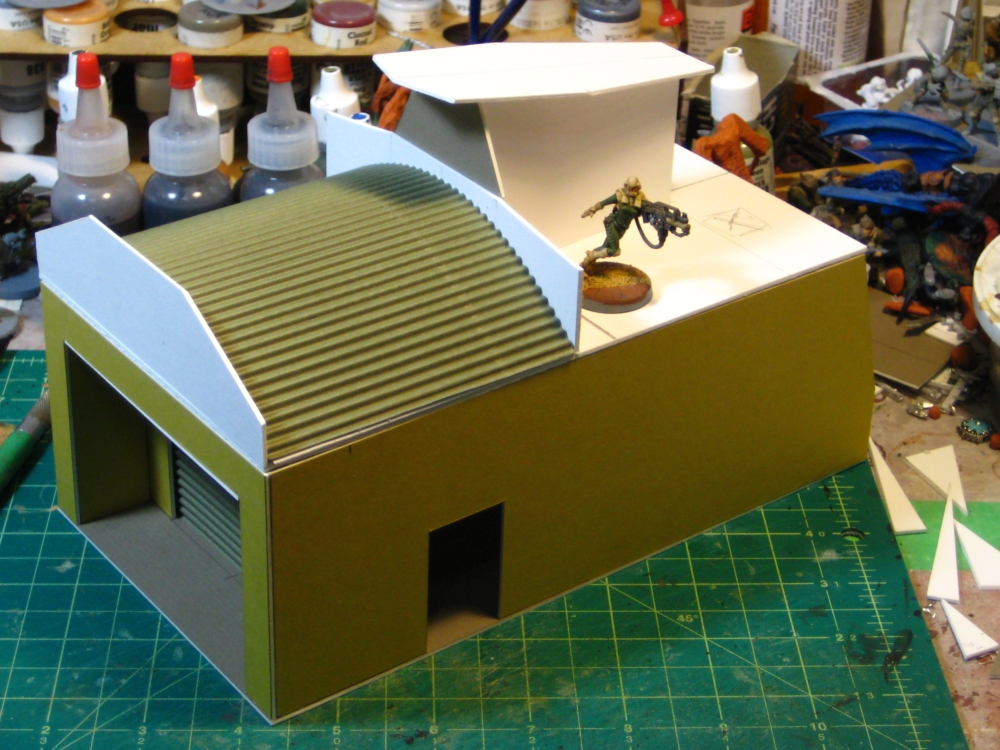
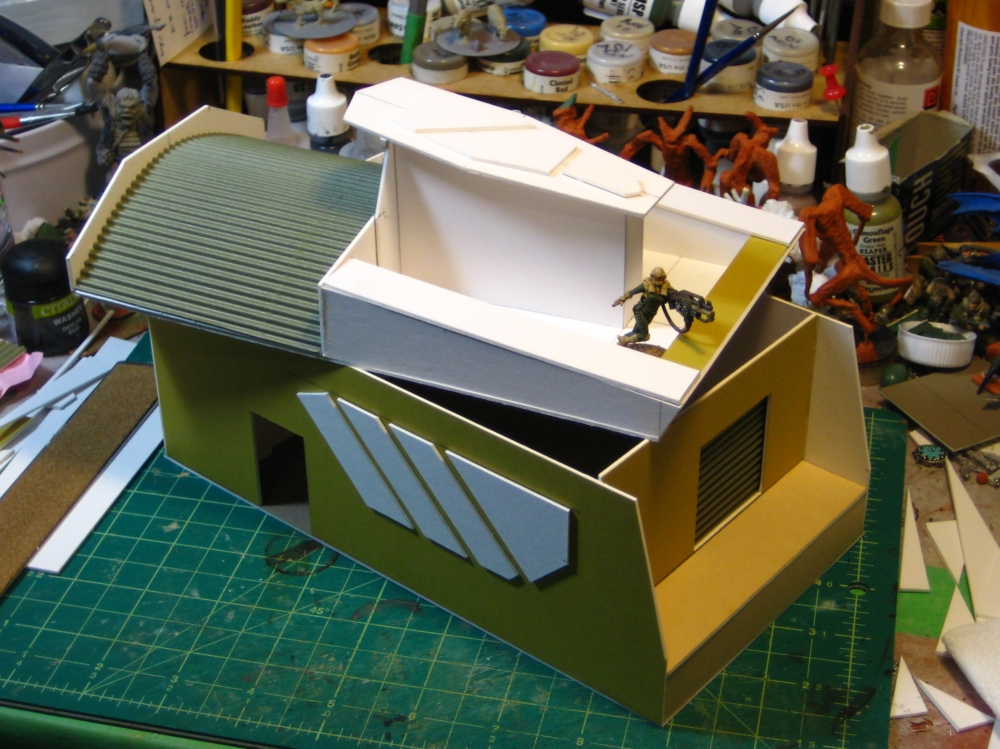
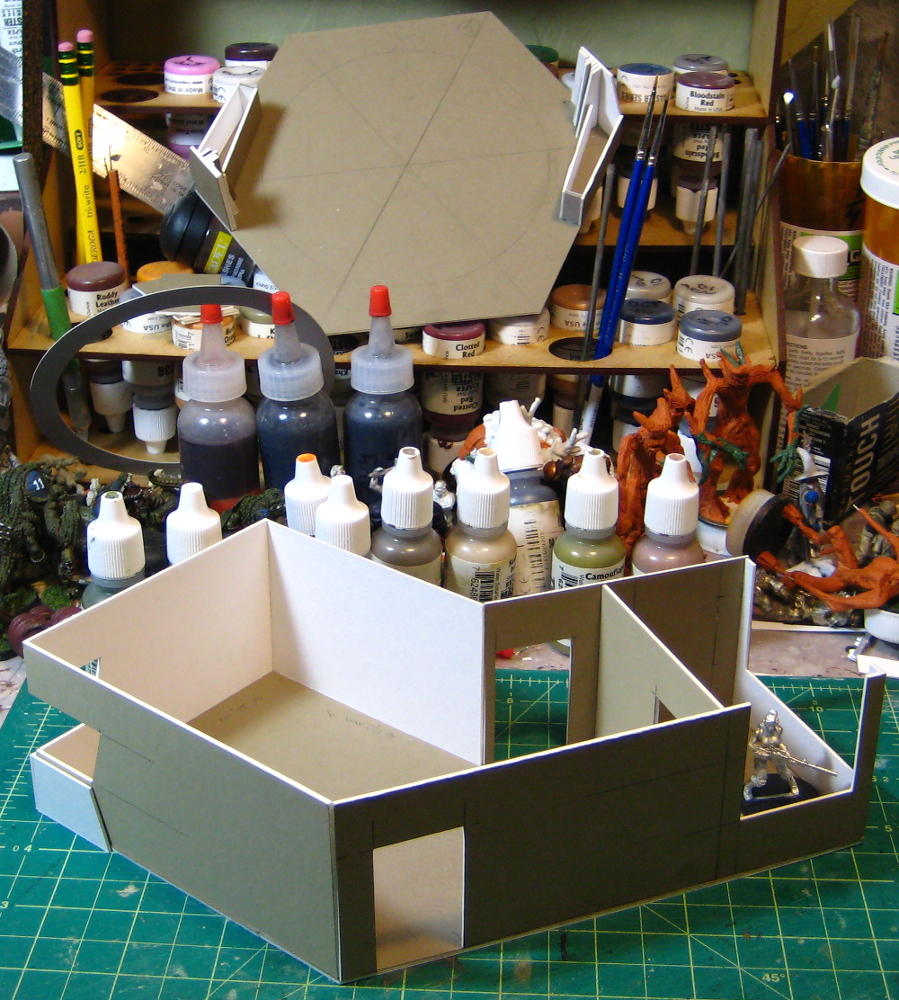
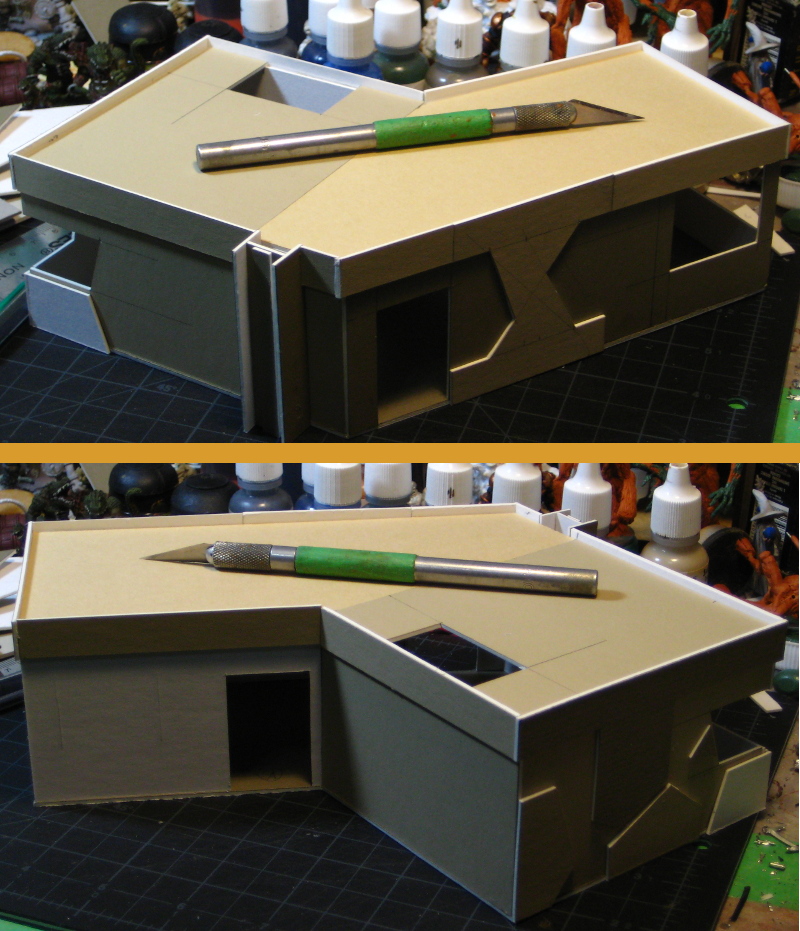
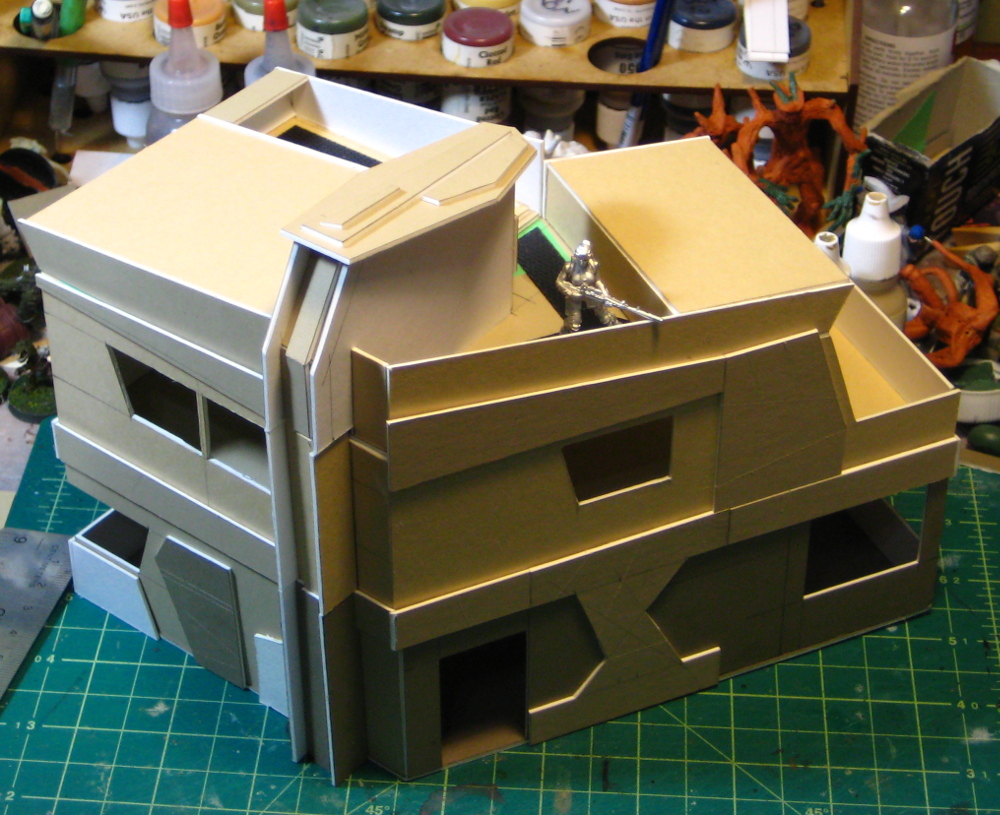
After building the first building to use on Infinity tables, which turned out to be a complex shape and two storeys plus roof, I decided the next building needed to be simpler and quicker to build, but still interesting.

Going through my building supplies I found a sheet of corrugated craft paper that became a feature of the new warehouse, both for the two large rolling doors and on part of the roof. The rest of the building is mattboard/picture framing card, which is cheap, easy to work with, and makes good durable buildings.

The whole warehouse is 9″ long, 5″ wide, and about 6″ to the highest point of the “sail” that divides the roof up.

More details on the picture captions below. There’s still some structural work to do on the back wall and on the roof, and a lot of detailing still to do. Paint will happen eventually, as well.

A Building For Infinity

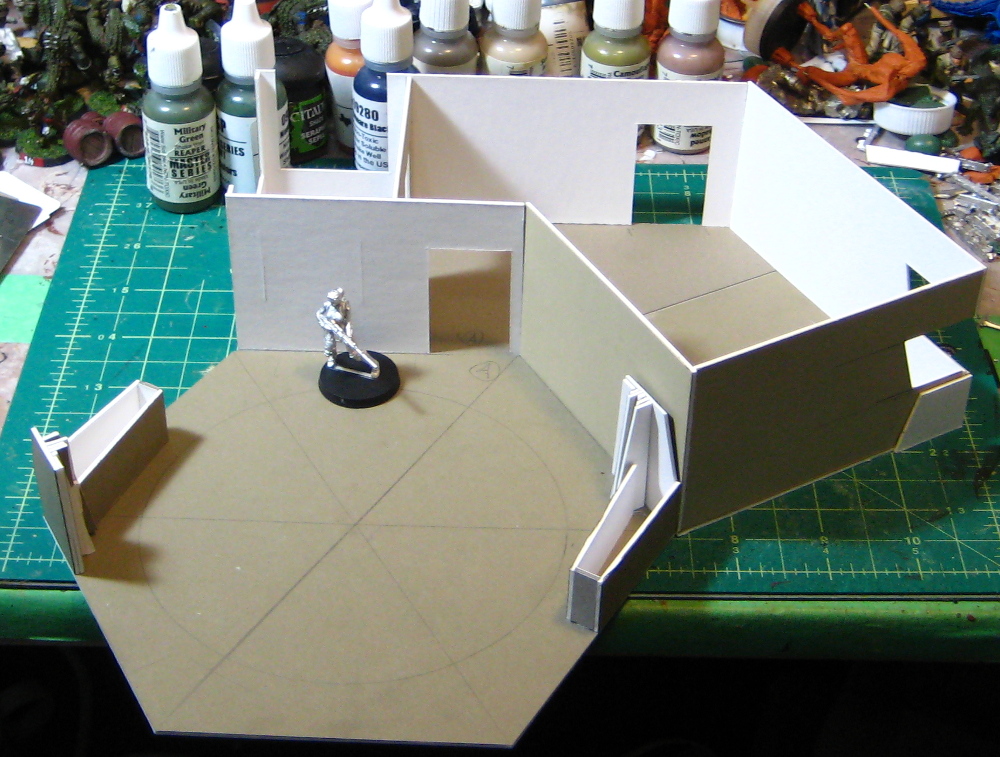
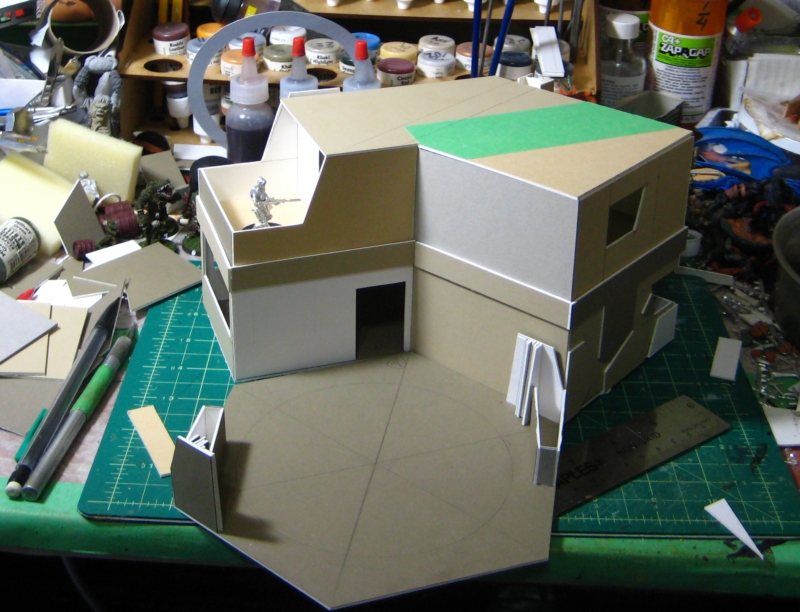
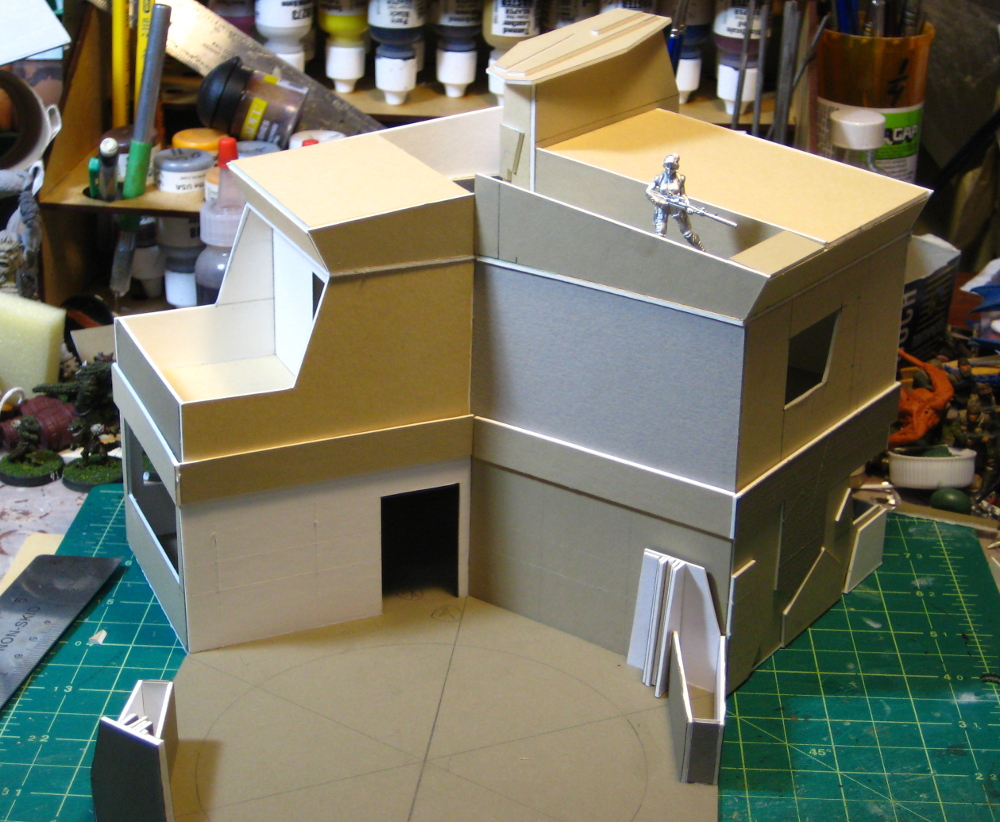
I’ve previously shown my urban scatter terrain for Infinity, and after getting that assembled I decided to tackle something more challenging and larger.

Quite a bit larger, actually. It’s a two-storey building that wound up being about 10″ long, 6″ wide and almost 7″ tall!

The building is entirely made of mat board, usually used as picture framing board. It’s good quality cardboard, easy to work with and it takes paint and glue well. Our local art supply place, Island Blue, sells the offcuts from their framing business off cheap! The roof and second storey come off to allow full access to the entire building during games, and I think I’ve managed to make the building tactically interesting for games of Infinity.

Check out the gallery below; the captions have a lot more detail.

If you’re interested in doing similar buildings for Infinity or any other skirmish game, I really like the ongoing “Cardbuilding” series of articles over on the Infinity news site Data Sphere: Part 1, Part 2, Part 3, Part 3.5, Part 4. Errhile is much more organized than I am, designing a whole system so that his buildings nest and stack for storage and reconfiguration, and he’s got lots of great techniques and ideas in his lavishly illustrated articles. I might well do some similar modular buildings, but for now it’s fun to just bust out a big, complex building — I haven’t done much terrain building recently!

BB Scoreboard Temple Part Five – Finished!

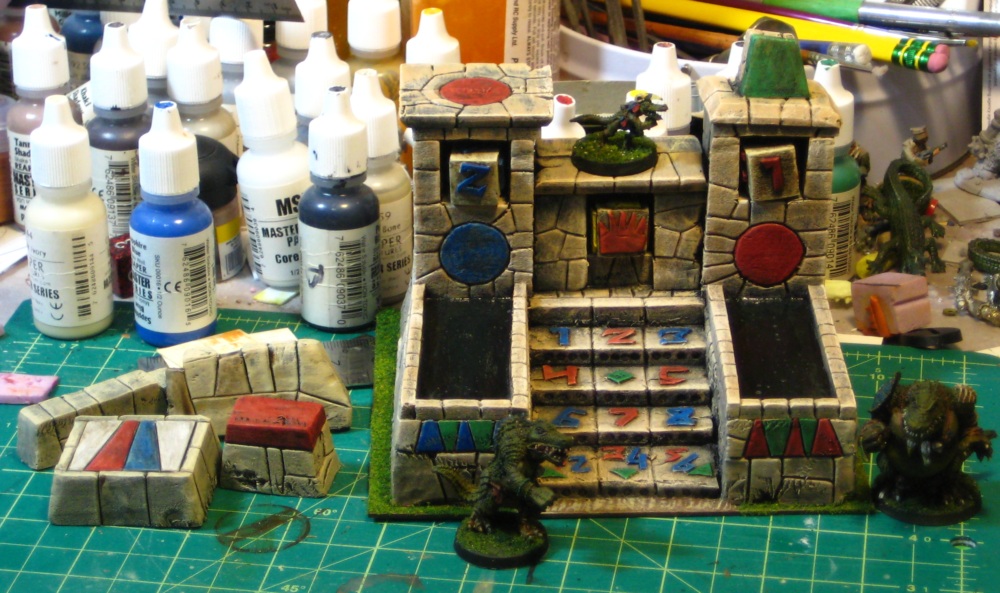
Three coats of gloss varnish on the water, flock around the edges of the base, and the two score indicators and weather indicator all finished – the temple is done!

Currently it’s 2-1 in the Very Sunny weather for whoever is on the blue side today! A Baby Croc, Saltwater Croc and Leviathan Croc observe from on and around the sacred structure.

temple
Temple all finished, with all three indicators in place. Click for larger, as usual.

I’m not entirely happy with the three markers, but they’ll do just fine for now and they’re easy to replace at some future date if I get inspired!

Off to the left of the temple in the photo above are a quartet of small temple platforms and ruined wall pieces from foam offcuts from the temple; they’ll probably get used in some future pulp jungle lost temple but might also appear in a future Bloodbowl-related project.

Sarissa CityBlock Buildings, Finished

Finally have the Sarissa CityBlock 28mm lasercut MDF buildings to a table-ready state, including another hand-painted advertising sign on the side of one of them.

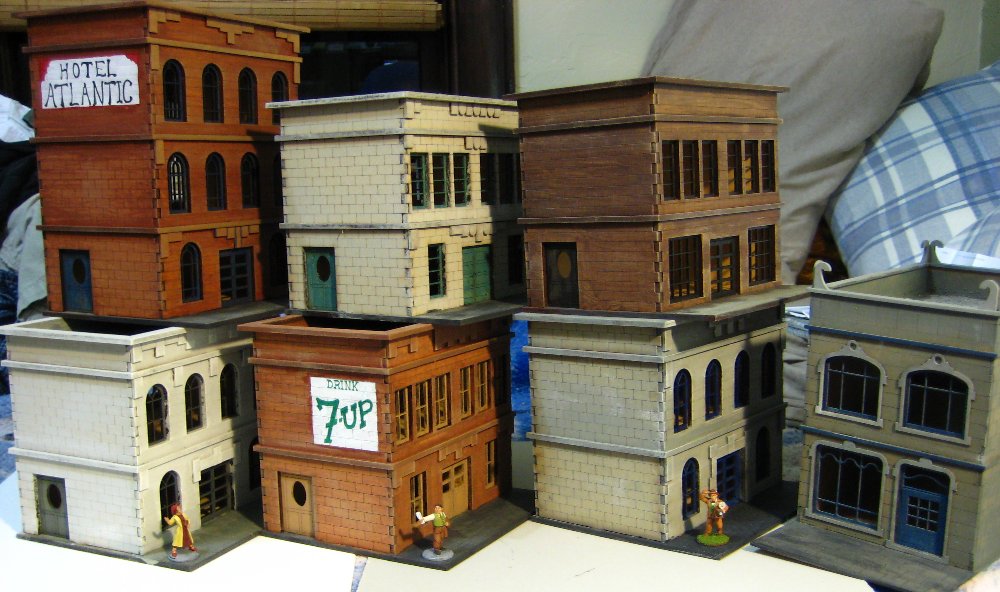
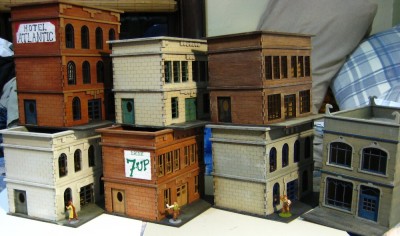
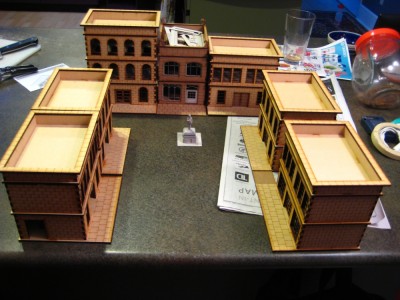
Here’s all seven buildings (six CityBlock plus one Narrow Townhouse from the Gaslamp Alley range) stacked up somewhat awkwardly:

sarissa_4aug2013
All seven MDF buildings, ready for the tabletop. Scale provide by three 28mm Pulp Figures reporters. Click for larger.

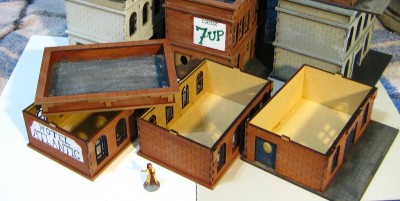
In one of my earlier posts, Chris had asked in comments about how these buildings came apart, so here’s the Hotel Atlantic spread open:

hotel_parts
The Atlantic Hotel spread into it’s constituent parts; three floors and a roof. Click for larger, as usual.

You can see I haven’t (yet) done anything with the insides of any of these buildings; beyond possibly splashing a coat of plain paint in, I’m not sure how much I’ll do inside them.

So, having built seven of the things but not actually written a full review, what did I think? First off, I like them, and will definitely be ordering more of Sarissa Precision’s buildings at some point. They’re solidly built, well designed, have enough detail to look good right out of the box, and are also easy to add extra detail to. Everything fits together very well, the laser-cutting is crisp and precise, and the CityBlock & Gaslamp Alley buildings are good generic city filler buildings, similar to thousands of real-world buildings all over the world, pretty much anywhere Europeans influenced architecture. Use them as-is, you could be nearly anywhere in North America, the UK or much of Europe; add a few “local” touches (different street furniture, a few different buildings for flavour, etc) and you could be in Shanghai, Cairo or Singapore just as easily!

I’ll do a couple of things differently on the next batch of MDF buildings I build, though. First of all, painting MDF is like painting a sponge. The stuff absorbs paint and water like crazy, and is actually quite hard to paint as a result. You go through a surprising amount of paint to get decent coverage; and because of the absorbency you can get streaky or blotchy paint coverage very easily. A couple of my buildings required a second coat of their base colour, and painting details like windowframes and the signs was harder than it should have been because you needed thin, wet paints and a well-loaded brush to get good coverage. So I’ll be doing as much painting as possible before assembly next time, instead of rushing assembly this time just for the joy of having complete buildings sitting around!

Spray cans or an airbrush might actually work better than brushes for basecoats on MDF, if you have access to an airbrush or a better selection of spraypaint colours than I do currently.

I’ve got a whole pile of small scenery detail bits that have been building up on the edges of my painting desk recently, so with these buildings out of the way it’s on to them to get them done and into play, then onto more figures! We’re having a Pulp Alley game tomorrow that should feature all my new buildings, so look for photos of that soon too.

Sarissa CityBlock Buildings, Part The Third

Progress continues on my seven Sarissa Precision buildings, albeit at a slower pace than I’d intended!

Basecoat and drybrushing is done on all seven buildings, gravel roof details likewise in place on all seven, most of the doors and windowframes are painted, and I’ve started cleanup and finishing.

I’ve always liked the looks of the big hand-painted signs and advertisements on the sides of older buildings, so given the wide blank side walls of the Sasrissa CityBlock buildings, it seemed natural to break out the smaller paintbrushes and go to it!

hotel_at
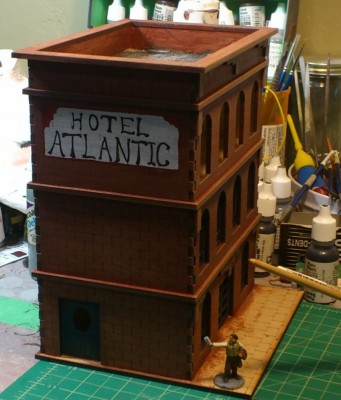
Newly-painted Hotel Atlantic sign on the side of the three-storey Sarissa Precision CityBlock building. Click for larger, as usual!

Still some cleanup to be done on the basic lettering, and I might yet redo the red ornamenting in both top corners, but the basics are done and I like how it turned out. This was all done freehand with a brush over some light pencil lines for guides, after I used Inkscape on the computer initially to play with letter sizes and spacing and figure out some basic guides. The “Hotel Atlantic” seemed like a good generic name, likely to occur anywhere in the English-speaking world, or even in non-English-speaking areas as the hotel set up to cater to English-speaking travellers.

One of the other buildings has a blank white square on it currently; later this week I’ll figure out what sort of sign or ad I want on it, too.

Sarissa CityBlock Buildings, Part The Second

Having assembled my new Sarrisa Precision lasercut buildings, it was time to consider adding some extra details to really make these buildings “pop” and bring them to life. One of the things I wanted to do was add detail to the fronts of the buildings, especially the cornices at the roofline, which are often quite elaborate on brick or stone urban buildings built in the late 19th or early 20th Century.

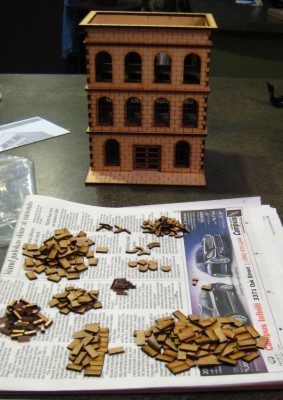
As I’d assembled these buildings I’d reflexively kept the bits of MDF from inside the windows and other openings in the models, and looking at the little pile of lasercut leftovers, I realized they’d be perfect for basic detailing and adding some relief to the fronts of my new buildings.

sarissa2
The three-storey Sarissa Precision building, and the sorted offcut bits of MDF. Click for larger, as usual.

There were more than enough bits and pieces to do the fronts of five of the seven buildings, with leftovers to keep going on the remaining two if I decide, although I’d like to use some light card in layers for a slightly different look on the last CityBlock building and the Gaslamp Alley townhouse.

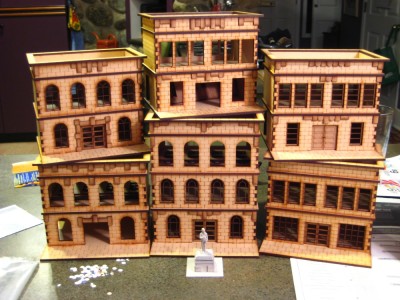
Here’s all six of the CityBlock buildings stacked up, five of them with basic ornamentation added with “scrap” MDF.

sarissa3
All six CityBlock buildings stacked up, five of them with front details added. The statue is roughly 28mm tall, just for scale. Click for larger.

Next step is chimmneys and other rooftop detail. I’ll use basswood and plastic tubing for chimmneys, and create roof hatches, vents and roofwalks from basswood and card. Masking tape for tarpaper or paint and fine gravel will complete the roofs, then there’s painting to be done!

Sarissa CityBlock Buildings, Part The First

In my last post (two+ weeks ago!) I mentioned I’d bought a bundle of Sarissa Precision’s lasercut 28mm CityBlock buildings to bring our pulp gaming into an urban realm. I’ve finally got all seven buildings assembled; here they are on the counter.

sarissa1
All seven Sarissa Precision 28mm lasercut buildings. Click for larger, as usual.

The six similar buildings are from Sarissa’s CityBlock bundle, with one extra floor purchased to give me five two-storey buildings and one three-storey building. The seventh building is the Narrow Townhouse from Sarissa’s Gaslamp Alley Victoria SF line.

The CityBlock buildings go together quickly and easily; the walls and floors are 3mm MDF, and the window frames are seperate sheets of 2mm MDF designed to slot in behind the walls. The first several buildings I put together with more enthusiasm than consideration and glued the windows in right away; for the ones I’ve finished more recently have had the windows left out for now to make them easier to paint.

The floors and roof all come apart to allow access to the interiors of the buildings during games, and the simple tab-and-slot system should survive many games with no issues. The buildings all feel very solid once assembled.

The Narrow Townhouse from the Gaslamp Alley range is one of Sarissa’s most recent releases, and there’s a number of tweaks, refinements, and added details compared to the older CityBlock buildings. The interior floors have wood planking engraved on them, some of the etched and cut detail is a bit finer, and instead of 3mm & 2mm MDF, the Gaslamp buildings use 2mm MDF and laser-cut light cardstock, called “greyboard” on Sarissa’s website. This makes the Gaslamp buildings lighter than the CityBlock ones (although just as solid) and somewhat more detailed. The windows have both inner and outer frames lasercut from cardstock, for example.

Having assembled the basic buildings, I’m now turning toward detailing them before painting. I want to add some details and bits on the front facades and cornices of the buildings, and to the roofs. I’ll use fine modelling gravel on some roofs for a tar-and-gravel roof, and narrow masking tape on others for tarpaper roofs, and add details like chimmneys, roof walks and possibly even rooftop signs.

After that it’ll be time for paint. The engraving on the CityBlock walls is too large to “realistically” be brick, but I’ll likely paint several of them up in traditional red bricks anyway, as well as some as stone.

Detailing photos and writeup in the next couple of days!

Links of Interest, 28 March 2013

Short links of interest post while I buckle down and get more cavalry painted for our Russian Civil War games — why is it that six damn horses take as much effort as two dozen infantry, anyway?

Burn In Designs do paint racks, buildings and other laser cut stuff. I rather like the vertical paint racks that minimize the footprint they take up.

Mad Mecha Guy do more lasercut stuff, this time 15mm science fiction buildings and bits. The chap behind MMG is also apparently the sculptor of Ground Zero Games’ awesome new engineering mechs.

Terrain For Hippos is an entertaining blog with loads of photo tutorials of short, straightforward terrain projects, all presented by a semi-literate cartoon hippo named “Grot”.

Speaking of painting horses, I just discovered this huge infographic JPG via DeviantArt, which goes into all the many variations of horse colour, including useful information like which colour of mane, tail or hoof is usually seen with which coat colour.

Finally, the interesting folks over at Naval & Military Press have just started their Easter Sale which means 20% off across the board on a huge and fascinating array of specialized military history titles! I’m saving this quarter’s gaming budget for Trumpeter Salute in ten days, but NMP’s booklists are always full of tempting items!