
I’ve been wanting do some more area terrain – mostly flat pieces to serve as rough ground, forested areas, and the like – for a while now. With the move back into ECW skirmish and terrain building for same, I’ve decided to start with a set of low profile stream pieces that can be used on practically any table.
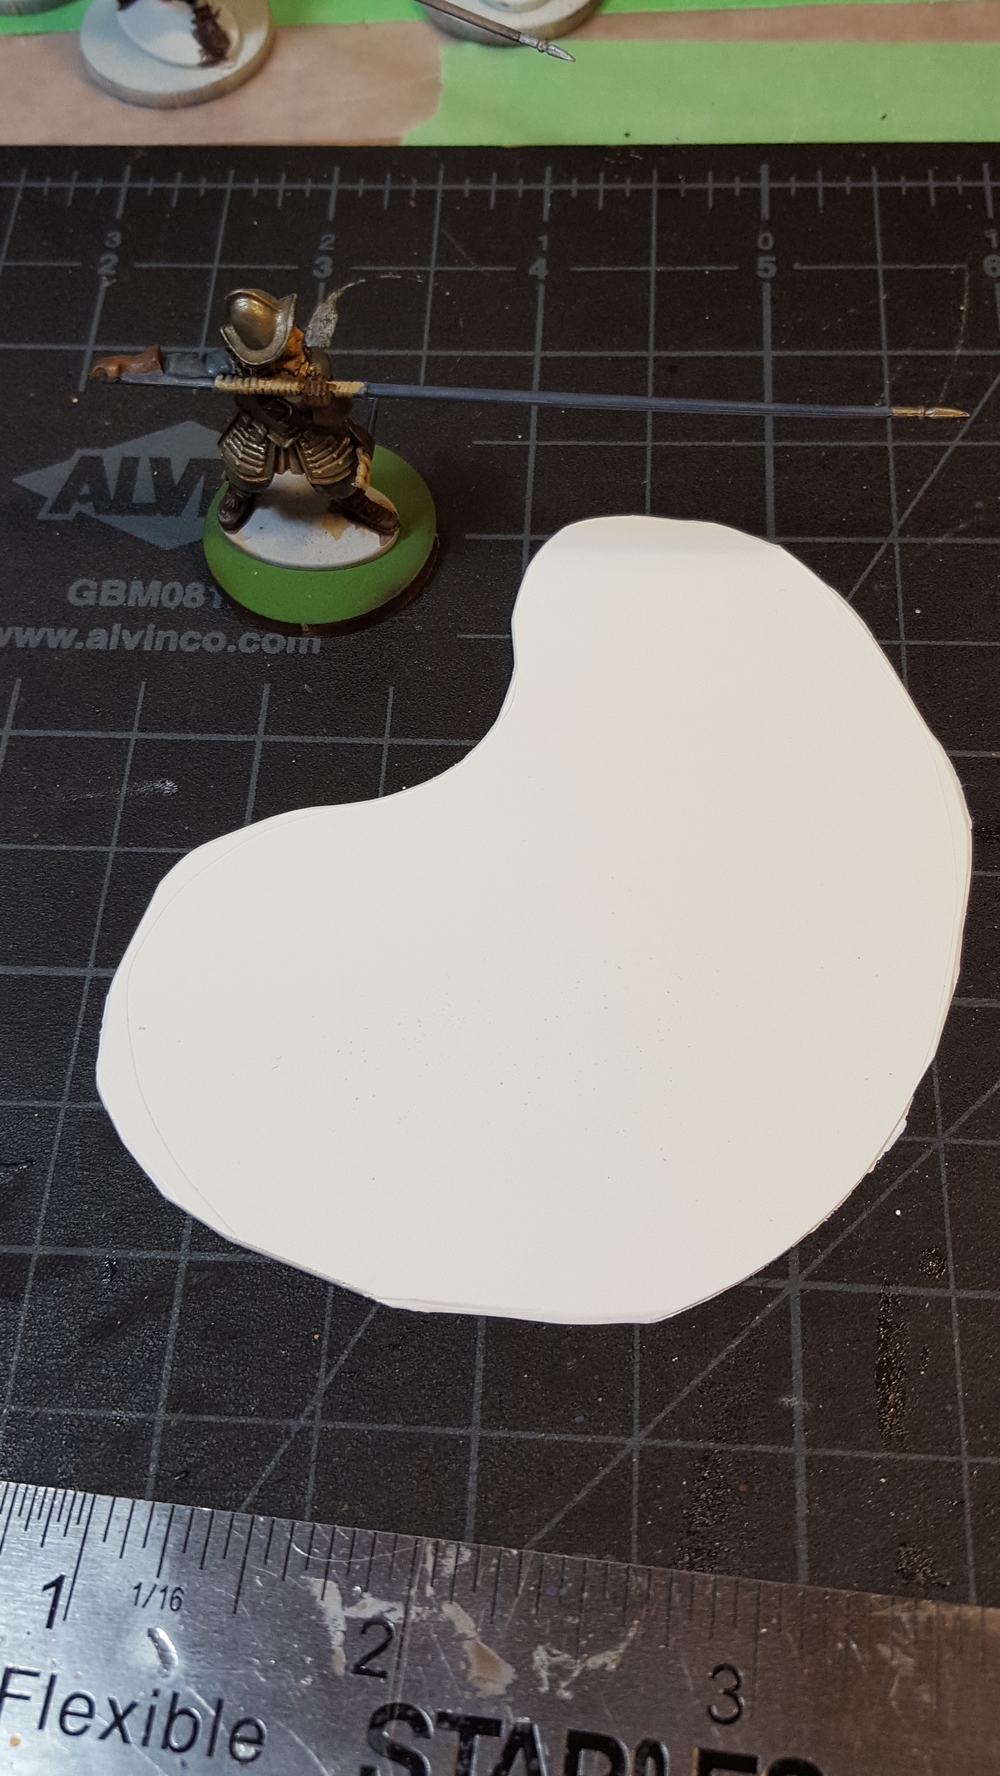
As a test piece, I started with a small duck pond, about 3 inches long and 2 inches wide or so.
I started with an offcut of relatively thick styrene sheet (plasticard) that I think is either .030 or .040. I chopped it to roughly the shape I wanted with an Xacto, then sanded the edges smooth and beveled them slightly.
Styrene sheet isn’t the cheapest material for terrain making, but it has a number of advantages for this type of terrain. It’s sandable, making it easier to smooth down corners and edges. It’s waterproof, so you can slop paint, water, and glue around with abandon and not worry about ruining your base material. It’s also stronger than similarly thin card and more resistant to warping. I’m using an offcut of Evergreen sheet styrene for this particular pond, but for future use I plan to go down to our local plastic supply place and buy a big 2 foot by 4 foot sheet of .030 or .040 styrene; it’s sold in bulk for signmaking and other applications and it’s much, much cheaper to buy it at that scale than in the little Evergreen or Plasticraft packages at a hobby store!
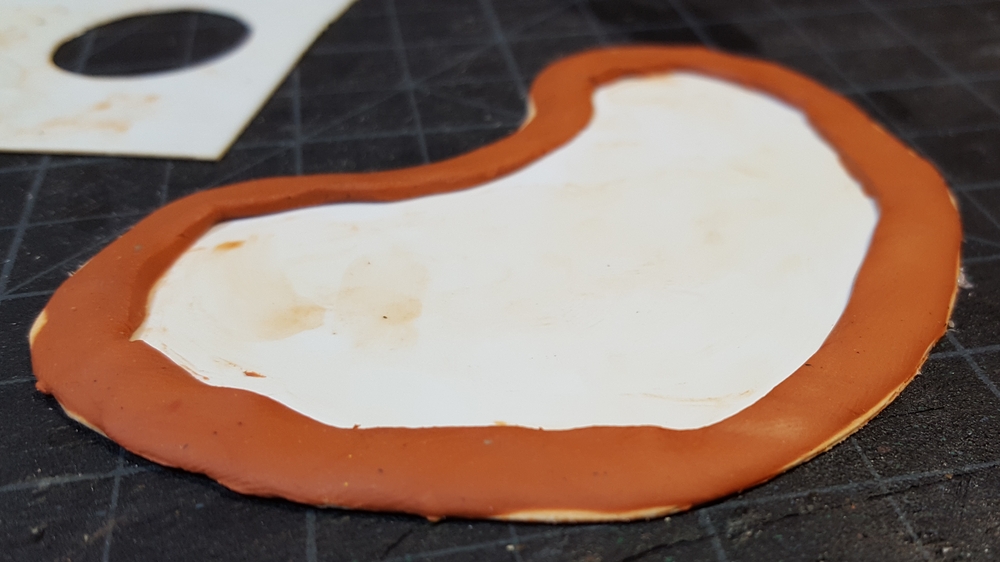
For the shoreline of the pond I used a long thin “snake” of Milliput, rolled out to about 2 or 3mm across. I mashed it down with my fingers, keeping my fingertips damp while working to prevent the Milliput from sticking to my hands. I tapered the outer edge down to the edge of the styrene sheet and kept the inner edge fairly vertical but only a couple of millimetres tall. Pushing your thumbnail up against the inner edge of the Milliput is an easy way to achieve this, although you could use sculpting tools too!
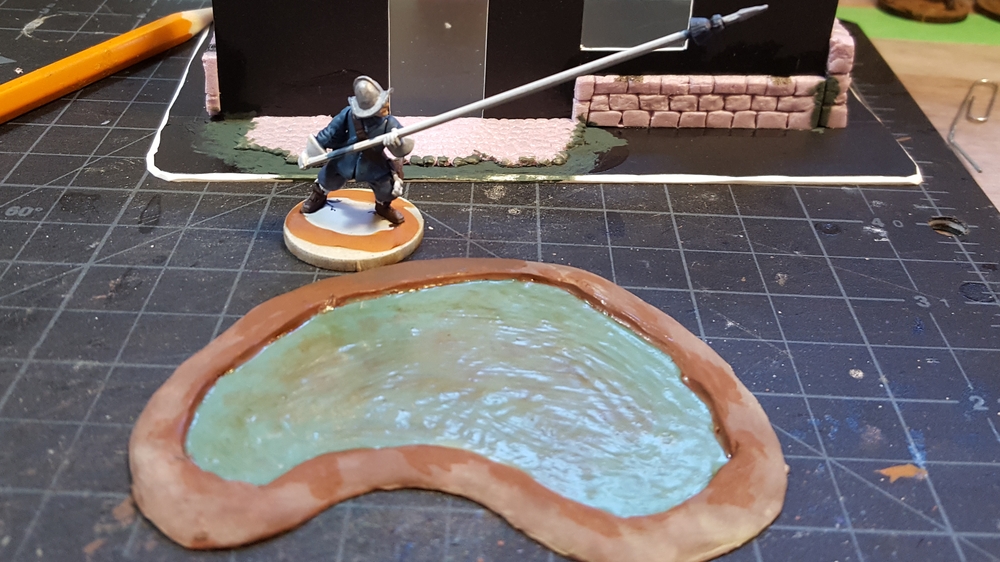
After letting the Milliput dry overnight I painted the whole thing brown. The outer edge got a couple of different shades of brown scrubbed on to look appropriately muddy, and the pond water is a greeny-blue with some brown added to the centre to make it look slightly deeper.
With all the paint thoroughly dry, I added several layers of white glue over the pond to give it the appropriate wet look. You could easily use gloss varnish or even a thin pour of clear or tinted resin here, but the white glue I’ve currently got dries to a high gloss and looks good as water so that’s what I used. I did one coat of white glue mixed with little bit of GW sepia wash to tone down the blue-green paint a bit.
When layering gloss varnish, glue, resin, or whatever water-representing material you choose, it’s important to let each layer – and any paint that will wind up underneath it – dry completely before adding the next layer! Forgetting this will get you frosting and/or bubbles and other inclusions in your layering and could really screw the look of your water up. Paint that isn’t dry properly can also crack or craze under a sealant layer and really screw things up.
I’ve got a set of 28mm ducks coming from Warbases soon that I’ll be added to this pond for some extra character. I added some flocking and tufts along the banks after the last coat of gloss had dried.
