Quiet month here on the Warbard, I’ve been busy in real life (terrible when that happens…) but getting some gaming and painting time in when I can.
We had an Infinity event in mid-October, eight of us at Everything Games for a full day of Infinity. Three rounds with four tables; I provided scenery for two of the tables. I’ll get those photos up sometimes soon, but first I want to share October’s big (really big!) painting project!
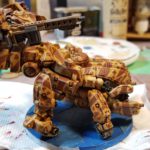
Haqqislam’s Maghariba Guard TAG is the largest model in the game, so big it has a whole new Silhouette class (S8) all to itself. I finally splurged on the monster when EG put together an order direct to Corvus Belli and gave us a generous discount on anything we ordered through them.
The order arrived right at the end of September, so I decided that the Maghariba would be my October pledge for the Painting Support Club over on the Infinity forums!
I got her assembled (mostly) on the 1st of October and finally, on the 30th, declared her done! Here’s a gallery of the entire build process, from bare metal to fully finished.
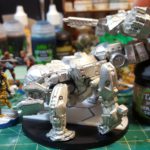
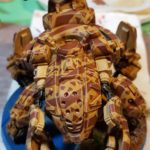
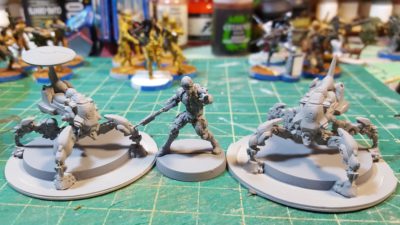
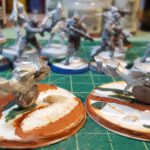
1st of October: Maghariba in bare metal, with the upper gun turret and lower cheek guns just balanced in place.
1st of October: primed, basecoat under way, and test camo on the central part of the gun turret.
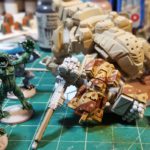
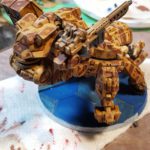
9th October: Basecoat all done, camo stripes and some dots in progress.
9th October: camo in progress.
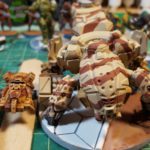
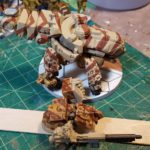
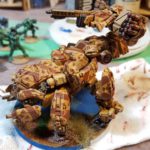
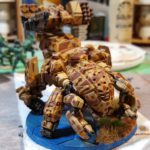
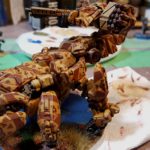
October 30th: All done, front view.
October 30th: All done, front left quarter view.
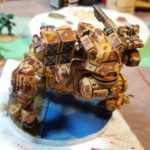
Oct 30th: Rear view.
Oct 30th: Rear right quarter view.
Oct 30th: Right side full profile.
Oct 30th: Right front quarter view.
Oct 30th: Back to the left front quarter for one last look!
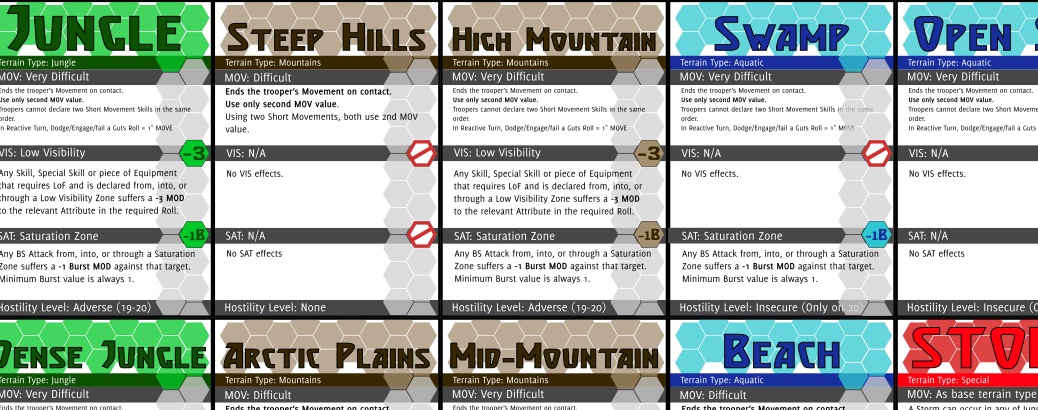
Infinity has really interesting terrain rules, but they’re an added layer of complexity over an already complex game so they often get ignored. The “default” terrain for Infinity is urban, generally, and doesn’t use any of the terrain rules. That’s a pity, because skills like Multiterrain and other movement skills only earn their keep and become interesting when you actually use the various terrain rules.
To hopefully encourage use of the terrain rules I’ve been working off and on on a set of Quick Reference Cards, and I’m finally getting around to publishing them here.
The PDF below is four pages with 19 cards in total. There’s a card for every terrain type in the terrain table in the main N3 rulebook, including one for the Storm effects; a card with a quick ref version of the Hostile Environment rules; a set of four blank cards for filling out with custom terrain types (as the book encourages players to do); and then a set of cards with each of the four Visibility Effects, two Movement Effects, and two Saturation Zone Effects that make up the terrain rules, so that you could create any combination of them quickly for custom terrain.
They’re sized to print eight to a sheet and should print out to the same size as Magic cards or other standard game cards, so you can put them in regular sleeves if desired. I’ve done up both Letter-sized for those of us here in North America and A4 for anyone living where they use rational paper sizes.
If you have any feedback or suggestions to improve these cards, please leave a comment below or use the contact form elsewhere on this site. Suggestions always welcome!
I’ve been back to painting Infinity figures recently, after being distracted by somescenery for a bit.
Over on the Official Infinity Forums there’s been a Painting Pledge/Support Group thread every month for a while now. I tend to be a bit of a scattershot distracted painter, so pledging a few figures to get properly finished in a month is a good way to keep me a bit more focused.
This month I pledged a pair of Kameel Remote combat robots and a Hassassin Barid Hacker figure to get done. I’ve also been trying to finish a few more of the other random figures around the place, and have been doing fairly well on that front too.
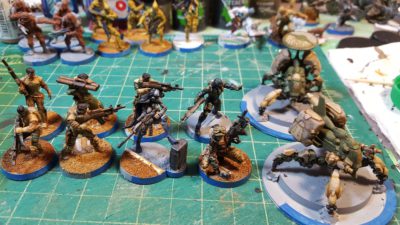
Left to right: Two Daylami and three Ghulam Light Infantry, a female Authorized Bounty Hunter, Hassassin Barid Hacker, Hunzakut infiltrator with Rifle+Light Grenade Launcher, and the pair of Kameel REMs. Click for larger.Primered for my September “paint pledge” over on the Inf forums. TR Kameel, Barid Hacker, EVO Hacker Kameel. Click for larger.Top view of the completed (except for the bases) Kameels and Barid. Click for larger.Front view of the September paint pledge figures. Click for larger.
Spent the weekend off on what might be our last camping trip of the season and I’ve been busy doing lots of other non-wargaming things, as one tends to when the weather is good, but I’m still getting some painting done.
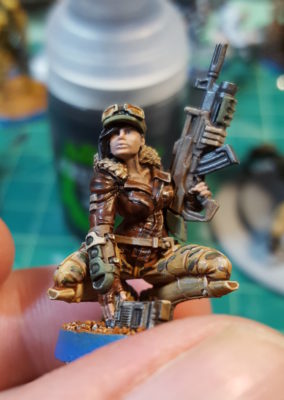
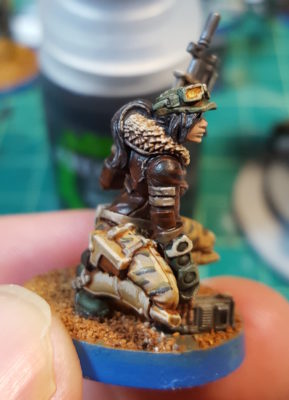
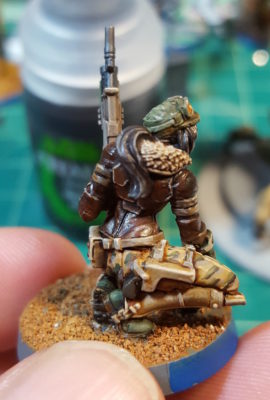
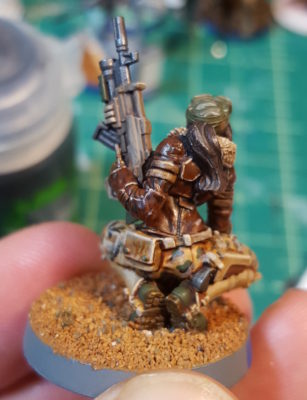
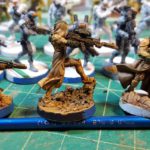
I’ve just finished a couple of figures for my Haqqislam forces for Infinity, but the one I really want to show off is this female Hunzakut infiltrator. This is a relatively recent sculpt from Corvus Belli, and it’s fantastically detailed and nicely posed, one of my favourite figures in my collection. She’s crouching while placing a mine or repeater, rifle balanced on her hip.
Hunz 1, face-on.
Hunz 2, side view.
Hunz 3, back quarter view.
Hunz 4, back view.
More soon, I’ve gotten some progress on the hill and shuttle scenery seen here recently!
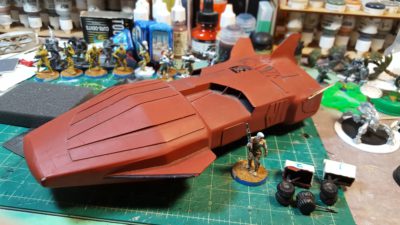
Doing a bit of cleaning up in my boxes of wargaming supplies I rediscovered a shuttle I built at least ten years ago. It was nominally for 15mm science fiction gaming, but was built without visible windows or any other really obvious scale indicators, and it’s big enough to look like a small craft in 28/32mm SF scenery!
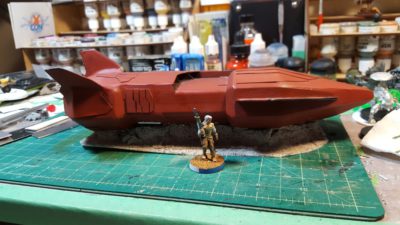
Shuttle retrieved from the box it’s been half-forgotten in for ages. Landing gear next to it; Infinity figure on 25mm base for scale. Click for larger, as usual.
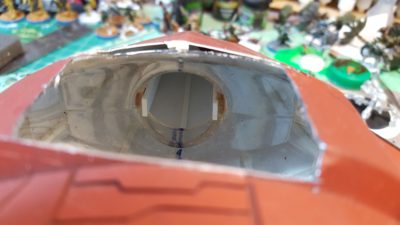
It’s suffered some damage in storage; one of the stabilizer fins is missing and the landing gear was loose and damaged. Rather than fix it up I figured I’d run with it as a damaged crashlanded shuttle that’s suffered a hard landing but is still basically intact. I added some more damage with a file, then chopped part of the underside away so it would sit slightly nose-down.
Hole in the nose. The original shape was a mouthwash bottle built up with styrene plastic sheet and putty. Click for larger.
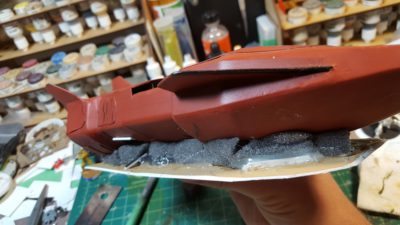
I used hot glue to stick the shuttle down to the base, then packed the gap between the ground and the shuttle with a few bits of scrap card, slices of foam from a miniatures blister, and a lot more hot glue.
Shuttle with foam and scraps packed into the gap between the body and the ground. Click for larger.Other side of the shuttle, also showing the missing tail fin and the extra damage I scratched into it. Click for larger.
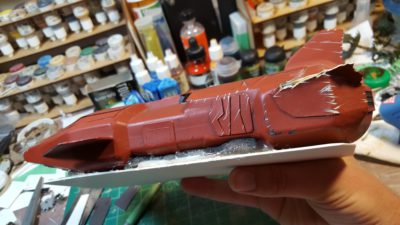
Finally I put a layer of white glue over the foam and base then dumped sand over it. It might need another layer of sand to touch everything up; we’ll see in a day or two once everything dries!
Sand in place; Infinity Daylami on 25mm base for scale. Click for larger.
More soon once I get the base painted up and touch up the damaged parts of the shuttle!
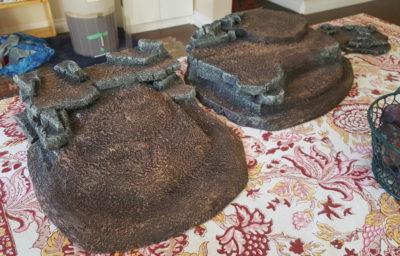
I’ve finished the first two hills I started a while back, and built a third large hill to finish up the set for now.
After the first coat of glue/sand/paint “goop” dried I added a second layer to a few areas of both hills, just to smooth out a few seams and such.
After the second coat of “goop”. Click for larger, as usual.
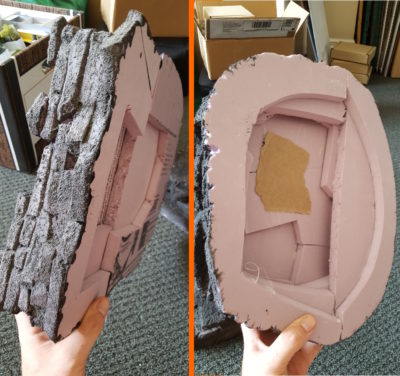
I mentioned in the first hill post that I was piecing these hills together out of pieces of styrofoam instead of using solid sheets for every single layer, to stretch my current supply of the stuff just that little bit further. Here’s what the underside of the two hills looks like:
Underside of the two hills, showing layers and pieces of styrofoam. Click for larger.
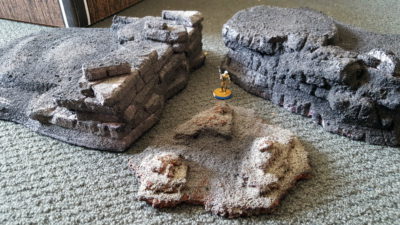
Before I started painting, here’s what the two hills and the smaller cork piece looked like.
All three initial pieces together, with an Infinity figure on a 25mm wide base for scale. Click for larger.
Painting
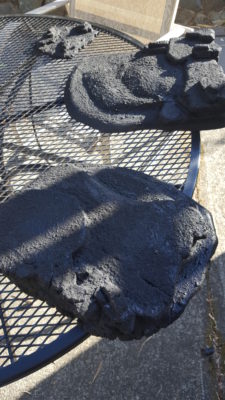
Painting these was pretty straightforward. I started with a flat black basecoat, to thoroughly hide any hints of pink styrofoam that managed to peek through the texture goop layer(s).
Black basecoat done and drying. Click for larger.
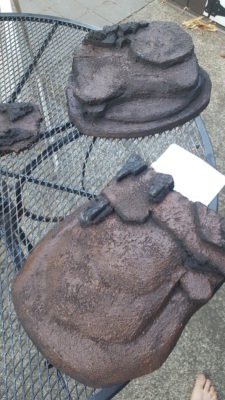
The earth areas got a heavy brown drybrushing, then a sloppy wash of thin brown paint, and finally a drybrush of brown mixed with a bit of white.
Brown done on the earth sections. Click for larger.
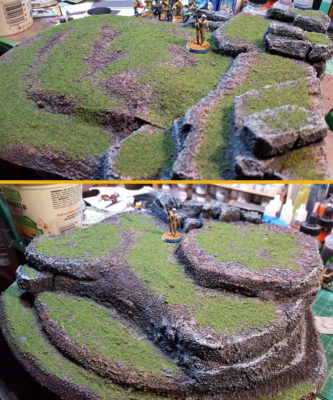
After that I did a couple of layers of grey drybrush on the rock areas; the initial drybrush was grey mixed with a bit of black, then straight grey, and finally grey mixed with a good dollop of white. The final drybrush mostly got applied on the upper edges of the rocks and on protruding corners and such.
Grey drybrushing done. Click for larger.Grey drybrushing done. Click for larger.
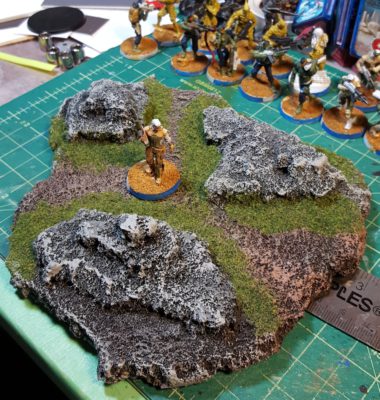
Finally I flocked random areas of the earth parts, let everything dry, and called it all done!
Smaller cork piece with flocking and Daylami on 25mm base for scale. Click for larger.Larger hills all flocked and finished. Click for larger.
I’ve started making a third large hill, and I’ll get photos of that up in the next day or so!
Awfully quiet around here for far too long, for which I apologize!
I’ve actually been doing quite a bit of painting and a little bit of terrain work. My personal goal is to get my entire current collection of Infinity miniatures painted, based, and completed before Labour Day, the first week of September. That’s about 65 miniatures total, of which maybe 25 or so are actually fully finished.
A couple of shots of recent work – see the photo captions in the gallery for more details!
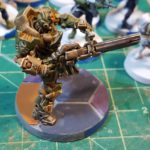
Haqqislam Azra’il, a big Heavy Infantry (superheavy, really) that I just did some edging on to make him “pop” more!
Bikes in progress. These are the old (2006 or so!) and out of production Haqq “unicycles”. I like them, a lot of people don’t. Building new bases so they fit the current standard base for motorbike units, which has changed since these were produced.
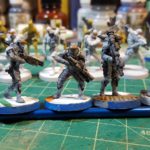
Lasiqs for Hassassin Bahram. Centre is a sniper, left and right are rifles.
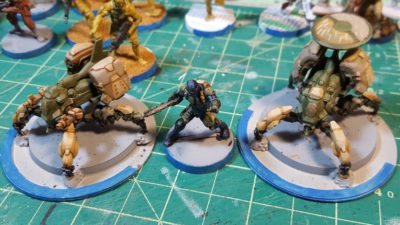
Sekban for my Qapu Khalqi Haqqislam force. A mix of rifles, boarding shotgun, and a rocket launcher.
My girlfriend is out of town with friends so I’ve had a bachelor/wargamer weekend and gotten a lot done on my Infinity figures.
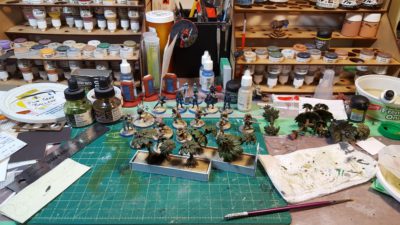
The workbench – planters in the foreground, various Haqqislam figures behind, and the usual clutter around the edges! Click for larger.
The planters are foamed PVC sheet and mat board offcuts, and the trees are from Games Workshop — at one point they produced a rather nice set of modular plastic “tropical trees” that vaguely resemble palm trees and are a lot of fun to put together. Like pretty much everything that GW ever does that’s actually interesting, these seem to have vanished from their website, which is a shame. I picked up most of a set a while ago when I bought a whole mixed batch of wargaming stuff off someone locally who was having to downsize.
Closeup of the planters – done with the old GW palm trees – and CB Haqq figures in progress. Click for larger, as usual.
Closeup of the figures and planters. The dark blue figures in the background are various Hassassin Bahram soldiers including three of the infamous Fiday assassins. The figures closer to the camera include a pair of Remotes on the left, an al’Hawwa sniper and al’Hawwa hacker, a pair of Hafza infantry in lower left, and a quintet of Djanzaban medium infantry on the right – two rifles, a sniper, an HMG, and a hacker, all stalwarts of the Qapu Khalqi sectorial force in Haqq.
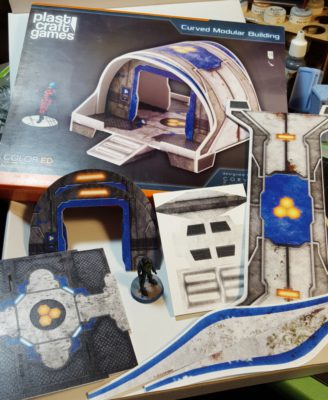
While at Trumpeter Salute I picked up one of PlastCraft’s Designed-For-Infinity plastic pre-coloured buildings, the Curved Modular Building, from the awesome folks at Imperial Hobbies, BC’s greatest wargaming store, and the only reason I do anything in Richmond other than change buses…
Anyway, the Curved Modular Building is a small building, with a footprint about 4″x4″ (not including the ramps) and about 3″ tall. It’s only 16 parts, six of which are for the two ramps off each end of the building.
Curved building parts all laid out. Click for bigger, see text for details.
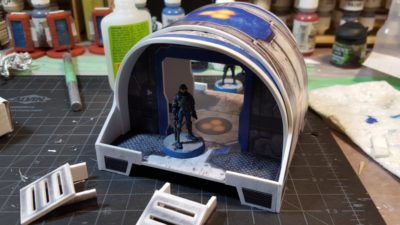
The material is all 2mm foamed PVC board (Sintra is one common brand name) that’s been colour printed on one side, presumably by computer. The printing seems very solid, certainly enough to handle transport and use on a gaming table, and foamed PVC is good solid material for gaming terrain. My space station walls are built mostly with thicker Sintra (1/8″ or about 3.5mm) that I picked up at our local plastics supply place.
Assembled, with ramps. Infinity (28/30mm) Hassassin Bahram Fiday for scale. Click for larger.
Assembly is pretty straightforward, with the small caveat that you do need to be slightly careful with the curved pieces so you don’t kink them. I glued the two end walls into the floor with superglue, let them cure for a bit, and gently pre-curved the main roof piece with my hands and over the top of one thigh before fitting it in place. Secure one end of the roof with superglue and work patiently around the curve of the piece, adding glue an inch or two at at time along the top edge of the two walls. Once you get the whole roof glued, hold the whole assembly for a minute or two to give the superglue a chance to cure.
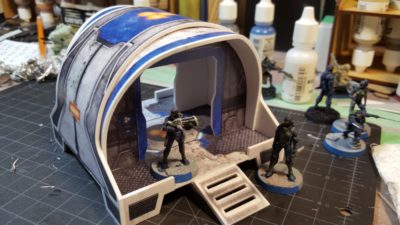
Pre-curve and dry fit the two end roof pieces before tacking them into place with superglue, then add the two short end walls on each porch. Glue the two ramp assemblies together and you’re done, one piece of terrain ready to go on the table. I elected to leave the ramps separate from the building to make transportation and storage slightly easier; they tuck nicely into one porch for storage.
End with two CB Infinity figures for scale and the ramp in place. Click for larger, as usual
I like these buildings, they’re super easy to assemble and it’s kind of nice not to have to paint and detail everything yourself. The use of foamed PVC instead of the more usual MDF or cardboard allows the interesting curved roof, and the curved features in some of the other PlastCraft ColorED range. PlastCraft has just announced an expansion of their ColorED Infinity line, and they have a couple of other lines in the same range, some of which could make for fun Infinity tables. They also do most of the range in plain white foamed PVC if you want to paint them yourself.
Having moved at the start of this year I’ve been sorting and reorganizing gaming stuff, as one does, and working on actually using some of the stockpile of stuff I’ve accumulated.
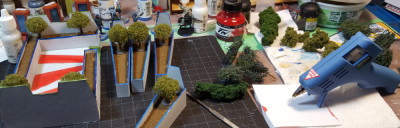
Part of the stockpile was a much wider array of greenery and model plant type material than I had thought I had. I also had a batch of sci-fi planters I had started back in January 2015, painted, and used a lot during Infinity games without ever putting greenery in.
A few minutes with the hot glue gun has finally fixed that!
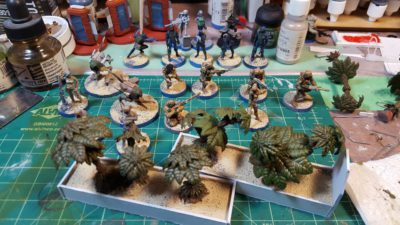
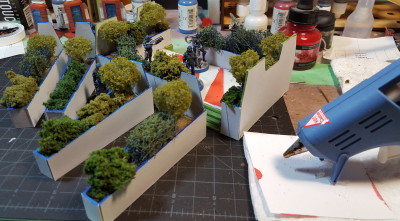
Shrubbery in progress. Click for larger, see text for details!
The little trees are from Woodland Scenics; I won them as a door prize at Trumpeter Salute a couple of weeks ago. Most of the bushes are just various shades of green foliage foam also from Woodland Scenics, while the spiky looking blueish bushes are actually furnace filter material, spraypainted green, and with fine ground foliage foam sprinkled onto them. Many years ago (like, in the early 1990s…) we had a family model train layout and our background trees were made from furnace filter. The stuff I’m using is from a bag of the surviving, salvaged railroad trees, finally back in service after a couple of decades off!
Completed shrubbery, with Infinity Hassassin Bahram figures observing. Click for larger, as usual.
Looking forward to getting these onto our Infinity tables; Infinity has a bunch of cool terrain rules that are often ignored but can really make the game more interesting.