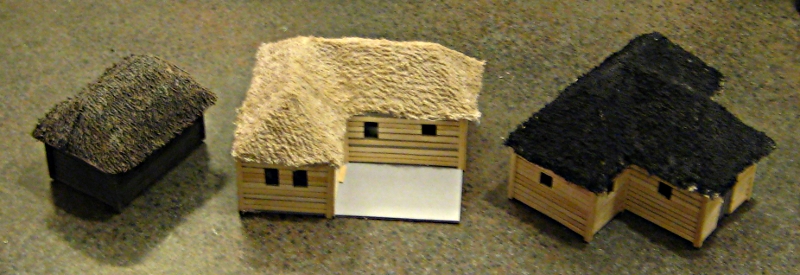
As a break from painting up Russians, last night I broke out the scenery supplies and started in on a new set of plowed field pieces. I like fields of various sorts, they provide interesting texture on the table while being easy to make and easy to transport, being largely flat!
These six are based on the last large piece I have of white 3mm thick plastic. It was salvage from the workshop of a non-profit I occasionally volunteer at, and I have no idea what sort of plastic it is, but it won’t glue with regular solvent cement and not even superglue holds it gracefully, so it’s useless for buildings. Hot glue and white glue will stick to it, though, and being plastic and relatively thick it won’t warp, so we’ve used most of it up as scenery bases of various sorts. The double handful of small scrap pieces (none much bigger than 4″ in any dimension) are being saved to appear under various small bits of filler and detail scenery in the future, but these six 6″x4″ fields are from the last 12″x12″ piece I had left.
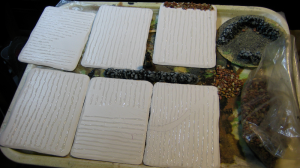
For the plowed ridges and furrows in the fields, I broke out my trusty hot glue gun and ran thin lines of hot glue for the plow ridges. A couple of the fields got different or interrupted plowing patterns, just for interest.
The scruffy drystone wall on one end of one of the fields, the larger drystone wall assembly on the CD base, and the freestanding wall on a tongue depressor tucked in between the fields in the above photo are all made from decorative gravel and Gorilla Glue, a technique I first saw over either on Maiwand Days or Rabbits in my Basement, although it was apparently pioneered by TMP stalwart John the OFM.
Gorilla Glue has the fascinating properties of being water-activated and expanding 2- to 4-times as it cures — the stuff foams as it hardens, basically. Lay a thin bead of it down, dump a line of damp gravel over it, and it’ll fill some of the gaps between the gravel as it expands, and even lift and fill your wall out. Pretty cool, and I’ll be using it for producing a lot more scruffy stone walls, blast craters and similar terrain in the near future!
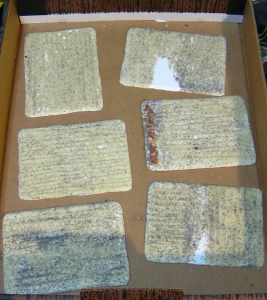
Next step was a layer of white glue, then sand. My sand mix is actually about four different kinds of “decorator” sand, model railway ballast and similar, so it isn’t totally uniform.
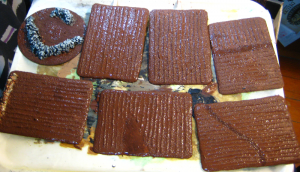
The base coat is a medium brown, with a bit of a much darker brown mixed in. I wound up having to repeat the base coat, as I’d applied it quickly right at the end of the night, so it was patchy and too thin in spots. I used a bit more dark brown and even a bit of well-thinned black in the second coat, for better contrast with the eventual drybrushing. The ragged rock wall along the one end of one field was basecoated straight black at the same time.
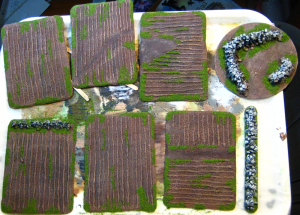
The day after the basecoat, I did two drybrushing passes, the first with a mix of the same base brown lightened with a pale brown/dark tan colour, mixed roughly 1:1. The second drybrush, even lighter, was a fairly pale tan colour. The stone wall got a fairly heavy dark grey drybrush, a lighter pale grey pass, then a final pass with pale grey mixed with white on just the tips of the rocks. Then it was back to the white glue to add bits of flocking, mostly around the edges. I might go back and add some sprouting crops or something low to some of the fields, but for now they’ll be empty and weedy, mostly because it’s easier to move troops over them this way.
I’m declaring these done for now and moving them out of the way to get back to Russian Civil War figures! Total time on this project, not including photos and writing it up, was a couple of hours over a couple of evenings, all in short bursts, interrupted by figure painting, the Internet, and other distractions!