Inspired by Tony’s plank-roof hut tutorial that I linked to in my recent links of interest post, I sat down with stir sticks and my Xacto knives to do up my own version of his hut.
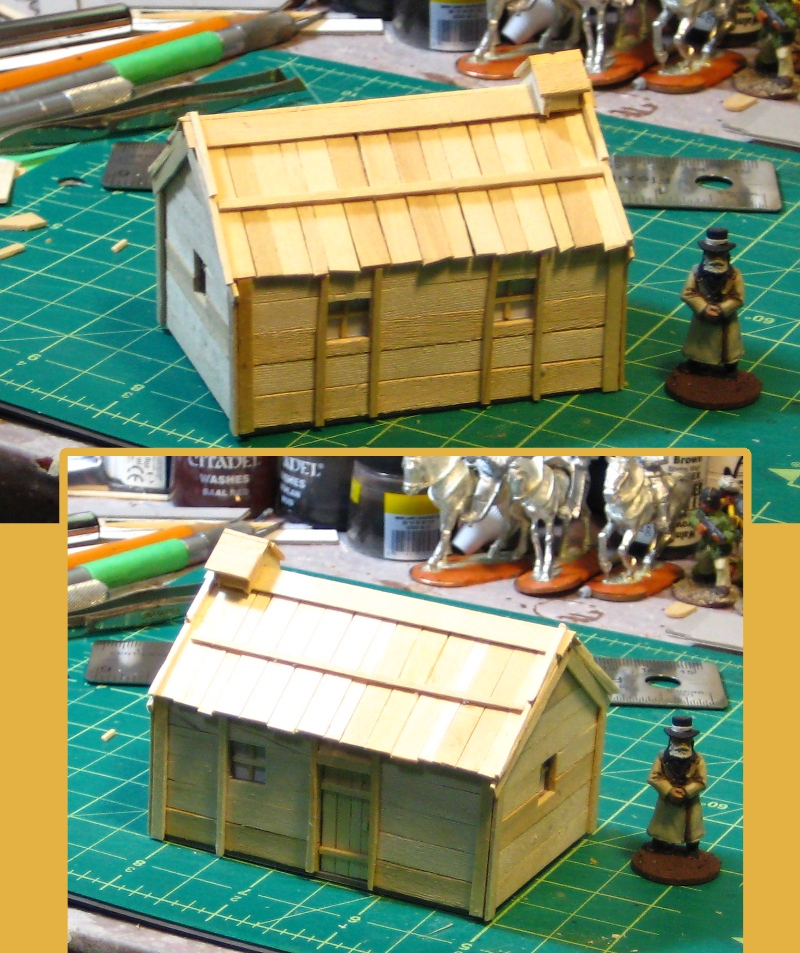
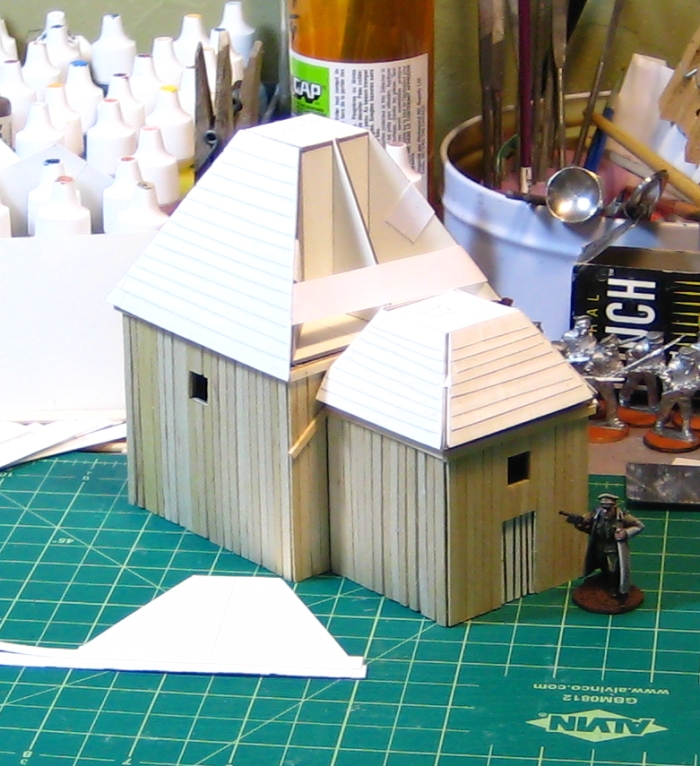
A Russian-style plank-roof hut, after Tony’s tutorial.
My version is 3 inches across the front, 2 inches deep and about 2.5 inches tall to the top of the chimney.
I’ve also been amusing myself recently with fake fur and fabric dye, searching for good loking long grass. I’ll have to write up my discoveries sometime soon, it’s been… interesting.
The new hut will have it’s final paintjob this weekend, more photos of that when it happens.
To celebrate (?) this fine Friday the 13th, another of my occasional posts of links.
Muskie commented on my Youtube scenery videos post to remind me of his fascinating Miniature Painting News Aggregator, which has a neat collection of feeds from all over the place, mostly focused on miniature painting but touching on a number of other hobby elements too. The aggregator apparently started as a private project, and it’s a bit GW-centric for my personal tastes, but it can throw up some neat semi-random content. Well worth a visit, and well worth bookmarking for return visits. (Incidentially, I”ll also recommend Muskie’s Better Hobby Blogging article for those of us who blog. Full of good advice.)
We talk about design, fonts, Inkscape and related topics fairly regularly here on The Warbard, and I’ve just discovered the Lost Type Co-op, a pay-what-you-want font foundry with lots of very nice Art Deco-influenced fonts and others suitable for Interwar/Early 20th C design efforts.
Further on the design and graphics front, Fantastic Maps is, well, fantastic. Jonathan Roberts also has a great collection of Tips & Tutorials that is well worth checking out.
Last but definitely not least, the Barking Irons site has a nicely illustrated Witchlands Hovel tutorial by Tony Harwood. The Witchlands are Flintloque’s version of Russia, and Tony’s article should provide inspiration for plank-roofed rural buildings for Russia and elsewhere.
In fact, I’m going to get off this computer, get some food, then start cutting coffee stir sticks for my own version of a plank-roofed hut!
I don’t spend a lot of time rummaging around on Youtube, so up until recently I’d missed the immense amount of wargaming material there, especially terrain & scenery tutorials. A lot of the model railroad techniques are really too fiddly (or the resulting scenery too fragile) to really work for wargaming, but there’s lots of wargaming terrain vids and some great ones from the model railroaders that’ll work nicely on the wargaming table.
This might be old news to some of you, but I thought I’d link to a couple of good ones I found. Who knows, this might become a semi-regular feature here.
Another YouTuber with lots of good video tutorials is RubbishInRubbishOut of Australia. Here’s his useful Making “Goop” for basing wargaming scenery and terrain, basically a mix of caulking, water, glue and sawdust or sand for texture to quickly add ground texture. He’s got a bunch of other good videos too, well worth checking out.
(I’ve avoided embedding the videos in this post quite deliberately. Half a dozen embedded vids can lock up older computers quite nicely, and the embedding always gets broken on Tabletop Gaming New’s blogroll and other RSS feeds anyway. Go watch the vids on YouTube, they’re worth it!)
These are only fairly quick if you ignore the fact that they sat around for about four months half-finished before I got bored of them taking up space on my project shelf and got them finished!
Actual construction time is quite short, nevertheless, and the results are solid enough for wargaming purposes.
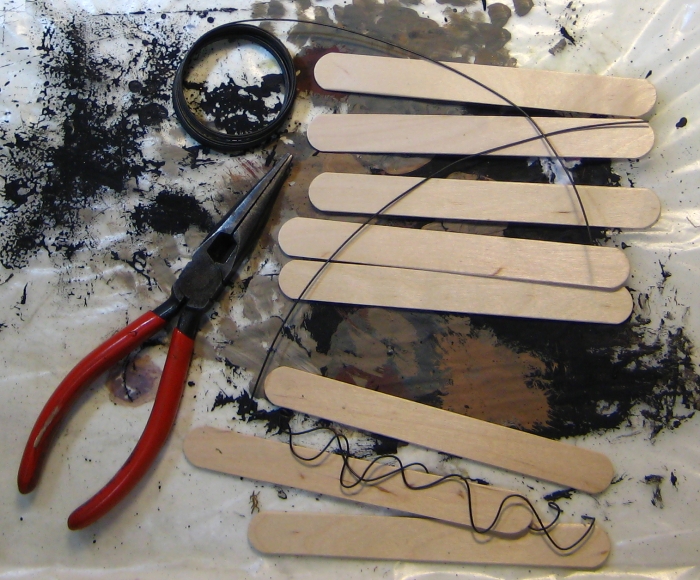
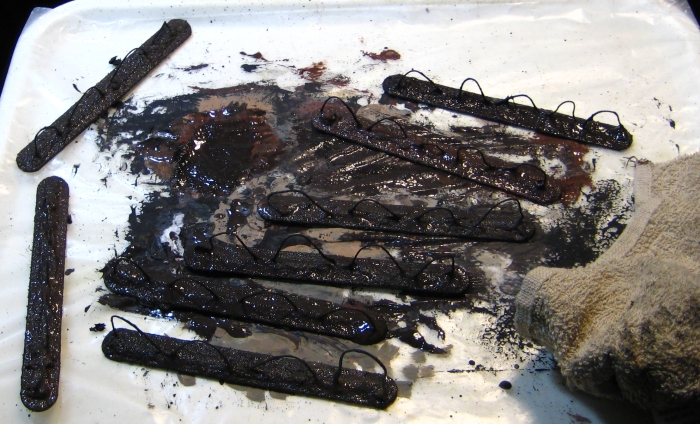
Raw materials for hedge making. Six inch hardwood tongue depressors, soft iron wire (from my local hardware store). Not shown, my hot glue gun.
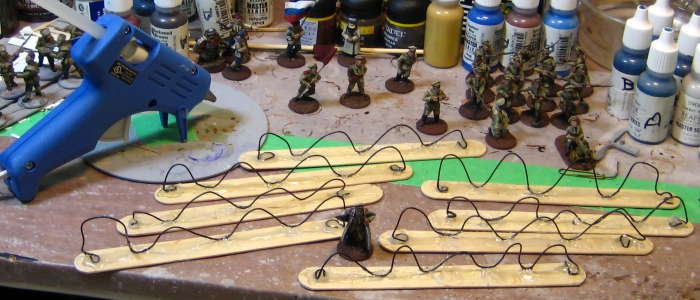
Adding wire loops, glued down with generous amounts of hot glue at the ends and where the loops touch down on the tongue depressors.
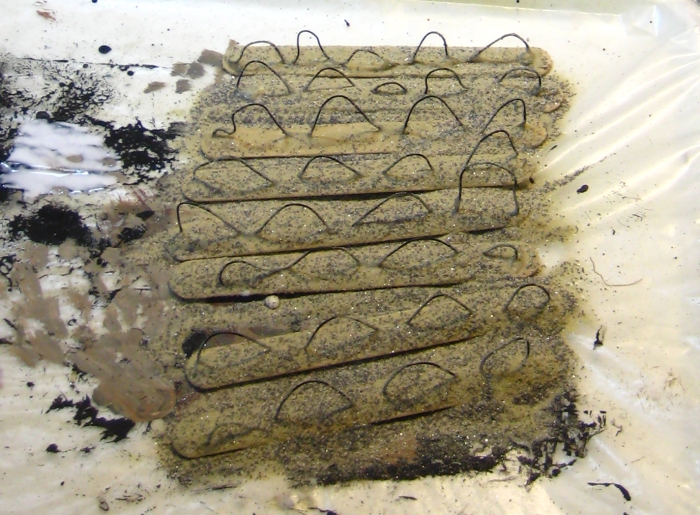
After the hot glue cools and solidifies, paint a slightly dilute white glue/water mix over the tongue depressors and the wire and dump sand and hobby gravel (or a mix of both, as I use here) over. Leave overnight to dry.
After the glue dries on the sand, paint. I use a mix of a couple shades of brown with a bit of black, and a generous amount (about 1 part in 3) of white glue to really solidly glue the sand down to the bases. Again, leave overnight to dry.
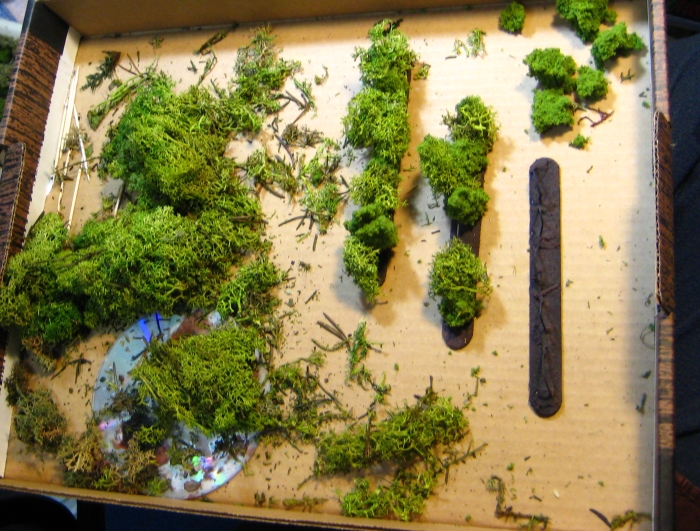
Fire up the hot glue gun again. Using a mix of lichen and foliage foam, start hot-gluing foliage to the wire “branches”. You could glue real twigs in too, or add some plastic trees to the mix if you want more height to the hedges. I’ve left this batch fairly low, they’re very roughly chest-high to a 28mm model, with some sections head-high or better and rare breaks lower than that.
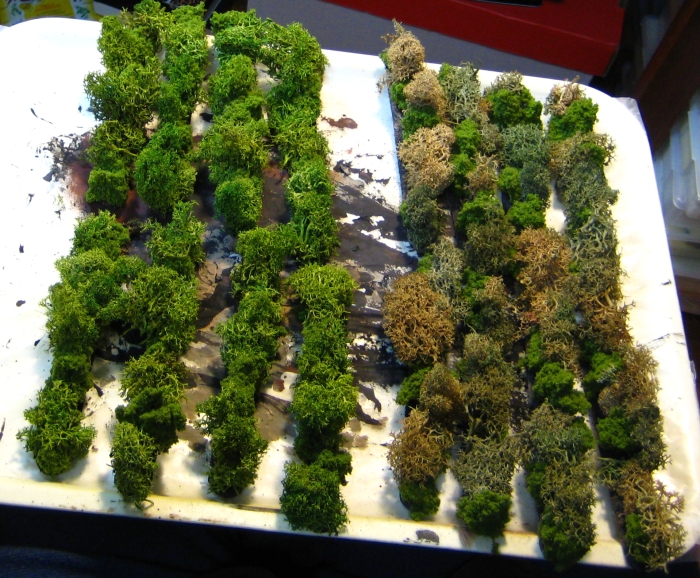
The finished hedges on the left, alongside the first batch I did on the right. Each batch is four linear feet of edge (eight six-inch pieces), nowhere near enough if you’re doing Normandy but enough for smaller tables outside of Normandy!
I’ve been house- and cat-sitting for a relative in town the last ten days, so not a lot of action here on the blog, but I did take advantage of having extra space available to get a bunch of wargaming scenery built.
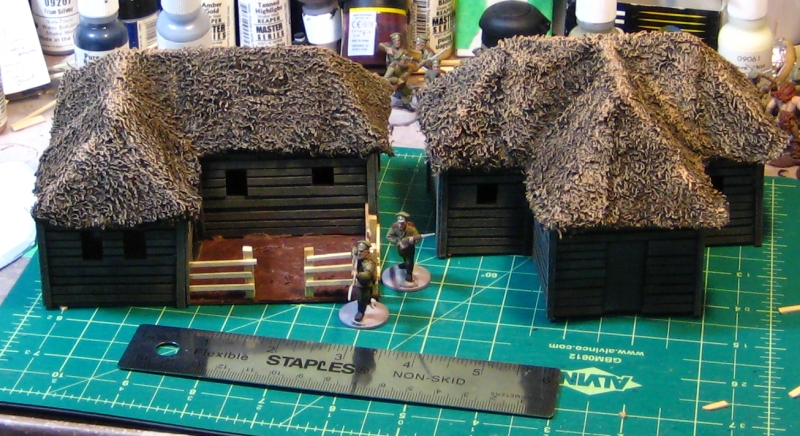
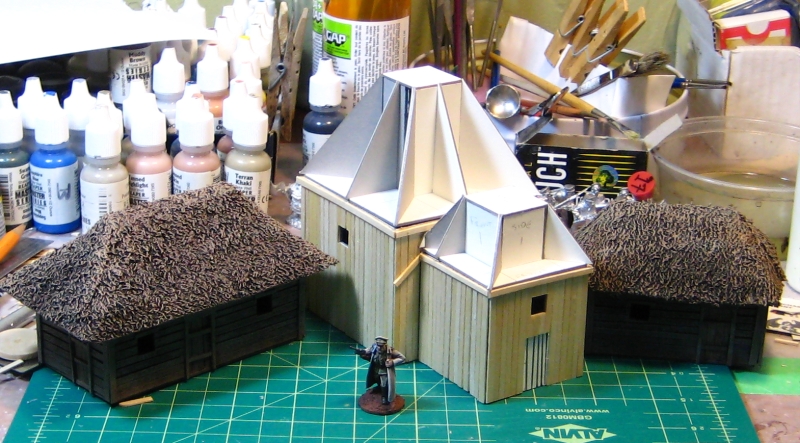
The most interesting pieces are a pair of houses for my growing Russian hamlet. The first is T-shaped, the second L-shaped with a fenced garden/yard area. Both have thatch roofs from towel; building and covering the more complex roof shapes was an interesting challenge. I even got some step-by-step photographs of the roof-building and thatching process, so expect an illustrated tutorial at some point in April here on the Warbard!
A pair of new, larger Russian-style buildings for our 28mm RCW games. Click for larger.
Both buildings have a 5″x4″ footprint and are about 3.5″ to the peaks of the double-hipped roofs. Unlike my earlier church, these two have doors or windows on all sides, so they’re potentially tactically useful instead of just being a line-of-sight blocker like the church.
In addition to the two buildings, I built two large hills (which can butt against each other to form one long ridge) and a smaller hill. I’ve needed more hills for ages, so it was nice to get these made finally. No photos of them, I’m afraid, as they’re buried in the bottom of one of my scenery boxes at present.
I”e also got about about ten new pieces of scatter terrain in progress, not all of which will be ready for my Trumpeter Salute RCW game in ten days, but I hope some of it will be. Photos of that as time allows in the countdown to Trumpeter!
It seems to be a week for belated followup reports to earlier posts here on the Warbard. Ah, well.
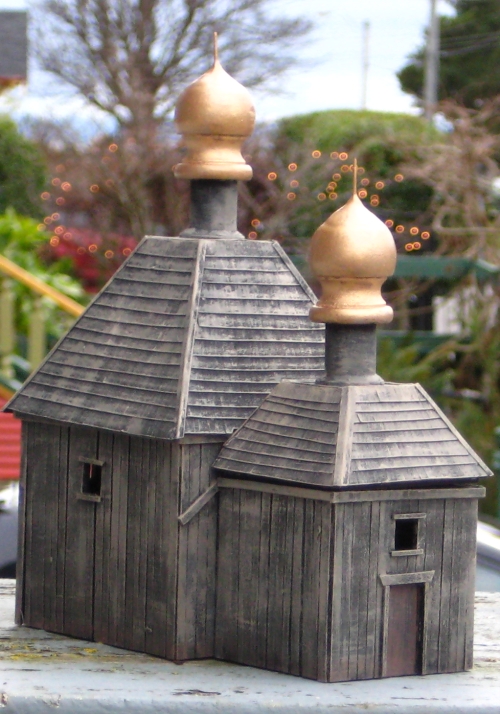
I finished up the Russian church at the end of January, amidst all the prep for GottaCon’s pulp game, and never did get around to posting the finished photos here.
The front of the church:
The Church of St. Boris the Intoxicated. Pardon the background, I had to take advantage of daylight and lack of rain together!
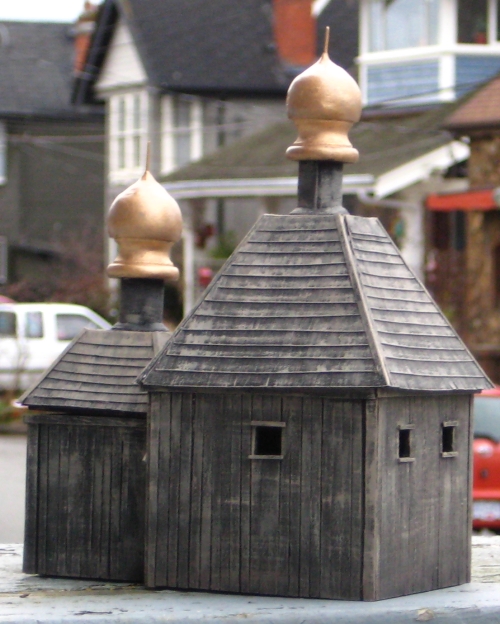
…and your first look at the back, and a better look at the main roof. The whole thing wound up being 5″ long, 3″ wide and 7.5″ tall to the top of the spike on the upper dome. That’s small, but really about as big as I usually build a wargaming building.
The rear view of the Church of St. Boris.
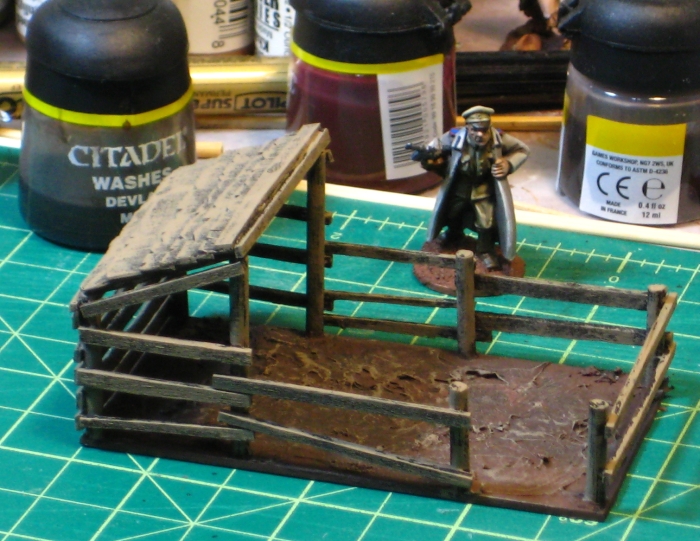
Finally, while I was finishing up the church, I threw together a small detail structure to add clutter and interested to my Russian hamlet. Behold, a pigpen.
A pigpen. Oink. Or do Russian pigs say, “Oinkski”?
The pigpen is random offcuts from the church project and about 2″x 3″. The mud is hot glue, from a glue gun, which is something I did as an experiment. Blob glue on, push it around before it cools. After it cools, pick the points and stringy bits off, paint brown and wash, and done. One advantage of hot glue mud is that it won’t warp cardboard or wood bases, unlike using globs of white glue.
Finally made it up to the local branch of Micheal’s craft store after work Wednesday to hunt down material for the two domes of the Russian church. I had planned on using 1″ wooden spheres, but the shelves of random wooden shapes were fairly well picked over and they had no wooden spheres of that size at all.
They did have 1″ wide turned wooden shapes advertised as “decorative rod ends”, though, and I realized they’d make much more interesting onion domes than the simple spheres I’d been planning on.
When I got them home I drilled holes in the top and inserted lengths of wire. One useful thing about turned wood shapes, it’s usually fairly easy to find the centre point, as the lathe tools always leave small ring impressions on the wood. The wire got superglued in, then I used a twist of tinfoil to form the core of the uppermost section of the onion shape. Terracotta Milliput is cheap, sure, but tinfoil is even cheaper!
After that I mixed a small batch of terracotta Milliput and worked it around the wire and foil. I used a 1″ circle I’d cut out of styrene as a rough guide to keep the upward concave curve consistent, and smoothed things down with a wet fingertip. I didn’t fuss with the surface finishing much, a bit of wet sanding after the milliput is dry and another thin layer of putty will finish everything off nicely in due course.
So, behold the domes of the Church of St. Boris the Intoxicated, with the putty still setting on them!
The onion domes take shape. Click for slightly larger, see text for details!
Aside from the domes, the roofs are finished structurally, all shingles and trim in place. I still have to finish the trim around the door and windows, then it’s off to painting.
A quick pair of photos of the small Russian church I’m building for Russian Civil War gaming in 28mm. Earlier in January I discussed some planning and thoughts I had for a wargame-scale small church, and while it isn’t going as fast as I had hoped progress is being made!
My work-in-progress Russian church, alongside the two earlier Russian huts.
As with the huts, the basic structure is mattboard with coffee stirsticks providing the woodwork.
A slightly more recent work-in-progress shot. Shingle roofs are slow going…
The roofs of the church are going to be shingled rather than thatched, and while doing shingles with built-up strips looks good, it is frankly tedious… The smaller roof is done except for trim, though, and the main roof is about half done, then it’s on to the domes to provide that very Russian look that’s so distinctive.
It’s been a bit of a slow ten days or so on the wargaming front around here; I wish I could say there was a proper reason, but I just haven’t spent much time at the workbench. One of those weeks.
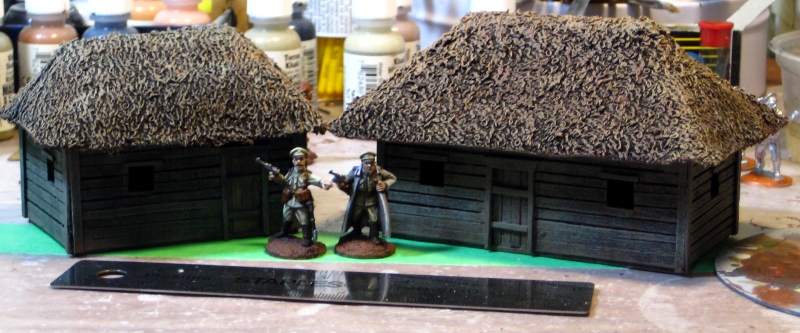
Regardless, earlier this month I did finish bothsmall Russian huts/farmhouses that I started over Christmas, and the Russian church is coming along nicely.
Here they are together, with a pair of Brigade Games’ 28mm White Russian officers for scale. The walls are mattboard and wood from coffee stirsticks, the roofs are towel with cardboard structure underneath.
The fronts of a pair of Russian rural buildings – huts, small barns, possibly small farmhouses.
The smaller one on the left is 3″x2″ and roughly 2″tall, the slightly larger one on the right is 4″x2″and about 3″ tall.
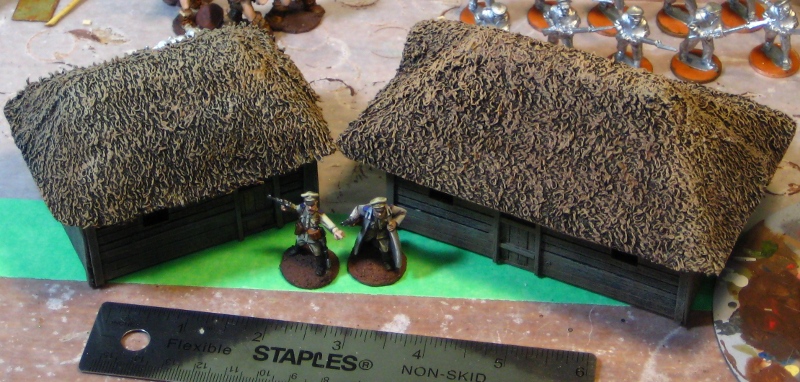
Removable thatch roofs from towel.
The hipped roofs are mattboard and light card underneath with towel soaked in diluted white glue as the thatch.
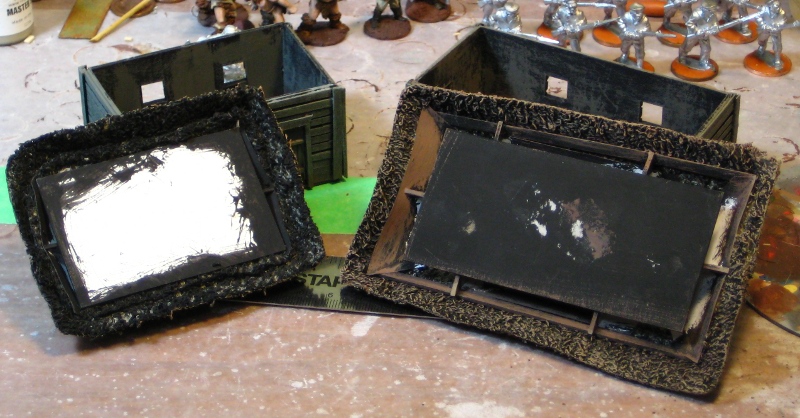
The roofs removed, showing their structure slightly.
Here you can see the roofs removed and flipped over. The structure of the roofs is all just cardboard and I’ve had no warping at all despite the towel for thatch being fairly liberally soaked in diluted white glue after it’s glued down.
Both buildings got a basecoat of black paint mixed with white glue (my standard scenery basecoat), the woodwork was drybrushed with a grey mixed with some tan followed by a second drybrush of paler grey. The thatch got the same black/white glue base then a couple of drybrushings with various brown/tan/grey mixes. The towel soaks up paint and glue as well as you expect towel to, even during drybrushing — expect to go through paint like crazy.
I have vague plans for a couple more buildings for a Russian hamlet, maybe something in whitewashed plaster more suited to the southern portions of the country, and of course the Russian church is nicely underway. More about that tomorrow!
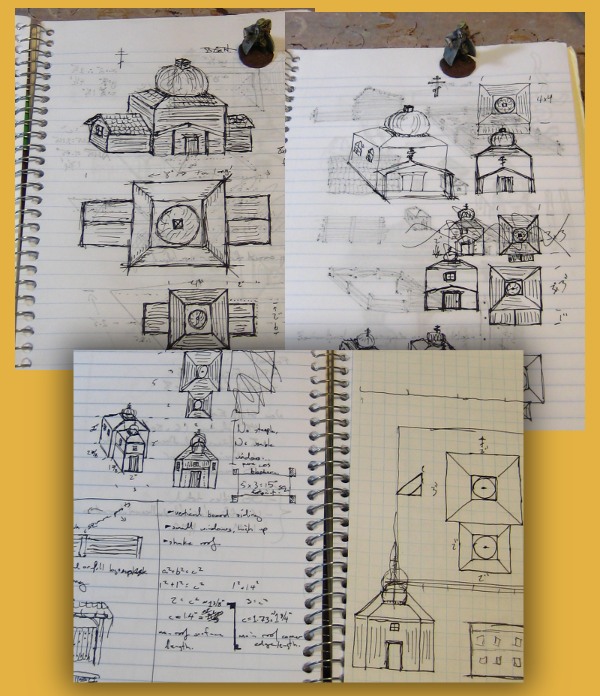
I don’t usually like to talk about plans and ideas before there’s at least some progress to show off, but while I was away over the New Year I had time to do some quick sketching and thinking about a building that would be at the centre of any Russian village or hamlet during the Russian Civil War, and which really is iconic when you want to remind players the game is, in fact, set in Russia.
Some pages from my notebook – possible plans for a feature building for my RCW table!
Google Image Search is really indispensable when looking for prototypes and inspiration, although it’s very easy to get a building that’s just too big for the table. The church at top left would have been over 8″ long and 4 wide, far too big for a scenery piece that is basically just a Line of Sight blocker. The design shrank from there (top right page) then grew slightly on the bottom page and I’m fairly confident the finished result will be something like the two-part double-dome design on those pages, with a footprint roughly 5″x3″ and an overall height somewhere around 6″.
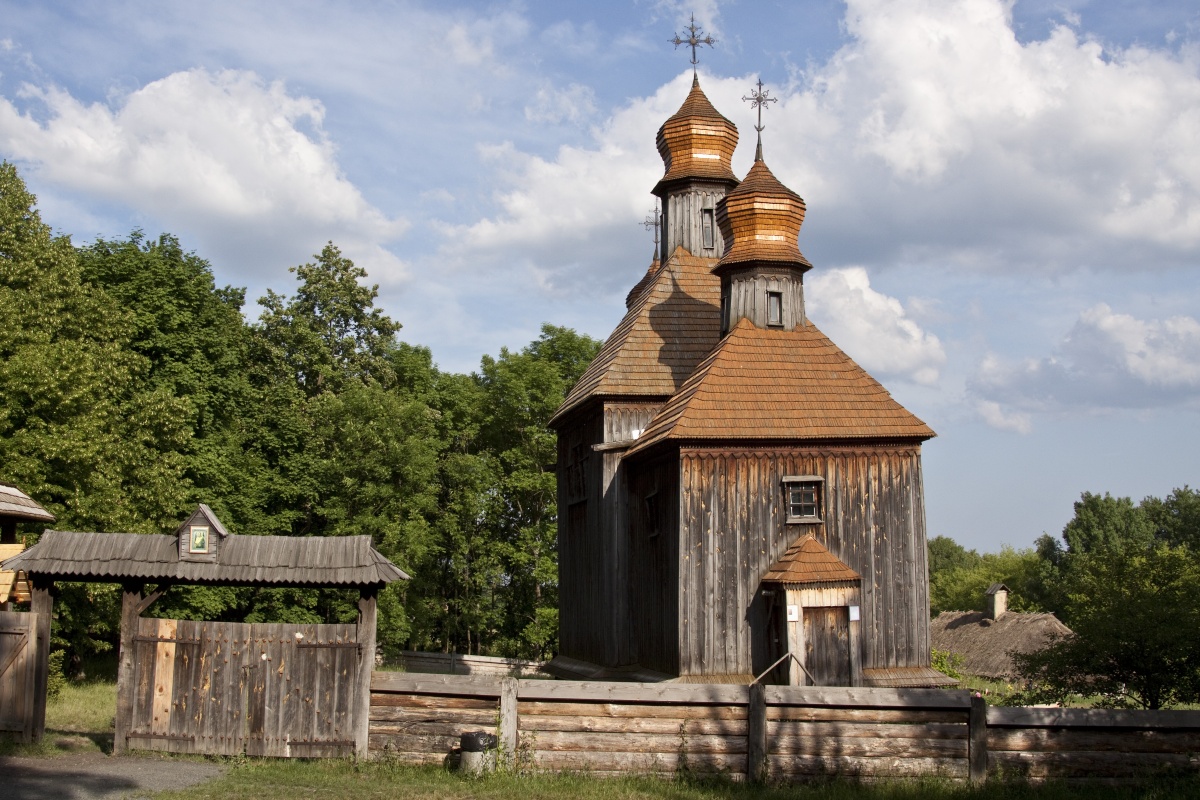
I saved this image from the web but forgot to write down where I found it or any details of the actual building, but it’s become my main reference. I also can’t currently find this picture again via GIS…anyway, it’s a perfect-sized building for my purposes and should help me get a lot of details right.
Russian Church found via Google Image Search, except I didn’t save any info on where I found the image… sorry.