

Nice simple bit of terrain I recently cranked out. I realized that the mushroom ring I built recently was nowhere near gamer-proof; it started shedding mushrooms as soon as it left my workbench so I popped the mushrooms off to rebuild the whole thing in such a way as to let me pin the mushrooms to the base with wire. More on that later, but this left me with a flocked and decorated CD base with nothing on it and it seemed a shame to waste it.
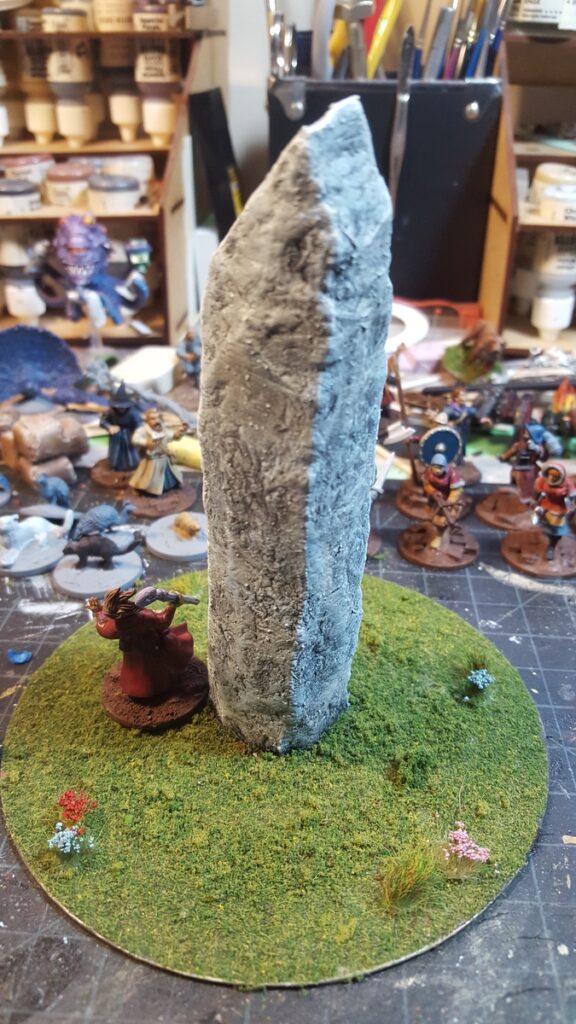
I took a scrap of 2″ thick pink styrofoam insulation, sliced off a piece about two inches wide, and craved bits off until it looks about right for a tall thin standing stone or monolith. Then I took a ball of tinfoil and rolled it all over the piece, which gives a really nice random stone texture. I put a few cracks and lines in with a pencil then rolled the tinfoil over those marks again, then glued the monolith into the centre of the CD with a healthy blob of hot glue.
Unfortunately I didn’t get a single photo of this piece during assembly or basecoating, but it got my usual mix of black paint and white glue as a basecoat, then once that was dry (overnight) it got drybrushed up with dark grey, pale grey, tan, light blue, more lighter grey, and finally white. The pale blue is subtle but makes the piece really pop, and I’ll definitely be using that on more stonework in the future.
Finally, I highlighted all the edges with pure white. It doesn’t show up all that well in the photos I’ve gotten so far, but in person that final step really makes the edges pop and makes the piece look bigger. After that it was just a bit of extra flock around the base of the stone and to cover the spots where mushrooms had originally been glued down.

The Rebuilt Mushroom Ring
As for the mushrooms, I took a scrap of 3mm plastic board, carved and sanded it so it fit onto a new CD, hot glued it down solidly, then marked out a circle and drilled a bunch of holes with a tiny drill bit. Those got overlength pieces of paperclip wire stuck into them with superglue. The wire was trimmed short after the glue had cured, and then mushrooms with holes drilled into the bottoms of their stems were superglued on.
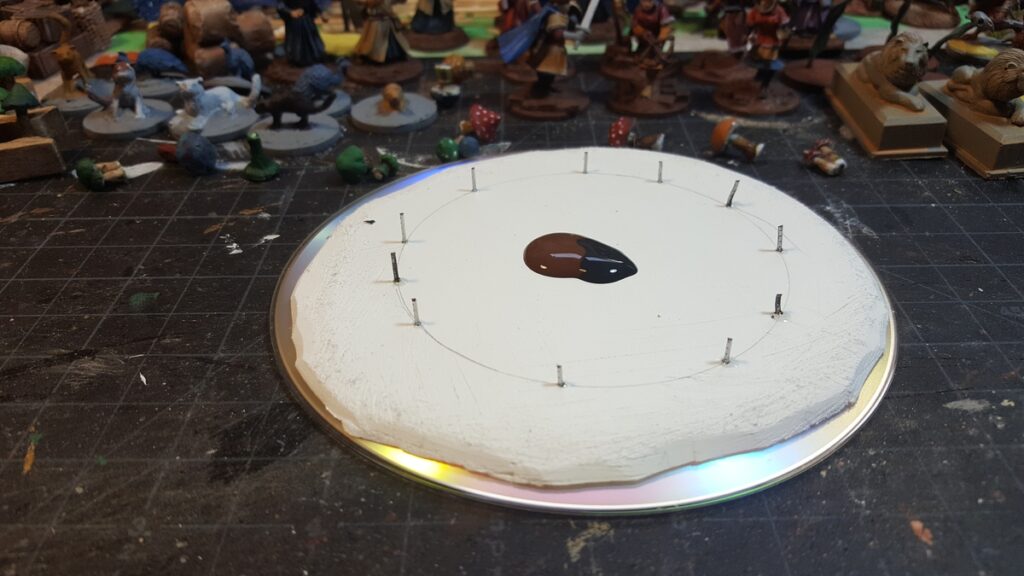
The lovely Bad Squiddo mushrooms got glued down (some got repainted beforehand, because I’ve just gotten some new shades of green paint, so why not?) and then the whole thing got my usual turf mix and will eventually get some flowers and other tufts to finish decorating it.

My Turf Mix
I had someone over on Lead Adventure Forum ask about my turf mix. It’s not an exact mix and has been changing gently over the years, but the base is Woodland Scenics mixed fine turf, with WS dark and medium green fine and coarse turf, some Games Workshop summer grass flock, and at least a couple random brands and colours I’m forgetting about in there.
That mix lives in a big 1 litre margarine tub that’s large enough to comfortably put an entire CD-sized terrain base in. For these pieces with fairly wild heavy turf on them I’ll leave the entire base in the turf mix for at least an hour or so before removing it and shaking excess back into the tub, to give a nice heavy scruffy layer of grass. For more manicured lawn-like grass, I’ll take the piece out of the tub right away and shake it off back into the tub, leaving a much shallower layer of turf.
You are right about the light blue- it really adds depth to the stone. Almost ice-like.