Almost all of my gaming is done away from home, at other houses, up at the university on the weekend (our local miniatures group takes over a classroom up there every Sunday) and at conventions. So everything has to be portable or it’s useless to me. Given the relative fragility of the White Russian SPAD, especially that damned upper wing, I needed a solid way to protect it in transit.
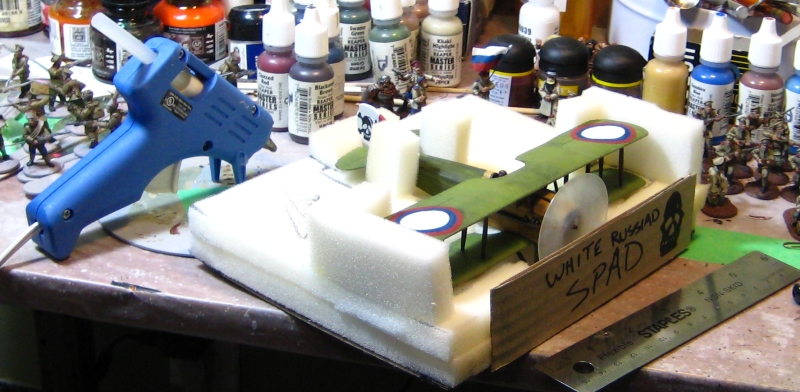
Some scrap cardboard, a dip into my stockpile of cheap upholstery foam (normally used for lining figure cases) and some work with razor knife and hot glue gun, and I had the SPAD Caddy:
A SPAD Caddy, for secure transport of my White Russian SPAD to games. Click for slightly larger version.
The base is a square of scrap cardboard, then two layers of half-inch foam with a cutout to accommodate the body and wings of the plane, and a deeper square cutout (through both layers of foam) at the front for the wheels and propeller. More scrap foam protects the tail and wingtips, and the two bits of foam forward of the tail hold the whole thing securely. The extra strip of cardboard across the front helps protect the propeller and landing gear as well as provide a convenient spot for a label.
I used the SPAD Caddy to get the SPAD and the rest of my Russian scenery and figures to Trumpeter Salute at the end of March, and it worked exactly as planned. There’s even room in my Russian Civil War scenery box (just!) for a similar caddy for the Nieuport I plan on doing for the Reds.
These are only fairly quick if you ignore the fact that they sat around for about four months half-finished before I got bored of them taking up space on my project shelf and got them finished!
Actual construction time is quite short, nevertheless, and the results are solid enough for wargaming purposes.
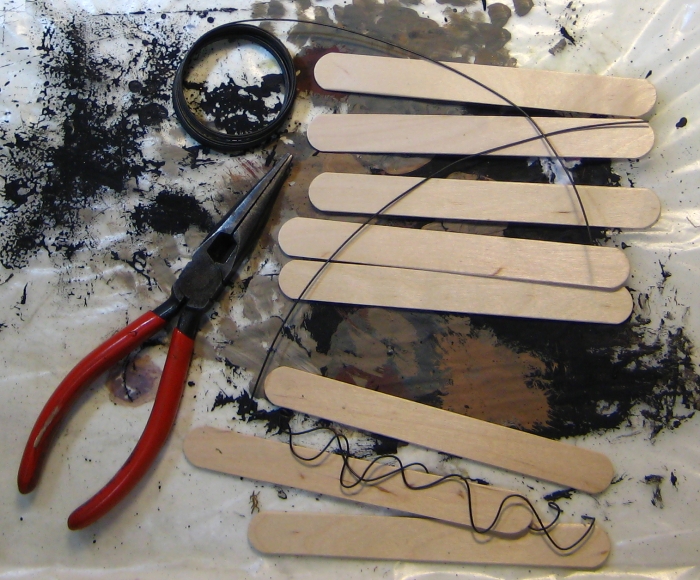
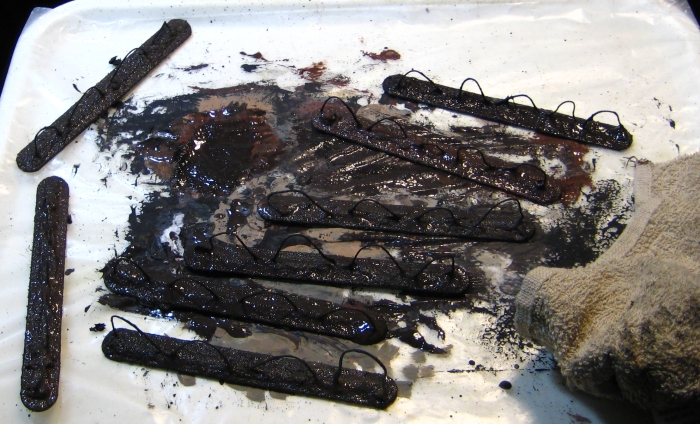
Raw materials for hedge making. Six inch hardwood tongue depressors, soft iron wire (from my local hardware store). Not shown, my hot glue gun.
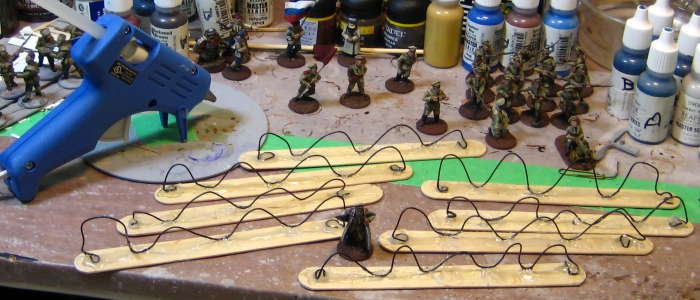
Adding wire loops, glued down with generous amounts of hot glue at the ends and where the loops touch down on the tongue depressors.
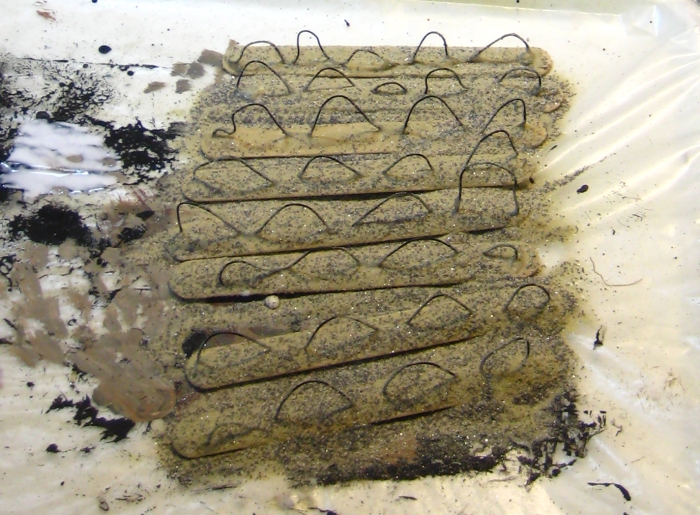
After the hot glue cools and solidifies, paint a slightly dilute white glue/water mix over the tongue depressors and the wire and dump sand and hobby gravel (or a mix of both, as I use here) over. Leave overnight to dry.
After the glue dries on the sand, paint. I use a mix of a couple shades of brown with a bit of black, and a generous amount (about 1 part in 3) of white glue to really solidly glue the sand down to the bases. Again, leave overnight to dry.
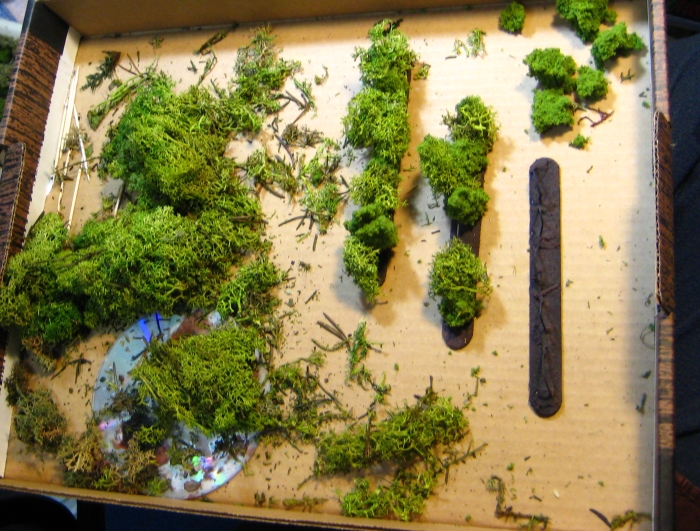
Fire up the hot glue gun again. Using a mix of lichen and foliage foam, start hot-gluing foliage to the wire “branches”. You could glue real twigs in too, or add some plastic trees to the mix if you want more height to the hedges. I’ve left this batch fairly low, they’re very roughly chest-high to a 28mm model, with some sections head-high or better and rare breaks lower than that.
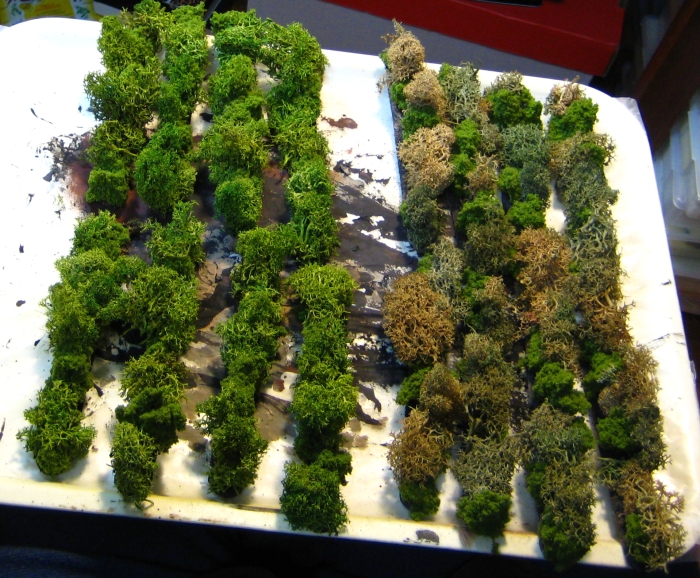
The finished hedges on the left, alongside the first batch I did on the right. Each batch is four linear feet of edge (eight six-inch pieces), nowhere near enough if you’re doing Normandy but enough for smaller tables outside of Normandy!
The Trumpeter Salute convention last weekend saw the first full outing of my Russian Civil War forces, in a scenario I called Even Whites Bleed Red. I’m a pulp gamer at heart, so a punchy, interesting scenario title appeals, what can I say?
The scenario is set “somewhere south of Moscow, sometime early in the Russian Civil War” and has a disorganized scratch platoon of Red Guard defending a hamlet from a composite company of White forces, composed of a shorthanded platoon of White riflemen and a plaston (infantry platoon) of Cossacks, lead by an energetic and capable group of Cossack officers.
I threw in my White Russian SPAD, for additional “Ooo shiny” factor and because I had the thing painted, and off we went, with two players on each side and me GMing.
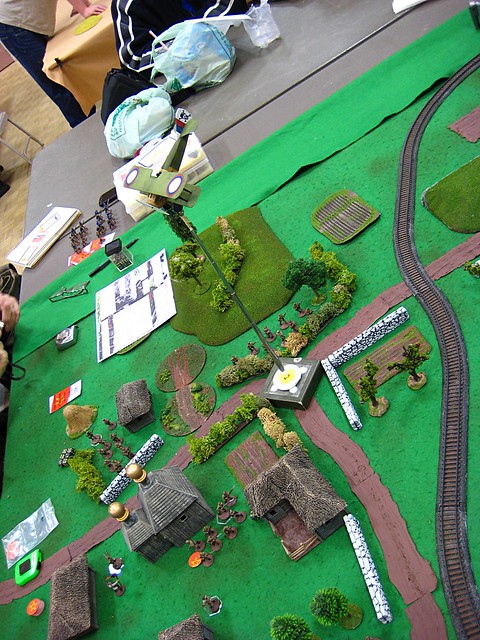
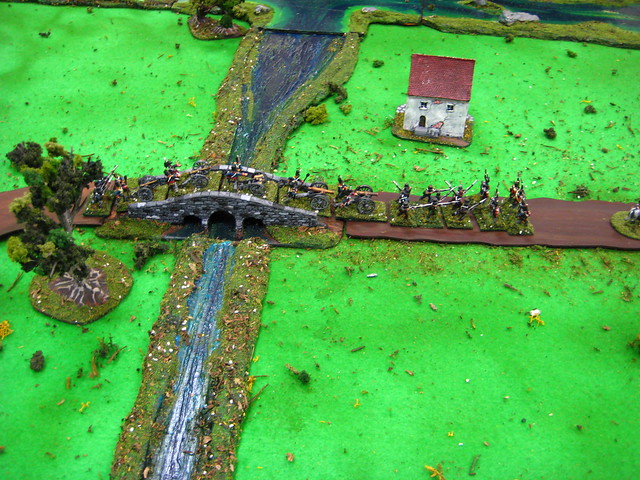
The SPAD appeared very early in the game, although never had much impact, neither strafing run doing much. Above, the plane machine-guns the Reds in the churchyard,
This game, the Reds got themselves shaken out and in position fairly quickly. They were able to get most of the Whites pinned down well outside the hamlet, and the Whites never got into position to launch more than a token assault on the place.
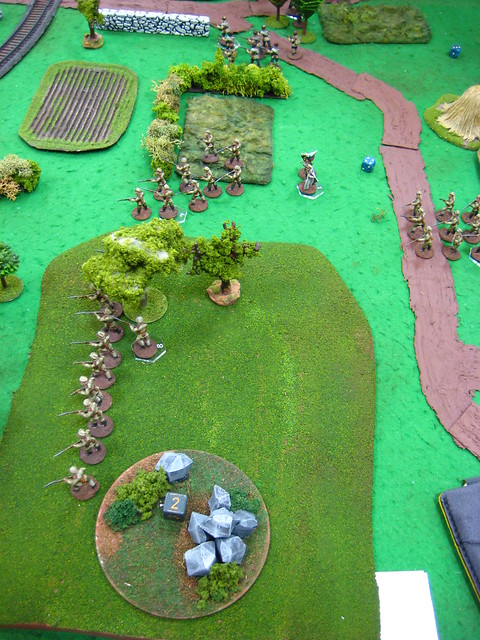
Above, the White rifle platoon advances, one section in the foreground on the crest of the ridge, the other two behind it. In the far background, one of the Cossack sections can be seen advancing. The Cossacks had far less cover than the rifles, and the White players might have been better off funnelling their entire advance up the near edge of the board, sacrificing one section to hold the flank while the rest of the composite company pressed in toward the hamlet.
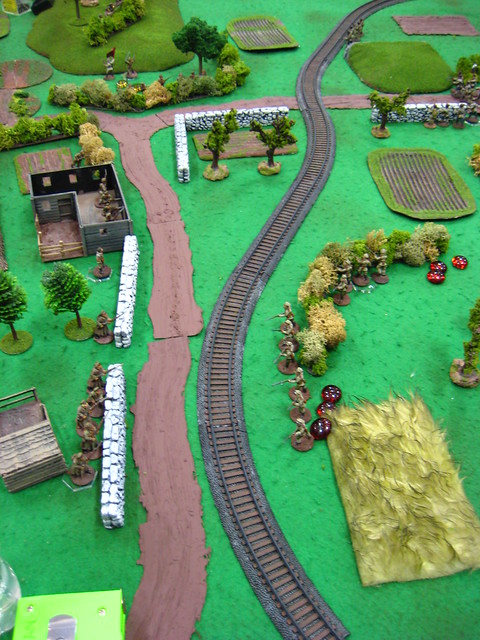
Above was the high point of the White advance, with one rifle section thrown back after attempting to storm across the railway embankment and attack the Reds along the stone wall. The Red reinforcements, one section of Red sailors and another section of Red Guard, also appeared just after this assault was thrown back, and the White players conceded the game at this point.
I’ve got some thoughts on why this game went so differently for the Whites when compared to our squirrel-obsessed playtest version, but I’ll save those for a longer followup post. Suffice to say that all four players enjoyed themselves, I enjoyed running the game, and we actually got done surprisingly quickly. Start to finish, including introducing the game to four players who’d never played it before, we were done in under three hours. Near-perfect convention game length, in other words. We could even have gone a bit longer and still had plenty of time for cleanup.
As it was, I had time to run a little demo session with a “stacked” deck to give two interested bystanders a chance to see how the Mud & Blood system worked, and get everything put away in good order!
So, Corey and I spent the weekend over in Vancouver at the always-excellent Trumpeter Salute 2012 gaming convention. We saw a lot of people we really only see at Trumpeter, played a bunch of good games and got to spectate at many more!
Corey is suffering from computer issues and hasn’t gotten his photos processed or online yet, but I finally sorted mine out this evening. You can go check out all of them on my Trumpeter Salute 2012 set on Flickr. Or you can read on for some of my favourite photos, and favourite games from this year’s version of Trumpeter Salute.
Canvas Eagles is an old standby, a great World War One air game. Rene runs pretty it much constantly at Trumpeter, and Corey and I both got into it Friday night. On opposite sides, of course. We have a firm convention rule that if/when we find ourselves in the same game at a convention, it has to be on opposite sides. That’s my Fokker Eindeker at the centre of this photo, which spent most of the game locked in a swirling, inconclusive dogfight with the very similar French Moraine-Saultier to the left. Both aircraft are very agile but not terribly fast, so we could neither outmaneuver nor outrun the other!
Colin is another Trumpeter regular, and has run a spectacular Darkest Africa game several yaears in a row now. I didn’t play this, just got a few snapshots.
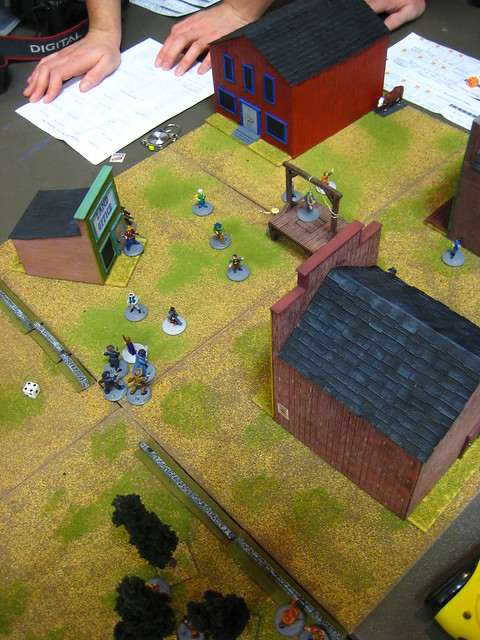
Our Saturday morning entertainment, with a friend and I attempting lead our outlaw gang into town to rescue a gang member from the gallows, while Corey and another gamer ran the Law to try (and succeed, worse luck!) in halting our attempt. Legends of the Old West has the virtue of being an uncomplicated set of rules that get out of the way and let you get on with the game. Neat scratchbuilt Old West buildings, too.
Saturday afternoon and evening are most convention’s “prime time” and Trumpeter is no exception. Lots and lots of great stuff all at once on Saturday afternoon!
My own “Even Whites Bleed Red” Russian Civil War scenario I’ll give the full AAR treatment in another post, but it went well.
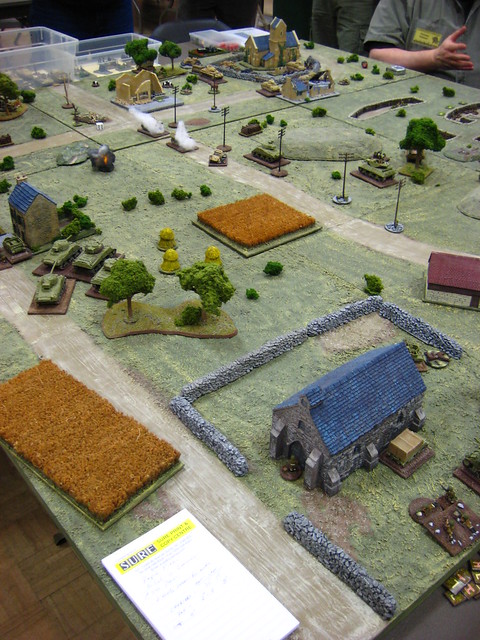
Spectacular scenery in this early World War Two Fall of France game, French vs Germans in 15mm.
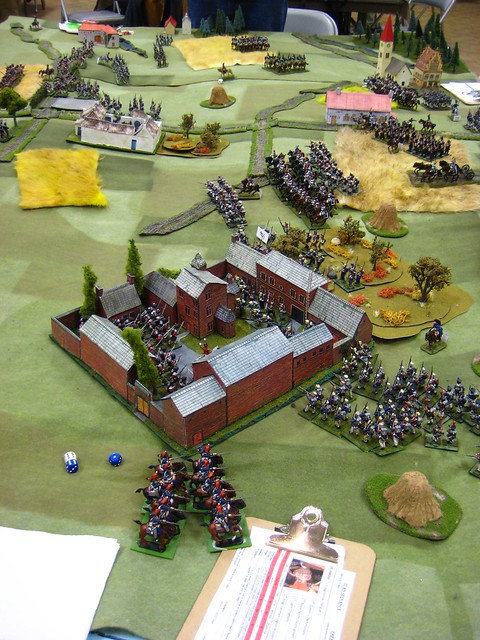
Malcolm is another Victoria gamer and friend, but this iwas my first chance to see his full, spectacular “Boy’s Own Waterloo” setup. The British even won this time, apparently.
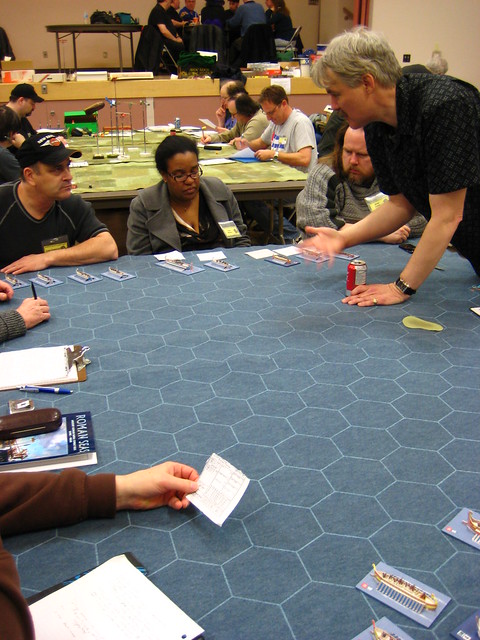
Saturday evening Eric Hotz ran his Roman Seas game, with our convoy set upon and seized by the merciless Pompey.
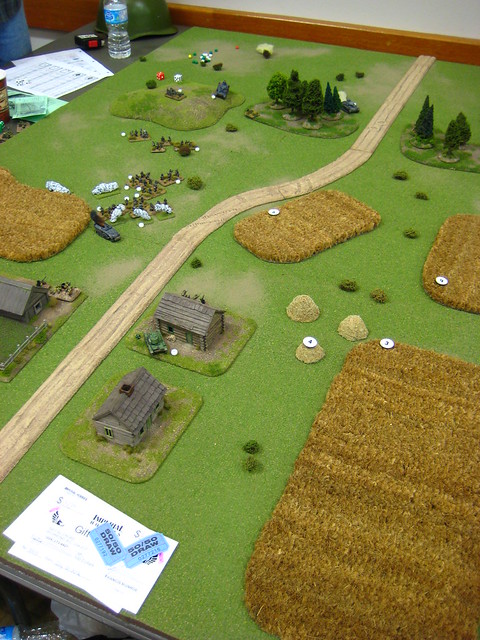
Also on Saturday evening, this elegant World War Two Eastern Front game in 15mm, showcasing new rules and some awesomely painted figures.
Sunday was a bit quieter, but Colin put on the appropriately timed War of 1812 Battle of Queenstown Heights, in which the British/Canadian forces held the Americans to a bloody but marginal victory.
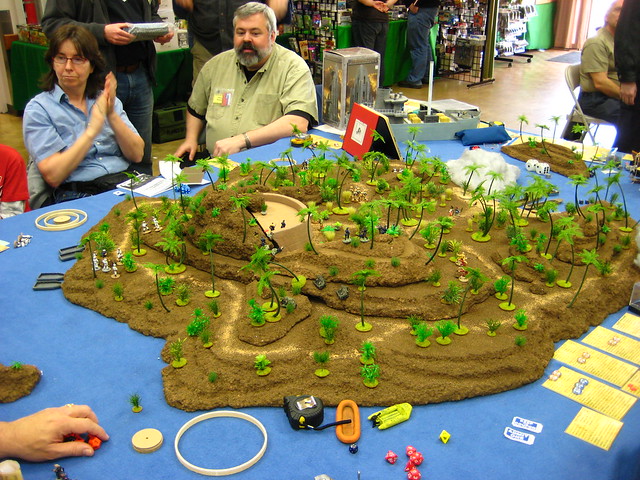
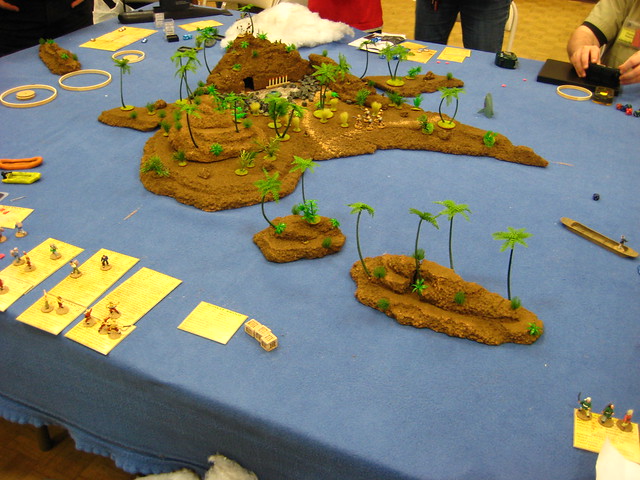
Also running Sunday was this spectacular pulp game set in the South China Sea, with various factions vying to discover the secrets of this volcanic island.
Except that volcanic islands are, well, volcanic, and sometimes prone to slipping back beneath the waves and taking their secrets with them! No need to imagine that with this game, the lower half of the island really does vanish!
Thanks again to Martin and his family for the hospitality over the weekend, Jon for transport to and from Vancouver, and the excellent organizers, GMs and other attendees at Trumpeter Salute for a great time. See you next year!
Ran my RCW game Saturday afternoon at the convention. Short version: everyone had a good time, but unlike our playtest a few weeks ago, the Whites got splattered, despite having more support and forces than the playtest. The Reds go going faster at the beginning and the Whites never had a chance to develop the momentum they had during the previous game.
Anyway, longer update and photos in a few days when I’m not blogging from my phone…
Off to Vancouver Friday morning for two and a half days of miniature gaming goodness at Trumpeter Salute 2012!
The Russian Civil War figures and scenery I needed for the game I’m running Saturday have all come together nicely, and I’ve got everything packed away for transport. Clothes, toothbrush, all that boring stuff too, with luck…
I’ve had a quick look at the convention schedule, but except for my own game, I don’t plan ahead too far at Trumpeter. There’s always good stuff running, with some reliable standbys like the near-constant 1:72nd Canvas Eagles WW1 air games to fall back on if nothing else grabs my eye. That said, I always go to conventions looking to try new gaming systems, new rules, new eras, new genres and to play with different people than the usual crowd I game with all the time!
I’ve got the WordPress Mobile app installed on my Android smartphone, so there might even be some short updates here over the weekend before the big post-Trumpeter posts sometime early next week. Hopefully I remember to take photos, even.
If you’re going to be at Trumpeter, say hi if you see me. I usually scribble “Wirelizard” on my nametag these days, because that’s become my default username online, and I even remembered to make a sticker version of my orange lizard logo (see the right-hand side of the banner up above this post) to stick to one edge of my nametag. Or just look for the Russian Civil War game in the Saturday afternoon slot and come join in! 2PM (1400) on Saturday afternoon!
I am, as mentioned in the last post, neck-deep in prep for my Russian Civil War game less than a week away at Trumpeter Salute 2012. Nevertheless, something near and dear to the very core of the Warbard’s raison d’etre needs to be linked to…
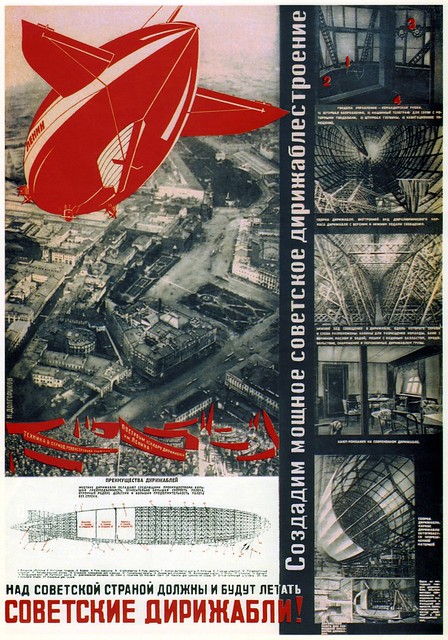
Via the excellent Dieselpunk, who in turn got it from kitchener.lord’s spectacular Flickr stream, this Red Airships photomontage poster:
I’ve long been a fan of pre-WW2 Russian design; there were some very talented people doing great stuff even in terrible conditions.
Anyway, back to final drafts of initiative cards, then painting the last 16 White Russian infantry for the game!
I’ve been house- and cat-sitting for a relative in town the last ten days, so not a lot of action here on the blog, but I did take advantage of having extra space available to get a bunch of wargaming scenery built.
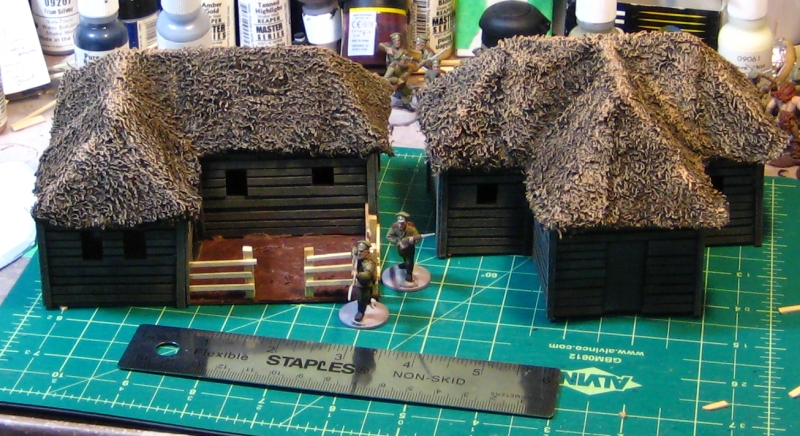
The most interesting pieces are a pair of houses for my growing Russian hamlet. The first is T-shaped, the second L-shaped with a fenced garden/yard area. Both have thatch roofs from towel; building and covering the more complex roof shapes was an interesting challenge. I even got some step-by-step photographs of the roof-building and thatching process, so expect an illustrated tutorial at some point in April here on the Warbard!
A pair of new, larger Russian-style buildings for our 28mm RCW games. Click for larger.
Both buildings have a 5″x4″ footprint and are about 3.5″ to the peaks of the double-hipped roofs. Unlike my earlier church, these two have doors or windows on all sides, so they’re potentially tactically useful instead of just being a line-of-sight blocker like the church.
In addition to the two buildings, I built two large hills (which can butt against each other to form one long ridge) and a smaller hill. I’ve needed more hills for ages, so it was nice to get these made finally. No photos of them, I’m afraid, as they’re buried in the bottom of one of my scenery boxes at present.
I”e also got about about ten new pieces of scatter terrain in progress, not all of which will be ready for my Trumpeter Salute RCW game in ten days, but I hope some of it will be. Photos of that as time allows in the countdown to Trumpeter!
We had an excellent Russian Civil War game using the TFL Mud & Blood rules Sunday afternoon. More people than I’ve seen in a while up at our gaming club’s Sunday meet but for a lot of folks it was a day to socialize, do a bit of painting or figure prep or similar – the RCW game would up being the only full game running.
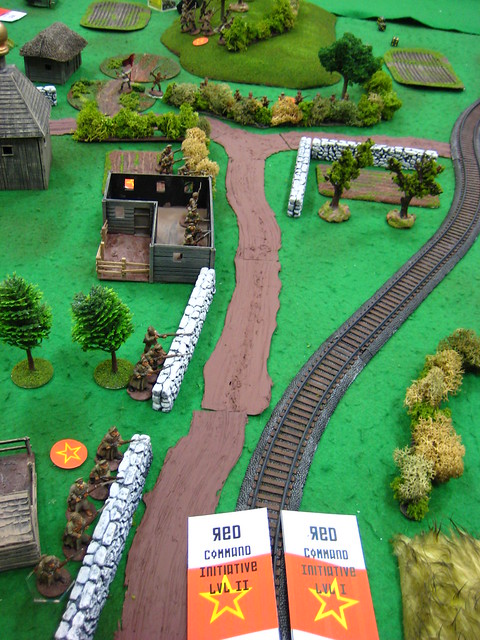
Red defending the village at the start
I acted as referee/gamemaster, and three of the four players had never played Mud & Blood before. We still finished the game in under three hours of play and everyone apparently had a good time, so that was all good.
Whites advance
The scenario was fairly straightforward, with a disorganized Red force defending the outskirts of a small village from a slightly larger but much better led force of White Russians. Continue reading Reds, Squirrels, Whites and Others→
Bit of a quiet week here on the Warbard. I’ve been burning up all my available hobby time painting Russian Civil War figures. There’s two dozen Cossack infantry finished, another three dozen regular White riflemen nearly finished, twenty Red infantry in progress, and a new unit of ten Red sailors well underway. Yes, if you total that up, it’s nearly 100 figures, all 28mm. I’ve been a busy chap. There’s six or eight half-written articles in the Drafts queue here on the Warbard, but I haven’t touched any of them in days!
Nevertheless, a short Saturday evening diversion from the painting table… we are well known to love zeppelins here. We have to bow down to the gentleman featured in this Popular Science article, though. (via Bayou Renaissance Man, who has more photos)
Even better? By my quick admittedly rough calculations, a 20ft-long model of the USS Macon is roughly 1:56th scale, ie 28mm… the gentleman in California has created a wargaming model, possibly without knowing it!
Tomorrow we game the Russian Civil War again using the Mud & Blood rules, photos and a game report tomorrow evening!