Trumpeter Salute, the best annual miniatures convention on the west coast of Canada (sorry, Gottacon. Your relentless focus on GW turns me off) is happening again this weekend and I am again reminded of why I come to conventions: to be inspired.
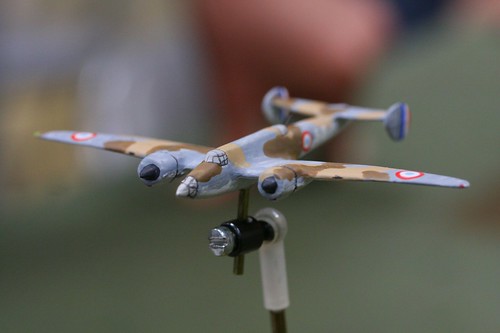
This evening found both Brian and I playing aerial games, although he had considerably less success with his World War One 1/72 than I did in Leviathans, where I fairly handily destroyed a British aerial cruiser and destroyer. Our third member, recovering GW player Sean, was evolving. Or something involving tails. I didn’t ask.
And the spending has begun. I picked up some Saxons for my eventual Dux Brittanium, Sean some ECW/30 Years War and Brian also managed to spend a great deal of money. And we haven’t even hit Pulp Miniatures yet.
But now, pictures:
Leviathan cruiser on cruiser actionGerman World War One aircraft, 1/72 scaleBritish World War Two aircraft, 1/300 scale
More photos tomorrow, including of Brian’s RCW game.
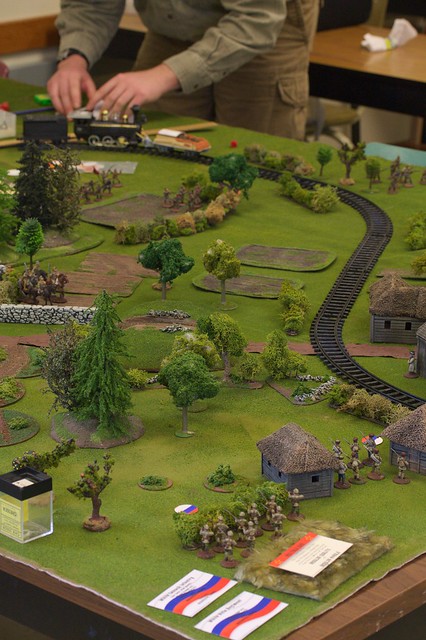
In a cavalcade of firsts this Sunday, my (mostly) freshly-painted Chinese met their match in our new armed train, all being played on our new gaming mat, some 6′ by 9′ of fully flocked canvas drop cloth.
The game, a preview of Brian’s Trumpeter Salute convention game, was the defense of a small Russian town by a combined White and Chinese force. Thankfully for the Whites, they had managed to scrounge up a field gun plus a machine gun. The wealthy Chinese warlord Wu Do also brought one along to the party. Facing against them were a large Red force, including the newly-built armed train and the armoured car.
Opening shot. Red armed train the back, Whites in the foreground. Chinese are out of shot to the left.
Due to a lot of luck, the Chinese ended up being the central troops in the game. They had lots of officers and their cards kept coming up, so they quickly occupied the central building and started taking fire. Another squad rushed up a hill, only to discover what happens when a HMG opens up on you when you cannot respond.
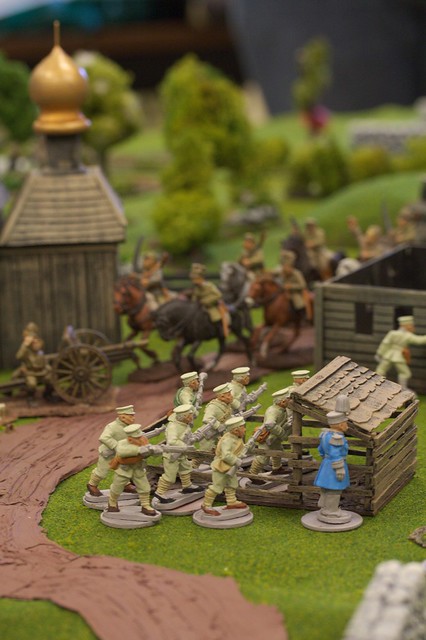
The maddest moment of the game came when Sean’s Reds cavalry attempted to run down the White field gun. The gun was right in the middle of town, which meant that his close assault was rudely interrupted by two squads of Chinese, including the Warlord’s aggressive Household troops. This did not end well for the Red cavalry, which were slaughtered to a man (and horse).
Red cavalry attempt to run down the White gun. Chinese infantry and Wu Do in the foreground.
By the end the train had done its job and had cleared a route into the town. We called it when it became clear that the Chinese would retreat (having no interest in defending this particular muddy bit of Russia to the death) and the Whites were too weak to hold back the largely untouched Red infantry (even if they couldn’t move due to bad card luck.)
(As usual, we used Through the Mud and Blood from Too Fat Lardies. An excellent rule set all ’round)
Brian and I avoid most post-WW2 gaming as a general principle (we just don’t find it all that exciting) but the one part that holds any interest for me is retro-future post-Apocolypse ala Fallout. Given I am a sucker for cars, I picked up these two on a lark during one of my many runs to the second-hand store. They have been completely repainted. Enjoy!
Front of the two ’59 CadillacsRear of the Cadillacs
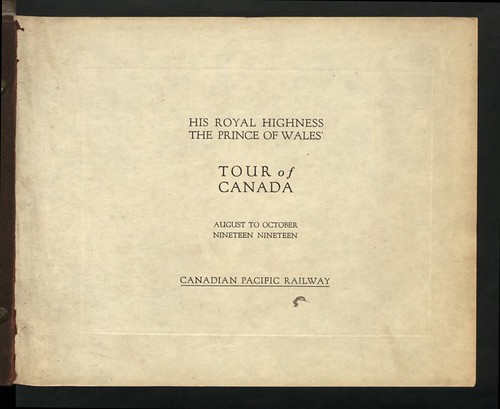
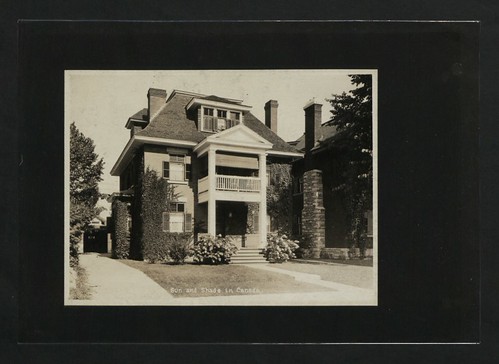
In commemoration of Canada Day, our former colonial masters have found some pictures of that place formerly known as their colony of Canada and very kindly shared them with us via flickr.
Brian already gave a nice little AAR of our last game, but I thought I would make it a little interesting. Sadly my primary machine has been on the fritz for a bit now, so photo editing is a slow process (I own a Canon 40D and shot in RAW). But given I just bought a new 60mm macro lens, I figured I just needed to share:
Early in the game, the Red armoured car:
The Red armoured car
My Lledo truck with Brian’s armoured car and Model T in the background, about to unload Red Sailors:
Red trucks before unloading sailors
…who promptly get chopped apart by my White cavalry.
The White cavalry runs down the Red Sailors
The White baggage train (my Copplestone Yaks and Brian’s White infantry), right before…
The baggage train
…the Red armoured car chopped with up with its twin machine guns. It was ugly.
The Red armoured car and infantry
The end result fo the game is that we each massacred one part of the other force, but I got the General off, so a (very) minor White victory.
I have some Copplestone Chinese on the painting table, so soon we will have a fourth side
Enjoying the now-disappeared sunshine that we had here a week or so ago, I went for a bike ride and came across a fairly common sight in any city: boxes of stuff left on the curb. These boxes were of a slightly different breed. Rather than the usual pile of broken student stuff, these looked awfully like my grandfather’s basement once did. My curiosity led to me root around a little, and lo did I find but this: A blank telegraph form from around 1931.
Front of the TelegraphBack of the telegraph
(I have the full form scanned at 300 DPI but it is more than 50mb large in that size. The above images are smaller but still at 300 DPI)
Dating is a little hazy, but I surveyed the few others I could find online. These facts quickly became clear:
1. Canadian National Railways (parent of Canadian National Telegraphs) came into existence in 1918 but didn’t truly exist as a railway until when they took over Canadian Northern Railway in 1922, who had previously taken control of Great North Western Telegram. Notice the similar logo?
Great North Western Telegram after the 1917 Halifax Explosion.
2. W. G. Barber was appointed General Manager at some point in 1923 or 1924. Canadian National Railways Systems 1923 Annual Report listed C. E. Davies as Acting General Manager, Telegraphs, and the 1924 report lists W. G. Barber. (All can be found on McGill University’s excellent Canadian corporate annual reports)
3. The 1930 Report is the last to list Barber as General Manager, but the 1931 is missing the executive list and by 1932, D. E. Galloway is now listed as Vice-President in charge of Telegraphs
4. Also in 1924, CN acquired some telegraph lines here in British Columbia. This is likely what led to the advertisement on the bottom of this form
5. In 1926, the form looked almost the same (source):
1926 Canadian National Telegraph Form
6. However, by the 1940’s the form cited D. E Galloway rather than our now forgotten Barber (source): 7. All of this lead me to the holy grail: an identical copy of the telegram form I have (source):
Always looking for interesting new miniatures, I stopped at one of the local gaming stores the other day, Curious Comics, and I saw these deer and I just had to have them. Not only am I looking for obstacles for a racing game that I am designing (road pieces are on the way, inspired by this Lead Adventure thread), but at my work I am currently working on deer management.
MegaMinis deerMegaMinis deer
These particular deer are part of MegaMini’s rather large animal range, some of which you can in their Animals catalogue (PDF). You get five animals, one buck and four antler-less animals. The Megamini’s catalogue claims that the feeding animal is the doe while the smaller one are fawns, but the size difference really isn’t large enough for me.
Buck and does.
Given the inconsistent quality of MegaMinis, these deer are pretty good. The castings were quite clean and the two-piece buck fit well together. Their size is pretty good for deer too, although their large bases make them quite tall once you place them on a 1 1/4″ washer like I did.
Lastly, this allowed me to try out my new Canon 60mm macro lens for the first time, the results of which you can see below:
Always interested in a new gaming system and being pen and paper roleplayers, Brian and I have been playing a little bit of Songs of Blades and Heroes recently. Like many of our gaming experiences, this one has been long delayed in coming but it was well worth the wait.
Our first game was a wonderful and thoroughly-illegally built three-way match involving two groups of Orcs and my Reaper Mouselings, his Dwarves and my Mouselings have had it out. The game is interesting and fun and very fast (we played three games on an hour and a half ferry ride) but has a few weak points.
Our current warbands are both tricked out minimum figures, maximum damage warbands. Neither has more than 7 figures, each worth at least two dozen points apiece. Hordes of zombies these are not. My mouselings have half their 300 point standard warband allotment between my mounted-on-an-owl, magic-using leprechaun leader, Shamus O’Reilly, and his familiar, Mossy, a captive stone golem with shooter(medium) and combat 5. Brian’s dwarves are just as nasty, with the two flanking dogs and a leader with Quality 2 and Combat 5.
A note about the game: In order to get units moving and fighting, you need to score successes by rolling at or above the quality on a d6. Combat is a simple oppposed d6 + Combat Value + modifiers. Lower Quality scores are better, higher Combat scores are better.
The game itself plays well, with some bad break points. Specifically, magic-users are useless as ranged combat figures, but deadly when they transfix. Combined with Mossy’s powerful combat and throwing ability, this gave my team a one-two killing “punch” that was hard to beat. Add in the dwarves (and mouselings) short-move and you can see where it will go wrong quickly. Where the dwarves beat me was when they were able to get their dogs around into my magic user (only combat 2) and made him move did things go badly.
And then there was the rout. Or maybe I should say “The Rout.” Brian apparently cannot roll combat rolls. I cannot roll quality checks to get people moving. These two phenomenmom manifested in one game where I never made it more than one or two short moves away from the table edge (basically less than 4″). When Brian got my leader to book it off the table, this triggered a morale roll every other warband member. Which I failed. And so my entire warband ran off the table. In a single turn.
In sum, we do enjoy playing the game, but I am not certain if its simplicities truly make me happy. We need to try some different warbands, including zombies, skeletons and cheap soldiers and see how that works.
And where are the pictures? I haven’t taken any and Brian didn’t either, so no pictures for all of you. Besides, we were playing with basically no scenery on a cafeteria table for most of our games, so they wouldn’t have been great photos anyway…
And so the day began, much like the day before it, but with the promise of relief. Dust clouds had been seen along the road toward the main force, maybe the good Colonel could see fit to send us some more men. Yesterday’s fight was bloody but at sundown, we still held the hospital, if only just.
-Memoirs of the Zulu War, Col. Reginald Heathe (ret.), commander of the Royal Oak Bay Volunteers 1875-1891
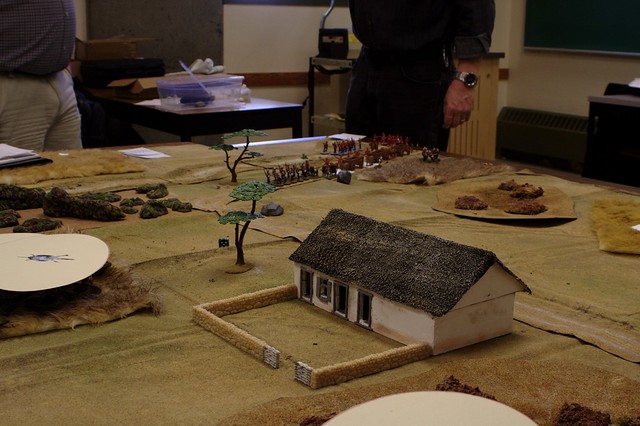
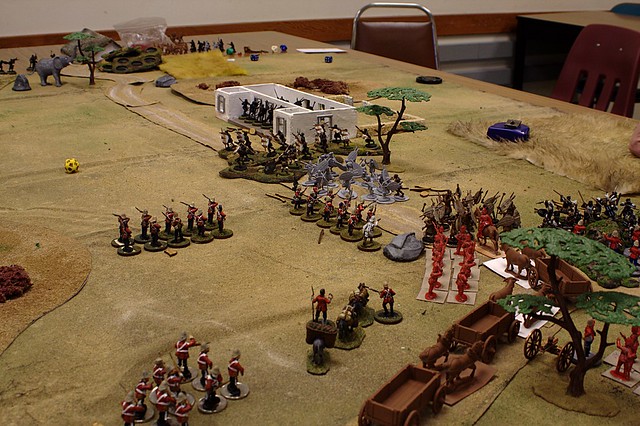
Sunday marked our second Zulu War game, the first to include figures from all five players who have bought in (myself, Malcolm, Dale, Bruce, and Nathan). Also debuting this game was my hospital, built on an imperial-ized version of Matakishi’s detailed plans.
In the beginning, the calm
The back story I concocted for this game was that my Royal Oak Bay Volunteers had found themselves under siege yesterday and had narrowly carried the day, but were holed in the hospital and required relief. This explained my single company on the table (my remaining British and Zulu are unbuilt). A large relief column was moving towards the hospital in an attempt to relieve it.
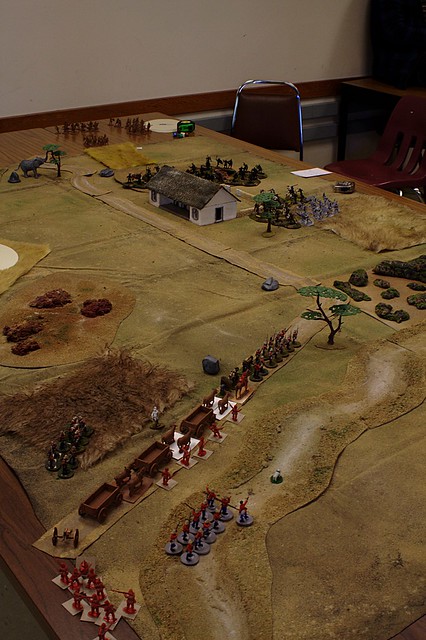
Zulus advance on the hospital
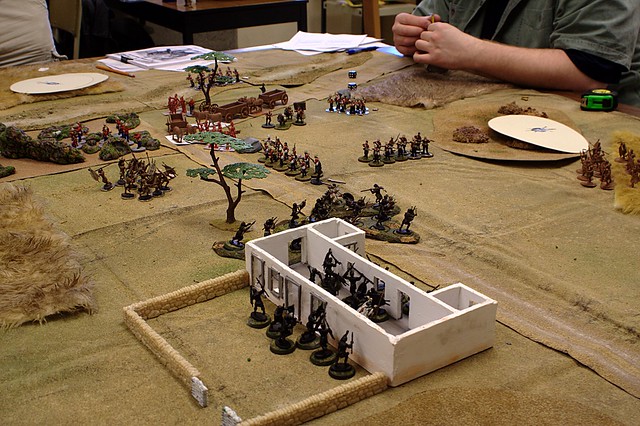
It all began well enough. Zulus appeared at one of six random locations under a blind, usually two blinds at a time. Luck meant that most of the blinds started in one of the two locations nearest the hospital, representing the forces from the day before coming back. The column moved slowly, but ground towards me. As our Zulus are “AI controlled”, the random stance they choose was to stand back and fire their muskets and chuck their spears against me. All was well, the Royal Oak Bay were holding.
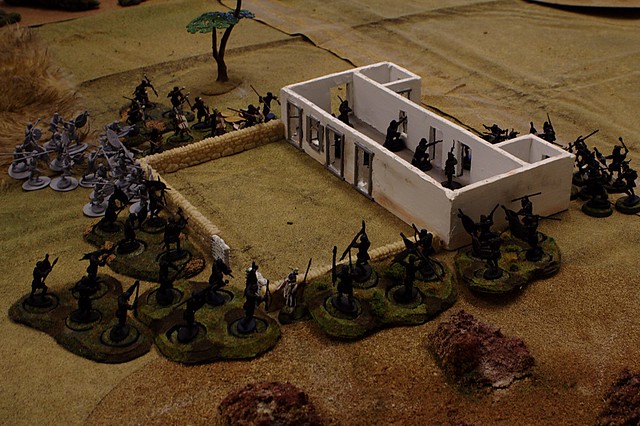
Completely surrounded
At this point, it all went off the rails. The relief column got bogged down in heavy terrain and by the time any numbers of them could have arrived, Zulus were already attacking the front of the wagon train, leaving the Royal Oak Bay all alone. And then the Zulu’s charged. Given the difficulties both of us had in scoring any hits through the windows and doors, I lasted a surprising long time, outnumbered and worse in melee than the Zulu.
Skirmishing across the front
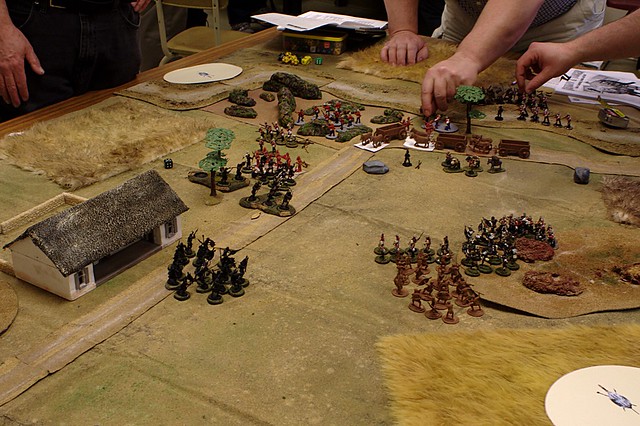
The hospital falls
The action was hot and close. The Zulus pressing on all sides of the hospital, finally testing their spears against our bayonets. With many doors and not enough men, I was forced to step straight into the breach, holding the door nearest our relief. I parried their spears thrusts with my saber, finally driving them back. I could see the relief column, but it appeared swarmed under with Zulus. As I turned to give encouragement to my men, I saw not a single standing red coat. What I saw instead was a wall of black Zulu warriors.
– Memoirs of the Zulu War, Col. Reginald Heathe (ret.)
Attacking from three sides
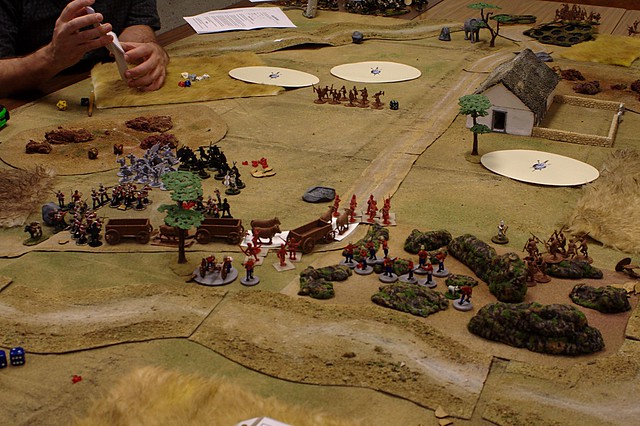
With the hospital fallen, the Zulus ground the British back, forcing them to retreat inch by inch. More Zulus appeared in the right flank of the column, but those Zulus discovered the pain of a gatling gun.
Up close and personal, with spears
By nightfall, the British were tired and bloody. They retreated in poor order, leaving the hospital and this part of veldt to the Zulus for a little while longer.
In the end, there are still more Zulus
As with our last game, we used Triumph and Tragedy, albeit heavily modified. Besides the aforementioned AI Zulus, the action is driven by cards which specify a certain command, either for the British or the Zulus. These include the basic T&T Fire, Fire and Move, Double Move, but also Zulu Charge, Zulu Command (which may change their tactics), and Hordes of Zulus (which puts new blinds on the table). In an effort to bring an end to the game, we decided that each player that had Zulus could lose up to four groups before they could bring no new groups on. Still, with over 250 Zulus between the four, we still didn’t end up with all the Zulus on the table at any one time.
All in all, an enjoyable game. Our rules are still in flux, but they appear to producing a good result. Now we just need to win. There are a few pictures that haven’t been seen here, they can be seen in my A hospital unrelieved Flickr group.
Well, dozens at least. We have recently decided to start down the Zulu War path, but haven’t made it very far down that path. In fact, I think we made it about 1/4 across the table today, our first Zulu Wars game.
As my Warlord Games figures have not yet shown up, we were quite light on the troops. I borrowed the 4th Coy of the 14th Fernwood, Malcolm ran his 3rd Coy, Bruce had a wagon train, and Dale another unit of infantry and a gatling gun. We pretty much all died.
I got to lead the whole day, an “honour” for which my slain commander, Captain Bromhead, scored our first Victoria’s Cross. At first, the Zulus were just a hazy sight in the distance (made hazier by Bromhead having lost an eye in the Indian Mutiny of 1857).
Zulus in the distance
However, the Zulus very rapidly became not-so-hazy. Very distinct as a matter of fact. They were kind enough to remain at a distance, allowing me to very sportingly shoot them. (Later arrivals weren’t nearly so accommodating. Hence the VC.)
Zulus in the rough
Bored at being out of action, our gatling gun decided to go and discover some Zulus via running to our extreme left flank. Shortly Zulus were discovered, and sent packing. The Horns of the Buffalo card meant that “sent packing” actually meant “gone to get their friends.” Amusing result on the right flank was a herd of cattle. Horn of the cattle more like.
Battle is joined
The left flank went from “Gee, I don’t think they should be all the way over there” to “Oh crap, we are overrun” in very short order. Colonel Spiffer, shiny white uniform and all, quickly found himself surrounded. Being a hero, he was able to extricate himself. Our gatling gun, on the other hand… Let’s just say that rumours of the Zulus using a gatling gun a month later are totally untrue. Slanderous treason, in fact.
(Nearly) surrounded
All this action to flank quickly evolved into action across the entire front as Zulus, hot off their success against our gatling gun, attempted a front assault. Flesh was pressed, personal details (and bodily fluids) were exchanged, and everybody got screwed in the deal.
Completely engaged
In due course this wave of Zulus was sent packing, but the next wave sent both my brave 4th of the 14th, and Dale’s scurrying for the rear. Which leaves only the 3rd to hold the line. I think the next two pictures tell the story.
Near the end now
The end now
And so ends our first action of the Zulu War. We can only hope that better painted troops will fare better (although that is likely to hold true for the Zulus as well).
Our rules are based very loosely off of Triumph and Tragedy (from the superlative Lead Adventure forums) with a great deal of rules changed. First and foremost, we ran our Zulus as AI-controlled with dice to determine action. There are many on the fly changes to the modifiers, as we sought to get the right “feel”. We also changed from i-go-you-go to alternating half-way through, again to test rules.
We also experimented where the overall commander, in this case Malcolm, handed out two order cards (from the standard T&T deck) to each player at the start of each turn. This led to a lot of jockeying for a specific card, especially as our situation became more desperate.
Figures are mostly Warlord Games, with some Empress, Wargames Factory and Essex. Terrain is a mixture of mine and Malcolm’s.


 surrounded")


