
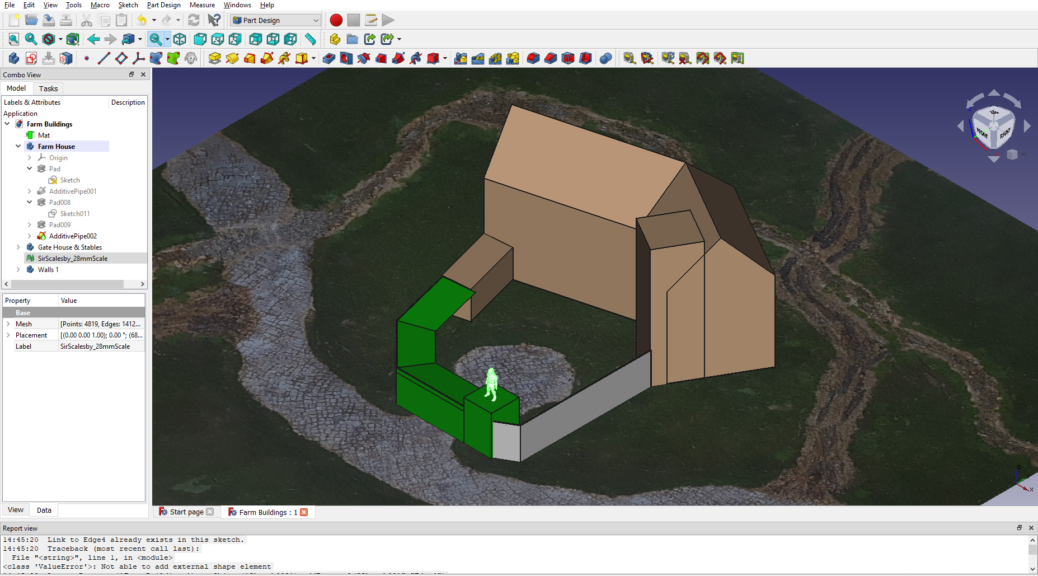
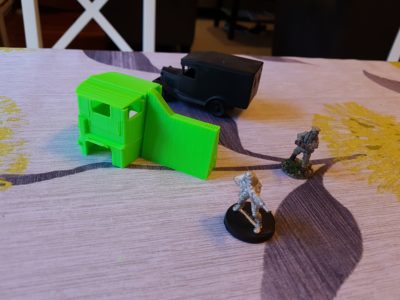
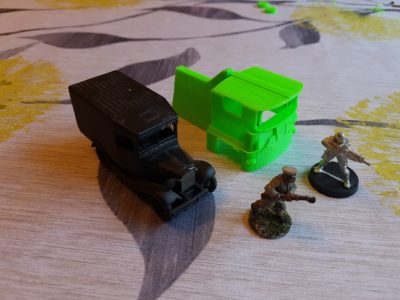
Each year Lead Adventure forum runs a Build Something Competition, each with a theme. Brian and I have participated 5 times at various points in the past years. So with 2022 here, I figured it was my time again.
Continue reading An entry for Lead Adventure’s Build Something Competition 2022 – a farm!All posts by Corey Burger
Necromancer necro-d, a Sellswords & Spellslingers adventure
We’ve been playing a fair amount of Sellswords and Spellslingers, a fairly light coop fantasy skirmish game. I picked it up on a lark, as I wanted something different it looked fun. Years ago Brian and I played a fair amount of Song of Blades & Heroes by the same author, which is a competitive, fast-play fantasy skirmish ruleset. You can read about one of our games many years ago here:
We recently we played through the Necromancer in the Tower scenario, something we’ve tried and failed before. Be warned, SS&SS can be a brutal game and losing your entire team is not unknown.
This scenario is pretty simple – fight your way through to the necromancer in the tower, kill them and then fight your way out. Like all SS&SS games, the game begins with a few foes scattered throughout the map, some deployed as hordes and some individually. To makes things interesting, I pulled out some skeletal dinosaurs I found a few years ago and meant to turn into museum exhibits for pulp but never did.
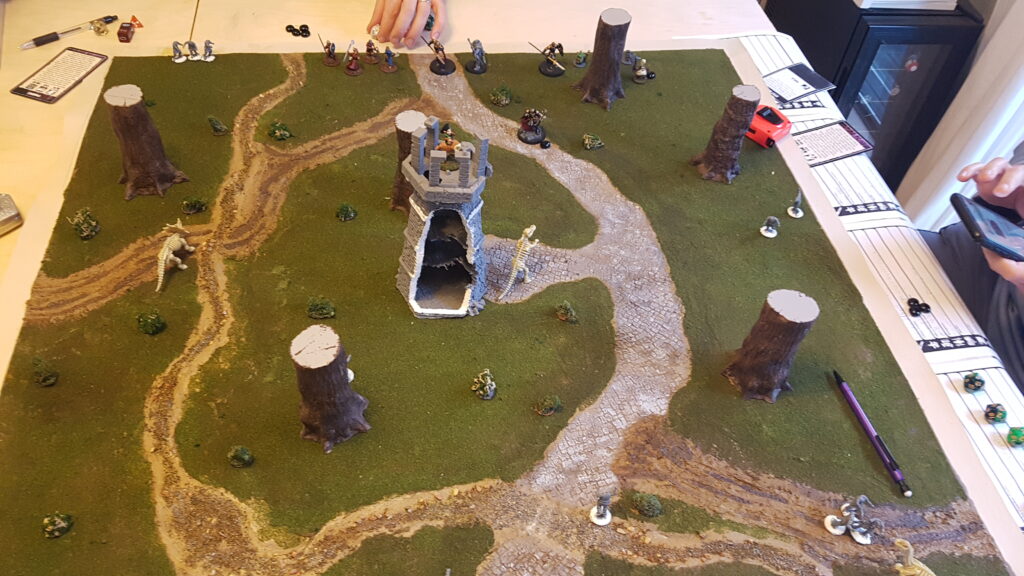
The game opened with the three dinosaurs nicely split across the board and us on the road into the tower. Early turns had us pick off the straggler skeletons and make good progress towards the tower. It looked to be going swimmingly, save for Brian rolling a 1 with his wizard, putting him out of magic. Which is where things go wrong.
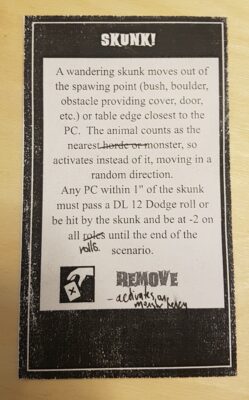
We run a custom event deck, one that takes a few of the monster spawning cards and adds a few new monster moving cards. One of which is Target on your Back. It causes the nearest non-Minion foe to target that PC to the exclusivity of anybody else.
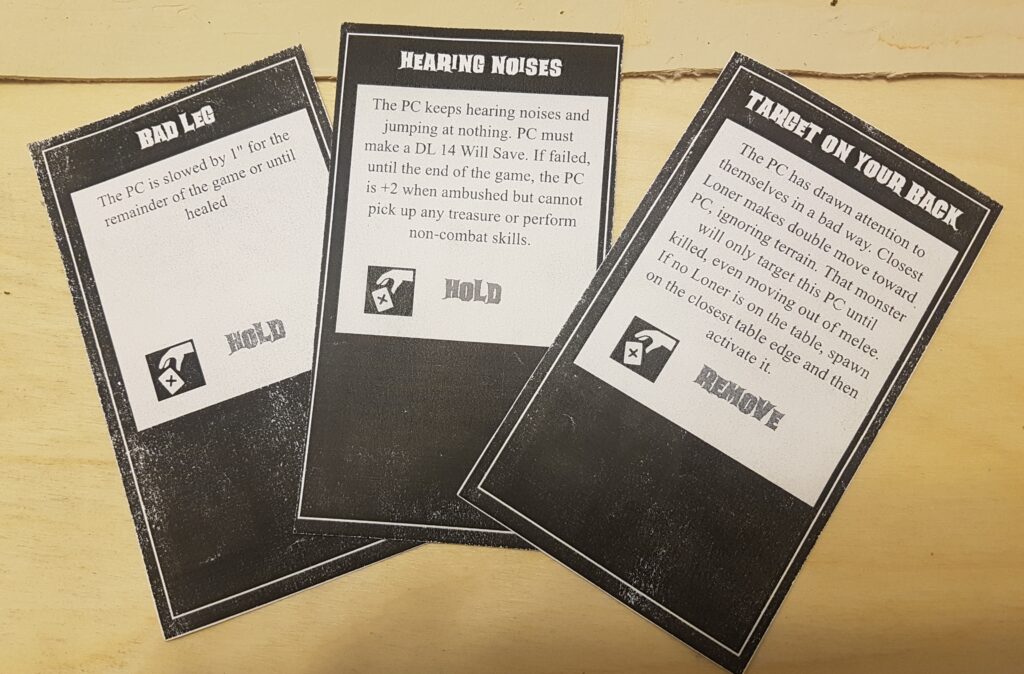
This card has caused chaos in previous games – a bear ran across the table, the PC it was attacking ran off the table, so it promptly killed two other PCs in revenge. In this game, it was no different. In two turns, the ceratops charged pretty much all the way across the map, attacking my main character, the wizard Green Hat. Who promptly went down, followed by my bruiser fighter, Mohawk. And then one of Brian’s figures. Here is where the necromancer’s ability to save their undead came in – the ceratops saved 3 different hits that would have killed it, each by a figure that later died by its horn.
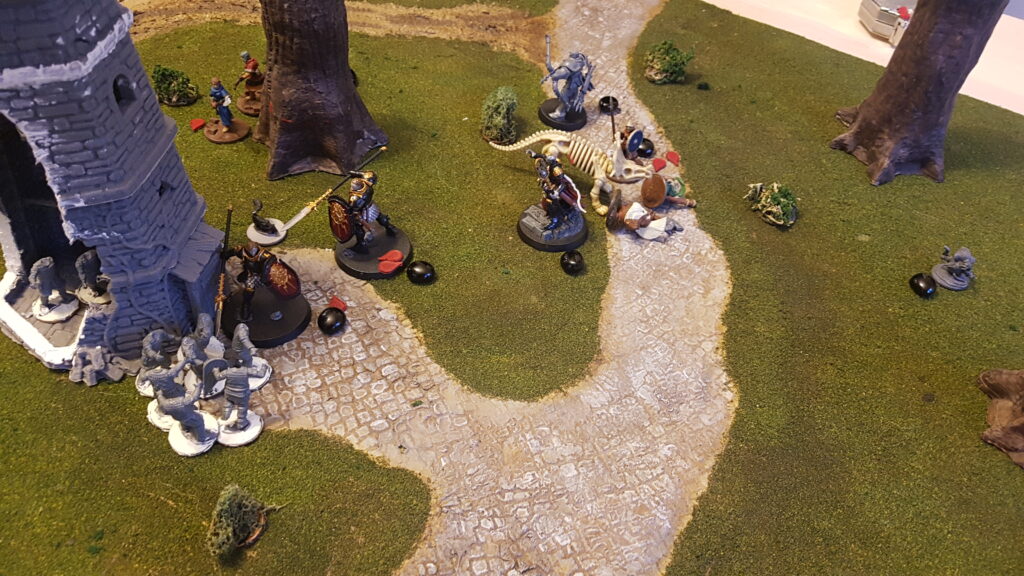
At this tense moment, nobody could really help me, as Sean was battling 12 skeletons in and around the tower, a merging of about 4 hordes of them, some in the tower, some outside. And Brian’s PCs were pinned by the skunk, a wandering monster that while it can’t harm directly, can you make you smell real good.
Thankfully a few targeted ranged attacks took out the necromancer and with it, most of the skeletons evaporated. And then the ceratops finally went down, but not before doing a lot of damage.
All in all, a fun game and while lethal, we actually managed to succeed, unlike a decent number of our games.
Game Details
We were running 80 XP parties, with Sean and Brian each having four figures to my 3. Each of us had a spellcaster and a ranged figure.
Stats for the Dinosaurs
All the dinosaurs were run with the following:
DL 14 HP 4 DMG 2
All had Bony Undead as per the Skeletal Warrior card – which makes them harder to hit by arrows and easier by crushing weapons (which apparently none of us had)
- Brachiosaurus
- Tail Sweep – everybody with 1″ takes DL 12 attack or falls prone
- Trample – everybody in path of moving is attacked
- Centrosaurus
- Gore – when charging, DL is 16 (as per Greater Minotaur)
- Hadrosaur
- Trample as per above
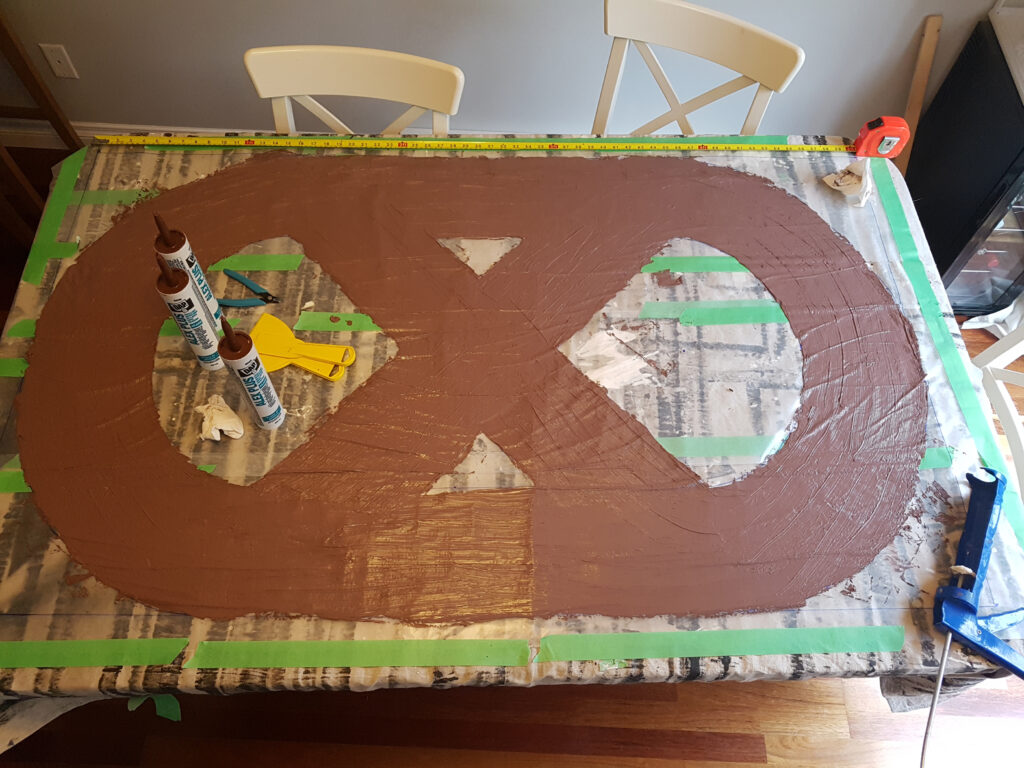
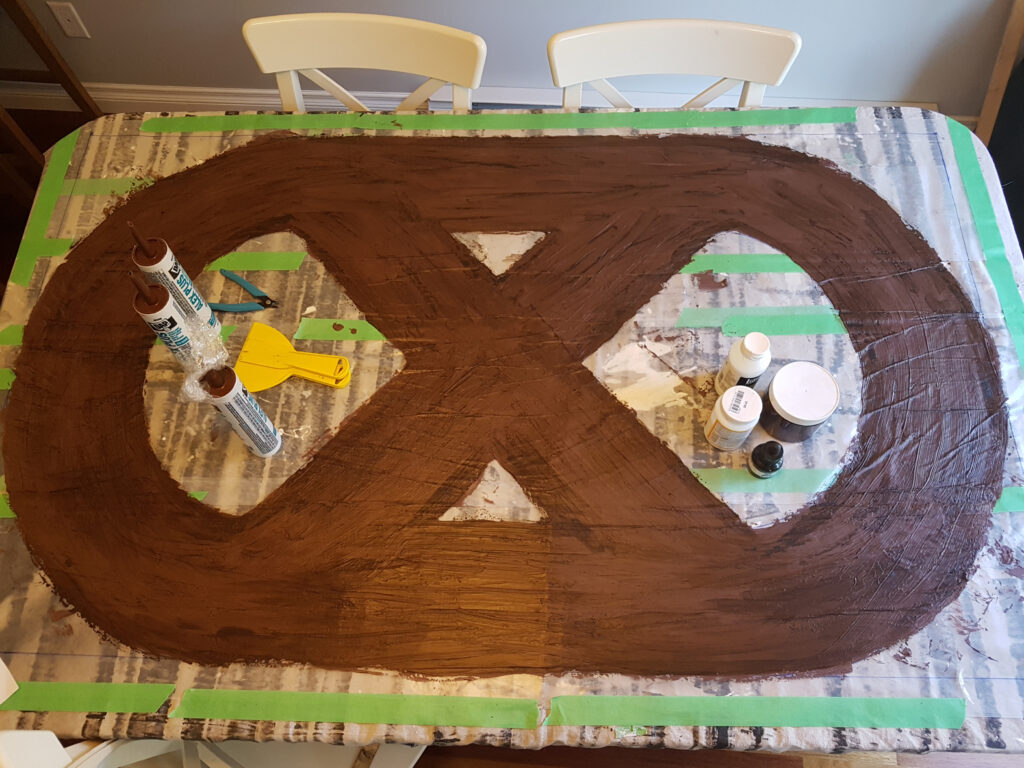
The board
The board was pretty simple. The mat itself is a custom SS&SS mat I have been working on for a while now and will write up soon. The necromancer’s tower is a 3D print of the Abandoned Lighthouse by escaroth on Thingiverse, while the trees are from Vegetation B by terrain4print. The bushes are new, adapted from Luke @ Geek Gaming Scenics. Will write those up too soon.
How to run gaslands (or any game) by webcam
The second wave of COVID-19 is here and with it, new restrictions on in-person events like gaming. While in British Columbia we don’t have a strict lockdown, we are limited to our “core bubble” aka our immediate household. Which means no in-person gaming. Our little gaming group (myself, Brian and our friend Sean) took a break, we wanted to get gaming again and preferably avoid fully-online solutions like TTS. Enter the webcam.
Attempt 1: Ancient webcam + gotomeeting
Our first attempt used an ancient webcam that spits out low resolution image, plus using Gotomeeting. I shared my screen, which had the default Windows camera app up on this. It worked, but was very difficult to see.
We were also challenged with how to track stats – gear, hazards, damage, etc. Brian tracked it on his computer and I tracked gear phase and hazards on the gaming board. Neither really worked – we couldn’t see what Brian was tracking and due to the webcam, nobody could see the hazards I’d placed on the board.
Attempt 2: Phone as webcam + OBS + Discord
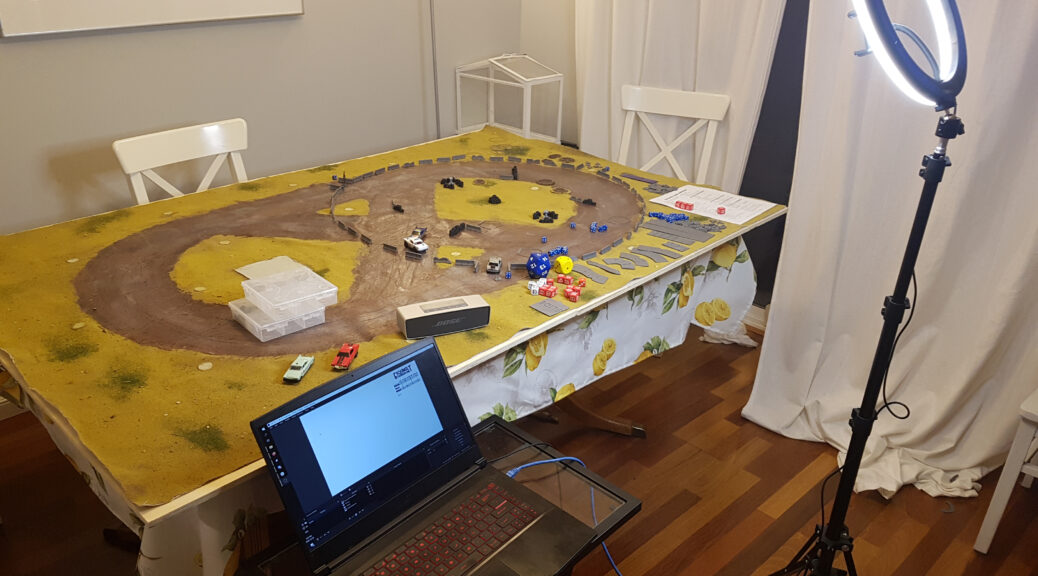
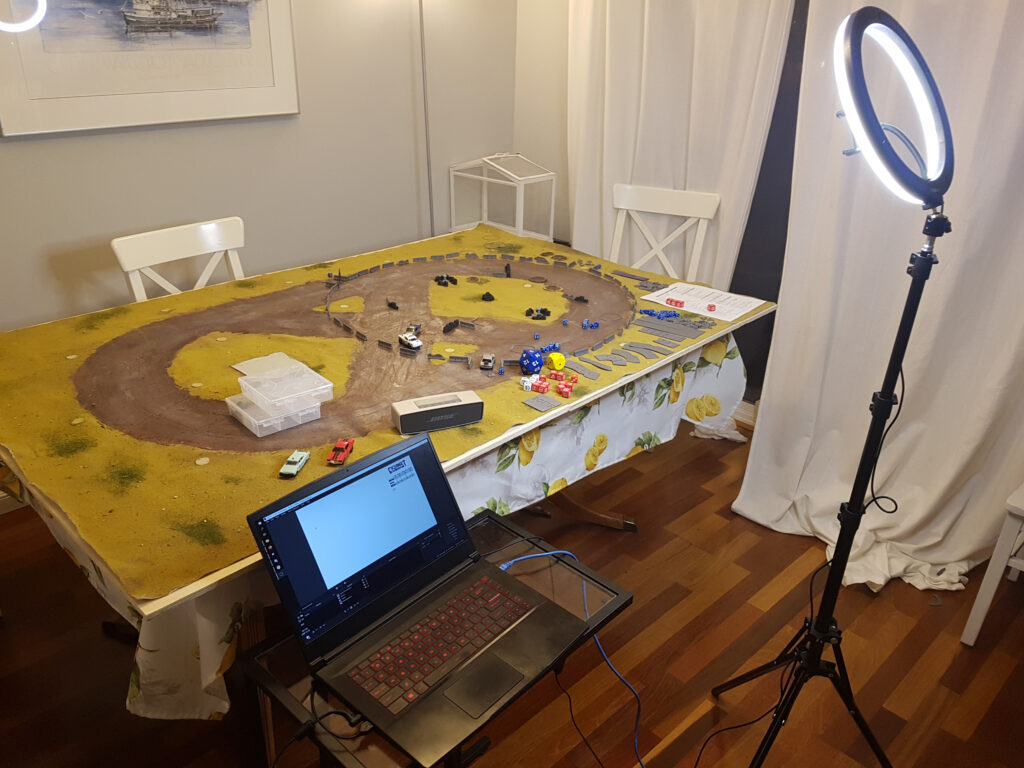
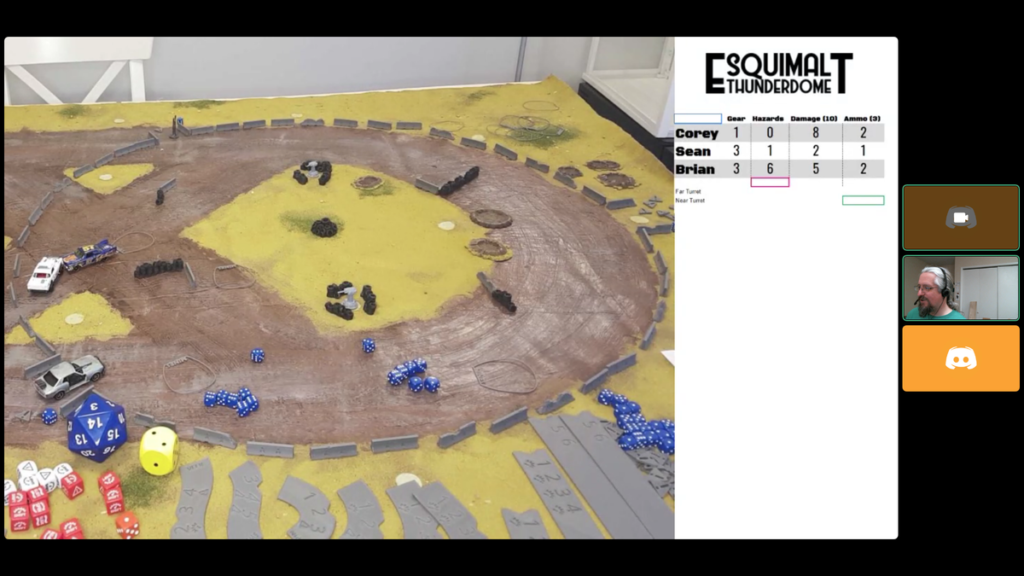
Having tried the old webcam and realized it didn’t work, plus the need to track stats, I decided to download and play with OBS Studio. I figured I could overlay a Google sheet to track stats, plus bring in the camera feed.
To deal with the poor image quality, I downloaded #LiveDroid, an Android app that streams your phone’s camera over a local server. To help with low light, I used my new ring light that my wife had bought me for Christmas.
Setting up Open Broadcast Studio
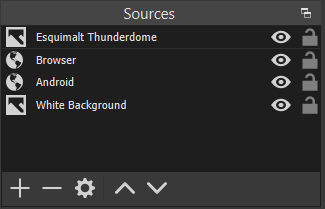
OBS is pretty easy to setup – this was my first attempt at using it and it ran flawlessly. I had four different sources: cam link from phone (as a browser source), read-only Google sheet (as another browser link), white image for a background and the Esquimalt Thunderdome branding image. Note that I didn’t run any audio through OBS, as we were talking via Discord.
For stats via Google sheet, I first setup the needed columns and then cropped the source down using a Crop/Pad Effects Filter to only show the key part of the stats. This method is easy to change on the fly, which we did when I forgot to add Gear Phase to the initial sheet.
Streaming from your phone
I downloaded #LiveDroid, a free Android app that streams your camera to a browser on your local network. You will need to set the resolution for both the camera and in OBS. I set the phone to be 1920×1280 and the OBS source to 1280×960. For me, Camera 0 was my rear camera.
#LiveDroid setup 
OBS setup for camera
I also tried DroidCam, which has an OBS plugin, but that stuck an ugly watermark on the image.
Connecting it all together
Finally, I shared the OBS window out using a virtual webcam. On the bottom left of the OBS window, it is labelled Start Virtual Camera. We then started a video call in Discord and I changed my webcam source to OBS Virtual Webcam.
If you’re the presenter, don’t be alarmed when your webcam looks like this:
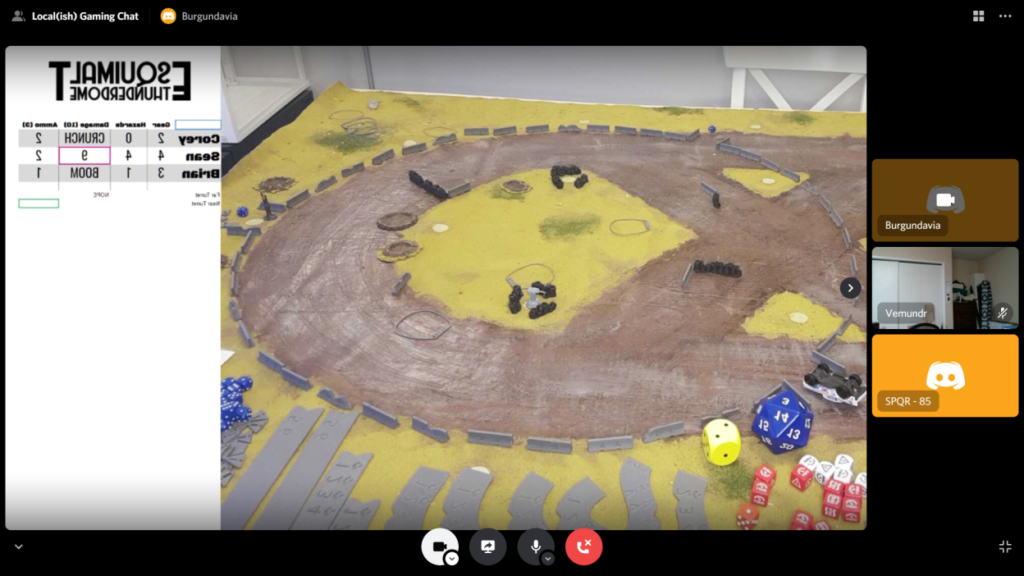
But for everybody else, the combination works well. This was Brian’s view of the final hit of the game.
Modifying Gaslands to play via webcam
For those playing remotely, the hardest challenge is spatial sense. A lot of Gaslands is about choosing the right template. Also, play will be slower, so plan for that.
Adjusting the template rules
The touch it, use it and no pre-measuring rules from Gaslands assume you have a good view of the table, which remote players really don’t. So we changed the template rules a bit. They could ask me about what a template would look like and sometimes I would even lay it down after they’d described what they wanted to do.
Keeping the cars and game simple
In order to keep the game from bogging down, we decided to institute a few simplifications to the game:
- Everybody drives the same car, in our case a car with a single HMG forward facing & a mine layer aft
- No sponsors
- Easy scenario – we ran both a modified flag tag and arena of death
Have a record keeper (and track stats locally and remotely)
The person moving the cars and running the feed doesn’t have the time to deal with record keeping that others can see. So we ended up tracking the key stats both on the game board (so I could see them) and in the Google sheet. So Brian, sitting at his computer, could track the stats for everybody, leaving me free to move cars and keep the game moving
Be ruthless about whipping people along
In order to complete a game, you’ll need the person who is moving the cars to be a ruthless GM. They need to keep the game moving via ensuring each player moves, constantly asking all the key questions like “How many dice do you want to roll”.
What’s next?
Overall, the second game ran really well. OBS made it a lot simpler for everybody to see all the stats.
One of the key problems we ran into was seeing the dice. Instead of an online dice roller, I rolled everybody’s dice in person. For the next game, I plan on using the crappy old webcam as a dice cam – set it up vertically over a dice rolling box.
I also need to play with the colour balance, contrast and saturation of the webcam. Unsurprisingly, all the various pieces of software being used tried to do some sort of correction and not all of it worked.
Where to get the software
OBS is free and runs on most major OSes, while #LiveDroid is Android-only.
Links:

Esquimalt Thunderdome – a Gaslands race track
I love a big terrain project and a few of us here got into Gaslands recently. So I decided to create a racetrack. A big one, at 5′ by 3′. So off I set to do that.
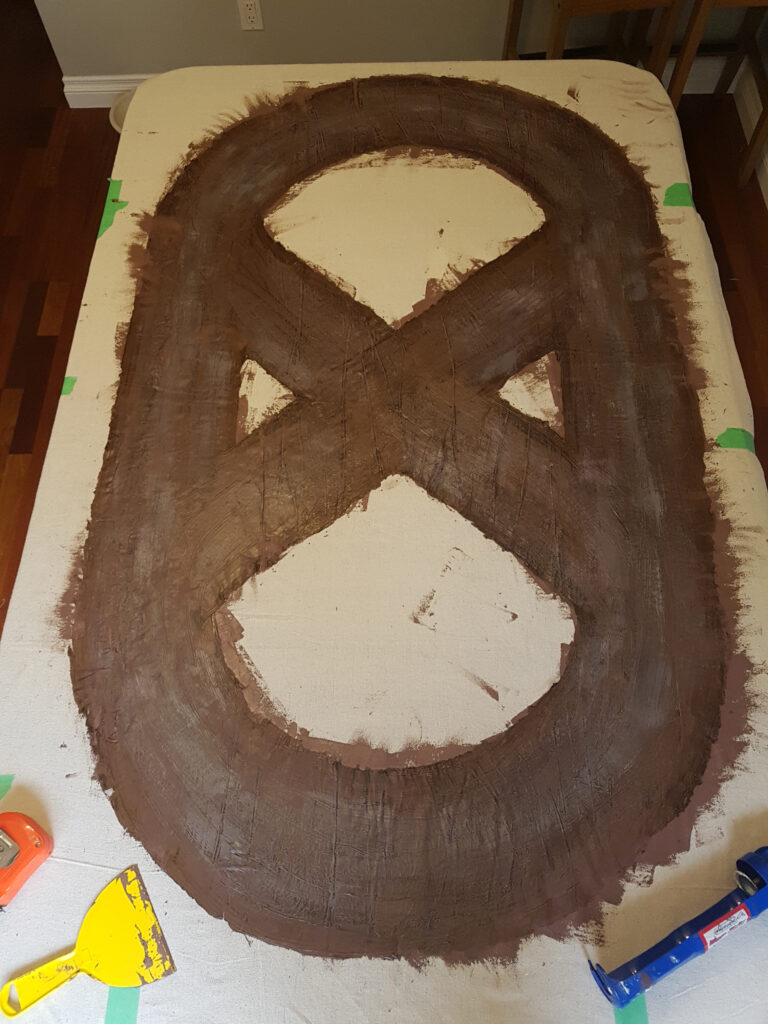
Initially, I wanted it to be portable, so I did some experiments and found that acrylic caulk will peel off of wax paper. I ended up regretting this decision, but I am going to use the technique for a future project.
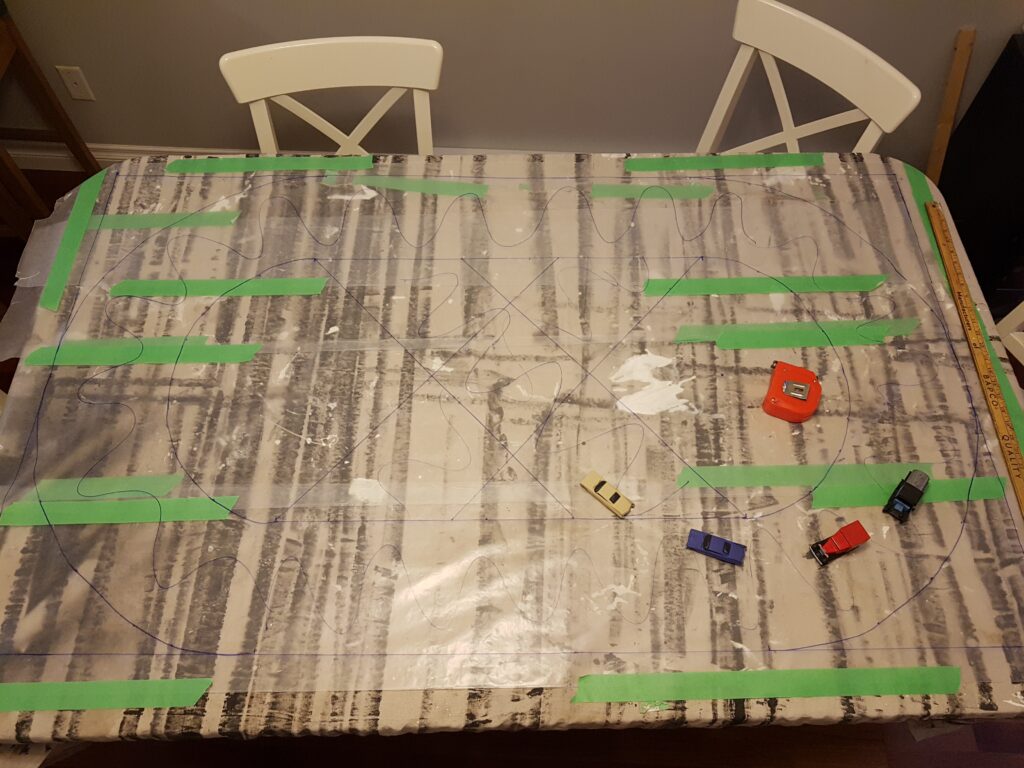
The track is 36′ wide and 60′ long, with the track itself being 8′ wide. All of these widths are approximate. The cars on the track are either older Hot Wheels or Lledo.
Once the caulk was added, I added quite a bit of texture with a rough caulk knife that I had roughed up on a previous project (oops). Here was another error I made – the wax paper was not fully taped in the middle, I ended up with ridges.
One note about drying acrylic – it loses a lot of water, so you’ll want something underneath your mat like another drop cloth to catch that water.
Once dry, I inked it using and then heavily dry brushed it with a variety of browns. Overall it works, but I was aiming for a slightly different brown than what I ended up with.
We used it a few times like this, but it really didn’t work that well. The edges of the mat were thin and a tear started developing in one curve. So onto a canvas mat it went, with more acrylic caulk to stick it down. Should have done that first…
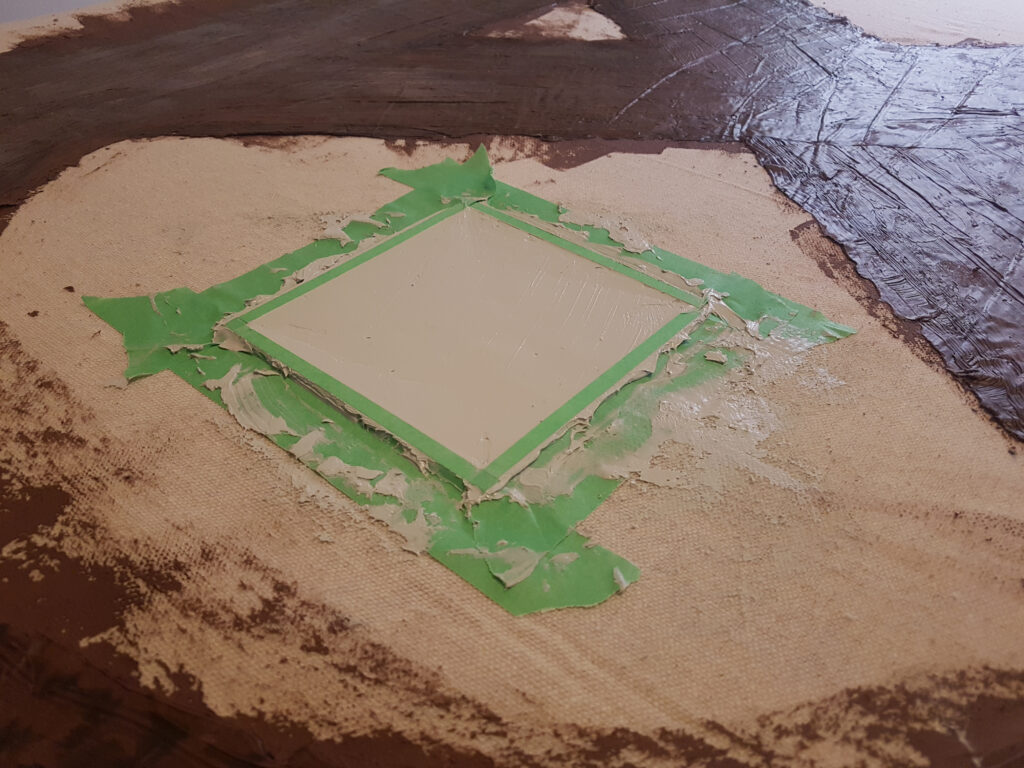
Now that it had a permanent home, I decided to add some concrete pads with thicker grey caulk, mostly as an experiment. It worked well, I would do this again.
Large concrete pad, using styrene as a mold 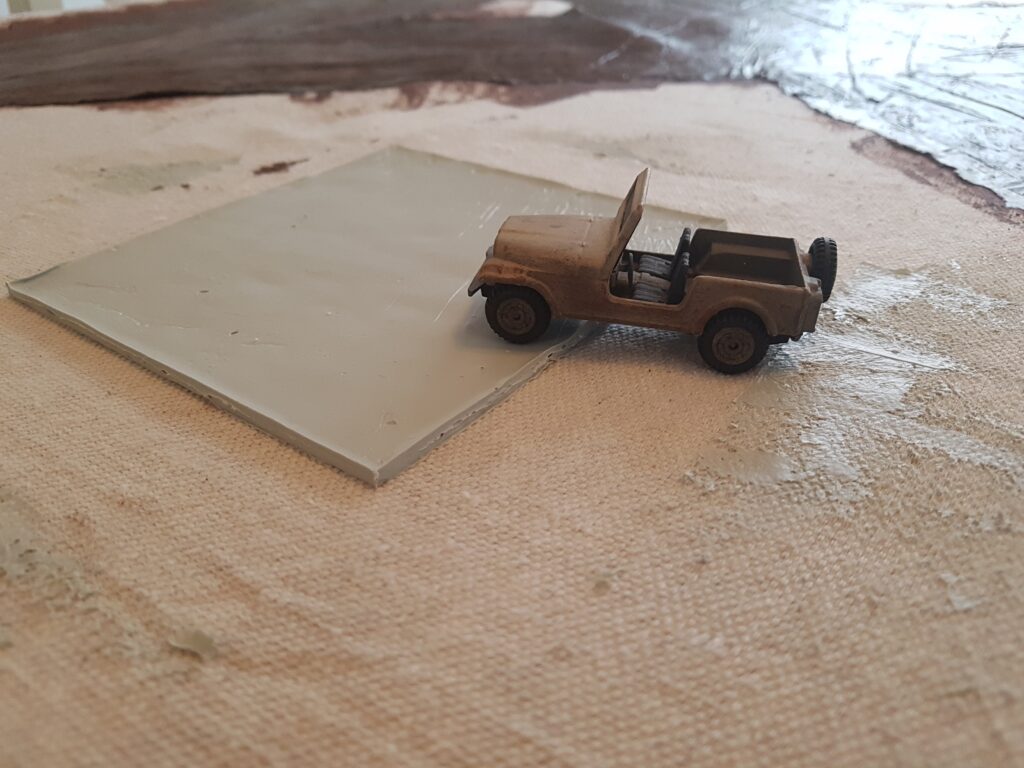
Dry caulk, showing the thickness 
Small circular concrete pads, using 3D printed circles I designed
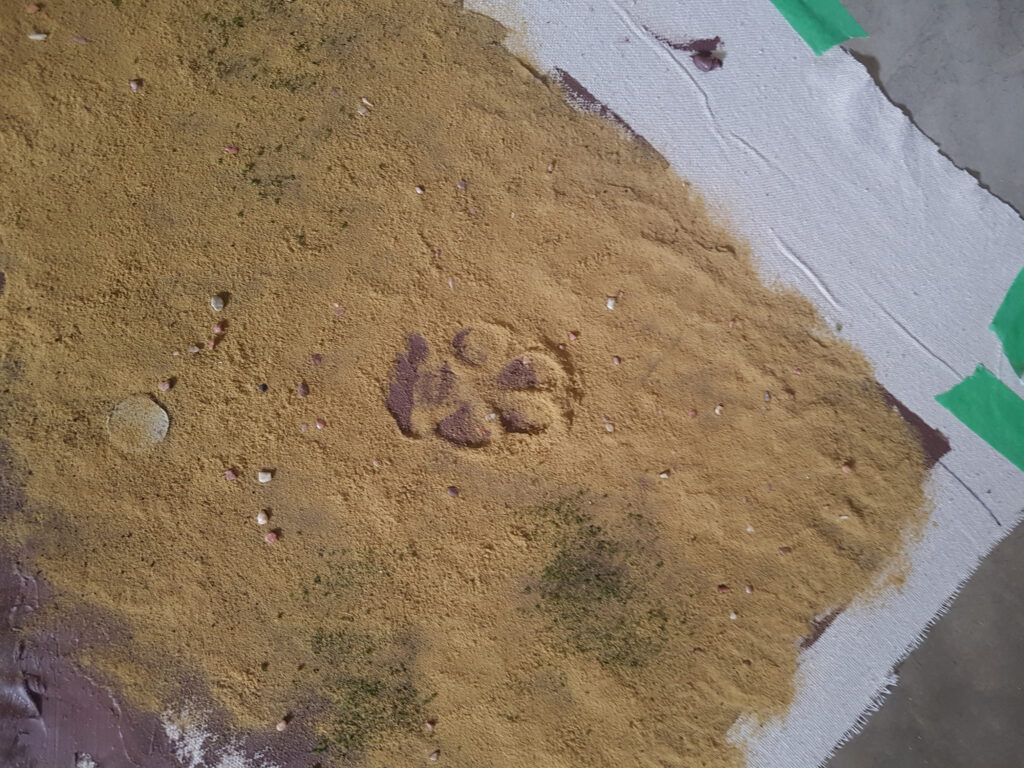
Then it was time to flock the rest of the mat. I decided a dead grass theme fit the post-apocalyptic Gaslands well. The dog decided to come and leave his mark on the mat (good thing acrylic caulk is non toxic, as it ended up on his pads too). And thus Crater Dog Paw 1 came to be.
Once the mat was fully flocked, it looks pretty good. This is the 85% stage done project – I need to cut the mat down to size and paint the concrete pads. I may also add some more bushes or other flock.
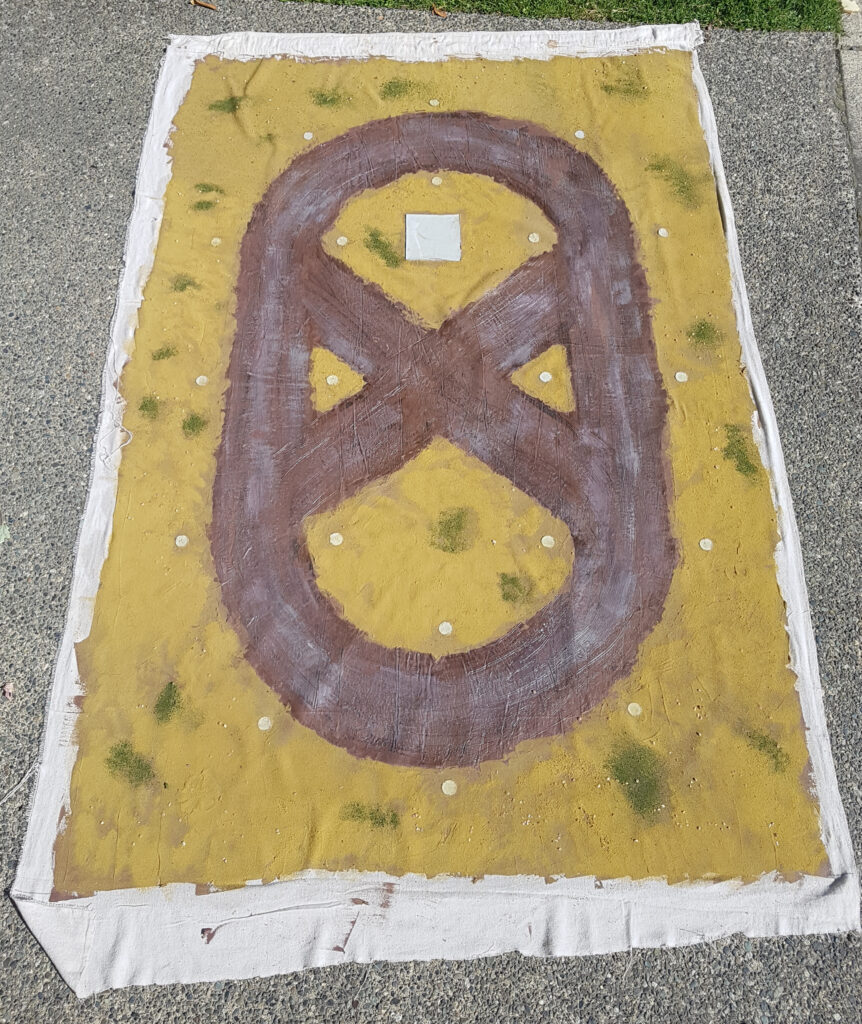
Final mat, showing the whole caulked area 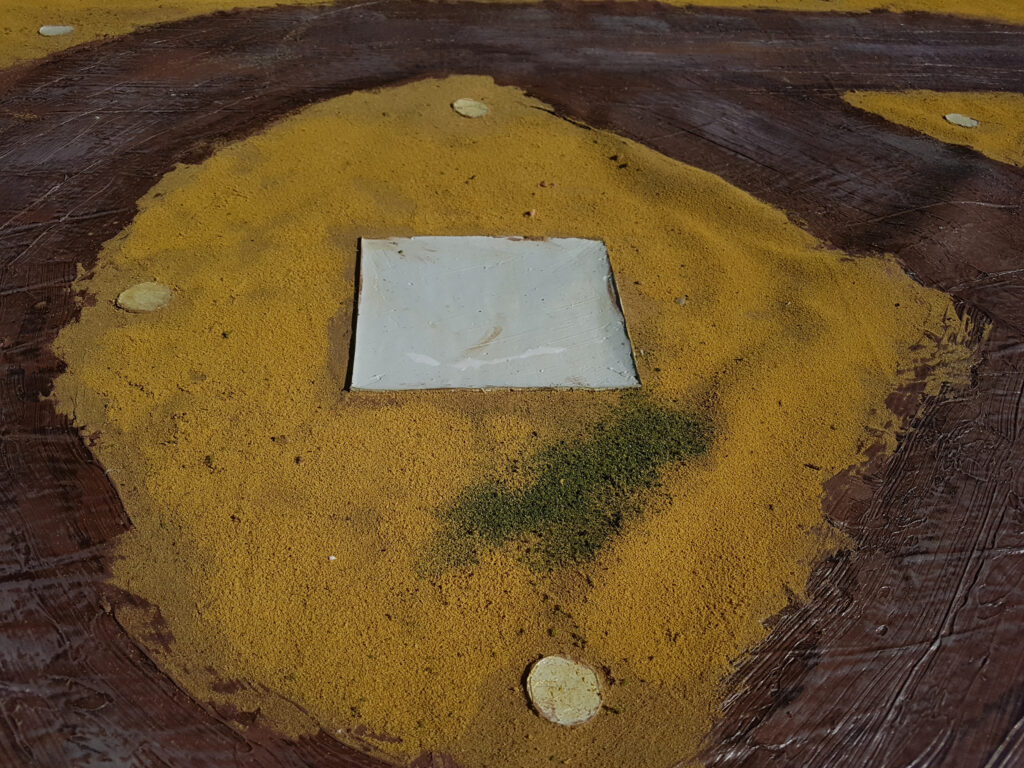
Close up of the concrete pad 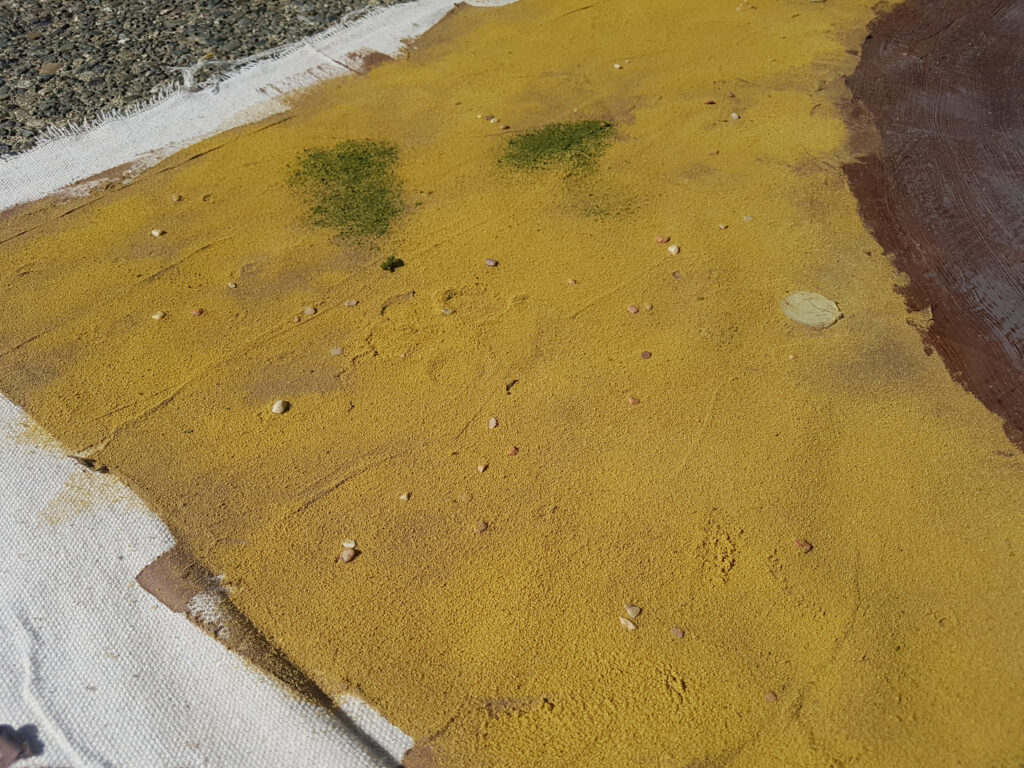
Crater Dog Paw 1, after the grass has grown into it
BSC 2018: Correcting some too thin errors
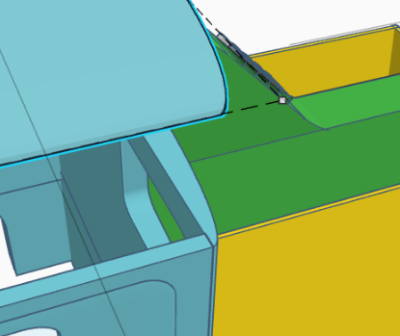
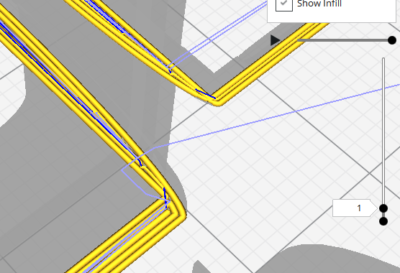
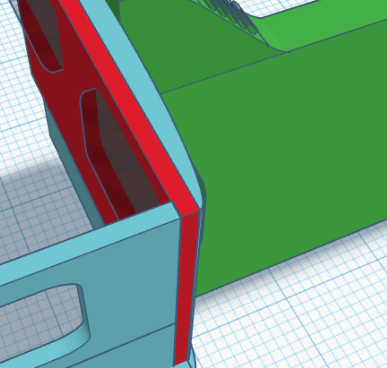
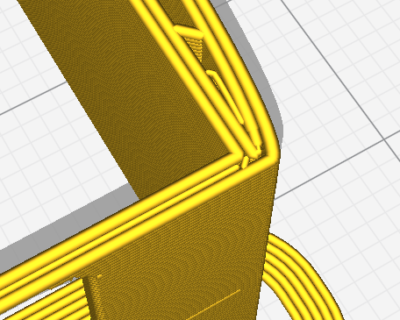
As I am fairly new to 3D printing, I am learning a tonne about what not to do. One of the biggest issues I have discovered is that things that look good in CAD can look absolutely terrible once printed, given the resolution of the printing or the limitations of FDM 3D printing. Today I wanted to talk about three different, but similar errors I made: making a part too thin to print correctly.
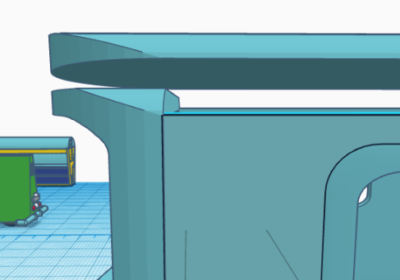
Back corner of the cab
First up – the back corner of the cab. As the backside of the cab is curved, it thins quite a bit at the very back corners.
When you bring this into Cura to slice it for printing, the problem becomes obvious.
The solution to this is to thicken the back wall of the cab, which I did by adding a flat piece to it:
Once you bring that into Cura, you see that the narrowest part is now at least 1mm thick, so the piece shouldn’t be so weak.
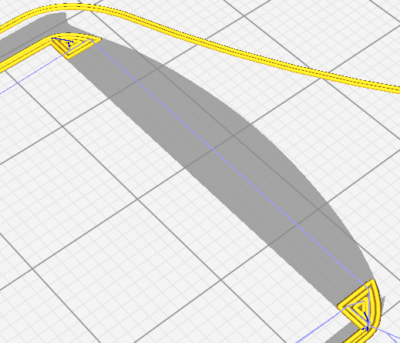
Fenders
The next piece I tackled was the fenders. They were originally 0.25mm thick, which means that they were just over one layer thick when printed at 0.2mm and only two layers thick at 0.1mm. This meant they basically didn’t print at all.
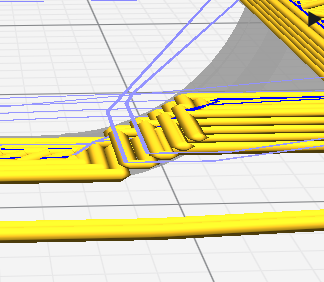
The solution to this problem is two-fold: thicken the fender up to 0.5mm and also only print at 0.1mm (considered Fine quality).

Top of the windshield
This is actually entirely my error. I made the windscreen and frame around it taller than the sides or back of the cab. This meant when I cut up the model to slice, the top of the windscreen disappeared. Oops.
BSC 2018: First print of 1956 PANG
The new printer board for my 3D printer finally showed up, so I got to printing the first print of my 1956 PANG. It was less than a full success. As you can see in the pictures below, I have a bunch of work to do.
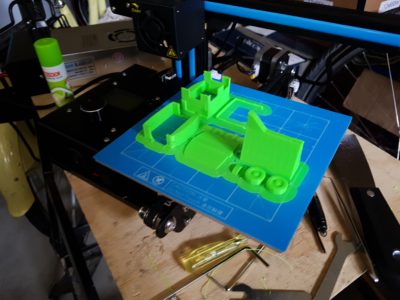
As can be seen on the build plate, a bunch of details didn’t come out right – the biggest of which was the top of the cab for some reason completely failed to print correctly. I also accidentally selected brim intead of skirt, so I had lots of cleanign to do.
The sides of the truck aren’t very smooth, and a bunch of the finer details simply didn’t print.
So what next? First of all,my printer needs some upgrades:
- A part cooling fan (the Ender 2 lacks it by default)
- Belt tighteners (and the belts replaced with metal-core of some kind)
- A more modern Marlin (the firmware that runs the printer)
- A lot more tuning
On the truck, the first thing I am going to do is shrink it by 25 to 30%. It is too large for what I want. Then I need to some work on the model itself
- Thicken some of the walls so that they print, especially the fenders, which didn’t print at all
- Clean up some of the smaller details, possibly removing them for now
- Re-cut up the cab so it prints correctly
Anyway, I have my work cut out for me!
BSC 2018: PANG print layout
I finally got around to laying out the 1956 PANG for the first printing. As you can see from the pictures below, I am trying to remove the need for supports which will mark the surface of the final print.
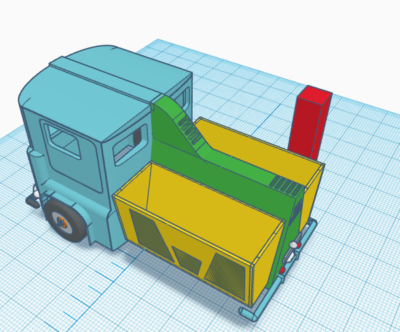
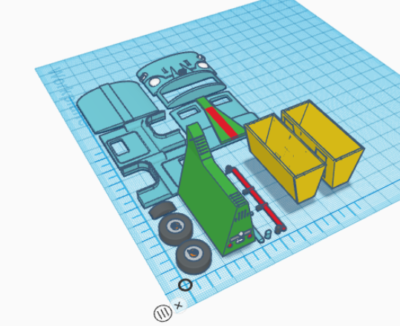
I chose not to break out the rear section or the bins for initial printing. I likely will in the final version, as it will speed up print time and make it cleaner.
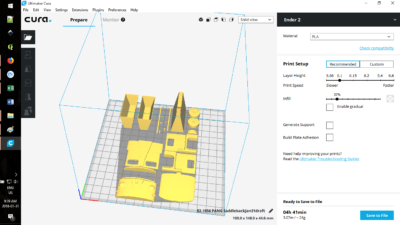
One final note: I am certain that there will be tweaks needs to be this and I am missing things, namely an interior and side mirrors to start.
BSC 2018: 1956 PANG first printable draft
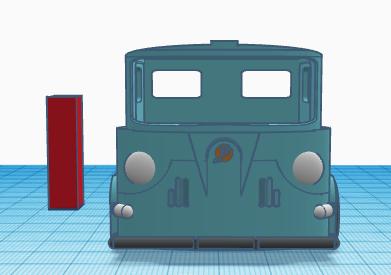
Build Something 2018 continues and I have been pretty quiet for the last week. Part of this is because I am waiting on the warrantied printer board, so motivation is low. Also been busy with other things. But today I kicked myself into gear and go the first printable draft done of the 1956 PANG. Take a look below (the red rectangle is 32mm high and is there for reference):
BSC 2018: 1956 PANG continued
Well, Build Something 2018 is well underway at Lead Adventure. You can follow all the entries, including at least two other 3D printed things, over on the subforum.
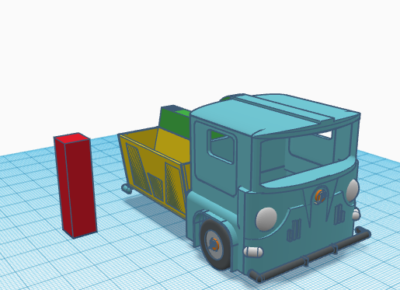
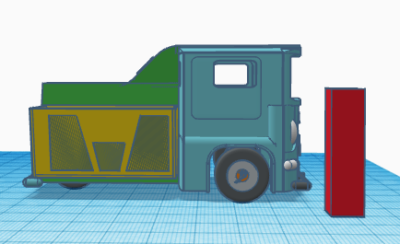
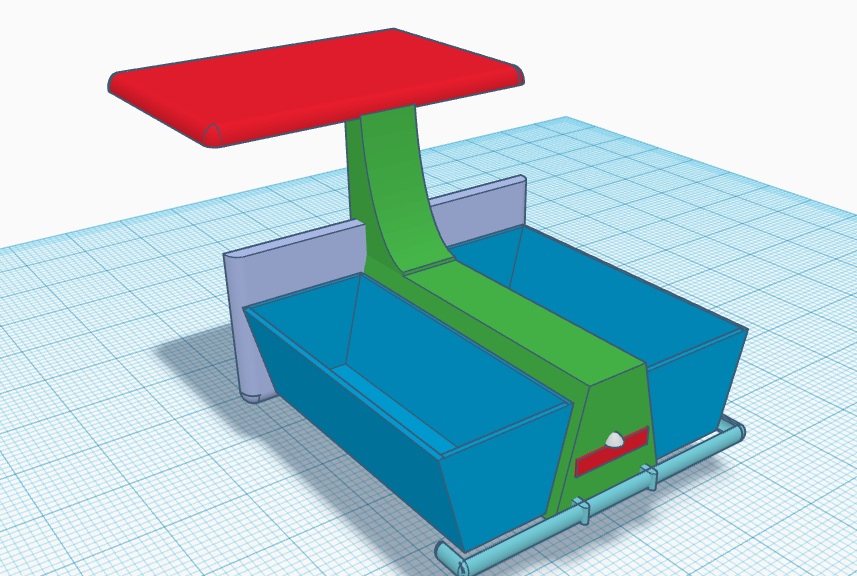
And what of our 1956 PANG tricycle truck? Yesterday saw a lot of work on the back end. As of two days ago it looked like this:
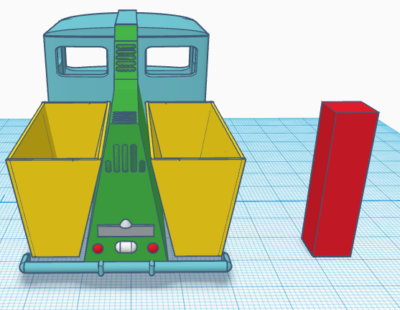
I really didn’t like the aspect ratio of the truck – height, etc. So I completely rebuilt the back end so it was taller and thus looked narrower:
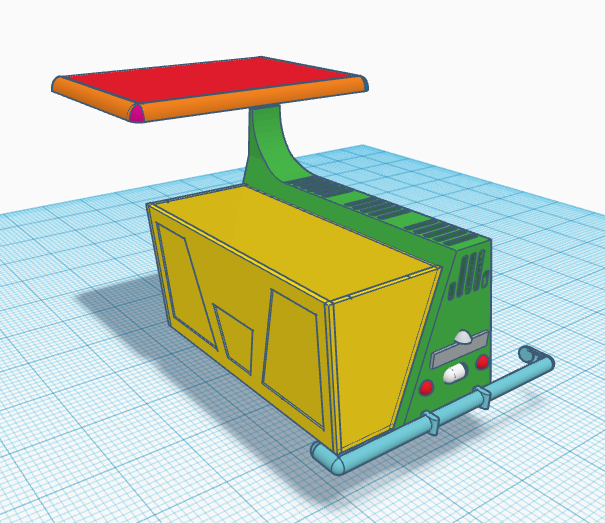
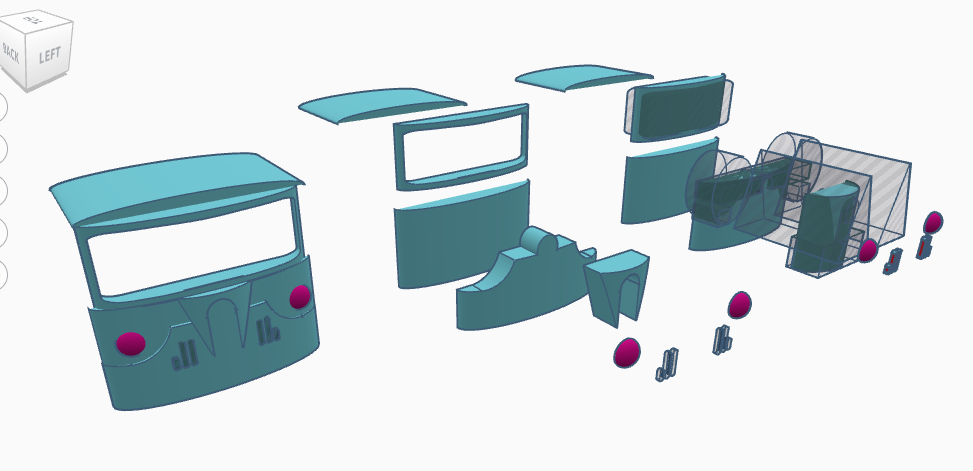
Today I started working on the front end, which is a lot harder. It has a lot of curves with curves, so it going to be a real challenge to do well. I am not overly happy with the look (too wide and squat) so might rebuild the front. Here it is in exploded view.
What I love about modelling this way is that if you don’t like something, it is trivial to rebuild it. Play with the ratio, etc.
Enter the 3D Printer, early work
Long time, no post. I (Corey) just got a 3D printer (an Ender 2) and so am working through beginning printing with it. Unfortunately after the first print the board cooked itself, so I am contenting my self with doing some design work in TinkerCAD.