Historical and quasi-historical gaming of various sorts. English Civil War and Thirty Years War, the Great War (World War One), the Russian Civil War and other interwar conflicts, and whatever else we wander into!
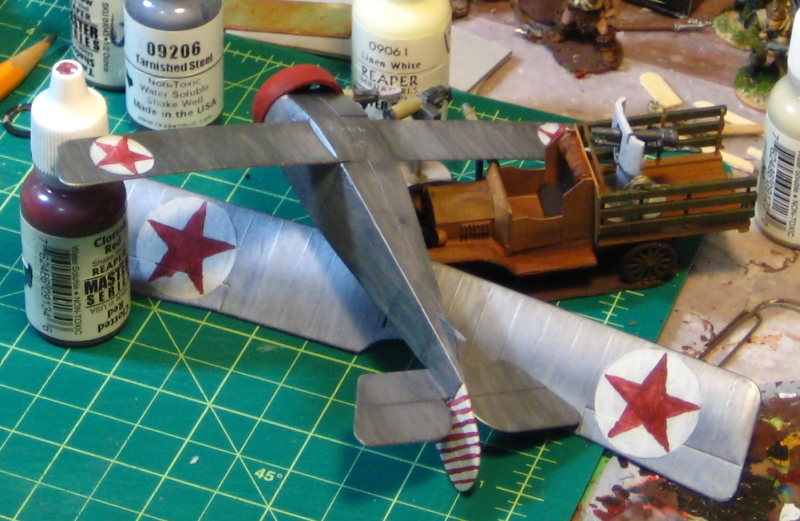
Got the star insignia finished up on the Bolshevik Nieuport 17. Some of the stars are a bit wonky, but frankly that’s historically accurate — a lot of actual insignia during the Russian Civil War had a definite hand-painted look to it!
I gave up on the red-and-white striped vertical tail as a bad job, and went with solid red to go along with the red cowling at the nose.
Painting all done on the Nieuport, Now to swear the upper wing into position!
Now to get the upper wing into position, always a job likely to provoke swearing. At least the Nieuport only has six struts, instead of the even dozen on the SPAD! After that there’s just the landing gear and prop disc to do.
Got started on the insignia for the Bolshevik Nieuport. This is going to involve at least six freehand red stars; to skip one pair I’ve decided to go with a red-and-white striped tail, although freehand stripes might make freehand stars look easy…
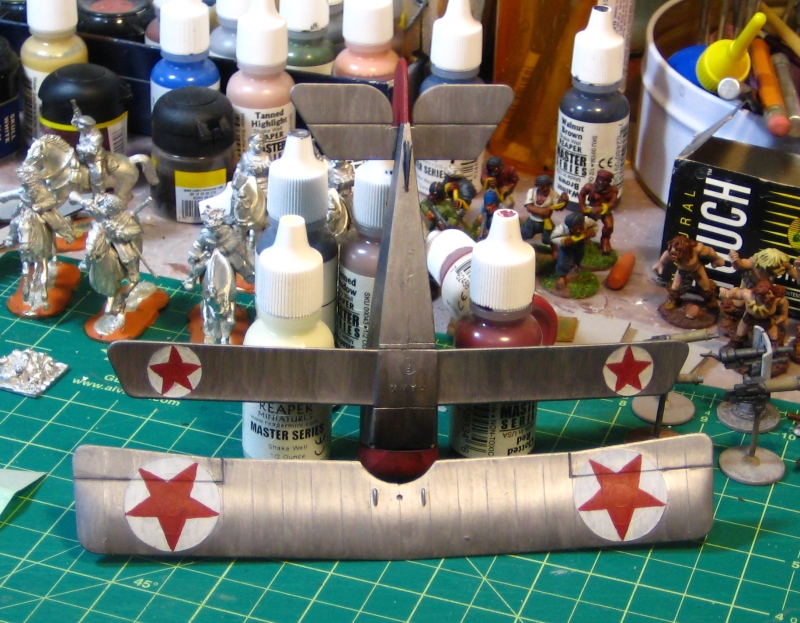
Anyway, here’s the current state of the beast. Like the SPAD, this Nieuport has roundels moulded right into the wing surfaces, so I’ve used those to put the stars in white circles. This appears to have been fairly common on Bolshevik aircraft, for the simple reason that the Imperial Russian Air Service roundel had to be blanked out somehow!
The Bolshie Nieuport upside down, showing four of the six Red stars on it. The upper wing has insignia on both the upper and lower surfaces of the wing, which was fairly common for Nieuports.
The insignia and tail stripes will get at least one more coat of paint, and they need some cleanup, then highlighting. Colours, for anyone following along at home, are Reaper Master Series Clotted Red and Reaper MS Leather White; highlights will be with Reaper MS Pure White and Carnage Red. I might yet abandon the striped tail in favour of a red tail, possibly with white star. It depends on how frustrated freehand pinstriping gets me…
Having built the White Russians a SPAD (Parts One, Two, Three), it’s time to build the Nieuport 17 for my Bolshevik forces!
As I mentioned in my original RCW Aviation article, the basic scheme for the Nieuport in Red service will be silver/grey dope with as many red stars as I can stand to freehand onto the thing. At a minimum, I”m committed to six: two on the vertical tail, two on the upper surface of the top wing, two on the lower surface of the bottom wing. Nieuports, because of their very small bottom wing, often had insignia on the lower surface of the upper too. We shall see.
Thankfully the Reds freehanded their star insignia too, so lumpy, misshapen and odd stars abound!
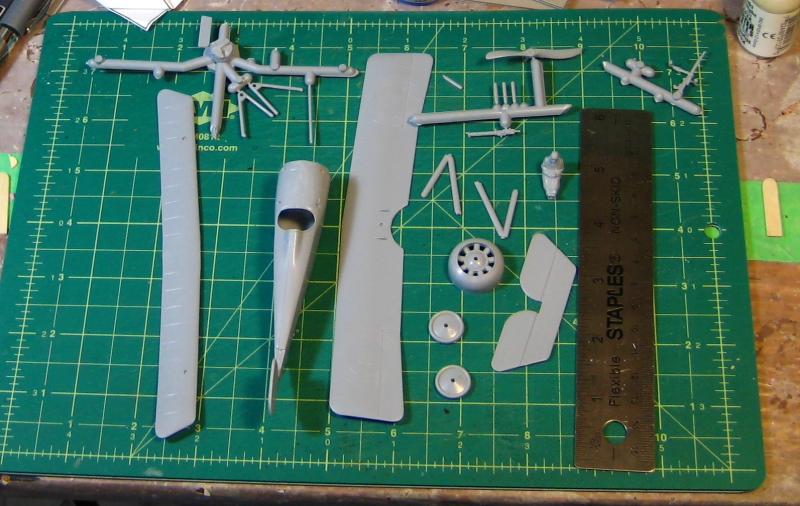
Here’s all the kit parts laid out on my cutting mat. Only about two dozen parts all told, and a much simpler strut setup than the SPAD which will hopefully be easier to assemble than the SPAD’s upper wing… (the fuselage is in two halves, I just had them popped together to check the fit when I took this photo.)
The Testors Classic Nieuport 17 kit all laid out.
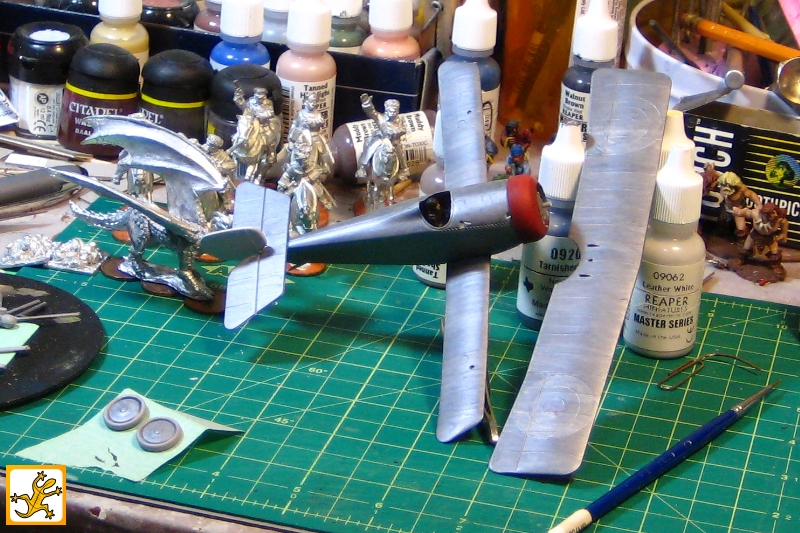
Here’s the current state of the Nieuport. Basic assembly of fuselage and lower wing done, and basecoat of silver, red (on the nose) and white (on the tail) done.
The Bolshevik Nieuport 17, base colours done, ready for insigia then weathering.
The English Civil War has become a definite back-burner project around here, but it is still around, along with ambitions to make some more Western European/British buildings and other scenery for dual use in both ECW and pulp gaming. Dark deeds in the pastoral countryside, that sort of thing, whether it’s with horse and musket or Mauser and sporty roadster!
It turns out that the ever-valuable Internet Archive (previously here on the Warbard) is stuffed with old books on English traditional architecture and buildings. Here’s a fairly random sampling of ones that caught my eye as being useful for inspiring suitable wargaming terrain.
Finally, you can find many more books in this vein by searching the Internet Archive’s Texts collection for Architecture, Domestic — England.
The Shire Publications book Discovering Timber-Framed Buildings is one I’ve seen recommended several places. As usual, check the various other recommendations Amazon and other customers make, good stuff there too. Shire do a whole series of inexpensive English history books that look very useful for those of us who aren’t in the UK but want some inspiration and authentic local details.
Inspired and begun by a thread over on Frothers Unite, of all places.
Introduced another local gamer to our Mud & Blood-powered Russian Civil War gaming on Sunday afternoon, it was a good little game although my attacking Whites kind of stampeded his defending Bolsheviks, despite the heavy machinegun they had to assist.
The scenario was another lift out of the great M&B scenario book, Stout Hearts & Iron Troopers, this time the very first scenario, “Attack on a Strongpoint”, which has two infantry sections with an HMG defending against an attacking platoon.
My attacking Whites were able to stay mostly in cover until they were very close to the edge of the hamlet, screening themselves from that lethal machinegun for the most part. There were a few tense moments when the MG caught one White section and another was thrown back after attempting to close assault one of the Red sections, but then the gun jammed, I was able to get another section in to launch a brutal close assault on the same Red section, and on the other flank my single flanking section poured some terrifyingly accurate rifle fire into the other Red section, and it was all over.
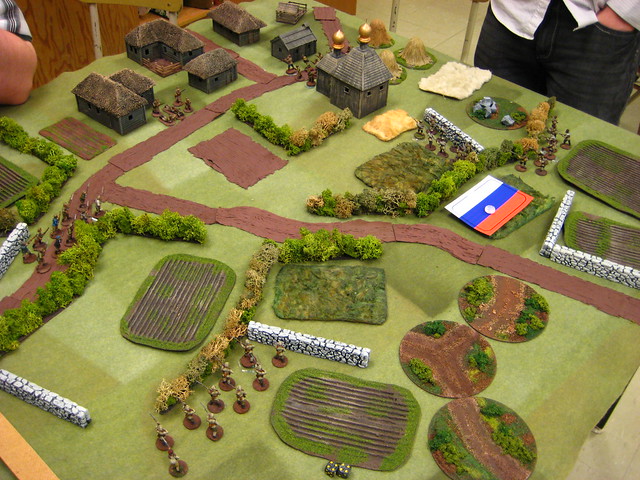
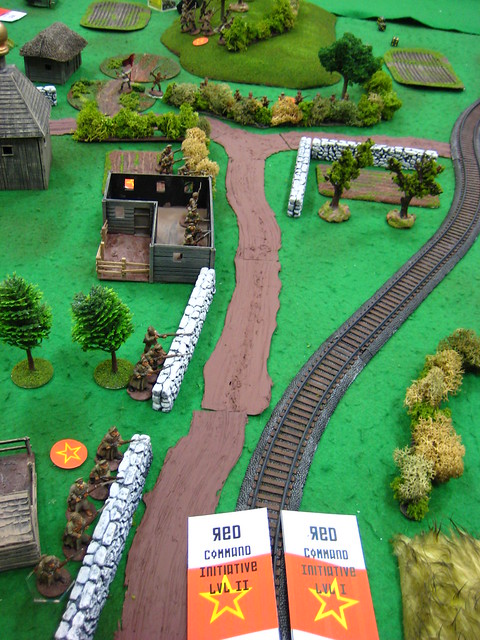
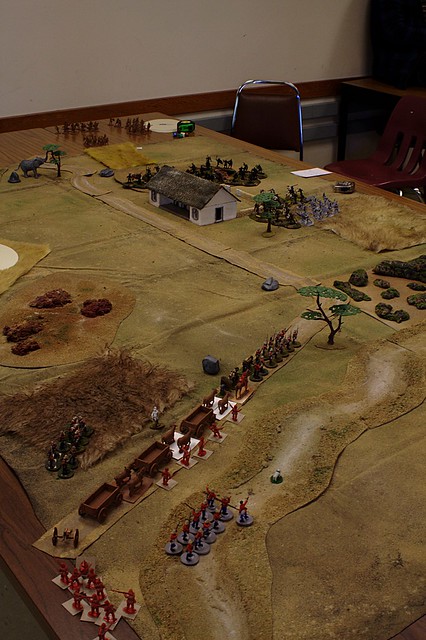
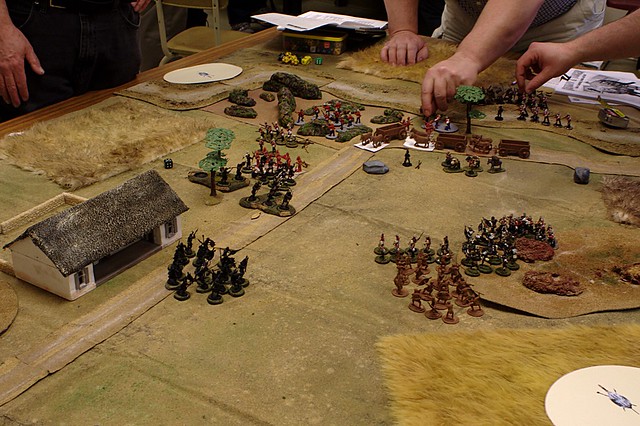
Here’s the table fairly early in the game, with my Whites in the foreground advancing and Reds visible on the edge of the hamlet.
The one White Blind (the Russian tricolour marker on the far side of the table) is a rifle section I was able to keep on Blinds right until I got them to the hedgeline behind the church, where they unmasked and proceed to slam the Red machinegun in a hail of fire. Units coming off Blinds get bonus dice to fire, which proved devastating.
We’ll hopefully get a chance to do a larger RCW game in the next few weeks, but today’s smaller game was interesting and Nathan was interested in another go at the system sometime in the future. I’ve got another fifteen or so Bolsheviks to get off the painting table sometime soon, which will finally give me enough Red figures that they don’t have to be on the defensive all the time!
Oh, and I also have an inbound order from Copplestone with some shiny new stuff. It won’t be just infantry in our RCW games shortly, let’s just say!
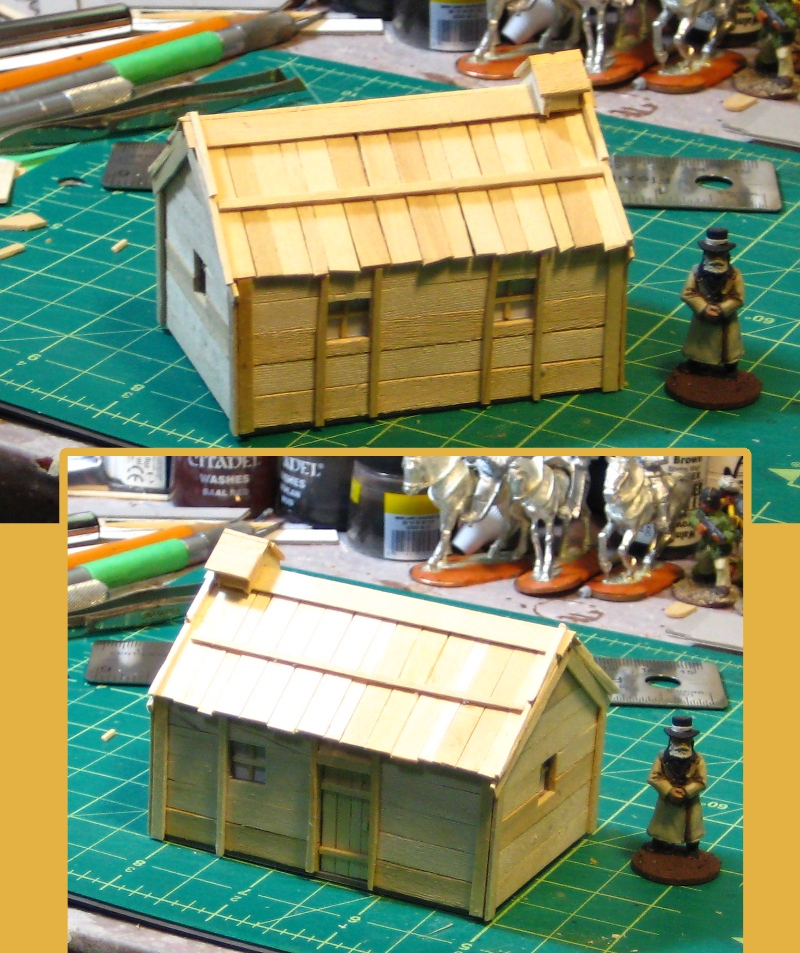
Inspired by Tony’s plank-roof hut tutorial that I linked to in my recent links of interest post, I sat down with stir sticks and my Xacto knives to do up my own version of his hut.
A Russian-style plank-roof hut, after Tony’s tutorial.
My version is 3 inches across the front, 2 inches deep and about 2.5 inches tall to the top of the chimney.
I’ve also been amusing myself recently with fake fur and fabric dye, searching for good loking long grass. I’ll have to write up my discoveries sometime soon, it’s been… interesting.
The new hut will have it’s final paintjob this weekend, more photos of that when it happens.
Almost all of my gaming is done away from home, at other houses, up at the university on the weekend (our local miniatures group takes over a classroom up there every Sunday) and at conventions. So everything has to be portable or it’s useless to me. Given the relative fragility of the White Russian SPAD, especially that damned upper wing, I needed a solid way to protect it in transit.
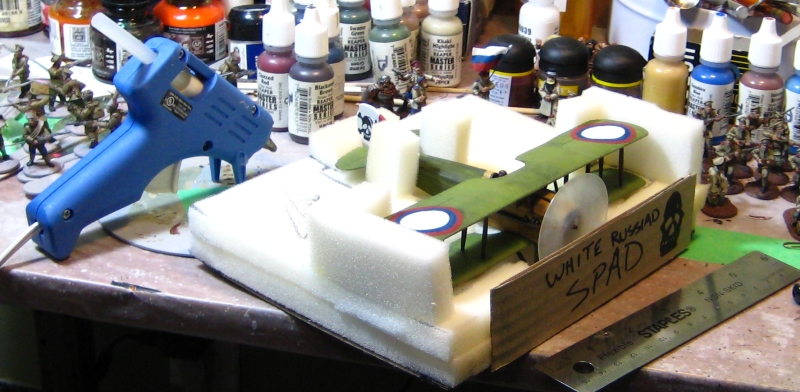
Some scrap cardboard, a dip into my stockpile of cheap upholstery foam (normally used for lining figure cases) and some work with razor knife and hot glue gun, and I had the SPAD Caddy:
A SPAD Caddy, for secure transport of my White Russian SPAD to games. Click for slightly larger version.
The base is a square of scrap cardboard, then two layers of half-inch foam with a cutout to accommodate the body and wings of the plane, and a deeper square cutout (through both layers of foam) at the front for the wheels and propeller. More scrap foam protects the tail and wingtips, and the two bits of foam forward of the tail hold the whole thing securely. The extra strip of cardboard across the front helps protect the propeller and landing gear as well as provide a convenient spot for a label.
I used the SPAD Caddy to get the SPAD and the rest of my Russian scenery and figures to Trumpeter Salute at the end of March, and it worked exactly as planned. There’s even room in my Russian Civil War scenery box (just!) for a similar caddy for the Nieuport I plan on doing for the Reds.
The Trumpeter Salute convention last weekend saw the first full outing of my Russian Civil War forces, in a scenario I called Even Whites Bleed Red. I’m a pulp gamer at heart, so a punchy, interesting scenario title appeals, what can I say?
The scenario is set “somewhere south of Moscow, sometime early in the Russian Civil War” and has a disorganized scratch platoon of Red Guard defending a hamlet from a composite company of White forces, composed of a shorthanded platoon of White riflemen and a plaston (infantry platoon) of Cossacks, lead by an energetic and capable group of Cossack officers.
I threw in my White Russian SPAD, for additional “Ooo shiny” factor and because I had the thing painted, and off we went, with two players on each side and me GMing.
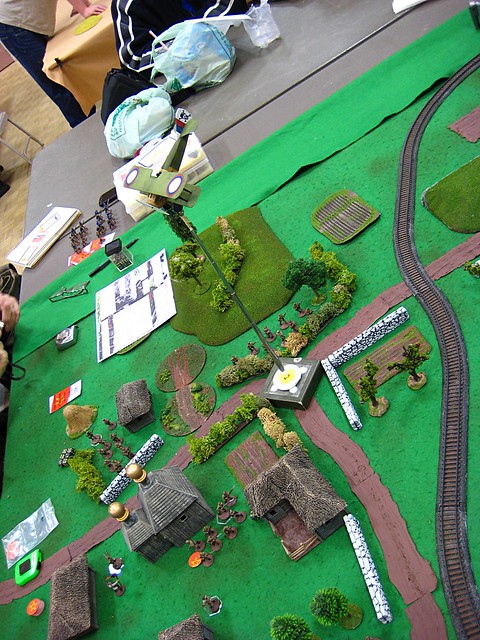
The SPAD appeared very early in the game, although never had much impact, neither strafing run doing much. Above, the plane machine-guns the Reds in the churchyard,
This game, the Reds got themselves shaken out and in position fairly quickly. They were able to get most of the Whites pinned down well outside the hamlet, and the Whites never got into position to launch more than a token assault on the place.
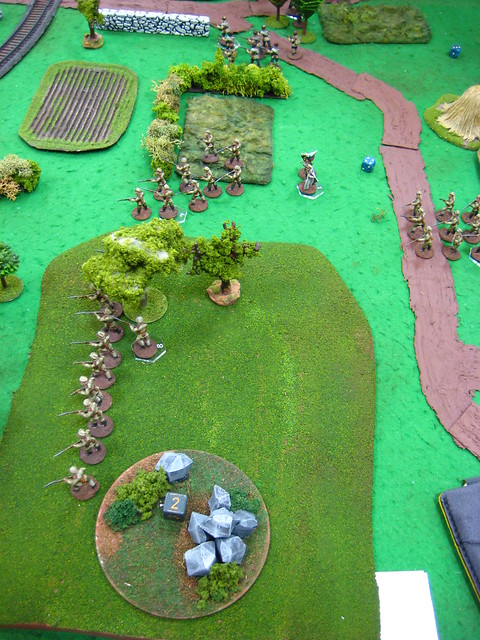
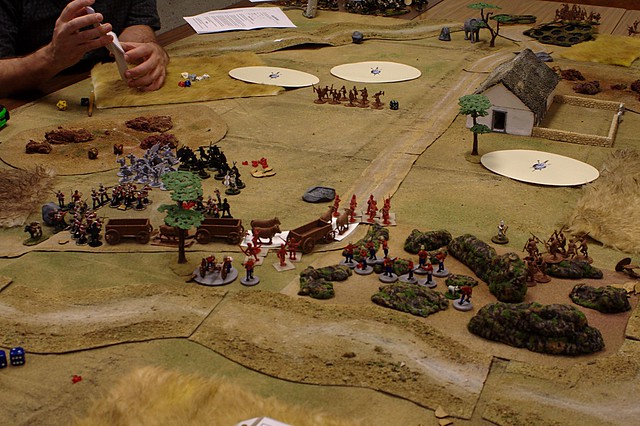
Above, the White rifle platoon advances, one section in the foreground on the crest of the ridge, the other two behind it. In the far background, one of the Cossack sections can be seen advancing. The Cossacks had far less cover than the rifles, and the White players might have been better off funnelling their entire advance up the near edge of the board, sacrificing one section to hold the flank while the rest of the composite company pressed in toward the hamlet.
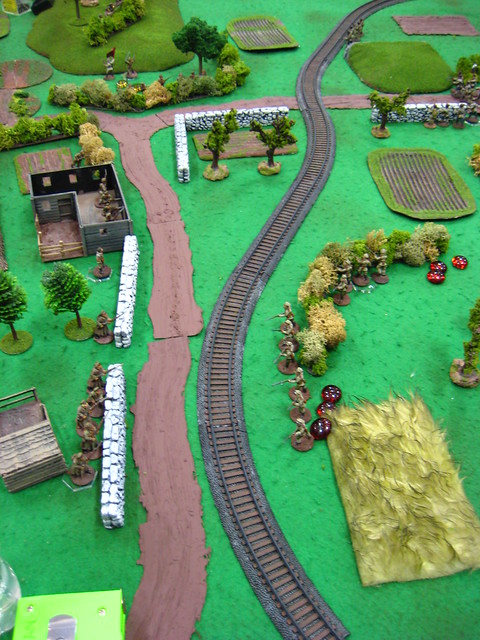
Above was the high point of the White advance, with one rifle section thrown back after attempting to storm across the railway embankment and attack the Reds along the stone wall. The Red reinforcements, one section of Red sailors and another section of Red Guard, also appeared just after this assault was thrown back, and the White players conceded the game at this point.
I’ve got some thoughts on why this game went so differently for the Whites when compared to our squirrel-obsessed playtest version, but I’ll save those for a longer followup post. Suffice to say that all four players enjoyed themselves, I enjoyed running the game, and we actually got done surprisingly quickly. Start to finish, including introducing the game to four players who’d never played it before, we were done in under three hours. Near-perfect convention game length, in other words. We could even have gone a bit longer and still had plenty of time for cleanup.
As it was, I had time to run a little demo session with a “stacked” deck to give two interested bystanders a chance to see how the Mud & Blood system worked, and get everything put away in good order!
Ran my RCW game Saturday afternoon at the convention. Short version: everyone had a good time, but unlike our playtest a few weeks ago, the Whites got splattered, despite having more support and forces than the playtest. The Reds go going faster at the beginning and the Whites never had a chance to develop the momentum they had during the previous game.
Anyway, longer update and photos in a few days when I’m not blogging from my phone…
And so the day began, much like the day before it, but with the promise of relief. Dust clouds had been seen along the road toward the main force, maybe the good Colonel could see fit to send us some more men. Yesterday’s fight was bloody but at sundown, we still held the hospital, if only just.
-Memoirs of the Zulu War, Col. Reginald Heathe (ret.), commander of the Royal Oak Bay Volunteers 1875-1891
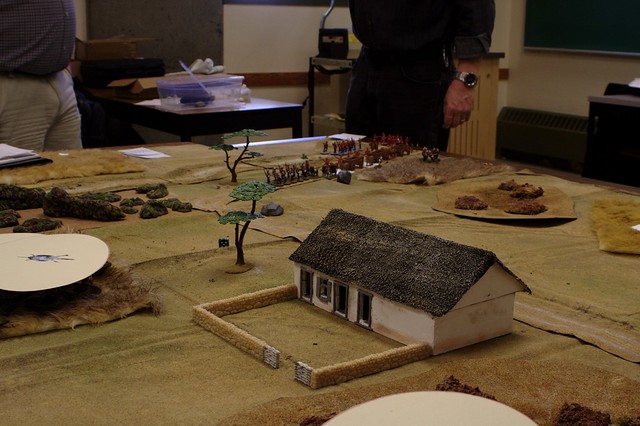
Sunday marked our second Zulu War game, the first to include figures from all five players who have bought in (myself, Malcolm, Dale, Bruce, and Nathan). Also debuting this game was my hospital, built on an imperial-ized version of Matakishi’s detailed plans.
In the beginning, the calm
The back story I concocted for this game was that my Royal Oak Bay Volunteers had found themselves under siege yesterday and had narrowly carried the day, but were holed in the hospital and required relief. This explained my single company on the table (my remaining British and Zulu are unbuilt). A large relief column was moving towards the hospital in an attempt to relieve it.
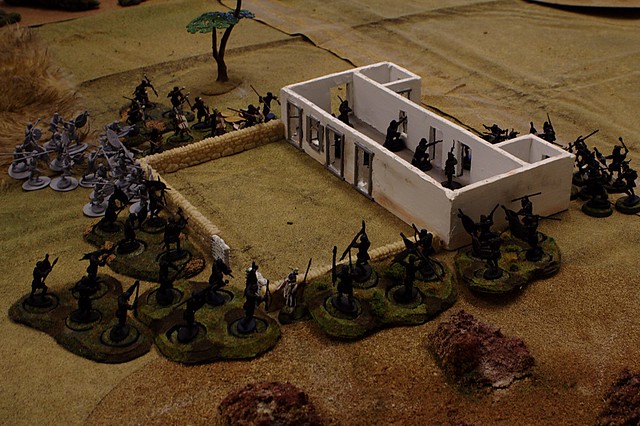
Zulus advance on the hospital
It all began well enough. Zulus appeared at one of six random locations under a blind, usually two blinds at a time. Luck meant that most of the blinds started in one of the two locations nearest the hospital, representing the forces from the day before coming back. The column moved slowly, but ground towards me. As our Zulus are “AI controlled”, the random stance they choose was to stand back and fire their muskets and chuck their spears against me. All was well, the Royal Oak Bay were holding.
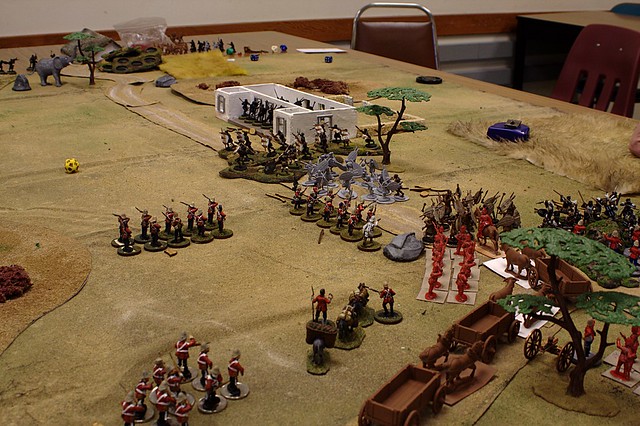
Completely surrounded
At this point, it all went off the rails. The relief column got bogged down in heavy terrain and by the time any numbers of them could have arrived, Zulus were already attacking the front of the wagon train, leaving the Royal Oak Bay all alone. And then the Zulu’s charged. Given the difficulties both of us had in scoring any hits through the windows and doors, I lasted a surprising long time, outnumbered and worse in melee than the Zulu.
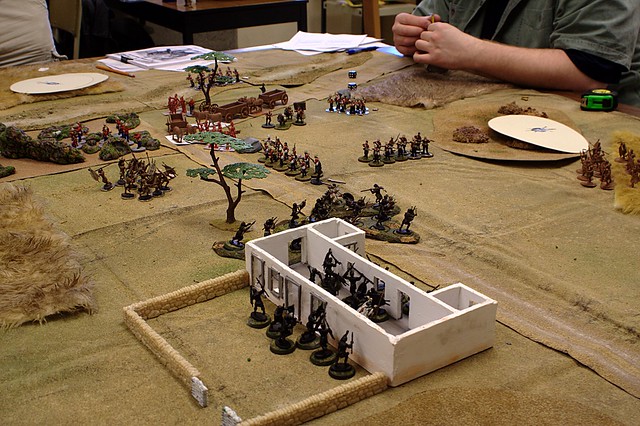
Skirmishing across the front
The hospital falls
The action was hot and close. The Zulus pressing on all sides of the hospital, finally testing their spears against our bayonets. With many doors and not enough men, I was forced to step straight into the breach, holding the door nearest our relief. I parried their spears thrusts with my saber, finally driving them back. I could see the relief column, but it appeared swarmed under with Zulus. As I turned to give encouragement to my men, I saw not a single standing red coat. What I saw instead was a wall of black Zulu warriors.
– Memoirs of the Zulu War, Col. Reginald Heathe (ret.)
Attacking from three sides
With the hospital fallen, the Zulus ground the British back, forcing them to retreat inch by inch. More Zulus appeared in the right flank of the column, but those Zulus discovered the pain of a gatling gun.
Up close and personal, with spears
By nightfall, the British were tired and bloody. They retreated in poor order, leaving the hospital and this part of veldt to the Zulus for a little while longer.
In the end, there are still more Zulus
As with our last game, we used Triumph and Tragedy, albeit heavily modified. Besides the aforementioned AI Zulus, the action is driven by cards which specify a certain command, either for the British or the Zulus. These include the basic T&T Fire, Fire and Move, Double Move, but also Zulu Charge, Zulu Command (which may change their tactics), and Hordes of Zulus (which puts new blinds on the table). In an effort to bring an end to the game, we decided that each player that had Zulus could lose up to four groups before they could bring no new groups on. Still, with over 250 Zulus between the four, we still didn’t end up with all the Zulus on the table at any one time.
All in all, an enjoyable game. Our rules are still in flux, but they appear to producing a good result. Now we just need to win. There are a few pictures that haven’t been seen here, they can be seen in my A hospital unrelieved Flickr group.