After building the first building to use on Infinity tables, which turned out to be a complex shape and two storeys plus roof, I decided the next building needed to be simpler and quicker to build, but still interesting.
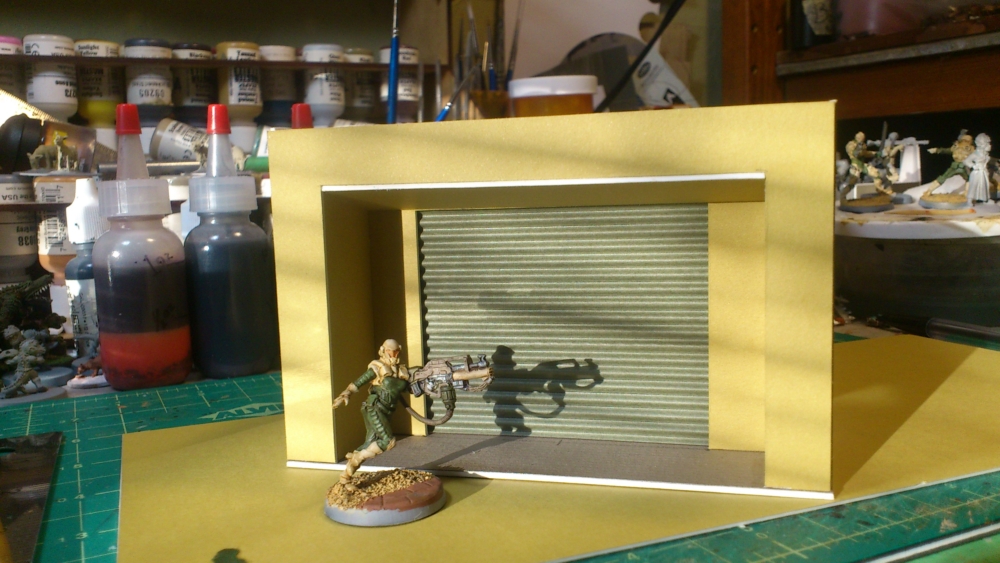
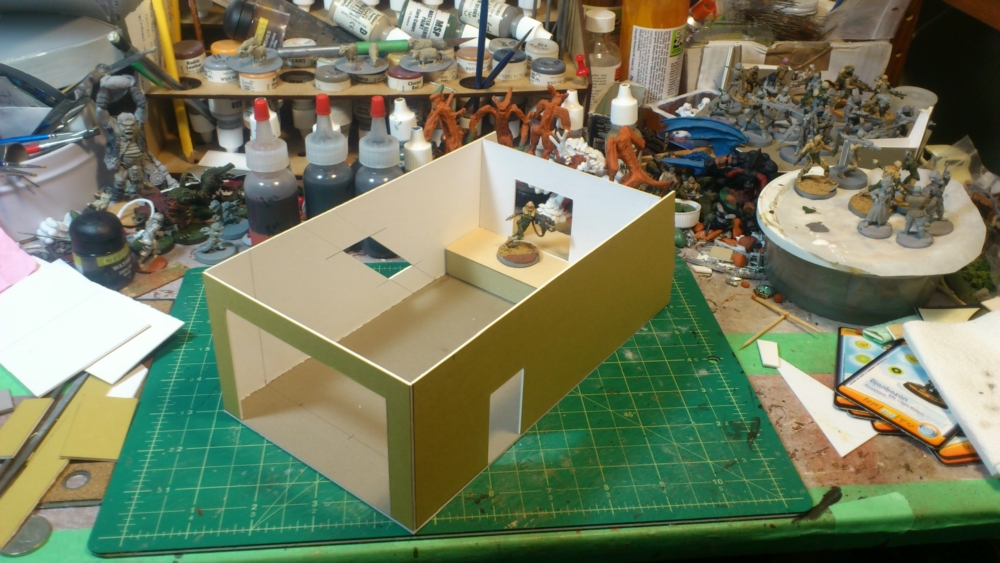
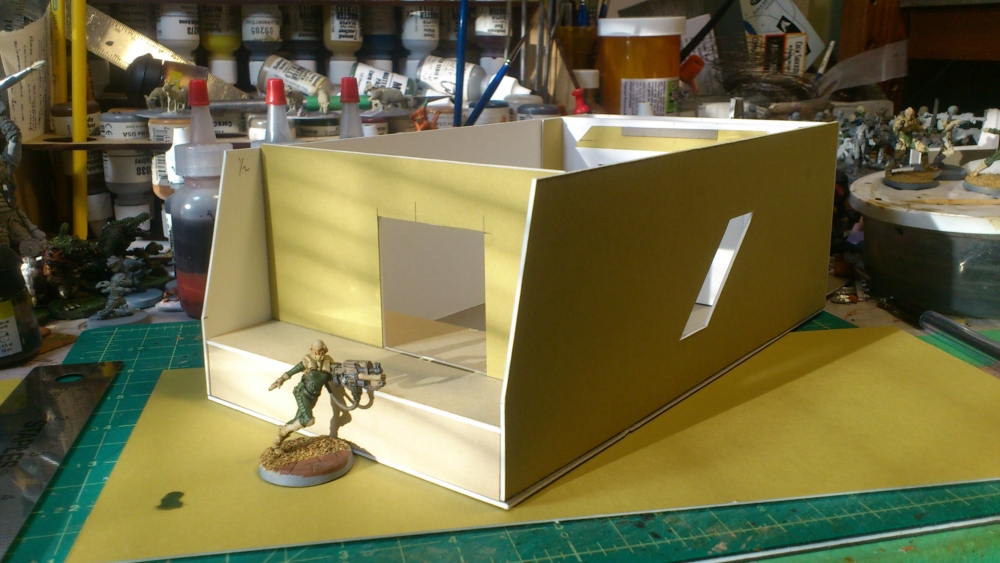
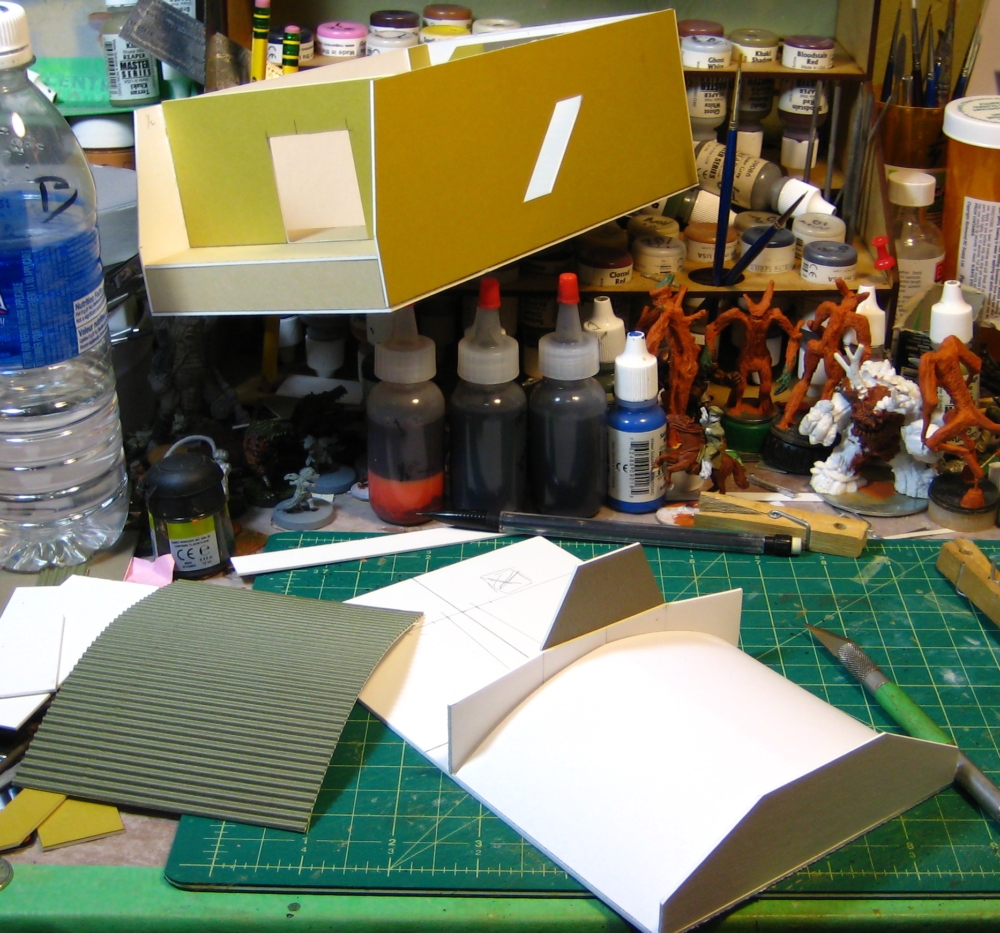
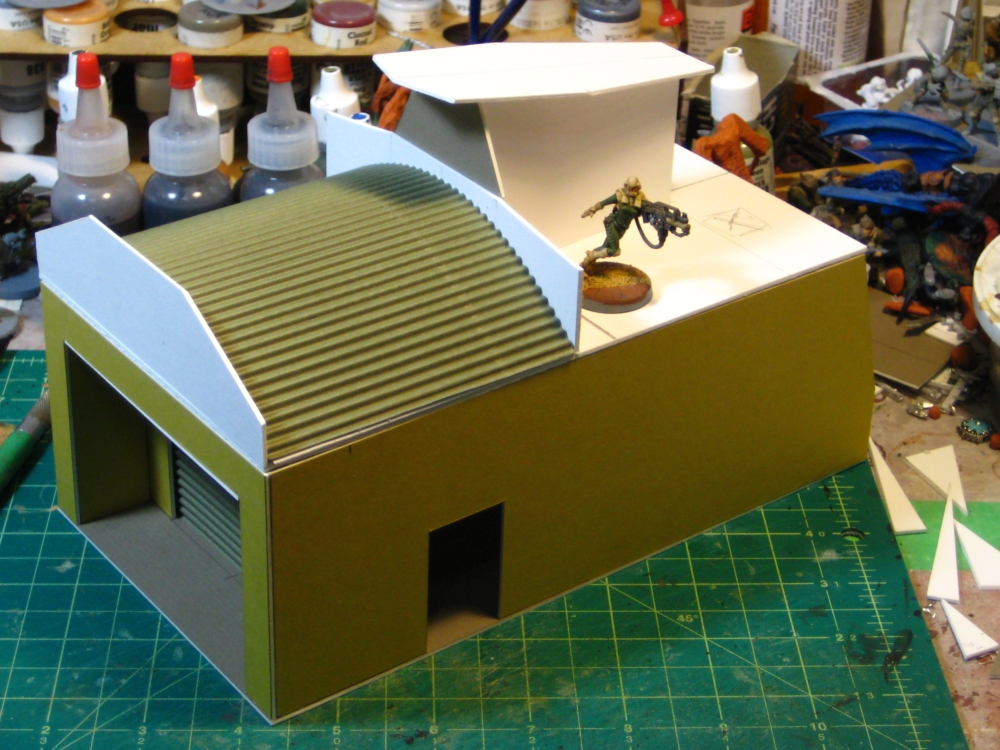
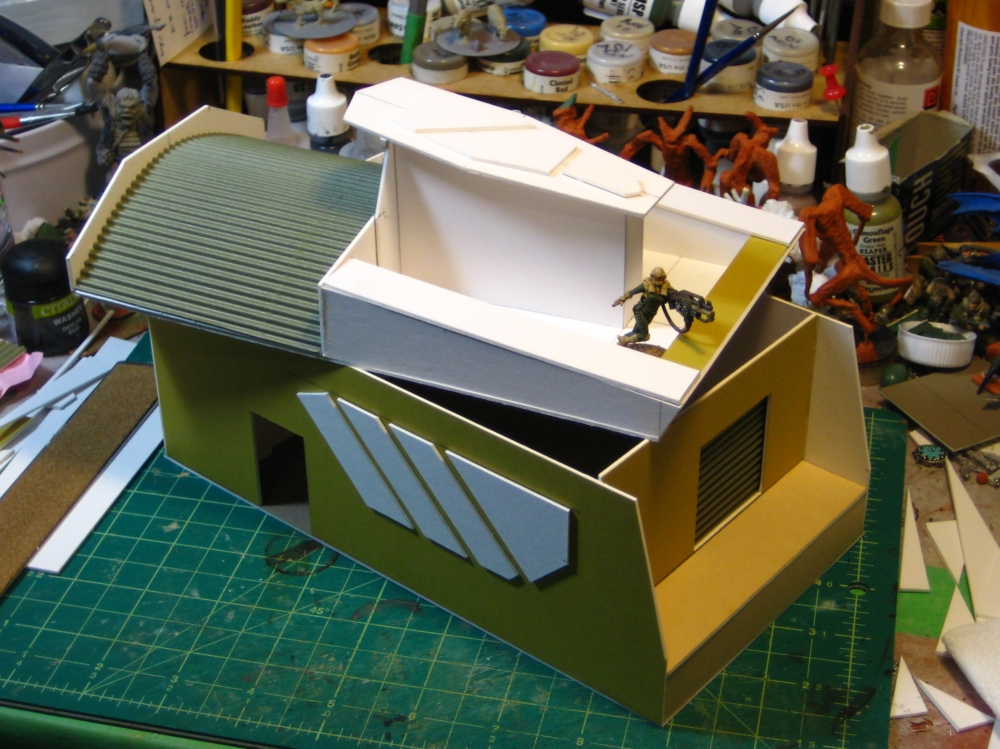
Going through my building supplies I found a sheet of corrugated craft paper that became a feature of the new warehouse, both for the two large rolling doors and on part of the roof. The rest of the building is mattboard/picture framing card, which is cheap, easy to work with, and makes good durable buildings.
The whole warehouse is 9″ long, 5″ wide, and about 6″ to the highest point of the “sail” that divides the roof up.
More details on the picture captions below. There’s still some structural work to do on the back wall and on the roof, and a lot of detailing still to do. Paint will happen eventually, as well.
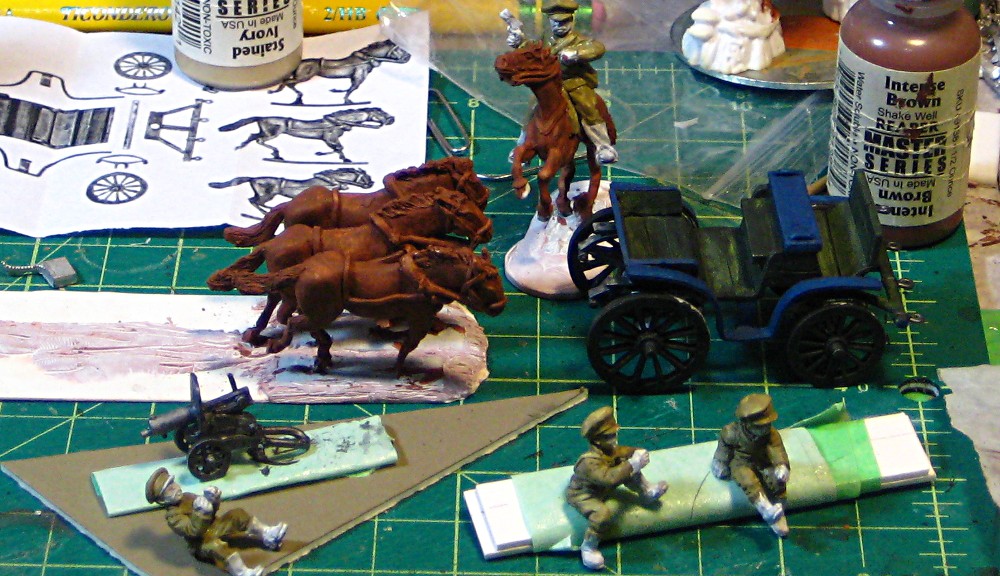
The Eureka tachanka itself (the wagon, that is) comes together fairly easily with a bit of patience and some test fitting. The main body is a single piece, which I had to bend very slightly to straighten as the back end had been pushed very slightly downward during shipping. The rear springs and axle are three simple pieces; the front piece has the bar the horses are harnessed to, then two springs, then a front axle.
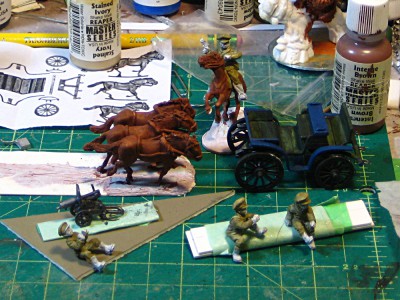
The tachanka itself upside down on the right; the horses mounted and puttied into place on the base to the left. Crew figures int he foreground, along with the Maxim MG. Click for larger, as always.
I glued the whole thing together in one shot, wheels and all, and now that I’m painting it I find myself wishing I’d left the wheels off to make the undercarriage slightly easier to paint. On the other hand, getting the fenders on either side into place and symmetrical is easier when you have the wheels already solidly in place for reference, so it’s one of those “on the one hand/other hand” sorts of things. I can always slop mud around on the underside to hide any minor painting glitches, after all…
The base the whole thing will sit on is a strip of .040″ styrene plastic card, reinforced with Milliput epoxy putty, especially around the horses’ integral bases. I also ran a ridge of putty down the centre of the card base to stiffen it, with some slivers of scrap card under that just to give the putty something to hang on to. The base is just barely big enough to hold the wheels of the tachanka and the horses, but similar minimal “shadow” bases have worked to protect the relatively delicate wheels of other pewter/resin vehicles in my collection for several years now.
The tachanka is getting a dark green basecoat, similar to the paint scheme on the earlier armoured car. I’ve gone with blue trim, either a remnant of civilian finery (a lot of tachankas were lightly converted civilian carriages) or a bit of regimental pride coming through. I’ll leave all three crew in generic Russian khaki so they can be used by either side in my RCW games; I might eventually rig a flag holder somewhere on the thing for it to show off which side it’s fighting for today!
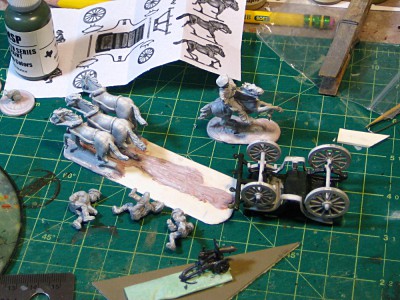
Such basecoating! Horses, tachanka and crew all basecoated, as well as heroic Russian officer dude on his horse behind – also a Eureka figure. Click for larger, as always.
I’m trying to get the tachanka ready for Trumpeter Salute in Vancouver which starts this Friday, so time is pressing and I’m speedpainting like crazy, and feeling rusty because I really haven’t painted much at all in the last eight months or so! At some point I also need to come up with some basic rules for running the silly thing in Chain of Command, but that might be left for the ferry ride over to Vancouver Friday afternoon…
What the heck, you ask, is a tachanka (also found spelled “tchanka”)? It’s a Russian vehicle developed during the Great War and used, in various forms, right through the Second World War. A lightweight, sprung carriage with two, three, or sometimes four horses out front, a Maxim machinegun mounted to fire out the rear, and a few crew holding on for dear life. It was designed to give machinegun support to cavalry units. Wikipedia has a bit more, if you’re interested.
The Eureka tachanka has been around for ages, but it has a bit of a mixed reputation among RCW/BoB gamers. The crew figures are undersized, is the usual complaint, and I’ve also heard comments about the beastie being fussy to build.
That said, it’s the only easily-available tachanka, and the presence of such an eccentric and unique unit in an RCW/BoB force is a powerful lure!
So to start off, here’s what you get.
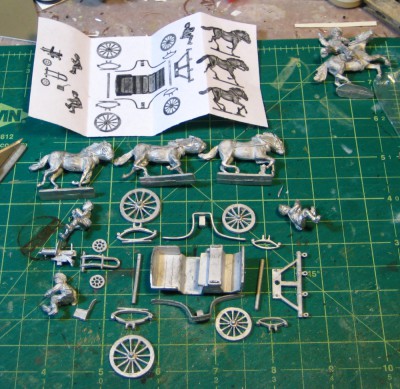
The Eureka tachanka all laid out. 25 parts including crew and horses.
Three horses, three crew (driver, gunner, assistant gunner), a Maxim on the usual Russian wheeled cart (4 pieces) and 15 parts for the tachanka carriage itself, most of which are suspension. The whole thing is cleanly cast and there was a minimum of mold lines and flash to remove, most of it between the horses’ legs.
The small piece of paper with the exploded view is useful as a reference, although I think I’ll wind up printing the photo of the assembled tachanka off the Eureka website as well for additional reference. The front wheels/suspension/horse-attachment bit is the only really complex subassembly, although the fenders on the sides are going to require some gentle, careful bending to fit them into place and keep them symmetrical. I’ll put it on a “shadow” base like I did the armoured car I did a couple of years ago to help strengthen the whole thing, and probably use a small amount of putty out of sight on the underside to reinforce things here and there.
As I assemble the beast I’ll get some photos of it along side Copplestone & Brigade RCW infantry and cavalry, to attempt to answer that whole question about the scale of it. Onward!
Last Sunday (15 March) got us another bash at using Chain of Command/Mud & Blood (I’ve taken to calling it “Chain of Mud”) for Russian Civil War adventures. I umpired the game for Mike, who has played RCW previously a number of times and once with the current Chain of Mud rules, and his brother Stewart, who was visiting from Vancouver and had heard interesting things about my RCW games and wanted to try it out.
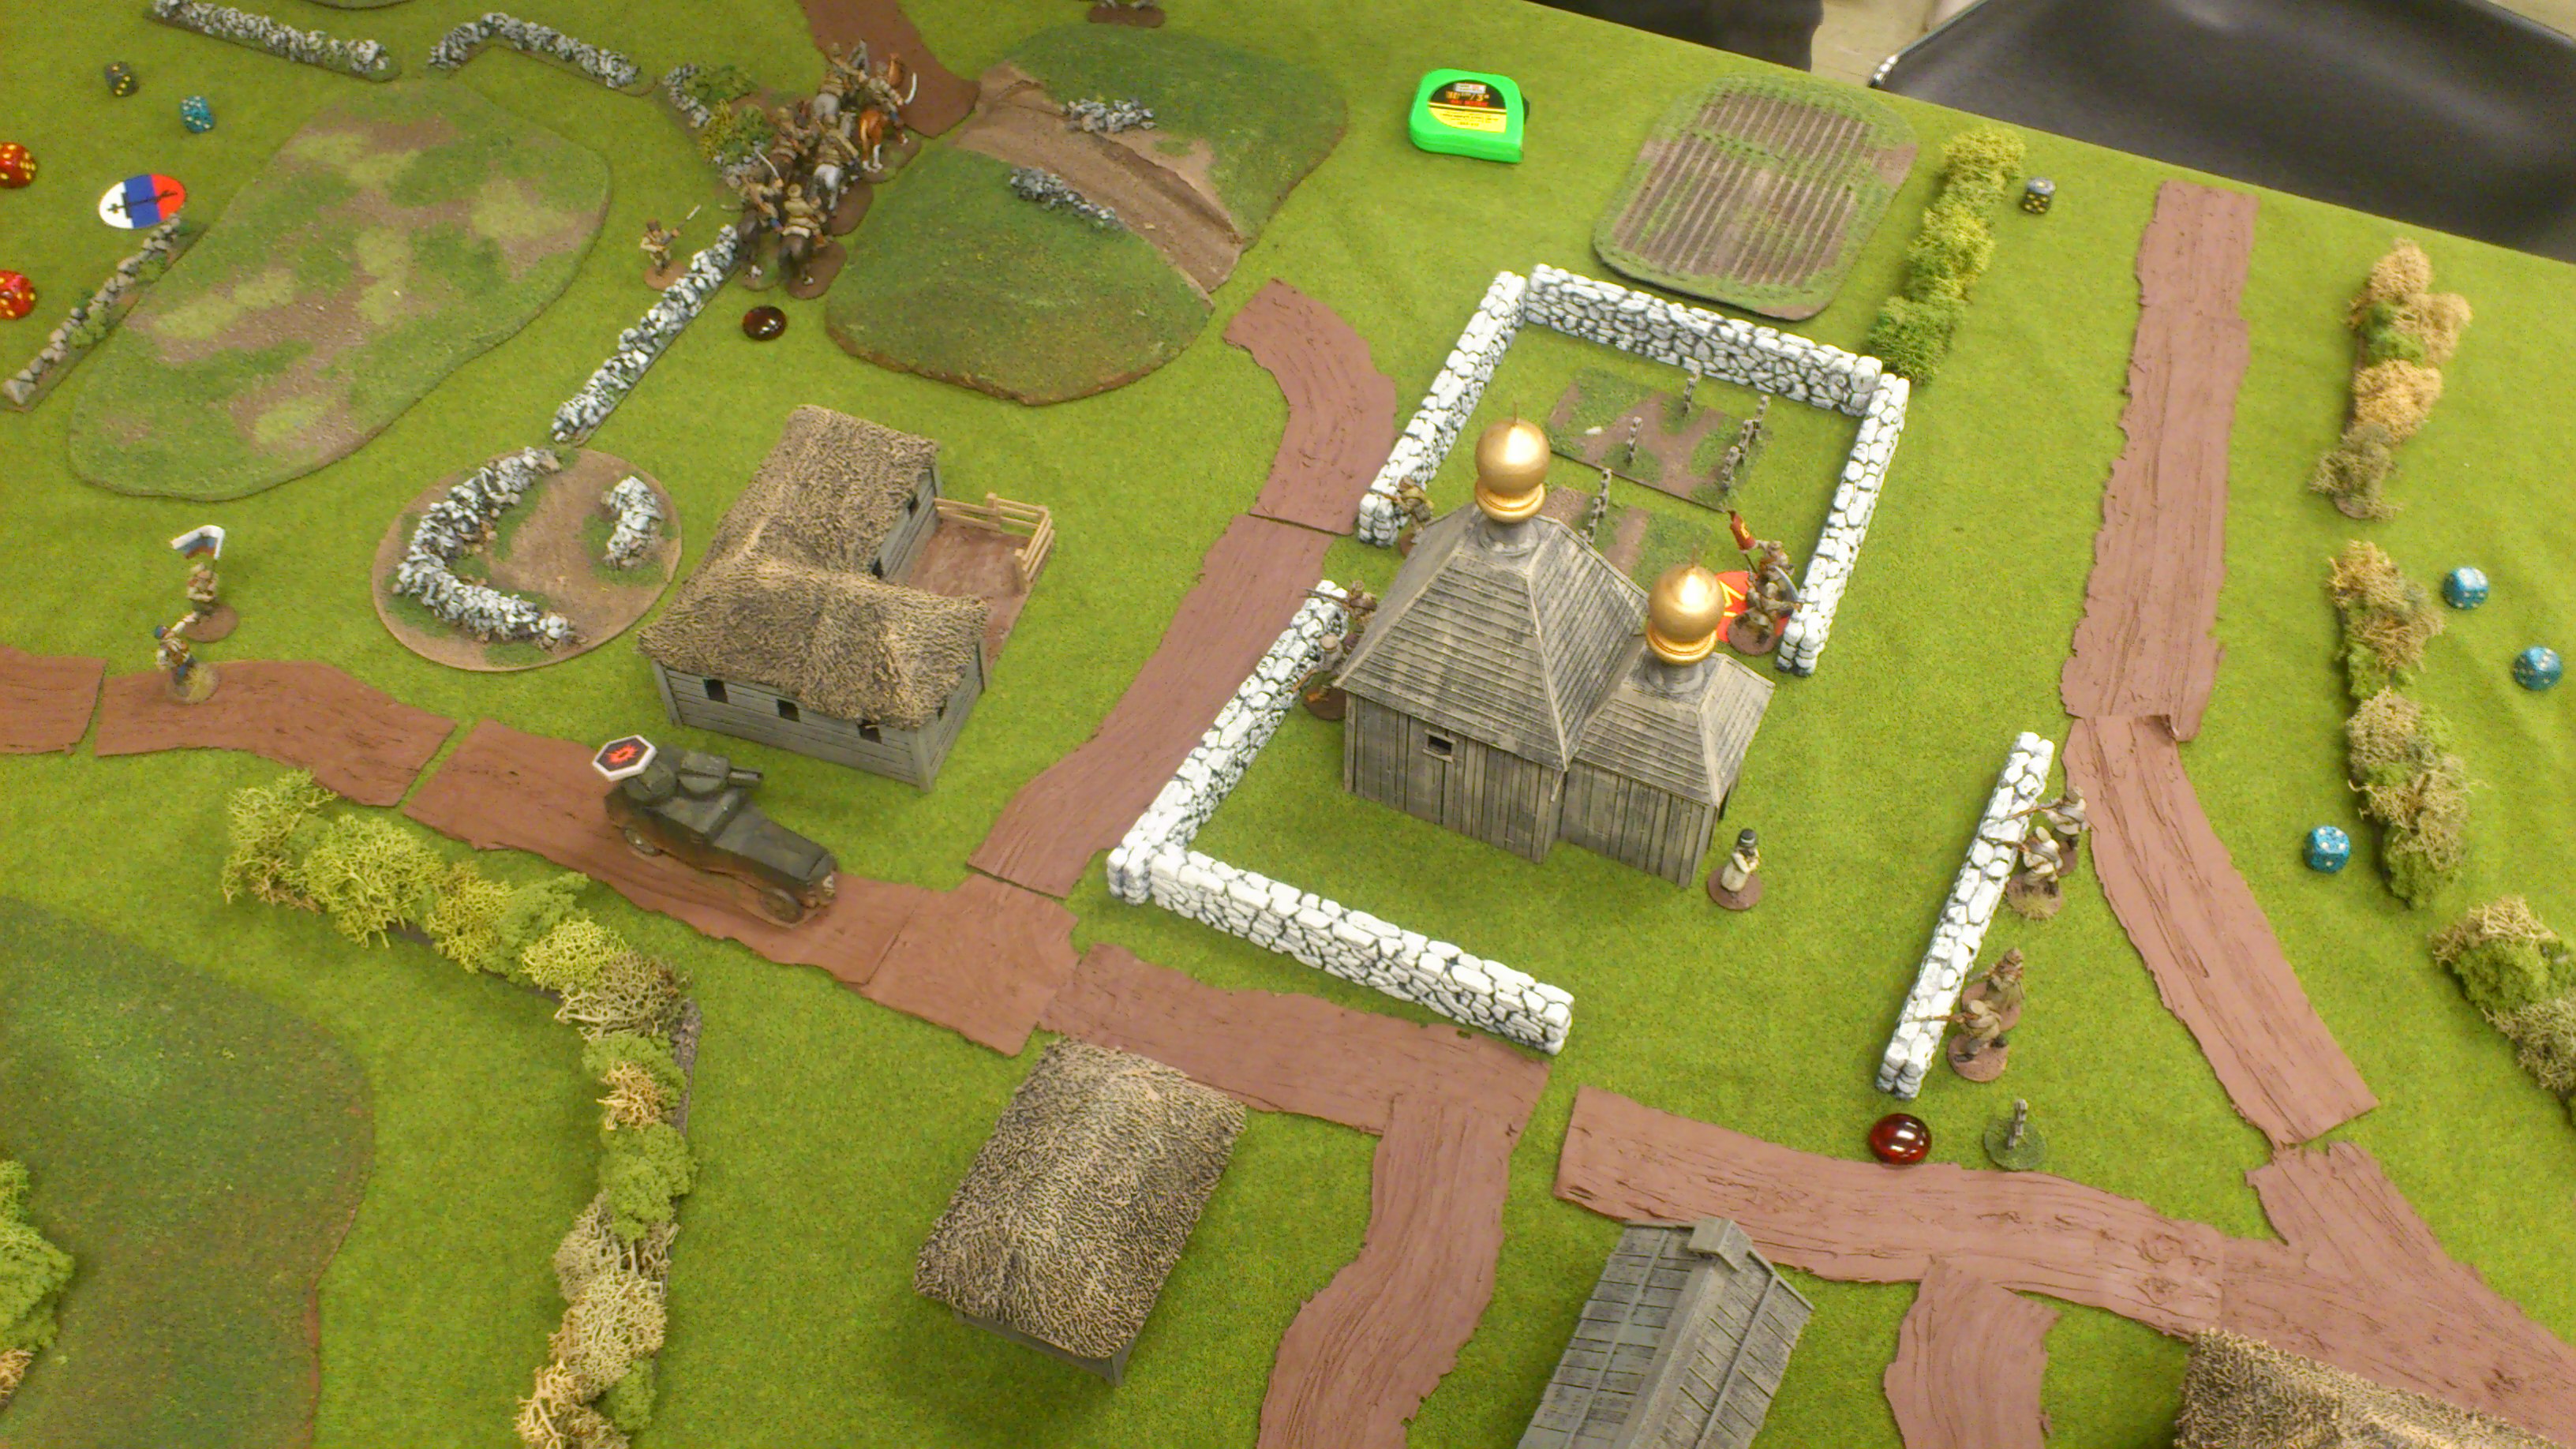
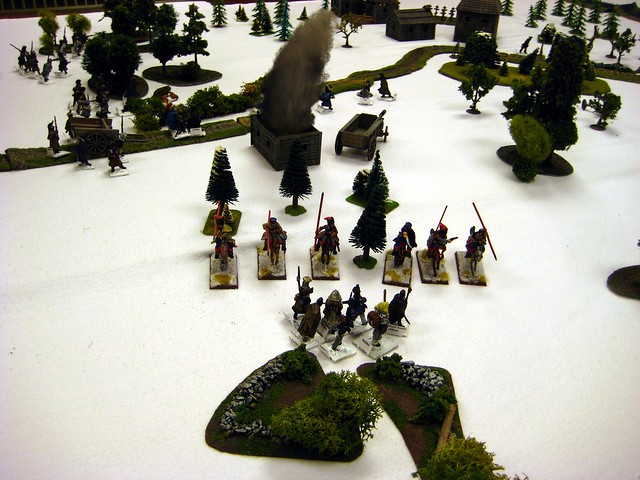
We had a scratch White force of a short platoon of White Rifles (three sections), supported by two small troops (Teams) of Cossack cavalry and an armoured car attacking a hamlet around a small walled monastery defended by two sections of Red militia backed up by a single section of Red Guard and a single Team of especially enthusiastic local Reds lead by one of the Red Guard leaders.
It was a good game that saw the White rifles driven off by Red rifle fire before the Cossacks and the armoured car finally rout the Reds in a really, really tight game that saw both players convinced it was all over for them several times.
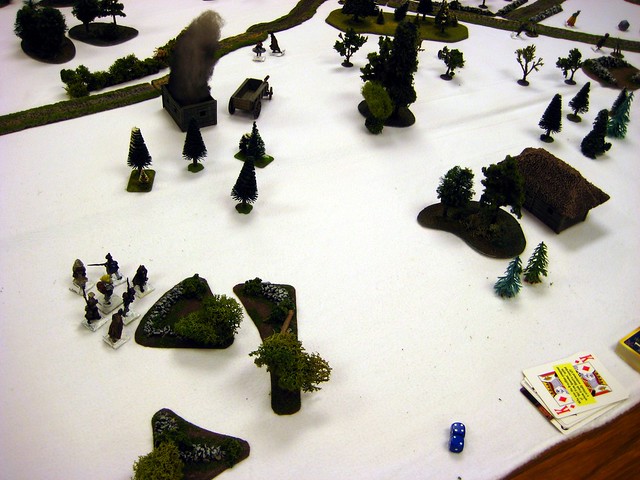
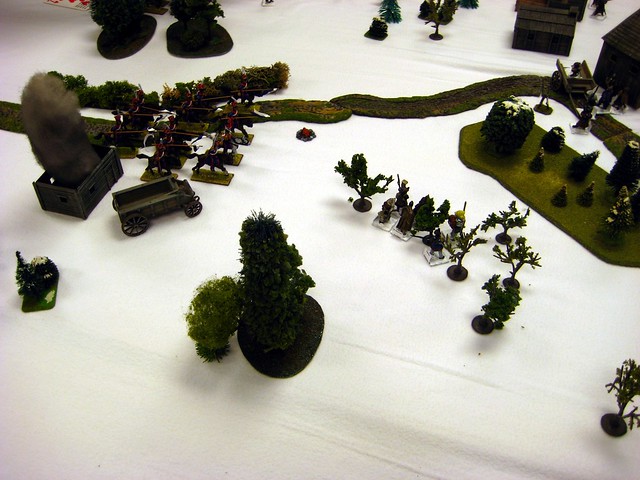
Late in the game, the White armoured car (lower left) brings its machineguns to bear on the walled monastery compound defended by Red Guard.
I realized afterward that I’d gotten the Force Morale tests wrong in the heat of the moment, so the Whites missed two tests that would almost certainly have damaged their Force Morale and could have cost them the game.
I’m really starting to enjoy the Patrol Phase of the game and the use of Jump-Off Points. The tactics of the Patrol Phase, once new players catch on, can be almost as fascinating as the main game itself, with the limits on movement imposed on the Patrol Markers and the conflicting desires to set up good JoPs for yourself and also deny the enemy good JoP positions. This was the first game we’ve played where one Jump-off Point marker wound up right on the table edge, nearly halfway up one long side of the table, which gave the Whites a flanking position on the whole hamlet that gave the Reds quite a lot of trouble in the first half of the game.
I’ll be running an expanded and tweaked version of this scenario at Trumpeter Salute in Vancouver in a couple of weeks; I might swap the ordinary Red Guard out for a section or two of Red Sailors, just because they’re such a colourful set of figures to put on the table! With a bit of postal luck I might also have a tchanka from Eureka Minis to add to the fun!
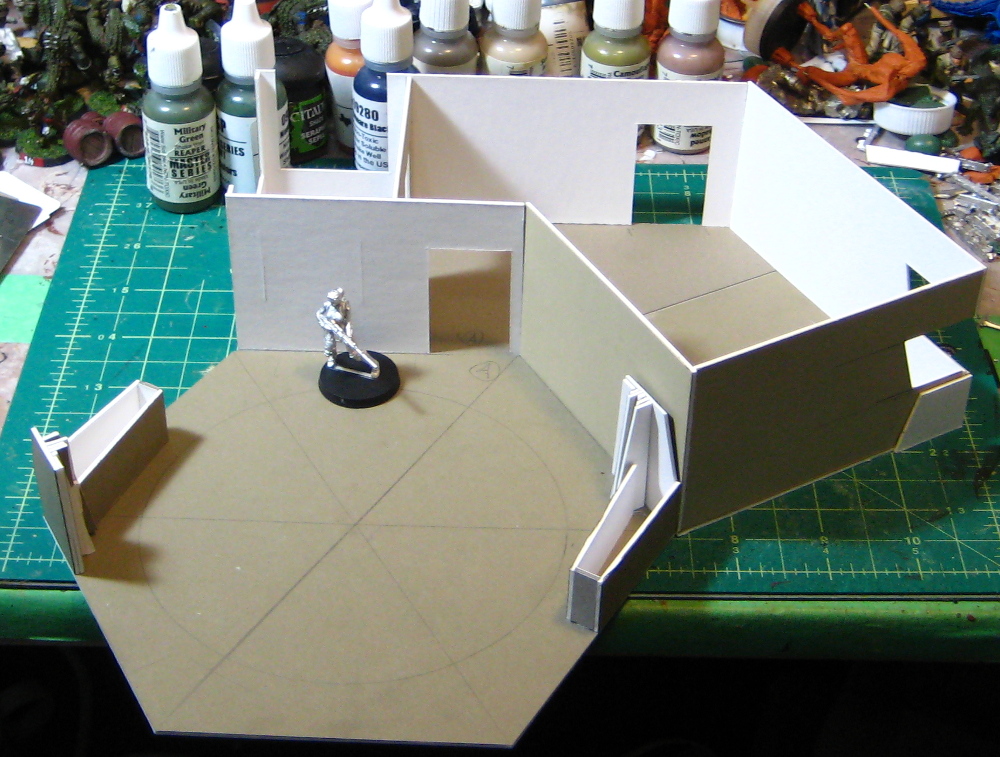
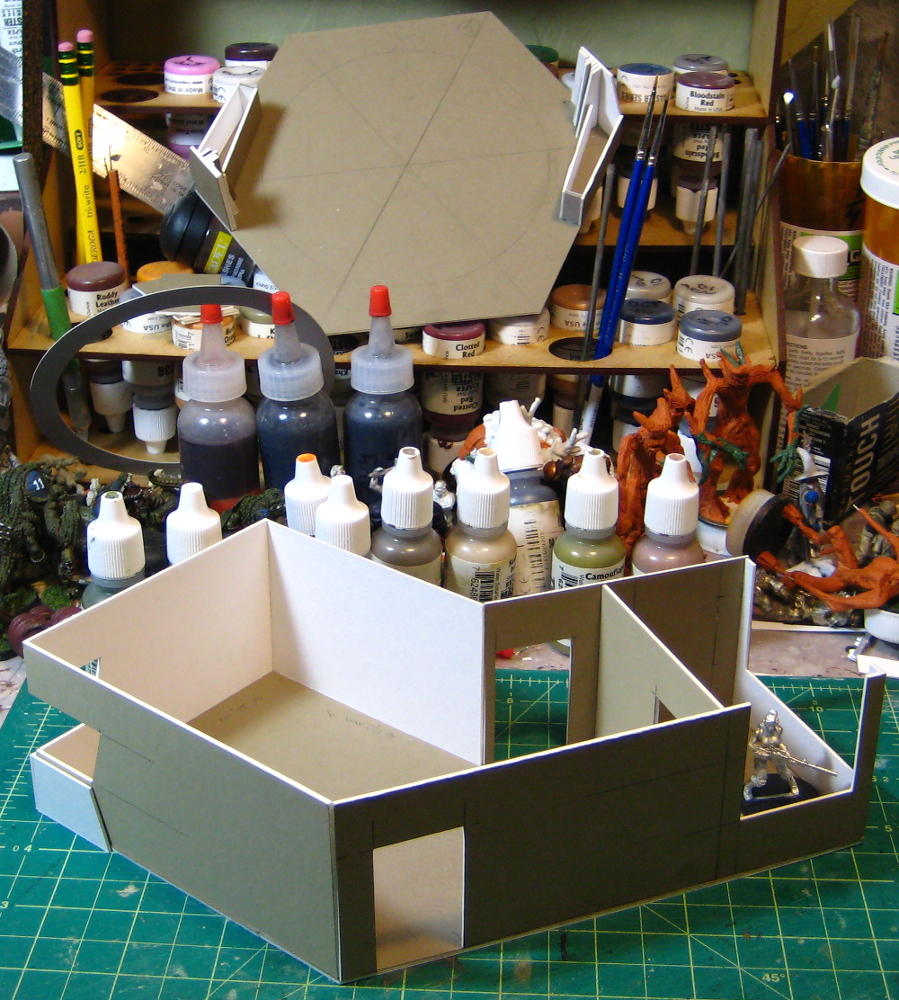
I’ve previously shown my urban scatter terrain for Infinity, and after getting that assembled I decided to tackle something more challenging and larger.
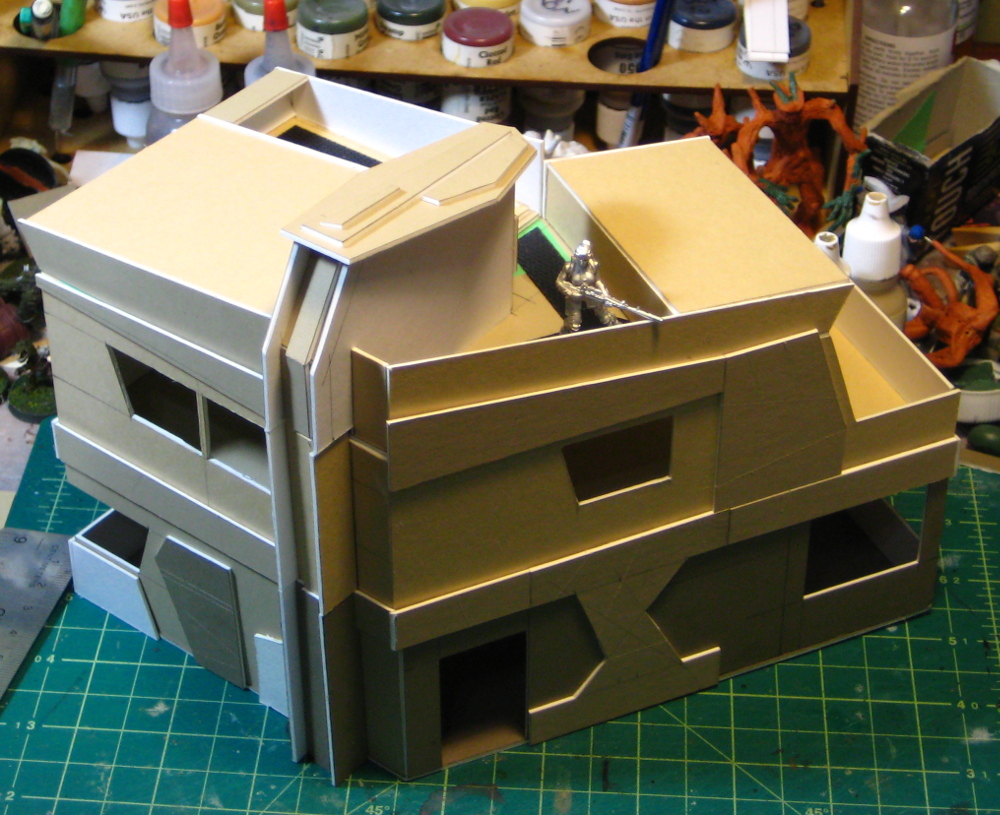
Quite a bit larger, actually. It’s a two-storey building that wound up being about 10″ long, 6″ wide and almost 7″ tall!
The building is entirely made of mat board, usually used as picture framing board. It’s good quality cardboard, easy to work with and it takes paint and glue well. Our local art supply place, Island Blue, sells the offcuts from their framing business off cheap! The roof and second storey come off to allow full access to the entire building during games, and I think I’ve managed to make the building tactically interesting for games of Infinity.
Check out the gallery below; the captions have a lot more detail.
If you’re interested in doing similar buildings for Infinity or any other skirmish game, I really like the ongoing “Cardbuilding” series of articles over on the Infinity news site Data Sphere: Part 1, Part 2, Part 3, Part 3.5, Part 4. Errhile is much more organized than I am, designing a whole system so that his buildings nest and stack for storage and reconfiguration, and he’s got lots of great techniques and ideas in his lavishly illustrated articles. I might well do some similar modular buildings, but for now it’s fun to just bust out a big, complex building — I haven’t done much terrain building recently!
So I’ve been persuaded (OK, it didn’t take much…) to get into Infinity, the fast and lethal science fiction skirmish game from Corvus Belli. I’ve been vaguely interested in Infinity for years, both by the high quality sculpting and because of the background and basic look of the game with it’s obvious influence from awesome sources like Ghost in the Shell, Bladerunner, cyberpunk, and a generally “hard science fiction” future – no skullz, no rusty Gothic goofiness, etc!
I’ve picked up a small Haqqislam force and started painting them up; they’re really neat figures that I’ll show progress pictures of later.
Being the sort of gamer I am, though, I also immediately started producing bits of terrain for the game. Infinity is a fast lethal game that demands a fairly high density of terrain on the table. Most of our terrain is fairly urban, lots of shiny new lasercut MDF buildings owned by the other players, so I decided to do some mixed scatter terrain to go along with that.
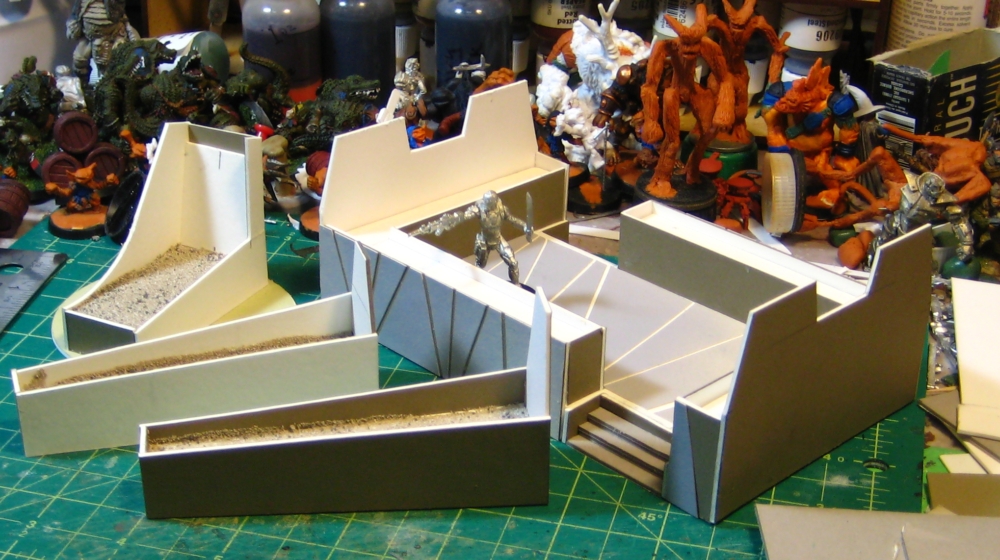
Planters seemed like a good choice – straightforward to build, plausible in an urban environment, a good chance to introduce some greenery and colour to an urban board, and a chance to use up some of my stockpile of scrap and offcut mounting board leftover from older, larger projects.
28mm planters from scrap card for Infinity SF skirmish gaming. Figure is a 28mm Janissary heavy infantry.
The largest piece is 6″ wide and 3.5″ across, mostly because that’s the size of a scrap of foamcore in my leftovers bin. The four smaller planters are 4″ long and 1″ across at the wide end. The small piece at the end is based on a 3″ circle of mounting board I cut as an experiment — yes, my circle cutter will cut mounting board. But not happily…
I’ll probably do another two or three of the long narrow planters, and then start exploring other shapes.
I did have to get into my uncut stockpile of large mounting board sheets for the end plates on the large raised piece, but basically everything else is from offcuts – total material cost so far about as close to zero as you can get!
I’ll get these painted this weekend, then break out the greenery to fill them in.
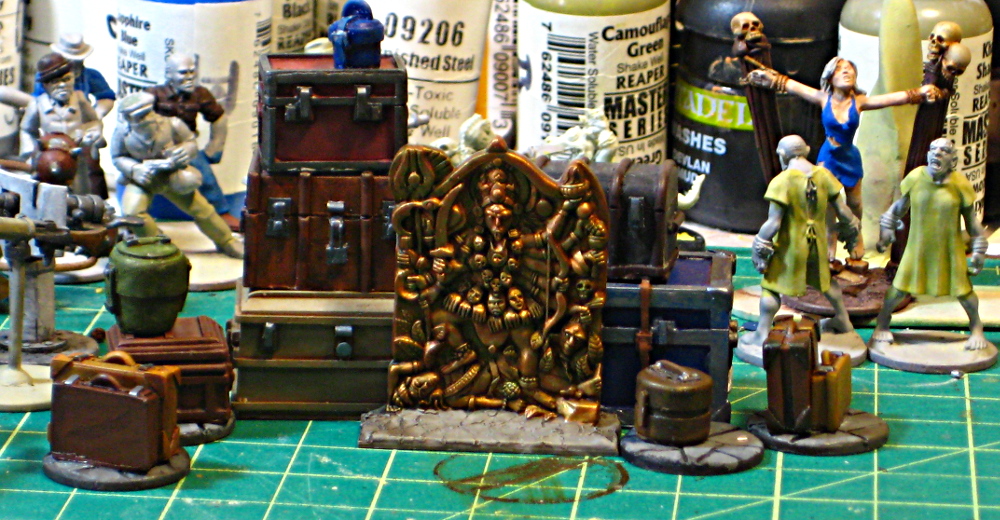
This sculpted bas-relief is by Bob Murch of Pulp Figures fame, and is included in his Mad Guru set of Thugee. I own most (possibly all, I’ve lost track) of the PF Thugee packs; they’re among my favourite figures from Mr. Murch and regularly appear in our Pulp Alley games. (Thugee previously on the Warbard here and here!)
A bronze bas-relief of Kali, Hindu goddess of death, change and rebirth. Click for larger, as usual.
The bronze relief, though, has sat around unpainted and ignored for at least a year until it fell into the current round of “clear off the painting bench” mania! The main colour is GW Dwarf Bronze over a grey primer, then a coat of GW Gryphonne Sepia wash/ink. A very, very thinned green ink over that for a bit of verdigris here and there, and finally a few highlights back with straight Dwarf Bronze. (Note that all my GW paints & washes are from the previous range, not the current GW paint/wash range, and I’m afraid I have no idea what the current equivalents of these colours are!)
The base is just a scrap of plastic sheet and a bit of Milliput with some flagstones scratched into the putty to tie it in with the flagstones already on the pewter. The whole thing has come out very nicely, and really shows off the incredible details of the piece, with the six-armed Kali with her necklace of skulls, skirt of human hands and forearms, and one foot on the body of her consort Shiva. (Good stuff on this Wikipedia article about Kali, btw.) Mr. Murch did his homework!
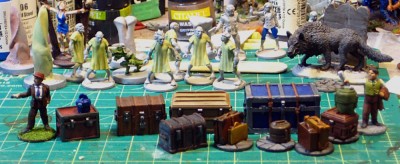
More months ago than I care to admit, I bought some really neat pulp-era 28mm luggage in resin from Slug Industries. I prepped and primed the first batch of the stuff, got some paint on it, then it sat around the edges of my painting bench for the next… thirteen months or so until just this week I finally finished it, as part of a badly-needed get stuff off the bench session!
Pulp luggage! Click for larger, as usual.
Several of the smaller pieces I’ve based together; the bases are pennies with a thin smear of Milliput on them that I’ve roughly sculpted into flagstones or cobbles. The larger trunks I’ve left as-is; they’re big enough not to be particularly fussy scenery pieces. Scale provided by a pair of Pulp Figures 28mm reporters in the above photo; the grid on the cutting matt is 1/4″.
There’s also some fun stuff in the background, but more on that soon enough!
I’ve got another two full sets of this luggage in my bin o’ bits, having ordered three sets from Phil last March. I might have to pull another set out sometime soon and get started on it… and hopefully it’ll take me less than thirteen months to finish the next batch…
Had two small orders come in last week. I have been saving money for an epic bike vacation to Europe in a few months (Vienna, Austria to Nantes, France over six weeks!) and not ordering much new stuff for wargaming the last few months, which is one of several reasons it’s been quiet around here. Nevertheless, some new stuff comes in every so often!
The first order was from Impact Miniatures, all Blood Bowl/fantasy football related stuff. A set of three block dice, two of their football markers, and eight more Baby Crocs – Skinks, basically, for their Sarcos Crocodile team, which I bought last year.
The footballs are neat. I haven’t confirmed with Impact, but I’m pretty sure they’re 3D-printed – they’re a slightly flexible resin-like stuff, with a large spike-adorned football and a ring/loop so you can hang the football of a figure’s arm or around their neck or shoulder when they’re carrying the ball. Imagine the sort of cheap charm ring you get in Christmas crackers, except in white resin and with a spiked football instead of a fake jewel. It’s a great idea for Blood Bowl or other fantasy football games and a much easier way to show which figure has the ball than the freestanding individual balls, which can be awkward to balance on some figure bases.
I already have eight Baby Crocs, so why double the local population? So I can proxy Baby Crocs as Halflings and field a BB team of Croclings, mostly! I’ve heard that Halflings are a challenging team to use and don’t expect them to win much, but what the heck, they’ll be entertaining. Corey also has a team of Impact’s Scotlings (Halfings in kilts with cabers) so a Scotling-vs-Crocling matchup should be entertaining.
I’ll also be using a few of the extra Baby Crocs as auxiliary figures for my existing Sarcos team. Cheer-crocs with greenstuff pompoms added to their hands, maybe an apothecary-croc with a barrel of go-juice to get injured players back on the pitch, that sort of thing – the fun, oddball sideline figures that round out a BB team.
Oh, and for the Treemen on the Croclings team, I’ll probably pick up a pair of these Reaper Bones Spirit of the Forest figures and convert them a bit as swamp-flavoured Treemen. Like the Impact Trollcast resin figures, the Reaper Bones plastic resin figures are a great thing, nice figures in easy-to-convert material for a very good price!
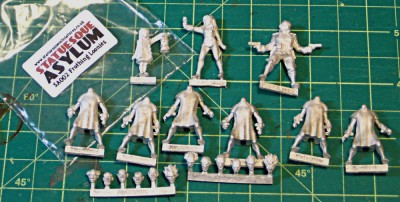
The other order is from Statuesque Miniatures in the UK, and as oddball as the Impact order was, this order was definitely crazier. Crazed, in fact, and lunatic, as it included six Frothing Loonies, a small girl, and a pulp hero & heroine! All part of a special introductory bundle deal Statuesque had put on back in the first week of March.
Lunatics & Heroes. 28mm figures from Statuesque. Head sprues for the lunatics at the bottom, headless lunatic bodies, then (L to R at top) Lillie, Pulp Girl & Phantom Ace. Click for larger, as always.
The six loonies have three different bodies and a sprue of six heads. Because I got two packs of three figures each, I have two of each body and two full sprues of heads, so I have half a dozen spare lunatic heads now – fodder for converting other figures, perhaps! The bodies are in hospital robes (yes, they’re all partially open at the back, in proper hospital robe style…) and have shackles on their wrists. The heads look suitably lunatic, and most have obvious scars across their shaved heads where diabolical, insanity-causing surgery was undoubtedly been performed by mad doctors!
The small girl is Lillie Poots, who wanders the world curious and unafraid, her path lit by the large lantern she holds up in one hand.
The pulp hero is Phantom Ace, a large man in flying leathers, helmet and goggles, with a pair of automatic pistols, one in each hand. Pulp Girl, his crimefighting companion, is a slender teenage girl with some sort of mystical or weird-science apparatus on one wrist and hand.
All the Statuesque figures are very cleanly sculpted and beautifully cast, with hardly a mold line or casting vent mark to be seen. The adult figures are bulky 28mm, sized to go with Pulp Figures, Copplestone and other common pulp lines. The only downside to them is they’re all designed to fit on slottabases, which I strongly dislike – my Blood Bowl teams are the only figures I own that I mount on slottas. I’ll be snipping the mounting bars off all of these figures and putting them on pennies or other flat bases to match my existing pulp collection. That aside, they’re lovely figures and I’ll be keeping an eye on Statuesque in the future as they expand their pulp ranges – I believe they’re going to be adding asylum staff and other asylum denizens at some point.
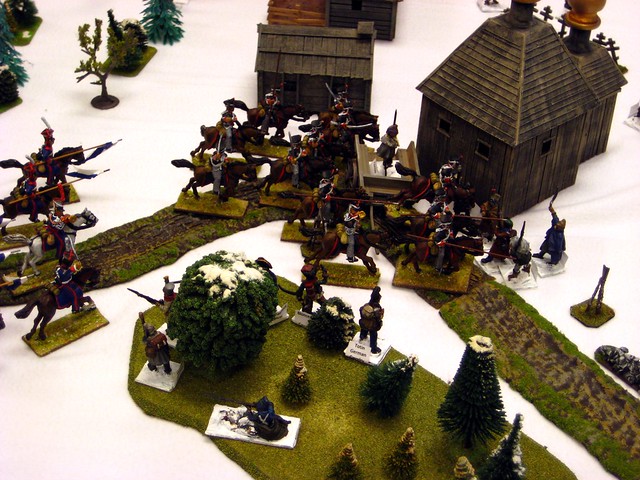
Back in late January, two of the gamers of our group put together a 28mm Napoleonic “Retreat from Moscow” game that was a blast – everyone had a small group of French officers and soldiers, all the main officers had personal side missions or special motivations they could do for extra VP, and the GM ran all the Russian forces.
Pretty much every Frenchman died by the end of the game, mostly run down by the pursuing Russian light horse, often after being distracted by their side mission or after attempting clever things like cutting through the forest instead of just following the road. Oh, and at least one was bashed over the head by an angry Russian peasant!
I contributed my nominally-Russian Civil War buildings to the game; the rest of the figures are from the collections of the two guys who ran it, and the base rules were GW’s out of print Legends of the Old West (LotOW) which are a good, flexible, sane set of blackpowder skirmish/light RPG rules that work well with small parties of figures.
The four photos I took are all up on Flickr; click on any of these photos to see the full-size version over there.