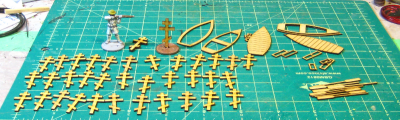
Exactly seven days after I ordered some Orthodox crosses and a few other laser-cut bits from Archeotech, a small padded envelope arrived from the UK. Tucked into a pipe-tobacco tin were 20 of the Orthodox crosses and a pair of small rowboat kits. Amusingly, the tin still smells strongly of pipe tobacco, which combines with the faint burnt-wood smell common to laser-cut MDF in an odd but not unpleasant way.
Orthodox crosses and such from Archeotech. Click for larger, as usual
Andy of Archeotech designed them in pairs out of 1mm MDF, so you glue them back-to-back to get a squarer, cleaner edge than you’d get with a single piece of 2mm MDF. This means that you get a mixed batch of fronts and backs. It’s fairly obvious which is the front and which the back with the MDF Andy uses; one side is noticeably shinier and smoother than the other.
I’ve assembled two of the crosses already, and tacked one of them onto a penny just to get it upright. Scale is provided by a Pulp Figures 28mm U.S. Navy gunboat sailor, also on a penny base.
The other part of my small Archeotech order was a pair of their little rowboat kits. The laser-cut 1mm MDF bits here provide the frame and detail bits (oars and oarlocks) for a small 2″ long rowboat; you provide a strip of light card or heavy paper about 7mm wide for the sides of the boat, as detailed in the well-illustrated instructions on Archeotech’s website. This isn’t a serious figure-carrying vessel, more a small detail piece to appear alongside a dock or as a tender, to provide nautical flavour. It’s a well-designed little kit, though, and the basic idea could easily be scaled up to make a small launch or powerboat that was capable of carrying three or four 28mm figures on small bases.
As I mentioned in my first “Frickin’ Lasers” post, Archeotech is set up to do custom/semi-custom lasercutting specifically for wargamers, and to work with wargamers on designs. I’ve certainly got some things I’ll be approaching Andy about in the future!
I’ve been housesitting a relative’s place since last week, which explains the lack of posts here, but we (my brother and I) have also taken advantage of access to working space to crank out a project we’ve talked about for several years – a good, big gaming mat!
I’ve done hills, trees, buildings and all sorts of scenery bits, but they’ve always been put on top of borrowed mats, a lot of which clashed with the scenery we’d built. The base is a 6 foot by nine foot canvas painter’s dropcloth from Home Depot; we then used latex caulking tinted with brown paint and scraped on thin, then dumped generous amounts of mixed Woodland Scenics flocking on top of that and pressed it down gently.
After the caulking dries (overnight), we shook the loose flock off and gathered it for re-use. The surviving flock seems pretty solidly attached, although we’re looking into some sort of fixative to solidify it. Spray adhesive or cheap, scent-free hairspray have been suggested; some experimentation might be in order. In the meantime, the mat is usable as-is!
I’ll do a proper tutorial-style posting when I’m home and on my own computer, but here’s two photos of the beast! The figure is a 28mm Artizan pulp heroine, chosen for her red dress so she stands out at least a bit on the huge green expanse!
Most of a six by nine flocked gaming mat, drying on the garage floor. The tiny fleck at the centre of the photo is a 28mm figure!28mm figure in the vast green expanse.
Over on Lead Adventure, in a thread about some nifty laser-cut bits someone had commissioned, I randomly commented that I wanted a dozen or so Orthodox crosses for Russian scenery, didn’t think they’d be strong enough if built from bits, but couldn’t see commissioning laser-cut ones because, well, I only wanted a dozen or so.
Whereupon Andy Slater (best known as the administrator of the long-lived and fantastic TerraGenesis wargaming terrain site) contacted me; turns out he has started up a small-run bespoke lasercutting service for wargamers. If he could sell them afterward on his site, was I interested in my dozen or so Orthodox crosses?
You see more and more laser-cut terrain everytime you turn around these days, lots of it very nice indeed, but I’d honestly never considered commissioning short-run custom pieces. Andy has, though, and has set up a small laser-cutting operation with exactly that aim.
I now have a batch of laser-cut MDF Orthodox crosses (and a few other bits from Andy’s store) making their way across the world to me. You can see Andy’s photo of the crosses already, and as soon as mine arrive (probably in a week or less, the Royal Mail->Canada Post pipeline is fairly efficient) I’ll post up my own photo and finally start a few Russian cemetery pieces to go along with last year’s onion-domed church.
This is not a new project, just something I remembered while waiting for glue to dry on my current scenery and decided to revisit.
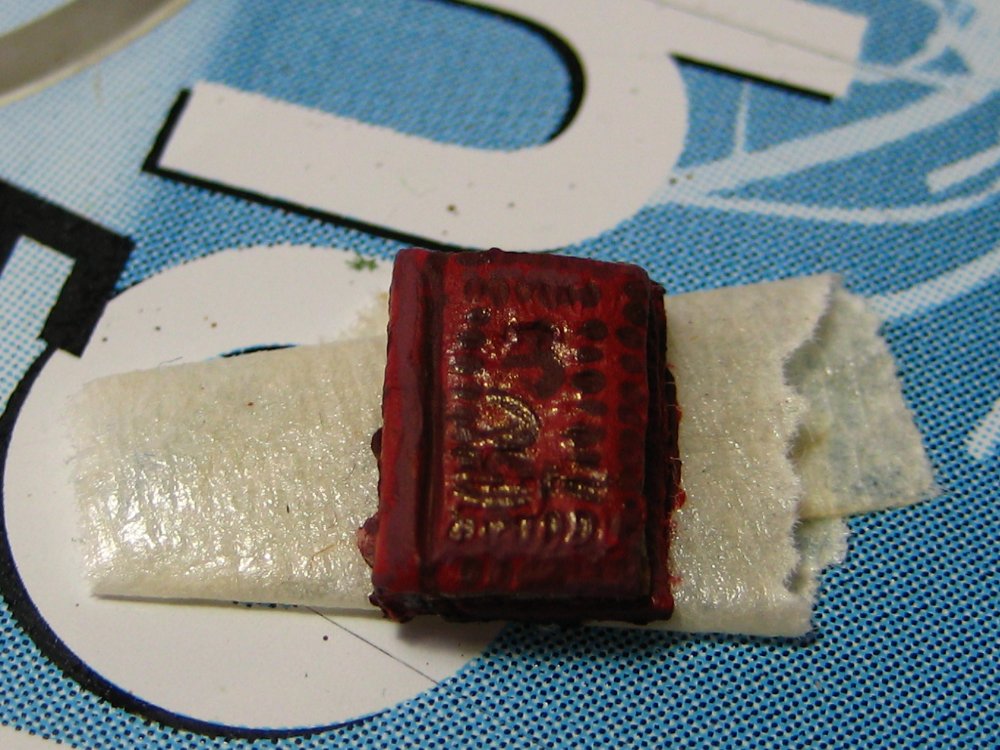
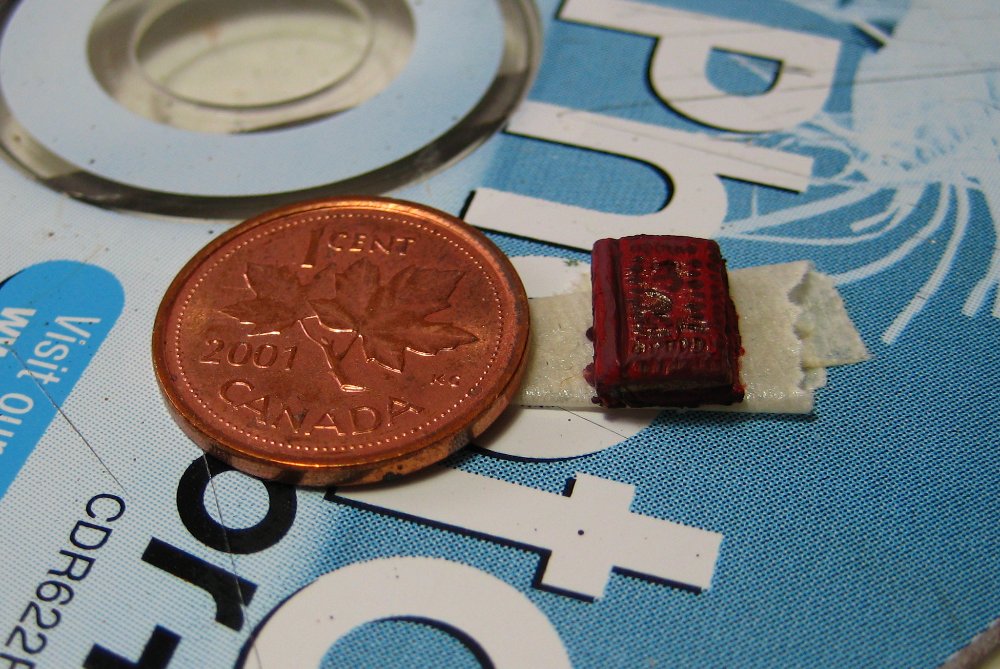
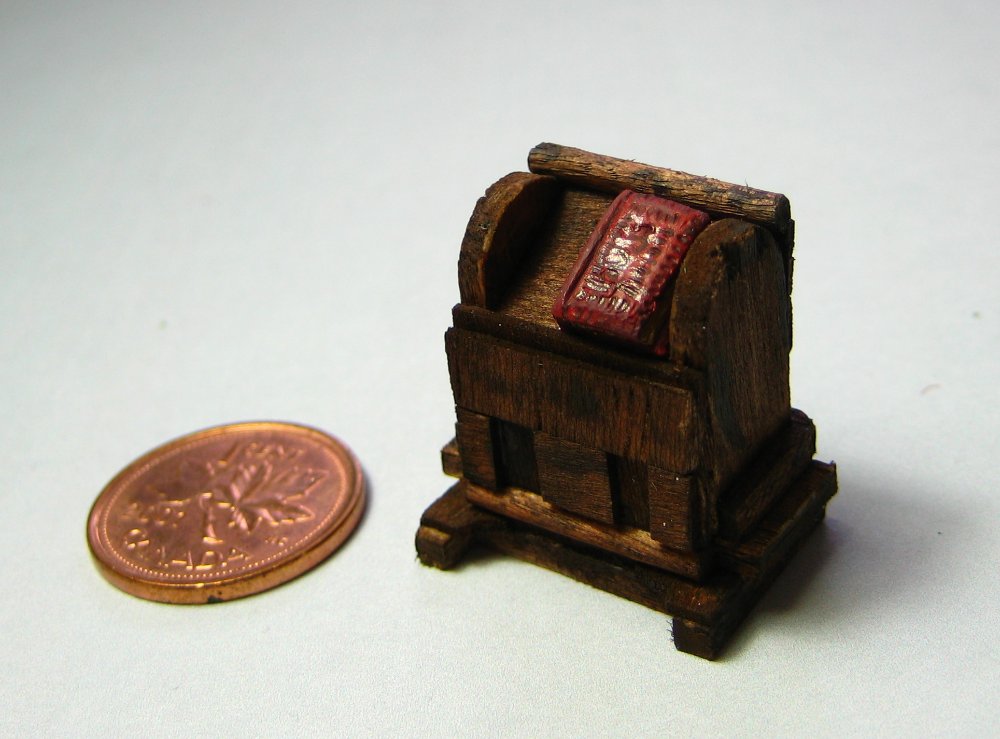
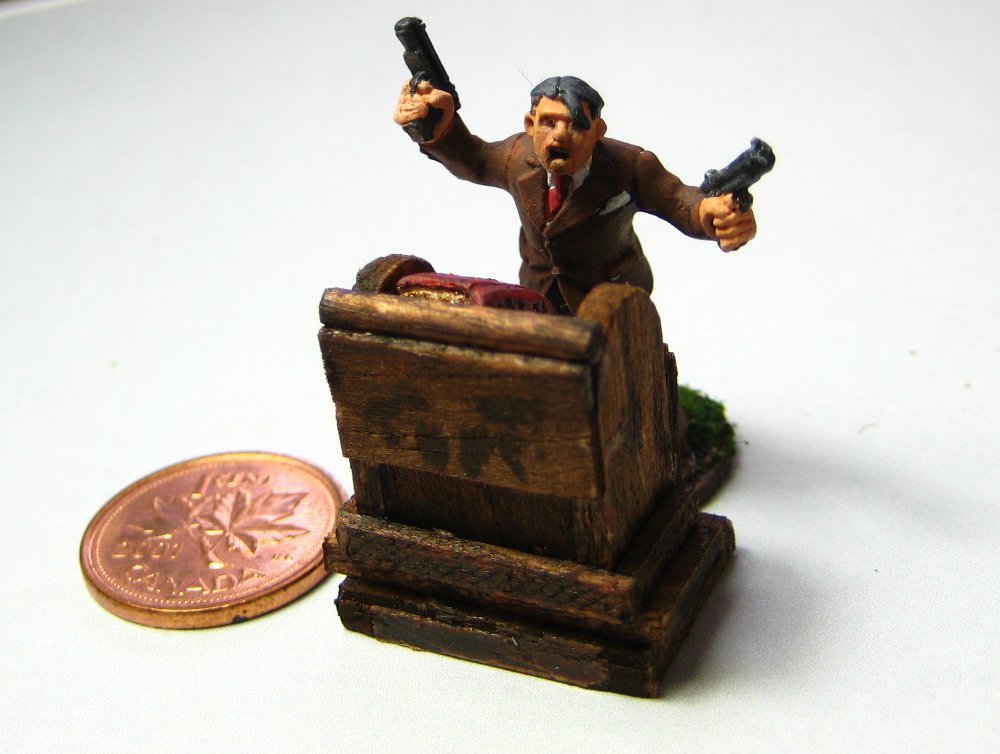
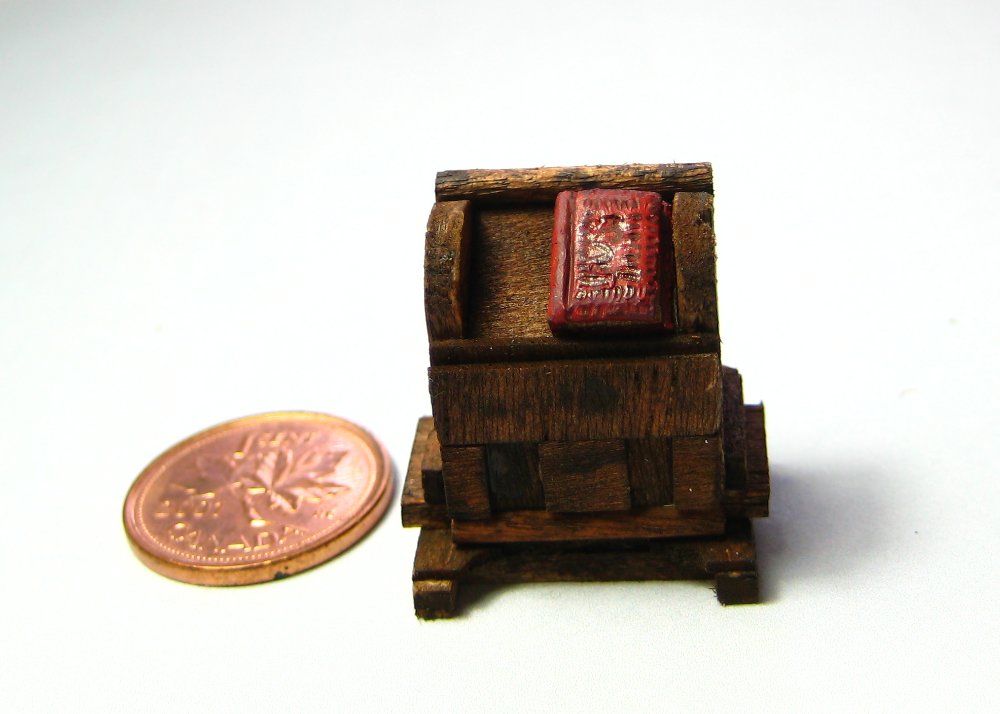
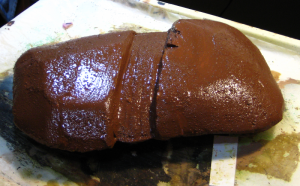
In September of 2009 I sat down with a bit of Milliput and some scrap wood and created the following lectern, upon which resides a Tome of Madness, filled with eldritch verses of great power and bound in the red leathery hide of captured demons. Or something like that, anyway. It was a birthday gift for my brother as he was busy painting a group of cultist figures from Pulp Figures. That pre-dates the current version of this website, so it never got featured here, although I did show it off over on the Lead Adventure Forum. Enjoy!
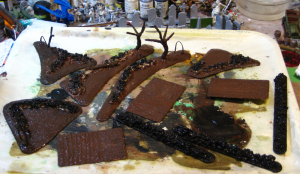
Having done hedgerows and fields, I wanted some rougher, more overgrown terrain, and I also wanted to start experimenting with tree creation, as trees are the one thing I’ve been lacking in my scenery so far.
I started with the last reasonable-sized offcuts of the 3mm plastic I used as the base for the fields. The rock walls are decorator’s gravel and Gorilla Glue. I mentioned Gorilla Glue briefly in the article on fields, but briefly it’s a thick glue (the colour and consistency of honey) that activates with water, and expands as it dries, foaming outward. I wet the surface of the plastic card with a damp paintbrush, ran a bead of Gorilla Glue were I wanted the wall, dumped gravel in roughly the formation I wanted, then sprayed the whole thing liberally with plain water. The expanding Gorilla Glue will fill some of the gaps between the pieces of gravel, and also fill out the bulk of the wall slightly. After it dries (a couple of hours) you can always run a second bead of glue across the top of the wall and dump more gravel on. Two layers of gravel like this will get a wall up to just over waist high on a 28mm figure, which is enough for my purposes.
The three straight rock walls are based on tongue depressors, so 6″ long and about 3/4″ wide. The three small fields/garden bits are old credit card sized gift cards I had lying around, with the raised beds and plow furrows done with hot glue. The larger pieces are all from the 3mm plastic card offcuts, the longest being about 8″ long, the triangular piece about 4-5″ a side.
Gravel and Gorilla Glue for rock walls. Click for larger.
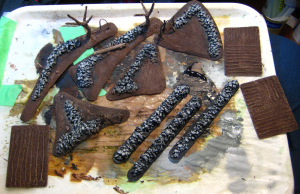
The trees are fairly heavy wire (sold in local hardware stores as “utility wire”, I seem to recall) bent and folded with pliers, then glued down with hot glue. Once they’re secured, I used more hot glue to bulk out the trunk and major branches. Everything – ground and trees – got slathered in white glue and had sand dumped over it at this point.
Rock walls done, on to tree trunks, then sand over everything. Click for larger.
After the sand had dried overnight, everything was basecoated with dark brown paint, mixed randomly with a bit of black paint. The rock walls got straight black as a basecoat. All my basecoats also have a healthy dose of white glue mixed right on each piece to secure the sand and gravel.
Basecoat – brown over everything but the rocks, which get black. Click for larger.
Last bit of painting is a pale brown/tan drybrush over the dirt and trees, dark grey then pale grey/white over the rocks, and finally a pale grey/tan/white mix drybrushed on the tree trunks so they’re a slightly different colour from the ground.
Drybrushing done – light brown & tan on the dirt parts, dark grey & pale grey (almost white) on the rocks, final grey/tan drybrush of the tree trunks.
In Part Two, flocking, scenic foam and other scatter on the ground, lichen for bushes, shrubs and tree foliage. Coming soon!
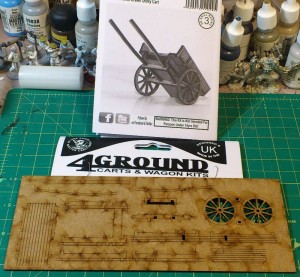
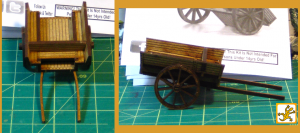
As part of an order that arrived this week from Brigade Games I picked up one of 4Ground’s neat looking laser-cut carts. This one is “28-CAW-303 C19th C Horse Drawn Utility Cart”, known on 4Ground’s own site simply as “Horse Cart”! I’ve been meaning to get some of these 4Ground carts & wagons for ages, as carts and wagons are nearly universal scenery and the pewter & resin ones out there tend to go for larger sums than I usually want to spend on waht i
It comes as a 8’x3′ sheet of 2mm MDF, laser-engraved on both sides, with the parts laser-cut except for very tiny sprues holding them into the sheet. There’s an A4 sheet that is both package label and (black and white) instruction sheet. The instructions are all photo illustrated, over a dozen small but clear B&W photos taking you through the assembly.
Straight from the ziplock bag- instructions at top, cart on it’s MDF sheet below. Bag topper card in the middle, just because. Click for Larger.
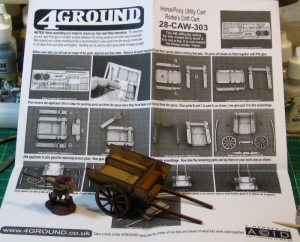
The parts are all marked by clearly engraved letters on the sheet, and the photos and text are more than clear enough to take you through the step-by-step assembly. I should note that there is a typo in the last sentence of the written instructions, though, where the letters identifying two parts are duplicated. The photos are clear enough, and by that point you’re down to so few parts it’s reasonably obvious where things are supposed to slot in.
Finished, with a 28mm Copplestone caveman for scale. Click for Larger.
The finished cart is actually fairly substantial. The body is about 2″ long and 1.5″ wide; the whole cart from tailgate to front of the arms that hold the draft horse is 3.5″ long, 2″ wide across the wheel hubs and 1″ high when sitting level. Resting forward on the arms (what are these pieces actually called? I’m sure they have a name in a real cart…) the back end of the cart is about 1.25″ tall.
Front & side views of the cart. Click for Larger.
I’ve not yet decided how I’m going to, or even if I’m going to, paint this up. I think I’ll experiment this weekend on the offcut pieces of MDF and see how it reacts to washes and other paint. A grey wash and a bit of off-white drybrush might be all it needs to weather the wood a bit and give it a well-used appearance.
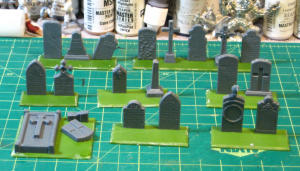
Quick photo of my work-in-progress Renedra gravestones, purchased over Christmas from J&M Miniatures. The bases are leftovers from my long-neglected English Civil War/Thirty Years War forces, which are Warlord sets and come to think of it, also cast by Renedra.
Quick and rough late night snapshot of half the Renedra graves. Click for slightly larger.
This is half (one of two identical sprues) of the Renedra gravestone set, and spread out to allow figures between the bases, it comfortably fills my 11″x9″ cutting matt. Adding the second sprue and some other bits like trees and such would give you an extensive graveyard to skulk in!
… is 40-some hours before a convention starts, right?
No?
Fortunately, this is actually a small and achievable project. Earlier this evening I declared “major painting operations” done on the bulk of my latest Russian Civil War figures, except the last two figures of the gun crew, which will need an hour or so of attention tomorrow. Needing a distraction from fiddling with figures, I broke out a couple of offcut pieces of pink 1″ styrofoam, nabbed a serrated knife from the kitchen, and started a new hill.
New hill carved, sanded, covered in sand, and basecoated. Click for larger, as usual.
Sizing the hill to space remaining in my Russian terrain box, I wound up with a roughly 10″ long by 7″ wide hill, with a dirt road climbing up and over it. The road fits with my existing caulk roads. There’s three scrap pieces of styrofoam as the structure, pinned together with snapped off toothpicks and glued with hot glue. I used Milliput to fill the gaps on the top surface of the hill and to add some detail to the banks on either side of the road.
While the Milliput was still tacky I dumped sand over the road and a few other patches of the hill, let that dry an hour or so, and slopped on the brown basecoat you can see above. As usual, there was a generous portion of white glue mixed into the paint.
Milliput is apparently able to dry underwater, so I don’t see a layer of wet paint & glue as a major impediment. If I wake up in the morning and the stuff is still tacky, I’ll have guessed wrong, I suppose…
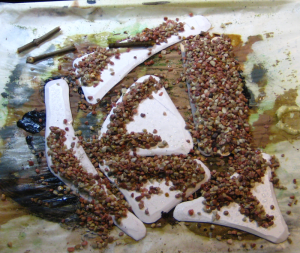
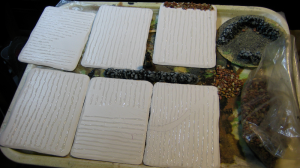
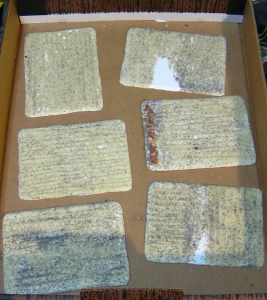
As a break from painting up Russians, last night I broke out the scenery supplies and started in on a new set of plowed field pieces. I like fields of various sorts, they provide interesting texture on the table while being easy to make and easy to transport, being largely flat!
These six are based on the last large piece I have of white 3mm thick plastic. It was salvage from the workshop of a non-profit I occasionally volunteer at, and I have no idea what sort of plastic it is, but it won’t glue with regular solvent cement and not even superglue holds it gracefully, so it’s useless for buildings. Hot glue and white glue will stick to it, though, and being plastic and relatively thick it won’t warp, so we’ve used most of it up as scenery bases of various sorts. The double handful of small scrap pieces (none much bigger than 4″ in any dimension) are being saved to appear under various small bits of filler and detail scenery in the future, but these six 6″x4″ fields are from the last 12″x12″ piece I had left.
Six new 6″x4″ fields, with the plow furrows made from lines of hot glue. Top right is one of my Gorilla Glue experiments – see text. Click for larger image.
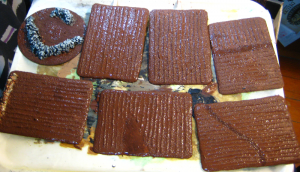
For the plowed ridges and furrows in the fields, I broke out my trusty hot glue gun and ran thin lines of hot glue for the plow ridges. A couple of the fields got different or interrupted plowing patterns, just for interest.
The scruffy drystone wall on one end of one of the fields, the larger drystone wall assembly on the CD base, and the freestanding wall on a tongue depressor tucked in between the fields in the above photo are all made from decorative gravel and Gorilla Glue, a technique I first saw over either on Maiwand Days or Rabbits in my Basement, although it was apparently pioneered by TMP stalwart John the OFM.
Gorilla Glue has the fascinating properties of being water-activated and expanding 2- to 4-times as it cures — the stuff foams as it hardens, basically. Lay a thin bead of it down, dump a line of damp gravel over it, and it’ll fill some of the gaps between the gravel as it expands, and even lift and fill your wall out. Pretty cool, and I’ll be using it for producing a lot more scruffy stone walls, blast craters and similar terrain in the near future!
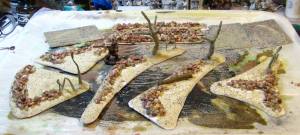
The fields with sand glued down for texture. Click for bigger, as usual.
Next step was a layer of white glue, then sand. My sand mix is actually about four different kinds of “decorator” sand, model railway ballast and similar, so it isn’t totally uniform.
Base coat and a bit of darker brown for some muddy bits. Click for larger.
The base coat is a medium brown, with a bit of a much darker brown mixed in. I wound up having to repeat the base coat, as I’d applied it quickly right at the end of the night, so it was patchy and too thin in spots. I used a bit more dark brown and even a bit of well-thinned black in the second coat, for better contrast with the eventual drybrushing. The ragged rock wall along the one end of one field was basecoated straight black at the same time.
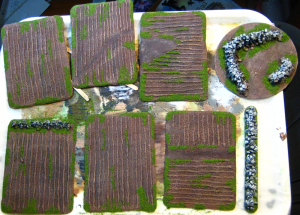
Drybrushed (two passes) and basic flock added. Click for larger.
The day after the basecoat, I did two drybrushing passes, the first with a mix of the same base brown lightened with a pale brown/dark tan colour, mixed roughly 1:1. The second drybrush, even lighter, was a fairly pale tan colour. The stone wall got a fairly heavy dark grey drybrush, a lighter pale grey pass, then a final pass with pale grey mixed with white on just the tips of the rocks. Then it was back to the white glue to add bits of flocking, mostly around the edges. I might go back and add some sprouting crops or something low to some of the fields, but for now they’ll be empty and weedy, mostly because it’s easier to move troops over them this way.
I’m declaring these done for now and moving them out of the way to get back to Russian Civil War figures! Total time on this project, not including photos and writing it up, was a couple of hours over a couple of evenings, all in short bursts, interrupted by figure painting, the Internet, and other distractions!
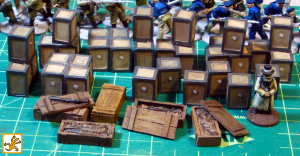
Painted up the first bits from my December Ainsty order, the rifle crates and tea crates.
Rifle and tea crates from Ainsty, painted. Click for full size.
The rifle crates are really nice pieces, with well sculpted rifles and crates; the tea crates are plain but well made and look great. The whole lot is (as you’d expect from Ainsty) perfectly cast, with scarcely any visible bubbles or casting flaws.
Scale provided by a 28mm Brigade Games Russian priest.