In the local Bloodbowl league I’m currently involved in, there’s a pair of Lizardman teams, one using the regular GW figures for the team and my crocodile dudes from Impact Miniatures. Our League Commissioner is also playing with an Orc team, and will occasionally write a game report in the persona of his Orcish coaching counterpart. After thumping on the league’s other Lizard team 2-0, the Orcish coach was heard to say, “Herd der is some dat look like those Crocodiles on dem Golf shirts everyone is wearing dees days; CHOMP!!! CHOMP!!!!”
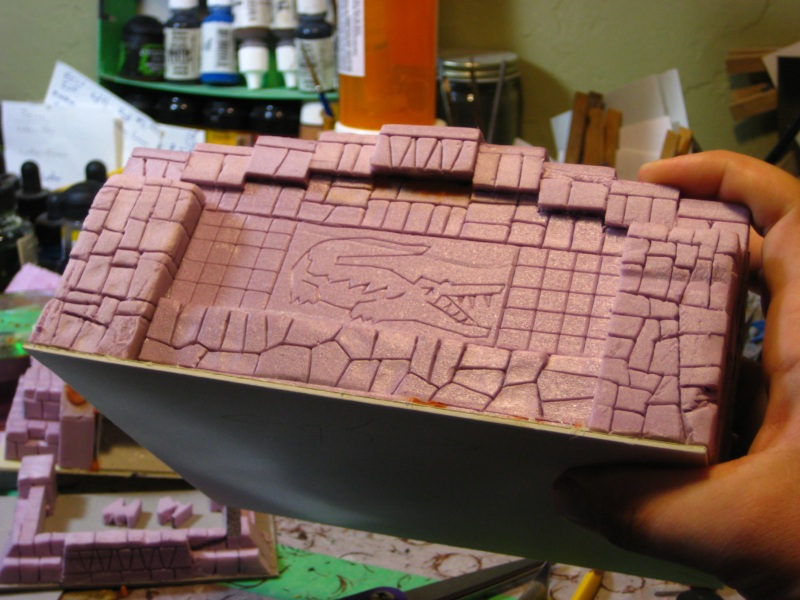
I was, at about the same time, wondering what to do for decoration on the dugout temple. A little bit of Google Image Searching and a little bit of Inkscape fiddling later to produce a basic image to guide my carving, I sat down with the completed temple, a very sharp Xacto blade, and this resulted.
Shirt pocket crocs? Sure! Still needs a fair bit of cleaning up and then of course paint! Click for larger.
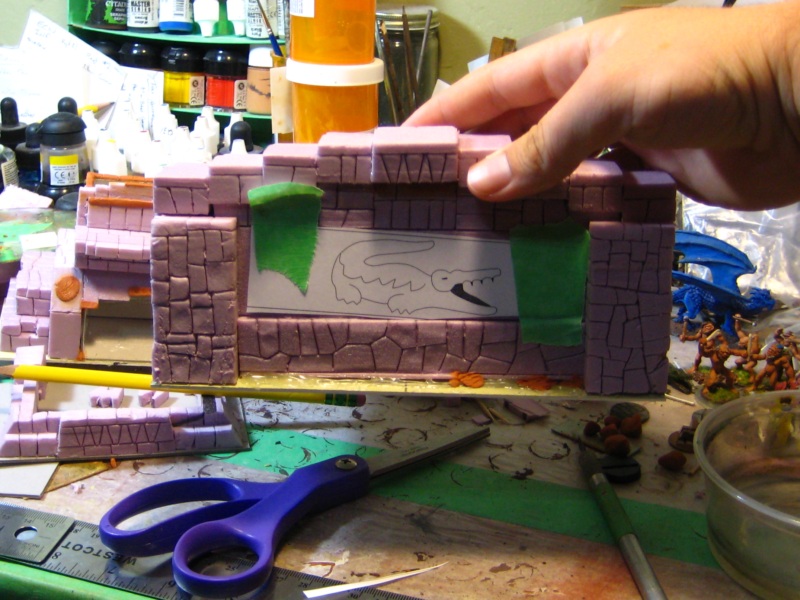
I printed out a simple line-art version of the relevant logo, taped it down across the foam, and went at it carefully with the brand-new very sharp Xacto blade.
The logo in place waiting for carving. Click for larger.
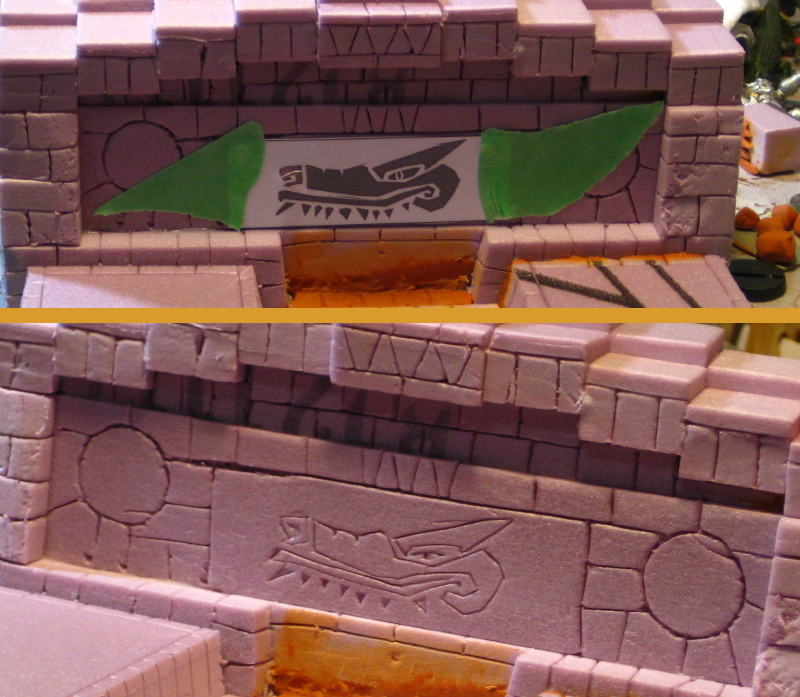
On the front of the dugout above the three actual dugout areas, I put the logo of my lizardman team, as seen in earlier in the year. Same procedure, taped the printout down and carefully went at it with an Xacto.
Saltwater Slaughter team logo on the front face of the dugout. Or a generic crocodile head, as you will. Click for larger, as usual.
When I finished the new BB scoreboard temple back in May I mentioned that when I got back from Europe I was going to be building a new set of Bloodbowl sideline terrain to match the new scoreboard.
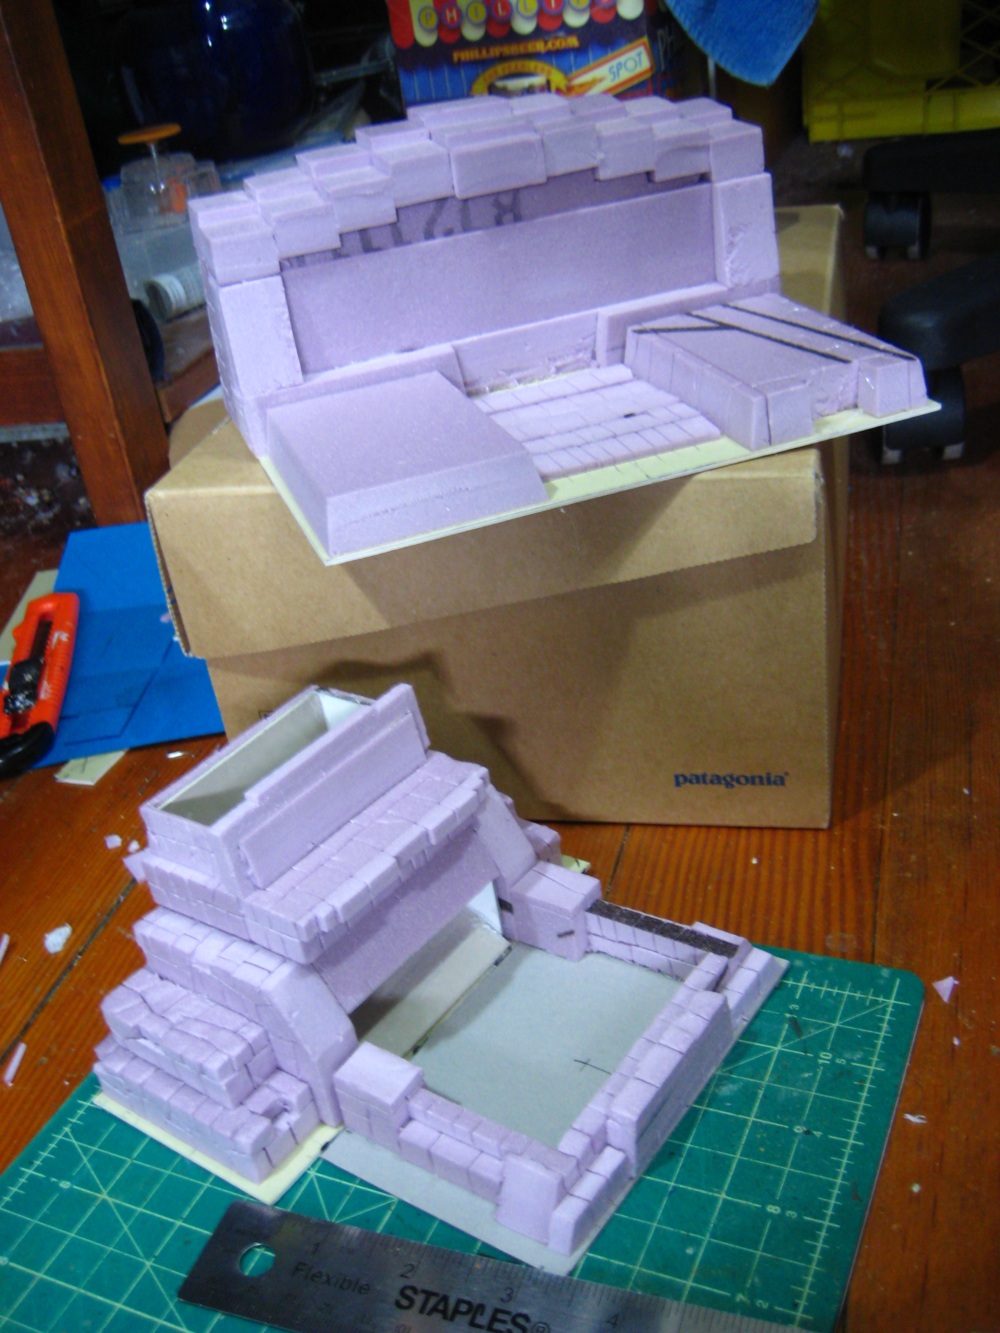
I’ve got one of the two dugouts (with turn & reroll trackers) built and ready for detailing, and using leftover bits and pieces I’ve put together a small dice tower as well.
Top, dugout & trackers. Bottom, dice tower. Click for much larger image, and see text for details.
The dugout/tracker temple piece has the three dugouts (Reserve/KO/Casualty) across the front, and the roof will be marked up for tracking turns (the eight tiles down one side), first half/second half (the two larger tiles at the peak of the roof) and re-rolls (the eight tiles down the other side). Overall size is 7.5″ wide, 6″ deep and about 3.5″ tall. The whole thing is styrofoam insulation board.
I haven’t yet started the second dugout/tracker temple because I’m out of full-size sheets of mattboard (picture framing card) to use as the base, but it will have the same footprint. The whole set is designed to fit into the large Patagonia shoebox the dugout is resting on, because I do almost all my gaming away from home and I want to keep the whole BB setup small enough for easy transport, including in my bike panniers!
The second, smaller piece is a dice tower that is just big enough to roll full-size dice. It’s 6″ wide, 2.75″ deep and just under 3.5″ tall, those being the dimensions of the leftover space in the shoebox when two dugouts and the scoreboard temple are tucked into place, and allowing for a couple of inches on top for the fabric pitch to tuck in — which also serves as padding for the buildings.
The internal structure of the dice temple is mattboard; the outer detailing is offcuts of styrofoam.
The catch tray for the dice is a separate piece about 5″ wide and 3″ deep. It’s going to be painted up as a sacred pool eventually, with gloss varnish as seen on the scoreboard temple. I might try to do something clever with magnets to keep the tower and pool attached while they’re in use, or just glue a tab of paper onto the bottom of the pool that sticks under the tower and helps keep them together.
Lots of putty detailing and styrofoam carving left to do on these two, and I need to hit the local art supply store this weekend to restock on mattboard so I can start the second dugout to finish the set.
Three coats of gloss varnish on the water, flock around the edges of the base, and the two score indicators and weather indicator all finished – the temple is done!
Currently it’s 2-1 in the Very Sunny weather for whoever is on the blue side today! A Baby Croc, Saltwater Croc and Leviathan Croc observe from on and around the sacred structure.
Temple all finished, with all three indicators in place. Click for larger, as usual.
I’m not entirely happy with the three markers, but they’ll do just fine for now and they’re easy to replace at some future date if I get inspired!
Off to the left of the temple in the photo above are a quartet of small temple platforms and ruined wall pieces from foam offcuts from the temple; they’ll probably get used in some future pulp jungle lost temple but might also appear in a future Bloodbowl-related project.
A while ago via Google Plus, I stumbled over the Terrain Wench and her work, specifically the nicely done Lizardman spawning pool she had created. She’d taken the trouble to do a really well-done video of her technique for doing stonework in styrofoam insulation board – embedded below.
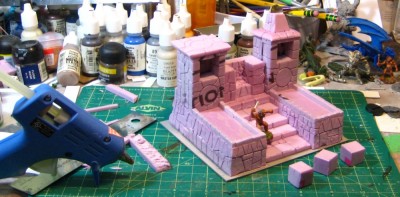
As I mentioned in the last post, I’ve been wanting to build a new scoreboard setup for my Blood Bowl pitch, one with a few features I missed in the first one built last December. I sat down and started it last night, and except for a few details here and there it was one of those projects that has (so far!) just worked, and in person it looks pretty much like I was visualizing it in my head. Always cool when a project works out like that.
Front view of the new Blood Bowl scoreboard/temple. See text for details, click for larger.
The base is about 5.5″ wide and 4.5″ deep, with the temple made out of two different thicknesses of pink styrofoam insulation board and standing 4″ tall to the top of the right-hand tower. The stairs will have a BB scatter diagram “carved” into them with Milliput, and the three square holes are for score markers in the tower and a weather indicator in the central piece. There’s a roof piece that still needs to be glued down over the central piece, and the two “arms” alongside the stairs are going to be done up like pools of water with gloss varnish eventually.
I’m going to be using the cubical styrofoam offcuts in the foreground of the photo above to make both score and weather indicators. I’ll layer Milliput over the cubes; the score markers will basically be d6s numbered 0-5; the weather indicator cube will have icons for the five types of Blood Bowl weather, and probably a second “Fair Weather” indicator on the sixth side, just because.
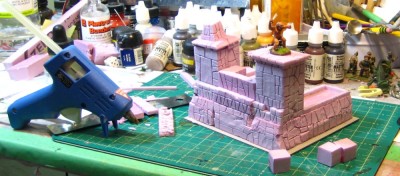
Rear view of the scoreboard temple. As usual, click for larger.
I’m quite pleased with the way the base of the temple turned out, with that slight inward slope as the wall goes up which is so typical of a lot of monumental architecture. I’ll be cleaning a bit of the stonework up with Milliput, but I’m generally pleased with how it’s turned out as well. Terrain Wench’s technique of using an Xacto then a pen or pencil to carve stonework gives a much nicer result than my few previous attempts at stonework in styrofoam where I’d just used a pen or pencil to carve the stone.
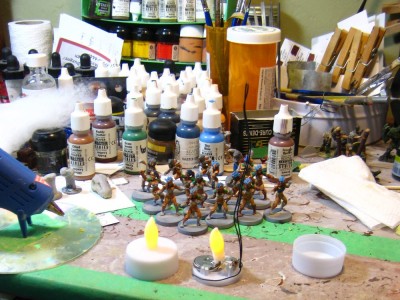
Doing some shopping last week, I found a batch of LED tea candles for sale, 6 for $5.95. I’ve been meaning to pick some up to play with them for ages, as I’ve seen some neat stuff done with flickering LEDs on the tabletop!
The first thing I whipped up was a pair of large fire & smoke markers, big ones suitable for a building fire or big bonfire! The LED tea lights are about 1.5″ across, 5/8ths of an inch high at the base, and 1.5″ to the top of the “flame”, which on these ones is just a white bit roughly flame-shaped.
The bases contain the LED, battery and switch and unscrew easily from the upper part of the base, and the flame pops easily out of the upper part. I eventually want to get my soldering iron out and do various sorts of more advanced work with the flickering LEDs, but for now I just used the stock base and setup.
Using hot glue, I glued a doubled-over length of soft iron hobby wire around the rim of the base and up past the flame to support the smoke plume. The smoke plume is just cotton batting I salvaged from a pillow I was throwing away – waste not, etc!
Fire & smoke markers in progress, and complete LED tea light to the left. Click for larger, as usual.
I speared the cotton batting on the wire, then used more small beads of hot glue around the LED base to fasten the batting down. I added more hot glue on the wire, then pushed the batting up against the wire to secure it. As I pushed the batting against the wire, I gave the whole piece of batting a twist with my hand, to make the smoke plume more interesting.
Spraypainted smoke plumes with LED bases. Click for larger, as usual.
The plumes got grey then black spraypaint, and might get a second coat of spraypaint – I’ll see what they look like after they dry. The LED lights still work (the switches are on the underside) and if I ever need to replace the battery, it’ll be easy to tug the batting aside and then fix things after with a bit of hot glue.
The whole project only took a couple of minutes, and should look good on the tabletop in the ruins of a building or as a bonfire. Here’s a short (11 second long) out-of-focus phone camera vid of the two smoke plumes and one original, unmodified tea light all flickering away.
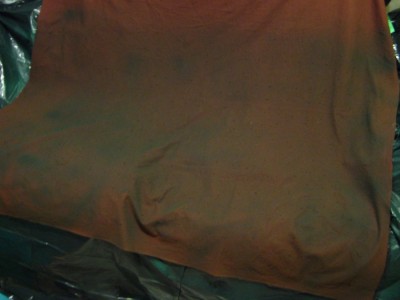
Finally got a can of green spraypaint at the local hardware place and laid my fabric BB pitch out to blotch green across it, just to break up the brown fabric. It looks a lot better with green on it now, and the dot grid that lays out the field is still visible.
My 40mm BB pitch, laid out on garbage bags on the porch to spray with green for a turf effect.
I’ve got an Amazon BB team on the painting table right now, as well.
Finally have the Sarissa CityBlock 28mm lasercut MDF buildings to a table-ready state, including another hand-painted advertising sign on the side of one of them.
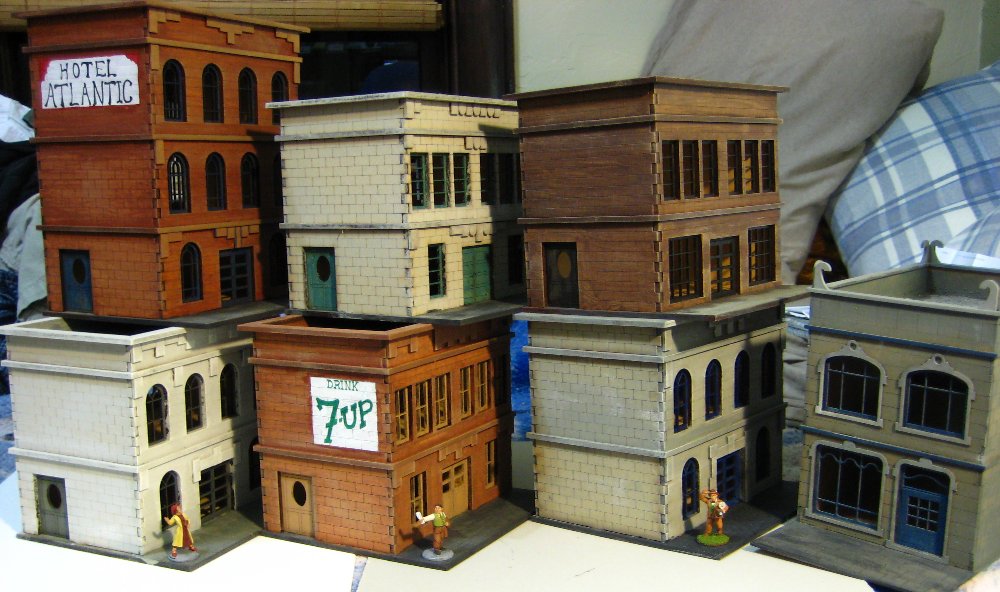
Here’s all seven buildings (six CityBlock plus one Narrow Townhouse from the Gaslamp Alley range) stacked up somewhat awkwardly:
All seven MDF buildings, ready for the tabletop. Scale provide by three 28mm Pulp Figures reporters. Click for larger.
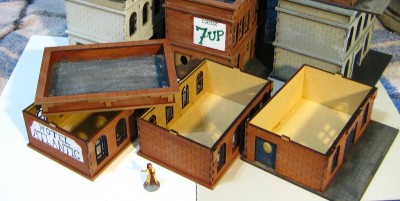
In one of my earlier posts, Chris had asked in comments about how these buildings came apart, so here’s the Hotel Atlantic spread open:
The Atlantic Hotel spread into it’s constituent parts; three floors and a roof. Click for larger, as usual.
You can see I haven’t (yet) done anything with the insides of any of these buildings; beyond possibly splashing a coat of plain paint in, I’m not sure how much I’ll do inside them.
So, having built seven of the things but not actually written a full review, what did I think? First off, I like them, and will definitely be ordering more of Sarissa Precision’s buildings at some point. They’re solidly built, well designed, have enough detail to look good right out of the box, and are also easy to add extra detail to. Everything fits together very well, the laser-cutting is crisp and precise, and the CityBlock & Gaslamp Alley buildings are good generic city filler buildings, similar to thousands of real-world buildings all over the world, pretty much anywhere Europeans influenced architecture. Use them as-is, you could be nearly anywhere in North America, the UK or much of Europe; add a few “local” touches (different street furniture, a few different buildings for flavour, etc) and you could be in Shanghai, Cairo or Singapore just as easily!
I’ll do a couple of things differently on the next batch of MDF buildings I build, though. First of all, painting MDF is like painting a sponge. The stuff absorbs paint and water like crazy, and is actually quite hard to paint as a result. You go through a surprising amount of paint to get decent coverage; and because of the absorbency you can get streaky or blotchy paint coverage very easily. A couple of my buildings required a second coat of their base colour, and painting details like windowframes and the signs was harder than it should have been because you needed thin, wet paints and a well-loaded brush to get good coverage. So I’ll be doing as much painting as possible before assembly next time, instead of rushing assembly this time just for the joy of having complete buildings sitting around!
Spray cans or an airbrush might actually work better than brushes for basecoats on MDF, if you have access to an airbrush or a better selection of spraypaint colours than I do currently.
I’ve got a whole pile of small scenery detail bits that have been building up on the edges of my painting desk recently, so with these buildings out of the way it’s on to them to get them done and into play, then onto more figures! We’re having a Pulp Alley game tomorrow that should feature all my new buildings, so look for photos of that soon too.
Progress continues on my seven Sarissa Precision buildings, albeit at a slower pace than I’d intended!
Basecoat and drybrushing is done on all seven buildings, gravel roof details likewise in place on all seven, most of the doors and windowframes are painted, and I’ve started cleanup and finishing.
I’ve always liked the looks of the big hand-painted signs and advertisements on the sides of older buildings, so given the wide blank side walls of the Sasrissa CityBlock buildings, it seemed natural to break out the smaller paintbrushes and go to it!
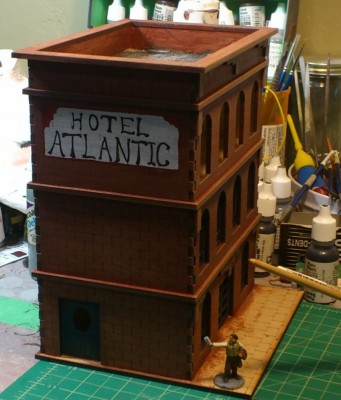
Newly-painted Hotel Atlantic sign on the side of the three-storey Sarissa Precision CityBlock building. Click for larger, as usual!
Still some cleanup to be done on the basic lettering, and I might yet redo the red ornamenting in both top corners, but the basics are done and I like how it turned out. This was all done freehand with a brush over some light pencil lines for guides, after I used Inkscape on the computer initially to play with letter sizes and spacing and figure out some basic guides. The “Hotel Atlantic” seemed like a good generic name, likely to occur anywhere in the English-speaking world, or even in non-English-speaking areas as the hotel set up to cater to English-speaking travellers.
One of the other buildings has a blank white square on it currently; later this week I’ll figure out what sort of sign or ad I want on it, too.
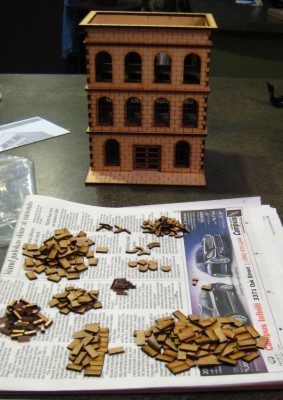
Having assembled my new Sarrisa Precision lasercut buildings, it was time to consider adding some extra details to really make these buildings “pop” and bring them to life. One of the things I wanted to do was add detail to the fronts of the buildings, especially the cornices at the roofline, which are often quite elaborate on brick or stone urban buildings built in the late 19th or early 20th Century.
As I’d assembled these buildings I’d reflexively kept the bits of MDF from inside the windows and other openings in the models, and looking at the little pile of lasercut leftovers, I realized they’d be perfect for basic detailing and adding some relief to the fronts of my new buildings.
The three-storey Sarissa Precision building, and the sorted offcut bits of MDF. Click for larger, as usual.
There were more than enough bits and pieces to do the fronts of five of the seven buildings, with leftovers to keep going on the remaining two if I decide, although I’d like to use some light card in layers for a slightly different look on the last CityBlock building and the Gaslamp Alley townhouse.
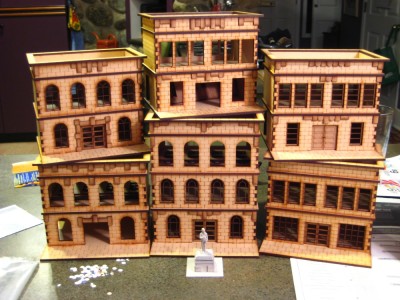
Here’s all six of the CityBlock buildings stacked up, five of them with basic ornamentation added with “scrap” MDF.
All six CityBlock buildings stacked up, five of them with front details added. The statue is roughly 28mm tall, just for scale. Click for larger.
Next step is chimmneys and other rooftop detail. I’ll use basswood and plastic tubing for chimmneys, and create roof hatches, vents and roofwalks from basswood and card. Masking tape for tarpaper or paint and fine gravel will complete the roofs, then there’s painting to be done!
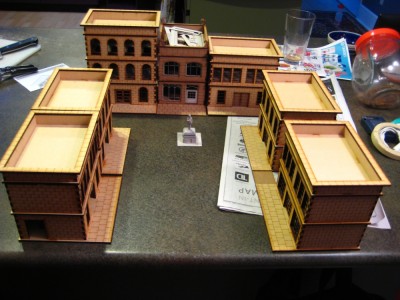
In my last post (two+ weeks ago!) I mentioned I’d bought a bundle of Sarissa Precision’s lasercut 28mm CityBlock buildings to bring our pulp gaming into an urban realm. I’ve finally got all seven buildings assembled; here they are on the counter.
All seven Sarissa Precision 28mm lasercut buildings. Click for larger, as usual.
The six similar buildings are from Sarissa’s CityBlock bundle, with one extra floor purchased to give me five two-storey buildings and one three-storey building. The seventh building is the Narrow Townhouse from Sarissa’s Gaslamp Alley Victoria SF line.
The CityBlock buildings go together quickly and easily; the walls and floors are 3mm MDF, and the window frames are seperate sheets of 2mm MDF designed to slot in behind the walls. The first several buildings I put together with more enthusiasm than consideration and glued the windows in right away; for the ones I’ve finished more recently have had the windows left out for now to make them easier to paint.
The floors and roof all come apart to allow access to the interiors of the buildings during games, and the simple tab-and-slot system should survive many games with no issues. The buildings all feel very solid once assembled.
The Narrow Townhouse from the Gaslamp Alley range is one of Sarissa’s most recent releases, and there’s a number of tweaks, refinements, and added details compared to the older CityBlock buildings. The interior floors have wood planking engraved on them, some of the etched and cut detail is a bit finer, and instead of 3mm & 2mm MDF, the Gaslamp buildings use 2mm MDF and laser-cut light cardstock, called “greyboard” on Sarissa’s website. This makes the Gaslamp buildings lighter than the CityBlock ones (although just as solid) and somewhat more detailed. The windows have both inner and outer frames lasercut from cardstock, for example.
Having assembled the basic buildings, I’m now turning toward detailing them before painting. I want to add some details and bits on the front facades and cornices of the buildings, and to the roofs. I’ll use fine modelling gravel on some roofs for a tar-and-gravel roof, and narrow masking tape on others for tarpaper roofs, and add details like chimmneys, roof walks and possibly even rooftop signs.
After that it’ll be time for paint. The engraving on the CityBlock walls is too large to “realistically” be brick, but I’ll likely paint several of them up in traditional red bricks anyway, as well as some as stone.
Detailing photos and writeup in the next couple of days!