
I put the first of these buildings – the Short Tower – up on the site sometime around 2000, and for ten years they’ve been consistently popular. I think I’ve gotten more feedback on these (and some of the other cardboard/paper stuff I have available) than on anything the website’s ever hosted.
Basic Instructions for all Cardstock Buildings:
- Save the .gif file to your computer. With a graphics program make sure the graphic will print onto one 8.5×11″ sheet. I use a light cardstock, which will run through most printers.
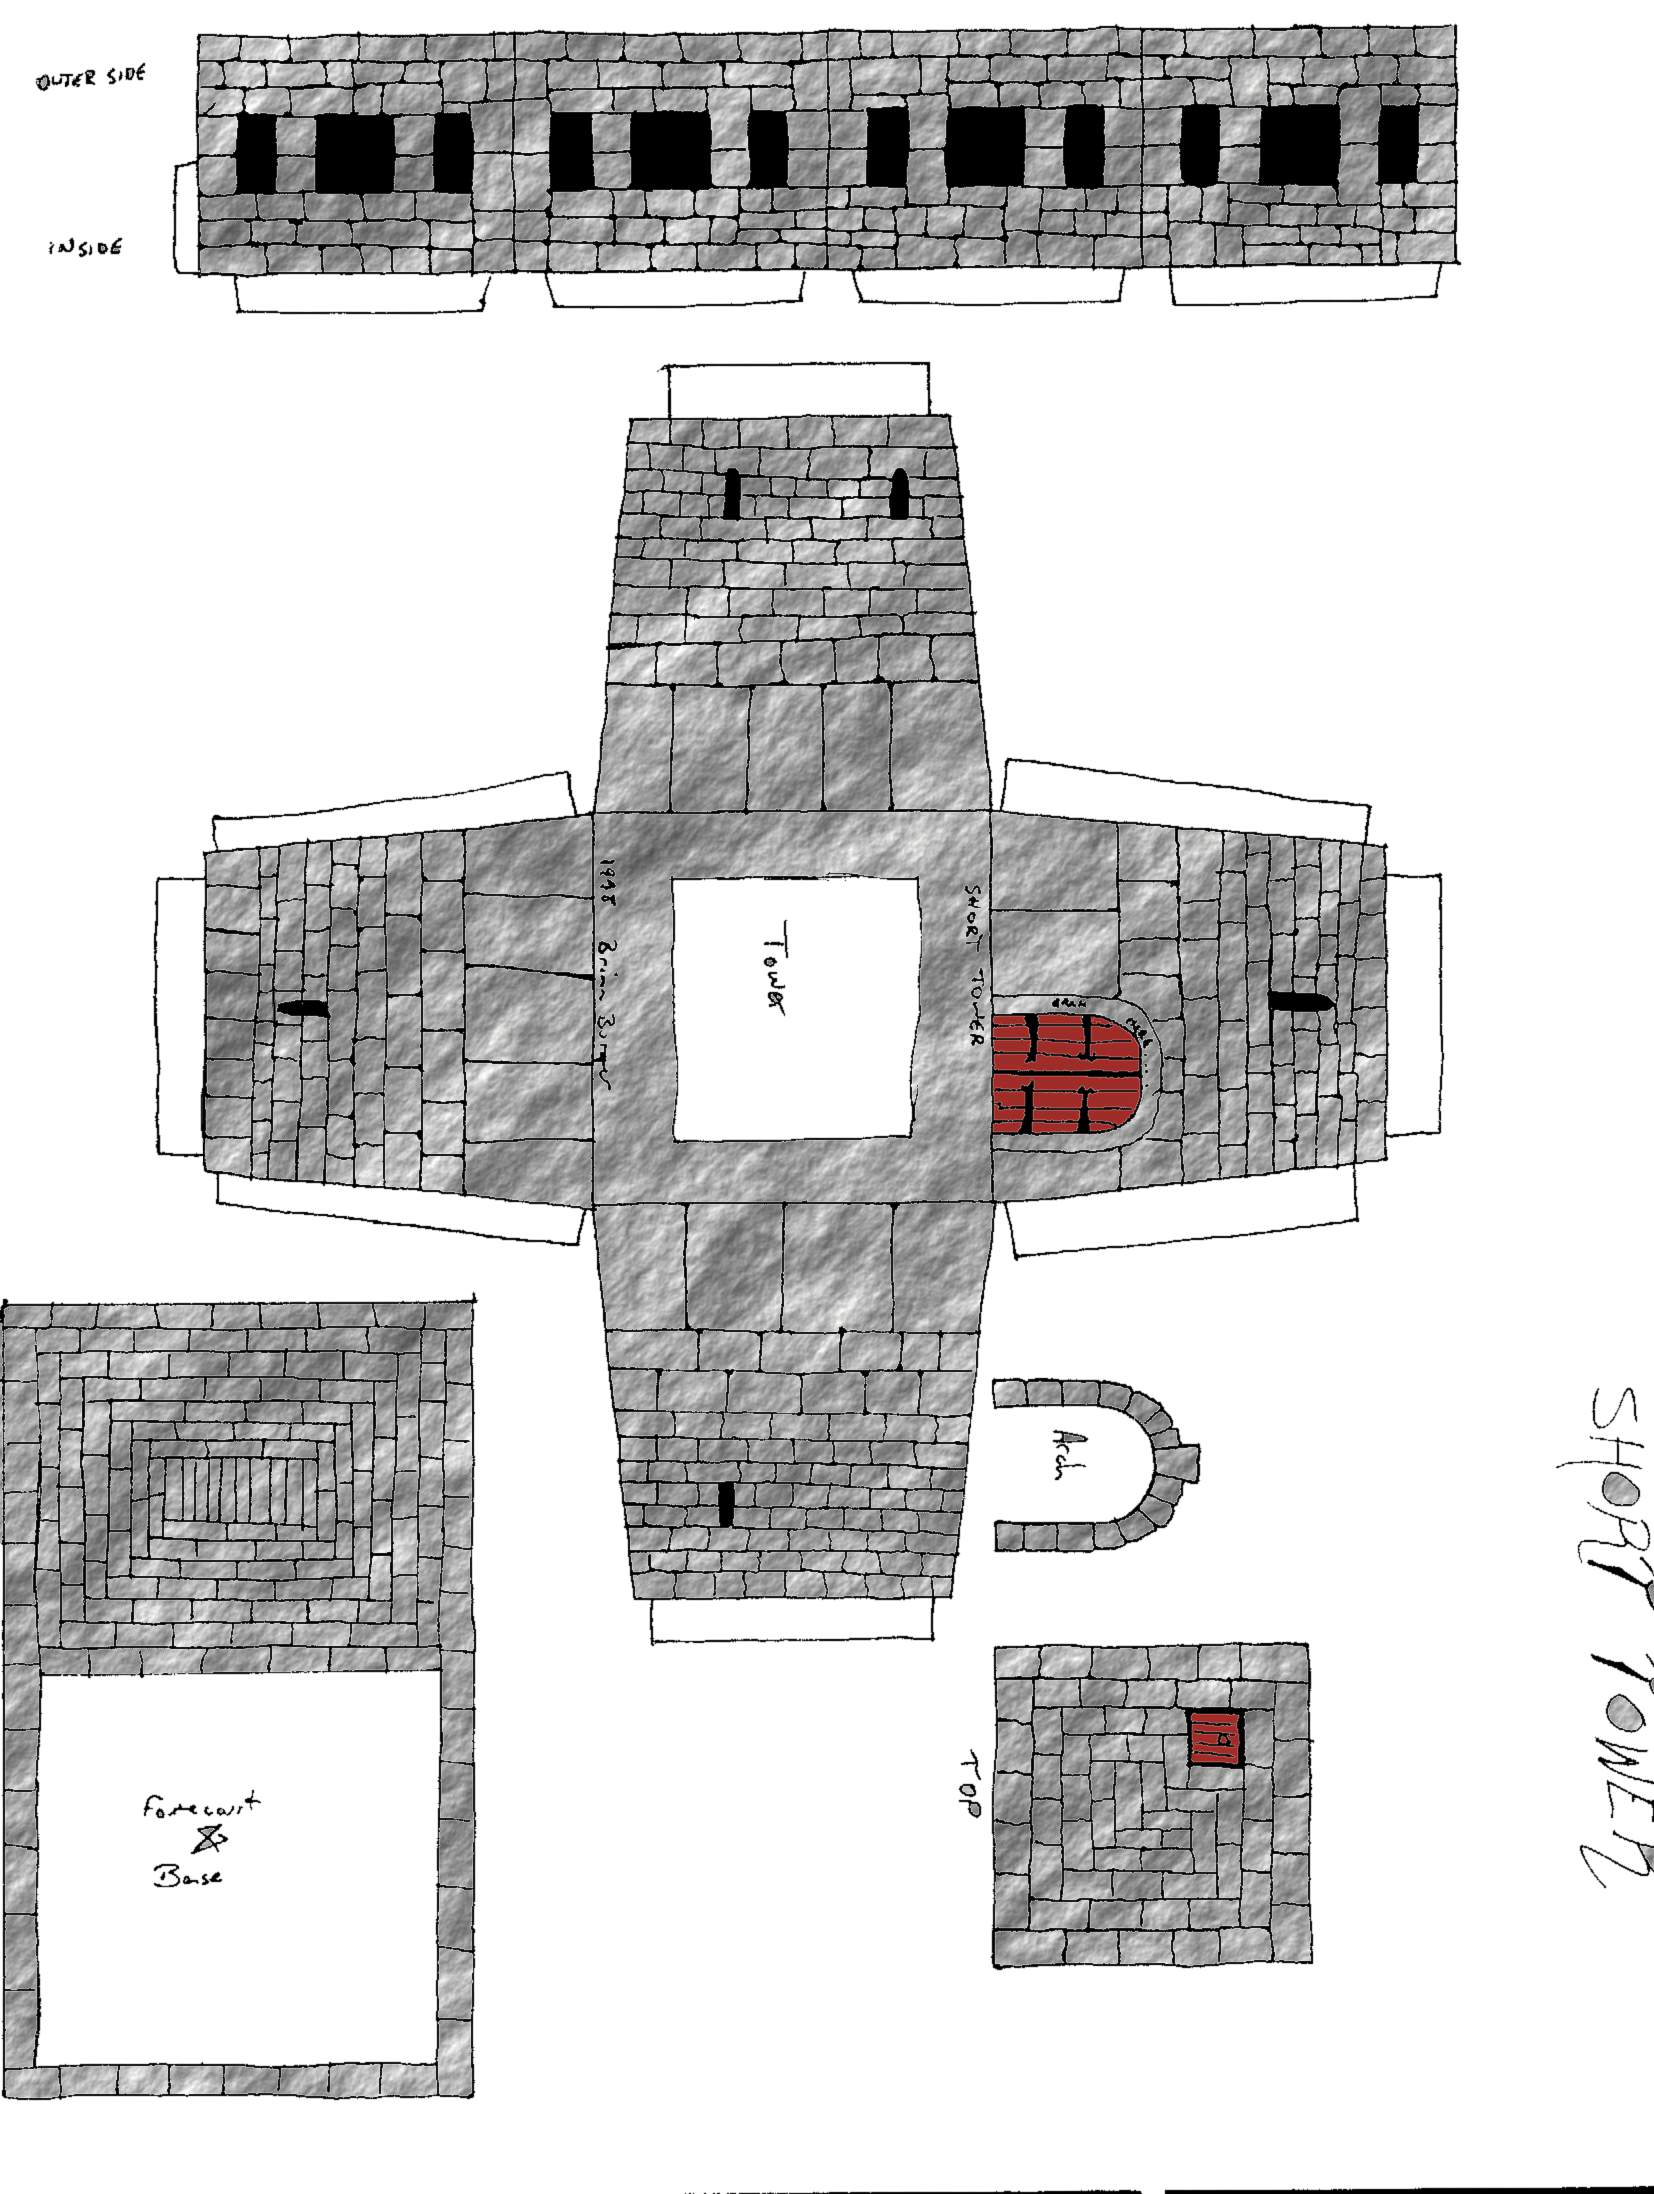
- These buildings are all just black-and-white images. You’ll need to spend a few minutes with pens or coloured pencils to color the building. (For stone buildings, you could also simply use a grey cardstock, and skip the colouring.) Using a painting program is another possibility.
- Then use a sharp X-acto blade and a steel ruler to cut out the building parts from the card.
- Fold as needed, using the steel rule to guide the folds and keep them straight and crisp.
- Glue along the tabs (I use gluesticks, as they’re faster drying, neater and don’t run like white glue.) and you will have a complete building in very little time at all.
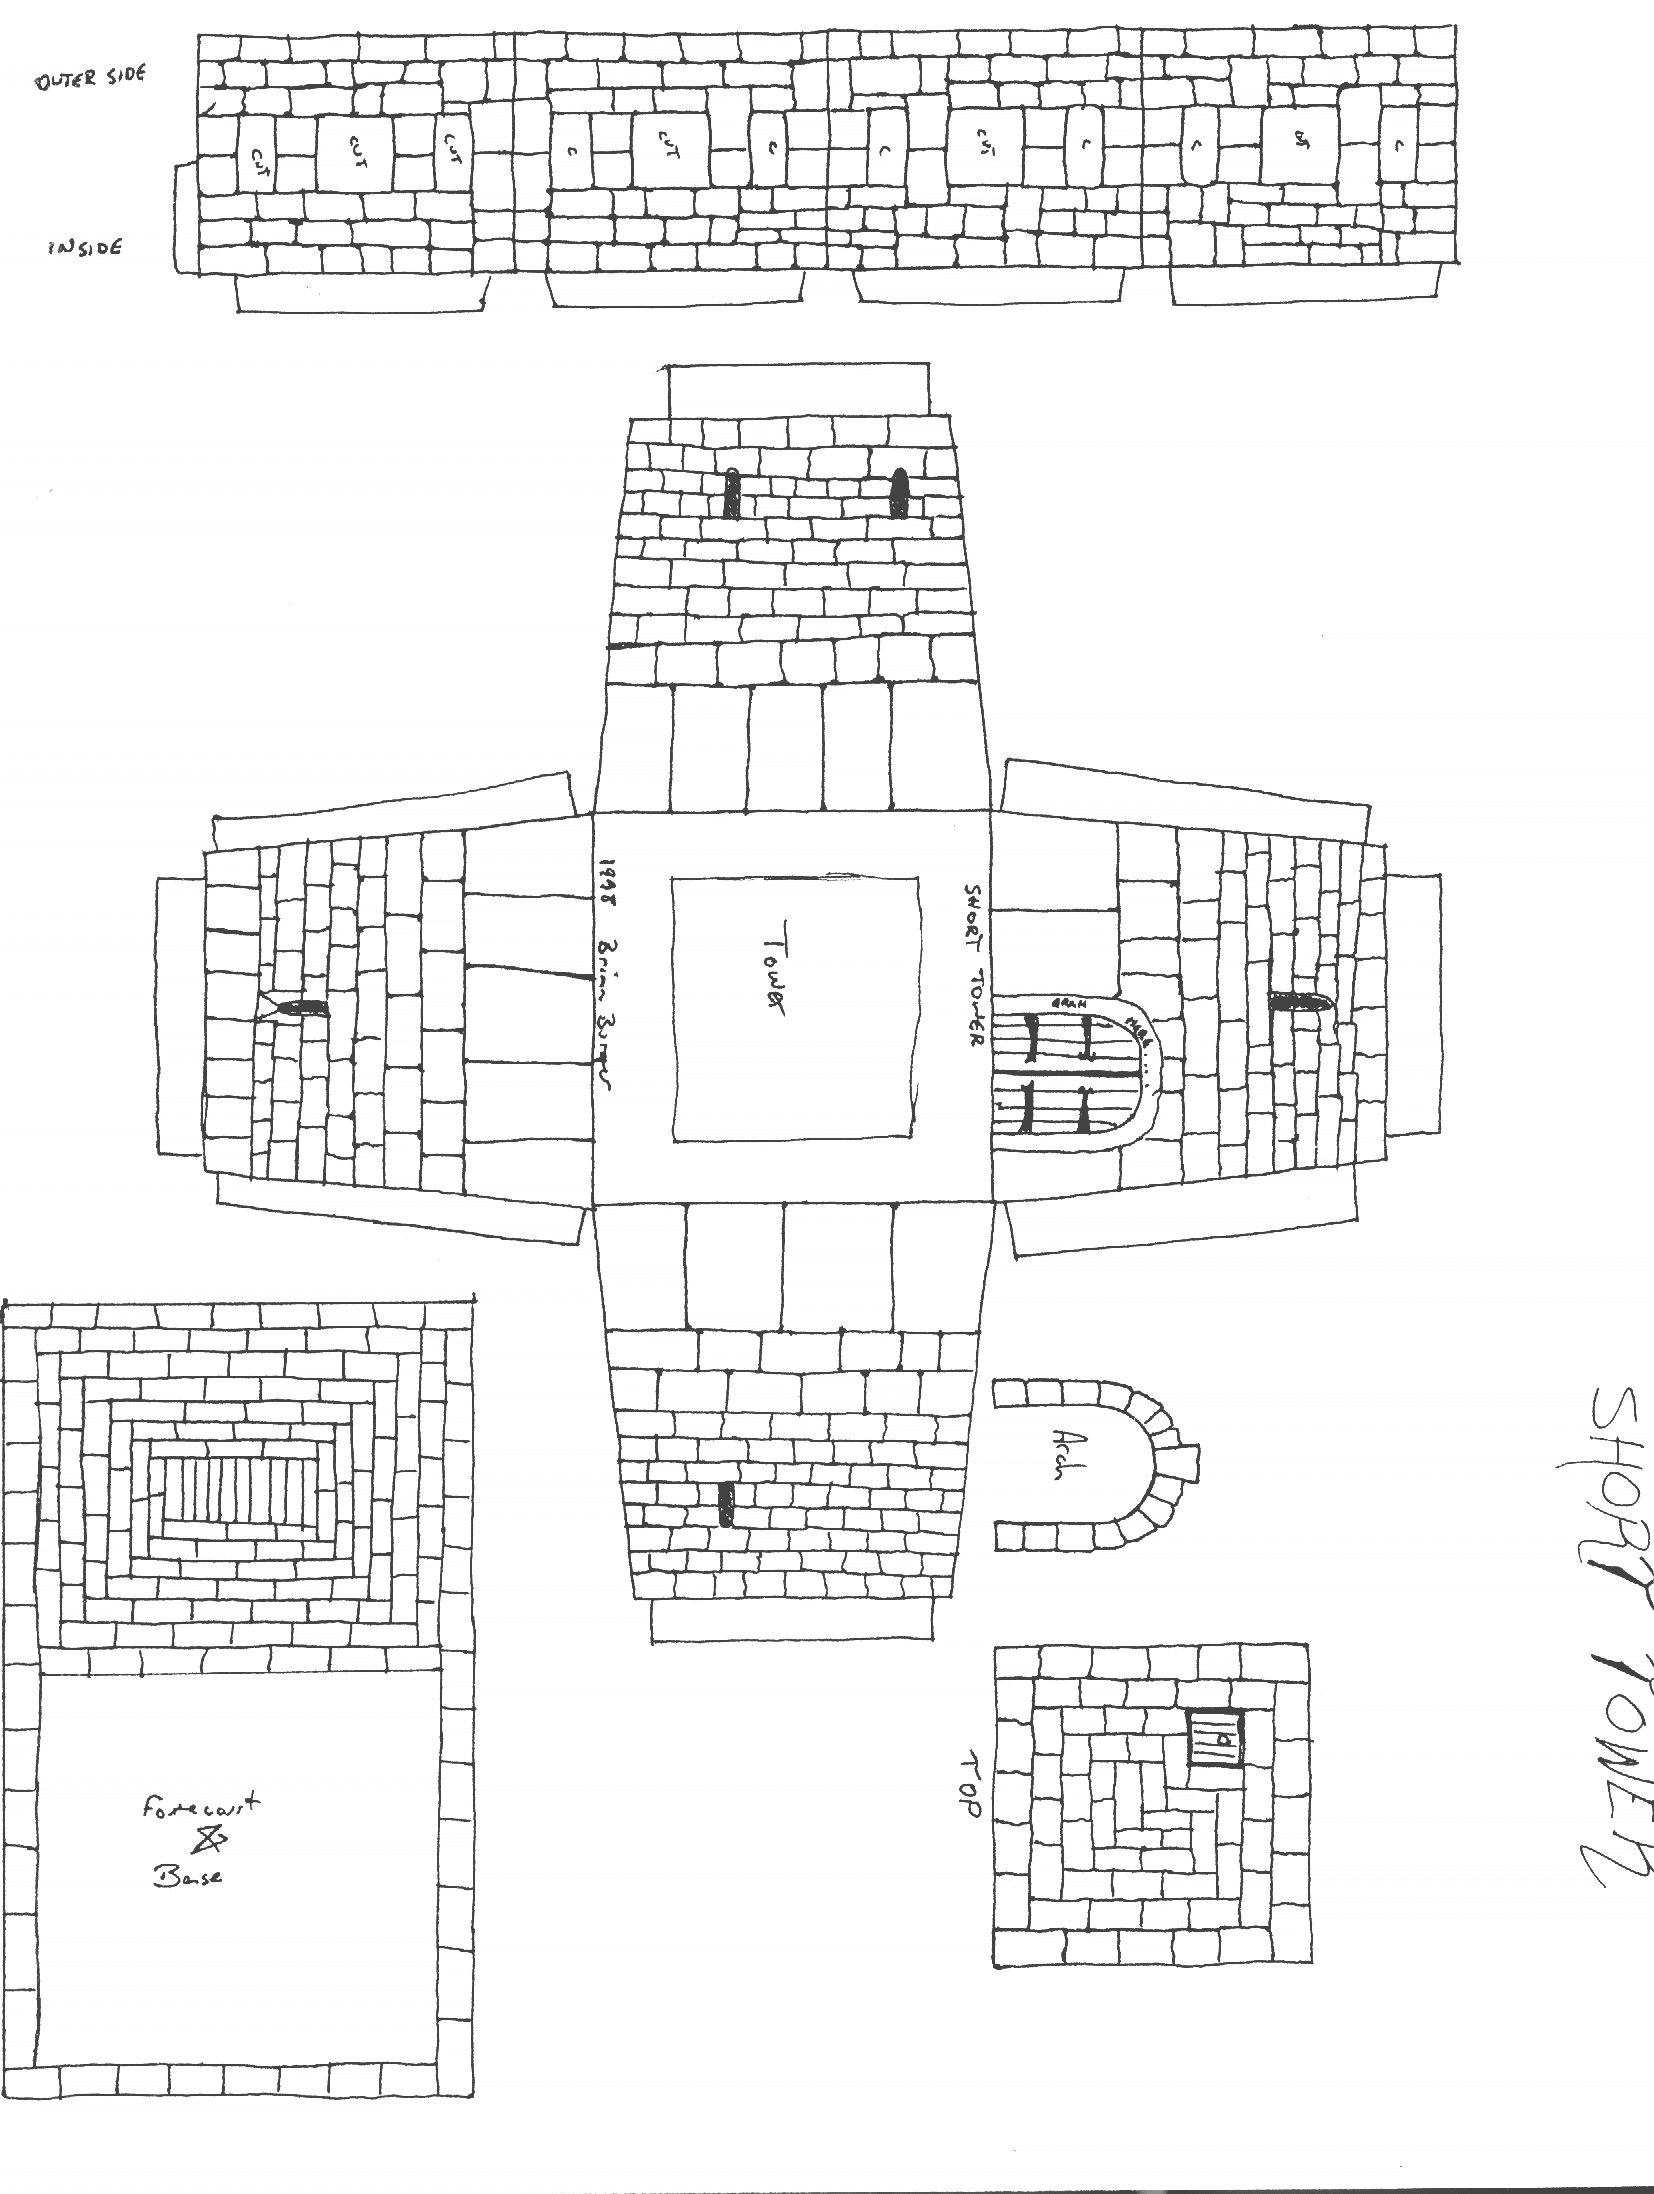
The Short Tower

Tower Instructions:
Topmost is the long narrow battlements piece, which will be folded in half lengthwise, then folded around the top of the Tower to form four battlemented wall. This is the most complex part of the tower.
Cut around the outside edges, and remove all the small squares inside (marked ‘Cut’ or ‘C’). On the half marked ‘Inside Edge’, cut the four edges between the wall sections. Fold the four glue tabs up, and then fold the central long fold down, and glue the two halves of the wall together, leaving an unglued space for the glue tab to slot into. (see the next step)
Fold the battlements up at all four corners, and slide the glue tab into the space.
The Walls: Much easier than the battlements, trust me! First, cut out the small Arch section, and stick it around the door. Then just cut the cross-shaped wall-and-floor piece out, cutting the central square out (you’ll need access to the inside for gluing). Fold the glue tabs down, and the tabs on the tops of the wall.
Glue the walls together, sticking a finger into the inside of the tower for support.
Glue the battlements piece on next, then the square Top (roof) section inside the battlements.
Finish: Glue the completed tower onto the Base & Forecourt section. (You might want to put a bit of weight – pennies or something – to ballast the Tower and make sure it stays were it’s put!) Finished!
The Files:
Short Tower GIF
Short Tower JPG
Short Tower, Coloured JPG
(coloured by a gamer from Italy, who’s name I no longer have! Thank you, sir!)
The Inn & Small Cottage
Two buildings on this sheet: a large half-timbered Inn and a small half-timbered cottage. The cottage is very simple; the inn is more complex.
Coloring: Supplied here in black and white. Using coloured pencils, I’ve done the timbers wood-brown and lightly coloured the walls with yellow to represent plaster. The roofs are thatch – they should be yellow straw colours. Do the window panes a very light blue.
The Cottage: The cottage is only two pieces: the roof and the wall strip, both to the left of the sheet’s label, along the bottom edge of the sheet. Cut them both out, fold the glue tabs and then the wall around, and glue the roof onto the walls. This building doesn’t have a base supplied – you might want to glue it to a piece of card for extra strength.
The Inn: Everything left after you cut out the cottage is Inn pieces. From the top left and working clockwise, we have: the back wall; the base, the roof, then the large piece that forms both side walls and the upper front wall. The lower front wall is right in the center, and the roof of the porch is below the main piece.
Cut out the main piece and fold the tabs and structural folds, then glue the rear wall in place. Glue the lower front wall in place, then the porch roof. This roof requires some different folding of tabs – the long solid tab goes toward the rear, and attaches to the lower front wall, folding down. The side tabs and the three tabs on the other long side fold up, attaching to the side walls and front wall respectively.
The porch pillars: Four spaces have been left in the porch roof for pillars. These would go from the overhanging upper floor down to the ground, one on each corner and two in between. Use small balsa wood or even square wooden matchsticks for these pillars, or leave them out.
The roof can go on next, and finally the whole structure can be mounted on the base provided, which will give the Inn a paved area under the porch.
The Files:
Inn & Small Cottage GIF