
It’s been a quiet stretch here mostly because I was away from home for just over a week housesitting for a family member on the other side of town, but the Blood Bowl pitch setup has been progressing slowly.
I posted my stencil tests recently and have since finished the full set of field lines and a logo on the fabric pitch.
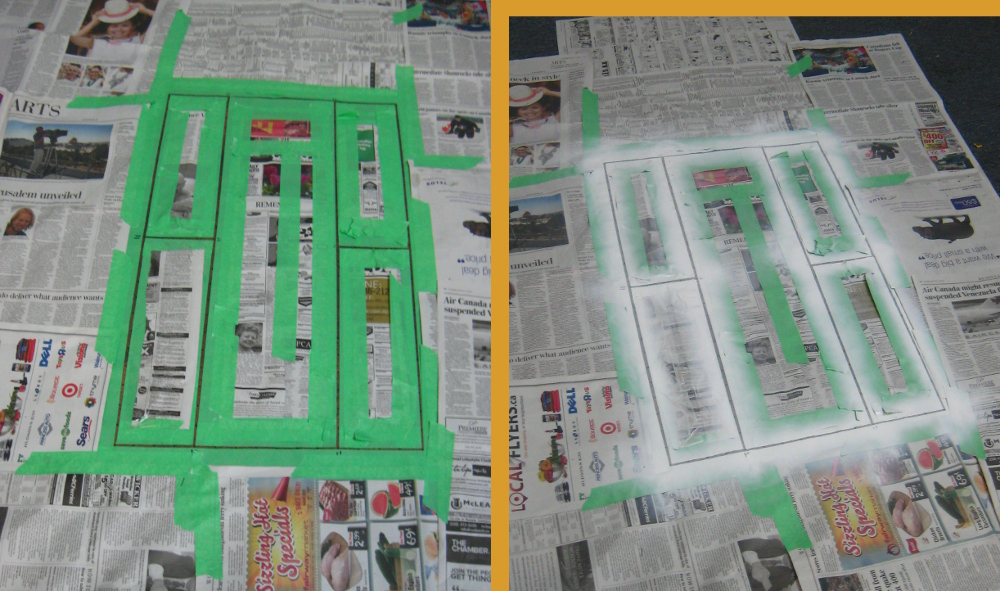
For the field lines, I used masking tape over the fabric to mask off the edges of each line. Because of the width of the tape I had, I wound up doing the outer lines of each endzone separately. The photo above has the centre line (Line of Scrimmage), wide zone and long edge lines masked off, as well as the inside edge of each end zone. After masking it off I sprayed along each line with white spraypaint, making two or three passes down each line.
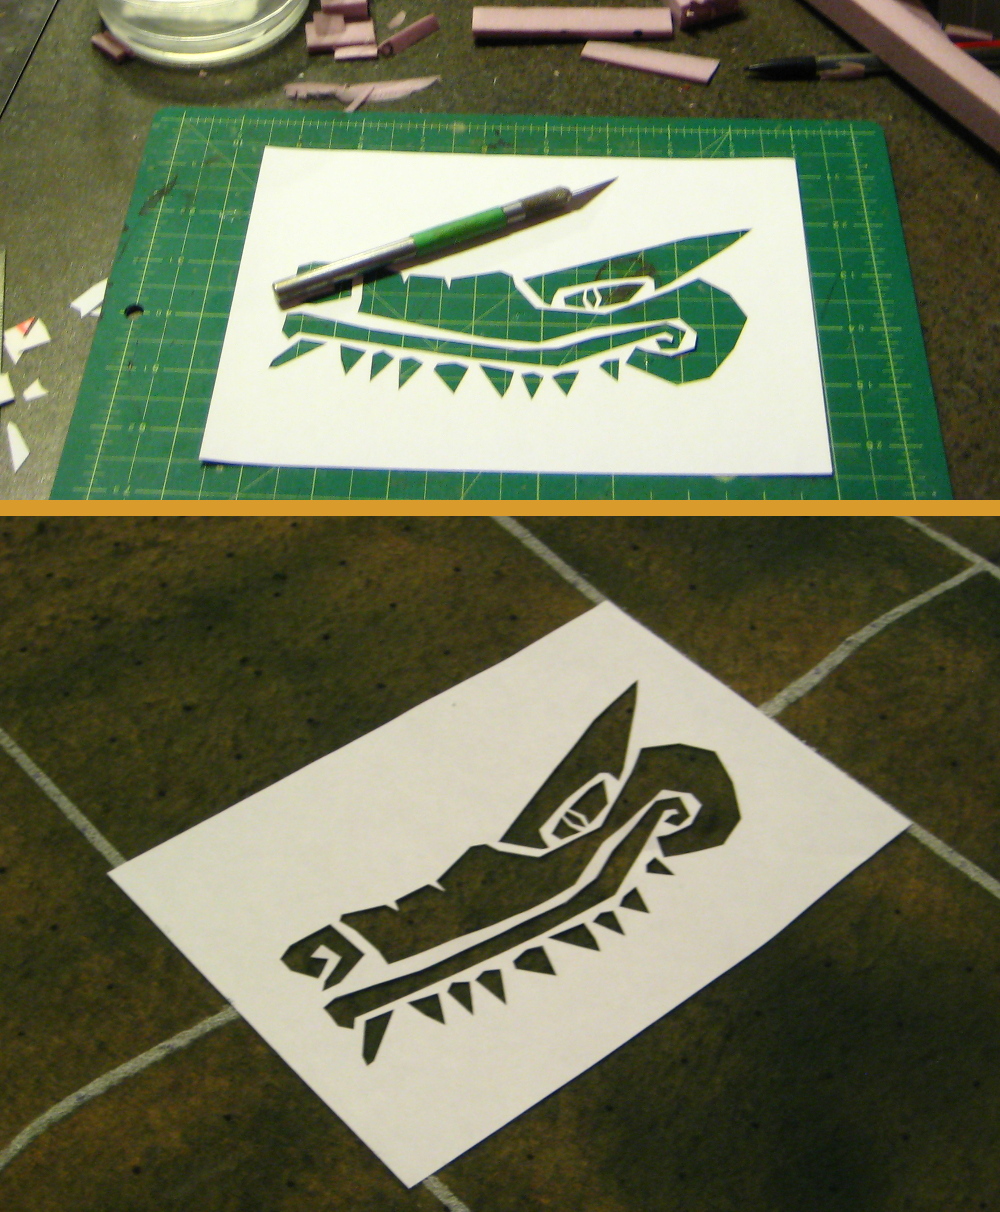
The red crocodile head logo in the centre of the pitch I did differently. I laid out the image in the size I wanted in Inkscape on my computer, then printed it on a sheet of full-sheet label paper — the sort of paper where the entire sheet is one giant sticker. After printing it I used an Xacto to cut the stencil out, mostly freehand but using a small steel ruler where needed. Once cut I peeled the backing paper off and stuck the stencil down to the fabric.
You could do this step with ordinary printer paper (ideally a good quality slightly heavier-weight sheet) and secure it in place with masking tape around the edges, but I happen to have a stockpile of the full-sheet label paper around and it does work better than ordinary paper for things like the spirals in this stencil and some of the smaller details — see around the nostrils and eyes, for example.
After it was carefully pressed into place on the felt I loaded up a regular 1.5″ wide housepainter’s brush with red craft paint and went at the stencil in the classic Martha Stewart-approved way of painting a stencil without getting paint under the edges of it and ruining the outline, namely short vertical stabby strokes down onto the surface, working slowly and being careful not to disturb the stencil as you work. It works on Blood Bowl pitches just as well as it works on bedside tables or whatever crafty random thing Martha does!
After getting a reasonable layer of paint into the stencil I lifted it carefully off while the paint was still wet, to keep the stencil from getting stuck to the fabric. It came out very clean, no fuzzy edges or paint bleeding under, especially given it was painted onto fabric!
Later I went back and masked off the last field lines around the outer edges of the endzones, same tape-and-newsprint method I used on the main field lines.
If (when!) I do another fabric pitch, I’m going to seriously consider just doing all the field lines and other decorations with a brush instead of spraypaint; protecting the rest of the project (and the rest of the room!) from overspray is a massive pain when using spraypaint. All the masking seen in the first photos of this post took most of an hour to do, while the spraypainting itself only took a couple of minutes after the masking was complete. Brush painting stencils produce no overspray and don’t generally put the rest of the room at risk of being repainted…
The felt pitch is done at this point, except that I might eventually go back and add some colour to the endzone areas, or a team name across one or both endzones if I get really ambitious.
Work on the various sideline temples (last seen here) is also progressing, although taking pictures of black-primered buildings is fairly pointless so a proper progress report from that segment of the project will be a couple of days from now.