
A relatively large modular river setup has been on my Things I Want To Build list for years. I went through the excellent set of scenarios that come with Pikeman’s Lament recently with an eye toward what additional scenery I might need to do them properly, and one of the scenarios is a bridge seizing/river crossing that needs a river the long way down the table — suggested table size for Pikeman’s Lament being 4’x6′.
Perfect, a good reason to shunt the river project to the front of the queue as my summer project! It’s also universal scenery that I can use on pretty much any of my tables, possibly with alternate bridge modules eventually to better match, say, my Russian Civil War setup or even Infinity’s cyberpunk future!
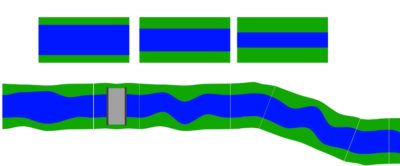
To check proportions and the basic idea I fired up Inkscape. You can work in real-world units in Inkscape really easily, so it’s ideal as a super-basic quick layout tool, faster than doing things by hand on graph paper and cheaper than wasting materials! I decided on 6″ wide modules with a 3″ wide river in between 1.5″ banks, which will let me put lots of flocking and foliage along the banks. The bridge is 50mmm wide across the road part, which gives enough width for at least two figures across and will accommodate figures on 40mmm wide multibases as well.
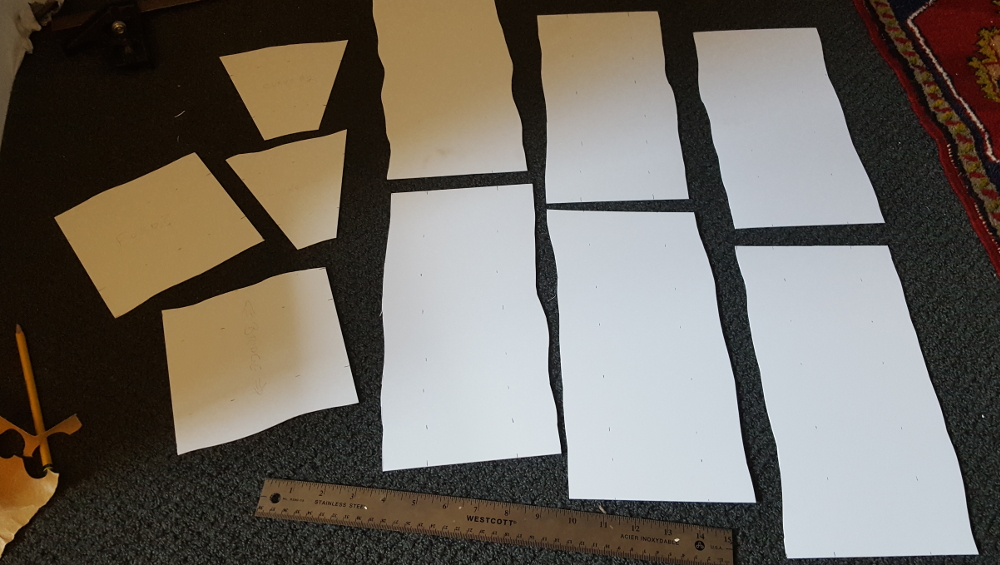
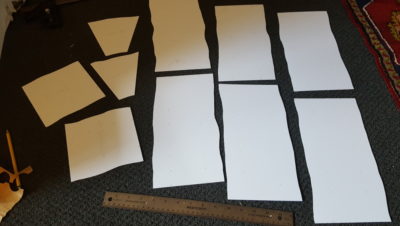
I started construction by buying a 4′ by 2′ sheet of .040 (~1mmm) styrene plastic sheet from our excellent local plastic store, Industrial Plastic & Paint. The big sheets of bulk styrene are identical to the 8×10 pieces you buy in a hobby store but much, much cheaper! I cut two 12″ by 24″ pieces, enough for six 12″ straight river modules, two 6″ long short modules, and a pair of curve pieces about 3 or 4″ long. That’s enough river to get from one side of a 6′ long table to the other at an angle, and keeping the bridge piece on one of the 6″ short modules makes placing it more flexible.
The long straight sections aren’t perfectly straight, incidentally. I offset each one by about a half inch, so the river will wander back and forth a bit on the table, or angle gradually one way if you align all the long pieces the same way. The long sides are cut slightly irregularly and then sanded down to smooth out any jagged edges from the scissors.
There are cheaper material than .040 styrene, even at bulk rates, and there are certainly stronger materials, so why thin styrene? Because it’s thin, strong, and waterproof. I dislike scenery that stands up really high off the table, the styrene is going to be strong enough provided nobody abuses it, especially once all the clay, sand, glue, more glue, etc etc is on it, and I can slop paint, water, and glue around with abandon without anything warping or being destroyed.
For the banks I decided to use air drying clay and picked up a cheap pack at one of our local art stores. I marked the 3″ standard width of the river on the ends of all the styrene pieces, rolled out snakes of clay, and mushed them into place with my fingers. Good old kindergarten-level stuff, nothing fancy. Keep a little pot of water handy to wet your fingers in and smooth the clay.
The best way to use air drying clay is actually to put a layer of white glue down on your base material, and then mush your clay around on top of the glue. They’ll dry together and bond to the base material. I didn’t do this, so now I’m gluing the dried pieces of clay back to the styrene… this does give me a better chance to correct any warping caused by the clay drying, which has happened. Gently bending the clay straight then gluing it down with a weight on top of it – I used figure transport cases – has so far sorted out all the warping issues.
A thicker more heavyweight base material wouldn’t have warped, but see above about disliking scenery that stands too proud of the table surface. Always about the tradeoffs!
With the clay done on all six straight long modules, the two curves, and one of the short straight modules – which I’m doing up as a shallow ford – I started building the bridge on the last short straight module. More on that soon!
There is a youtuber out there called the Red Beard Baron who has a tutorial on building a flexible river system similar to what you are doing. I am going to try out his approach. It looks very doable. I am looking forward to see how yours comes along. For the time being, I am using the old JR Miniatures flexible river terrain.
I follow Red Beard Baron over on YouTube myself, this is inspired by some of his stuff, and some of Mel the Terrain Tutor’s videos on making ponds, swamps, and rivers. — Brian