Tag Archives: church

Warbases Church, Part Two

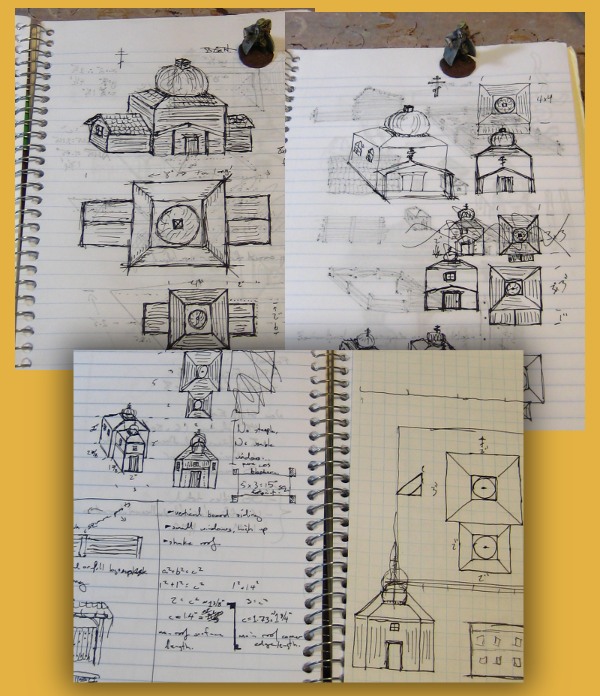
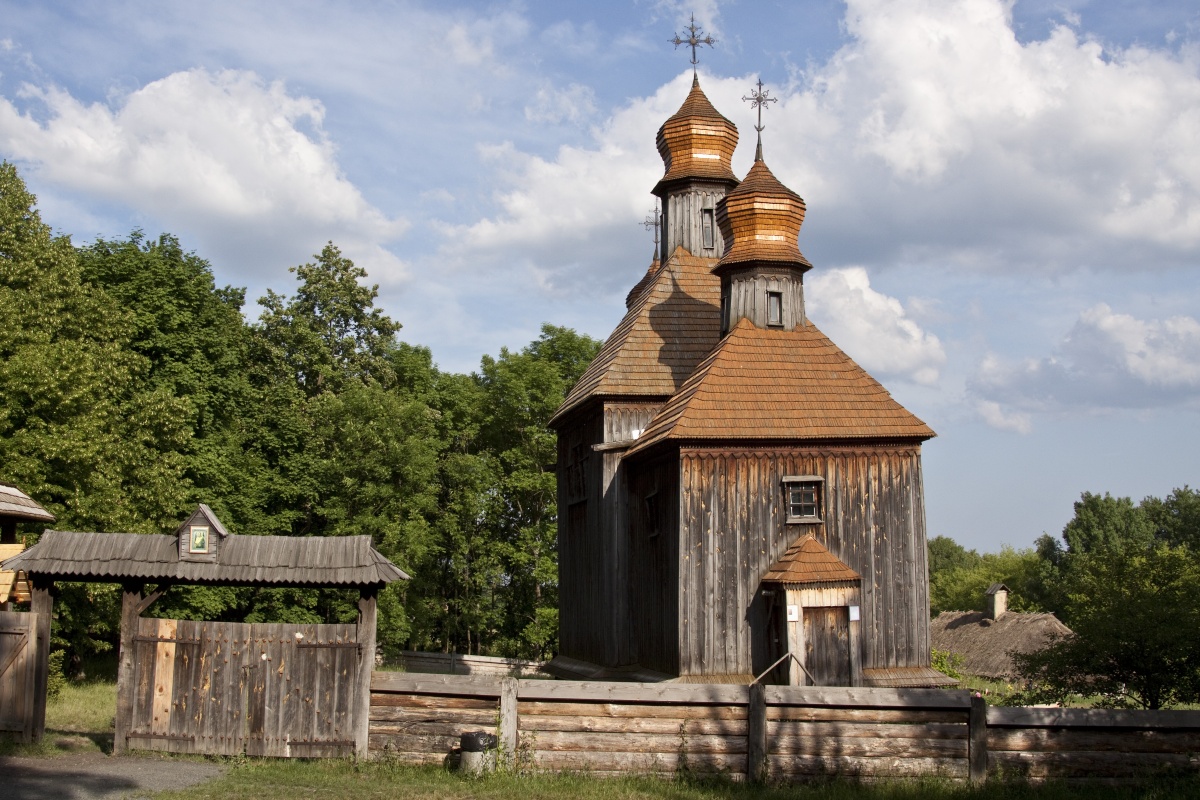
More progress on detailing the lasercut MDF church from Warbases that I started previously.

Stonework & Doors

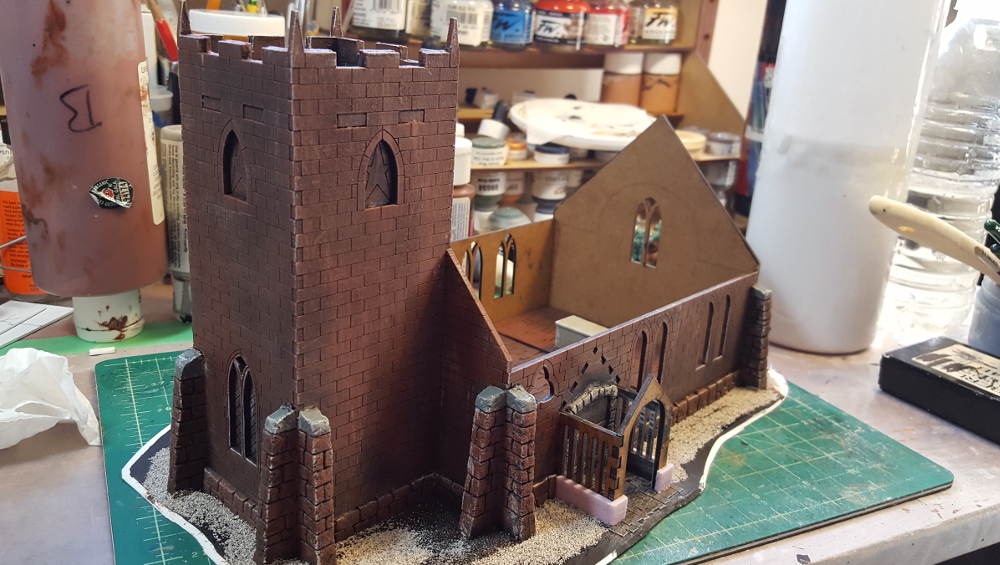
Buttresses and a double row of foundation stonework have been added with pink styrofoam insulation cut with a new Xacto knife. I used scrap card to create a small jig to keep the angle of the front of the buttresses the same across the fourteen buttresses around the outside of the church. The buttresses are roughly a quarter inch wide, two inches tall, and about half an inch deep at the base of each.

Styrofoam stonework in place on the church; Warlord 28mm pikeman on 25mm base for scale. Click for larger.
Buttresses and stonework on the other two sides of the church. The extra stone partway down the side disguises a join in the foundation strips. Click for larger.

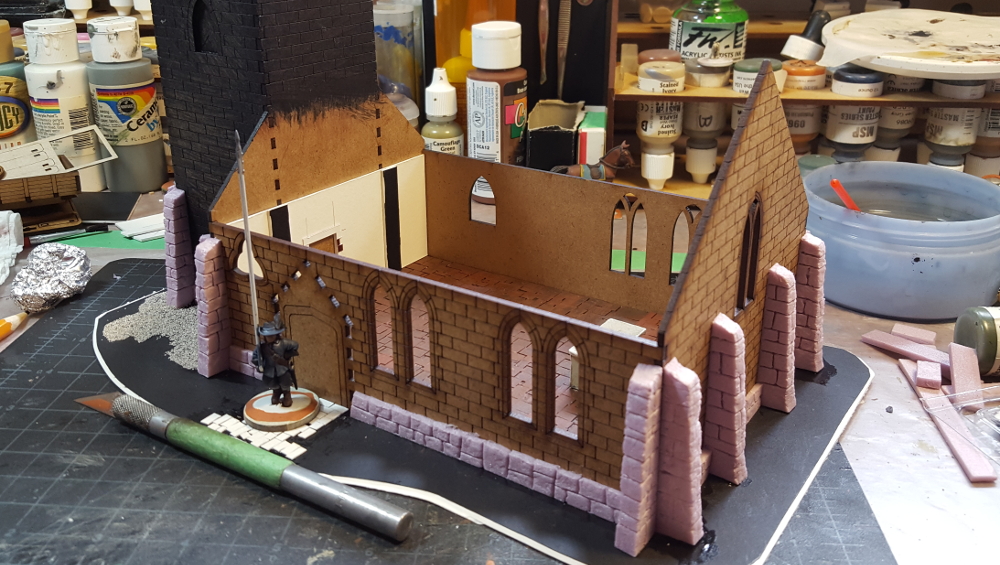
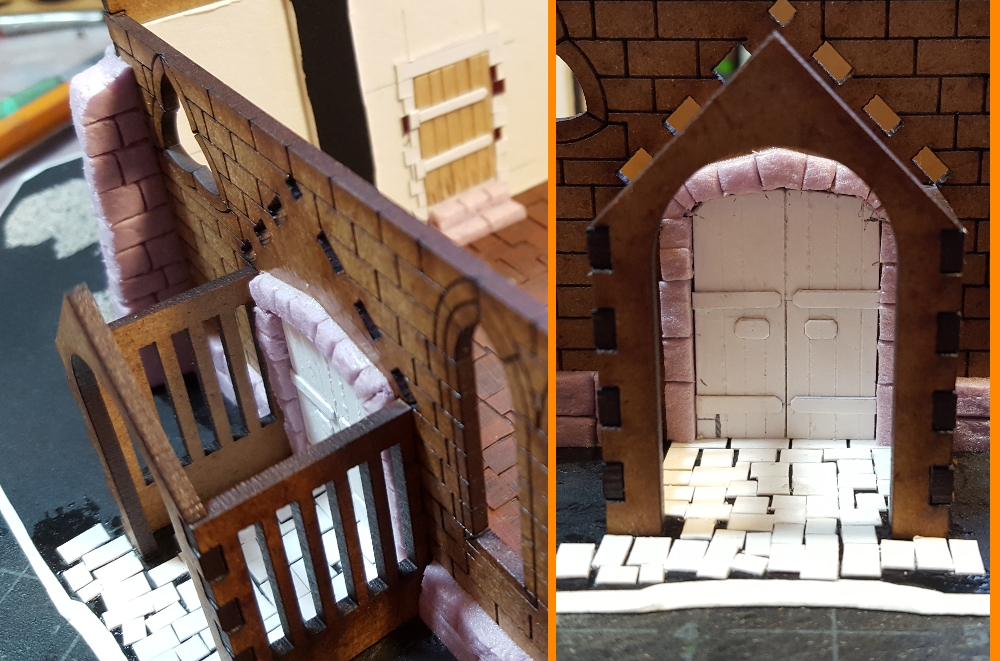
The front door is card with planks scored into it, with more light card for the hinges and handles. The door arch is more pink styrofoam. Inside the church I’ve added an interior wall of 1/16th matt board on the tower end to hide the tabs where the tower walls slot into the end wall. That’s had some added detail with matt board and card, and the door was done with offcuts of coffee stir stick wood and card.

On the left, both doors at once, with the porch walls in position but not glued. Right, close-up of the front door. Click for larger.

All of the styrofoam was glued down then carved and textured after the glue had dried; I used a ball of tin foil to add a stone texture, then my usual knife-and-pencil stone carving technique.
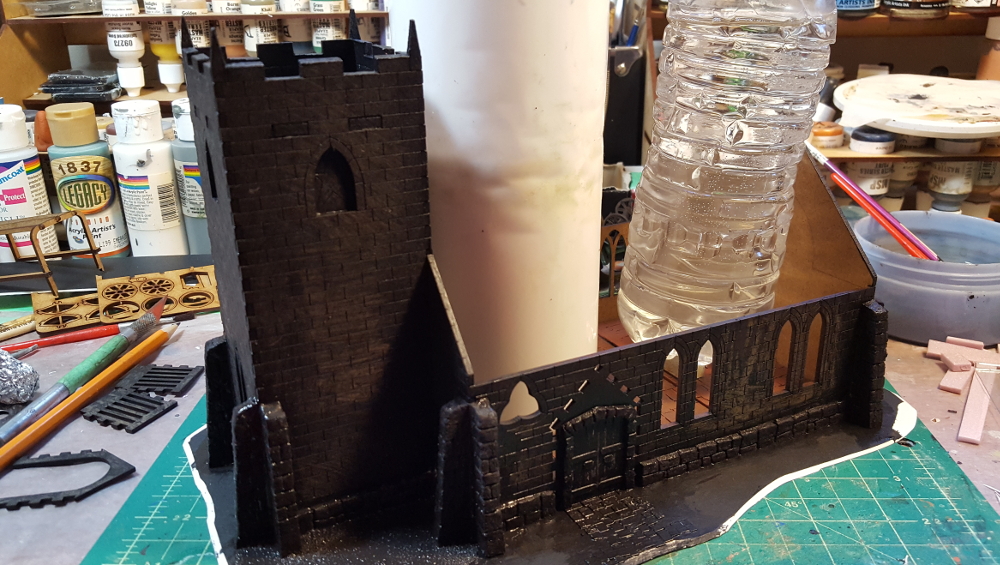
Priming & Painting

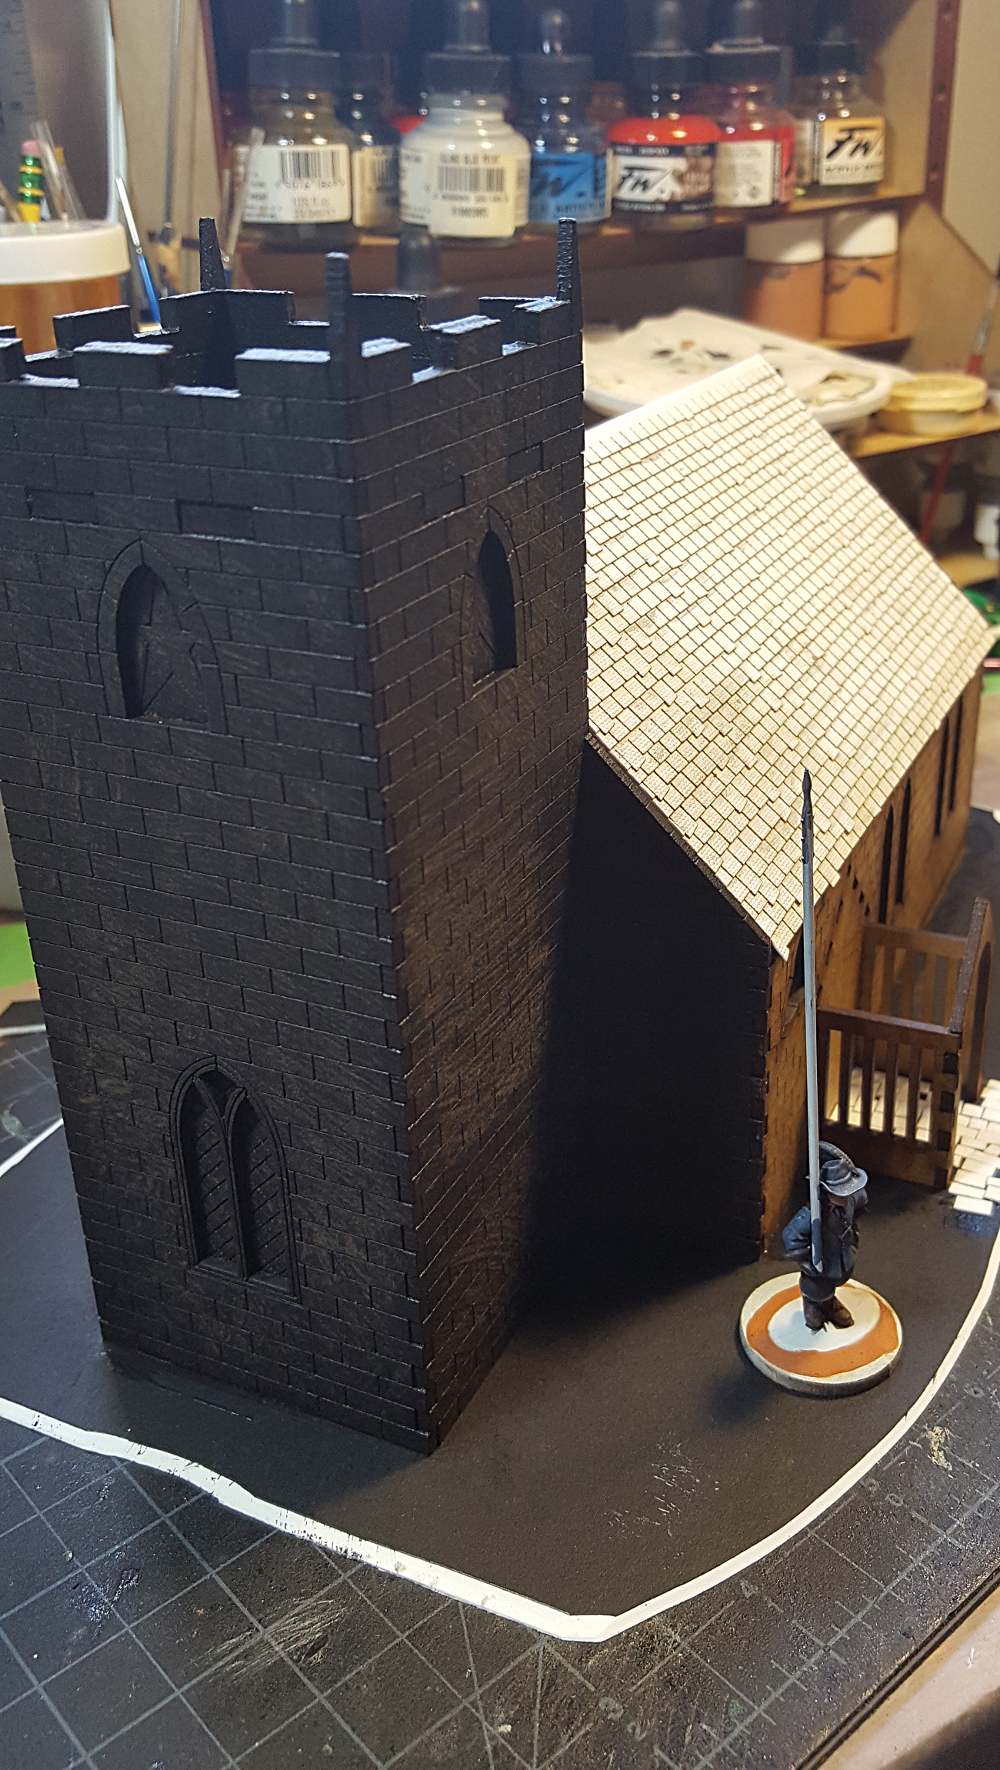
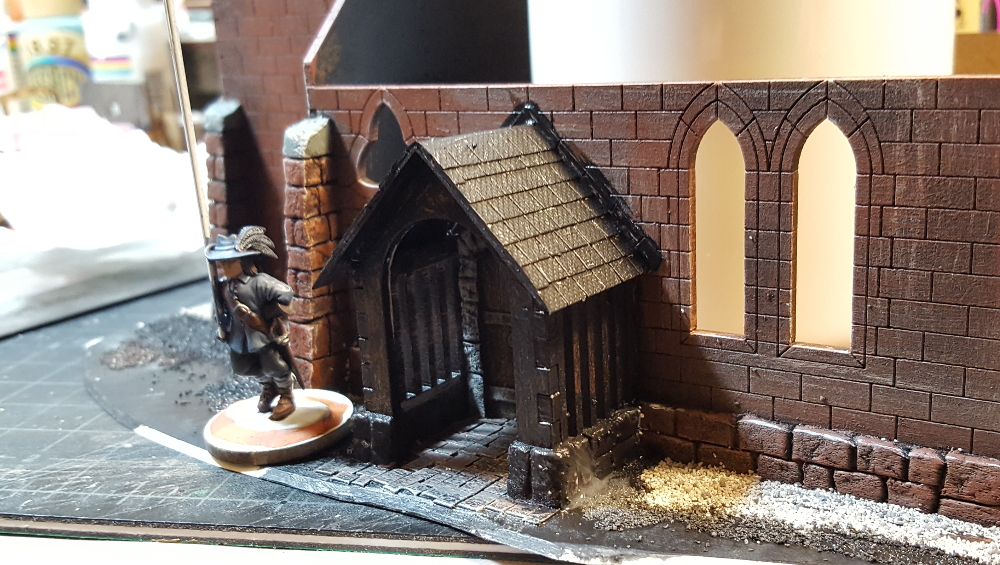
The whole building got a coat of black paint as primer. Rather than the default grey stone that I always seem to use I took some inspiration from churches I’ve seen online from Shropshire county in England and decided to do mostly reddish stone with some grey stone used as accents, similar to the Cound Church of St Peter

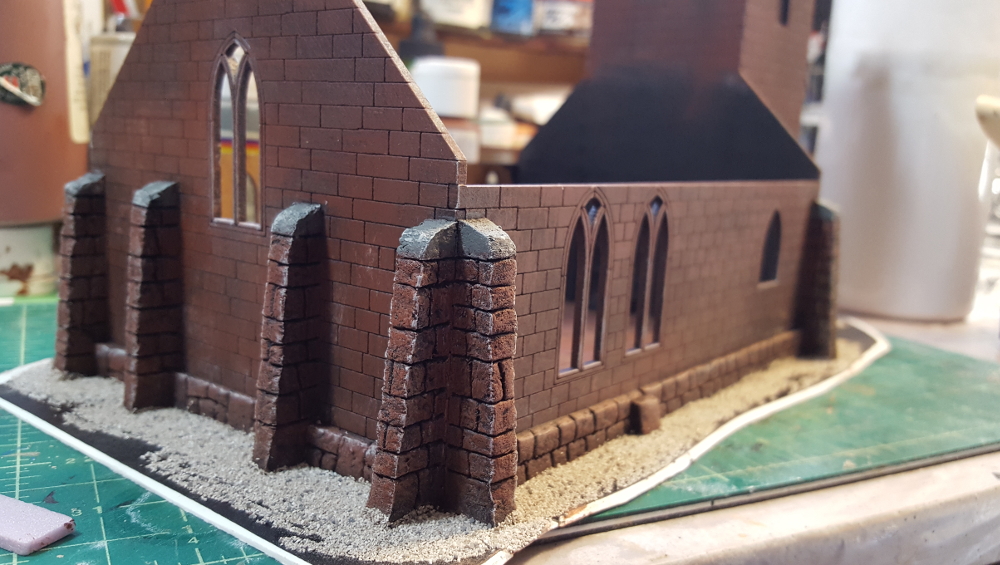
I started with brown paint drybrushed heavily on, then a fairly light grey paint, and finally a drybrush of red oxide/burnt umber. I’ve done a bit of edge highlighting so far, but will do more and might yet do another paler drybrush over the whole building to pop some more details out.

The capping stones on each buttress were done in dark grey then drybrushed a paler grey, as was the arch around the main door. I might yet do more stones in grey, just to add some variation to the building. I also glued the porch walls and front down, and added more strips of styrofoam for the foundation of the porch.
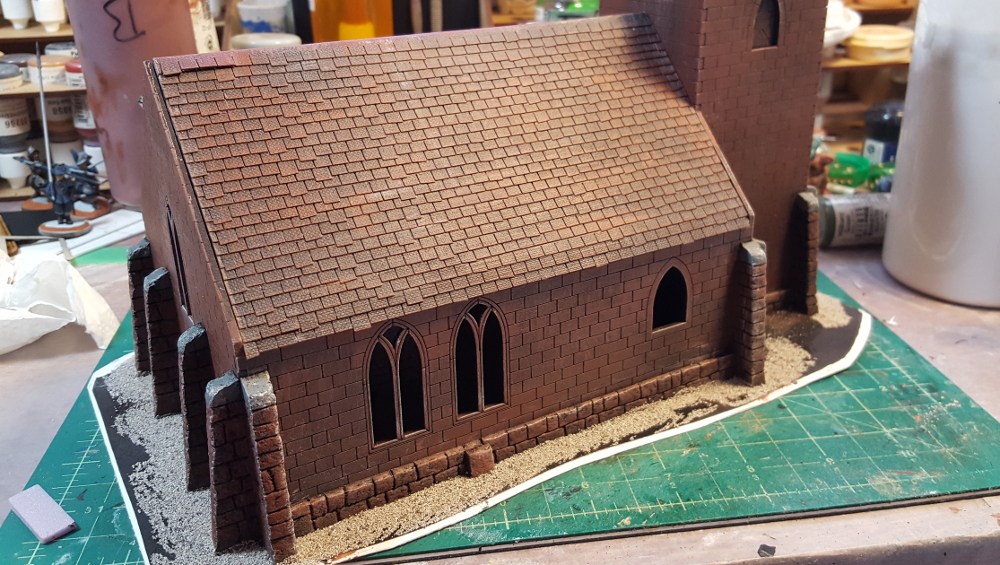
Black primer paint drying, with some weight inside the building to keep the base from warping. Click for larger.
Tower end of the church all painted, and with the porch glued down and stonework added around the base of it. Click for larger.
Altar end of the church all painted. Click for larger.

The Roof(s)

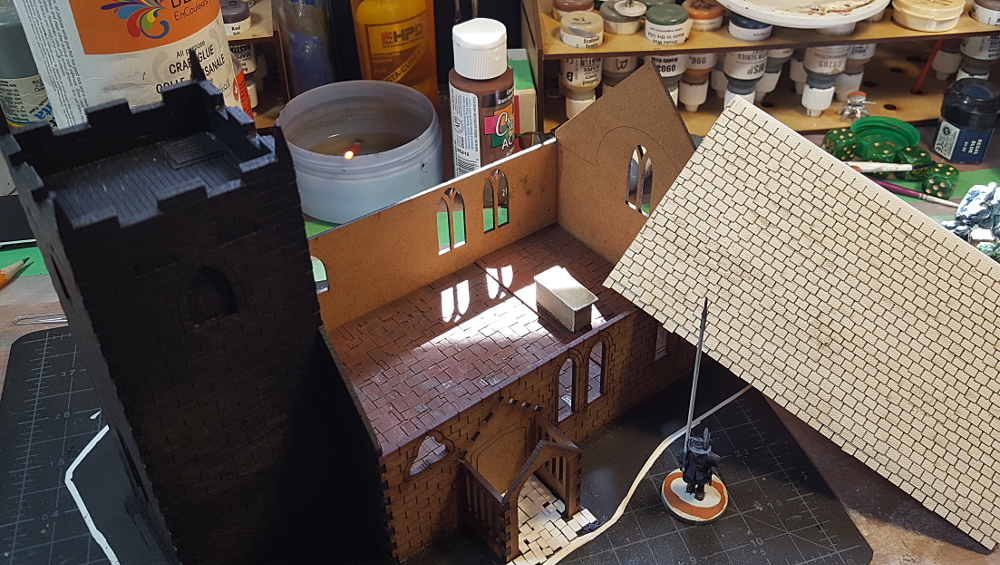
Both the main roof and the porch roof got covered in Warbases’ very nice lasercut slate tiles and primed black like the rest of the building. So far the main roof is painted more or less the same as the rest of the building, with an extra grey drybrush to pop the texture a bit more and make it look a bit different from the walls.

Main roof, painting in progress. Click for larger.

The porch comes with MDF panels for the roof, but they look quite thick so I cut a strip of light card the same size, folded it, and glued it into place. Before gluing the roof down I added strips of card against the stone wall to hide the slots where the MDF roof panels should slot in; they’ll be painted to look like lead flashing eventually. As mentioned, the porch roof got more of the Warbases lasercut slate tiles, and will get bargeboards on the front edges eventually to hide the edges of the slate.

Porch roofed and primered, with Warlord pikeman for scale. Click for larger.

Up on the roof of the tower I doubled the thickness of the walls with matt board, then put down a wooden floor using styrene plank sheet, with a roof hatch from a bit more styrene. The upper edges of the walls got a bit of GW Liquid Greenstuff to help disguise the line between the MDF wall and the matt board additions, and painting is in progress.

Tower roof and main roof from overhead. Click for larger.

Still To Do…

The outside edges of the base has a layer of fine scenery grit – coarse sand – glued down and mostly painted black; I’ll paint it up dark brown with a bit of a drybrush, then put various kinds of flock and turf around.

The porch still needs work, mostly paint, and a bit of detailing on the roof. The tower roof also needs painting, and I’m not entirely happy with the colours on the main roof.

Inside is still the big job. The Warbases kit comes with solid lasercut windows that look good from the outside but will make the accessible interior look a bit odd. I might use square grid plastic mesh – the same stuff you use in screen doors – to fill the windows, with inside walls of more matt board, like I did with the inside of the wall between the tower and church proper. Still, with the exterior done including scenic groundwork I’ll be happy to put the church on the table and put finishing the interior off for a bit!

Warbases Church In Progress

Not much activity on the wargaming front in the last couple weeks, for a variety of mostly-irritating reasons, but I have made a bit of progress on the Warbases church I first mentioned in a post a few weeks back.

This is a nicely proportioned building, not so big as to dominate the table, and it’s of a basic design that can literally be found all over the world, anywhere Europeans (especially the Brits) hung out long enough to build churches. You could assemble the basic church in just a few minutes, paint it up quickly, and have a solid and respectable piece of wargaming terrain to use for years. Inspired by the really nicely upgraded example shown on the Warbases website, though, I’ve decided to do some extra detailing and really make this building pop.

I started by assembling the tower, then glued it and the floor to a piece of matt board roughly 11″ long by 7″ wide. I used light card to put flagstones on the floor, with another piece of mattboard at one end of the floor to raise the altar just a bit. The altar itself is more bits of matt board assembled into a rectangle about 1″ wide and half an inch deep. The altar got a coat of GW Liquid Greenstuff for texture, then painted grey with various washes, and a quick edge highlight of much lighter grey.

Warbases church assembled, roof on the right. 28mm Warlord pikeman for scale on a 25mm wide base. Click for larger.

The floor was primed black, then heavily drybrushed with a couple of shades of brown, red oxide, and burnt umber craft paints to get a good reddish stone colour. Most of the church is going to be that colour, with grey stone trim, as a change from the default grey stone!

The entry way on the side of the church has similar flagstone laid down and will eventually be painted the same as the inside floor.

It’s kind of hard to see on the photo above but at the top of the tower I’ve added wood plank flooring from sheet styrene, a trap door in one corner (more sheet styrene), and added matt board to the inside surfaces of the crenelated tops of the walls to double the thickness and make it look more like stonework.

Tower end of the church with the roof properly in place. Click for larger.

The roof got covered in Warbases slate tiles, sold in sheets lasercut from heavy paper (light card? Hard to say, really) with an interesting texture to it. Certainly easier than cutting my own tiles, I got the entire roof covered in just over half an hour of work!

Next up will be adding stone piers to the corners of the building from pink styrofoam, and adding some other stonework detailing with either styrofoam or greenstuff putty.

Onion Domes, Part One

Finally made it up to the local branch of Micheal’s craft store after work Wednesday to hunt down material for the two domes of the Russian church. I had planned on using 1″ wooden spheres, but the shelves of random wooden shapes were fairly well picked over and they had no wooden spheres of that size at all.

They did have 1″ wide turned wooden shapes advertised as “decorative rod ends”, though, and I realized they’d make much more interesting onion domes than the simple spheres I’d been planning on.

When I got them home I drilled holes in the top and inserted lengths of wire. One useful thing about turned wood shapes, it’s usually fairly easy to find the centre point, as the lathe tools always leave small ring impressions on the wood. The wire got superglued in, then I used a twist of tinfoil to form the core of the uppermost section of the onion shape. Terracotta Milliput is cheap, sure, but tinfoil is even cheaper!

After that I mixed a small batch of terracotta Milliput and worked it around the wire and foil. I used a 1″ circle I’d cut out of styrene as a rough guide to keep the upward concave curve consistent, and smoothed things down with a wet fingertip. I didn’t fuss with the surface finishing much, a bit of wet sanding after the milliput is dry and another thin layer of putty will finish everything off nicely in due course.

So, behold the domes of the Church of St. Boris the Intoxicated, with the putty still setting on them!

ruschurch_domes1
The onion domes take shape. Click for slightly larger, see text for details!

Aside from the domes, the roofs are finished structurally, all shingles and trim in place. I still have to finish the trim around the door and windows, then it’s off to painting.

Small Russian Church WiP

A quick pair of photos of the small Russian church I’m building for Russian Civil War gaming in 28mm. Earlier in January I discussed some planning and thoughts I had for a wargame-scale small church, and while it isn’t going as fast as I had hoped progress is being made!

ruschurchwip
My work-in-progress Russian church, alongside the two earlier Russian huts.

As with the huts, the basic structure is mattboard with coffee stirsticks providing the woodwork.

ruschurchwip2
A slightly more recent work-in-progress shot. Shingle roofs are slow going…

The roofs of the church are going to be shingled rather than thatched, and while doing shingles with built-up strips looks good, it is frankly tedious… The smaller roof is done except for trim, though, and the main roof is about half done, then it’s on to the domes to provide that very Russian look that’s so distinctive.

The Next Building Project

I don’t usually like to talk about plans and ideas before there’s at least some progress to show off, but while I was away over the New Year I had time to do some quick sketching and thinking about a building that would be at the centre of any Russian village or hamlet during the Russian Civil War, and which really is iconic when you want to remind players the game is, in fact, set in Russia.

notebook_jan2011
Some pages from my notebook – possible plans for a feature building for my RCW table!

Google Image Search is really indispensable when looking for prototypes and inspiration, although it’s very easy to get a building that’s just too big for the table. The church at top left would have been over 8″ long and 4 wide, far too big for a scenery piece that is basically just a Line of Sight blocker. The design shrank from there (top right page) then grew slightly on the bottom page and I’m fairly confident the finished result will be something like the two-part double-dome design on those pages, with a footprint roughly 5″x3″ and an overall height somewhere around 6″.

I saved this image from the web but forgot to write down where I found it or any details of the actual building, but it’s become my main reference. I also can’t currently find this picture again via GIS…anyway, it’s a perfect-sized building for my purposes and should help me get a lot of details right.

rus_church
Russian Church found via Google Image Search, except I didn’t save any info on where I found the image… sorry.