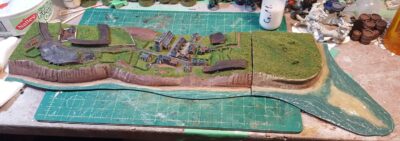
The first coastline segments are done, barring a tiny amount of touchup here and there.
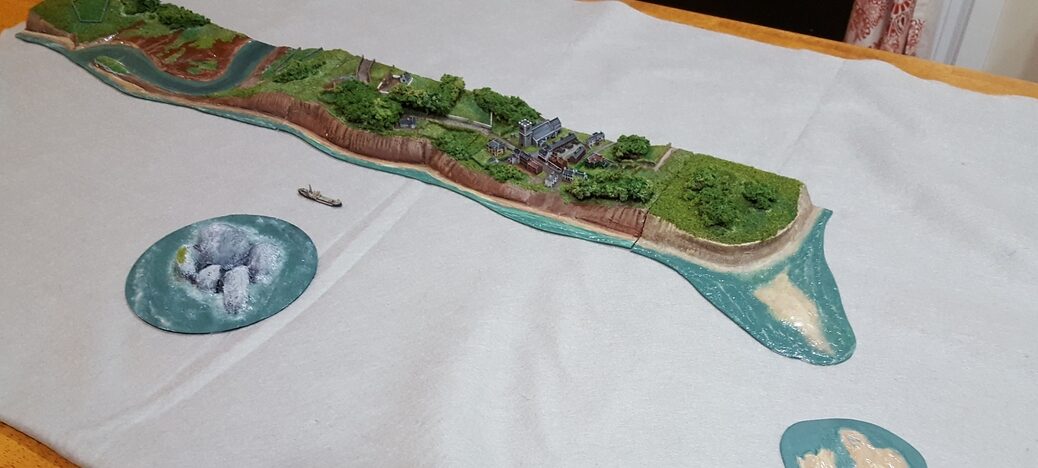
Overview of the coastline and other bits. Click for larger.
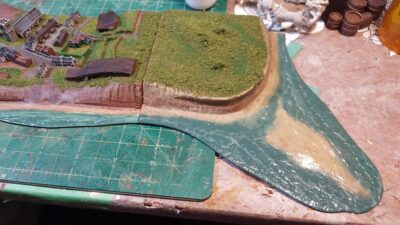
The sandbank off the headland still needs some paint and the waves done, and I need to do a bit of drybrushing along all the cliff segments to get a better colour match along the whole thing.
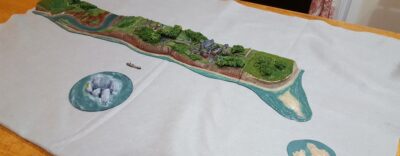
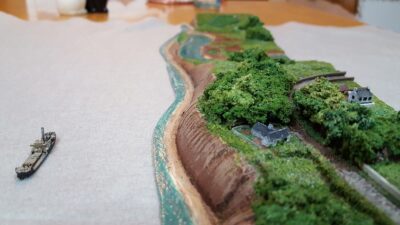
Low level view of the coastline, starting from the headland. Click for larger.
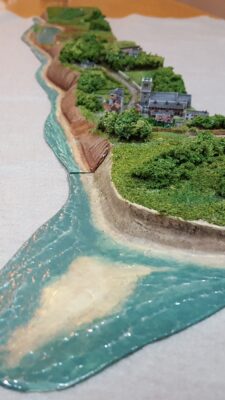
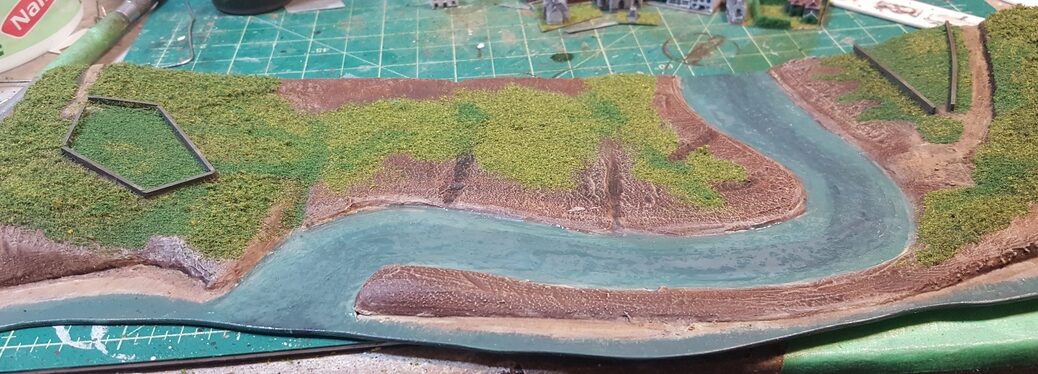
Low over the coastline, approaching the village. Click for larger.
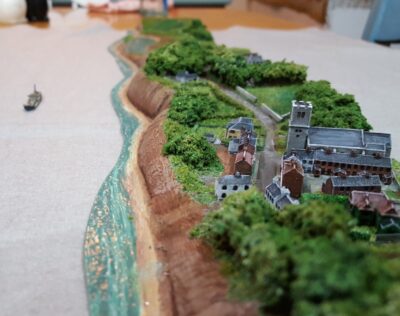
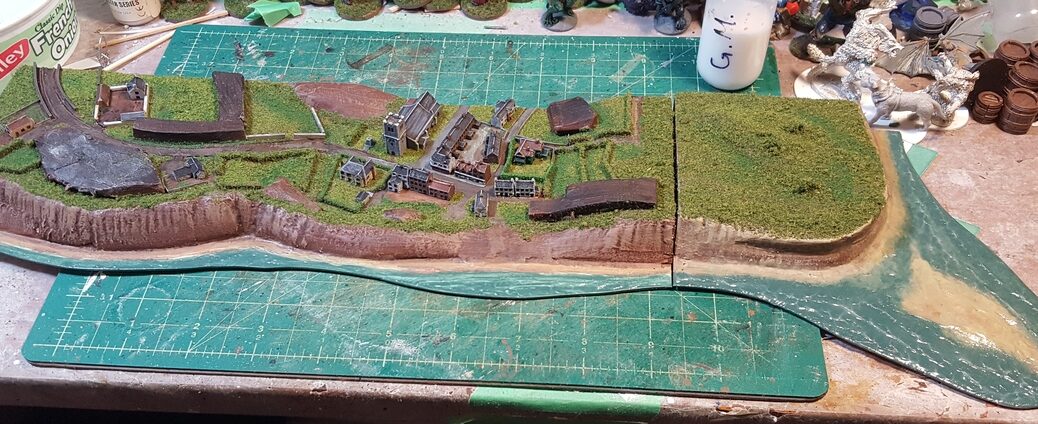
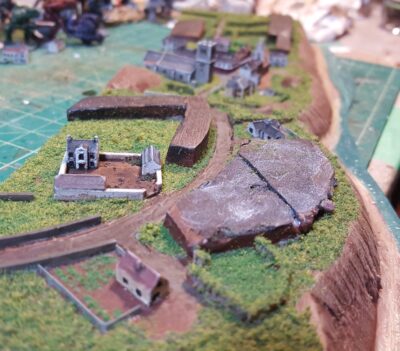
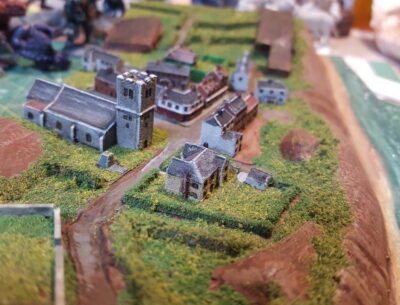
Over the village and looking at the farms and countryside beyond. Click for larger.
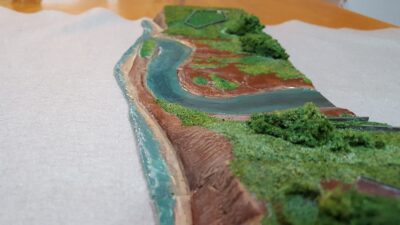
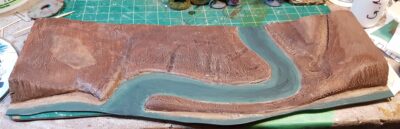
The last part of the finished coastline features a lazy tidal river and mudflats.
I’m planning on running this 1/1200 naval game and a big 28mm Pulp Alley game at Trumpeter Salute 2020 in April (the 17th through 19th) so I doubt I’ll do more coastal segments until after that, but in the future I do want to do several more segments, enough eventually to have one side of a table as solid coastline, so six or more feet.
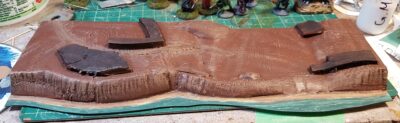
Cranked out a headland for my coastal terrain, so we can have the coastline end on-table without looking super-weird. It’s designed to go on either end of the modules, so that constrained the design considerably, but I like how it worked out.
Basic headland before painting. See text for details, click for larger.
As with the larger coastal sections, the base is 1mm (.040″) plastic card cut down and sanded, with a chunk of half-inch styrofoam insulation for the land. I used a couple of different grades of sandpaper to shape the landform, including the slightly undercut eroding cliff faces, which I really like the look of.
After that I covered the whole thing with a 1:1 mix of premixed drywall plaster (the pink stuff) and white glue, smoothing and shaping it with my fingers to cover the styrofoam, smooth out the sanding marks on the cliffs, and shape the sandbank in front of the point.
The headland basically finished. Click for larger.
Painting and gloss gel for wave effects went fairly quickly, with a dose of my usual flock mixes on the land side. Because this headland section has to connect to any end of the other coastal sections, and I (deliberately) didn’t run roads off the ends that limited what I could realistically put on this piece. So it’s just scrub, cliffs, and ocean.
The headland next to the village module. Click for larger.
Finally, a quick shot of the new headland next to the village module, which is still awaiting woodland sections. I can see I need to do a little bit more drybrushing on all the cliff sections together to match them up, but otherwise everything looks good together. The gap between the modules is less obvious when they’re properly in place; here the headland is tipping off the edge of my cutting mat and making the gap look giant!
I’ve had a bit of setback with the river section – glue accident while putting flock down – so it’s back to finishing that off in the next few days then I need to actually do the wood canopy sections to call this round of tiny naval terrain finished!
I have to admit to being straight-up intimidated to start painting the 1:1200 Last Square coastal naval boats. They’re tinier than anything I’ve painted in years and incredibly detailed. I’m not kidding when I say I own 28mm figures with cruder details than these tiny, tiny ships, most of which can balance on a fingertip.
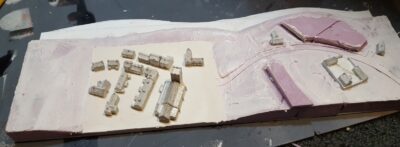
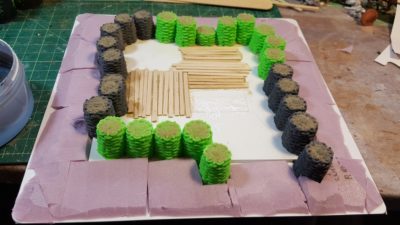
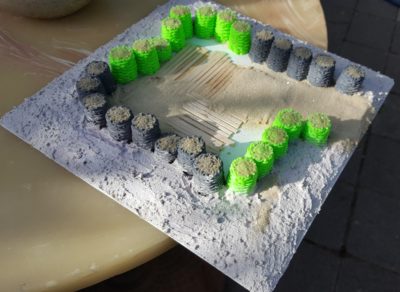
A green and miniature land! The first two coastal modules are finished, except that I’m still mucking about with forest canopy solutions, so those aren’t done yet either. There is also the chance of me being (more) obsessive and going back to add even more details – cars on the roads and sheep in the fields, maybe?
Imaging that the odd brown-black blocks in the following photos are solid woodland canopy, please.
The farms outside the village. Note vegetable garden in the nearest farm. Click for larger.
The village up close, looking down the slope. Note war memorial for the Great War next to the church. Click for larger.
The river module finished except for trees, as with the village, and some more gloss varnish over the river itself. Click for larger.
Incidentally, for some other high-detail microterrain work that covers whole tabletops, not just slivers of coastline, go feast your eyes on the Münsterland Wargaming English blog’s 2mm archive. The towns are all amazing, and the autumn coloured table (for an early winter Franco-Prussian war battle) is gorgeous.
I’ve got a headland module underway now; no photo because it’s currently a slightly glossly white blob under plaster and glue. These three will let me end the coastline on-table sensibly, and the headland is designed to fit at either end of the coast. I’ve got definite plans for at least two more full size coastal sections, but first I’m going to paint boats!
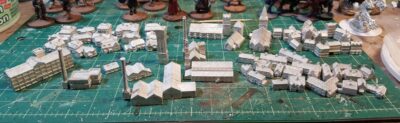
Painting up the Brigade Models tiny English buildings turned out to be ridiculously fun. They’ve got all sorts of great detail and really reward a little bit of extra effort beyond a basecoat and drybrush, although you could turn out perfectly usable buildings that way too.
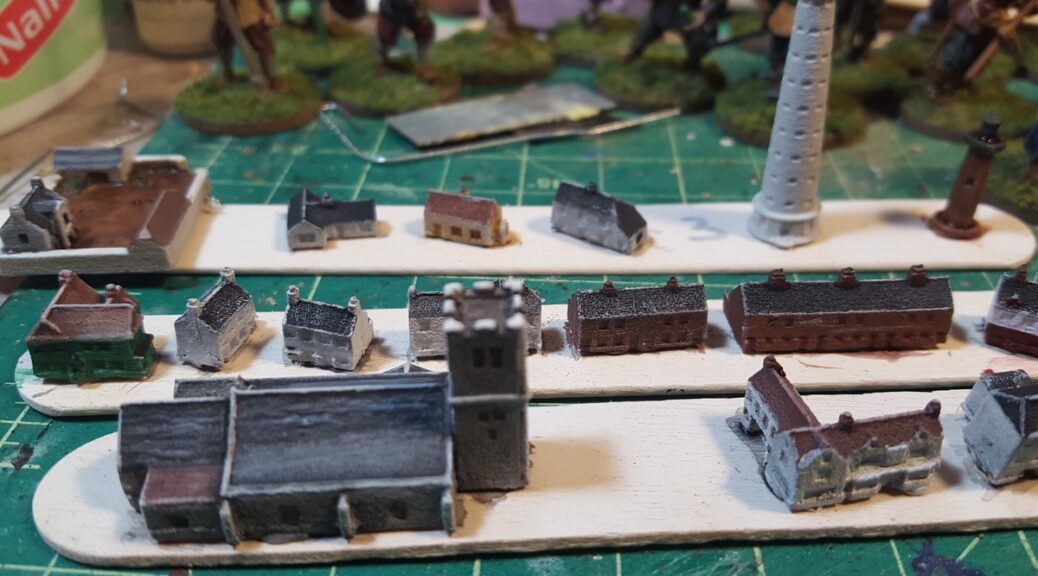
Buildings and boats all primed and ready to be painted. Click for larger.
Above is everything I primed in this batch, including a number of buildings I don’t intend to use right way and all of the British 1/1200 boats and the two coastal merchant vessels I bought from Last Square in December for this project. Everything is mounted on tongue depressors (craft sticks) that are 6″ long and about 3/4″ wide, just for scale. Small buildings and tiny ships, indeed!
Painting buildings in progress. Click for larger.
More buildings in progress. Click for larger.
The only thing left to do on most of the buildings now is to go in with black and darken all the windows, and then some cleanup here and there. I’m going to be mounting some of the buildings on thin plastic card to make it easier to add garden walls and similar details, and then we’ll get onto flocking and detailing the actual coastal pieces last seen mostly painted in the previous post.
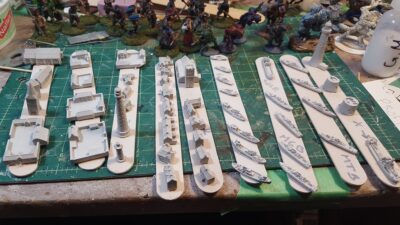
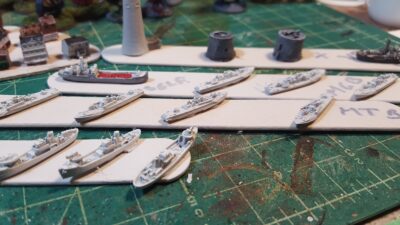
Some of the British coastal combatants & merchants from Last Square. Click for larger.
Finally, because this is supposed to be a naval wargaming project, here’s a look at some of the Royal Navy ships & boats from Last Square, along with two coastal merchant ships. In the foreground are three anti-submarine or minesweeping trawlers, then four Fairmile D Motor Torpedo Boats. The third stick back has Fairmile D Motor Gun Boats and (with the red hatch covers) a coastal merchant vessel. In the background right is the stern of another, larger coastal tanker, as well as two Martello towers from Brigade Models.
Progress on my naval project, last seen in November’s A Naval Diversion post. My buildings from Brigade Model’s Small Scale Scenics range and British & German ships from Last Square’s Figurehead 1/1200 Coastal Forces line all showed up before Christmas, but aside from doing some quick and basic cleanup of most of the castings I didn’t do anything with them until after Christmas.
The scenery plan for this project is fairly simple, a set of modular coastal strips. After some experimenting with the Brigade buildings I decided on 4″ wide by 12″ long modules, with roughly 3.5″ of land and half an inch of sea/beach. The base is 1mm (.040″) sheet styrene, which I buy in big 4’x3′ sheets from our local plastics shop, and then half-inch styrofoam insulation for the land on top.
Quick graphic done up in Inkscape to explore options for coastal modules. The left-hand trio were 3″ deep, the right-hand set 4″. Click for slightly larger.
Because I’d never done any scenery this small before, I grabbed a scrap of MDF and did up a quick test piece. A lot of flock and foam foliage is too coarse for 1/1200 scale stuff, where 1mm equals 4 feet, so an average human is under 1.5mm tall! I wound up picking up a couple of extra colours of fine foam flock, and I really like the look I got on my little 3″x3″ test piece.
A 3″x3″ scrap of MDF plus various foliage materials and such for a test piece of 1/1200 scale terrain. Click for larger.
So far I’ve done just two modules, but I want to do at least one more full-size module and a headland/corner module of some sort so the coast can end on the table without looking weird. The first module has a looping tidal river and not much else; the second one has a village at a low break in the coastal cliffs and farms outside the village.
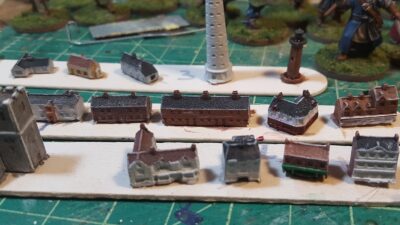
Brigade’s tiny English buildings laid out on one of my coastal modules. Click for larger.
The village has a fair-size church, a small commercial area/High Street, some row houses, and a few other buildings that might be the village school or similar.
The village module, mostly painted. Click for larger.
The river module will be mostly river, mud flats, scrubland, and fields, but there will be a small lifeboat station in the outer edge of the big curve. Just one or two buildings and a short dock.
The river module. There will be a small lifeboat station on the right, where the road comes down to meet the river. Click for larger.
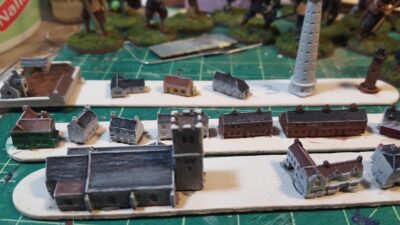
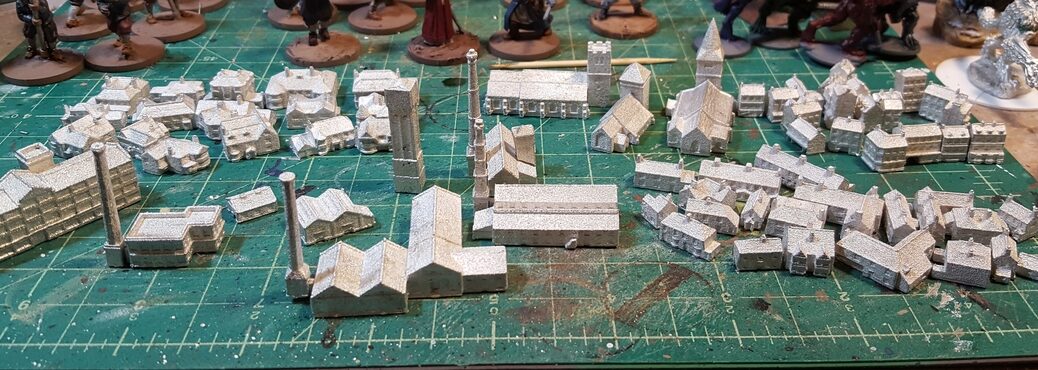
Finally (for now!) here’s a photo of all the Brigade Models buildings I bought. The group of large buildings in the left foreground is SSS-8010 Industrial Buildings, then going clockwise from there we have all of SSS-8037 English Detached Houses, SSS-8007 English Churches (three of those), SSS-8022 English Town Shops in the back corner, and finally SSS-8006 English Village Houses in the right foreground. They’re amazingly detailed little buildings, and should be awesome to paint up.
All my current Brigade Models Small Scale Scenics English buildings all together. Click for larger.
More soon as I get into painting buildings and ships!
If you’re interested in terrain building but not sure where to start, or you already craft terrain but want to step your game up, there’s a bunch of great YouTube tutorials out there these days. I’ve linked to Mel the Terrain Tutor before, but Black Magic Craft (YouTube homepage, website) is one I just recently discovered, and on his website he’s got a fantastic list of Essential Equipment with discussion of what he uses each tool or thing for and links to the various incarnations of Amazon to buy the things. Very useful regardless of your experience level.
By way of example, here’s one of Black Magic Craft’s videos on Better Stone Painting with some good stuff on getting your stone to be something other than flat grey, which is a thing I still struggle with after years (decades, gah!) of making terrain! (direct link to video, if the embed decides not to work)
Terrain is the third army, so why is it so neglected? was posted a couple of years ago (2017 sometime) but remains true and is a useful short rant on the importance of what might be my favourite part of this hobby!
Blinky blinky lights! Aircraft-style strobes on models with really simple electronic components, via Instructables. I still want to do some sort of shuttle or dropship for sci-fi gaming, might need to bump it up a notch and add lights now! Hmm, maybe a live lighthouse on the 1/1200 naval terrain I’m doing?
In the “It’s insane, I kind of want one, but storage would be a nightmare” category, Things From The Basement has a 20th Century Train Station that is 45″ (yes, forty-five inches, almost four feet) across! Some other neat stuff too including a batch of Russian buildings and scenery. There’s a fantastic fully painted and decorated version of the train station with lots of photos over on The Demo Gamers. You could run an entire pulp game just in and immediately around this thing…
More on the naval gaming front soon, although expect a bit of a blogging break over the Christmas & New Years holidays as I shall mostly be out of town. On the off chance that I don’t actually blog again before leaving town, I hope my readers have excellent holidays. Happy Holidays, Merry Christmas, and so on and so forth!
TerranScapes has a good video on using gloss gel for water, and I also found a video on using gloss gel medium for ship wakes, so naturally I had to pick a tub of the stuff up from my awesome local art supply store, Island Blue. (shop local, folks. Local stores are always cooler, and the staff far more likely to know their stuff!)
Anyway, I pulled out two of the shoreline/river bank modules I made over a decade ago (Part One, Part Two). For pieces started in June 2010 from matt board they’ve held up remarkably well, and they made ideal test subjects for learning how gloss gel medium works.
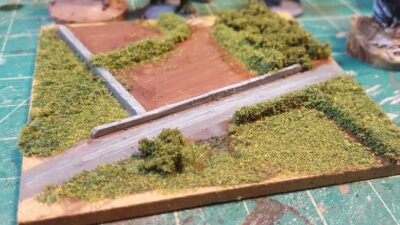
Gloss gel waves applied to two of my shoreline or river bank segments. Click for larger.
Gloss gel medium works beautifully for waves, and the main thing I learned is not to be afraid to put more on than you might think is wise, because it shrinks a fair bit when drying. It also doesn’t dry perfectly clear when it’s thick, which is fine for waves. That might be a function of humidity, according to the TerranScapes video. He talked about putting terrain pieces in a box with desiccating (silica) pellets to get everything perfectly cured and clear…
I’ve got another two or three of these modules around here somewhere, so they’ll get spruced up with gloss gel now too, eventually. I’ll also redo the foliage along the banks, and probably have to repaint the undersides to take some of the warp out of the cardboard again. Not bad for terrain that’s over a decade old!
I picked up a few things from Fenris Games back in June or July, and the first pieces are finally getting completed and onto the gaming table!
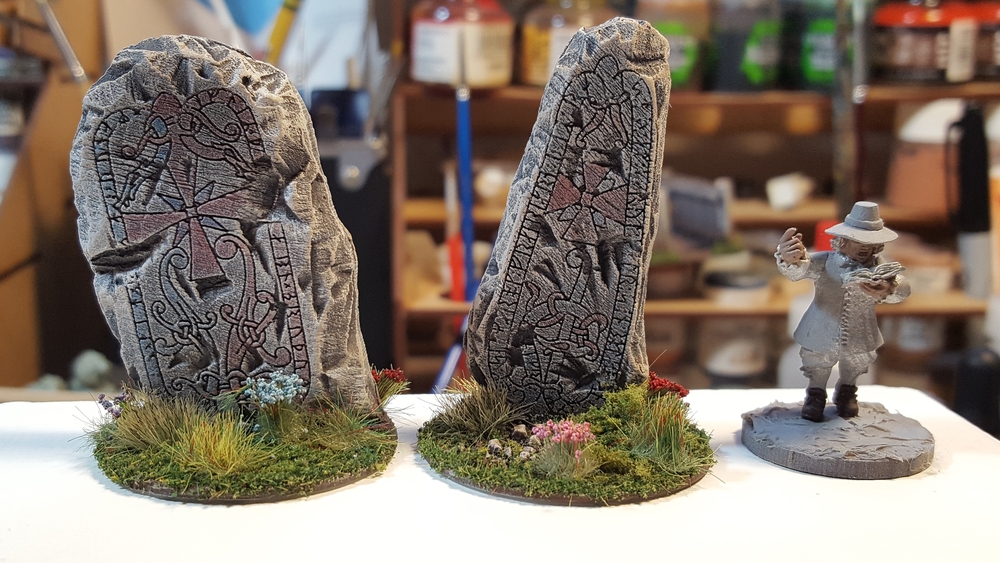
Two Viking Runestones from Fenris Games. Click for larger.
These are “Viking Runestones 2” from Fenris, cast in pale grey resin. Each is about 2″ tall. The carved runes on the front are very finely detailed; I wouldn’t be surprised if they had been laser engraved on something (thin acrylic?) and that was then embedded in putty or something to make up the rest of the stone.
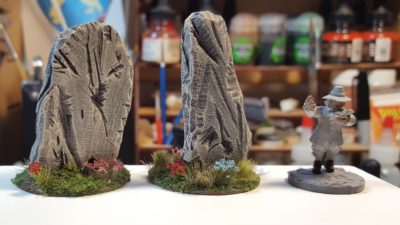
Runestones, rear view. 28mm Warlord ECW figure for scale. Click for larger.
I’ve got a few other bits and pieces from Fenris in progress. All of their stuff is really high quality, their range is huge, and shipping was fast. Highly recommended!
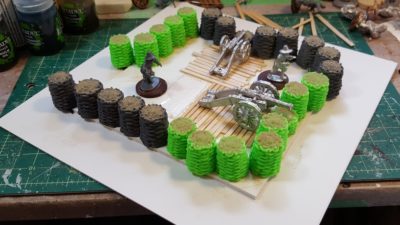
Several of the scenarios in Pikeman’s Lament ask for a bastion or earthwork to be attacked or defended, but at a maximum area of 9″x9″ it isn’t going to be some grand fortification or anything.
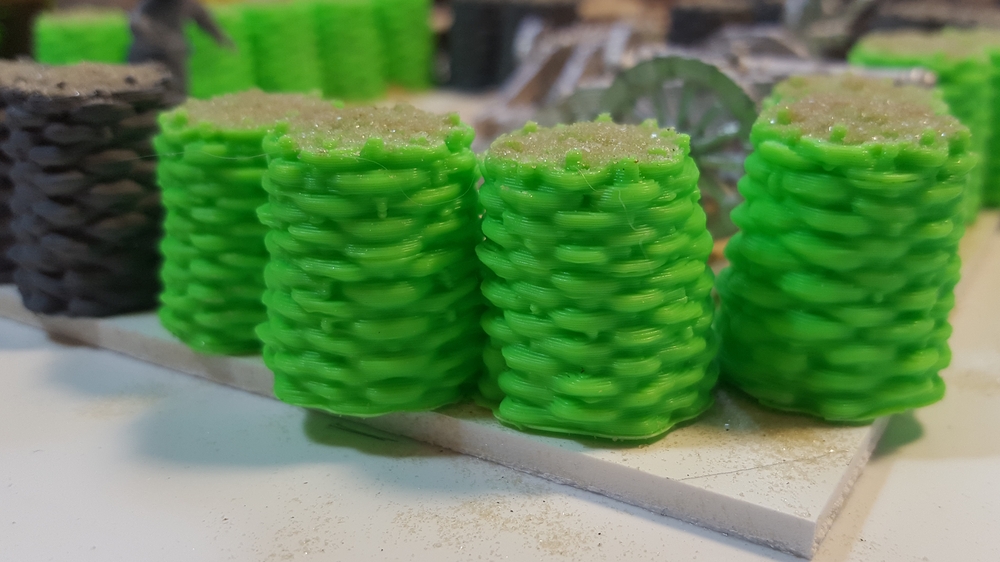
I wasn’t sure what, exactly, could be done in that area, so I cut a piece of heavy plasticard that size and started arranging my Assault Group guns and crews around the 3d printed gabions we found over on Thingiverse.
The 3d Printed Gabions
As seen previously here on The Warbard, my brother Corey owns a 3d printer. A Creality Ender 2, apparently. Gabions are big roughly-made wicker tubes filled with dirt, basically, used for temporary fortification for centuries – right up until at least the First World War, in fact. They’re iconic looking but would be really, really fiddly to scratchbuild. Finding the set of 3d modelled gabions for free over on Thingiverse was what kicked this whole project off.
3d printed gabions in closeup. The striations of the 3d print process nicely add texture. Click for larger.
If you haven’t got access to a 3d printer, Renedra will sell you a couple of sprues of quite nice-looking gabions for a very reasonable sum.
The Bastion
The 9″x9″ footprint was dictated by the Pikeman’s Lament rules, but proved to be a good size anyway for a bastion that could hold one gun with crew or a full unit of 12 infantry in the Pikeman’s system while not dominating the table. It’s still a very, very small bastion; even single-gun emplacements in the English Civil War were usually bigger than this once you included their surrounding ditches and such. Compromises are always made for tabletop usability, however!
The actual gabions and fortified part of this are raised slightly on a 6″x6″ offcut of 1/8th” EPVC plastic board, with openings for cannon to fire through on two sides and a ramp leading down and out on the third side.
Gabions in lace and planking started inside. Assault Group guns and crew and a Warlord plastic infantry figure for scale. Click for larger.
I used chunks of styrofoam to fill in the area outside the gabions, sloping up slightly from ground level, holding it in place with hot glue to speed up construction.
Styrofoam to fill in the slight slope up to the outer edge of the bastion itself. Click for larger.
To cover the styrofoam I mixed up premixed plaster, white glue, sand, and a bit of water to make a tough textured fill, then pushed it into place with a tongue depressor. The interior has flooring/duckboards made from wooden coffee stir sticks, with sand filling the gaps between the boards.
Plaster, white glue, and fine gravel over the styrofoam. Click for larger.
Paint tomorrow after the plaster has had a chance to dry fully. I thought about putting extra obstacles in the ground outside the gabions, but have decided to leave it mostly bare earth. I do have my recently-bought Renedra chevaux-de-frise to add around the bastion once it’s on the table, after all.
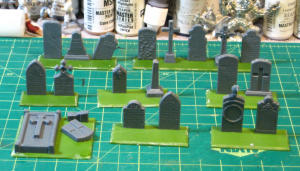
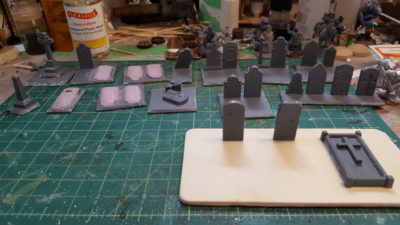
Back in 2013 half of them (one of the two identical sprues) got cleaned up, based, sand added to the bases, and grey primed, and that was it. For more than five years.
The original 2013 batch of graves, based but not yet primed. Click for slightly larger.
In early 2018 I pulled the 2013 bits out of storage and got them painted up and flocked fairly quickly for the game I ran at Trumpeter Salute 2018.
The paintjob was pretty simple. I hit all of them with a wash (GW Nuln Oil or Earthshade), then drybrushed and scrubbed various other colours across the stones. Two different shades of grey, some dark green, two shades of tan, and two shades of off-white applied in different amounts to different stones give a bit of variation to each stone.
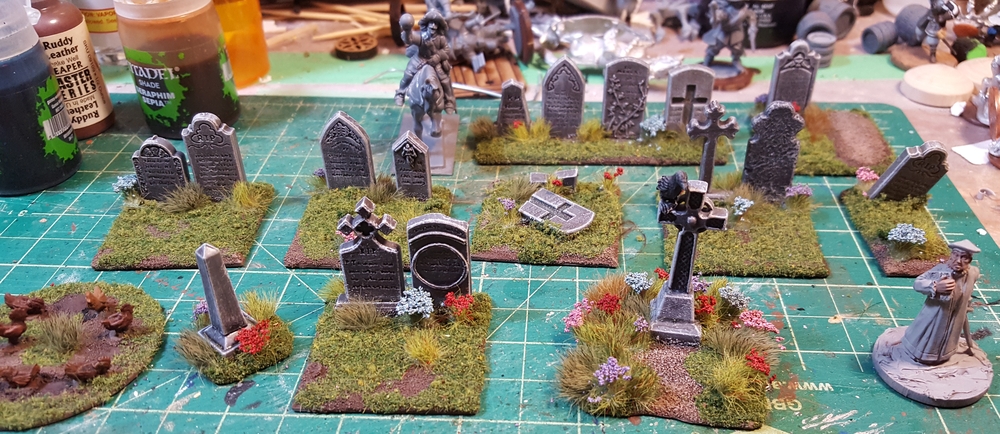
Finally, this week I’ve pulled the second sprue out and got them all based up.
Latest graveyard stuff all based up. Click for larger.
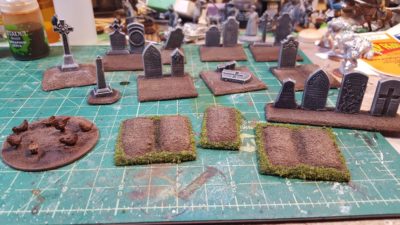
The bases are all leftovers from various Warlord ECW plastic box sets. I think the newer stuff is from the Firelock Infantry box and the older from either the regular infantry or cavalry box. Waste not, want not, and I wasn’t ever going to use them for figures! The freshly dug graves (great potential plot points!) are just scrap styrofoam glued down and then sanded.
Latest graveyard bits. Fresh graves in front, regular gravestones behind. On the left is a base of chickens from Warbases, just for fun. Click for larger.
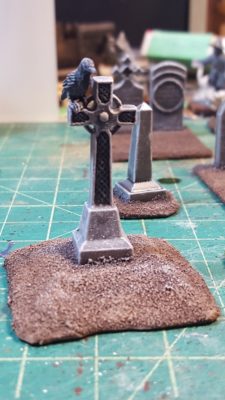
I’ve used the Celtic cross and some of the base pedestal bits to create a roadside cross or shrine. Just the thing to lurk on a dark and misty moor or something!
The roadside cross, still in progress. Complete with ominous raven! Click, as usual, for larger.
Finally, I used Rain City Hobbies tufts and flowers to add some detail and interest over my usual mix of flock. I really like the little pops of colour the flowers provide, and they’re becoming a standard feature on my scenery, especially the English Civil War items.
Finished, all these years later! I’ll get some photos of the full graveyard setup soon. Click for larger.
Should you want your own gravestones the two-sprue set is still available from Renedra which is definitely not always the case when coming back to some products after this long. Hopefully you take less than seven years to get yours ready for the tabletop!