I don’t usually like to talk about plans and ideas before there’s at least some progress to show off, but while I was away over the New Year I had time to do some quick sketching and thinking about a building that would be at the centre of any Russian village or hamlet during the Russian Civil War, and which really is iconic when you want to remind players the game is, in fact, set in Russia.
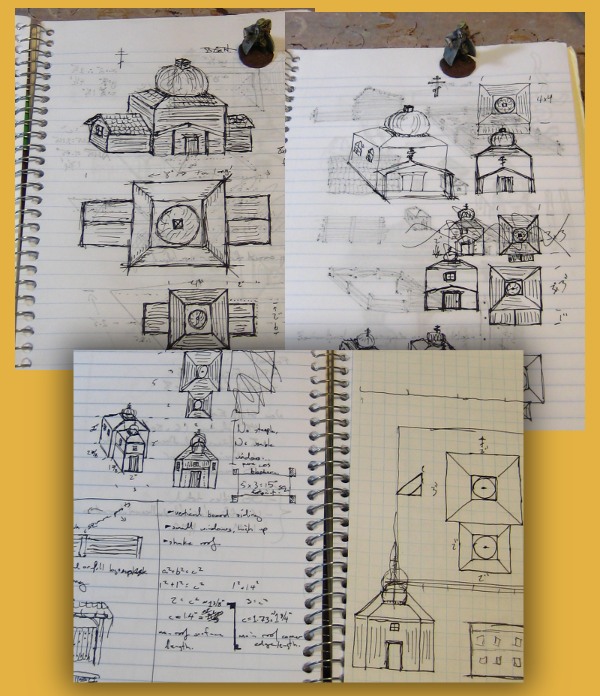
Google Image Search is really indispensable when looking for prototypes and inspiration, although it’s very easy to get a building that’s just too big for the table. The church at top left would have been over 8″ long and 4 wide, far too big for a scenery piece that is basically just a Line of Sight blocker. The design shrank from there (top right page) then grew slightly on the bottom page and I’m fairly confident the finished result will be something like the two-part double-dome design on those pages, with a footprint roughly 5″x3″ and an overall height somewhere around 6″.
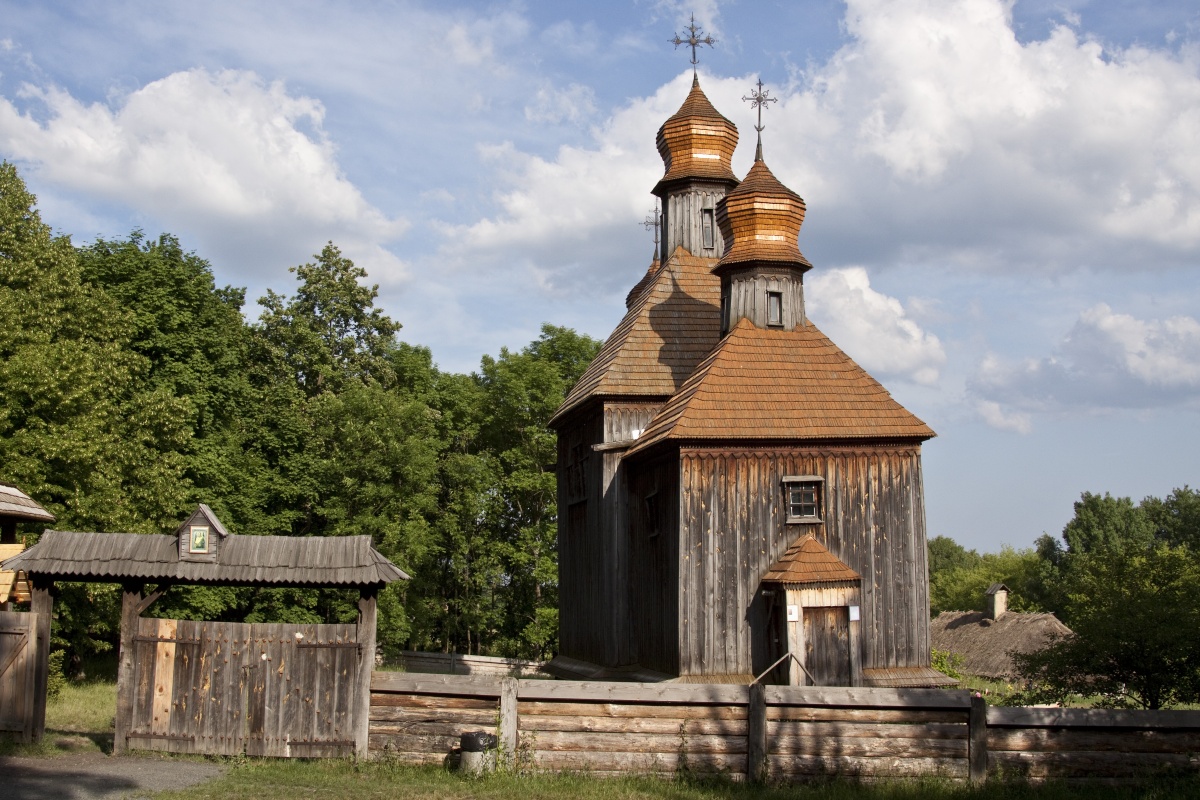
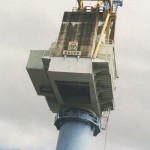
I saved this image from the web but forgot to write down where I found it or any details of the actual building, but it’s become my main reference. I also can’t currently find this picture again via GIS…anyway, it’s a perfect-sized building for my purposes and should help me get a lot of details right.