Tag Archives: jungle

More Jungle To Rumble In

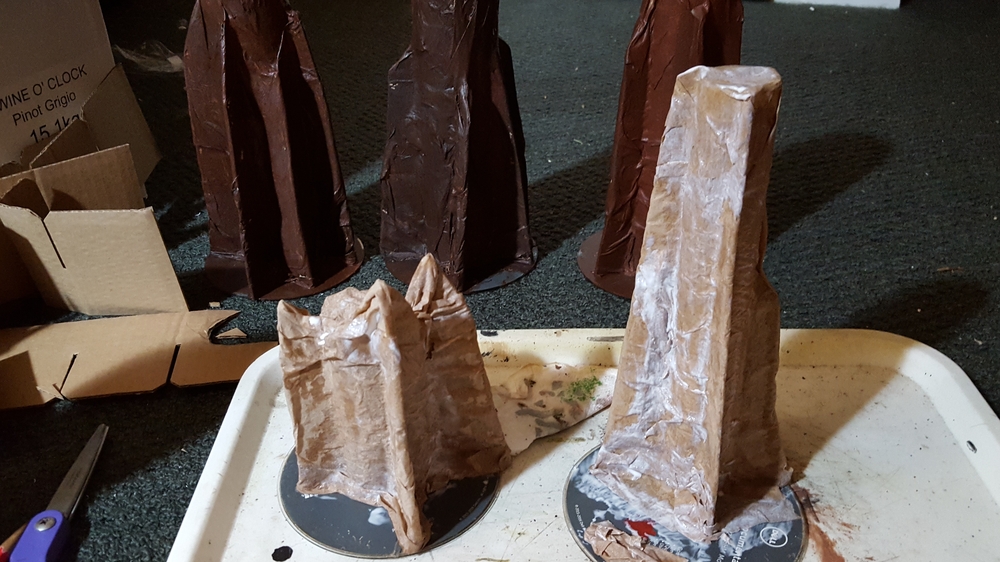
Scored another big paper towel roll from our recycling bin, so I decided to make a fallen tree instead of another upright one.

Like the other trees, the fallen tree started with a paper towel roll, scrap cardboard, some CDs, and my hot glue gun. I made the root ridges lower so the tree would sit mostly level, and glued on a few random bits of cardboard to break up the surface of the paper towel roll a bit. All the ridges are made of two strips of cardboard, so they’re a bit thicker.

Tree assembled, with Infinity Ghulam light infantry on a 25mm base for scale. Click for larger.

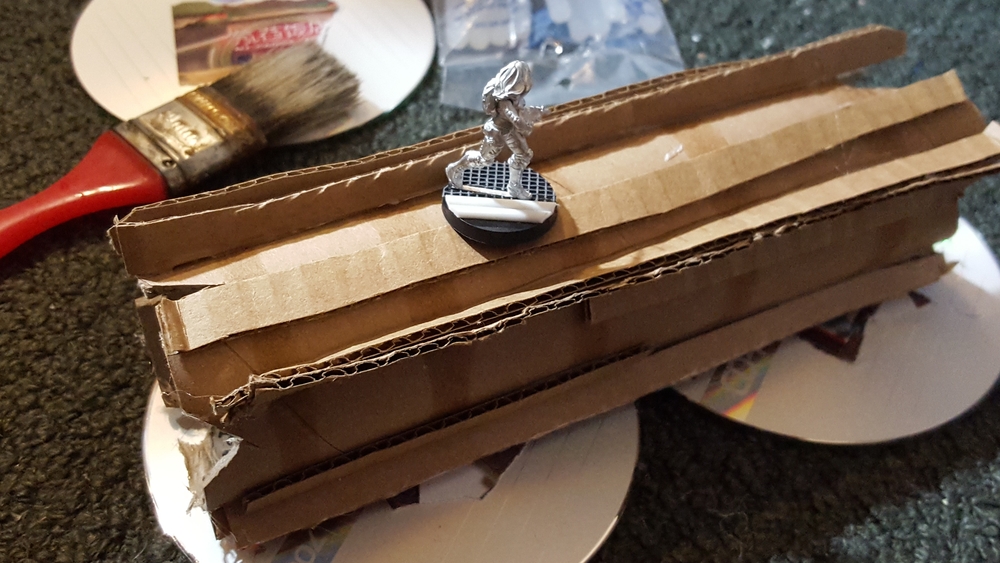
I used a pair of CDs as a base, and didn’t bother filling in the gap between them.

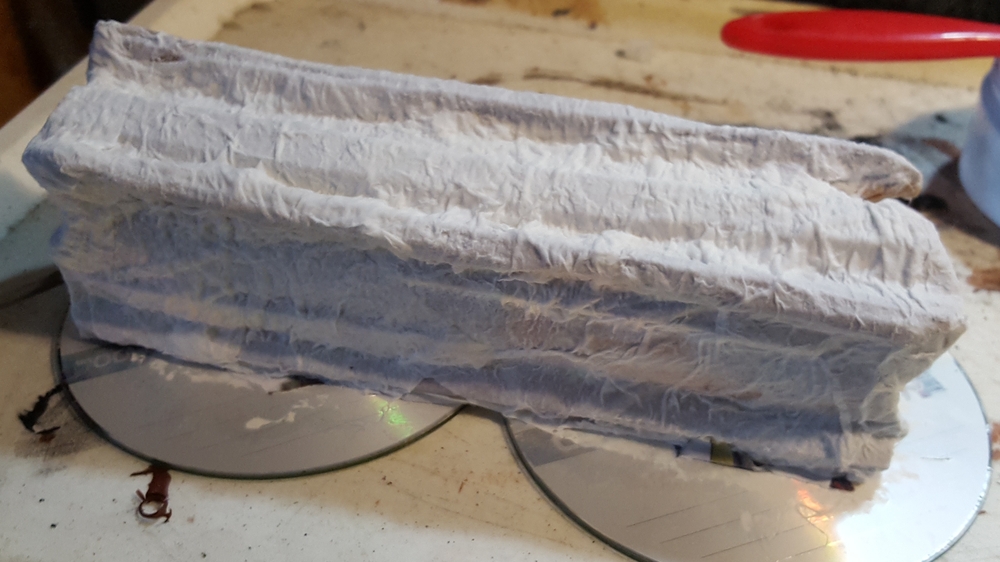
Right after assembling the fallen tree (I love hot glue, there’s no waiting for glue to dry or cure!) I got to work with white glue, some paper towel, and toilet paper for bark texture. I filled in the two ends with scrap cardboard and a bunch of paper toweling, added some ridges of paper towel here and there, then covered the whole thing with toilet paper, pushed into place with a damp brush and sometimes my fingers, with extra white glue drizzled on as needed to make sure everything was well stuck down.

Bark texture done with toilet paper. Click for larger.

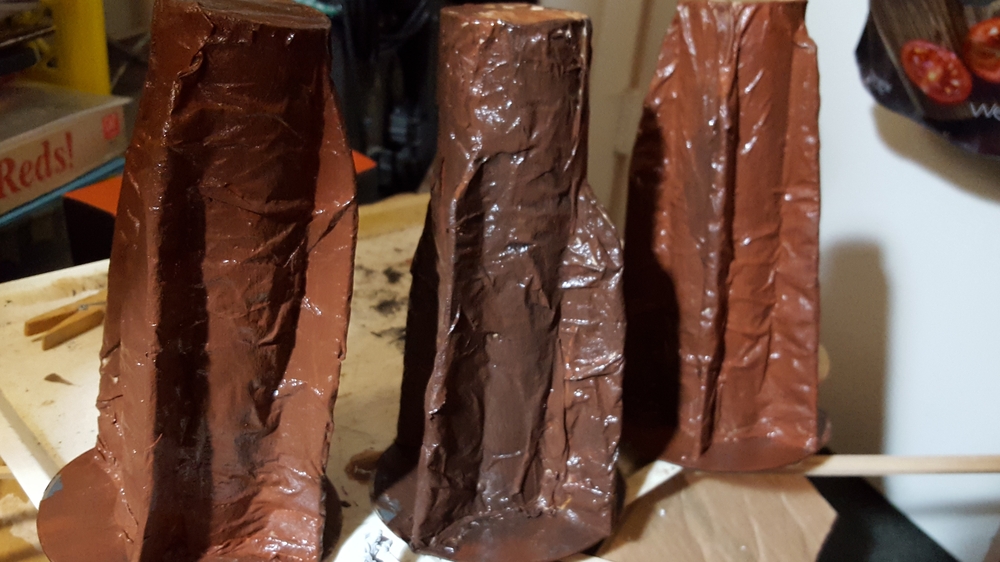
That needed to dry overnight, so the next evening I got the basecoat done, mostly brown paint with a bit of black and some tan to add a bit of variation, with a squirt of white glue mixed in for extra strength.

Basecoat all done, still wet. Click for larger.

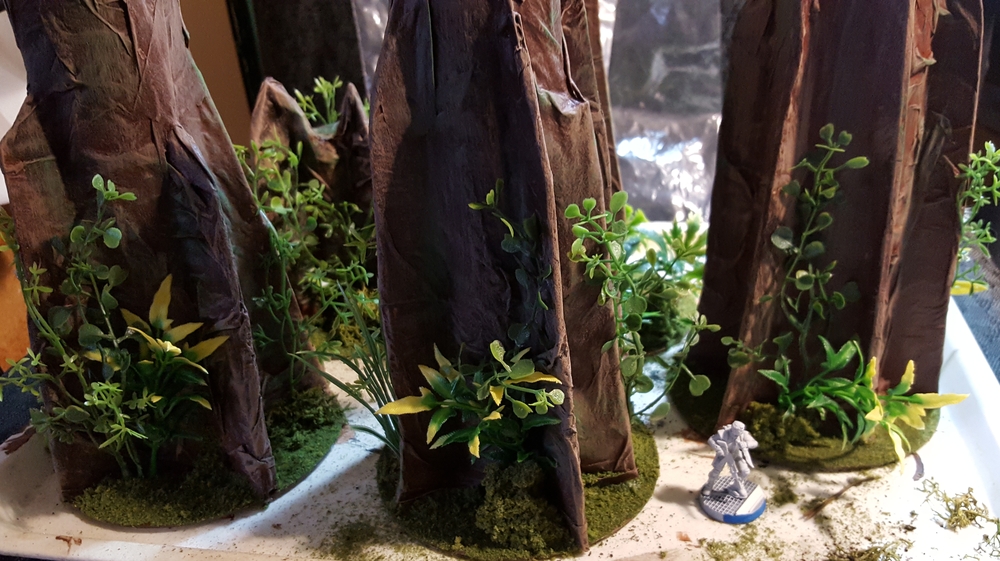
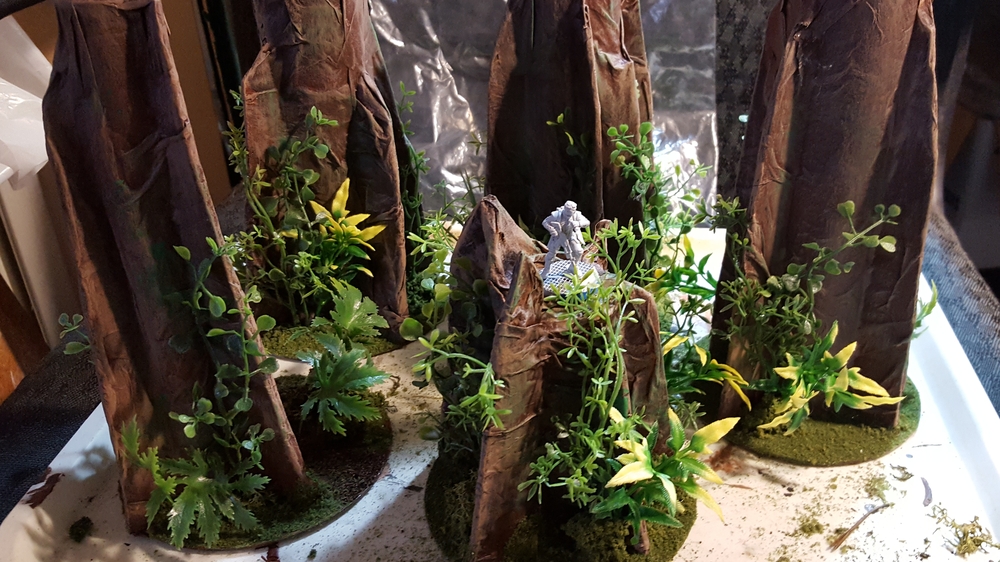
After the basecoat had dried overnight again, I did some drybrushing with tan and white paint to bring the bark texture out, then splodged on some green paint in two different shades here and there. That didn’t really need any drying time, so I got the hot glue gun out again and the box of random plastic plants and other greenery. I finished the fallen log off with a mixed batch of plants and foam, then ground foam grass over the base and here and there on the log as well, and declared it done!

Finished fallen log, same Infinity figure on 25mm base as the other photos. Click for larger.

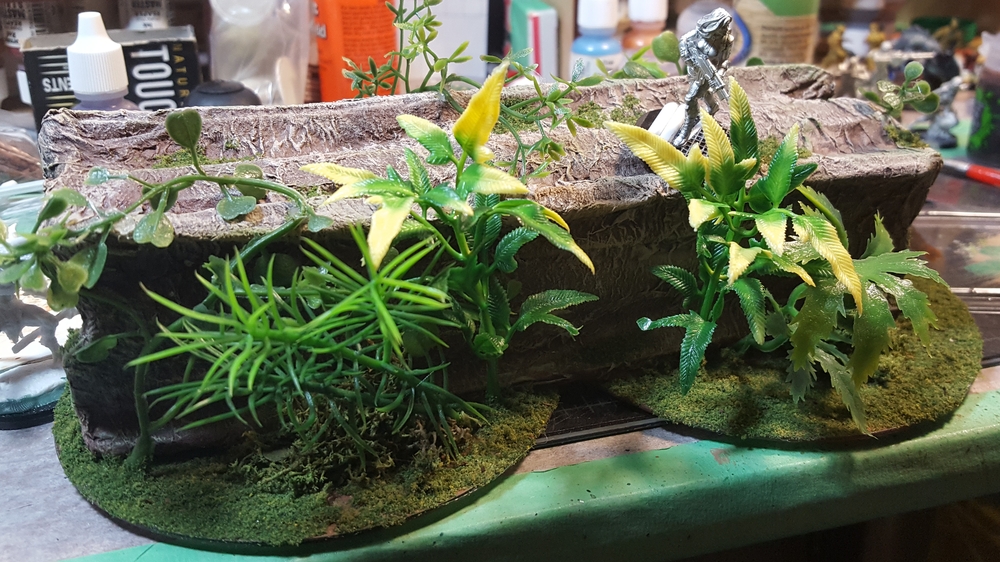
The finished piece is about 9″ long, 3″ wide, and 2.5″ tall. I’m looking forward to adding it to my jungle themed tables!

In the Jungle, the Mighty Jungle…

Several years ago now I did a whole banker’s box full of jungle terrain, but it was all fairly low-lying stuff, thickets and bushes and that sort of thing.

I’ve always intended to add some bigger trees to the set, inspired by the nice trees DM Scotty does in this video…

[su_youtube url=”https://www.youtube.com/watch?v=bJ-ZvGMnTIM”]

…and Dr. Mathias’ extravagantly photographed jungle tree tutorial over on Lead Adventure forum!

Our paper towel dispensers at work are the large commercial models, and staff are expected to refill them on their own when they’re emptied, so I’ve brought home a few of the heavy cardboard tubes from the centres of the big rolls of brown paper towelling, as well as a couple of lighter tubes from home, and a few shorter toilet paper tubes.

This weekend I sat down to crank out a few trees! I started with the hot glue gun, the tubes, some CD-ROMs salvaged from the recycling bin, and some scrap cardboard to produce four trees and one big stump.

Fourth tree and stump all covered in paper towel. Three other trees drying in the background. Click for larger.

The three big trees and the stump basically fill the entire CD base edge to edge, with space between the buttress roots for figures to duck for cover. The smaller tree (from a tube that originally held glow-ropes) covers about half the CD it’s on.

I used lots of white glue to attach a layer of brown paper towel to the trunks, let that dry, then slapped on a base coat of reddish-brown and black mixed. After that dried I gave the trunks a heavy drybrush of tan, then blotches of two different shades of green here and there to suggest moss or jungle fungus.

Basecoated trees drying, before drybrushing and foliage. Click for larger.

After that had mostly dried I broke out my box of random plastic plants, gathered from craft stores over the last couple of years. Vines, random bushes, and some low-lying lichen filled some of the gaps around the trunks and provided some colour, then I put a generous layer of flock around the bases and declared these things done!

All flocked and foliaged. The white primered figure in the lower-right is an Infinity Ghulam infantry on a 25mm base. Click for larger.
Stump speech! Using the toilet paper roll for a giant stump gives the tabletop some vertical tactical possibilities, which always makes games more interesting. Click for larger.

It’s nice to have a quick down-and-done project, sometimes, and I’m really pleased with how these all came together. Looking forward to getting them onto a table for a pulp or Infinity game!

Shoreline Part 2 (Sort of…)

Found, buried in my harddrive, another couple of forgotten work-in-progress shots from the first round of shoreline/riverbank construction back in June 2009. The rest of the construction was written up last week.

shoreline wip1
Bare cardboard stage of construction of the first set of shoreline/riverbank pieces. Click for full size.
shoreline wip 2
Shoreline/riverbank beginning painting. Click for full size.
shoreline wip 3
Muddy brown paint on the banks, first coats of acrylic gloss varnish down on the water. Click for full size.

Shoreline or River Bank Terrain Pieces

shoreline june 2009
Two feet of riverbank/shoreline, the original two from summer 2009. On the right, a 28mm hunter and a 28mm sabre-tooth tiger on a 20mm by 40mm base. Click for full-size image.


These riverbanks or shorelines made from picture-framing board (mattboard). I did the first set back in 2009 and another batch in the winter of 2010. They’re designed to form one edge of a playing board, especially on the 2’x2′ playing areas common to .45 Adventures. One of the really nice things about games like 45A that encourage smaller playing areas is that terrain projects become a whole lot more managable — no more having to crank out eight feet of river just to have enough to be usable on the table!
Each segment is 12″ (1 foot) long and 5″ deep, 4″ of river and 1″ of banks. The banks are the same mattboard as the rest, to keep them as low-profile as possible. The painting is black and two colours of blue, damp-blended right on the card. I tried to keep the edges mostly matched while painting the pieces. The water portions then got about six or so coats of acrylic gloss varnish so they looked like water. If I was going to paint them again, I’d do the water areas a greener shade with less black, as is often seen in murky jungle rivers.

riverbank with docks
The docks in place on the new riverbank section. Click for full-sized version.


In the winter of 2010 I added two new segments to the set, one another copy of the existing riverbank pieces, and the second incorporating a ramshackle wooden dock. The dock segment was wider than the others for most of the length, although obviously the same width at the ends. The docks were built up with baswood planks, with toothpicsk and bamboo skewers for the piilings. The large dock section is glued to the base; the three smaller sections are freestanding for flexibility.

riverbank, docks loose
The riverbank dock section, showing the freestanding dock segments. Click for full-size verison.

All four sections have been largely free of warping or damage, although the docks section does havea tendency to bow when stored. The eventual plan is to rebuild these riverbank sections in 2mm or 3mm MDF, using a bandsaw to cut the curves, but mattboard will do until then!

(these photos have been seen over on the Lead Adventure Forum and elsewhere previously, if you’re thinking they look a bit familiar…)