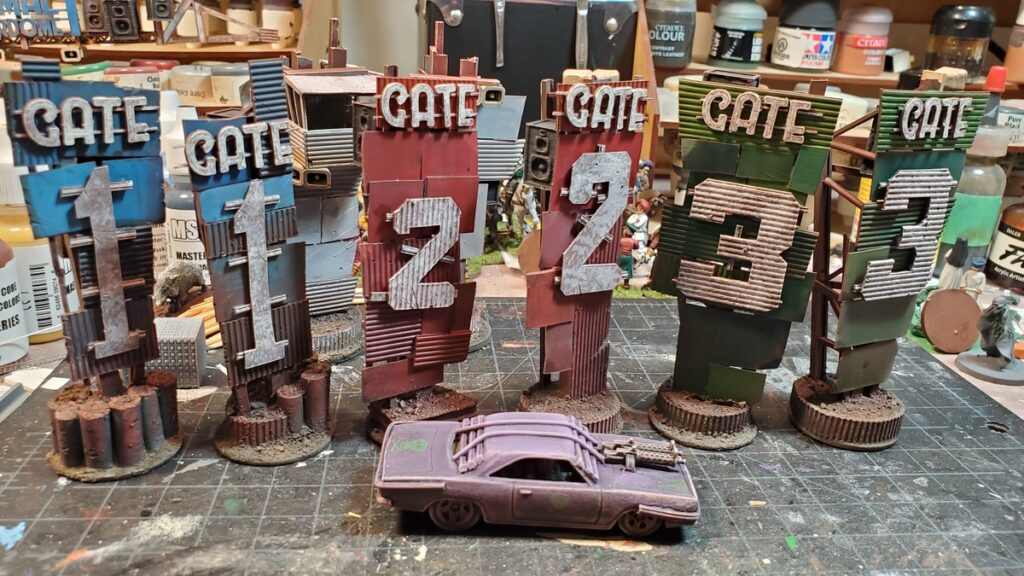
Up next was the “GATE” lettering and giant numbers for the three numbered gates.
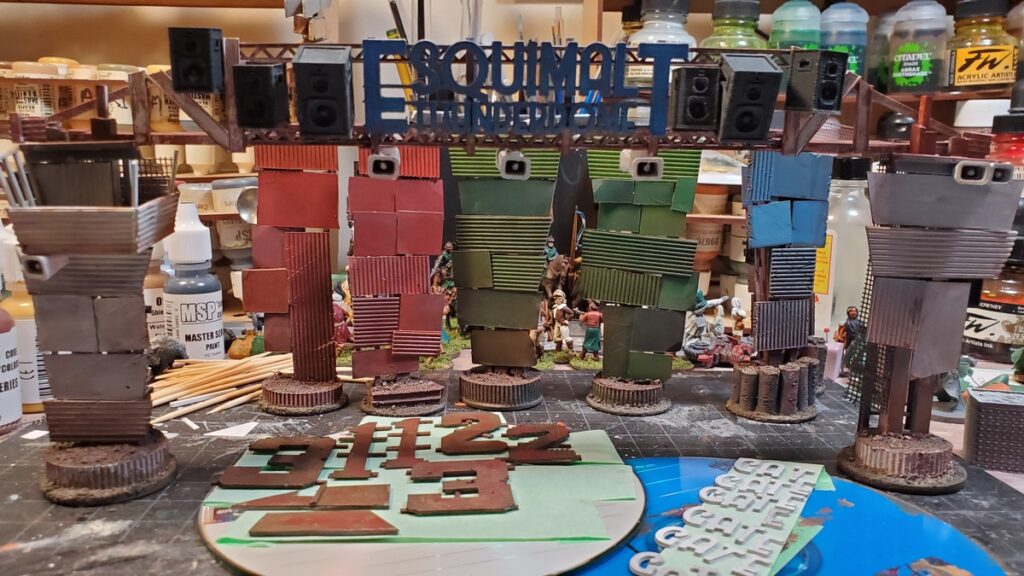
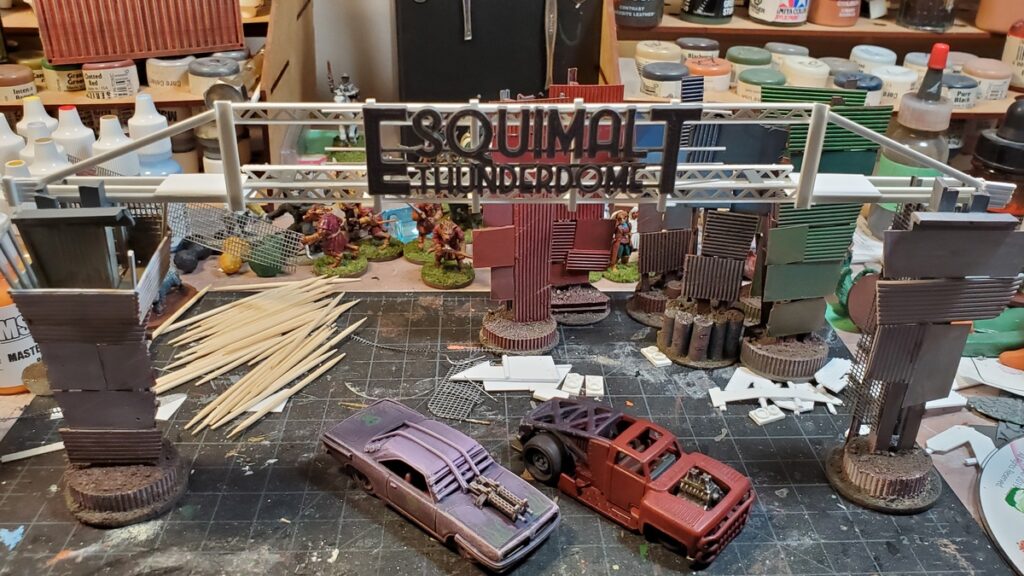
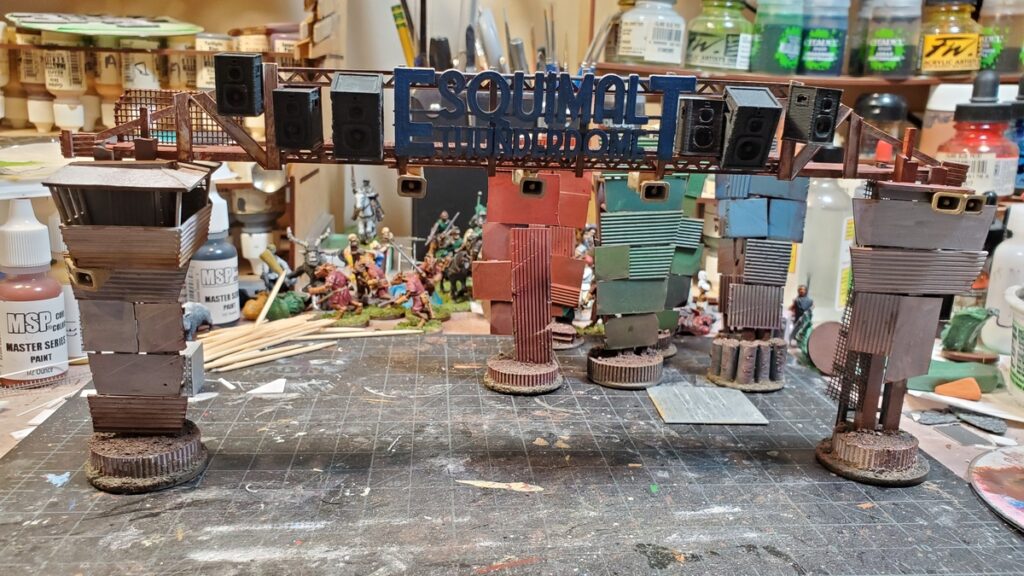
Mid-project roundup. Rust basecoat on the big numbers, front centre; GATE lettering primed on the right, and the gate towers all lined up behind and overhead. Click for larger.
I cut the giant numbers from sheet styrene and mounted them on strips of scrap styrene. The GATE lettering was 3d printed as separate letters and then mounted on very thin square section styrene strip. To make that easy I taped long pieces of the styrene strip down to my cutting mat, glued the letters down, then once the glue had cured cut each word out.
Everything got spray primed grey and then basecoated the same blotchy rust I’d used on the overhead gantry and elsewhere. I stippled and drybrushed everything with a couple of different shades of off-white (Reaper Linen White and Leather White, primarily) before a final drybrush of Reaper Pure White.
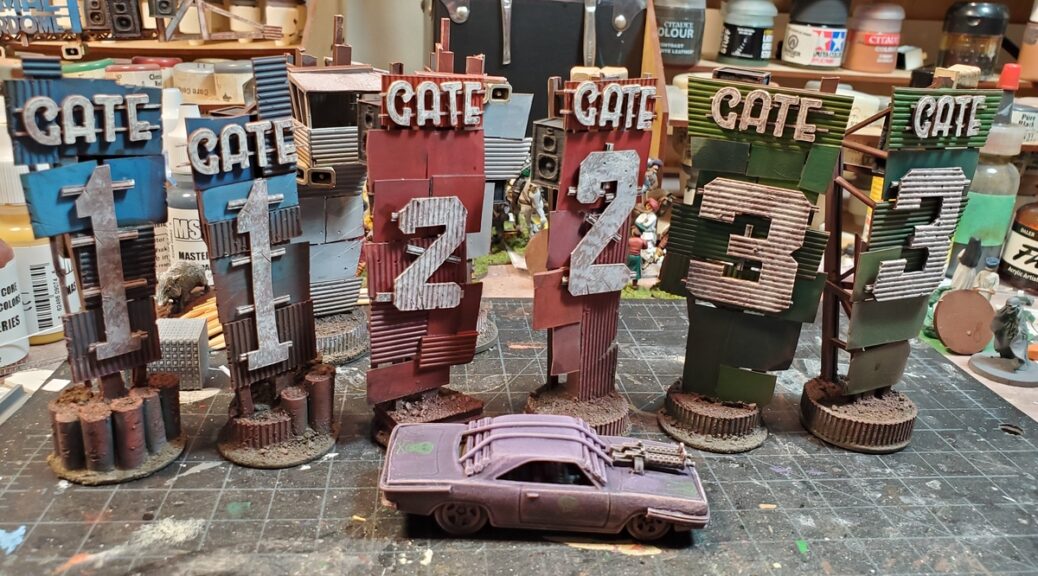
The GATE signs and numbers all mounted and final weathering begun. Click for larger.
After that it was back to the weathering, primarily drybrushing with a big soft makeup brush. I only just picked one of these up, a super cheap dollar store special, and it really is the bomb for drybrushing! I used a fairly random selection of browns, reds, tans, and off-whites for this, going back and forth over all the towers and the gantry as well.
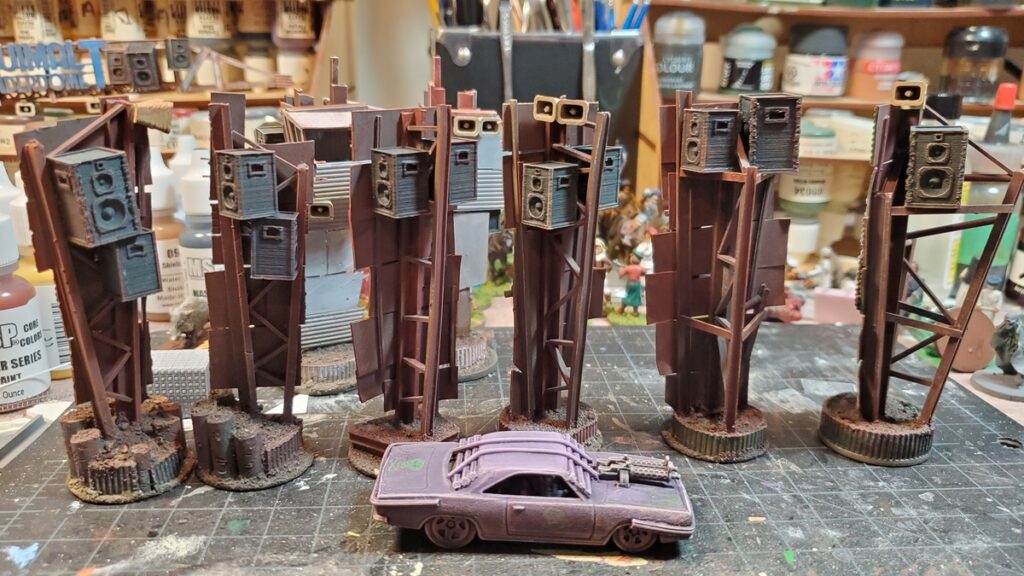
Back view of the six gate towers, with speaker cabinets and loudspeakers mounted. Click for larger.
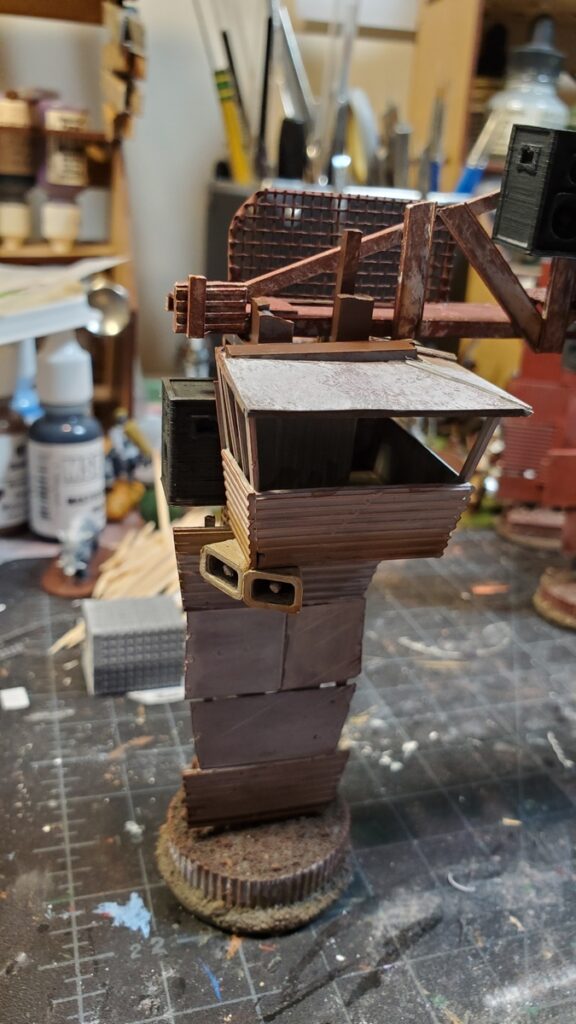
While adding the lettering I had finally primed, painted, and installed the roof on the announcer/race official cab on the lefthand start gate tower. I thought about installing mesh on the windows but decided to leave them open for now; I might go back in and add some additional protection for the folks who wave the chequered flags but the current form will do for now!
Roof installed on the announcer/official cab. It had to be cut to fit around the fairly random structure of the tower itself. Click for larger.
Final touches and some finished shots soon as this project finally wraps up and might actually hit the table sometime soon!
When we last saw our gates they were basecoated but stalled due to missing 3d printed parts. Those arrived, thanks to my brother’s 3d printer, and I was able to move on with the project.
I didn’t want to start the overhead gantry on the Start/Finish gate until I had the 3d printed “Esquimalt Thunderdome” sign in hand, but once I had that the basic construction went together quickly.
The three openwork girders have been in my stash for decades and the packaging is long gone, but they’re from Plastruct – possibly these ones, which seem to be about the right size. You can find all the similar openwork web girders from Plastruct by searching their site for “web”.
The girders are only six inches long, so I knew I’d need to extend the gantry with other materials as the Gaslands rules call for gates the same width as a Long Straight movement template, which is roughly 7 inches long, and Corey’s Thunderdome racetrack dirt track is roughly 8 inches wide. Fully finished, this gantry is almost 10 inches long, and slots into the roof structure of the two vertical gate towers to hold everything together.
The start of the overhead gantry. I later pulled off the plastic mesh as it was getting in the way of construction and painting, and replaced it much later in the process. Click for larger.
The rest of the gantry was a random scatter of styrene shapes from the stash – there’s some flat C-channel, different T- and H-girder bits, and lots of square or rectangular cross section stuff. It had to both look structurally sound and actually have a certain amount of structural integrity, but the beauty of post-apoc engineering is that it still looks great if you bodge extra bits on to fix earlier problems!
in progress but before priming. You can see here how the gantry’s beams slot into the tops of the two gate towers. Click for larger.
After grey primer I covered the whole thing in a blotchy rust coat using a couple of different shades of browns, reds, and oranges.
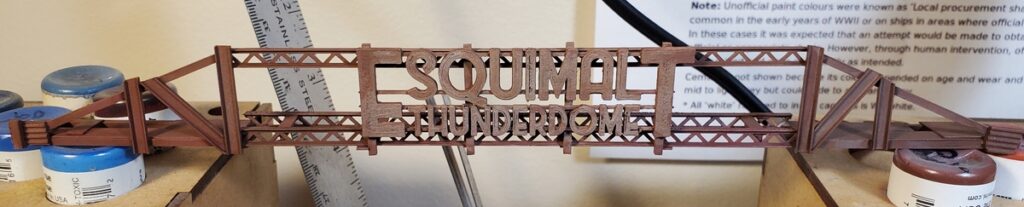
Rust coated. Click for larger.
After the rust coat I did a blotchy coat of white, partly drybrushed and partly stippled into place. This came out far better than I’d hoped, and really looks like white paint that’s flaking off as the metal under it rusts and weathers.
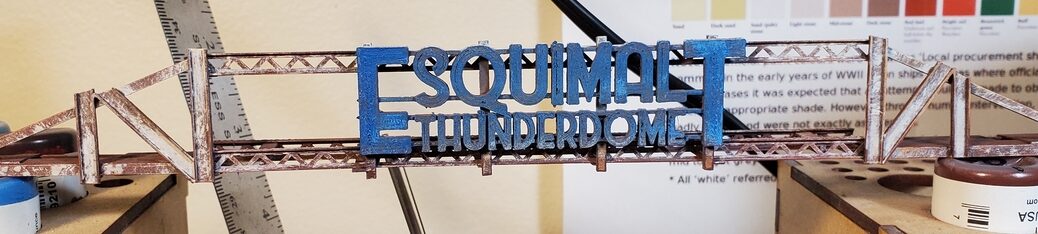
Stippled and drybrushed white, and first coats of blue on the sign. Painting of the actual gantry is basically done at this point; the sign got a bunch more weathering and highlighting and touchups. Click for larger.
The speaker cabinets and loudspeaker horns were 3d printed from STLs on Thingiverse, both from a very nice collection of Gaslands parts. The speaker cabinets were printed in two different sizes, which added some visual interest.
Speaker cabinets and loudspeaker horns in place and weathering started. Click for larger.
The speakers got painted a blotchy off-black (Reaper Pure Black with a dot of one of their greys mixed in) and the loudspeakers got one of the many tan off-whites in my collection, I can’t remember which one.
The clutter of speakers and loudspeakers really makes this piece pop, it’s exactly the visual clutter I’d pictured in my head when first thinking these designs up!
I’d like to add some light fixtures, but it seems nobody makes 20mm 3d printable floodlight fixtures, at least not that I can find, and I’d want enough of them that scratchbuilding isn’t really an option unless I can come up with a really simple design…
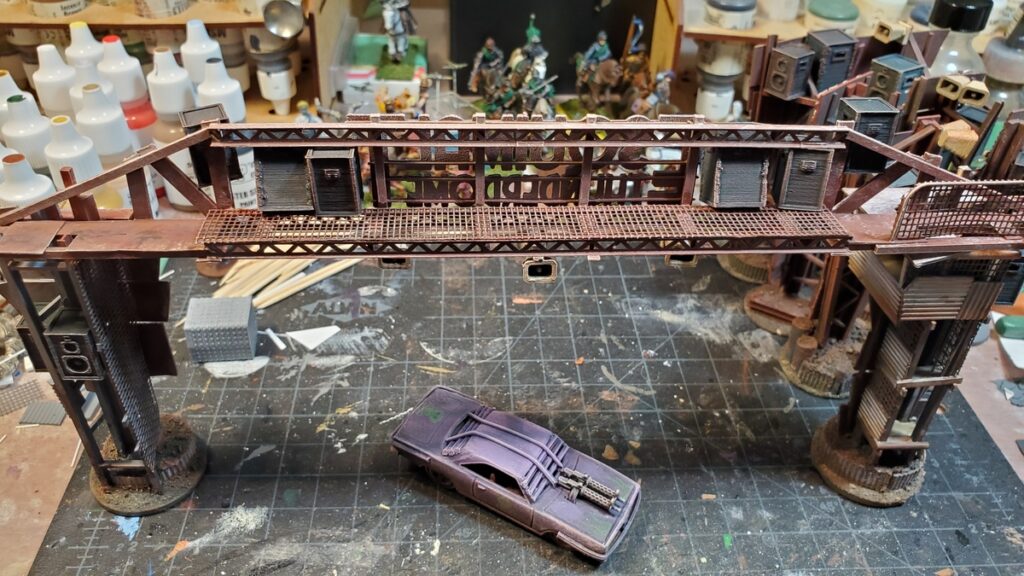
The back of the gate, with mesh back on the walkway and all the 3d printed stuff getting weathered.
Next up, painting and installing the big “GATE” signs and numbers on the rest of the gates, and loads more weathering. So much weathering…
The Death Race scenario for Gaslands calls for at least three or four gates, for start/finish line (which might not be the same gate) and a couple along the course. We’ve been using various random scenery bits, which works fine, but proper gates have been a obvious piece of scenery I wanted to make.
The scrap metal look worked well for the jumps I made last year, so it was the asthetic I followed for the gates as well. I decided to do freestanding gate pillars, essentially, with no permanent overhead horizontal pieces but with the vertical construction to allow modular overhead gantries to slot in if desired.
To keep the tall gate posts ballasted I started with solid 1 1/4″ washers from the stash, then sank the main vertical beams for each into a footing of styrene plastic filled with Milliput epoxy putty, which dries rock hard. Because it’s a fast technique and super cheap, I filled the lower levels of the foundation footings with crumpled tinfoil tacked in place with superglue, then put a layer of Milliput over that.
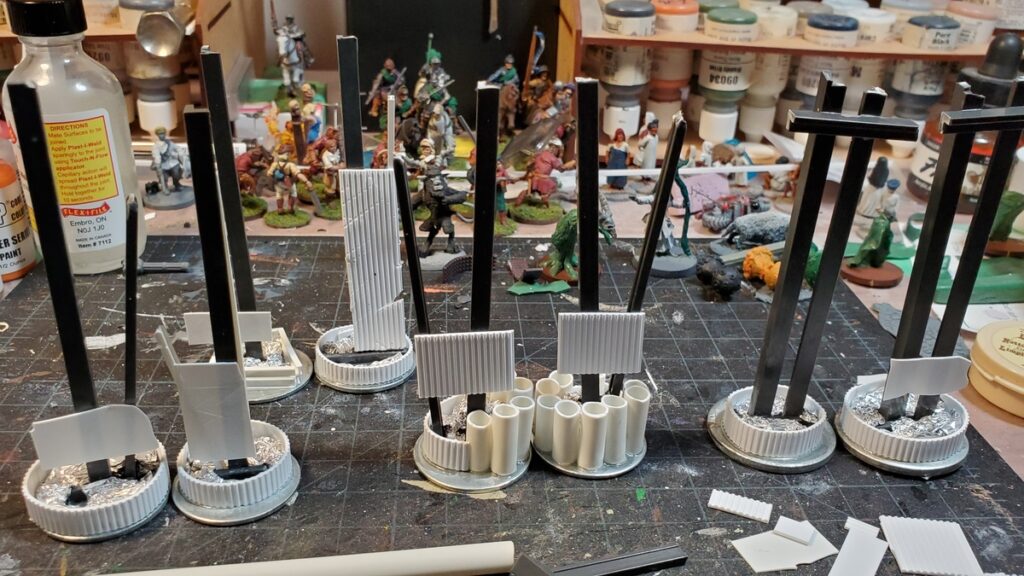
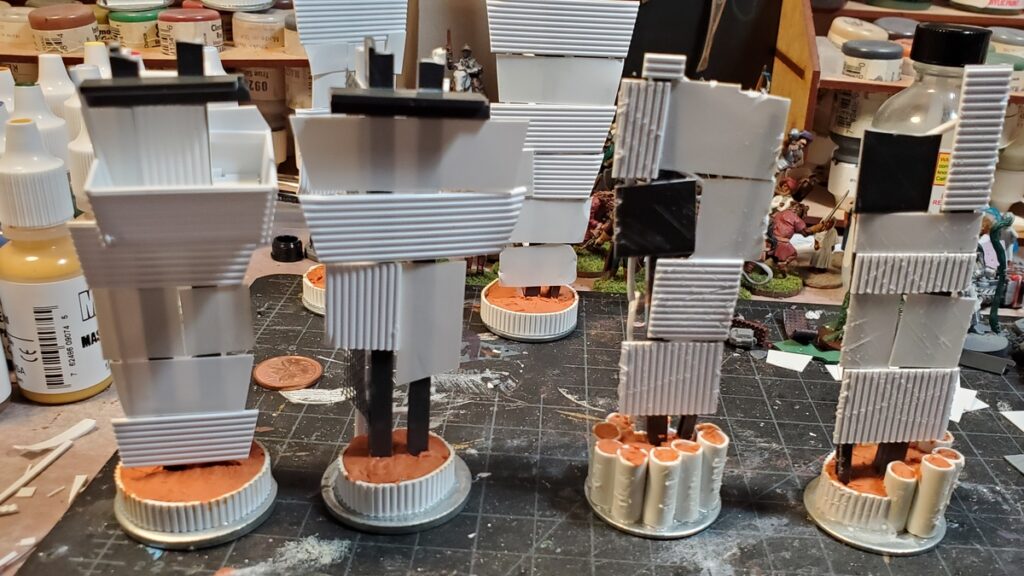
Early in construction, tinfoil filler visible in the footings. The three course gates are on the left, and rightmost is the start line, which is more substantial. Click for larger.
I used a couple of different methods to construct the footings; roughly circular lengths of corrugated sheet styrene were fast and easy but I really like how the vertically-embedded heavy pipe (styrene tube) came out.
This entire project was done from the Ancient Stash of Doom; I’m pretty sure some of these random girder pieces date back to the family model railroad we had in the early 1990s when I was in junior high. The dark grey plastic is all Plastruct; all the white plastic is Evergreen Plastics. There’s three or four sizes and styles of girder, a couple sizes of tube, and sheet styrene in at least four thicknesses and styles.
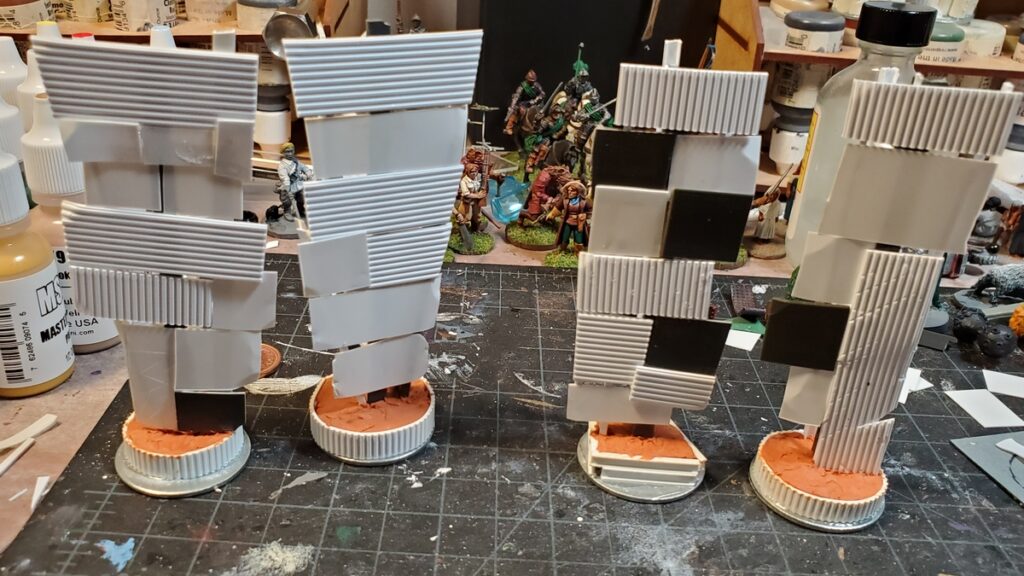
Beyond making sure all the main vertical beams were roughly the same length (about 4 inches) I did very little planning ahead. Each pair of gate pieces is in roughly the same style… more or less. After making sure the main vertical beams were solidly anchored to the washers, I filled in the rest of the structure from whatever sheet and beam bits were handy and looked the part.
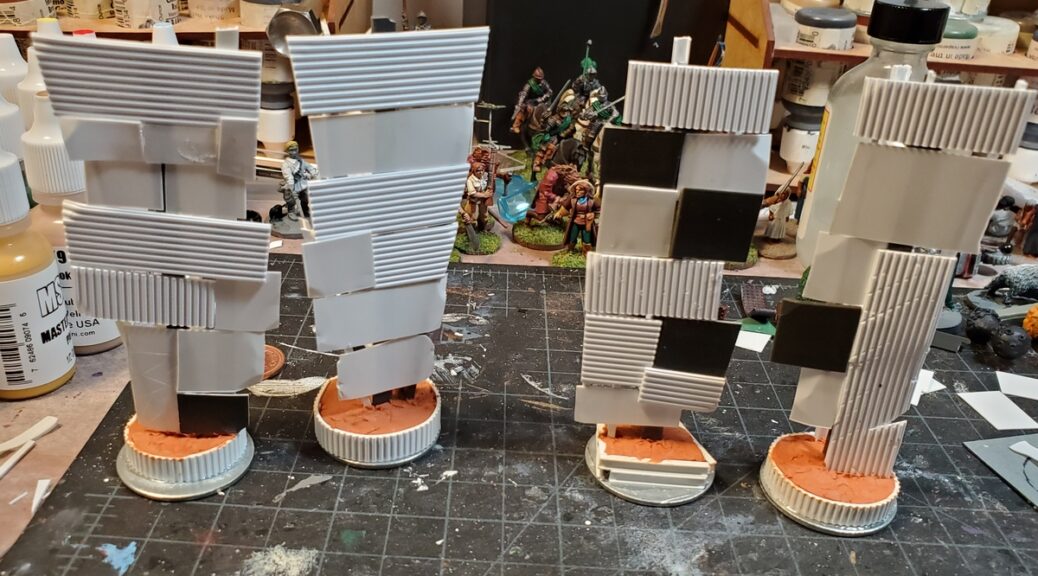
Left, the Start Gates, with an elevated box for race officials, announcers, media, etc. I’ve decided that the “pipe” gates are Gate One, for no particular reason. Click for larger.Gates Two and Three, basically finished and awaiting primer. Click for larger.The backs of Gates Two and Three. The scrap-built girder structures are actually fairly solid now! Click for larger.The backs/sides of the Start Line Gate and Gate One. Gate One has by far the simplest struture, but I really like how it turned out and if we need more gates will definitely be copying the basic design. Click for larger.
Gates One, Two, and Three are basically done, structurally, although I might yet put more details (floodlights, maybe loudspeakers) on them, and the plan for all three is to get Corey to 3d print lettering for “GATE” and then add the gate number in sheet styrene like they were cut out of sheet metal.
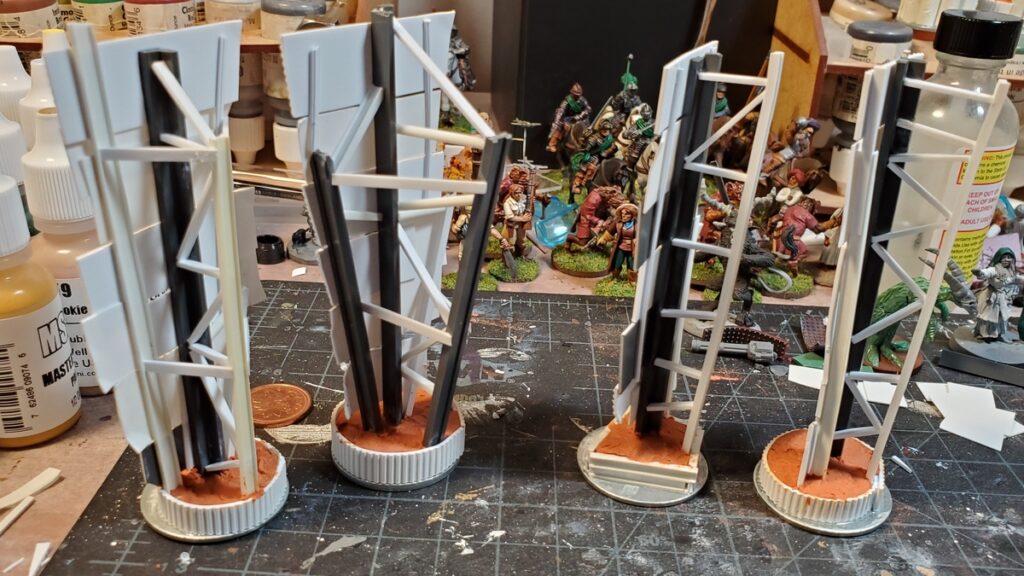
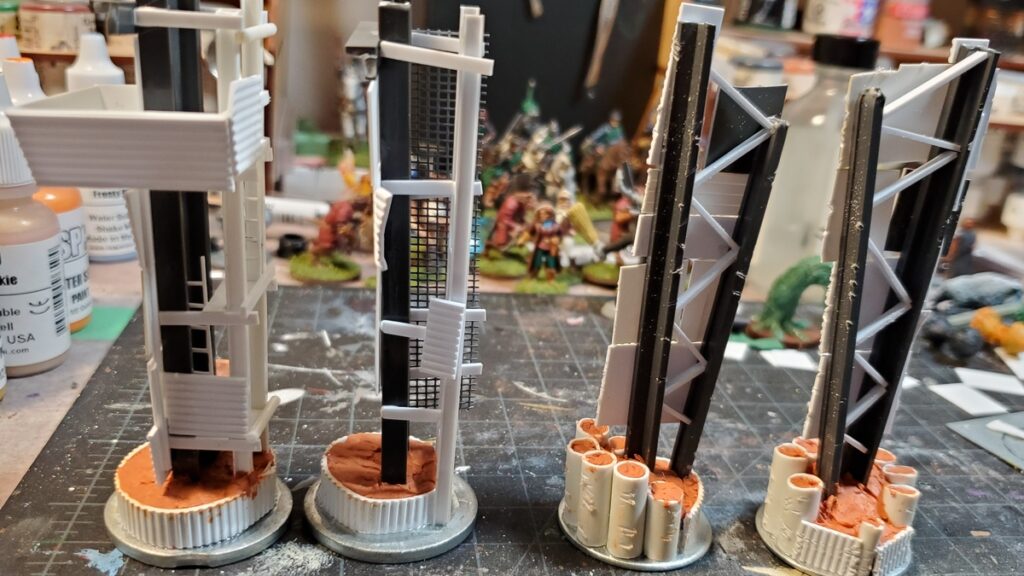
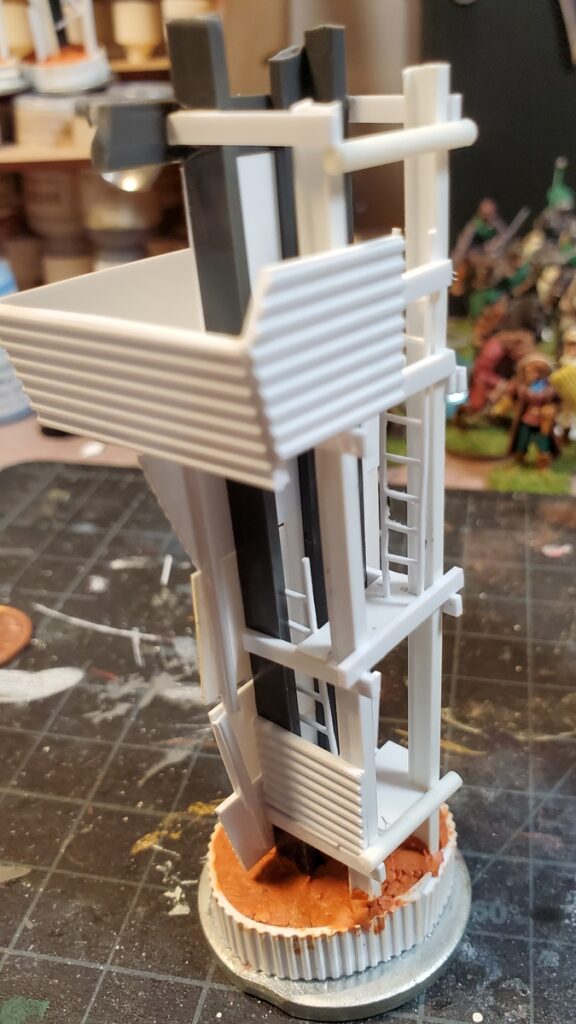
The Start Line Gate is still undergoing detailing. There’s ladders to get the crew up into the announcer’s cab, and I’ll be covering the sides and back with some solid metal sheet and a bunch of mesh – you can see the first piece of that on the offside Start Gate pillar, second from left above. The ladders are scratchbuilt from very thin strips of styrene; I’d have used HO scale plastic ladders but my awesome local hobby shop was out of stock.
The Start Gate is also going to get a fairly substantial horizontal gantry spanning the course between the two pillars. It’ll have floodlights, speakers, and a 3d printed “Esquimalt Thunderdome” sign on it, or will when Corey coaxes his 3d printer back to life. I’ve got some very cool openwork styrene girders to form the main central part of that gantry.
The main vertical part of the Start Line Gate, with partially constructed announcer’s cab. This photo was mostly taken to show off the scratchbuilt ladders, which came out really well. Click for larger.
More on these gates soon, and in the meantime stay safe, everyone.