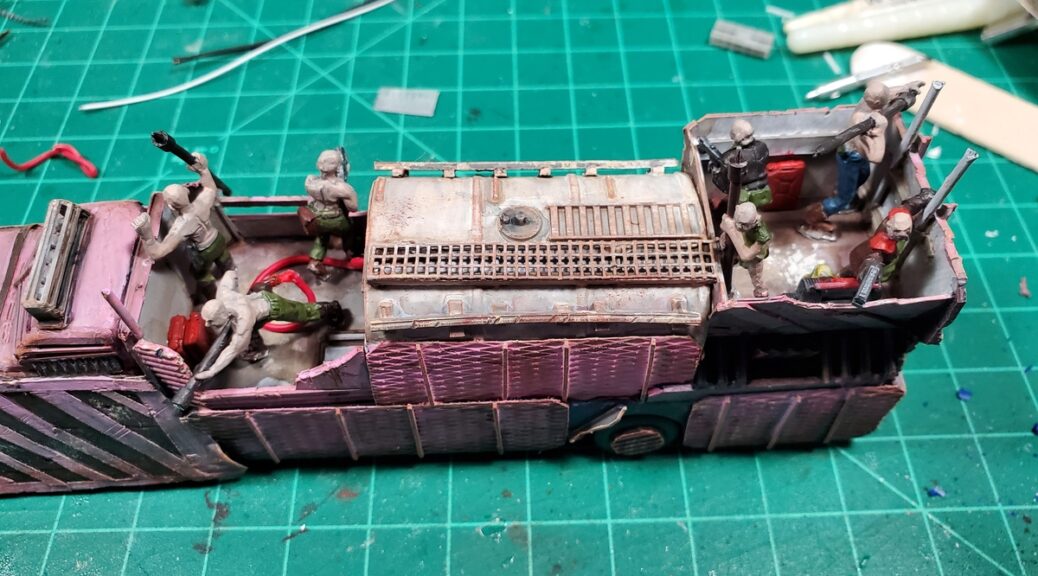
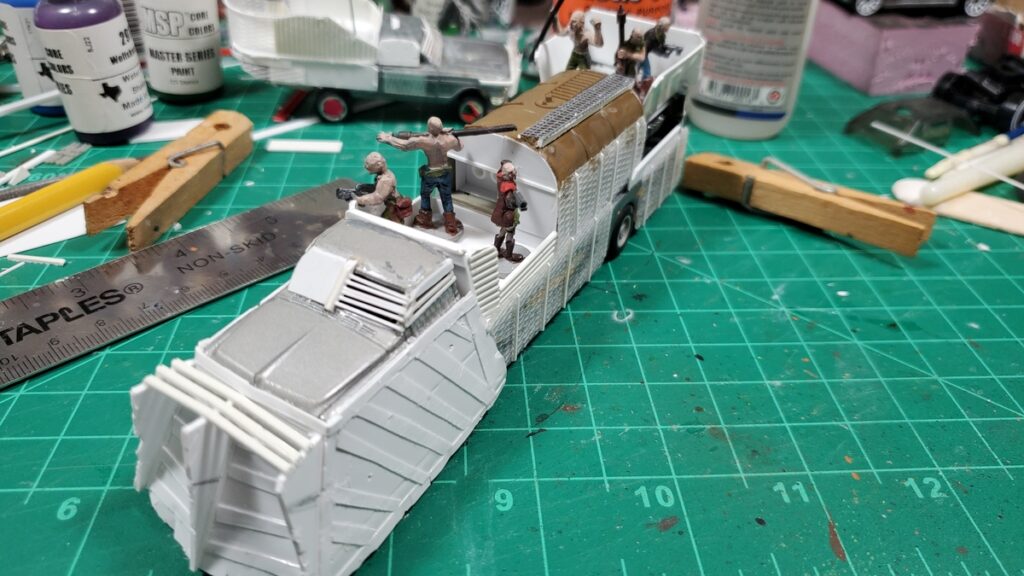
The Queen is the largest Gaslands vehicle I’ve done so far and by far the most complex conversion I’ve done for the game!
She started life as a city busy of some sort, sourced I think from Ali Express by Corey, sat around in his stash for a while, then became mine when I volunteered to make something cool to terrorize our Gaslands games with! She’s true-scale to Matchbox/Hot Wheels cars, so very close to six inches long now that I’ve finished a full post-apoc war bus conversion job.
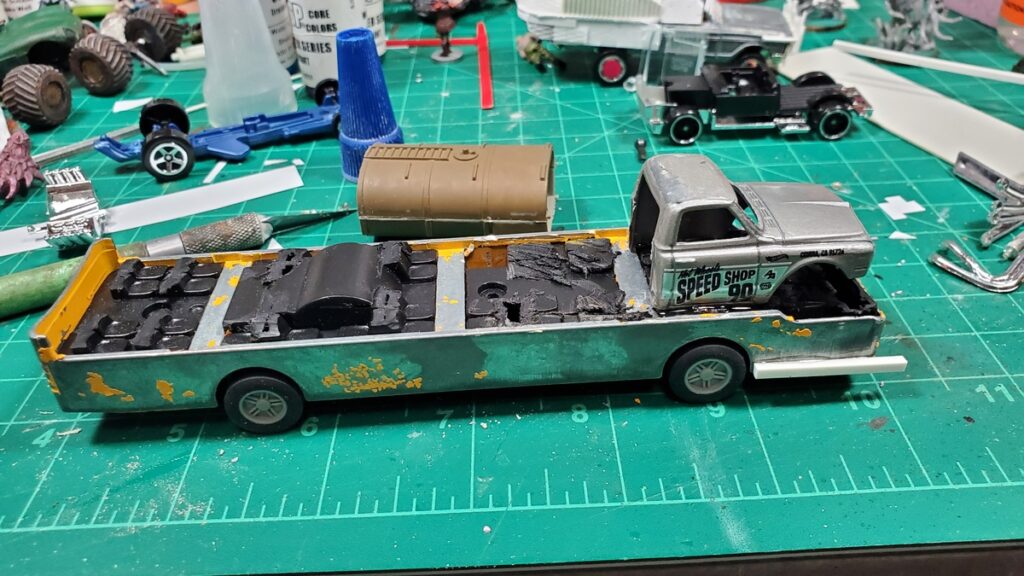
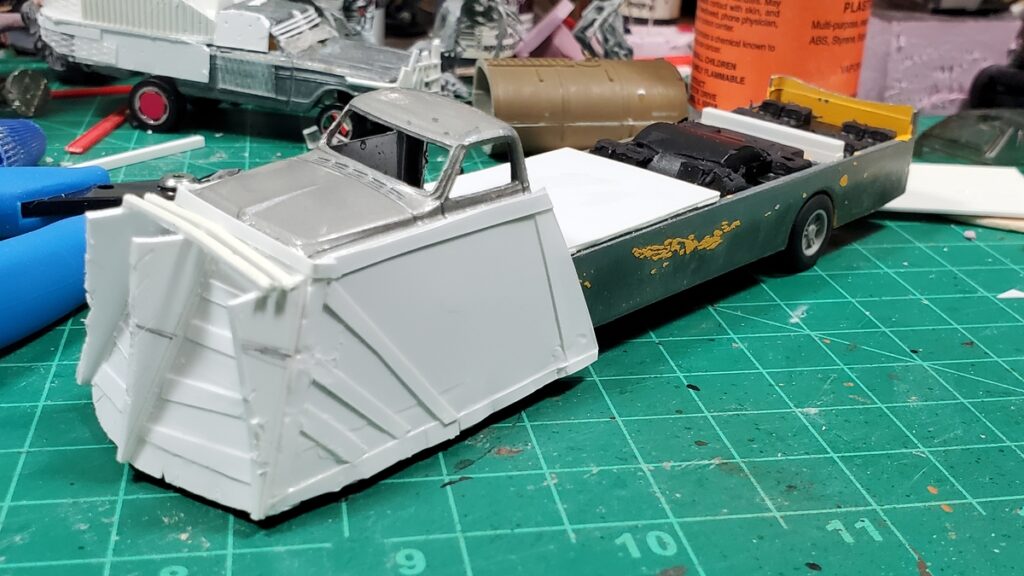
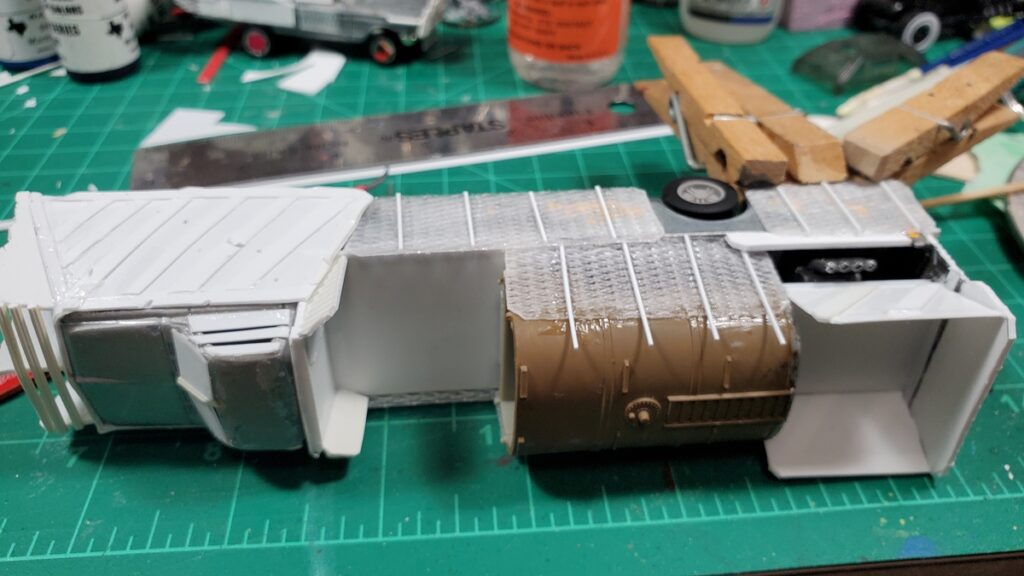
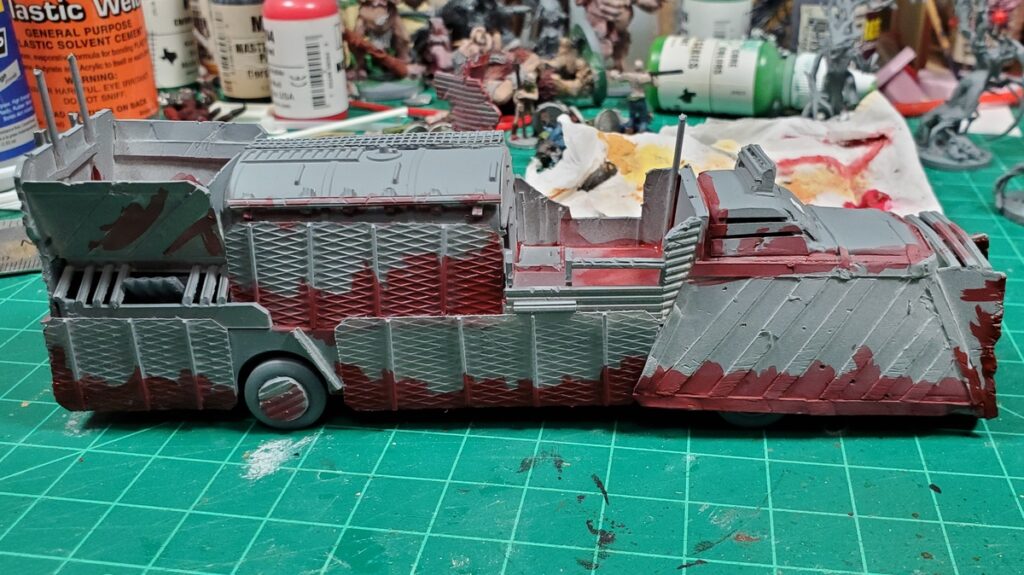
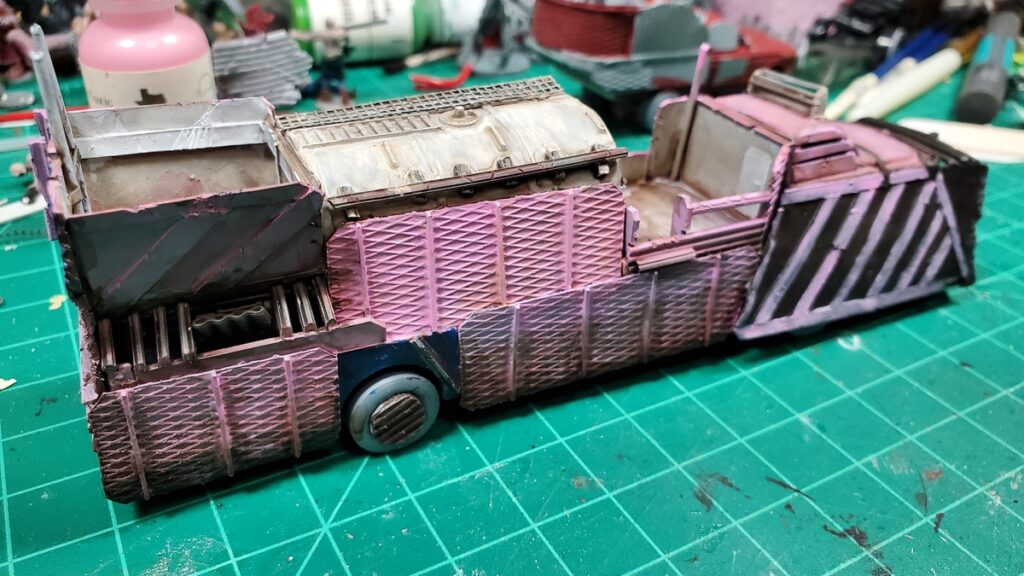
Planning the Queen. Bus chassic, truck cab, tanker truck parts, and the engine from the dragster.Dremelled the truck apart, first step of construction!The massive front ram taking shape.Flamethrower deck.Armour. Very important.Test fitting some crew, first glimpse of the rear fighting platform.The ram from the front.The tail of the beast.Primed and painting started.Pink? Why not?Weathered, crew installed, other details installed on both fighting platforms.The Queen rolls out! Her first in-game appearance.
Up next was the “GATE” lettering and giant numbers for the three numbered gates.
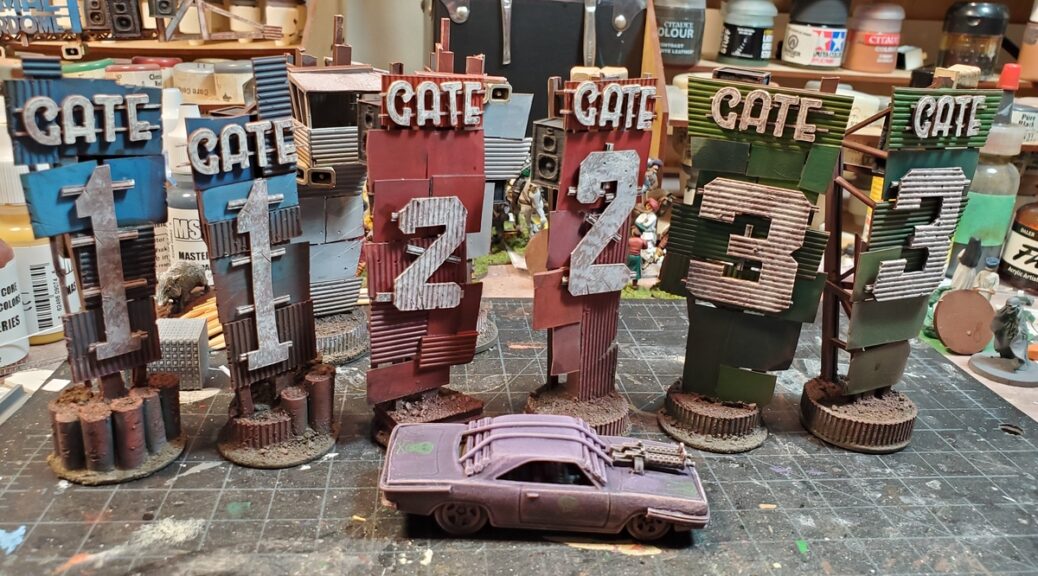
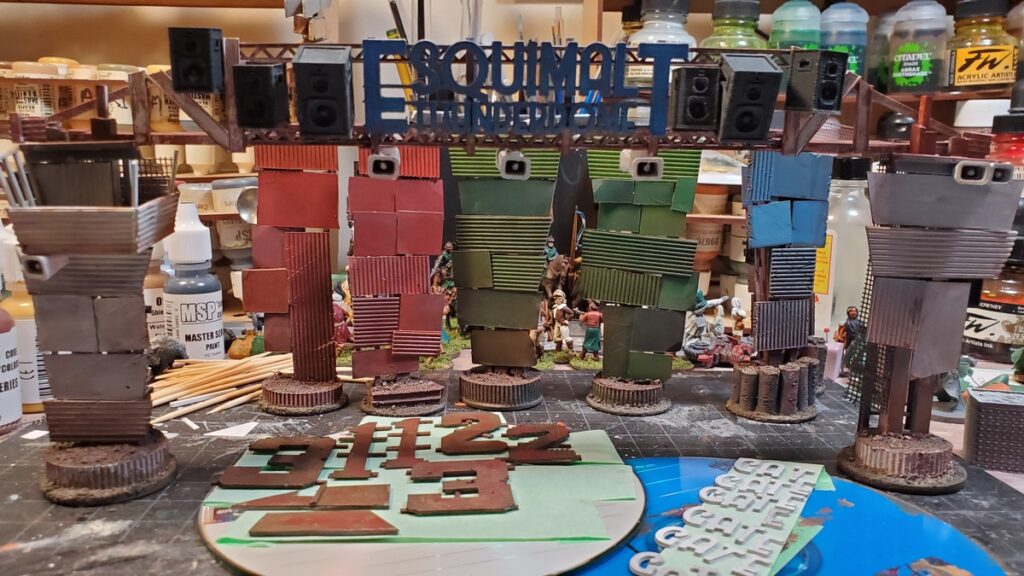
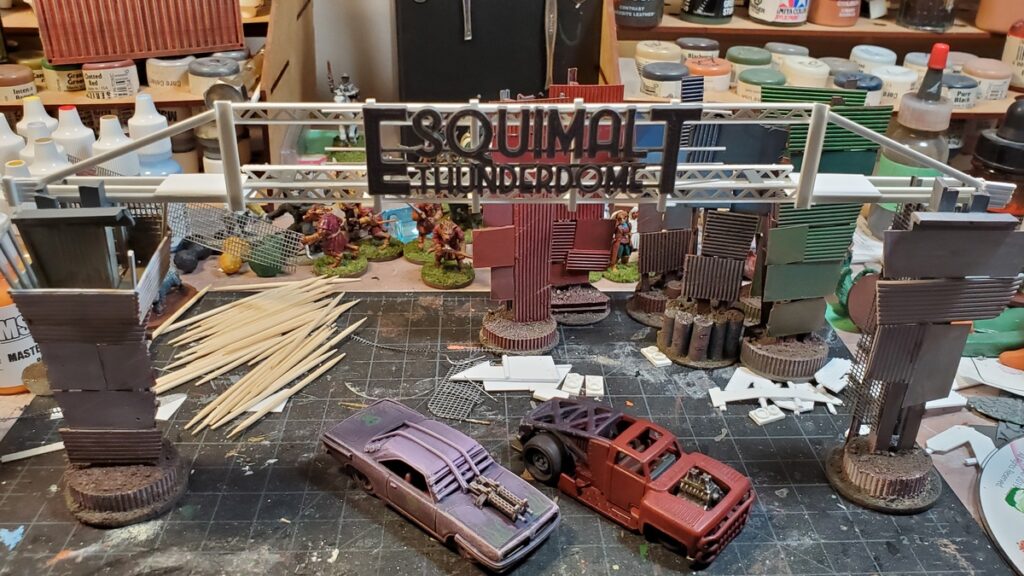
Mid-project roundup. Rust basecoat on the big numbers, front centre; GATE lettering primed on the right, and the gate towers all lined up behind and overhead. Click for larger.
I cut the giant numbers from sheet styrene and mounted them on strips of scrap styrene. The GATE lettering was 3d printed as separate letters and then mounted on very thin square section styrene strip. To make that easy I taped long pieces of the styrene strip down to my cutting mat, glued the letters down, then once the glue had cured cut each word out.
Everything got spray primed grey and then basecoated the same blotchy rust I’d used on the overhead gantry and elsewhere. I stippled and drybrushed everything with a couple of different shades of off-white (Reaper Linen White and Leather White, primarily) before a final drybrush of Reaper Pure White.
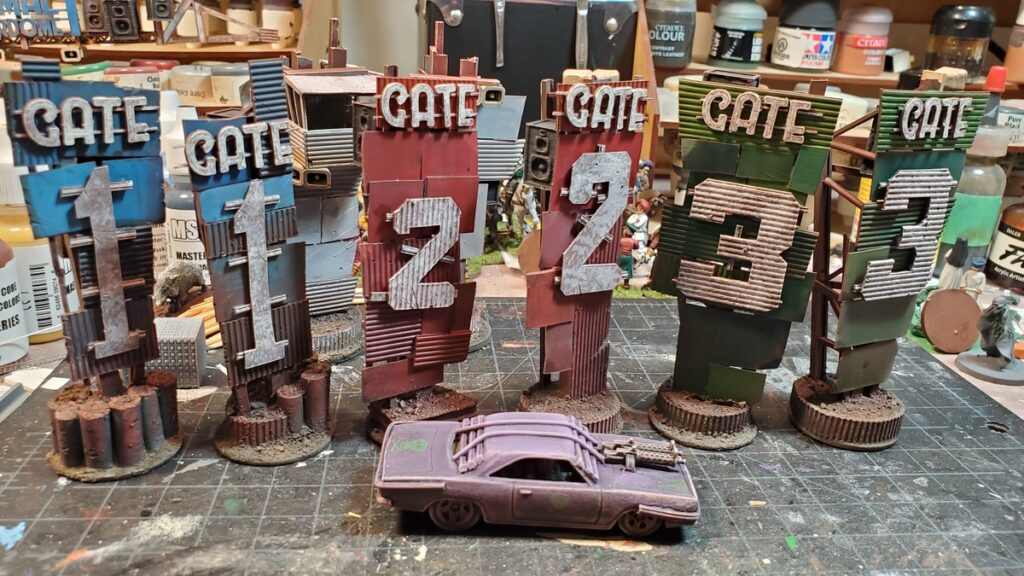
The GATE signs and numbers all mounted and final weathering begun. Click for larger.
After that it was back to the weathering, primarily drybrushing with a big soft makeup brush. I only just picked one of these up, a super cheap dollar store special, and it really is the bomb for drybrushing! I used a fairly random selection of browns, reds, tans, and off-whites for this, going back and forth over all the towers and the gantry as well.
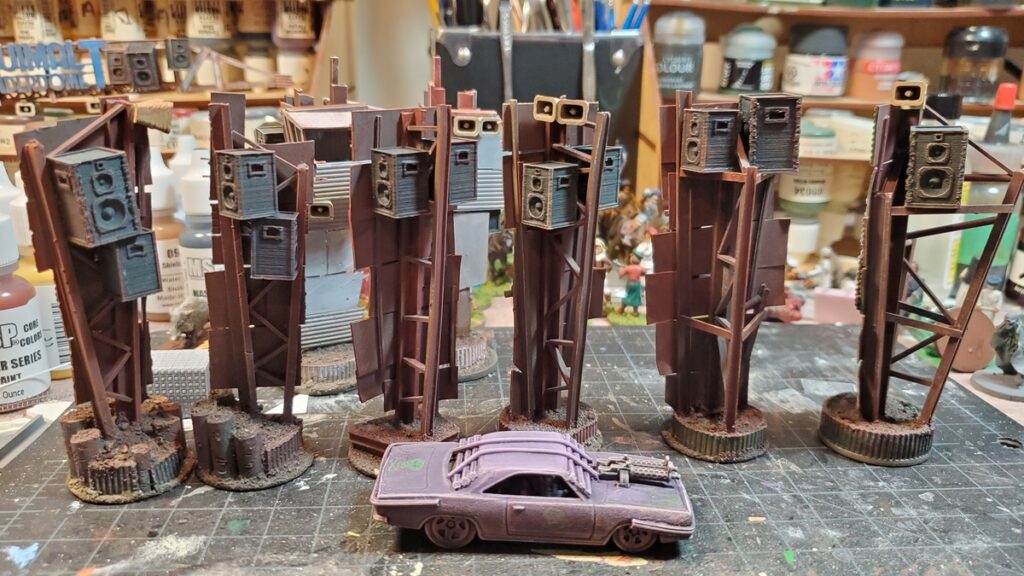
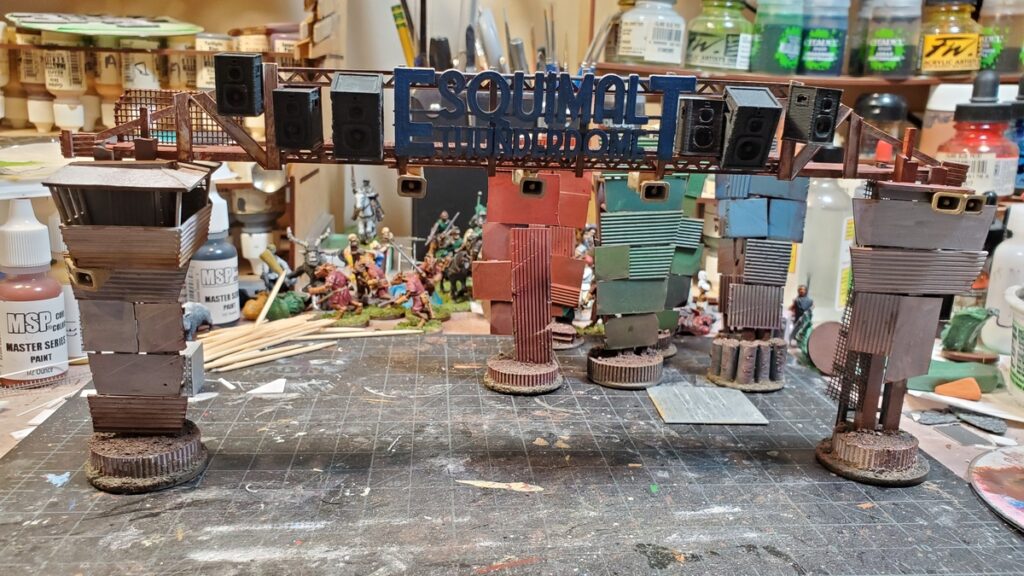
Back view of the six gate towers, with speaker cabinets and loudspeakers mounted. Click for larger.
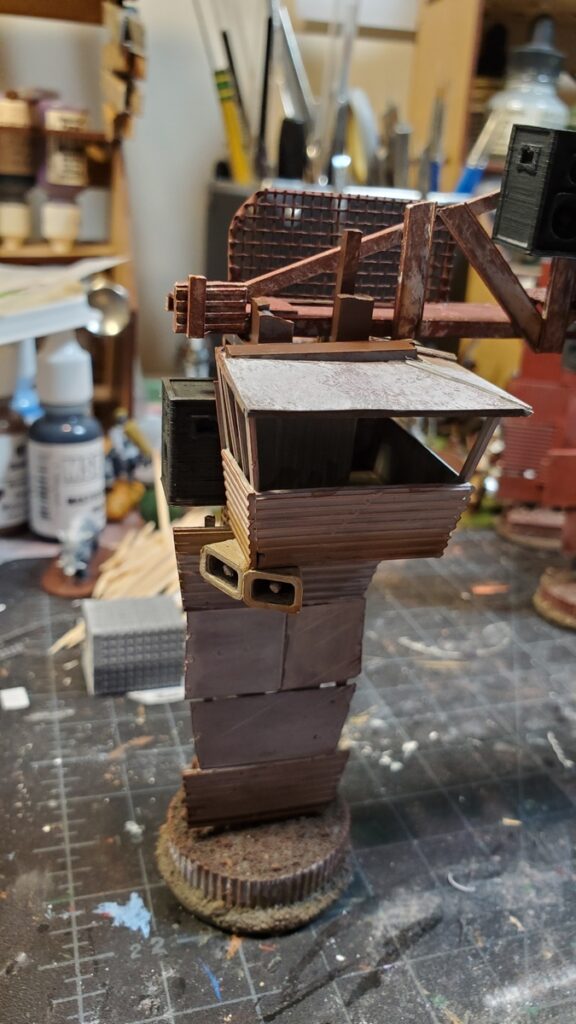
While adding the lettering I had finally primed, painted, and installed the roof on the announcer/race official cab on the lefthand start gate tower. I thought about installing mesh on the windows but decided to leave them open for now; I might go back in and add some additional protection for the folks who wave the chequered flags but the current form will do for now!
Roof installed on the announcer/official cab. It had to be cut to fit around the fairly random structure of the tower itself. Click for larger.
Final touches and some finished shots soon as this project finally wraps up and might actually hit the table sometime soon!
When we last saw our gates they were basecoated but stalled due to missing 3d printed parts. Those arrived, thanks to my brother’s 3d printer, and I was able to move on with the project.
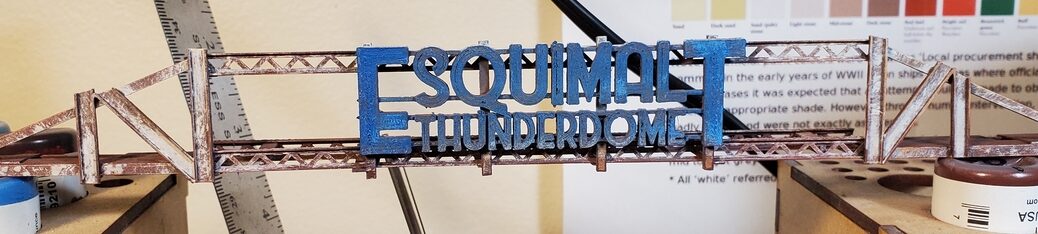
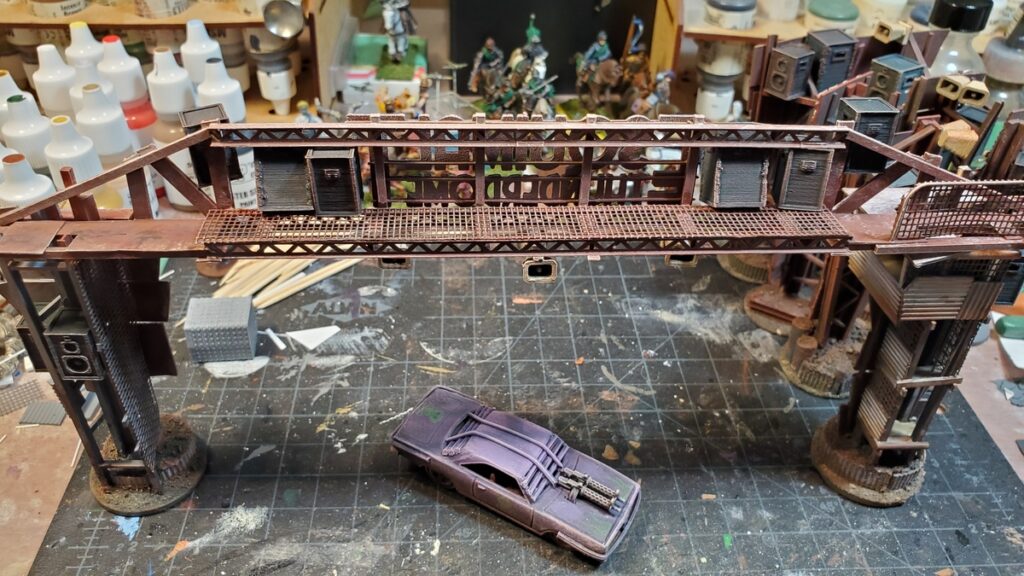
I didn’t want to start the overhead gantry on the Start/Finish gate until I had the 3d printed “Esquimalt Thunderdome” sign in hand, but once I had that the basic construction went together quickly.
The three openwork girders have been in my stash for decades and the packaging is long gone, but they’re from Plastruct – possibly these ones, which seem to be about the right size. You can find all the similar openwork web girders from Plastruct by searching their site for “web”.
The girders are only six inches long, so I knew I’d need to extend the gantry with other materials as the Gaslands rules call for gates the same width as a Long Straight movement template, which is roughly 7 inches long, and Corey’s Thunderdome racetrack dirt track is roughly 8 inches wide. Fully finished, this gantry is almost 10 inches long, and slots into the roof structure of the two vertical gate towers to hold everything together.
The start of the overhead gantry. I later pulled off the plastic mesh as it was getting in the way of construction and painting, and replaced it much later in the process. Click for larger.
The rest of the gantry was a random scatter of styrene shapes from the stash – there’s some flat C-channel, different T- and H-girder bits, and lots of square or rectangular cross section stuff. It had to both look structurally sound and actually have a certain amount of structural integrity, but the beauty of post-apoc engineering is that it still looks great if you bodge extra bits on to fix earlier problems!
in progress but before priming. You can see here how the gantry’s beams slot into the tops of the two gate towers. Click for larger.
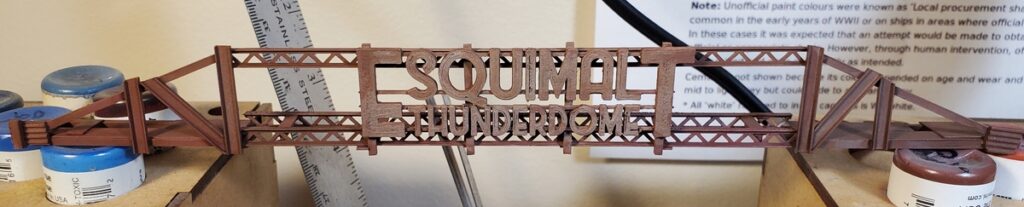
After grey primer I covered the whole thing in a blotchy rust coat using a couple of different shades of browns, reds, and oranges.
Rust coated. Click for larger.
After the rust coat I did a blotchy coat of white, partly drybrushed and partly stippled into place. This came out far better than I’d hoped, and really looks like white paint that’s flaking off as the metal under it rusts and weathers.
Stippled and drybrushed white, and first coats of blue on the sign. Painting of the actual gantry is basically done at this point; the sign got a bunch more weathering and highlighting and touchups. Click for larger.
The speaker cabinets and loudspeaker horns were 3d printed from STLs on Thingiverse, both from a very nice collection of Gaslands parts. The speaker cabinets were printed in two different sizes, which added some visual interest.
Speaker cabinets and loudspeaker horns in place and weathering started. Click for larger.
The speakers got painted a blotchy off-black (Reaper Pure Black with a dot of one of their greys mixed in) and the loudspeakers got one of the many tan off-whites in my collection, I can’t remember which one.
The clutter of speakers and loudspeakers really makes this piece pop, it’s exactly the visual clutter I’d pictured in my head when first thinking these designs up!
I’d like to add some light fixtures, but it seems nobody makes 20mm 3d printable floodlight fixtures, at least not that I can find, and I’d want enough of them that scratchbuilding isn’t really an option unless I can come up with a really simple design…
The back of the gate, with mesh back on the walkway and all the 3d printed stuff getting weathered.
Next up, painting and installing the big “GATE” signs and numbers on the rest of the gates, and loads more weathering. So much weathering…
Kind of slow on the gaming front around here; we are still in COVID lockdown so no in-person gaming is permitted, but Thursday evening Gaslands by webcam is still going strong – we’ve had six players the last couple of games, which is probably pretty close to the limit for webcam gaming and keeping things organized and moving.
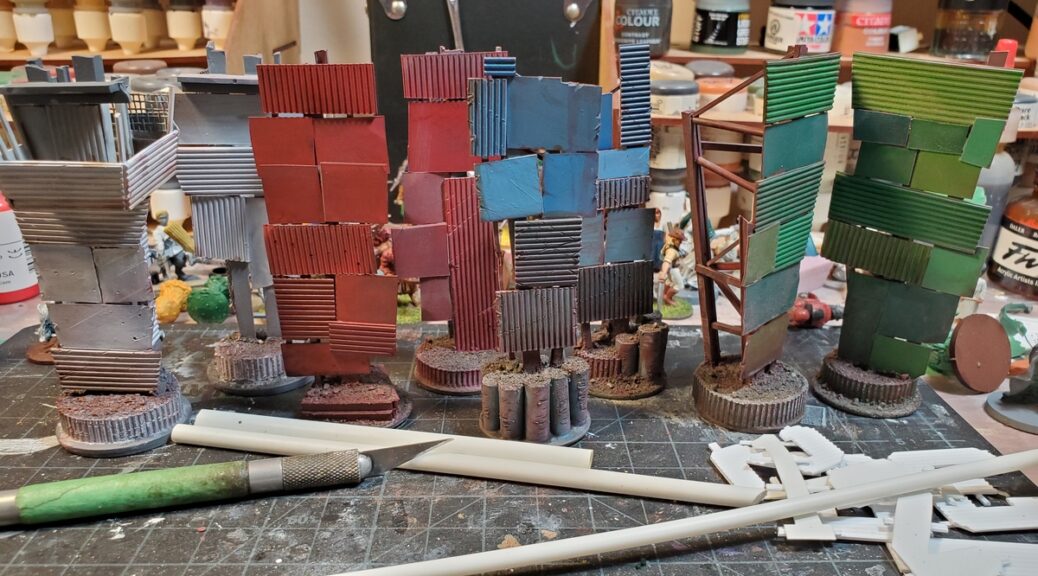
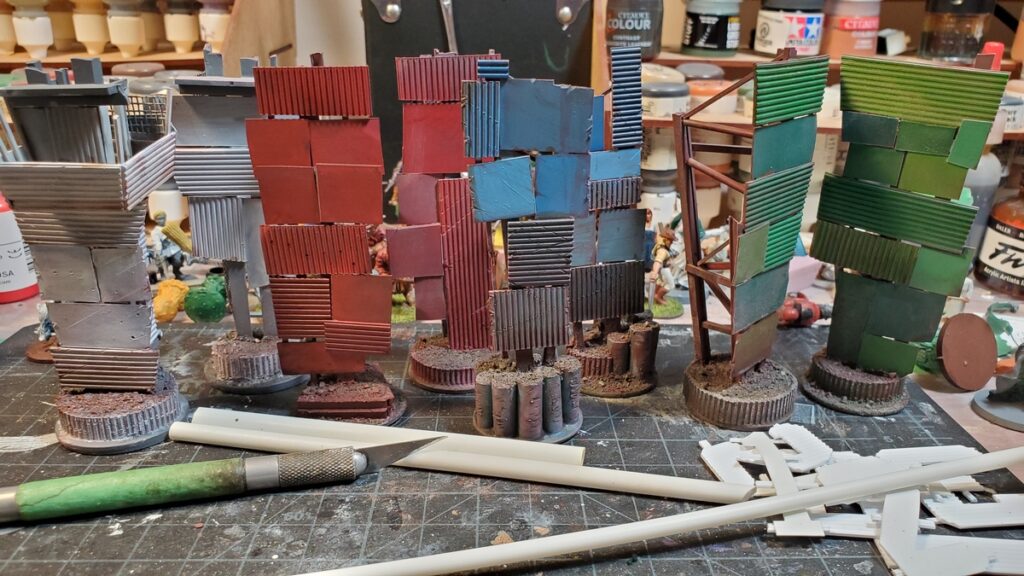
The gates have their basecoats and a first pass of weathering done, at least. I’m especially fond of the blue pair, they’ve taken the weathering really well so far.
Base colours and a bit of weathering on all four gate towers. Click for larger.
We had a blast of unusually cold weather and snow which has meant that my brother’s 3d printer (which lives in his garage) has been out of order, so everything is on hold until he can print the “GATE” lettering the six or eight times I need to add to each gate. It’s warmed up to normal winter temps again so hopefully he can get that done this week and I’ll be able to finish these up!
The Death Race scenario for Gaslands calls for at least three or four gates, for start/finish line (which might not be the same gate) and a couple along the course. We’ve been using various random scenery bits, which works fine, but proper gates have been a obvious piece of scenery I wanted to make.
The scrap metal look worked well for the jumps I made last year, so it was the asthetic I followed for the gates as well. I decided to do freestanding gate pillars, essentially, with no permanent overhead horizontal pieces but with the vertical construction to allow modular overhead gantries to slot in if desired.
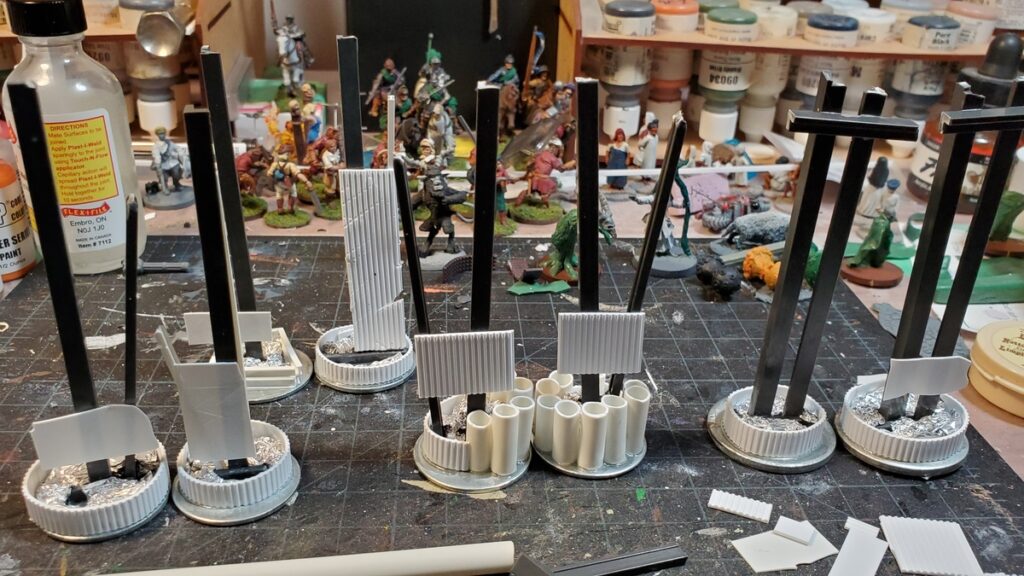
To keep the tall gate posts ballasted I started with solid 1 1/4″ washers from the stash, then sank the main vertical beams for each into a footing of styrene plastic filled with Milliput epoxy putty, which dries rock hard. Because it’s a fast technique and super cheap, I filled the lower levels of the foundation footings with crumpled tinfoil tacked in place with superglue, then put a layer of Milliput over that.
Early in construction, tinfoil filler visible in the footings. The three course gates are on the left, and rightmost is the start line, which is more substantial. Click for larger.
I used a couple of different methods to construct the footings; roughly circular lengths of corrugated sheet styrene were fast and easy but I really like how the vertically-embedded heavy pipe (styrene tube) came out.
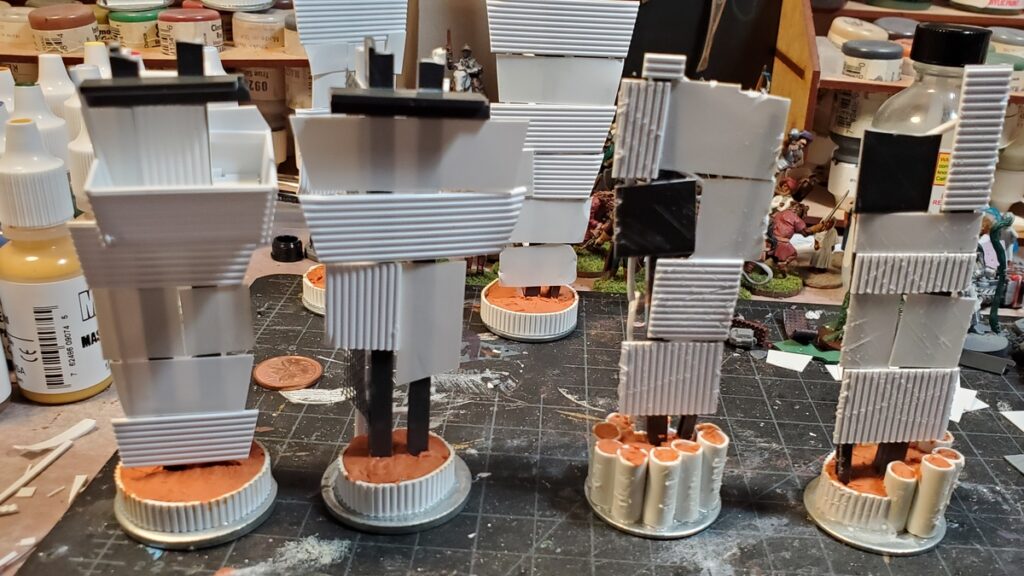
This entire project was done from the Ancient Stash of Doom; I’m pretty sure some of these random girder pieces date back to the family model railroad we had in the early 1990s when I was in junior high. The dark grey plastic is all Plastruct; all the white plastic is Evergreen Plastics. There’s three or four sizes and styles of girder, a couple sizes of tube, and sheet styrene in at least four thicknesses and styles.
Beyond making sure all the main vertical beams were roughly the same length (about 4 inches) I did very little planning ahead. Each pair of gate pieces is in roughly the same style… more or less. After making sure the main vertical beams were solidly anchored to the washers, I filled in the rest of the structure from whatever sheet and beam bits were handy and looked the part.
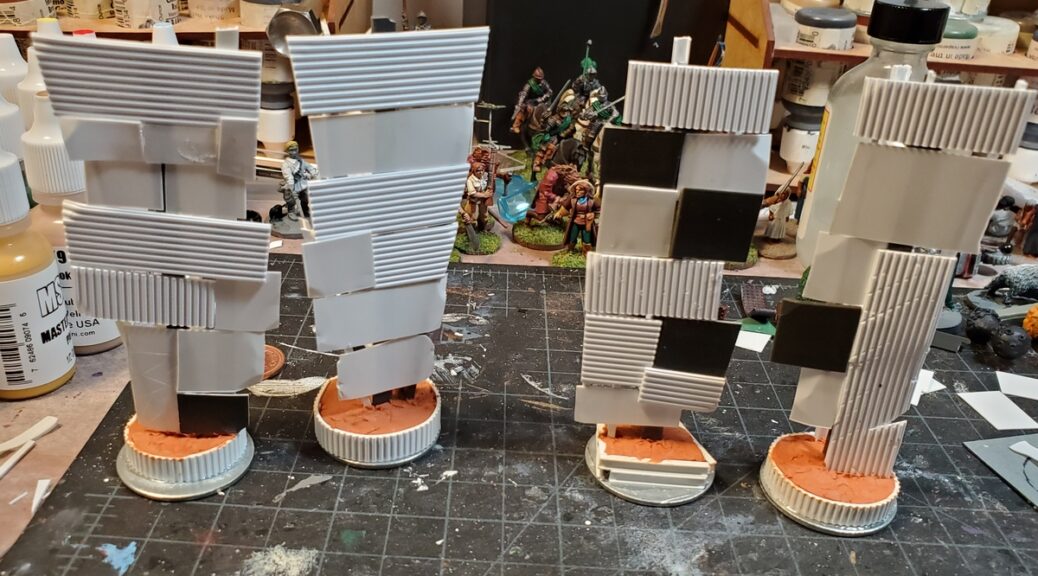
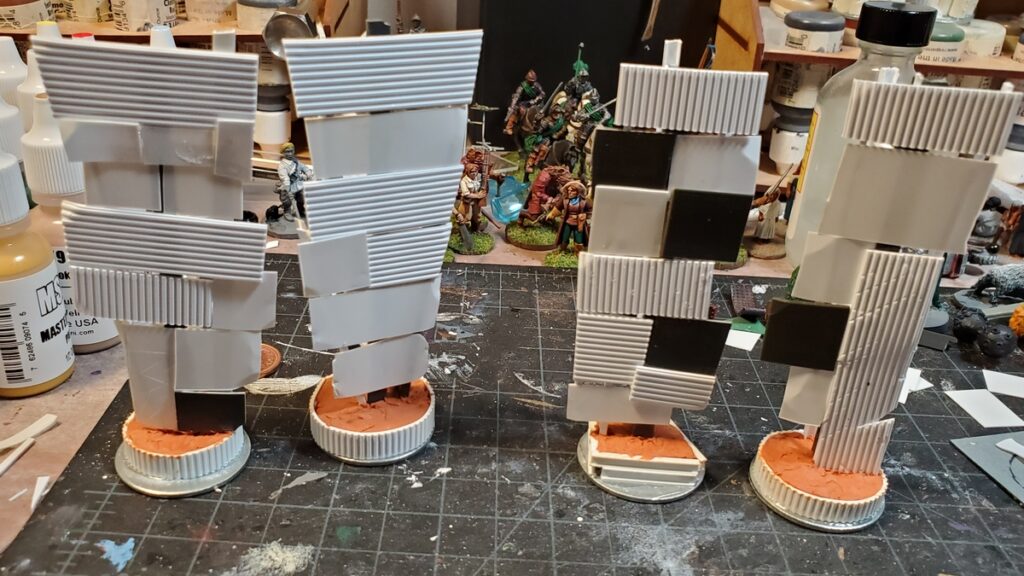
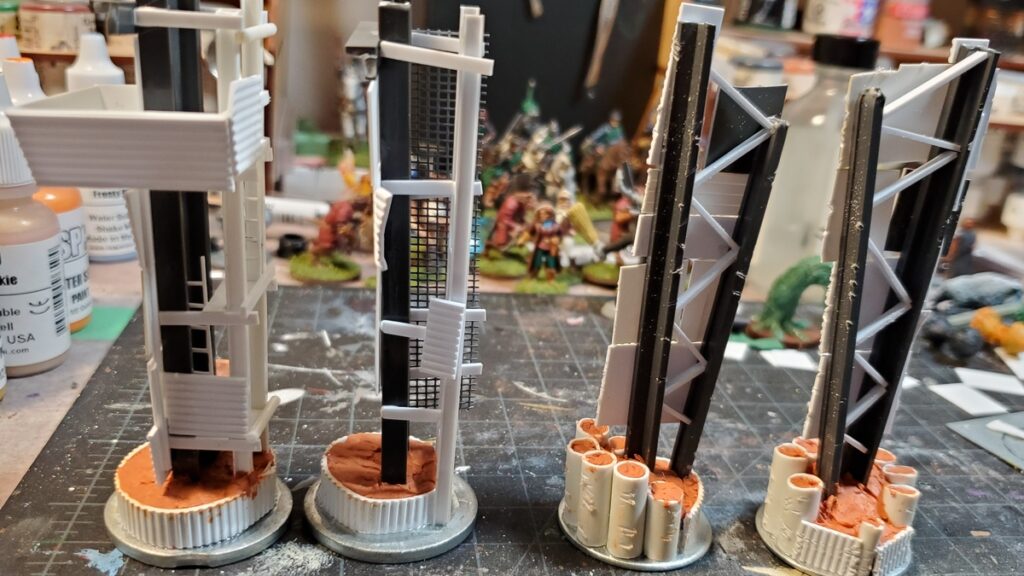
Left, the Start Gates, with an elevated box for race officials, announcers, media, etc. I’ve decided that the “pipe” gates are Gate One, for no particular reason. Click for larger.Gates Two and Three, basically finished and awaiting primer. Click for larger.The backs of Gates Two and Three. The scrap-built girder structures are actually fairly solid now! Click for larger.The backs/sides of the Start Line Gate and Gate One. Gate One has by far the simplest struture, but I really like how it turned out and if we need more gates will definitely be copying the basic design. Click for larger.
Gates One, Two, and Three are basically done, structurally, although I might yet put more details (floodlights, maybe loudspeakers) on them, and the plan for all three is to get Corey to 3d print lettering for “GATE” and then add the gate number in sheet styrene like they were cut out of sheet metal.
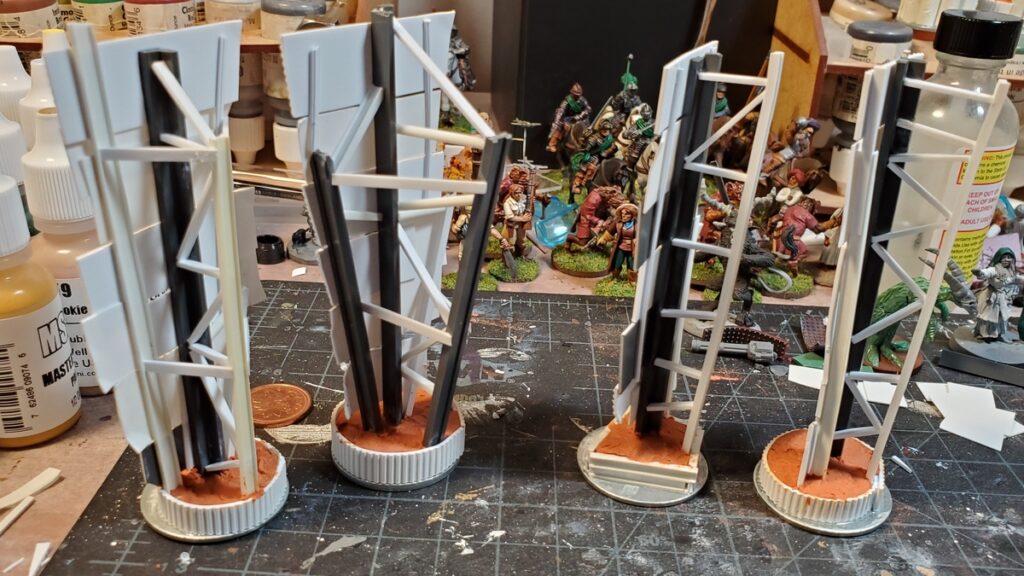
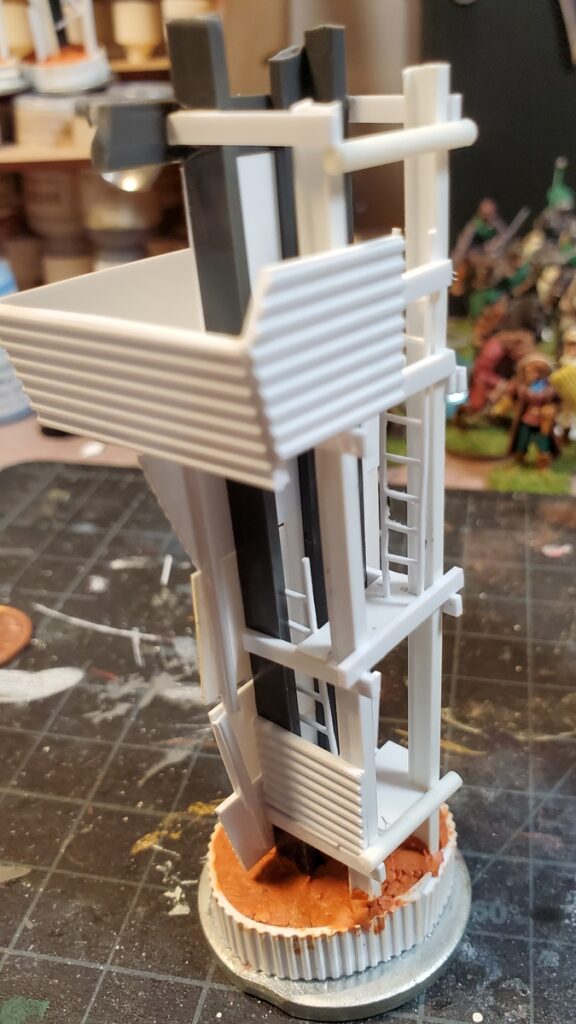
The Start Line Gate is still undergoing detailing. There’s ladders to get the crew up into the announcer’s cab, and I’ll be covering the sides and back with some solid metal sheet and a bunch of mesh – you can see the first piece of that on the offside Start Gate pillar, second from left above. The ladders are scratchbuilt from very thin strips of styrene; I’d have used HO scale plastic ladders but my awesome local hobby shop was out of stock.
The Start Gate is also going to get a fairly substantial horizontal gantry spanning the course between the two pillars. It’ll have floodlights, speakers, and a 3d printed “Esquimalt Thunderdome” sign on it, or will when Corey coaxes his 3d printer back to life. I’ve got some very cool openwork styrene girders to form the main central part of that gantry.
The main vertical part of the Start Line Gate, with partially constructed announcer’s cab. This photo was mostly taken to show off the scratchbuilt ladders, which came out really well. Click for larger.
More on these gates soon, and in the meantime stay safe, everyone.
Finished up my first three cars for Gaslands over the weekend, the two Barracudas and an Impala last seen in grey primer a little while ago.
Basecoat on all three cars; the black stripe on Vlad was done as part of the basecoat with glaze medium. Click for larger.
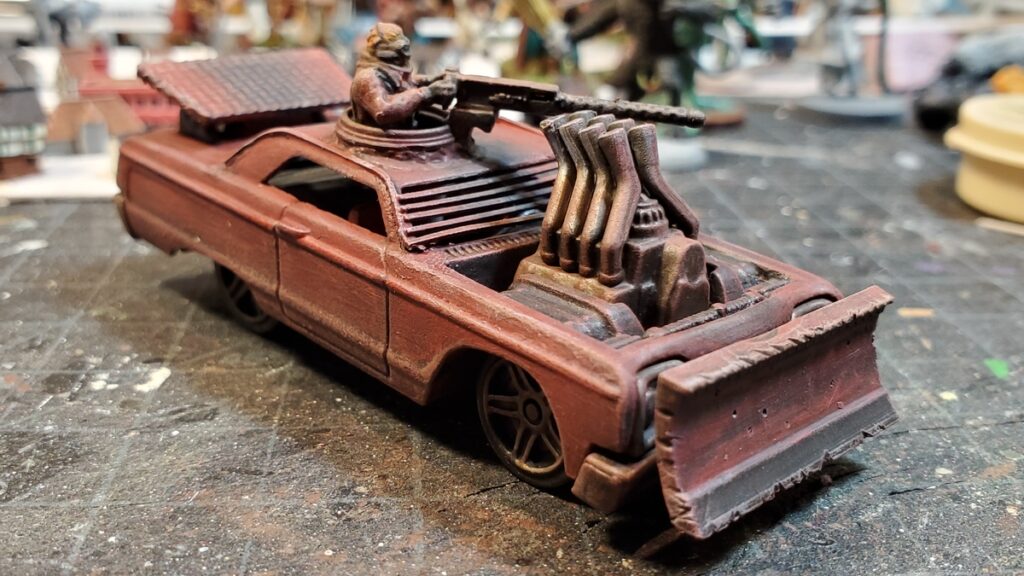
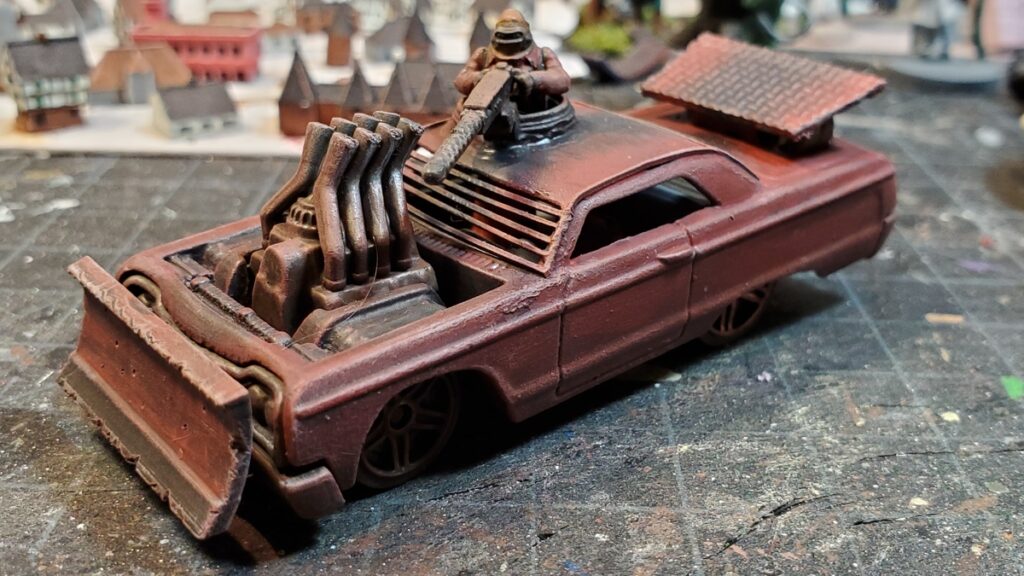
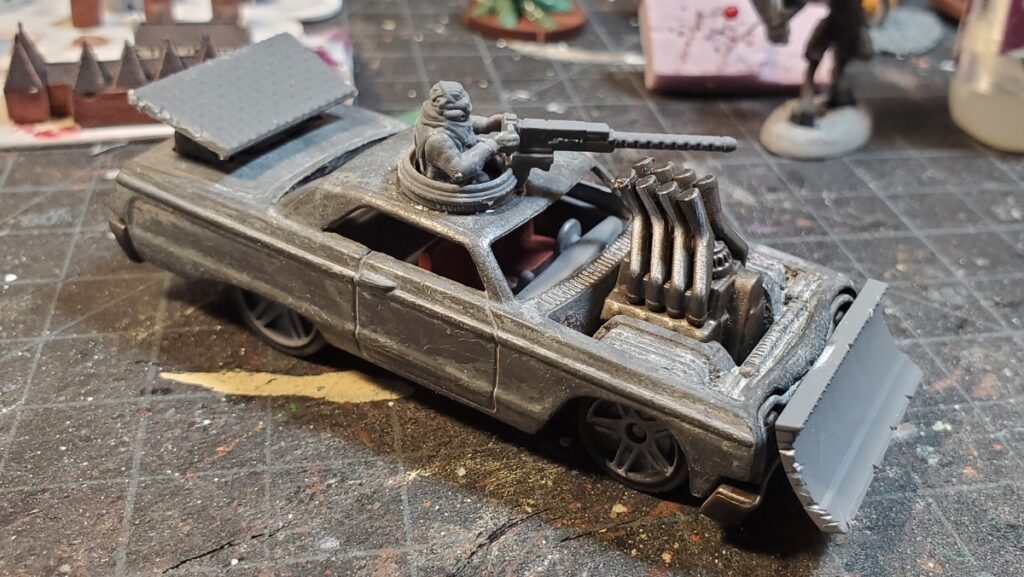
Car One: Vlad the Impala
The big red and black car is an Impala, so naturally it has to be called Vlad in the long tradition of ancient dumb car jokes. The bulldozer blade ram plate, exhaust pipes, ring mount gunner, and rear slab spoiler are all off the North Star accessories sprue; the bar armour on the windows is thin styrene plastic strip. I might yet freehand the car’s name on the top of the spoiler, but it’ll thunder around the track quite handsomely without it for now.
Vlad the Impala, right hand side.
Vlad, left hand (drivers) side.
Two views of Vlad the Impala.
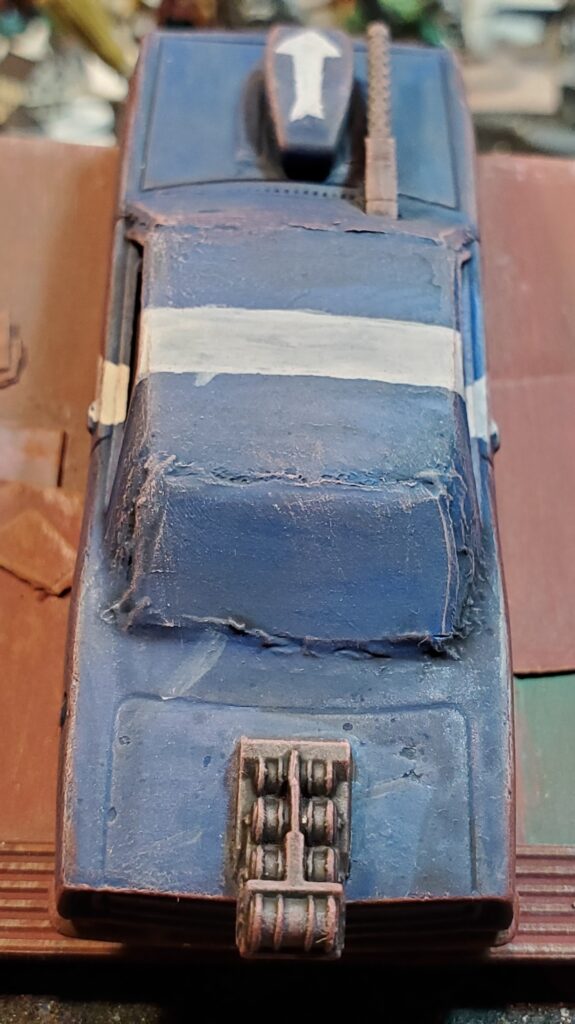
Car Two: the blue Barracuda
This one seems to have accidentally turned into a Spaff Maureen landsplatter or whatever they’re called, never having played any 40K myself. It’ll be nice and clear which direction to point toward the finish line, anyway! Sheet armour over the windows is sheet styrene scrap; the air scoop, gun, and minedropper are North Star accessories.
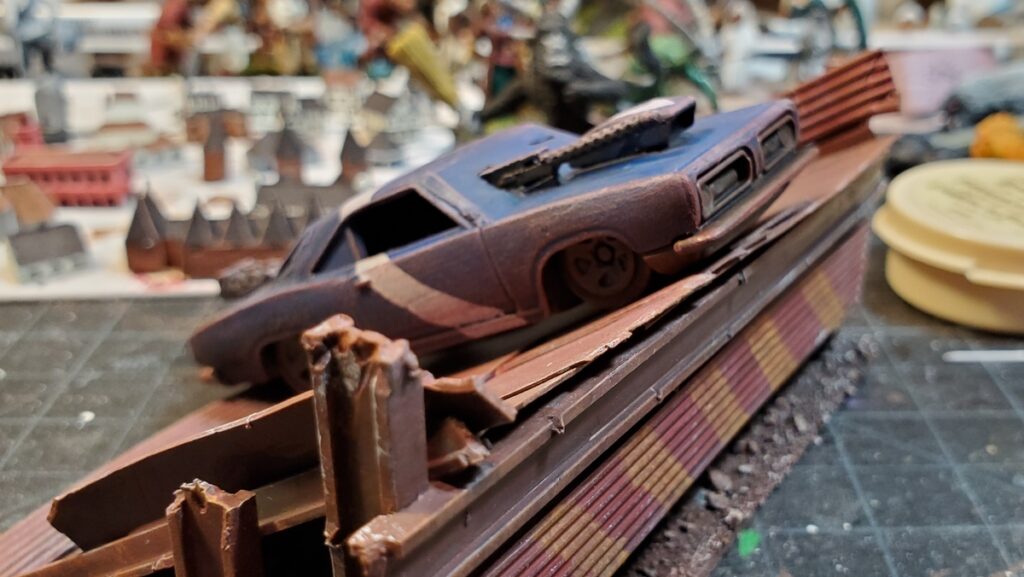
Posed on the ramp so we can see the top nicely.
Side view on the ramp.
The blue Barracuda.
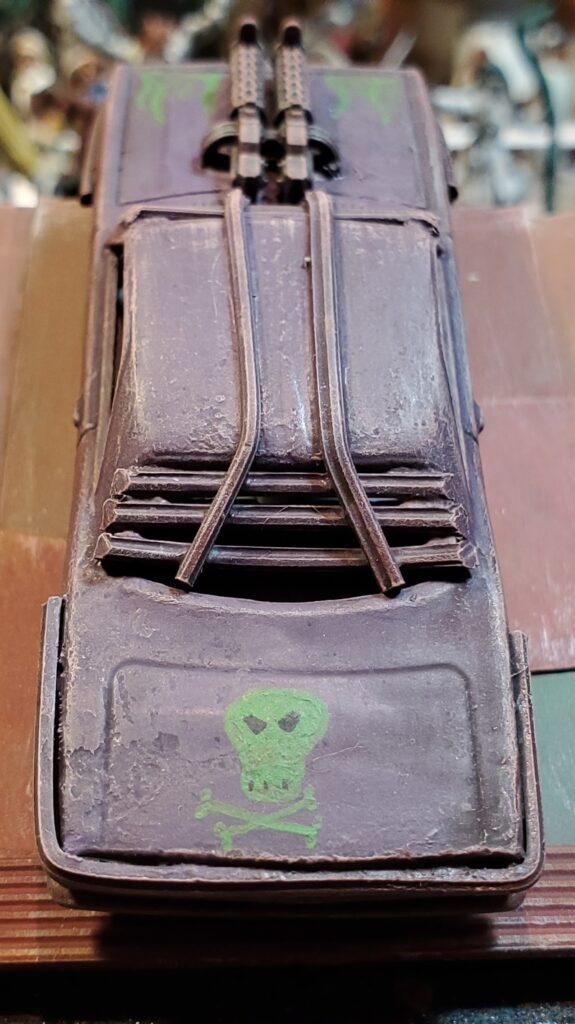
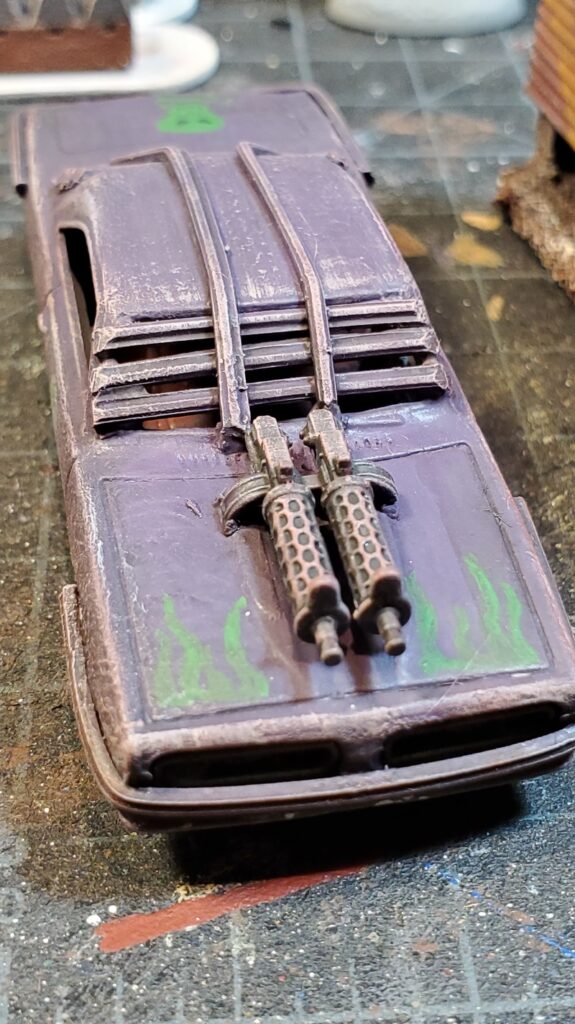
Car Three: The Purple People Eater (Barracuda)
The second Barracuda is wrapped up in some extra bar armour with a pair of machine guns bolted to the hood. Guns again from North Star, bar armour bits from scrap styrene. Over the purple paint it has neon green skulls on the trunk and both doors, with some flames alongside the gun on the hood.
Rear view, showing the trunk skull and rear window armour nicely.
Front view, with flames, guns, and windscreen bar armour.
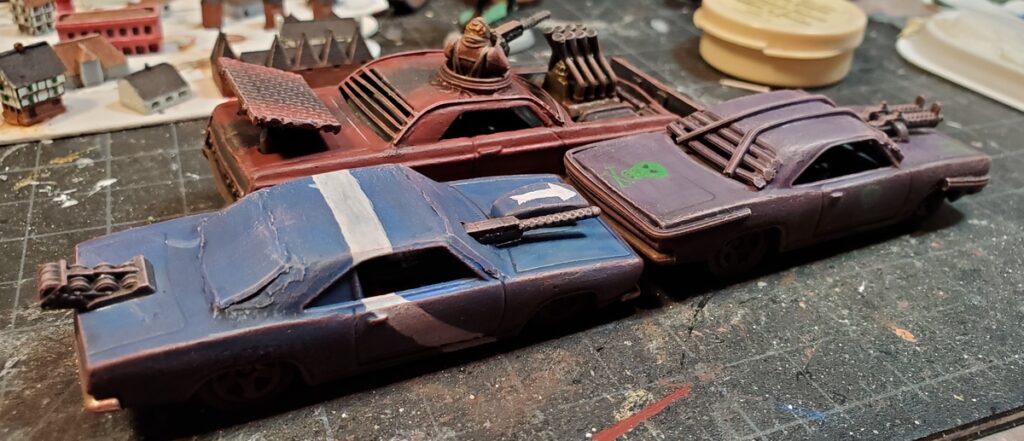
A Few Extra Shots
Just a few extra beauty shots for fun!
Both Barracudas heading up the jump. You can see the passenger door skull on the side of the Purple People Eater. Click for larger.Tight starting grid, or parked up waiting for the mayhem to start! Click for larger.
My next project is going to be a set of gates for Gaslands race events; I’ve got a big stash of random plastic tubing, girders, and such that’ll make three or four gates to lay out race courses.
We’ve had a couple more Gaslands-by-webcam sessions since Corey wrote up his how-to and that’s inspired me to finally get the first few cars built up properly.
I’d primed and painted these cars months ago and they probably even appear in a few of our game photos, but I’d rushed the painting so the primer was scratching off far too easily, and I really hadn’t done much conversion.
I dropped the metal car bodies back in Simple Green to reset them to bare metal, then set about properly converting them into post-apoc Gaslands armed cars! Some time ago we’d done a group order to North Star for a bunch of their Instruments of Carnage plastic accessory sprues and those plus bits of plasticard from my parts box has gotten me three armed, up-armoured cars, all Gaslands Refuelled legal designs.
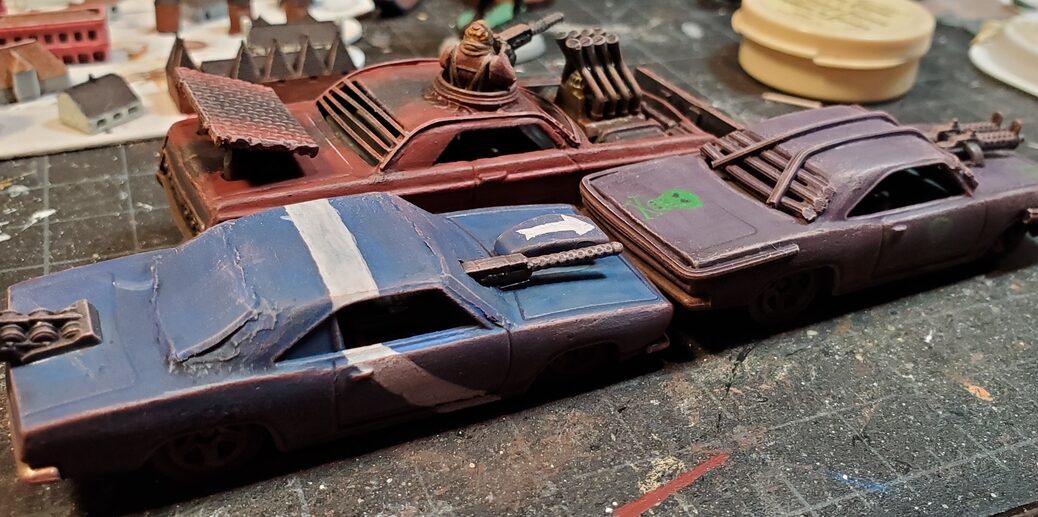
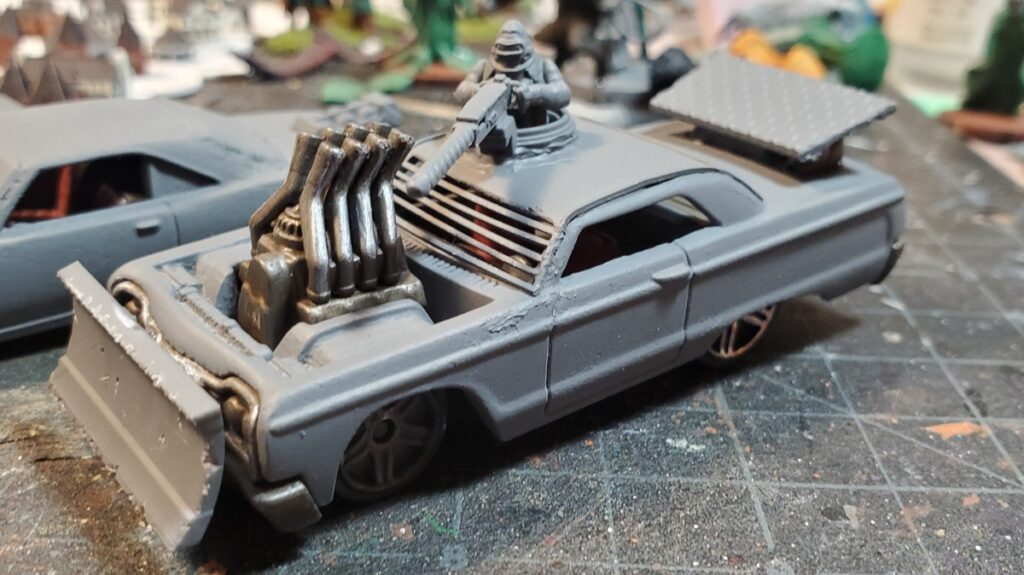
Vlad the Impala in progress. The huge absurd exhaust stacks, bulldozer blade ram, pintle mount gunner, and sheet metal spoiler are all from the North Star accessories. Click for larger.
The first and largest of the three cars is Vlad the Impala, with a turreted MG or HMG, ram plate salvaged from a bulldozer blade, huge exhaust stacks coming directly off the engine block, and “spoiler” on the back hacked from a piece of sheet metal. The windows also got barred off with plastic strips.
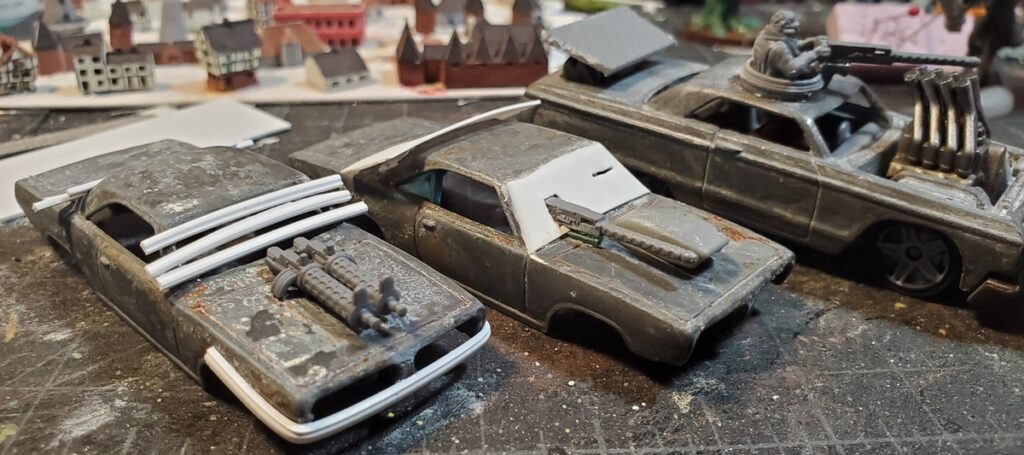
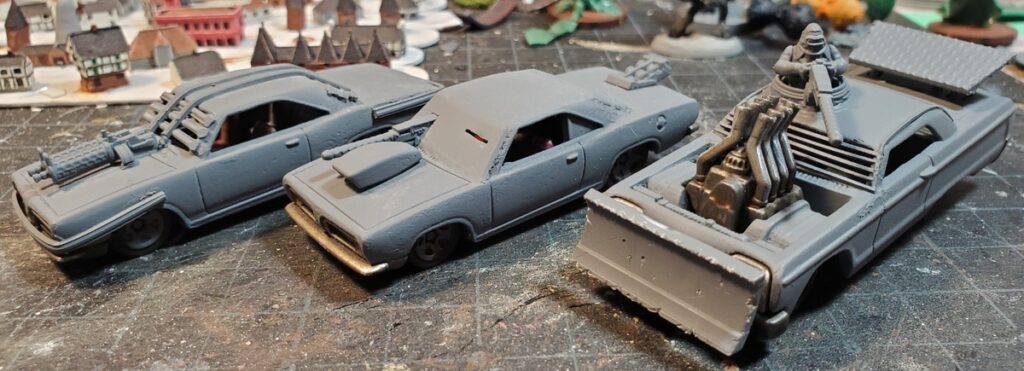
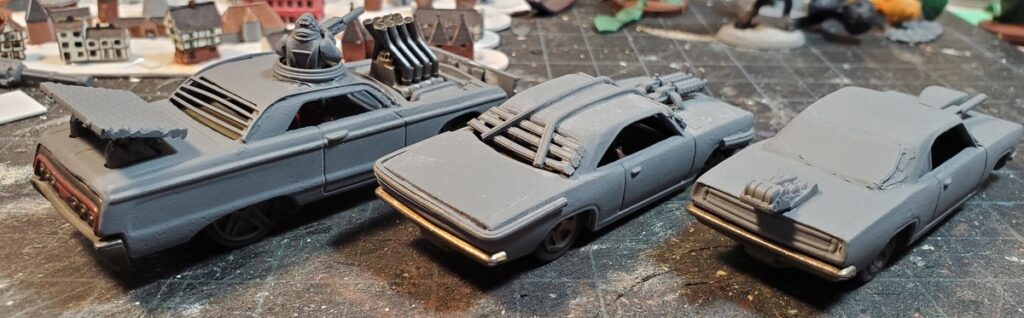
The school of Barracudas. Dual MG/HMG on the left and in-progress bar armour over the windows; the right hand ‘Cuda has an air scoop, single front HMG, a rear dropped weapon (not yet fitted), and sheet metal over the front and rear windows.
The two Barracudas are slightly smaller. One of them got an air scoop on the hood, a single HMG mounted alongside, sheet metal on the windows, and a dropped weapon (usually mines) off the back. Barracuda 2 got metal bar armour over the windows and reinforcing the front and back of the car, and a pair of MGs or HMGs on the hood.
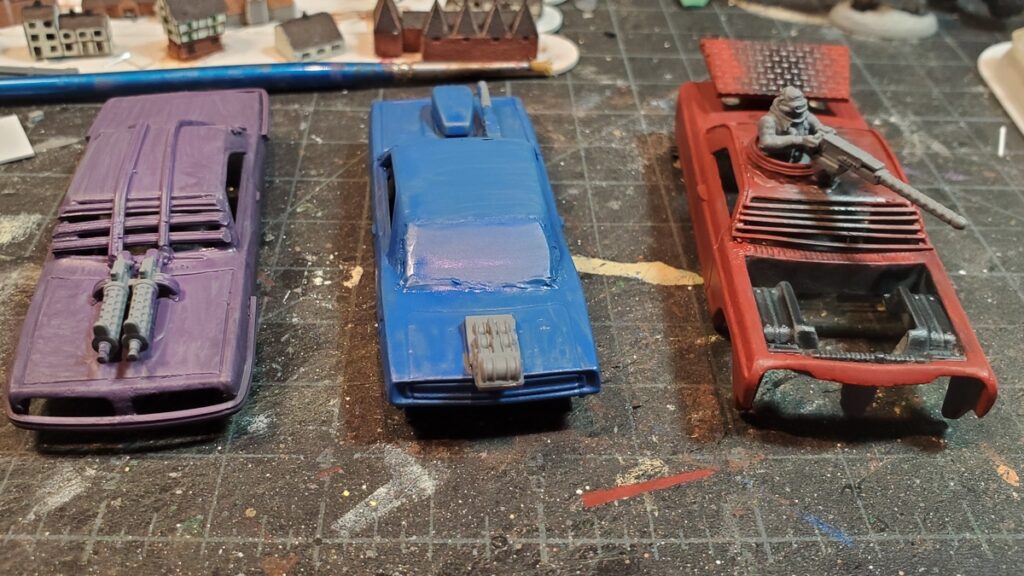
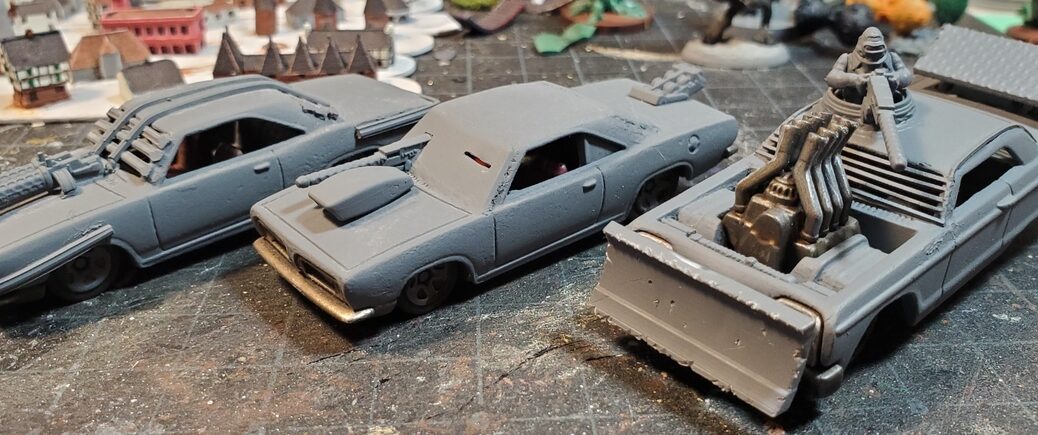
Vlad the Impala all primed and ready for paint, with the bar armour over the front window nicely visible. I scarred up the ram plate with files, an Xacto knife, and a tiny drillbit a little bit, because it’s such a prominent feature of the car. The exhaust stacks stick up so high as to get in the way of the gun mount, but Rule of Cool prevails so I’m sure the gunner can work around that little detail. Click for larger.All three cars all ranked up ready for painting. Click for larger.
I’m pretty sure that one reason I had trouble getting paint to stick to the metal toy car bodies the first time I tried painting these cars was because I rushed off to paint before the primer coat had properly cured, so I’m going to put this trio aside for a couple of days to give the primer a chance to really properly dry and cure.
Rear quarter view of all three cars. Very pleased with all three of them, and looking forward to getting paint on them soon! Click for larger.
I haven’t actually finalized a paint scheme for any of them, although I suspect Vlad the Impala will wind up red and black, with one of the Barracudas mostly purple and the other blue, just because. There are driver figures on the North Star sprues, but with all the window armour none of the driver seats are particularly visible, so I think I’ll save them for other projects with more visible crew positions.
Given that our current COVID restrictions are running until at least mid-February at this point, I am probably going to finish all three of these and then drop them off at Corey’s place, along with the jumps and other terrain I finished late last year so they can appear in our webcam games as lockdown drags on!