Apparently not many people have webpages featuring working model trebuchets. Except the old version of this webpage! Transplanted and spruced up; it’s been many years since I’ve built this one (and it’s since been misplaced in a move) but the photos and story are still good, and I’ll try and update the links. Enjoy! — Brian, 12 Jan 2011.
One slow weekend, I built myself a siege engine of the ancient mold and threw rocks at the neighbours…
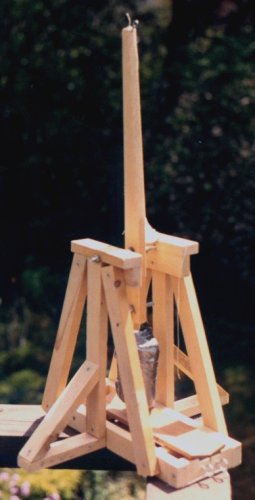
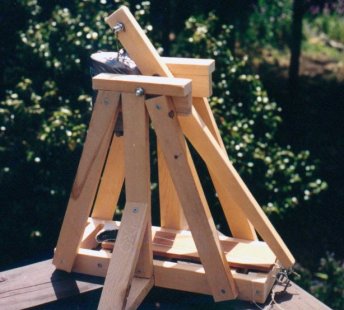
Actually, it wasn’t as bad as that – the beast is only about 40cm tall to the top of the frame, and the biggest rocks it throws are only maybe 8cm long. The counterweight is 4 pounds of lead fishing weights.
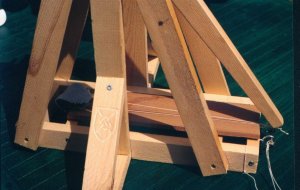
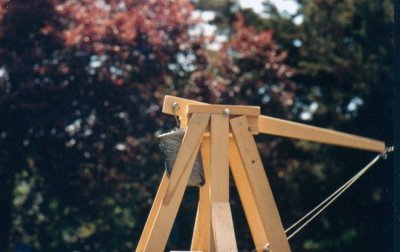
A trebuchet (tree-boo-shay) is a counterweight powered mechanical artillery piece, traditionally used for throwing huge rocks at castle walls or throwing dead horses over the walls. Mine is made entirely of 1×2 lumber, but the design is entirely traditional and historically accurate. The counterweight falls, pulling the far end of the arm up and over, which in turn propels the sling which actually contains the rock. The sling whips up and around, releasing when it comes over the top, sending the rock on its way. The trajectory can be changed by adjusting the sling’s release hook, on the end of the arm. The usual trajectory is fairly high and arcing, but a surprisingly flat, fast trajectory can also be achieved by careful adjustment of the hook.
Accuracy is quite good, providing you are slinging rocks of identical or similar weight. Firing the same rock, I landed 30 shots in the same 1.5m wide circular area. Range could also be quite long – firing a very small rock, one shot went over 25m, with the usual shot being around 10-15m.
The simple plans I used to build my treb used to be available on the Web from A Trebuchet Story (now sadly defunct, and possibly not in The Wayback Machine – Brian, 12 Jan 2011). These seem to be the only trebuchet plans actually available on the Web. There are loads more treb and engine site out there on the WWW – check out some of the following Trebuchet, Catapult, Siege Engine & Mechanical Artillery Links:
- Dan Becker’s Trebuchet Page is a great page with lots of photos and info on building a treb about the same size as mine. He’s also got a Toothpick Trebuchet page. (added 1 Feb 2010)
- Grey Company Trebuchet & Catapult pages: lots of information about cats, trebs, and other mechanical artillery engines, and a great Links section.
- Danish Medieval Centre: a giant trebuchet, great photos and lots of general medieval information as well.
- Hilarious article on the dead-horse & Mini -chucking treb in England: a must read!
- Castle Siegecraft and Defence: siege information, siege engines, photos.
- Codesmith’s Siege Engines Page: a group of nice diagrams & photos of a smallish trebuchet in action.
- Trebuchet.com ‘For people who like to HURL!’ Good links & information, and the Siege Engine webring.
Igor Award Recipient: Goes to my brother Corey, who acted as mad scientist’s assistant during most of the firing of this beast. (then bugged me about giving him credit until I invented the Igor Award!)
And finally, the photos – click for complete views, although not that much larger, I’m afraid.