A semi-random collection of links that have caught my eye recently!
Swamp grass from cheap paintbrushes via Rob Hawkin’s awesome blog. Hmm, I just picked up a 5-pack of Home Depot paintbrushes that look exactly like the one he uses in his tutorial, and I’m planning some stream/swamp sections! Lots of other good stuff on Mr. Hawkin’s blog, it’s well worth rummaging through his archive.
The crowded English Civil War – Royalist & Parliamentary garrisons in a 14 mile by 14 mile area of the West Midlands! I looked a few of these locations up on Google Maps – it’s mostly the suburban/semi-urban sprawl and absorbed villages on the edges of Birmingham these days. One thing that fascinates me about the ECW is just how damn small the UK is. A lot of the historical counties are 50-75 km each way or less, and for the small skirmishing squabbles of the ECW competing garrisons only a few miles apart wouldn’t be uncommon.
Tiny Furniture is a fairly new company with some neat science fiction furniture and detailing bits for your tabletop terrain projects. They’re running a Kickstarter as I write this for some retro-apocalypse (Fallout-style) furniture that looks pretty cool.
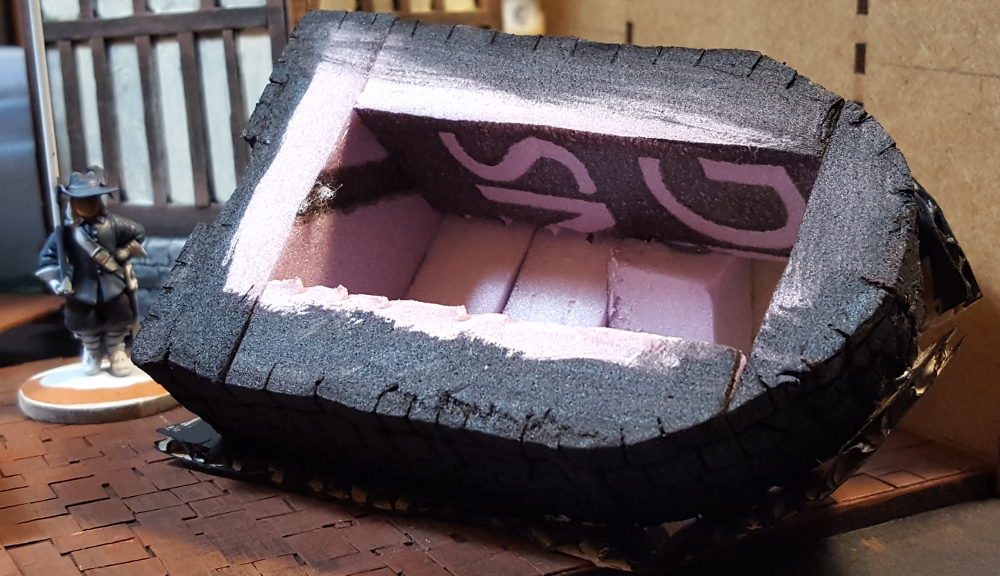
With the farmhouse and dovecote progressing well, I wanted to move on to a few smaller buildings to the mix.
This little stone outbuilding is the first of those. It’s a few random scrap pieces of pink insulation styrofoam, hot glue, and a chunk of corrugated cardboard so far. Footprint is about 2″ wide by 3″ long, and it’s about 2.5″ tall or so.
Stone outbuilding from scrap styrofoam insulation. The roof will get towel over it for thatch. Click for larger.
The four wall pieces were glued together with hot glue and the curve across the back cut after everything was assembled. I didn’t get a photo before I put the cardboard roof on, but there’s another couple of bits of scrap styrofoam under it to reinforce the roof.
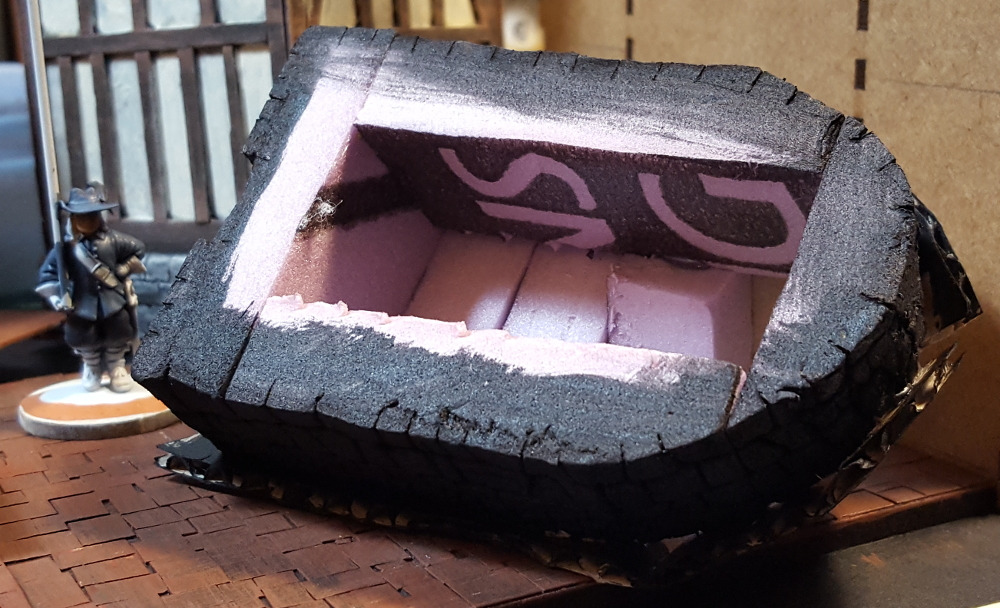
Underside of the stone outbuilding. Four bits of styrofoam for the walls, with the curve of the back wall cut freehand after everything was assembled. Click for larger.
The gap in the front wall will get a door from scrap cardstock after the stonework is all painted up.
This one might be finished tonight, if I get time to glue the towel thatch down and slap a bit of paint around. It’s nice to have some quick little projects sometimes!
I’ve been painting the dovecote and farmhouse together, so rather than separate updates I’ll just do combined “state of the ECW scenery” update today!
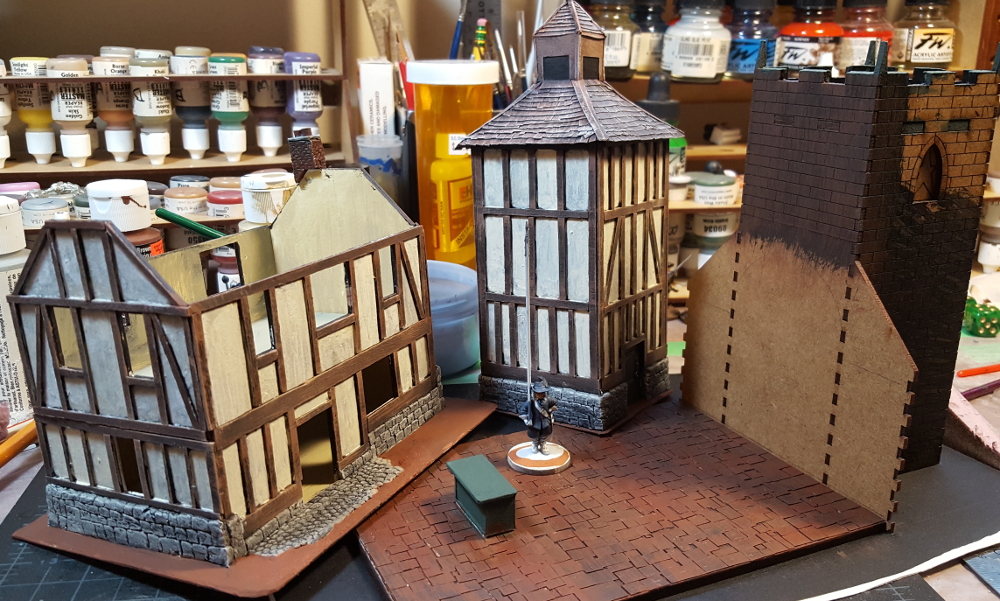
Both buildings have had most of their painting finished, with touchup and work on the bases the main things left to do, along with the roof of the farmhouse.
I’ve also glued the tower section of the Warbases church down to the base, which had already had the floor glued down and cardstock flagstones added earlier. I haven’t posted about the church yet, I’ll do a separate post soon about it, but it’s a nice basic MDF kit that I’m planning on dressing up considerably!
Farmhouse on the left, dovecote centre, and Warbases church on the right and in the foreground. Click for larger.
I’m not entirely happy with the roof and cupola/tower of the dovecote, so might go back and add some more details there, and I think it needs at least one more round of paint to really get the slate tiles (from thin card) looking really good. I’m really pleased with how the rest of both buildings have come together, though, espcially now that they’re painted.
Both buildings got a black undercoat across everything, then the woodwork got a heavy drybrush of very dark brown (brown + black paint mixed), then a lighter drybrush of brown, and finally a very light drybrush of tan mostly on the corners and edges of the bigger beams. The plaster areas between the timber got a brown coat, very thinned, then tan paint, also very thinned, then a final coat of white with a bit of the tan paint mixed in, also very thin. The final colour is a great blotchy not-quite-white that varies between panels.
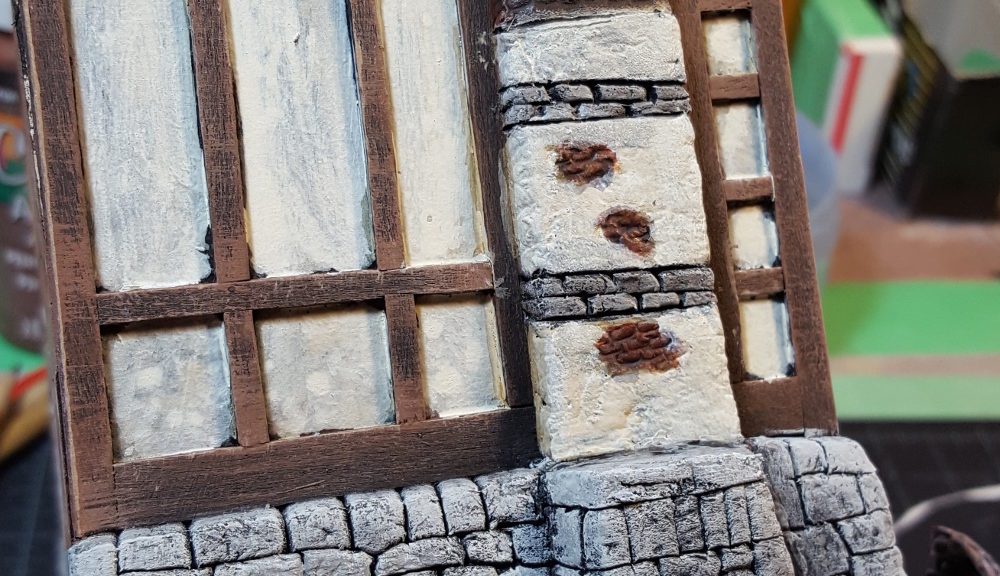
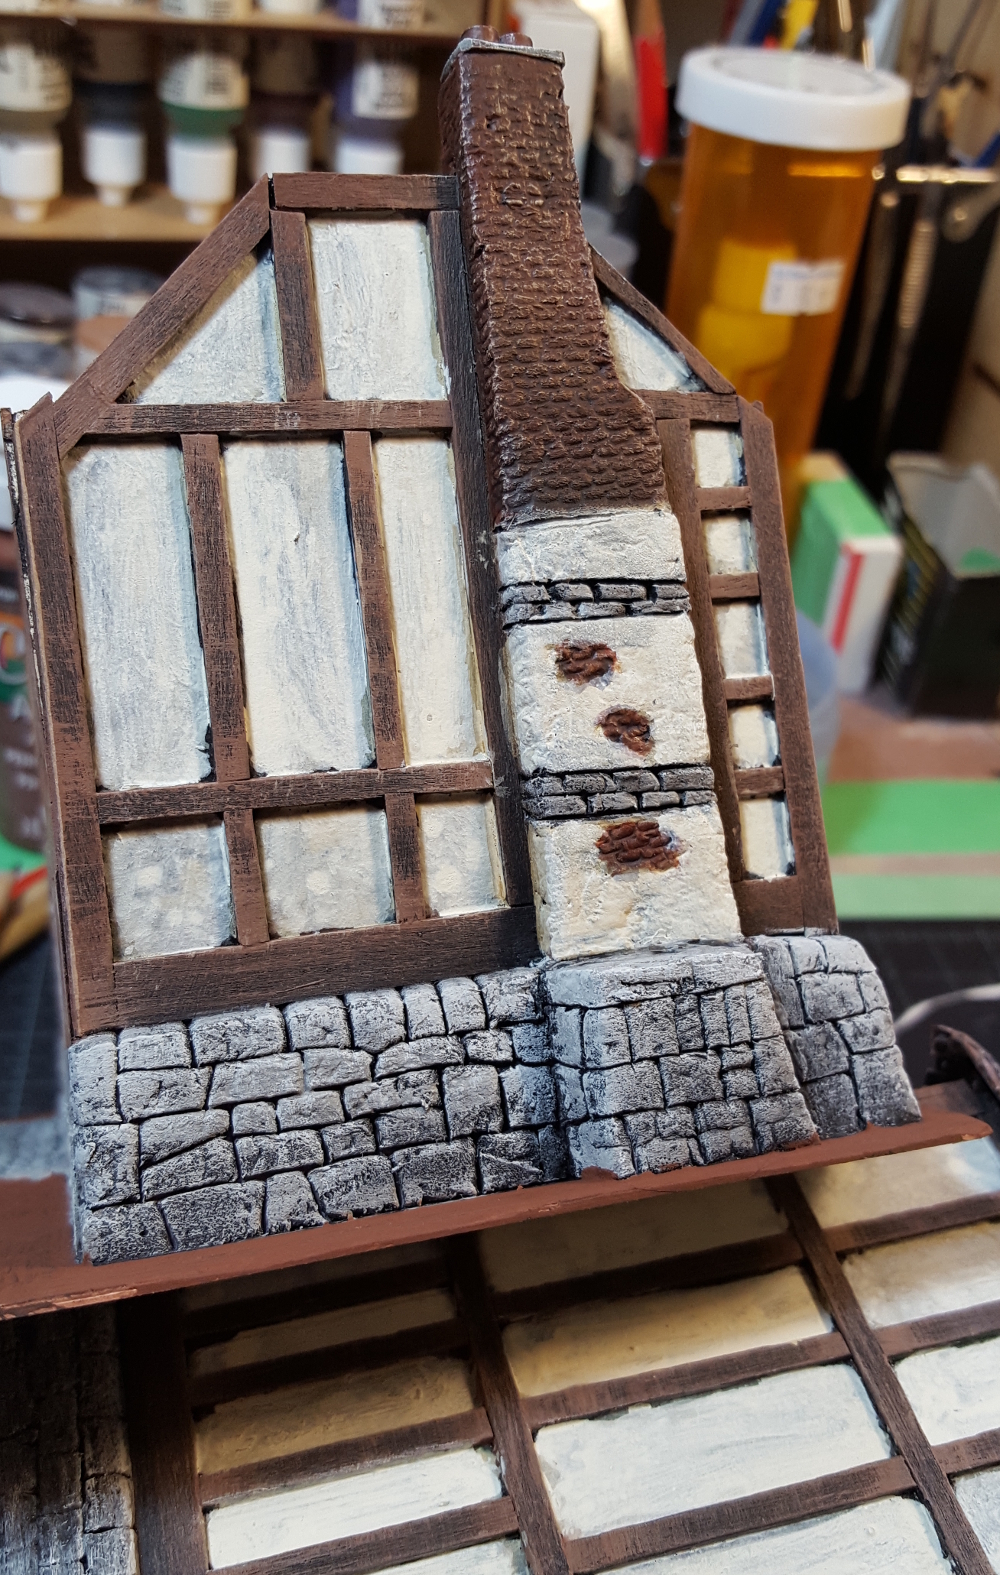
The chimney and end wall of the half-timber farmhouse. Click for larger.
I am really pleased with how the big chimney up the end wall of the farmhouse has turned out. It’s a mix of stone, brick, and plastered areas (some broken with brick showing through) and came out looking great. Paint on the brick is brown base, red oxide, then washes of GW Nuln Oil and Seraphim Sepia, and finally a light drybrush with red oxide and tan. The plaster areas got the same paint mix as the walls.
More soon; I’ll be building a couple of small cottages, hovels, and outbuildings to finish off a bit of a rural hamlet or farm for English Civil War gaming or pulp games set in the English countryside.
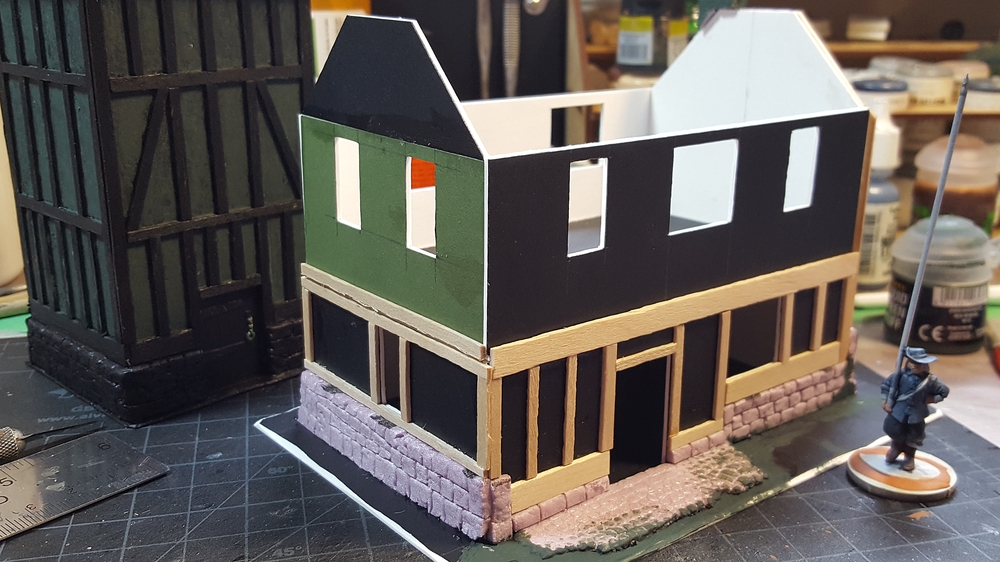
After getting the dovecote constructed (although not yet painted) I decided the next building would be a bit more substantial, and that a farmhouse would be the obvious counterpart to the dovecote.
It’s not quite a manor house, except maybe in some rather backwoods shire, but it’s a substantial two storey building with a big chimney rambling up one end. The main structure is all 1/16th matt board, the stonework is pink styrofoam insulation, and the timbering is thin wooden coffee stir sticks, mostly split lengthwise into thinner pieces.
The dimensions, roughly, are 5″ long, 3″ wide, and about 5″ tall to the top of the chimney, which is about where the roof peak will fall too once that’s done. The walls are 40mm high; the total base is about 7″ long and 5″ wide or so.
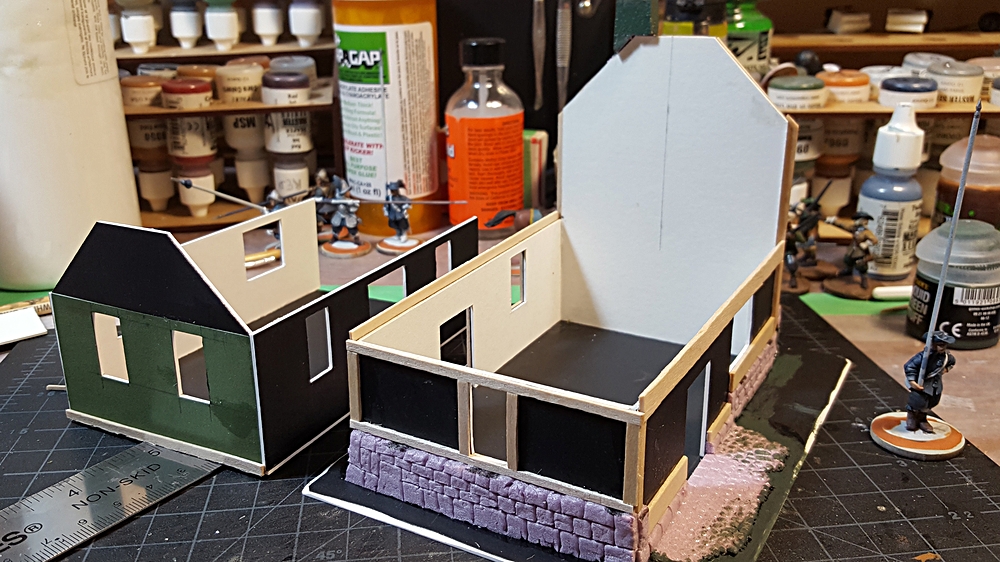
The earliest construction photo I remembered to take. Walls all up, foam stonework in progress, started the half-timbering on the back wall and one long wall. Second floor off to the left. Click for larger.
The other end, early in construction. Stonework in place and half-timbering just begun on the first floor. Click for larger.
For the cobblestone patches outside each door and the bricks up the chimney, I used two different old paintbrushes that I yanked the worn-out bristles from and then re-shaped the metal ferrule with a pair of needle nose pliers and a small file. The smallest brush became the brick press tool, and a slightly larger round one became the cobblestone tool. There’s also a larger rectangular one that doesn’t appear on this project but will at some point in the near future. I’ll get a photo of the press tools for a future post, they’re a great easy way to do bricks, cobbles, and other semi-regular or regular masonry patterns.
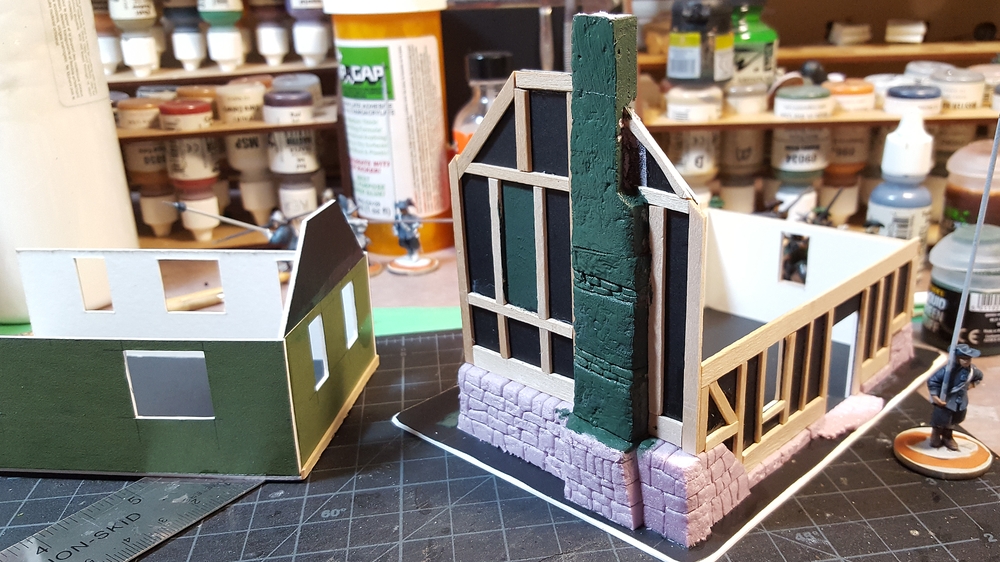
Upper floor in place; it’s basically a three-sided tray held in place by the horizontal half-timbering along the sides. Click for larger.
The second floor is three-sided to make building the big chimney down the back wall easier, rather than splitting the chimney into two or three pieces. The second floor is held in place by the half-timbering horizontal beams along the two long sides of the house, and the beams overlap at the back corners so the join between the floors and walls is nearly invisible when the house is all assembled.
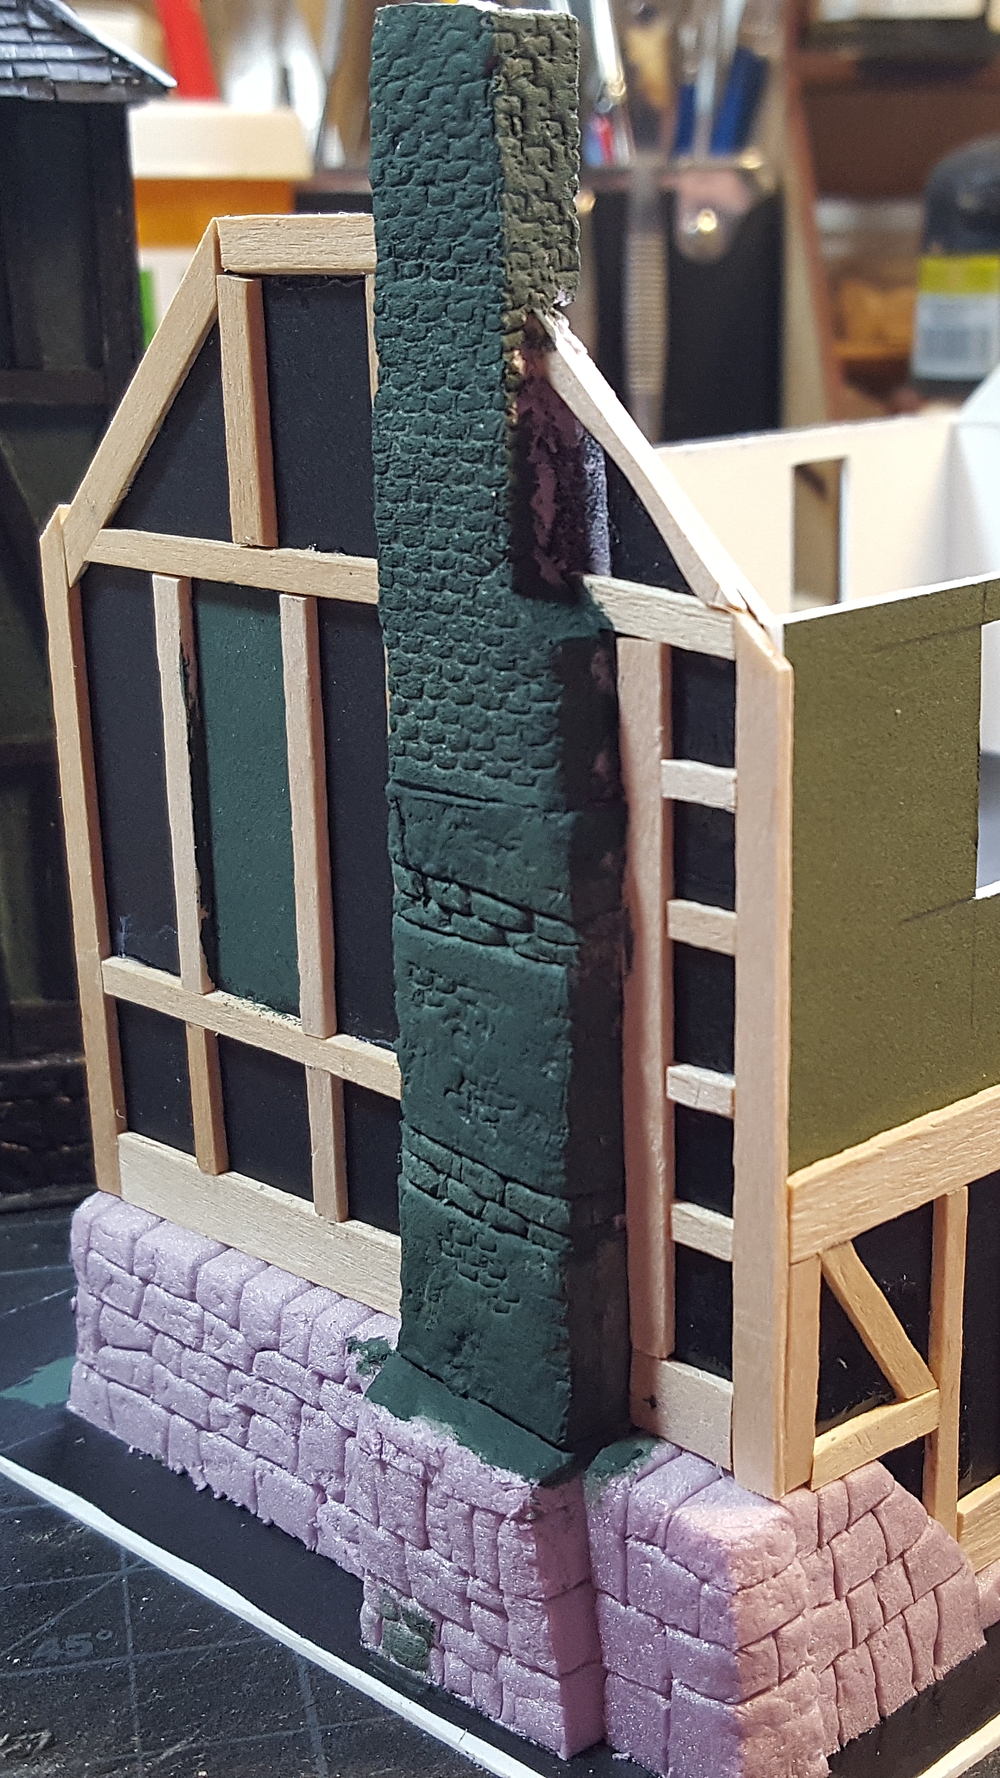
Close up of the end wall, with brick patterning all done on the chimney. The pink foam has been coated in GW Liquid Greenstuff for strength and texture. Click for larger.
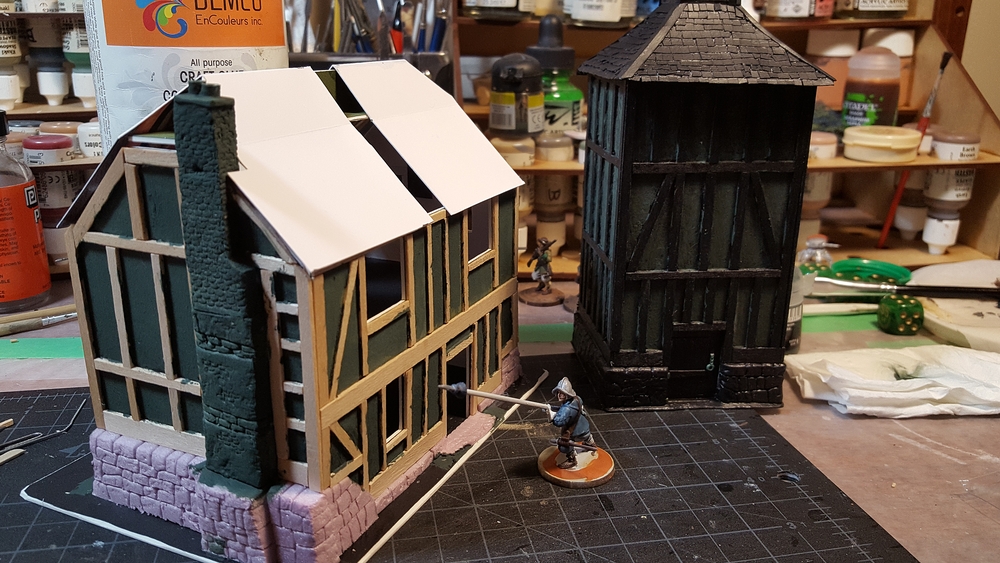
Wider view of the chimney end of the farmhouse, with 28mm Warlord pikeman on a 25mm base for scale. Click for larger.
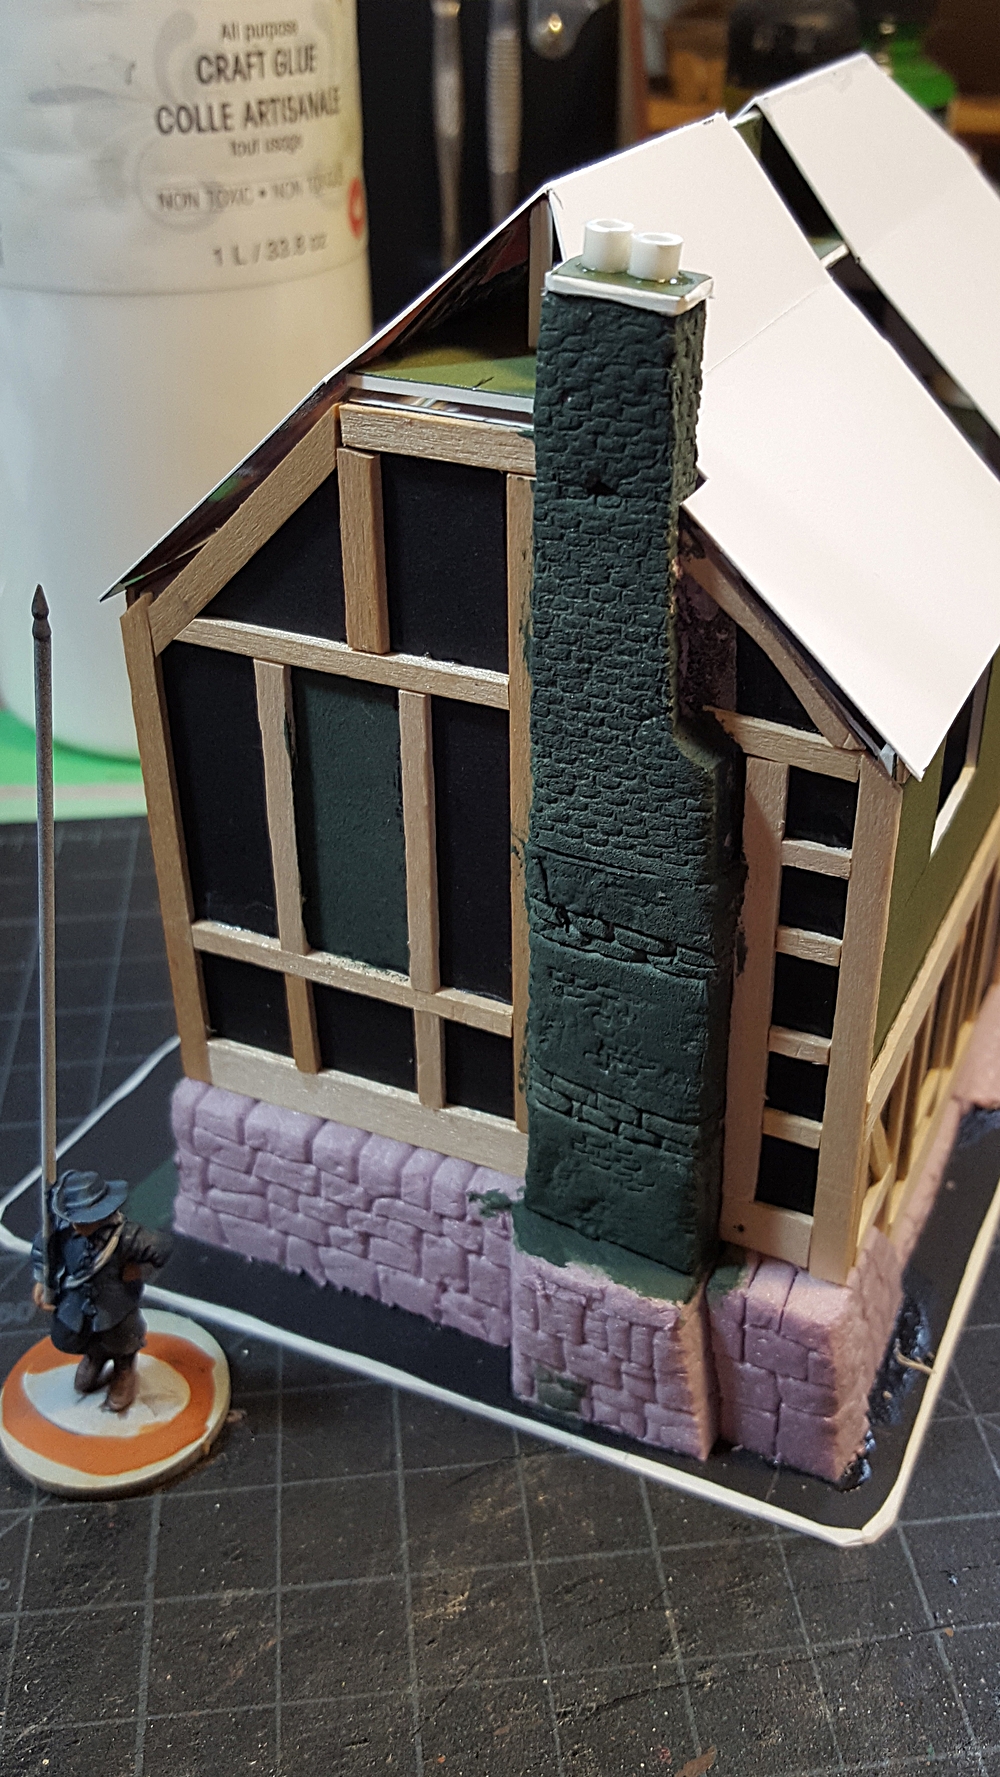
The top cap of the chimney is a scrap of matt board and two little segments of styrene tube, all coated in more GW Liquid Greenstuff for texture.
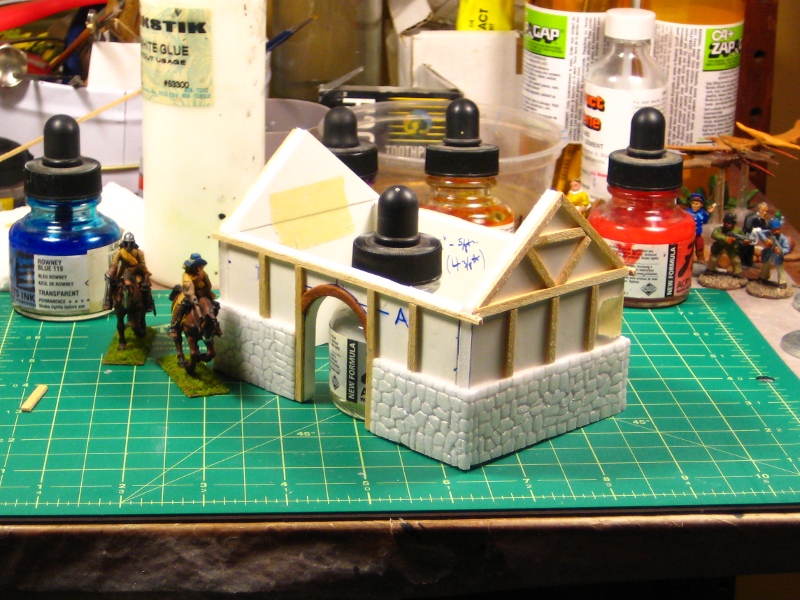
Timbering all complete and roof structure started. Click for larger.
The roof will be thatch, once I get around to picking up another cheap handtowel to chop up for thatching. The understructure is a mix of 1/16th matt board and lighter card, and will all be buried under towel in due course.
In the background of the last photo you can see the current state of the dovecote, all black primered with yet more GW Liquid Greenstuff to add texture to the wattle & daub panels between the timbering.
I’ll probably paint both buildings together, now that they’re both at the primered stage. More on that soon!
When we last saw the dovecote, the halftimber detailing on the walls was done, the roof was just started, and it lacked paint.
Here’s the current state of the beast! Waiting for paint! Click for larger, as usual.
The roof got cardboard tiles to look like slate on both the main roof and the top of the tower. The capping along the ridges on the main roof is strips of light card, while for the tower roof I used greenstuff putty for the ridge caps and the little finial decoration right at the peak.
I also used a bit of greenstuff to add a ring handle to the door, and some details to the hinges.
The whole thing has been primed black, and then the wall panels between the timbers got a coat of GW Liquid Greenstuff to add some extra texture to those areas.
I’ve also started work on a large farmhouse, two stories with a thatch roof planned for it. More photos of that soon, it’s coming along nicely and I suspect I’ll paint both buildings at the same time.
I’ve had people ask about plans for these buildings. I rarely make formal plans for buildings in a way that would be useful to other people, to be honest! For the dovecote I started with the article in WS&S #87 and tweaked things slightly; the farmhouse is entirely out of my head, starting with a basic idea of how large I wanted the building to be (about 5″ by 3″, as it happens) and the basic features I wanted. I have spent some time looking at photos and sketches of the real thing; the post I wrote a few years ago on half-timber architecture in the Internet Archive is still useful, as is Google Image Search for terms like “17th Century English farmhouse” and similar. A lot of buildings like this, especially rural or village buildings, could be pretty wonky and random, so it’s kind of hard to get things wrong! If in doubt, just chuck a coat of plaster over it, like real builders have been known to do!
I’ve been wanting do some more area terrain – mostly flat pieces to serve as rough ground, forested areas, and the like – for a while now. With the move back into ECW skirmish and terrain building for same, I’ve decided to start with a set of low profile stream pieces that can be used on practically any table.
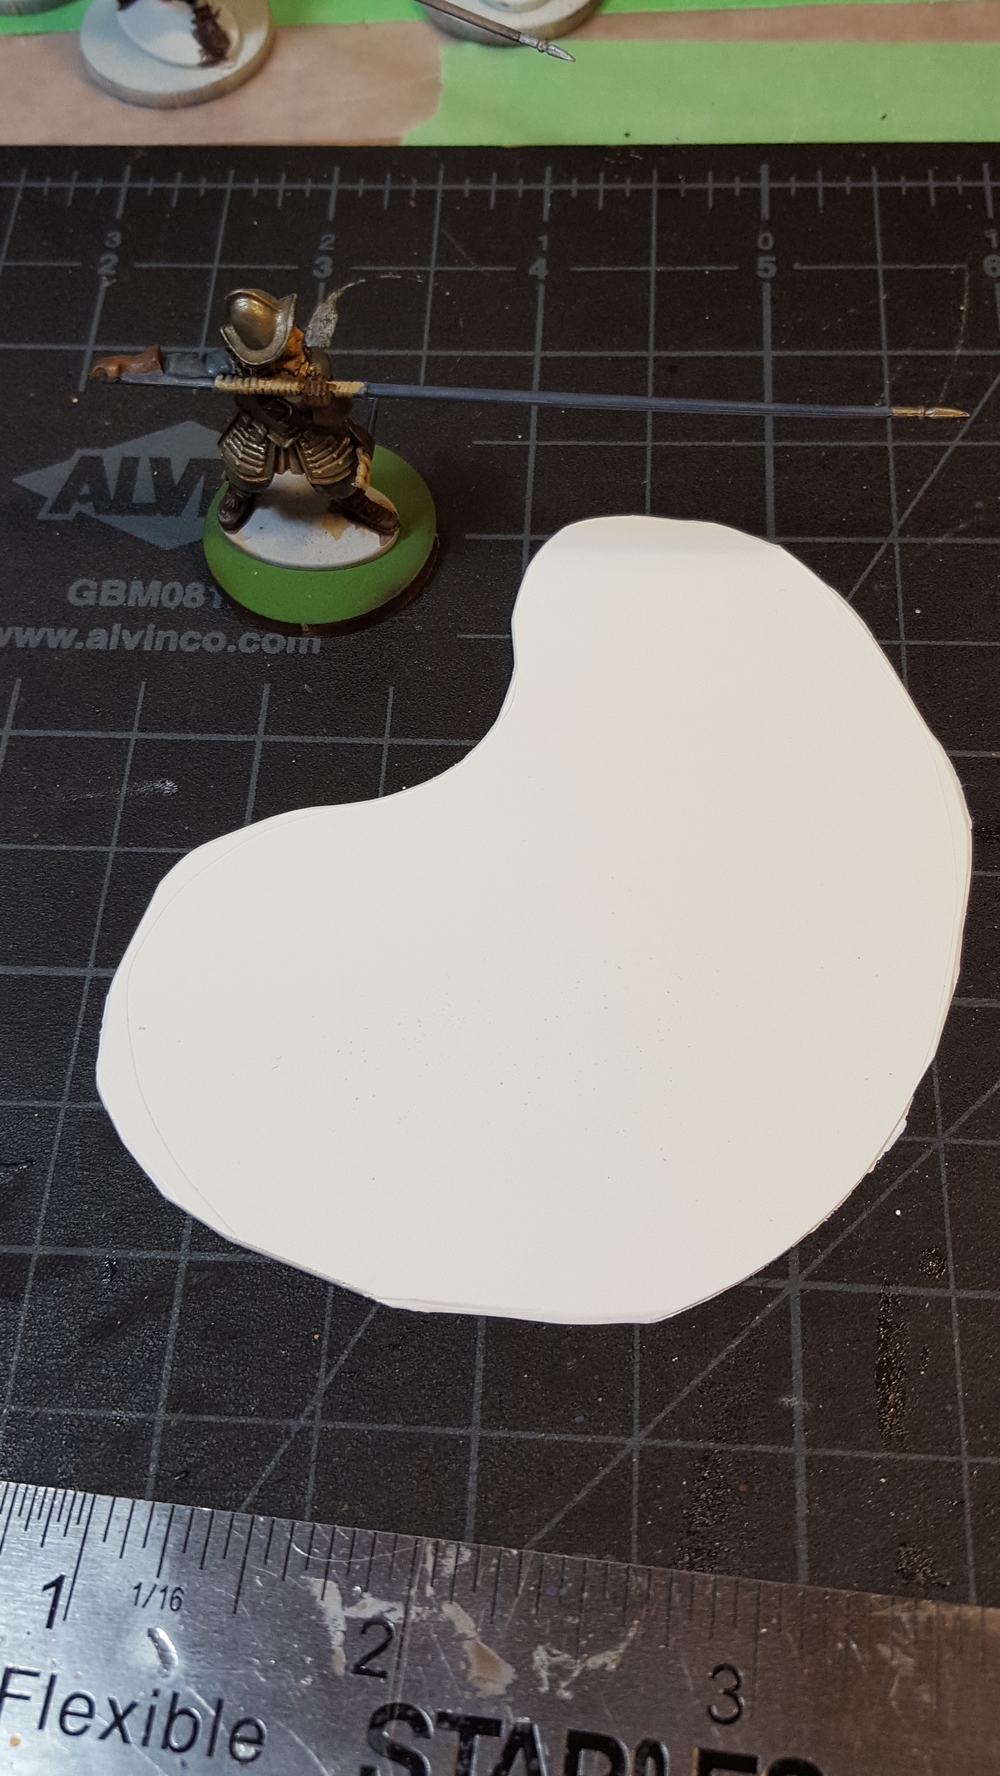
As a test piece, I started with a small duck pond, about 3 inches long and 2 inches wide or so.
I started with an offcut of relatively thick styrene sheet (plasticard) that I think is either .030 or .040. I chopped it to roughly the shape I wanted with an Xacto, then sanded the edges smooth and beveled them slightly.
Styrene base for the pond. 28mm Warlord pikeman on a 25mm base for scale. Click for larger.
Styrene sheet isn’t the cheapest material for terrain making, but it has a number of advantages for this type of terrain. It’s sandable, making it easier to smooth down corners and edges. It’s waterproof, so you can slop paint, water, and glue around with abandon and not worry about ruining your base material. It’s also stronger than similarly thin card and more resistant to warping. I’m using an offcut of Evergreen sheet styrene for this particular pond, but for future use I plan to go down to our local plastic supply place and buy a big 2 foot by 4 foot sheet of .030 or .040 styrene; it’s sold in bulk for signmaking and other applications and it’s much, much cheaper to buy it at that scale than in the little Evergreen or Plasticraft packages at a hobby store!
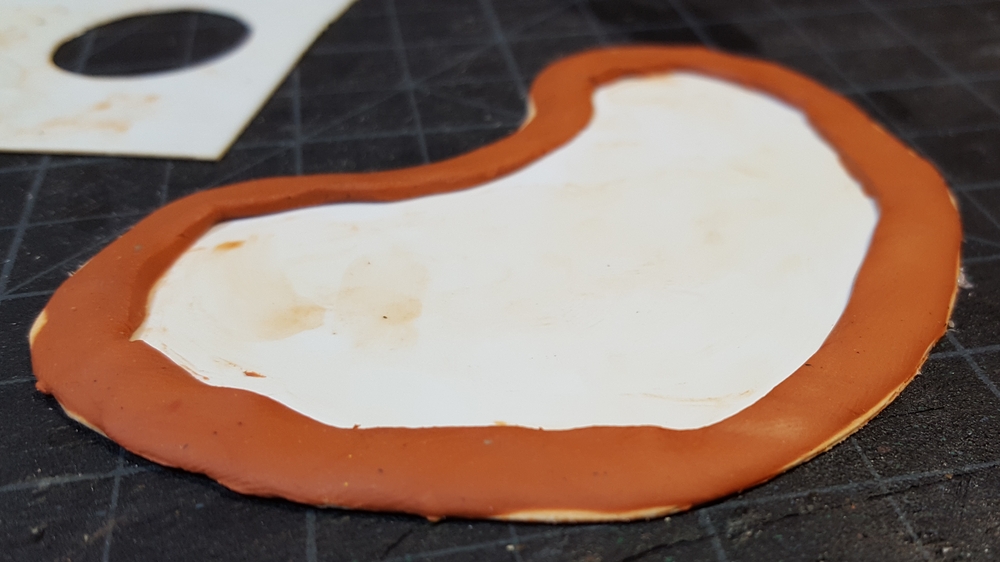
For the shoreline of the pond I used a long thin “snake” of Milliput, rolled out to about 2 or 3mm across. I mashed it down with my fingers, keeping my fingertips damp while working to prevent the Milliput from sticking to my hands. I tapered the outer edge down to the edge of the styrene sheet and kept the inner edge fairly vertical but only a couple of millimetres tall. Pushing your thumbnail up against the inner edge of the Milliput is an easy way to achieve this, although you could use sculpting tools too!
Shoreline in place with Milliput. Click for larger.
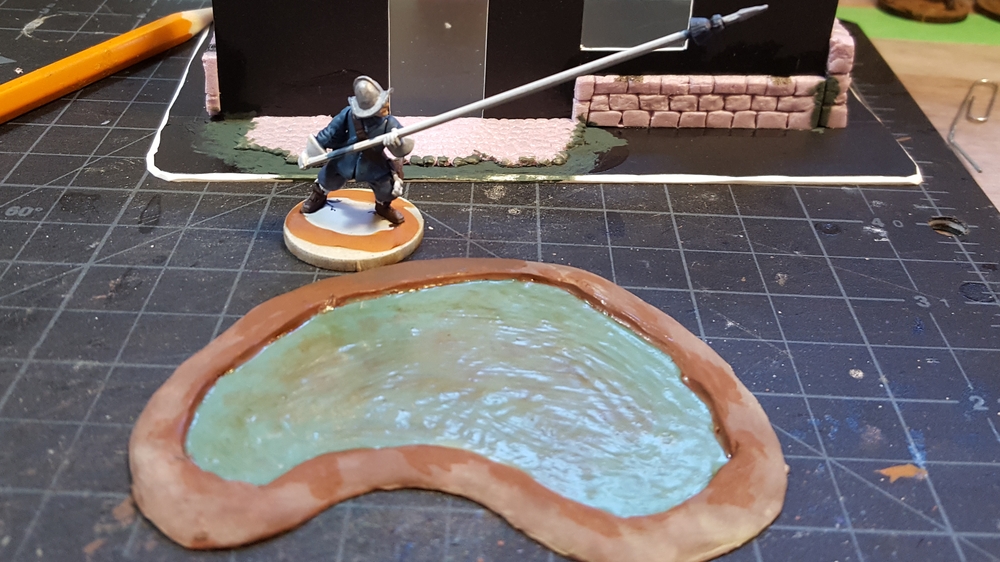
After letting the Milliput dry overnight I painted the whole thing brown. The outer edge got a couple of different shades of brown scrubbed on to look appropriately muddy, and the pond water is a greeny-blue with some brown added to the centre to make it look slightly deeper.
With all the paint thoroughly dry, I added several layers of white glue over the pond to give it the appropriate wet look. You could easily use gloss varnish or even a thin pour of clear or tinted resin here, but the white glue I’ve currently got dries to a high gloss and looks good as water so that’s what I used. I did one coat of white glue mixed with little bit of GW sepia wash to tone down the blue-green paint a bit.
Basic painting done and first layer or two of gloss glue in place. Click for larger.
When layering gloss varnish, glue, resin, or whatever water-representing material you choose, it’s important to let each layer – and any paint that will wind up underneath it – dry completely before adding the next layer! Forgetting this will get you frosting and/or bubbles and other inclusions in your layering and could really screw the look of your water up. Paint that isn’t dry properly can also crack or craze under a sealant layer and really screw things up.
I’ve got a set of 28mm ducks coming from Warbases soon that I’ll be added to this pond for some extra character. I added some flocking and tufts along the banks after the last coat of gloss had dried.
As I mentioned in my last post about the things I brought home from Trumpeter Salute, one of them was a copy of Issue #87 of Wargames, Soldiers, and Strategy, their ECW special. One of the articles in there was by Tony Harwood, also known as Dampfpanzerwagon around the internet, including on the Lead Adventure Forum.
Wanting more buildings suitable for an English Civil War game (and possibly for early 20th C pulp games set in the English countryside!) I decided to build my own version of Tony’s dovecote. It’s a great building for wargaming, having a minimal footprint but nice presence because of it’s height.
My version of Tony’s dovecote has walls 60mm wide and a total footprint, including minimal base, of about 65mm by 65mm. It’s 120mm (12cm) to the tops of the walls. I haven’t actually measured to the top of the roof, but it’s somewhere around 20cm or so total height.
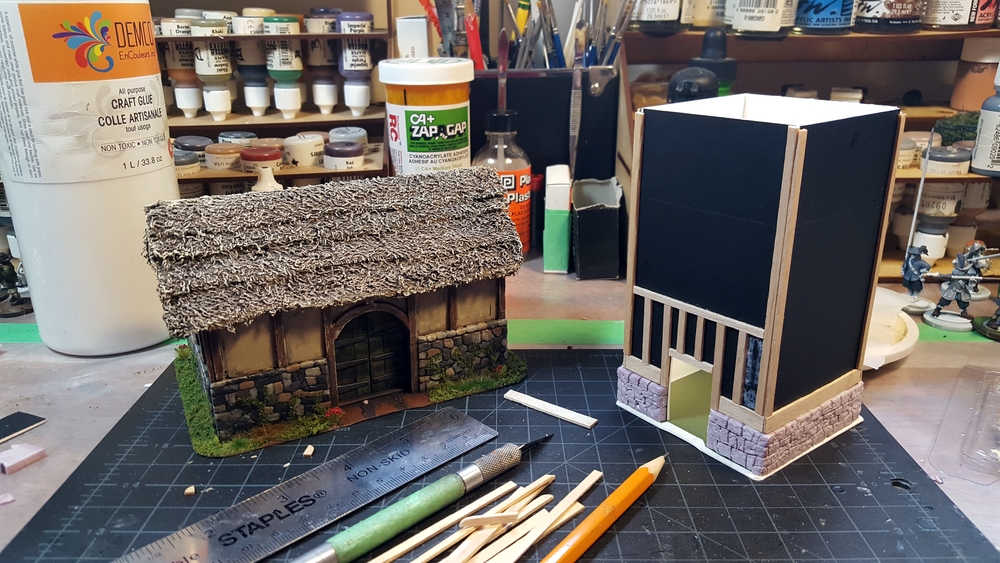
Dovecote started, with the finally-completed barn on the left! Click for larger.
The walls and base are 1/16th” matt board (picture framing card). The stone foundation is thin (about 1/8th” or so) styrofoam insulation, carved with an Xacto blade and pencil. The half-timbering is all wooden coffee stir sticks, most of them split lengthwise to make narrower beams.
The half-timbering took a couple of hours all told, done in bits and pieces in between household chores on a Saturday. Do the big vertical corner beams first, then the horizontals, then the infill verticals or diagonals. The pattern of the half timbering is slightly different on all four walls, which seems pretty typical of this sort of Medieval/Renaissance building!
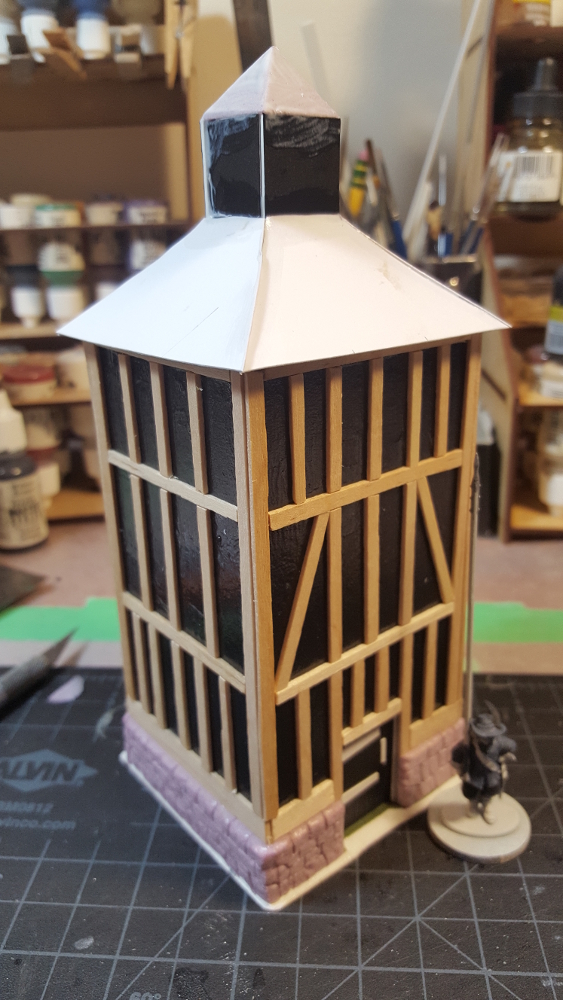
Roof structure installed, half timbering done. Click for larger.
The central “tower” on the roof is more 1/16th matt board, 20mm a side. The sloping pieces of the main roof are lighter card, cut to fit by trial and error. The tower roof is a scrap of styrofoam insulation, cut with a fresh Xacto blade into a four-side pyramid. All eight roof surfaces will get “slate” tiles from medium weight card, and the top of the tower will get some basic detailing from card as well.
For texture in the panels between the timbers, Tony uses air drying clay in his original dovecote. Lacking air drying clay, I’m trying out stippling a fairly heavy coat of white glue over the card. I’ll slap some paint over it soon and see how it looks; the white glue I’m using currently dries very glossy which makes it hard to see how much texture I’m actually getting.
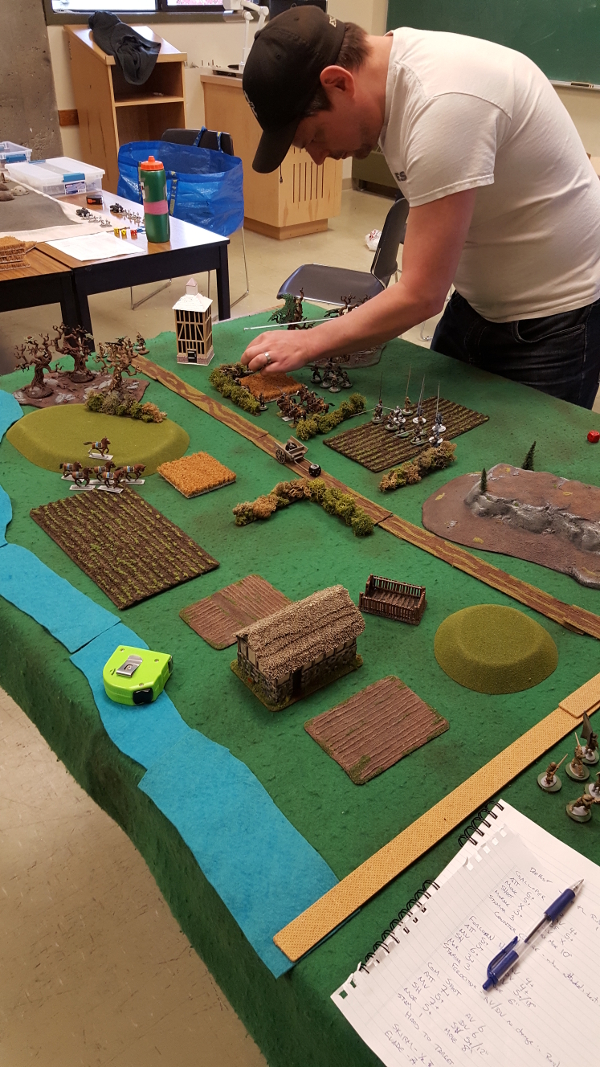
The dovecote at the far end of the table during our first games of Pikeman’s Lament. Good game, look for a proper review here sometime soon! Click for larger.
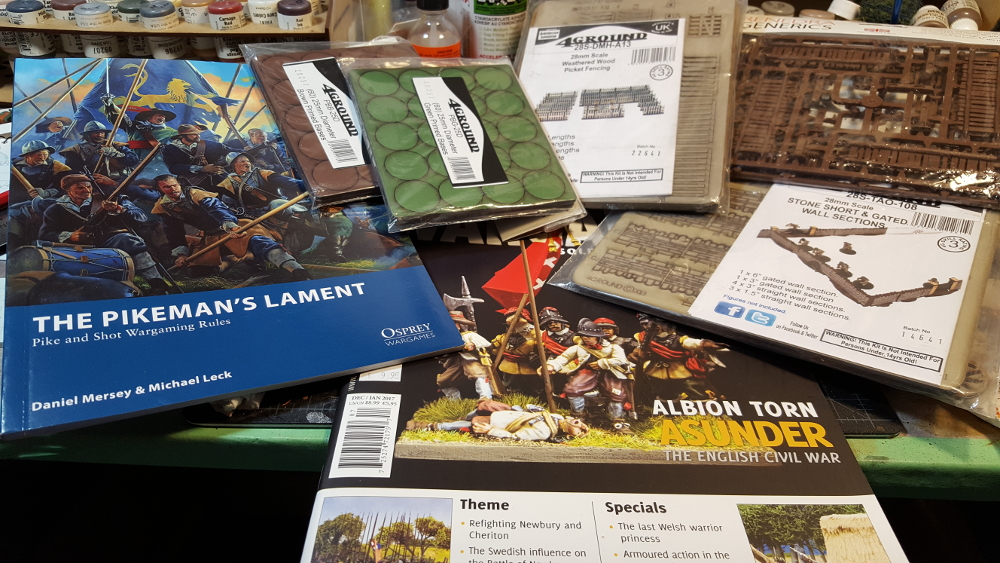
I managed to escape from Trumpeter Salute 2017 at the start of April without buying a single actual figure, but I brought home a batch of scenery bits and pieces and some reading material, at least.
The haul from Trumpeter Salute 2017 all laid out. Click for larger.
It helped my wallet that Bob Murch of Pulp Figures wasn’t there, and neither was Uncle Mike of Uncle Mike’s Worldwide/Strange Aeons. The excellent folks of Imperial Hobbies did help lighten my wallet and bulk up my luggage a bit, at least, although winning a pair of their $20 gift certificates in the very generously supplied door prizes offset the wallet-lightening a good bit!
The centerpiece of my acquisitions are the Pikeman’s Lament rules from Osprey, to finally put my long-neglected English Civil War/Thirty Year’s War figures to use and get them some time on the table! Related to that I snagged Issue #87 of Wargames, Soldiers, and Strategy, their ECW special, which has some great articles including an excellent building how-to by Tony Harwood that I’m going to be doing my own version of sometime soon.
Way back in June of 2011, I started a fairly smallhalf-timber barn for 28mm, for either my ECW/TYW stuff or early 20th C pulp gaming.
I’d gotten most of the painting done on the building six years ago, then moved on to other projects as the 16th C ECW/TYW gaming failed to grab my attention. The barn has floated around the edges of my painting bench, almost but not quite finished, ever since.
Earlier this week I was off sick and needed something sedentary and easy to do, so I pulled the barn out and started adding doors, some final paint touchups, and flocking and terrain around the outside of the walls. I’d originally planned, long ago, to do hinged arched doors on the big front doorway of the barn, but decided that six years of not figuring out how to do that in a wargamer-proof way was long enough and have gone with simple closed doors across the back of the arch!
Here’s what it looked like back in June 2011: A stone-and-halftimber barn, work in progress. Click, as usual, for larger.
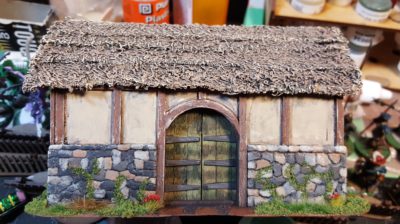
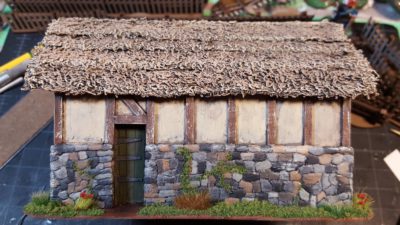
Here, all finished and detailed, is the barn in April 2017!
Barn, front view. Click for larger.
Barn, back wall. Click for larger.
Barn from the front left corner. Click for larger.
The big front door is wooden coffee stir stick planks over an offcut of picture framing card (matt board), cut to size, and then roughed up with sandpaper, an Xacto knife, and a razor saw. The back door is just card, with planks scored into it with the back of an Xacto knife. The hinges on both are scraps of light card painted with Tarnished Steel. Both doors got all-over washes with several different colours of wash, including green on the front door to stain the wood.
The roof is towel thatch (this was the first thatch building I’d ever done!) with thin foam for the stonework on the bottom half of the walls. The greenery is a mix from all over, including the nice red flowers from Rain City Hobbies over in Vancouver.
For more details on building the barn, check the two 2011 articles I linked to right up in the first paragraph of this post, there’s lots of detail there.
Nice to finally get this building done and dusted after nearly six years of three-quarters finished limbo! Now I need to consider other buildings for an English Civil War or Thirty Years War hamlet… some cottages, maybe a version of the interesting dove cote seen in the ECW edition of WS&S I picked up at Trumpeter Salute. We shall see!
The English Civil War has become a definite back-burner project around here, but it is still around, along with ambitions to make some more Western European/British buildings and other scenery for dual use in both ECW and pulp gaming. Dark deeds in the pastoral countryside, that sort of thing, whether it’s with horse and musket or Mauser and sporty roadster!
It turns out that the ever-valuable Internet Archive (previously here on the Warbard) is stuffed with old books on English traditional architecture and buildings. Here’s a fairly random sampling of ones that caught my eye as being useful for inspiring suitable wargaming terrain.
Finally, you can find many more books in this vein by searching the Internet Archive’s Texts collection for Architecture, Domestic — England.
The Shire Publications book Discovering Timber-Framed Buildings is one I’ve seen recommended several places. As usual, check the various other recommendations Amazon and other customers make, good stuff there too. Shire do a whole series of inexpensive English history books that look very useful for those of us who aren’t in the UK but want some inspiration and authentic local details.
Inspired and begun by a thread over on Frothers Unite, of all places.