Ordered a few things from the excellent and varied ranges of Bad Squiddo Games back in March; things took longer to get from the UK to here than I’m used to, almost like some major world event is disrupting trans-Atlantic flights or something. However, everything was dispatched from the UK in good time and I am certainly not going to blame Anne of Bad Squiddo or the various postal services involved for a lack of air mail capacity…
I got a fairly mixed bag of stuff. A few ladies that will probably show up mostly as players or civilians in my English Civil War/Weird ECW games, a fine herd of pigs and some farm scenery, a bunch of cats, and some small scenery to add detail here and there, including a whole lot of mushrooms and toadstools for suitably creepy weird fantasy/horror forest bits.
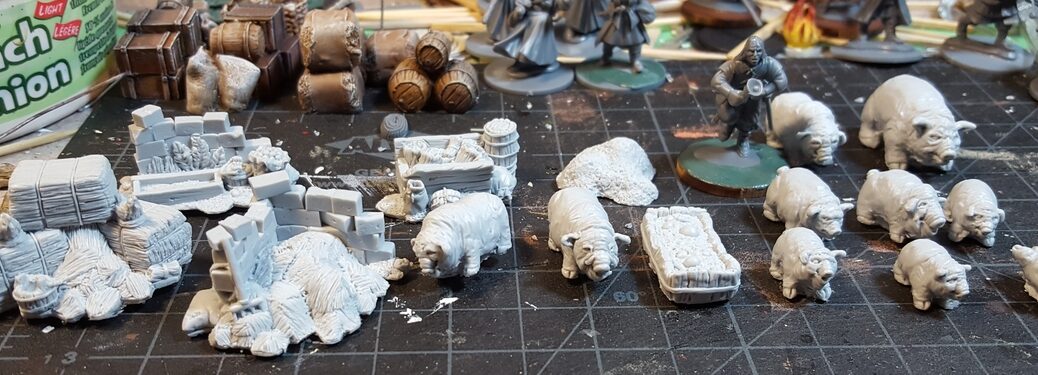
Most of the Bad Squiddo haul all laid out. Clockwise from lower left: mushrooms/toadstools, candles, several female characters, cats, fish seller w/ cats, skoggskattar, and finally in front centre a batch of food. Click for larger.Skoggskattar – giant Scandinavian cats. Compare to the 28mm Warlord guy jogging past them on the right right there. Click for larger.
Everything is really cleanly cast and beautifully sculpted. The scenics are mostly by the very talented Ristul and in an interesting slightly flexible grey resin; the white metal sculpts are by a variety of sculptors and all really well done.
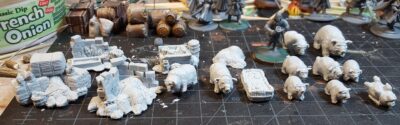
Not pictured above is the pigs, my favourite single part of this purchase. I indulged in the Pigtopia bundle deal which got me ten pigs and six bits of pigsty/farm scenery. I’ve already painted the pigs up, basing them in small groups on 40mm bases.
Bad Squiddo pigs! Ten pigs, six pieces of pig-related scenery. Click for larger.
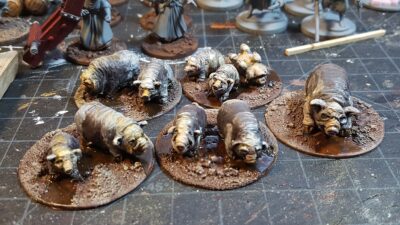
I painted the pigs up to vaguely resemble one of the oldest heritage breeds of pig in the UK, a black-and-white breed that I now can’t find or remember the name of. Anyway, they painted up nicely and I look forward to watching them chase players around the table or be part of someone’s provisions on the hoof in a scenario.
Pigs all painted up, all on 40mm bases. Just a bit of greenery to add and they’re all done. Click for larger.
Most of the painting is finished on the various Reaper dogs last seen a few weeks ago, and they’ve painted up so nicely I’m going to show them off before they’re entirely finished, which I do not usually do.
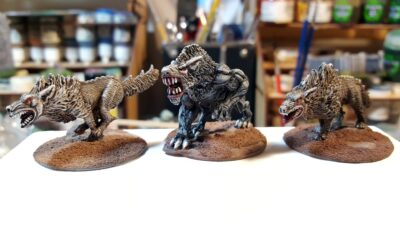
Centre is Reaper’s Moorhound; flanking him are Reaper Hellhounds. Click for larger.
The Moorhound got a black basecoat; the other four got a dark brown basecoat. No particular reason, honestly. Most of the texture was brought out by simple drybrushing in a variety of off-white shades, then some highlights all the way up to pure white, and some selective shading with washes. I pushed the contrast more than I usually do and I think it works really well for these otherwordly demon-dogs.
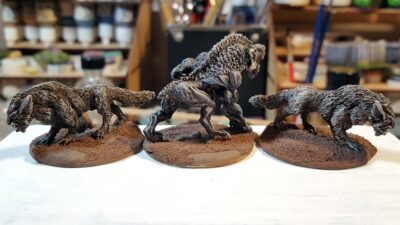
Back view of the Moorhound, flanked by two Reaper Goblin Wolves. Click for larger.
The bases all five dogs are on are 40mm rounds built up from sheet styrene and putty; I’ll get flock and tufts on them in the next couple of days. Then I need to figure out stats for these in Pulp Alley 2nd Edition and unleash them upon our tables!
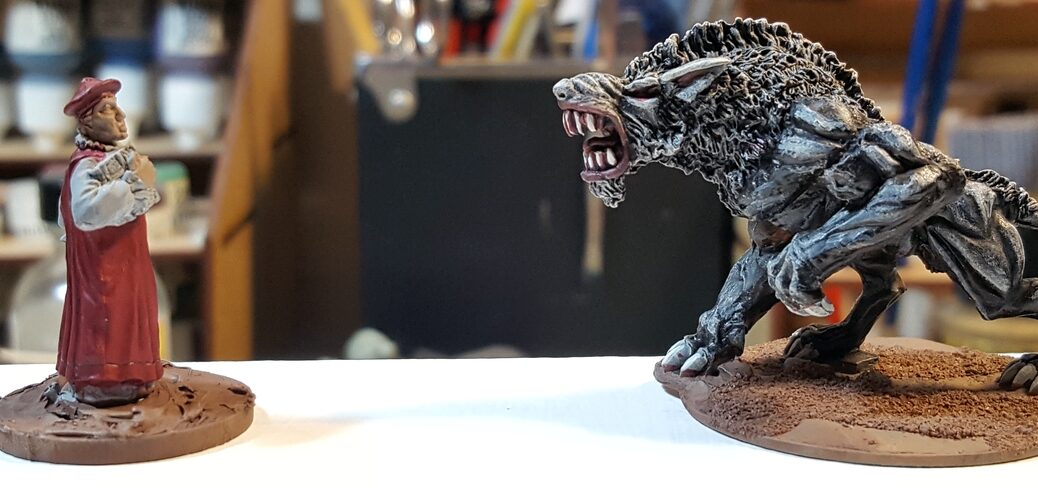
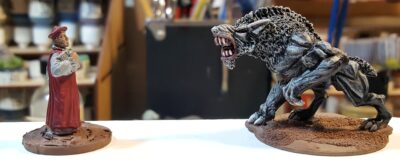
A Warlord 28mm priest faces down a Reaper Moor Hound. Click for larger.
I picked up a few things from Fenris Games back in June or July, and the first pieces are finally getting completed and onto the gaming table!
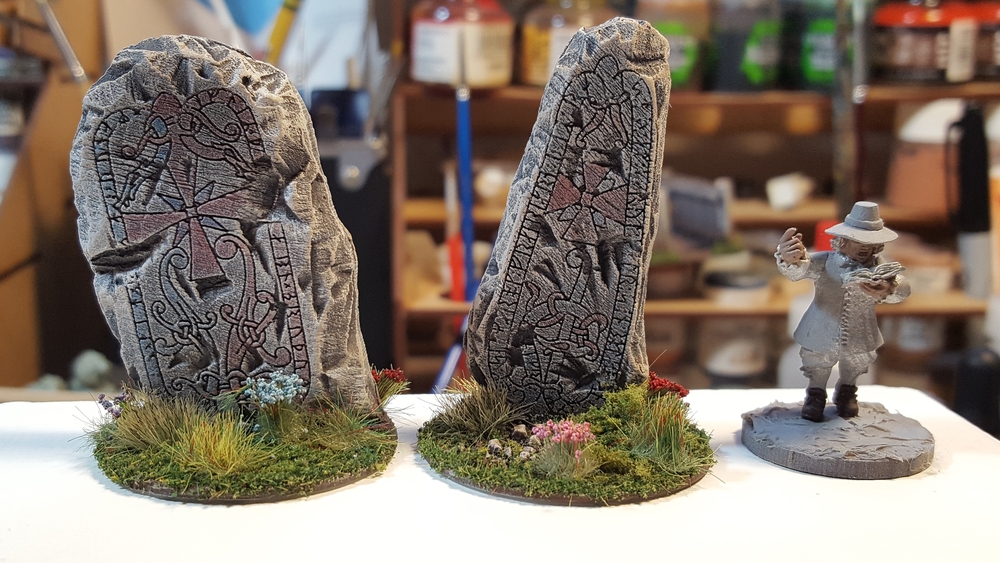
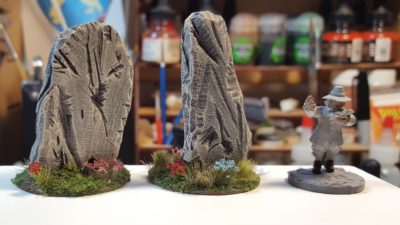
Two Viking Runestones from Fenris Games. Click for larger.
These are “Viking Runestones 2” from Fenris, cast in pale grey resin. Each is about 2″ tall. The carved runes on the front are very finely detailed; I wouldn’t be surprised if they had been laser engraved on something (thin acrylic?) and that was then embedded in putty or something to make up the rest of the stone.
Runestones, rear view. 28mm Warlord ECW figure for scale. Click for larger.
I’ve got a few other bits and pieces from Fenris in progress. All of their stuff is really high quality, their range is huge, and shipping was fast. Highly recommended!
Every culture has dog/wolf demon things in their folklore. The UK is thick with them, it seems like every county has three or four varieties, and they show up everywhere else in Europe too. Usually huge, black, red-eyed, and inclined to eat people by dark of night or just bay (they never merely bark) threateningly on dark and misty nights.
With that in mind, adding some demonic dog-creatures to my “Weird ECW” skirmish seemed like a natural thing to do. Fortunately, Reaper Miniatures has a whole selection of suitable figures, so I sent some money to those nice folks in Texas and got a good selection of things back, of which this pack of extremely bad dogs is just the first part to be seen here!
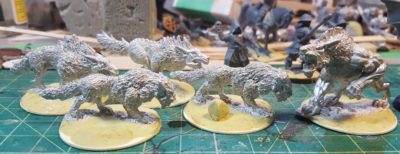
Five extremely bad dogs. See text for details, and click for larger.
The two left-hand figures are Hellhounds, the two slightly smaller beasts in the middle are Goblin Wolves, and the really, really big doggie on the far right there is Moor Hound.
They’re all on 40mm wide bases, just for scale, and the grey figure in the background is 28mm Warlord plastic.
Looking forward to getting these guys painted up and figuring out stats for them in Pulp Alley and the other rules sets we use! Somewhere in my mountain of unpainted figures I have at least one other big dog figure (a Reaper Warg, I think) that I can add to this pack when I find it.
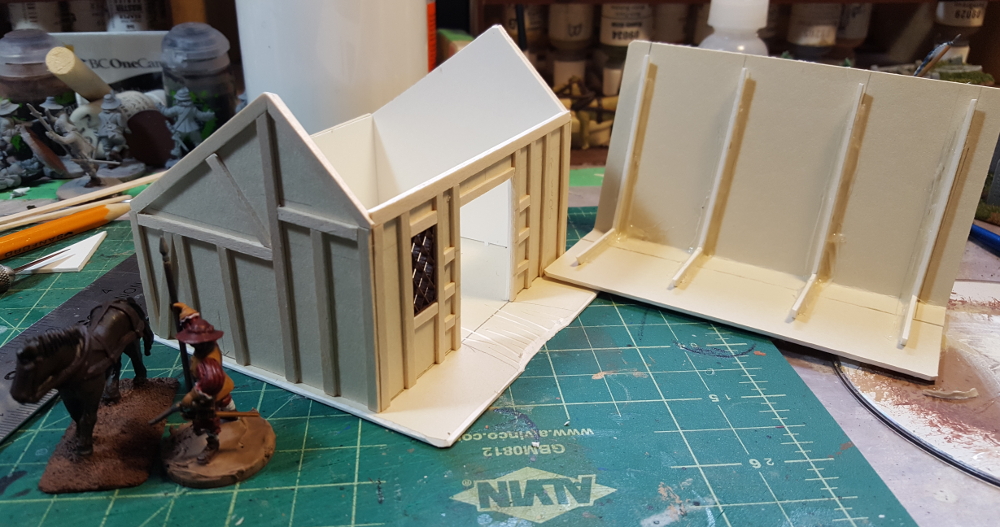
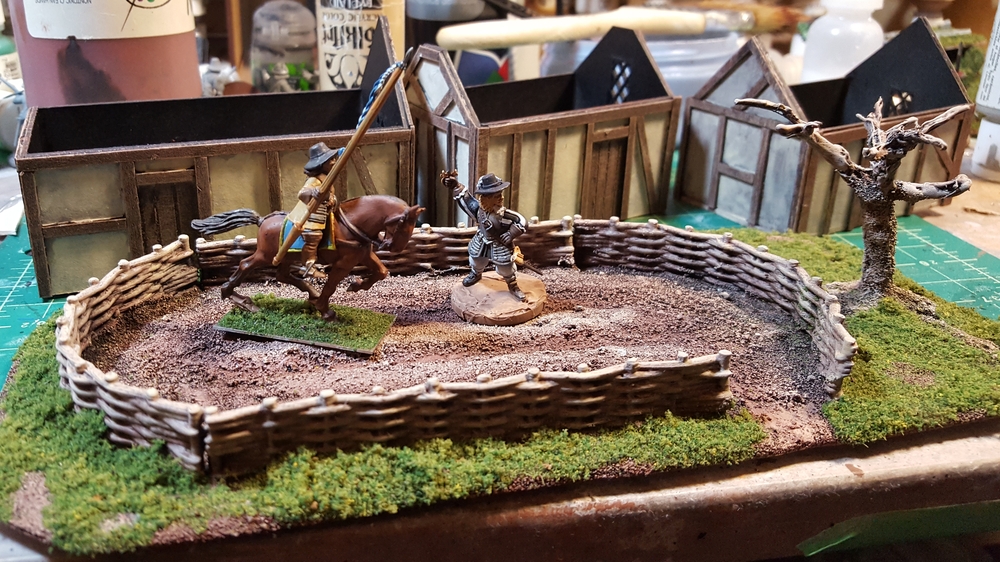
After finishing the three little cottages on Saturday, I decided to do something slightly different on Sunday and made a building that could serve as a stable or other outbuilding for a manor farm on my ECW/English pulp tables.
It’s 3″ deep and 4″ wide, so actually larger in footprint than the little hovels. Horse need their space, tenant farmers not so much! Same construction, 1/16th mattboard (picture framing card) with wooden coffee stir sticks for the timbering. The roof is assymetric, with the peak closer to the front of the building instead of down the centreline, for no other reason than it looked more interesting and on a gaming table, people spend a lot of time looking down at rooftops!
Stable “blank” assembled, with window and horse both from Warbases. Click for larger.
A roof with a pitch like this should probably be shakes or slate or something, because a steep pitch is part of what helps keep a thatch roof watertight, but towel thatch is a heck of a lot faster to assemble than a shingled roof, even with Warbases’ nifty lasercut tile cards available! Perhaps I’ll go back and rebuild this roof with tile card in the future, when I’m not under a pre-convention time crunch… but don’t hold your breath!
All the half-timbering complete and unthatched roof in place. Click for larger.
Roof off, showing the card “beams” to give it some strength. Click for larger.
Towel thatch in place, including an extra strip across the top ridge. Paint to follow! Click for larger.
I’ll add open doors on the big doorway on the front; the doors are built but not installed yet. I might whip up a couple of horse stall walls to put in the interior, but honestly that seems like a post-Trumpeter addition to me…
With the clock running on toward Trumpeter Salute 2018, I need to get serious about producing the new scenery the linked pair of games I’m running there need!
I’ve got more than enough hedges, dirt roads, and other greenery bits from previous scenery projects, but the farmhouse/manor, dovecote, and barn I’ve built previously need more buildings to hit the table along with them if I want to do a 17th Century English hamlet up properly.
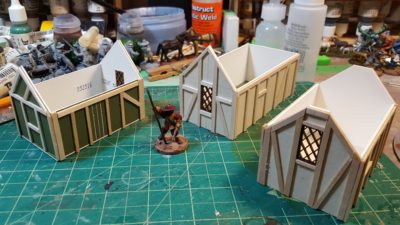
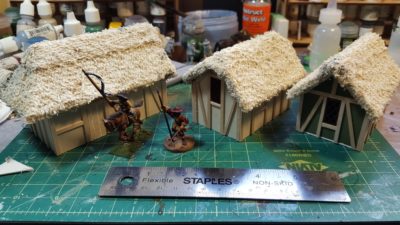
This weekend I sat down and cranked out a trio of little (tiny, really!) thatched and half-timbered cottages or hovels, along with a pair of fenced gardens.
Three cottages underway. 28mm Warlord officer on a 25mm base for scale. Click for larger.
These are simple little buildings of 1/16th” mattboard with half-timbering from wooden coffee stirrers and thatch from towel. The windows are lasercut from Warbases in the UK. For a bit more bulk the roofs have a substructure of corrugated cardboard with the towel hot-glued to that and then further stiffened with white glue. All three roofs are removable.
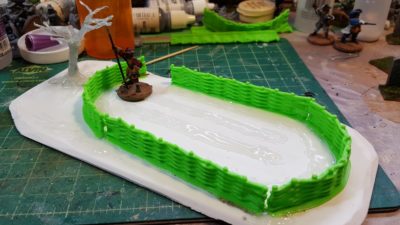
Large fenced garden with a tree. 28mm Warlord officer on 25mm base for scale. Click for larger.
The tree has a core of paperclip wire, bulked out with soft iron craft wire, then covered in hot glue to fill in between the wires. The garden beds are also just hot glue “sculpted” into place with the hot tip of the glue gun.
Painted cottages and painted and flocked garden. Click for larger.
I’ve also done a second garden piece, slightly smaller, but haven’t gotten a photo of it yet. The cottage roofs need one more drybrush to really pop the thatch texture, but the cottages themselves are all done, and the gardens are fully painted and flocked outside the fence. The tree needs some foliage, and the gardens inside the fences need greenery and detail, but not bad for part of a weekend’s focused effort!
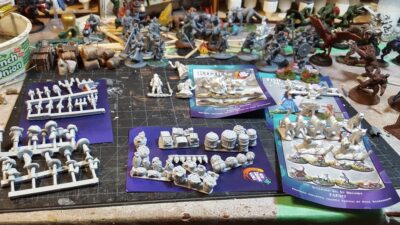
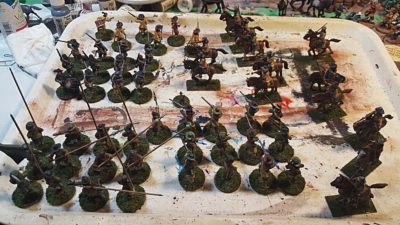
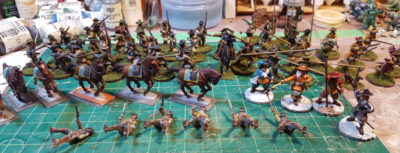
Not the greatest photographs going, but so far the only ones I’ve gotten of all of my recently completed 28mm ECW figures all together!
Every figure finished recently! See text for details, and click for larger.
Starting top left, the dark yellow coats belong to six firelock musketeers (in Pikeman’s Lament terms, either a Forlorn Hope or Commanded Shot). Clockwise we have two troops of regular horse, six per troop. One unit is brand-new and the other had most of it’s painting done years ago but have been touched up and re-based just recently. Somewhere in amongst the other horsemen is the mounted commander as well, finally finished and based.
The bottom centre infantry unit is a dozen muskets in green, then a dozen pike in green, and finally a dozen muskets in blue. There’s a couple of extra officer/sergeant figures in there as well.
The only unit not on the tray in the photo above is the twelve pike in blue I finished back in July 2017.
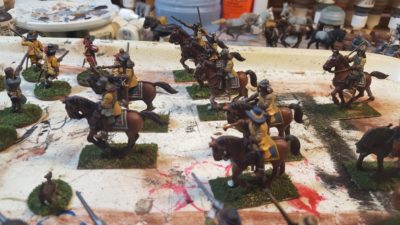
The new horse, with blue and white horse blankets, as well as some of the older horse with blue and yellow on the horses. Click for larger.
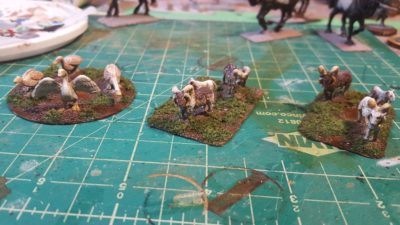
Finally, for fun and extra colour, I’ve been painting up the farm animals I got from Warbases early in 2017.
Geese and sheep, all from Warbases. See text for details, click for larger.
The geese are on a 40mm round styrene base, while the two sets of sheep are on roughly rectangular bases about 1″x2″. They’ll mostly be just scenery, or objectives in games that need loot tokens, but I’m also planning on using the flock of geese as a hazard in games of Pulp Alley, because big geese can be scary psycho critters!
Still in progress on the farm animal side are five or six ducks to go in and around the ponds I made in 2017, two big cart horses, and a couple of goats. I’ll probably get a few more animals on my next Warbases order, they’re fun to paint and provide great extra detail and colour on the tabletop.
On the ECW figure side of things the first six cuirassier heavy horse are in progress, and I’ll be doing up at least one more unit of firelock muskets. There’s also six officer/sergeant/character figures in progress – more on them in another post!
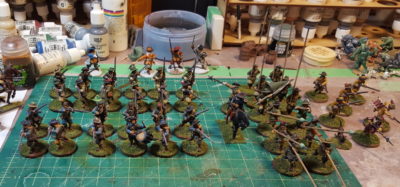
After months of doing absolutely zilch on the gaming front I saw the year out in some style, at least, with a whole bunch of English Civil War 28mm figures pushed through from “almost done” to actually finished in my time off between Christmas and New Years.
Two units of musket, one of pike, one of firelocks, all DONE! Click for larger, see text for details.
This means that all of the regular soldier figures seen on the workbench back in June are now finished and ready to game with, just the four officer/character figures seen there still to finish off.
The cavalry on the table now include five figures that I “finished” for the Lead Painter’s League way, way back in early 2011 (!) that have sat around ever since. I had thought these ECW figures had sat around for four or five years, but apparently it’s been more like seven. Yikes. “Finished” is in scare quotes in here because I was never happy with some of the details and finish on the riders, having put most of the effort in the horses. They’re back on the painting table for touchups, as are the other seven cavalry figures from that box of 12, and the first six heavy Cuirassiers for extra cavalry punch.
Cavalry of various flavours in various stages of completion, and the four officer figures. Click for larger.
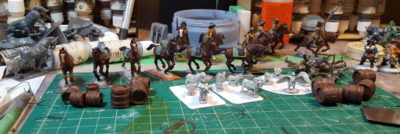
Finally, I pulled out a bunch of farm animals from my Warbases order of early 2017 and cleaned up and based six sheep, two cart horses, and a flock of geese, just for fun and extra flavour in games. They can act as loot markers in Pikeman’s Lament, just as scenery, or (especially the geese, geese are evil!) as unique hazards in Pulp Alley games!
Cavalry, sheep, geese, and some barrels. The unpainted horse on the far left are for the cuirassiers. Click for larger.
Looking forward to a bit more gaming in 2018 than 2017 had to offer, including more Infinity and some games at Trumpeter Salute 2018 in a few months!
I’m fairly sure the last time I touched a paintbrush was back in July. Maybe August. As posts here will show, all wargaming activity of any sort coasted to a stop sometime in the first week or so of September, mostly due to a brain- and free-time-destroying family health crisis and associated astronomical levels of stress.
Most of that is sorted and past now, thankfully, and I did some fun non-wargaming creative stuff before Christmas so I’m finally sitting back down at the painting desk and getting stuff moving again.
I’ve committed to running at least two games at Trumpeter Salute 2018, as I mentioned last post, so I need a bunch of my ongoing English Civil War figures and scenery done by March. To that end, I’ve started cranking through the long-neglected ECW figures, most of the plastic Warlord figures.
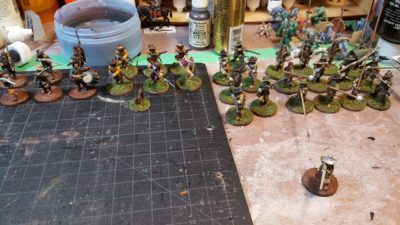
I finished the last details and added flocking to a unit of six firelock musketeers, half a unit of regular musketeers, a full unit of a dozen pike, and a dog.
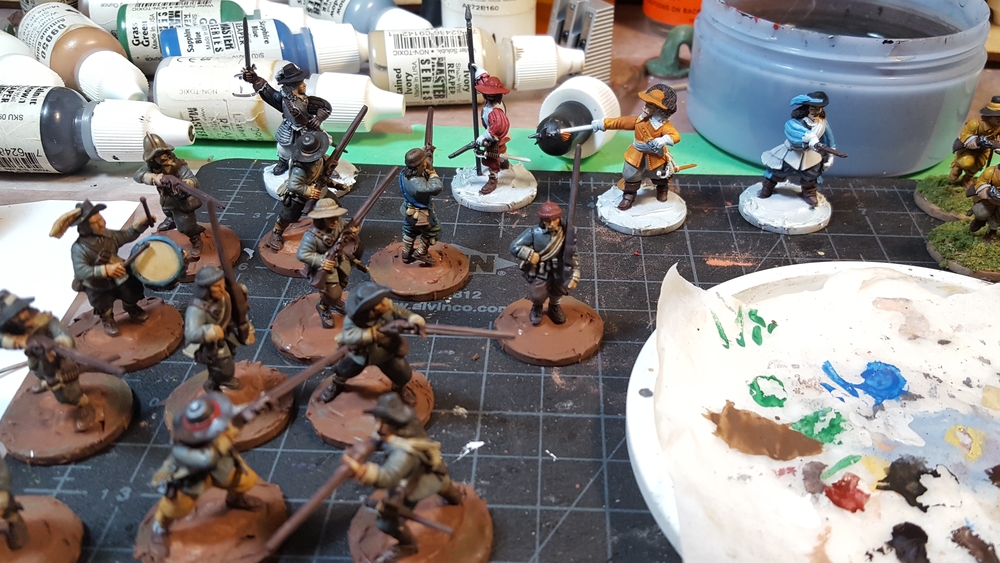
I’ve since moved on to another dozen mostly-finished musketeers and four more officer/character figures. The officer/character types are a chance to bust out some fun colours, as officers rarely wore uniforms in this period and often dressed like the gaudy wealthy gentlemen they were.
Finished figures – six firelock musketeers in mustard yellow, six regular musketeers in blue, and a full dozen pike in blue. And a dog. Click for larger.
Four colourful officers in the background and part of a unit of a dozen muskets in blue in the foreground. Click for larger.
I have this week between Christmas and New Years off, so before the end of 2017 I might actually get a usable 24 point Pikeman’s Lament force finished by forcing myself to deal with a lot of the mostly-painted figures!
The Assault Group (TAG) has a huge range of Thirty Year’s War/English Civil War/general Renaissance figures that I’d heard good things about, including that they were fairly compatible in size and style to the Warlord figures that make up the entirety of my TYW/ECW collection so far.
The only major piece missing from my 17th C forces so far are guns, so I ordered TAG’s English Battery Builder pack which has a culverin, eight crew, and accessories. To give me some game options I also picked up a falconette light gun on it’s own. That gives me a light gun, a heavier field gun, enough crew to do a full six man gun crew per the Pikeman’s Lament rules for either of them, and some nice extra bits for base decoration – gunpowder barrels, piles of shot, that sort of thing.
Then I waited.
And waited some more.
Then I got an email apologizing for the wait.
This wasn’t a surprise by this point, because a significant number of posts on the TAG blog are, in fact, posts explaining how backlogged their orders are.
Then I waited a while longer.
My initial order was made on June 22nd. The “we’re backed up” email came through on August 4th. My order was apparently “completed” on August 11th. It showed up in Canada on September 11th.
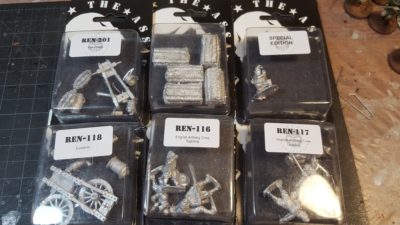
Nearly three months wait for this! The culverin, both crew packs, and the gabions are part of the Battery Deal; the falconette was separate; and the praying cavalryman is, as the sticker says, the ECW/TYW Bonus Figure, apparently. Click for larger.
That’s… goddamn glacial. In nearly two decades of ordering stuff from overseas for wargaming I don’t think I’ve ever had an order take so long from initial order to the toys actually showing up, even back in the late 1990s when I was just starting out and an order to the UK or the States meant snail mail, paper order forms filled out by hand, and an International Money Order.
So, don’t order from TAG if you’re in any sort of hurry for your toys. I have a generous backlog of painting and loads of scenery projects to distract me, thankfully.
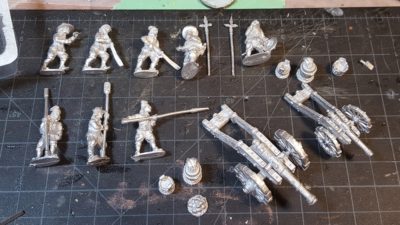
Eight figures, two guns, and accessories. Click for larger.
Now that they’re finally here, what about the figures themselves? I quite like them, the casts are very clean, the sculpting is well proportioned and nicely detailed, and while they’re mostly a little bit smaller than the Warlord figures they’ll look fine in adjacent units on the table!
Warlord’s plastic figures are actually slightly bigger than most of their metal figures; their metal ones are a pretty close match for TAG’s while Warlord plastics are bigger. Odd that Warlord has that difference between the two materials they produce figures in…
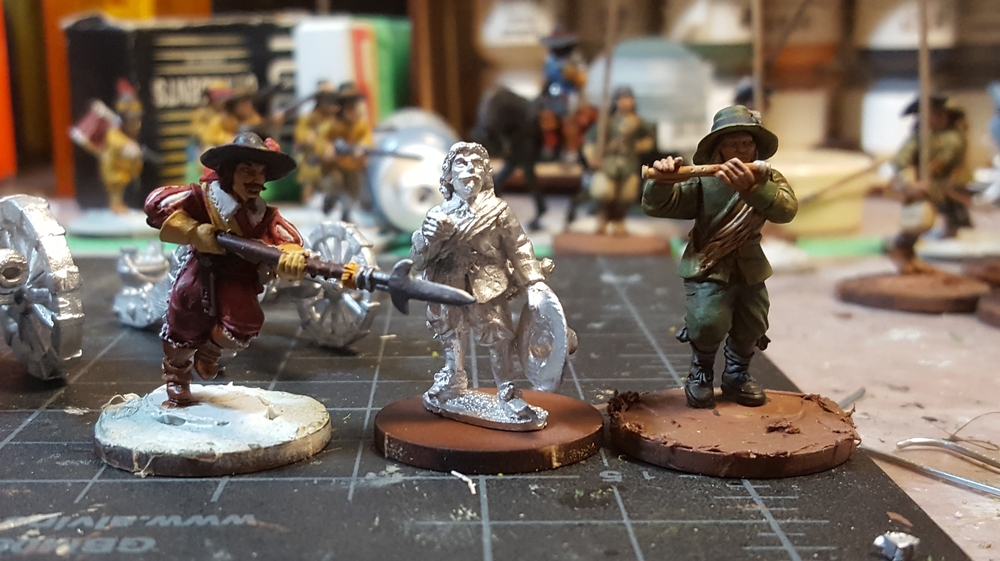
Left to right: Warlord Firelock officer (metal), TAG artillery officer (metal), and Warlord musician (plastic). The two metal figures are a pretty good match, the plastic guy is half or one-third of a head taller than either. Click for larger.
The two guns are four parts, two wheels, the stock (carriage?), and the barrel, and fit together easily. Mold lines and flash are minimal, just a few minutes cleanup for the whole lot.
The two crew packs are available separately as English Artillery crew loading and English Artillery crew sighting, each consisting of an officer/sergeant figure and three crew. The loaders have a powder scoop, rammer, and swab; the sighting crew have two with large timber levers to adjust the gun’s wheels and a gunner doing the actual sighting.
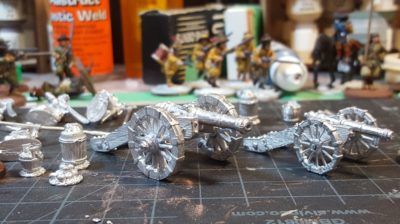
Both guns and most of the extra bits they come with. Click for larger.
The culverin is also available separately; it comes with the gun, a powder barrel, a water bucket, and a small pile of cannon balls. The falconette has the gun, a wedge, water bucket, and a bucket of small shot.
I still haven’t quite settled on how I’m going to base the guns and their crew, but I’m looking forward to assembling and painting them up; the whole unit should be pretty quick to paint up, and while I usually base figures before painting them, I might well tack these guys down to craft sticks to get them painted before I make any basing decisions. Basing might involve a custom movement tray of some sort ordered from Warbases that can fit six crew on 25mm bases and the unbased gun, to match the 2mm MDF movement trays I’ve already got.
I’ll probably order from TAG again; they have some different figures that Warlord don’t offer, I like their sculpting style, and variety is always useful, but the insanely long order times are offputting.