Hope everyone had a good Labour Day long weekend, if that’s a thing for you, and a good return to school, if that’s a thing for you and your family!
My hobby time has been really minimal the last while, both because the weather has been awesome, and because of whole piles of family stuff going on, both good and bad.
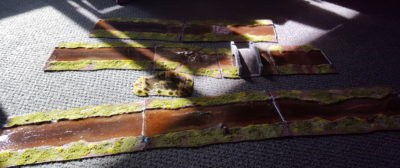
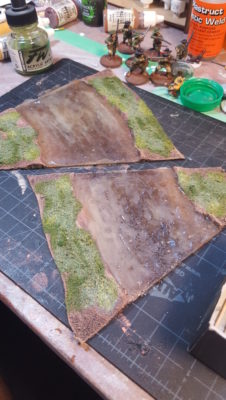
I’ve nevertheless managed to get the last of the resin water poured into the river modules, and touch up some of the earlier pieces done with epoxy glue with a skim of pourable resin to improve and harmonize all the water on all the segments. The two corner pieces done with epoxy had gone quite matte when the glue cured fully, not like the full gloss the resin retained.
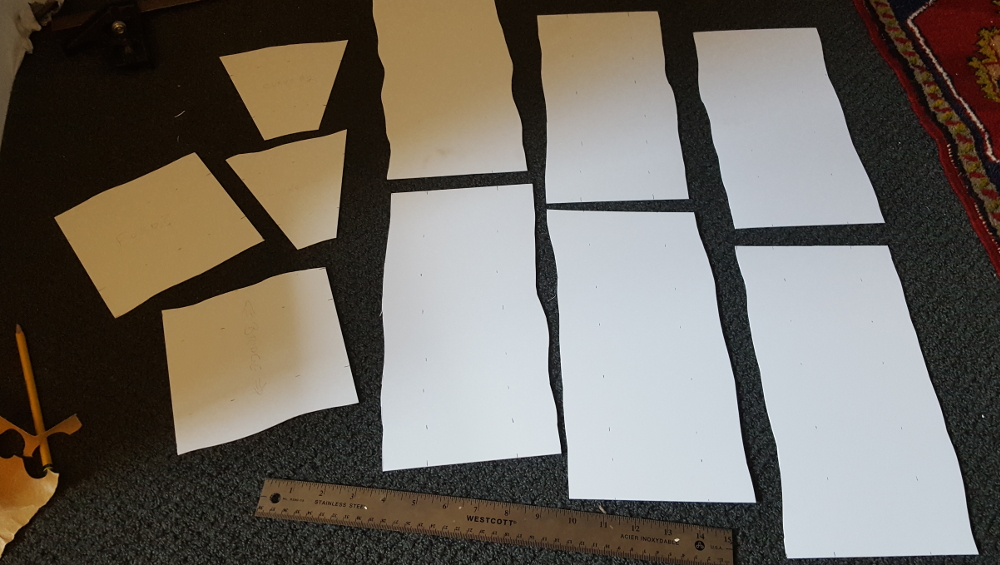
A ten segments (and the pond test piece) laid out on my floor. Click for larger.
Another mediocre picture of my floor, but the only passable shot I have so far of all ten segments all at once. Click for larger.
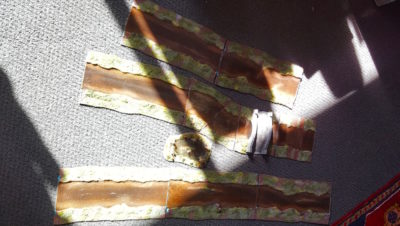
Not quite done with these river segments yet, though. The ends of each segment needs cleanup. There’s bits of blu-tak that have bonded to the resin and will need to be scrapped off, a little bit of overflow resin to carve off, and most of the segments have little ridges at each end where the resin has crept up the tape-and-craft-stick dams at the ends of the segments. I’ll need to carve those off carefully with a sharp knife, and might need to mix a tiny batch of resin to patch a few bits.
After that the flocking on the banks all needs to be re-done; I’ll just cover over the existing flock with a new layer after the thinned matte medium went all milky.
Looking forward to getting this project done and onto the table during an actual game, it should look pretty damn good and I’m happy to finally have a high quality set of river segments at long last!
Some of the segments laid out on my desk for inspection. You can see some of the bits of blu-tak on the ends, and the milky stains on the flocking. The water looks great, though! Click for larger.
Gradual progress on pouring resin into the river segments, doing one segment every night. I work on an old plastic cafeteria tray and cover the tray with a box lid to keep out dust, cat hair, the cat, and other household sources of lint, dust, and fluff that will happily glue themselves to freshly poured resin.
One ounce of resin (half an ounce each of resin and hardener) is enough for one of the long 12″ river modules, which makes for easy measuring. I bought a batch of disposable plastic 3oz shot glasses to mix the resin in, and those seem to be working out nicely so far.
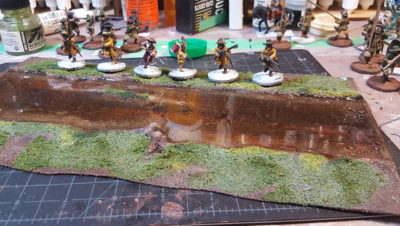
I add 8-10 drops of GW brown wash as I mix the resin, just enough to darken it a bit and add a bit more depth to the water effect. Between that and the shading I painted into the river bed sections I think I’ve gotten a reasonable feel of depth from a layer of resin that’s only about 1/8th” deep or so!
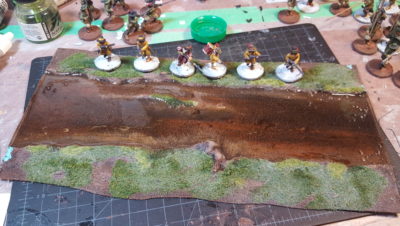
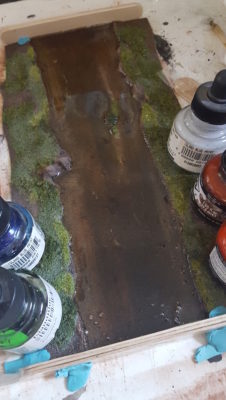
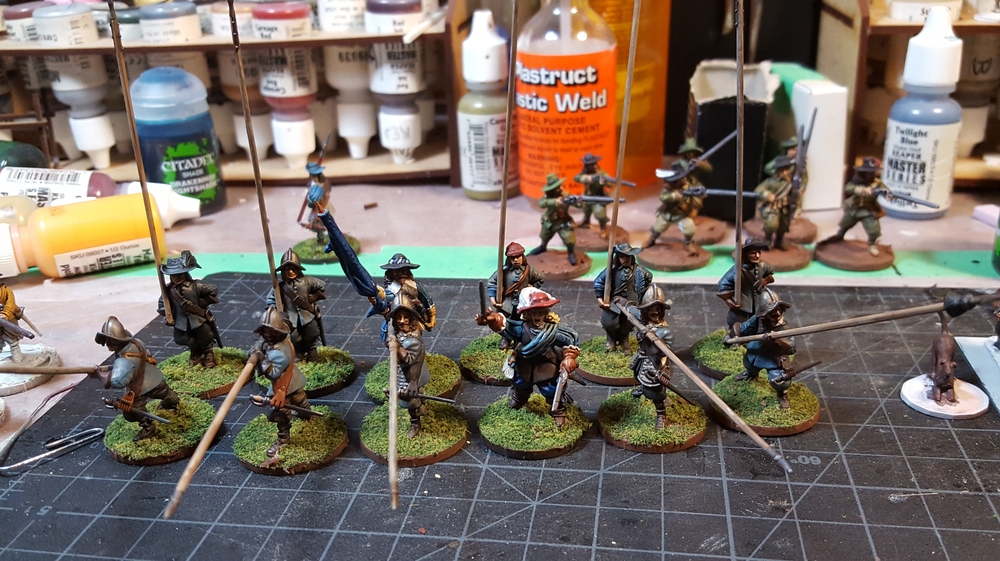
Overhead view with some almost-finished Warlord firelock musketeers about to charge into the water. Click for larger.
Lower view, nicely showing off the reflective surface of the resin. Click for larger.
There’s a little bit of a lip on the ends where the resin has crept up the sides of the dams, but I’ll use a knife and wet sanding to get rid of that and a bit of gloss medium (or an additional dab of resin) to fix any scuffing from that process. I need to scrape off or cover the bits of blu-tak that have been glued into place by the resin, too, but I’ll do that last while I’m fixing the discoloured flocking along the banks, the places where the resin has soaked up into the flock, and adding the rest of the foliage.
Onward to the next resin pouring session!
(Semi-random aside: This is the 480th post here on The Warbard! Here’s to 500 before the end of 2017! September 2017 will mark seven years of our current WordPress based format; November 2017 will mark 19 years (!) of a wargaming web presence of some sort or another for me. I should probably organize something interesting for our 20th anniversary in November 2018…)
I had used basic hardware store 5-minute epoxy glue for the swampy pond test piece, and had more or less intended to just keep doing that for all ten river segments. I did the two smaller corner/curve river segments as a further test, and was really irritated when one of them came out all lumpy and matte instead of glossy.
Two corner segments done with 5-minute epoxy glue. Click for larger.
I also realized that given the price of 5-minute epoxy, actual casting epoxy resin was actually going to work out cheaper for this whole project, especially given that 40% off coupons for large chains of craft stores are a thing! I picked up some EnviroTex Light Pour-on Epoxy from the aforementioned large craft store, for a total cost of about three more tubes of 5-minute epoxy after that useful discount coupon.
First resin pour on one of the full-sized river segments! Click for larger.
One US fluid ounce of resin nicely fills one of the full size 12″ long river segments; I could probably cut the quantity down just a bit, even. I did the resin pouring in an old cafeteria tray I use to help contain potentially messy projects. The dams at either end of the river segment are hardwood craft sticks (tongue depressors) wrapped in packing tape, secured with more packing tape from underneath the river segment and then further secured with blobs of blu-tak. I also pushed more blu-tak in along the edges of the river banks to block up possible gaps there.
As far as I can tell everything has gone smoothly with this first pour; I did it last night in bad light, working on our back patio to keep from stinking the apartment up. The Pour-On product is much less volatile and stinking than 5-minute epoxy glue, though! I didn’t see any leaks onto the tray and everything seemed to be cured up OK when I checked this morning before work, too, although the material info does warn this stuff takes up to 72 hours to full cure.
I’ve got seven river segments still to do water on – five more long straight pieces, the bridge, and the ford (both 6″ long) – so at one piece a day it’s going to be sometime next week before I can put the epoxy away.
The resin is much, much more aggressively self-levelling than the epoxy glue. I might go back and do a few ripples with gloss medium just so the river water doesn’t look completely still and stagnant. The one curved river segment that went all lumpy is going to get a very thin skim of resin to fix that and get a proper wet glossy look, as well.
At that point, once all the epoxy has cured hard, I need to go back and fix the flocking along the river banks. If you look at both photos above you can see some white staining on the banks. I put a coat of dilute matte medium over the flock, which I’ve used before many many times to properly secure flock and foliage on terrain pieces, and this time it left a distinct milky residue behind. I painted over that where it had stained the river bottom, and once the resin water is properly hardened I’ll re-do all the flocking to fix the discolouration there.
I’ve never had a matte medium and water (or white glue and water) mix do this to me before, in years of using it to secure terrain material of all types. Any readers have any good ideas about what the heck happened here?
Quick update on the river project! I’ve been taking a lot of summer holiday time recently, including all of last week away, so not a lot of progress or action, but there has been some, at least.
I’ve got all the river segments except the bridge basecoated and drybrushed up, ready for foliage and then water effects.
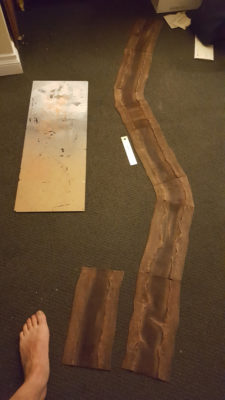
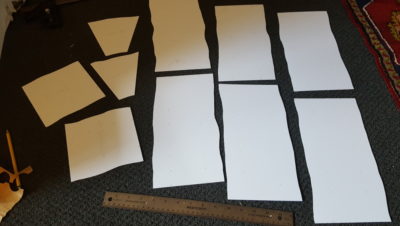
All the river segments except the bridge all laid out on the floor. Click for larger.
I snapped this photo after dark, so I apologize for the generally crap image quality, but it shows the current state of everything except the bridge. Black basecoat over the sand layer, then heavy brown drybrush on the banks and shallow bits and a lighter brown drybrush down the centre of the river channel. Finally a drybrush of tan on the banks and the shallow parts of the river channel.
The bridge segment is a bit behind the others; it just got the black basecoat on the banks and channel so no picture for now as I didn’t want to put wet paint down on my carpet for some reason.
The long straight sections are 12″ long, 6″ wide overall, and the river channel is 3″ with 1.5″ wide banks on either side. The short straight is intended to be a ford and is 6″ long; the two short curve segments are roughly 4″ or 5″ long on the long outside sides. The bridge is on another 6″ segment, and the eventual plan is for different 6″ segments to add flexibility – a high tech bridge for my Infinity gaming will be one of the first, probably.
Next up will be foliage and flocking along the banks, and then the smelly, messy business of resin water effects on the whole set!
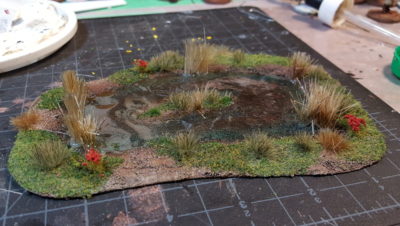
I started a pond as a test piece just before starting the whole river section project, and it’s been progressing one or two steps ahead of the rest of piece all along. Like the river pieces, the base is sheet plastic styrene with air drying clay for banks, and it was then covered in fine sand before being primed black.
It got painted and decorated with various foliage bits, and after letting all of that dry for a bit I tried out a new-to-me water effect with cheap resin 5-minute epoxy glue.
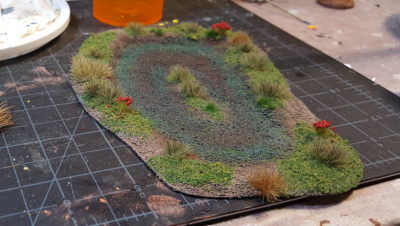
Pond all painted and foliage’d with flock, static grass, and tufts from various sources. Click for larger.
For water I’m trying out ordinary hardware store 5-minute epoxy glue, as shown in one of Luke’s APS YouTube videos on water effects – this link is to the main channel page, as I can’t remember which of his water videos actually talks about epoxy glue for water. Sorry – will update if I find it!
Anyway, I squeezed the 5-minute epoxy right into the pond bottom and mixed it with a scrap stir stick. There was a brief scare when it went all silvery while I was mixing part of it, but that cleared up right away, thankfully.
I wound up using three overlapping small batches of epoxy to fill the pond to the current level, then left that for 24 hours to fully cure.
The pond with the first batch of 5-minute epoxy water curing. Click for larger.
It needs a bit more epoxy around the outer edges as the first pour didn’t get right in under and behind some of the reed bunches, but I’m really happy with how it’s going so far! For the second pour I’m going to try getting the epoxy glue a bit thinner by warming the dispensing syringe with a hot water bath before squeezing it out.
Sand and paint on the river modules, and paint on the bridge. Click for larger.
Nothing fancy, just a coat of black paint mixed with some white glue, then sand shaken over while everything was still wet. I’ll put another coat of paint and glue over the sand to fully secure it, then get on with the rest.
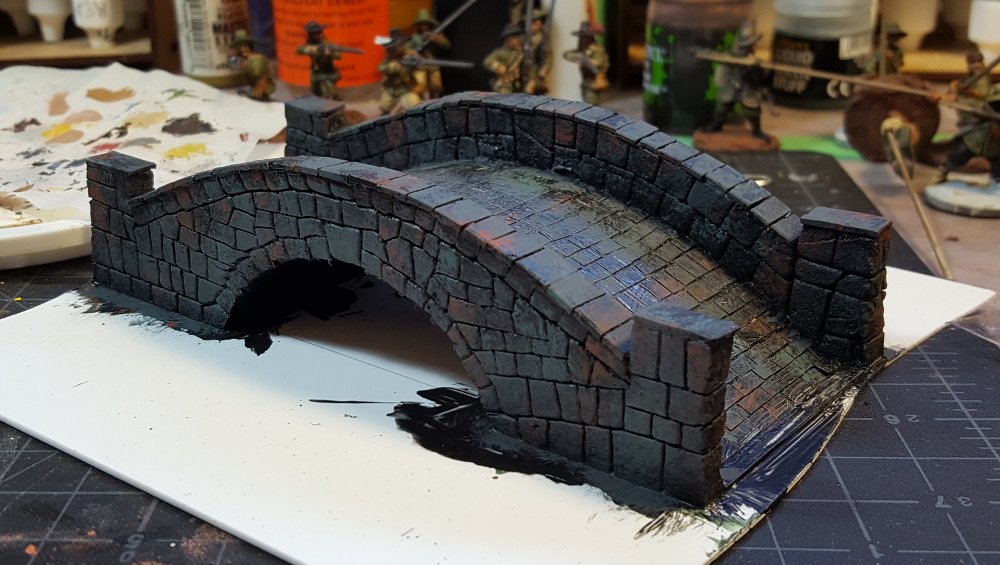
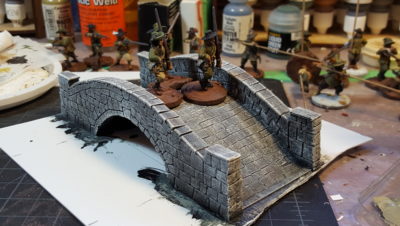
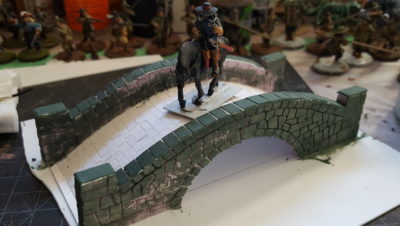
As seen in the photo above, the bridge is also fully painted. Over the black primer (mixed, as usual, with white glue) I blobbed two different green shades and some rust brown, then started drybrushing with a dark grey, a bit of tan, then lighter grey and finally just a bit of pure white on the edges and upper surfaces.
Black primer coat with blotches of other colours. Click for larger.
Drybrushing in progress, starting the greys. 28mm Warlord pikeman on the 25mm base to the right for scale. Click for larger.
Bridge all painted, being guarded by a trio of Warlord 28mm musketeers. Click for larger.
I’ll do the river banks alongside the bridge next, then paint and sand so all ten river segments are at the same stage, then it’s off to doing water effects, probably with epoxy resin.
Realized I forgot to include the photo of the river modules with the air drying clay banks in place, so let’s start off with that! I rolled clay snakes out, mushed them into place, and left everything to dry.
Clay banks in place on some of the river modules. Click for larger.
On to the actual subject of this post, the bridge! This river project is initially intended to go along with my English Civil War pike & shot project I’m painting figures for, so I started with a classic stone arch bridge. The base module is one of the two short river modules, so it’s 6″ long and 6″ wide. I decided to make the roadway portion of the bridge 50mm wide, which will fit at least two foot or cavalry figures side-by-side, or a wagon or vehicle. The whole bridge is roughly 5.5″ long, more or less.
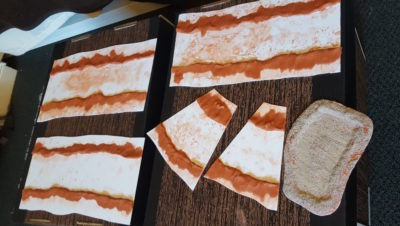
The roadway is three layers of light card (90lbs or so) laminated together with white glue and left to dry under a couple of heavy books. After that dried overnight I cut it to length to form the arch, then glued more small rectangles of light card to it for the flagstone bridge surface. While that was drying I superglued two little strips of card in place on the styrene base to hold the arch in place – you can see them at either end of the roadway in the picture below. These gave the roadway something to be braced against while I superglued it into place.
The inner arch was formed similarly, although I only used a single layer of card as it won’t be exposed in the final model.
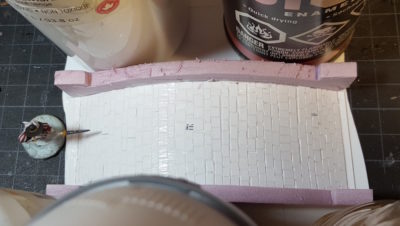
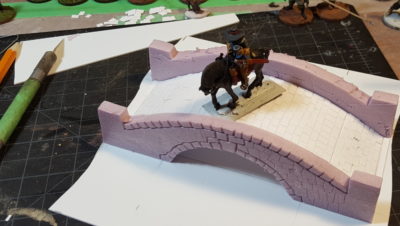
For the sides I started with an offcut of one inch thick pink styrofoam insulation. I marked the roadway and inside arches on the side of the piece with a pencil, then carefully cut the curves and the end pillars with a brand-new Xacto blade before slicing the entire piece in half lengthwise to get both sides of the bridge. They were glued into place with white glue – you can’t use superglue on styrofoam, it melts! – and braced with various heavy things overnight so they dried in place.
The bridge with sides held in place while the white glue dries, top-down view. The figure on left is on a 25mm wide base. Click for larger.
After the whole assembly had dried for about six hours or so I started carving the stone sides, using my usual combination of an Xacto knife and a pencil. Cut patterns with the knife, then open up the cuts with the pencil for a nice easy stone effect. I also used a ball of tin foil to add a bit of stone texture to the sytrofoam; I might yet go back and add more to the parts that are still too smooth.
Carving started on the walls of the bridge. Horseman is on a 20mm by 40mm base. Click for larger.
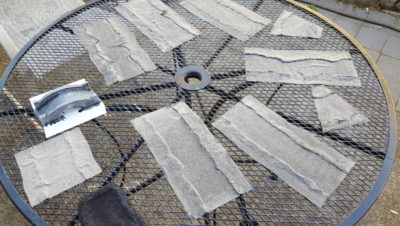
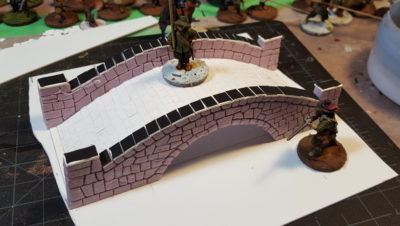
After doing the carving I decided to put a row of capping stones across the tops of the arches and pillars. Making them out of heavier matt board (picture framing card, one of my favourite building materials) means they’ll protect the styrofoam sides of the bridge, much the same way a harder stone like slate is often used to protect a more carveable stone! I cut a strip of matt board then chopped slightly different sizes rectangles from it, to make the result more varied and interesting.
Cap stones in place on the arches and pillars. Click for larger.
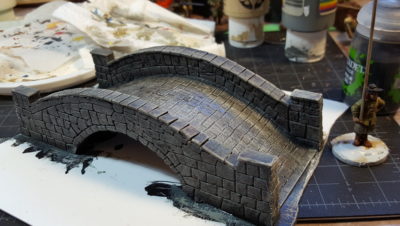
To add texture, especially to the card, and to help protect the whole structure a bit more, I put a coat of GW Liquid Greenstuff over most of the bridge and, for now at least, declared construction finished! I still need to do the river banks, obviously, and might yet add some small buttresses to the sides of the end pillars of the bridge. The stonework might need more texture, too, but I’ll wait until I get a primer coat of paint on it before making that decision.
Liquid Greenstuff applied, bridge construction basically done. Click for larger.
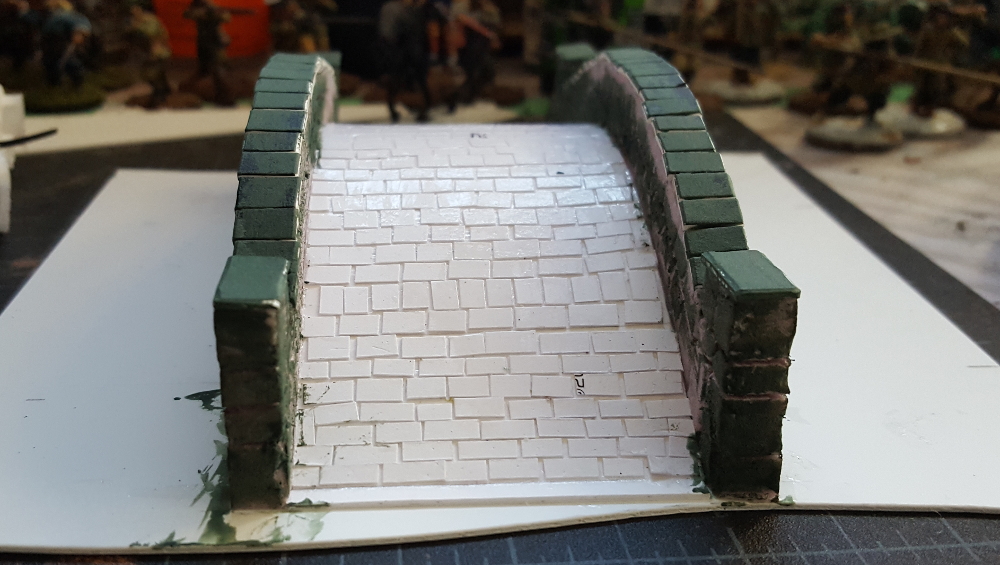
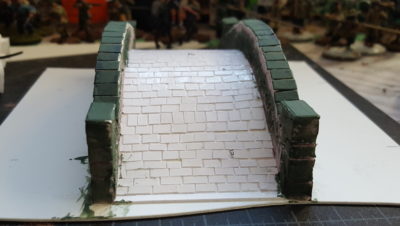
Finally, here’s a miniature eye shot (more or less!) of one end of the bridge looking up the roadway. This shows the flagstones of the roadway nicely; I’m really pleased with how they turned out. Individual little rectangles of light card is a painful way to do flagstones, but it does look good! You can also see the card strip I glued down to brace the road arch in place; I’ll eventually cover that in clay or putty to disguise it as flagstones or hide it.
Low level view across the bridge! Click for larger.
The main river modules are also proceeding, all the clay banks are straightened and glued down, so I might be able to get texture on them in the next few days, although we’re going to have a house guest in our spare room (usually my workspace/man cave) for all of this coming week!
A relatively large modular river setup has been on my Things I Want To Build list for years. I went through the excellent set of scenarios that come with Pikeman’s Lament recently with an eye toward what additional scenery I might need to do them properly, and one of the scenarios is a bridge seizing/river crossing that needs a river the long way down the table — suggested table size for Pikeman’s Lament being 4’x6′.
Perfect, a good reason to shunt the river project to the front of the queue as my summer project! It’s also universal scenery that I can use on pretty much any of my tables, possibly with alternate bridge modules eventually to better match, say, my Russian Civil War setup or even Infinity’s cyberpunk future!
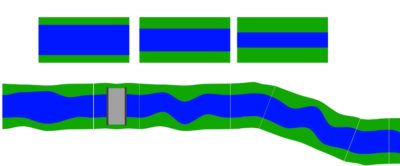
To check proportions and the basic idea I fired up Inkscape. You can work in real-world units in Inkscape really easily, so it’s ideal as a super-basic quick layout tool, faster than doing things by hand on graph paper and cheaper than wasting materials! I decided on 6″ wide modules with a 3″ wide river in between 1.5″ banks, which will let me put lots of flocking and foliage along the banks. The bridge is 50mmm wide across the road part, which gives enough width for at least two figures across and will accommodate figures on 40mmm wide multibases as well.
Screenshot of my river planning setup in Inkscape. Top is testing different river widths, bottom is messing with different module layouts. Click for larger.
I started construction by buying a 4′ by 2′ sheet of .040 (~1mmm) styrene plastic sheet from our excellent local plastic store, Industrial Plastic & Paint. The big sheets of bulk styrene are identical to the 8×10 pieces you buy in a hobby store but much, much cheaper! I cut two 12″ by 24″ pieces, enough for six 12″ straight river modules, two 6″ long short modules, and a pair of curve pieces about 3 or 4″ long. That’s enough river to get from one side of a 6′ long table to the other at an angle, and keeping the bridge piece on one of the 6″ short modules makes placing it more flexible.
The long straight sections aren’t perfectly straight, incidentally. I offset each one by about a half inch, so the river will wander back and forth a bit on the table, or angle gradually one way if you align all the long pieces the same way. The long sides are cut slightly irregularly and then sanded down to smooth out any jagged edges from the scissors.
Styrene sheet all cut out for the rivers. Six 12″ straights, 2 6″ straights, and two short curve pieces, over 7 feet of river all told! Click for larger.
There are cheaper material than .040 styrene, even at bulk rates, and there are certainly stronger materials, so why thin styrene? Because it’s thin, strong, and waterproof. I dislike scenery that stands up really high off the table, the styrene is going to be strong enough provided nobody abuses it, especially once all the clay, sand, glue, more glue, etc etc is on it, and I can slop paint, water, and glue around with abandon without anything warping or being destroyed.
For the banks I decided to use air drying clay and picked up a cheap pack at one of our local art stores. I marked the 3″ standard width of the river on the ends of all the styrene pieces, rolled out snakes of clay, and mushed them into place with my fingers. Good old kindergarten-level stuff, nothing fancy. Keep a little pot of water handy to wet your fingers in and smooth the clay.
The best way to use air drying clay is actually to put a layer of white glue down on your base material, and then mush your clay around on top of the glue. They’ll dry together and bond to the base material. I didn’t do this, so now I’m gluing the dried pieces of clay back to the styrene… this does give me a better chance to correct any warping caused by the clay drying, which has happened. Gently bending the clay straight then gluing it down with a weight on top of it – I used figure transport cases – has so far sorted out all the warping issues.
A thicker more heavyweight base material wouldn’t have warped, but see above about disliking scenery that stands too proud of the table surface. Always about the tradeoffs!
With the clay done on all six straight long modules, the two curves, and one of the short straight modules – which I’m doing up as a shallow ford – I started building the bridge on the last short straight module. More on that soon!
First unit of foot for my English Civil War project is done!
28mm pike from Warlord on 25mm wide bases. Click for larger.
Ten pikemen, an officer, and a flag ensign all lined up ready for battle.
I’m plugging away at the shot in blue to go along with these guys… the musketeers have a lot more equipment hanging off them and are a lot slower to paint than pikemen!
There’s also a second unit of pike almost finished, these ones in green uniforms, as well as six firelock musketeers for a forlorn hope or commanded shot unit. The mounted commander from my last post has also had a few more details completed and is inching toward the finish line. Lots of assembly line style painting currently, which makes for really boring photos to share here until a unit is suddenly done…
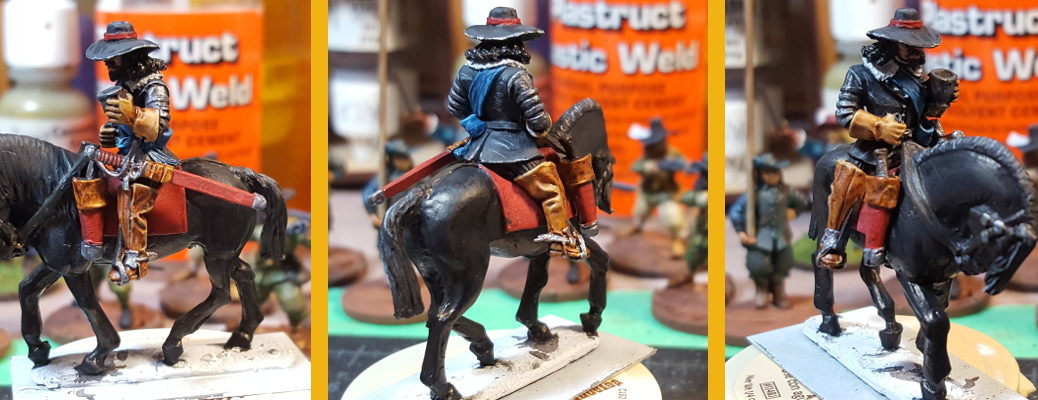
Got a couple of half decent photos of Warlord’s Pike & Shotte Mounted Commander that I’ve got on my painting bench right now, along with a whole bunch of pike & shot soldiers for him to command.
This is one of Warlord’s all-metal figures, and very nice too, a good level of detail and a pose full of attitude as he slouches along, pewter wine cup in one hand and a huge broadsword on his hip. There’s an eyepatch under that wide hat too, although I don’t think you can actually see it in these photos!
An officer of the English Civil Wars; 28mm figure by Warlord Games. Click for larger.
I set myself the painting challenge of doing a black horse, black coat and hat, and black hair on the commander. The clothing is done with a base of Reaper Walnut Brown (a very, very dark almost black brown) with a few drops of Pure Black in it, highlighted with Rainy Grey; the horse is mostly Pure Black with some Walnut Brown highlights and then a coat of artist’s India Ink over the whole horse except the mane and tail.
Loads of highlighting and some detail painting left to do, but I’m happy with the progress so far and thought I’d show him off here!