Category Archives: Terrain

Wargaming terrain & scenery posts.

Remembrance Day Weekend, November 2022

Went to our local municipal Remembrance Day ceremony in person this year, after two years of live streamed ceremonies watched from my computer, which was nice.

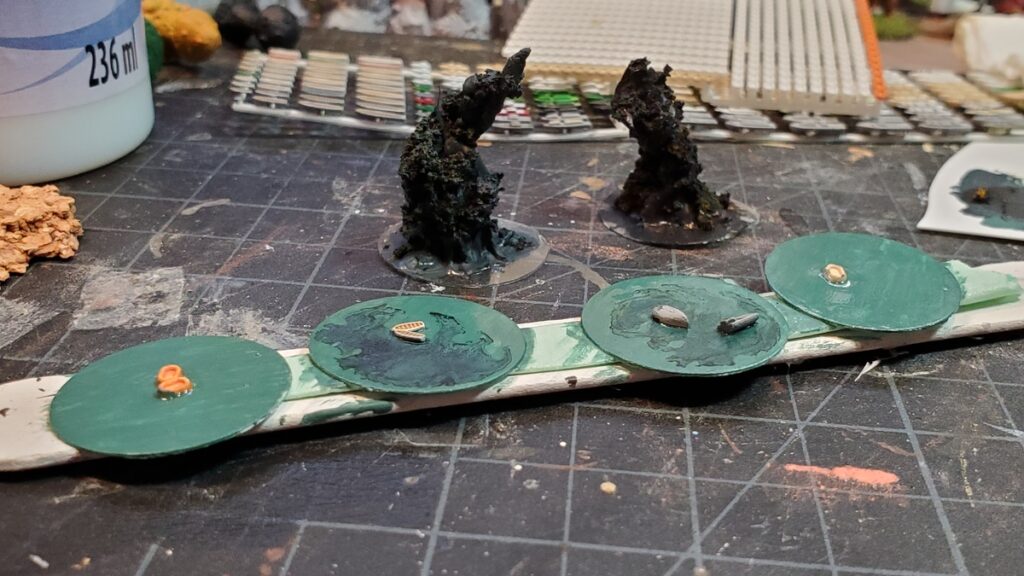
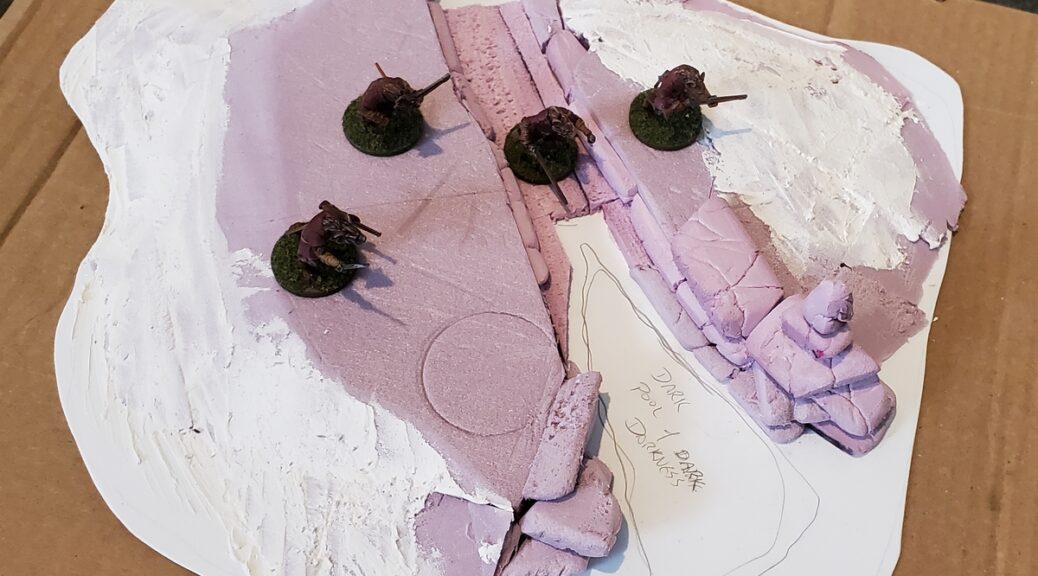
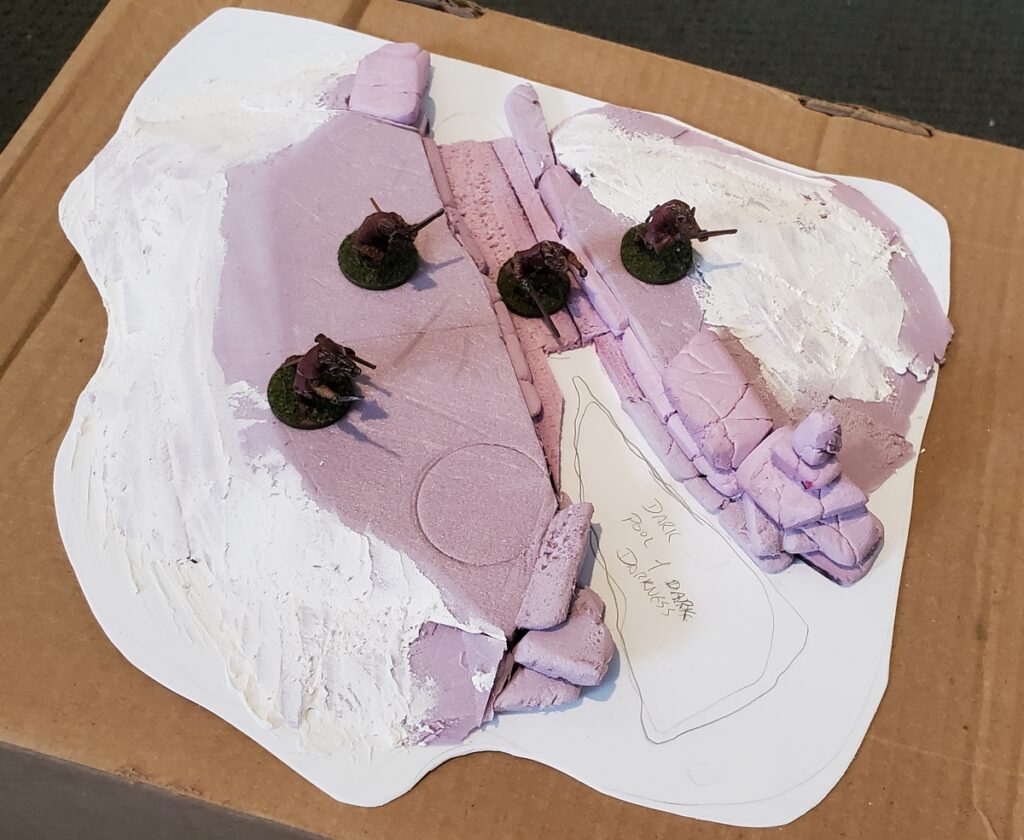
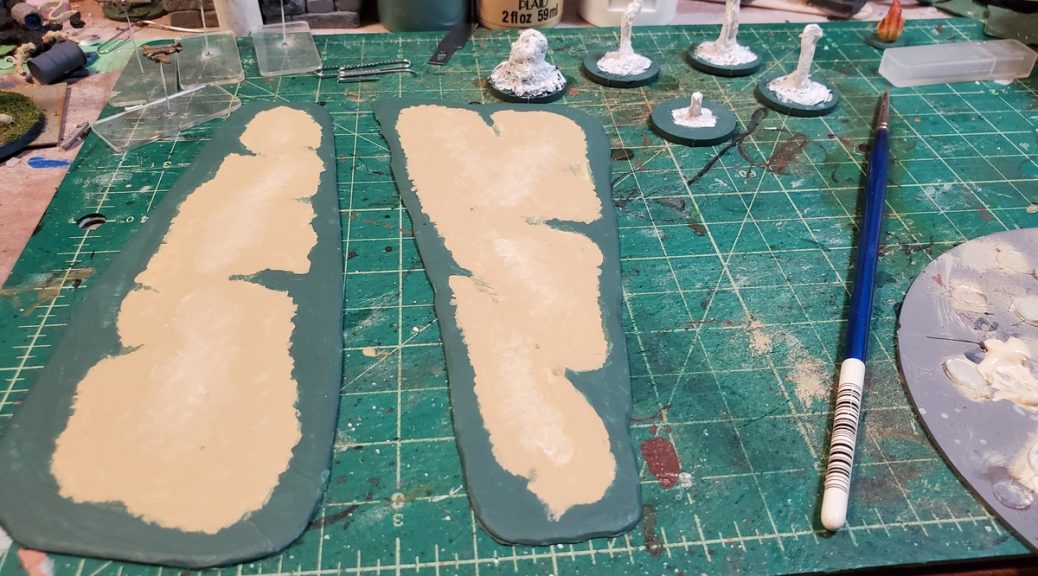
Also making time for some hobby this long weekend, starting with some scenery and bits to add interest to our 1/1200 coastal naval games. It is a truism of naval games that if you put any piece of scenery on the table, no matter how minor, some intrepid player will attempt to run their boat into it. Therefore, a new pair of sandbanks in progress to give players new stuff to run into!

Base colours done on a pair of sandbanks. Each is about 6″ long by 3″ wide at the maximum extent.

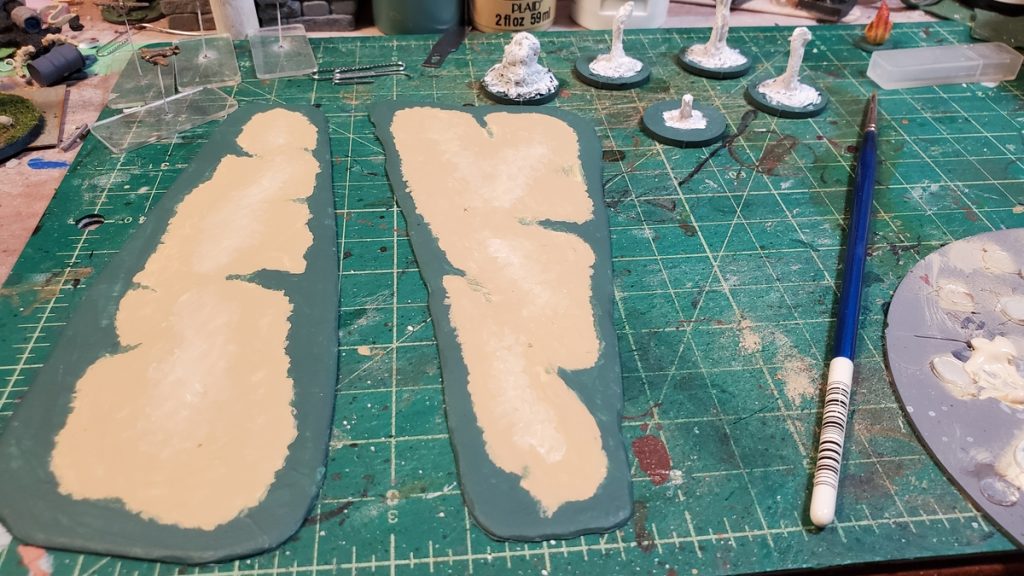
These are just simple shapes of .040″ (~1mm) plastic card with paint on them, two sand colours and the blue-green sea colour I’ve used on earlier naval scenery bits, and a bit of mindful brushwork and wet blending. I’ll do some glaze coats to blend the edges a bit more, then a couple of coats of gloss varnish and some gloss gel for waves and done.

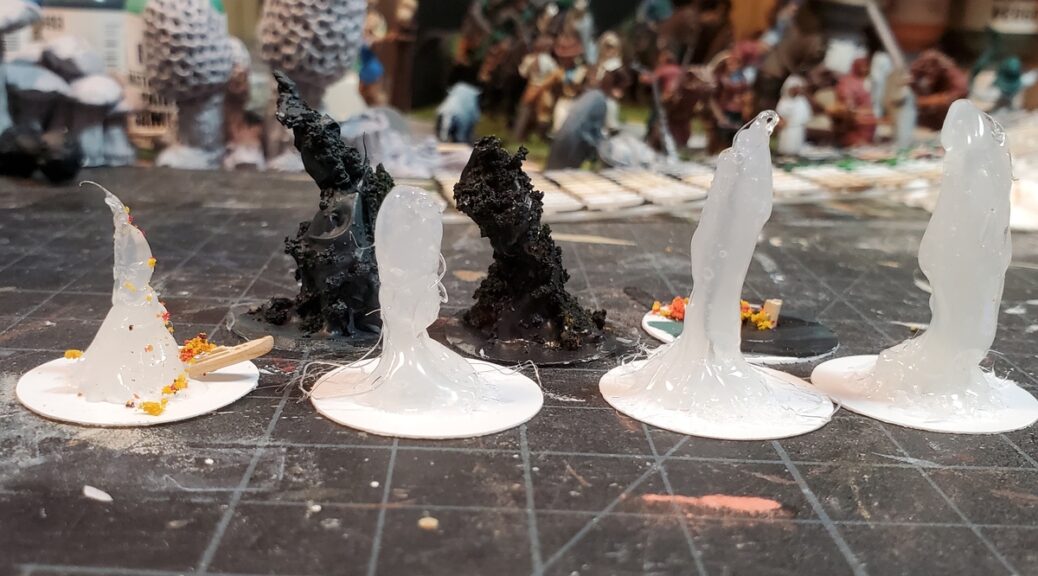
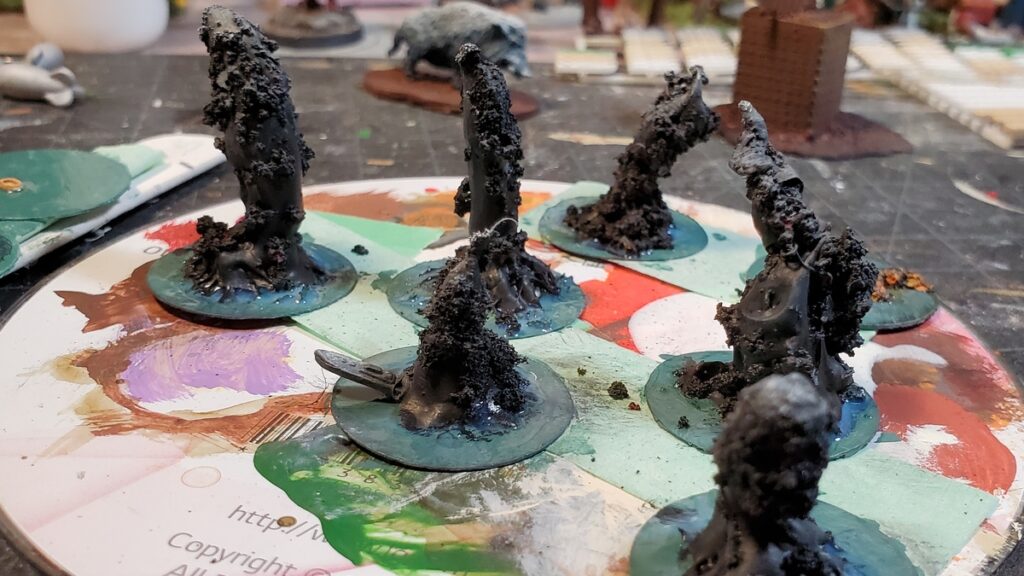
In the background are some in-progress shell splashes. I’m not entirely happy with them at present but will put some more effort into them before making up my mind one way or another.

The shell splashes were directly inspired by Yarkshire Gamer’s rather nice photo/video tutorial over on their blog. He’s working in a larger scale (1/700 to my 1/1200) and with larger ships, but the basic technique is solid. I’m working with hot glue instead of clear caulking and of course wanting smaller shell splashes in a smaller scale, so adapting as I go. I have some ideas for making them work still, so we’ll see how that goes over the next few days.

A Trash Bash Tower

A few days into January I had a fall that destroyed my glasses and injured my shoulder, both of which combined to cut down the amount of time I was able to spend on the computer. The upside of this, as I still needed something to do, was that I started a random construction project and completed it in about three weeks. (glasses have been replaced and shoulder is nicely on the mend, too)

Over the Christmas holidays I had painted up an entire village of really cool Toadstool Brownies from Fenris Games (they’ll get their own post soon) so I decided to trash bash a multi-story tower for them to cause trouble from, a sort of weird fantasy cross between a fortified tower house and a tenement apartment building.

I started with a medium size paper coffee cup from a widely available but deeply mediocre coffee chain, glued that to a scrap of 1/8th PVC sheet a bit bigger than my hand, then started adding details with scrap cardstock, wood coffee stir sticks, bits of styrofoam, paper, and Milliput.

This hasn’t actually graced a table yet, but I’m sure it will soon, and I want to write up stats for the Toadstool Brownies as either playable characters or random on-table nuisances for the games we play!

I haven’t done a pure stratchbuild like this in a while, but really want to do more, and weird fantasy builds are SO much fun!

An entry for Lead Adventure’s Build Something Competition 2022 – a farm!

Each year Lead Adventure forum runs a Build Something Competition, each with a theme. Brian and I have participated 5 times at various points in the past years. So with 2022 here, I figured it was my time again.

Continue reading An entry for Lead Adventure’s Build Something Competition 2022 – a farm!

Links of Interest, 9 January 2022

First LoI post of the new year! Just a couple of things, mostly to get the BSC link out while entries are still open!

On the scenery front, this trio of useful little bridges with a neat construction trick involved to keep them more game-friendly from Olicanalad’s Games blog.

Over on the excellent Lead Adventure Forum, the Build Something Contest 2022 is accepting entries and already some some great discussions and ideas being posted. Highly recommended, the BSC always has some fun and gorgeously executed projects coming out of it. I don’t think I’ll be participating this year, but I’ll be watching the whole thing closely!

Fire, Explosion, and Wreckage Markers for Tiny Boats

Sometime earlier in the pandemic I ordered a batch of 1/1200 3d printed stuff from Shapeways, who use some sort of resin printing to get incredible detail on their prints. I keep meaning to write up that purchase in a proper review, I took a bunch of photos of everything I bought, but nevermind…

One place I have used a few of the 3d printed bits is in some wreckage markers. I bought a sprue of inflatable liferafts, and the sprue of boats included traditional life boats in several sizes, so I popped a few of those onto 1″ styrene bases as wreckage markers, or possibly as scenario goals – rescue downed aircrew or stranded squadronmates, that sort of thing.

Wreck and rescue markers for naval gaming, and the first two fire/explosion markers behind.

I also did up a batch of fire/explosion markers, also on 1″ bases. These are pretty simple things, made up mostly of hot glue splatted and “sculpted” with the tip of the hot glue gun. Holding the bases upside down and twisting them back and forth as the glue stretched and cooled helped, and for several of them I dunked them into the cool water of my paint rinse pot to help “freeze” the shapes. A few of them have wire centres but the most interesting ones don’t and I won’t bother with that step if I do any more.

Various explosion markers in progress. You can see the wire core in the one second from right, but don’t bother with this step if you do your own like this.

After the glue had cooled and I’d cleaned the thready wisps of glue off that hot glue so often leaves, I glued on a bit of medium flock as extra texture, which works nicely.

All the explosion markers painted, lightly drybrushed, and the first coat of gloss added to the water.

The explosion markers got a black basecoat. I considered trying to paint actual fire on them, but decided to just do a bit of a grey drybrush, mostly on the very tops, and leave them at that.

The boat sticking out of one base, about to be engulfed in an explosion, is one of the Shapeways 3d printed ones, left a generic grey so it could be from any side of the war. I cut the stern few millimeters off that boat to tuck it into the body of the explosion a bit more, then used that boat piece on the fire marker just visible on the far right of the photo above.

The Shapeways stuff makes for nice extra bits, and the explosion markers are super easy to make. These little pieces should make for some interesting extra colour during our next games of messing about in tiny boats.

Links of Interest, 11 August 2021

Quiet around here as I’m not doing a lot of gaming, painting, or terrain building this summer. Too busy with other things! I did have a couple of fantastic games of WW2 coastal forces earlier in August, and will get those photos up here in the next little while.

I recently got a well-stuffed box of awesome stuff from Fenris Games as part of their Toadstool Brownies Kickstarter, including whole forests full of mushrooms and some really neat tiny brownie and kobold figures. I’ll get some more photos of those and get some sort of review up soon-ish.

On to links… over on Empire of Ghosts we have some rather nice small scale islands in two styles, one tropical for Caribbean/the Med and one more northerly for the North Sea. They’re nominally 6mm or 1/300 to match the Warlord Cruel Seas boats and others, but as designed they’re pretty scale-neutral and the basic ideas will serve for even smaller scales too.

My excellent local game store started carrying UV resin and I picked some up a while ago, intending to try it out for windows in various buildings. Usefully, I just found this tutorial on using UV resin for windows over on the Comm Guild blog, which should prove useful when I finally get around to finishing the MDF church I started a few years ago.

More content here as the summer comes to an end in a month or so, I promise!

BCS 2021 & A Blog Update

Well, “a few weeks” in my last update apparently turned into two months of radio silence here. Oops.

Build Something Contest 2021 over on LAF had the end date pushed back by two weeks due to the organizer having an attack of Real Life, but it’s wrapped up and voting should start this week over on Lead Adventure!

I’ll get a full gallery of all my build shots up after voting begins, but in the meantime here’s a teaser from early in construction of my entry, which wound up named the “Dark Pool of Dark Darkness”…

The piece with most of the basic groundwork laid down and the rock formations just started. 28mm gnolls on 25mm bases for scale; the whole thing is about 10″ long by 9″ wide or so. Click for larger, as usual.

Build Something Contest 2021

Quiet here the last week or so because I’ve been thoroughly distracted by Lead Adventure Forum’s Build Something Contest 2021!

Lots of cool entries in progress over on the BSC subforum of LAF. Posting WIP photos elsewhere is discouraged but I’ve taken lots of photos so far of the rocky moor piece I’m doing and I’ll be sharing them here in a month or so when the contest is concluded.

I do have some other stuff I’ll be showing off, including some scatter pieces I just finished that I’m quite happy with, so it won’t be totally dead here but go check out the BSC and look for my updates there!

Over a Barrel, Gaslands Edition

Corey has a 3d printer, as has featured here many times, and a little while ago he cranked out half a dozen barrels in Gaslands-ish scale. His printer was being temperamental, however, and they wound up a bit lumpy and mis-printed. The care and feeding of 3d printers appears to be an entire hobby unto itself, one I’m happy to leave to him…

Waste not, want not, though and on a post-apoc deathtrack battered misshapen barrels seem more likely than pristine clean ones anyway, so I took them, stuck them in a rough line on a base made of a lump of Milliput, and chucked some paint on ’em.

Rust basecoat after priming.

After my usual grey spray primer the barrels got a reddish-orange rust basecoat, then I painted them alternating white and red, to fit with the general colour scheme on our Gaslands arenas.

White barrels masked while I paint the red ones.

All the paint was stippled on to be deliberately scruffy and let the rust basecoat show through, and then I drybrushed various shades of rust, dust, and grime back over everything. I think there was a dark brown wash in there too, but can’t actually recall.

Finished and ready to be put out in the arena to be crashed into!

This was a nice quick little barricade, done over a couple of short sessions, and a good way to reuse slightly misprinted but still basically intact bits!

Gates for Gaslands, Part Five

Up next was the “GATE” lettering and giant numbers for the three numbered gates.

Mid-project roundup. Rust basecoat on the big numbers, front centre; GATE lettering primed on the right, and the gate towers all lined up behind and overhead. Click for larger.

I cut the giant numbers from sheet styrene and mounted them on strips of scrap styrene. The GATE lettering was 3d printed as separate letters and then mounted on very thin square section styrene strip. To make that easy I taped long pieces of the styrene strip down to my cutting mat, glued the letters down, then once the glue had cured cut each word out.

Everything got spray primed grey and then basecoated the same blotchy rust I’d used on the overhead gantry and elsewhere. I stippled and drybrushed everything with a couple of different shades of off-white (Reaper Linen White and Leather White, primarily) before a final drybrush of Reaper Pure White.

The GATE signs and numbers all mounted and final weathering begun. Click for larger.

After that it was back to the weathering, primarily drybrushing with a big soft makeup brush. I only just picked one of these up, a super cheap dollar store special, and it really is the bomb for drybrushing! I used a fairly random selection of browns, reds, tans, and off-whites for this, going back and forth over all the towers and the gantry as well.

Back view of the six gate towers, with speaker cabinets and loudspeakers mounted. Click for larger.

While adding the lettering I had finally primed, painted, and installed the roof on the announcer/race official cab on the lefthand start gate tower. I thought about installing mesh on the windows but decided to leave them open for now; I might go back in and add some additional protection for the folks who wave the chequered flags but the current form will do for now!

Roof installed on the announcer/official cab. It had to be cut to fit around the fairly random structure of the tower itself. Click for larger.

Final touches and some finished shots soon as this project finally wraps up and might actually hit the table sometime soon!