Category Archives: Terrain

Wargaming terrain & scenery posts.

Build Something is done for 2024 & I finished!

Another year keeps marching on and Build Something 2024 has come to an end and unlike nearly every prior year, I actually finished this year! No pictures of the painted model yet due to the rules, but here are some updates on the construction.

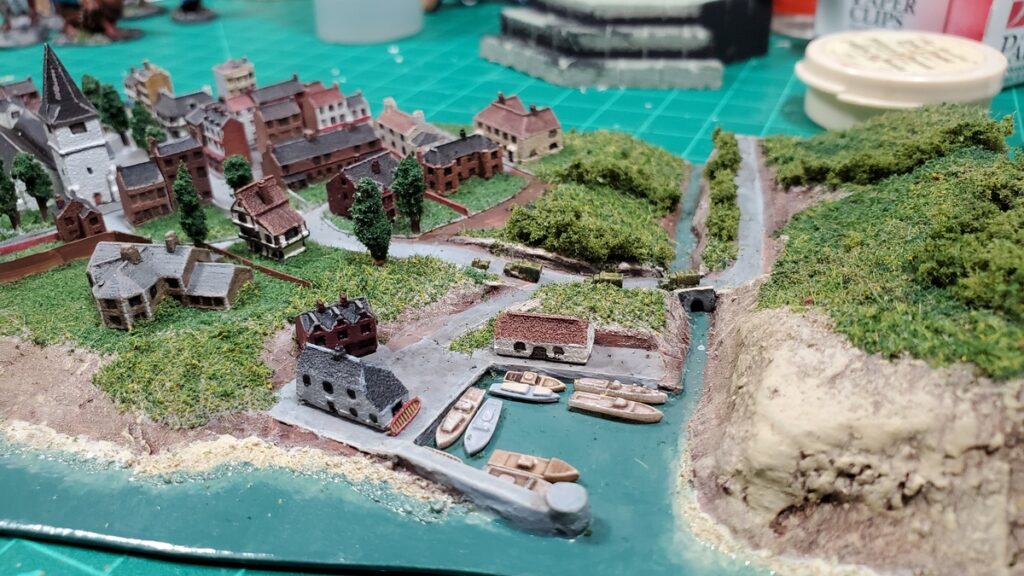
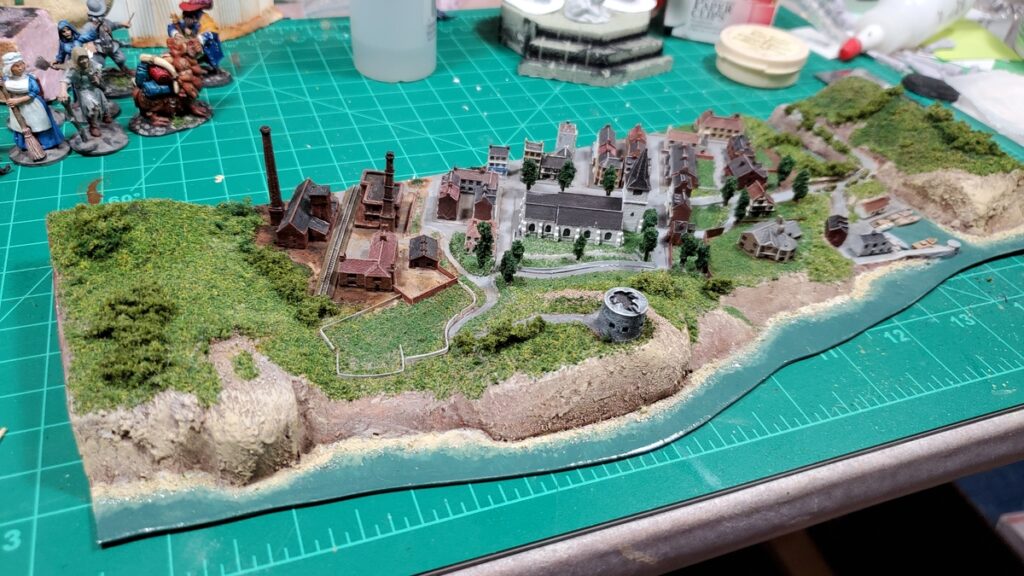
Overall, I managed to only get the warehouse done of the whole set I planned – will have to do the actual landing pad later. But I was happy with where I ended up with the warehouse.

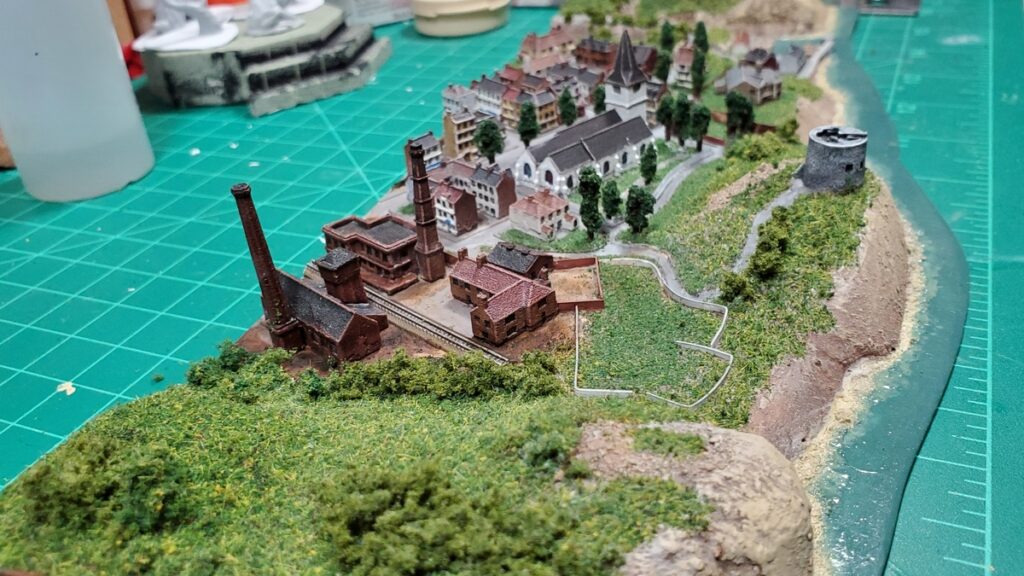
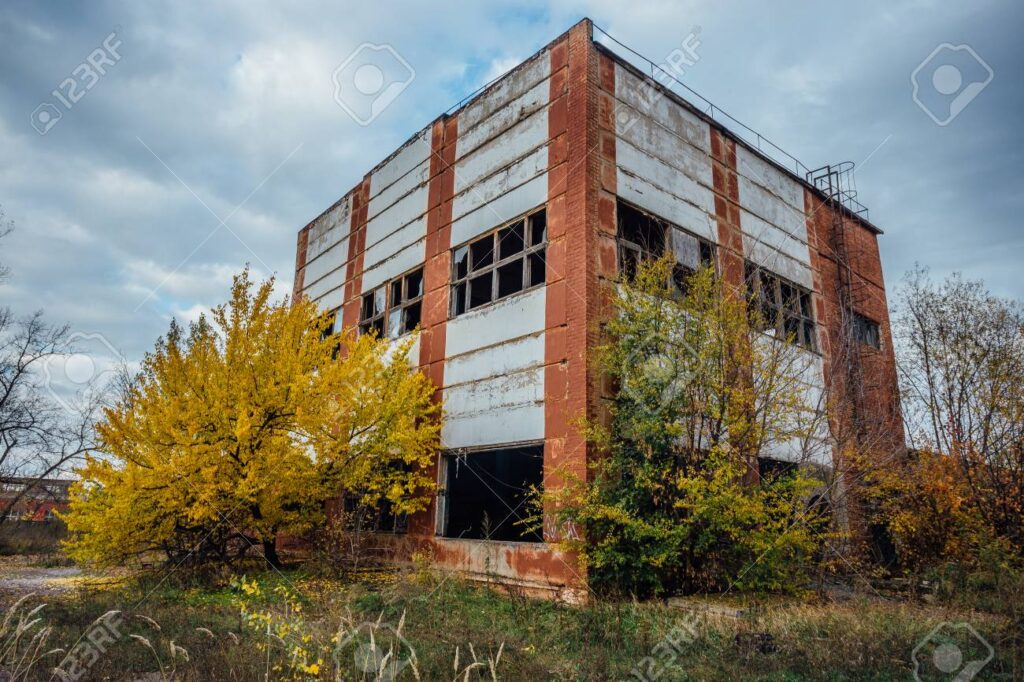
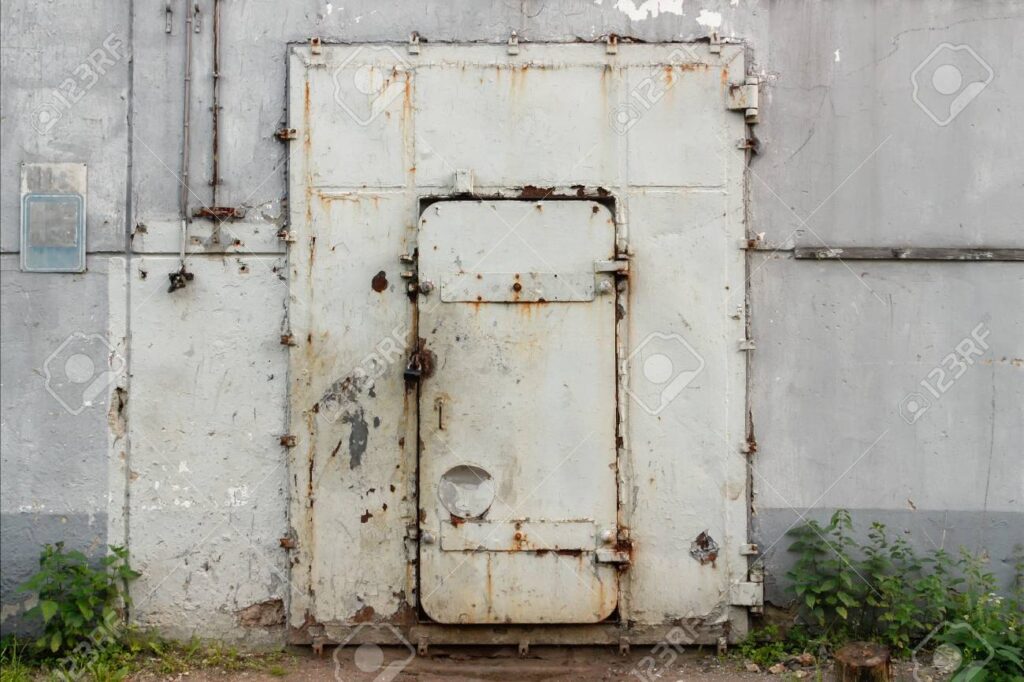
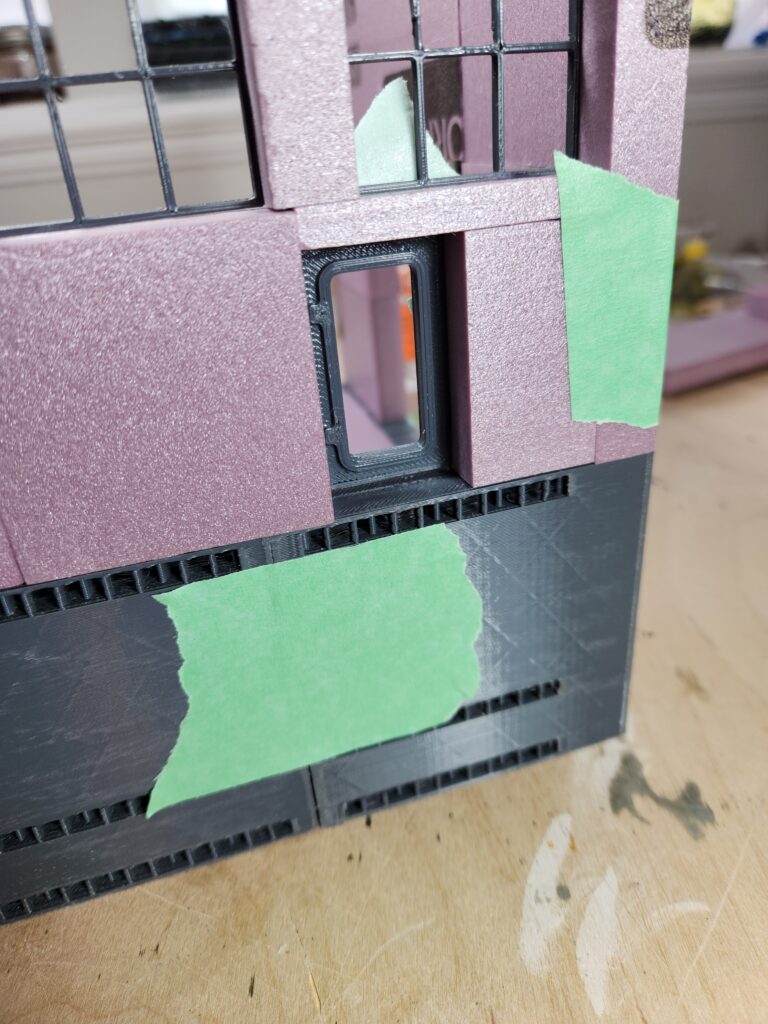
For the warehouse, I ended up with a more “ruined 20th century concrete” vibe than I initially planned, largely because of the design of the windows – rectangular with thin frame pieces.

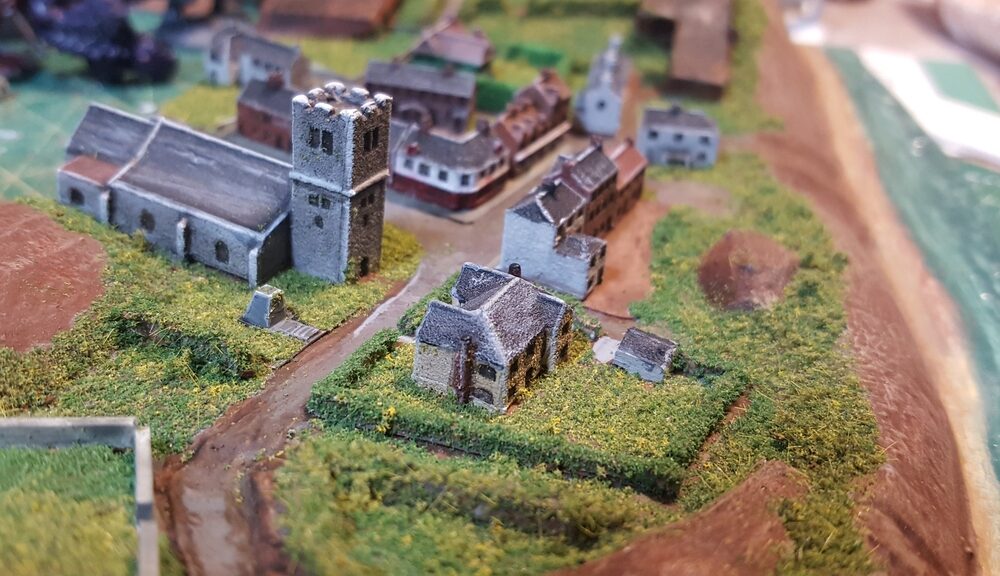
With that, I switched out a lot of my concept and leaned more heavily into that look. Here’s a few pieces of inspiration I pulled from the internet:

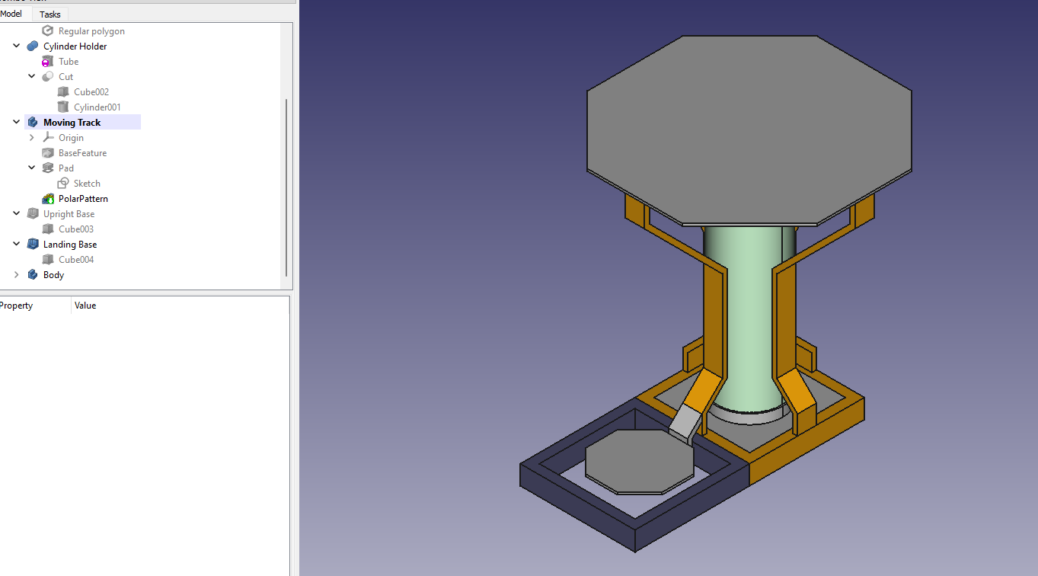
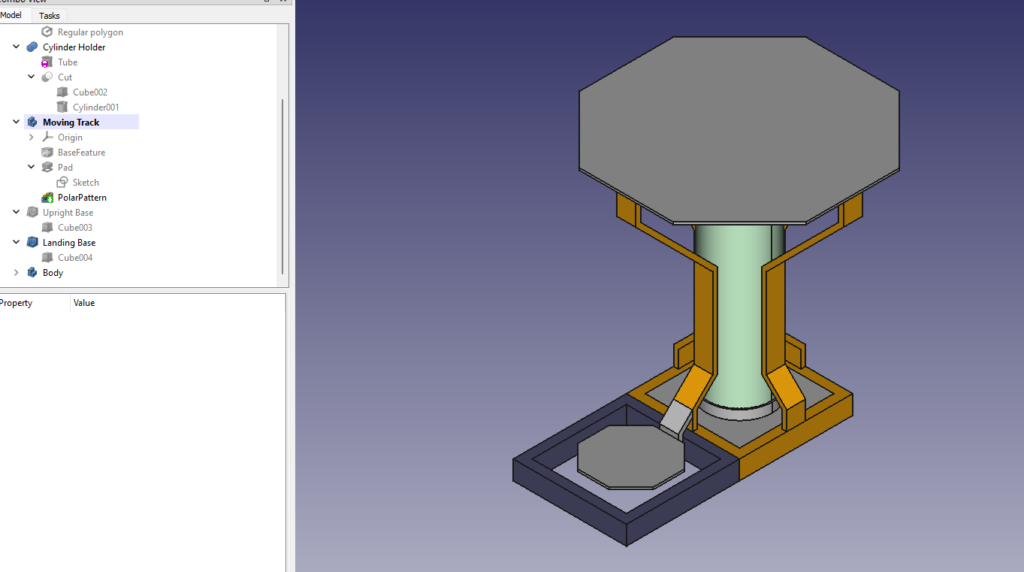
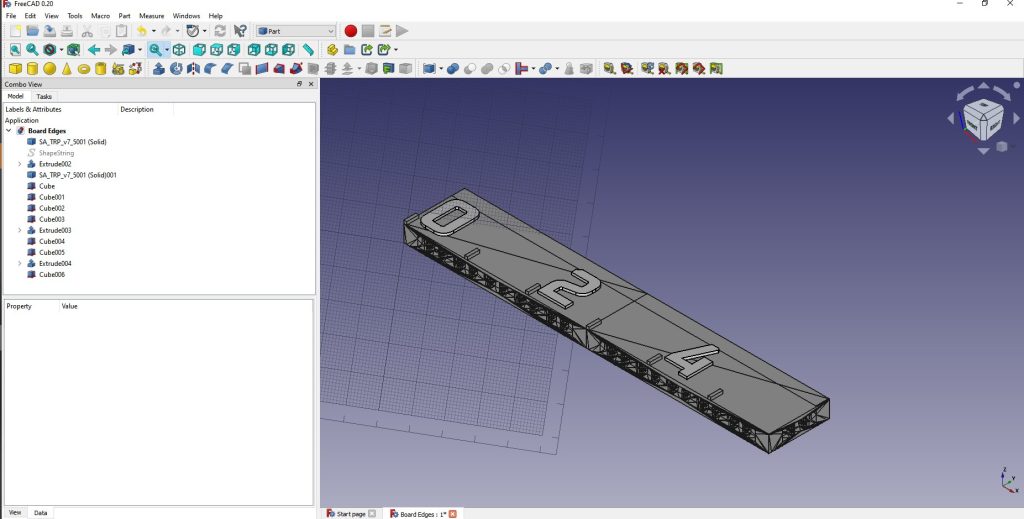
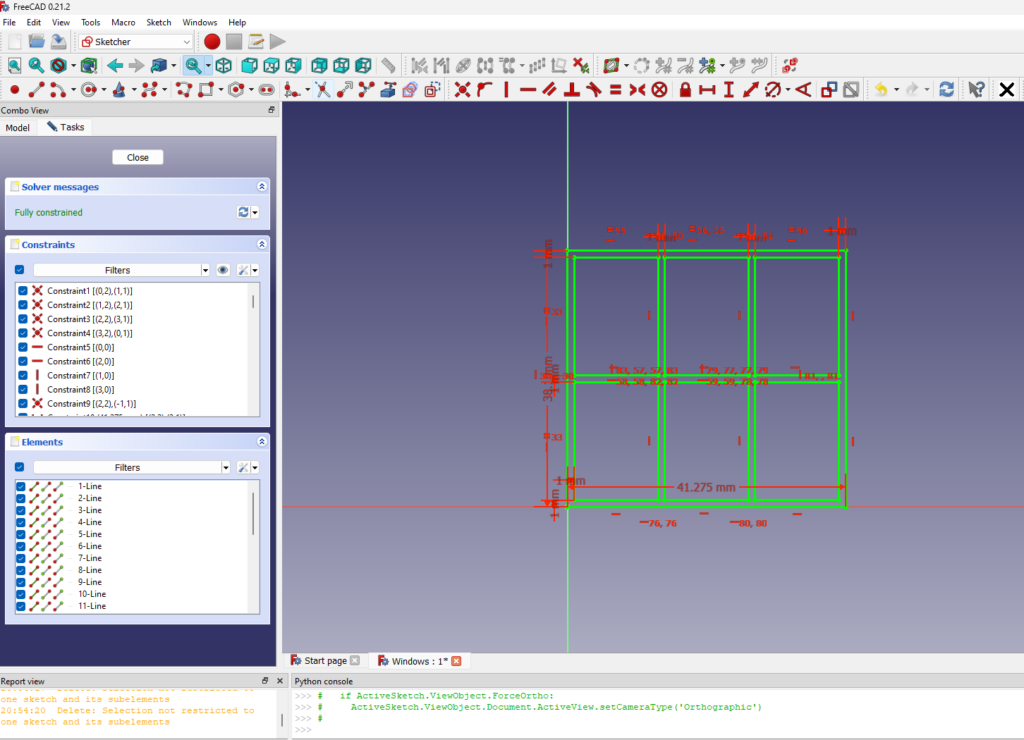
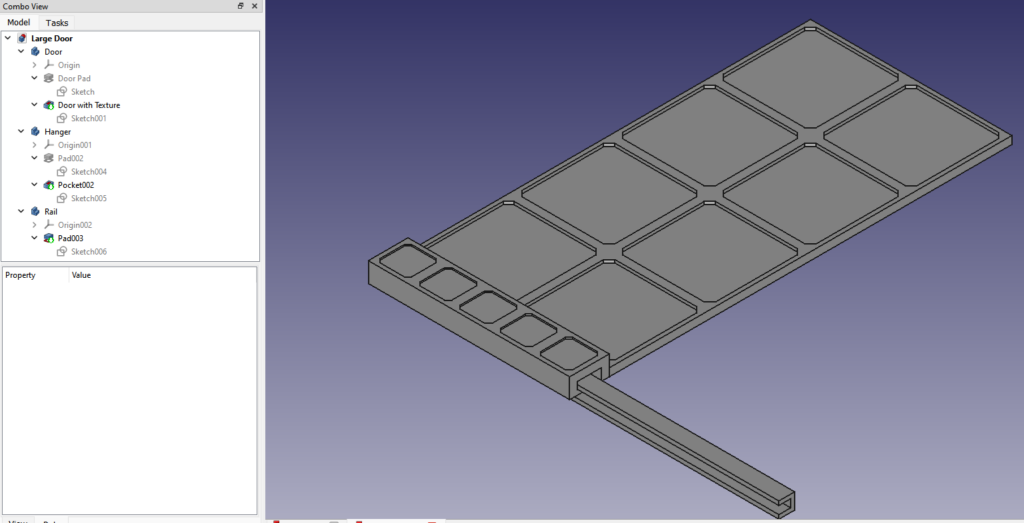
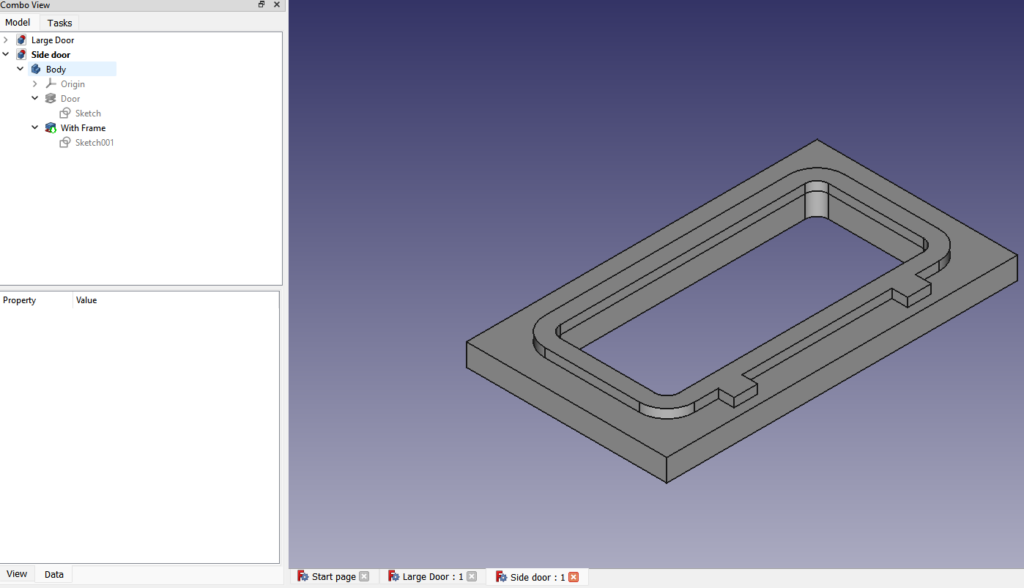
I then decided on a heavy, old-style large doors, with a small door that roughly followed the inspiration above. Both were modelled in FreeCAD and then printed on my Ender 5. The large doors…

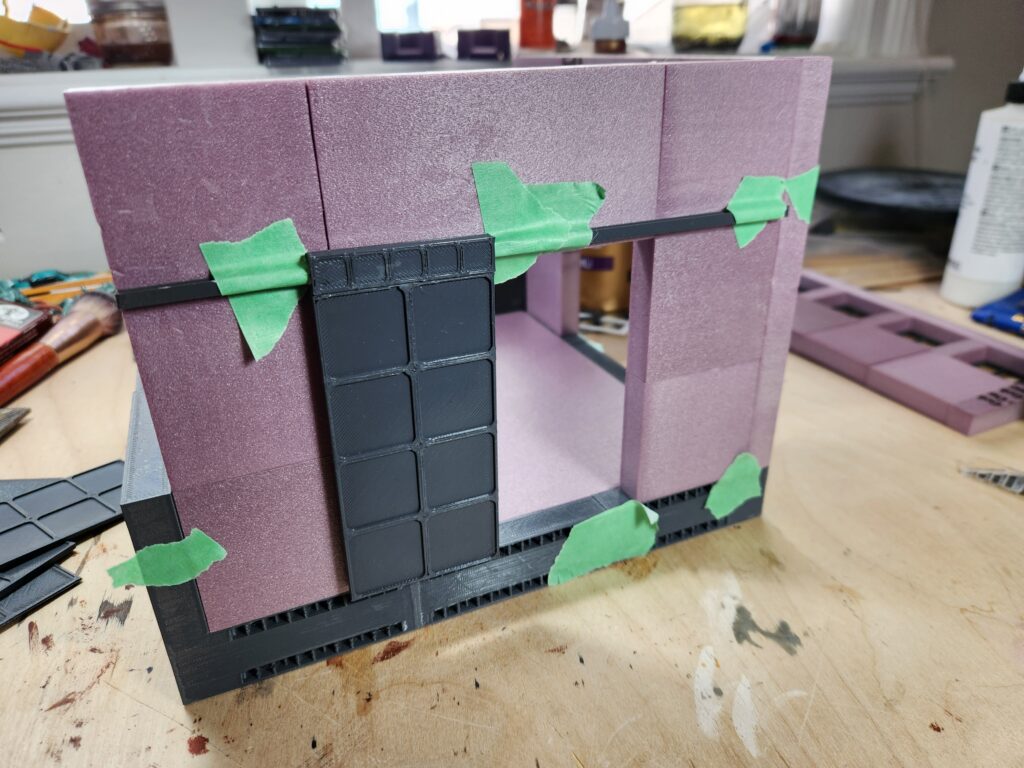
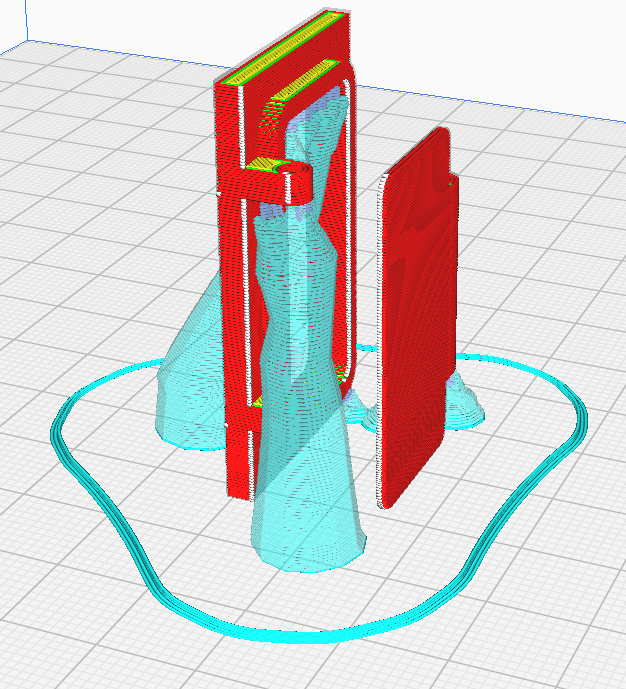
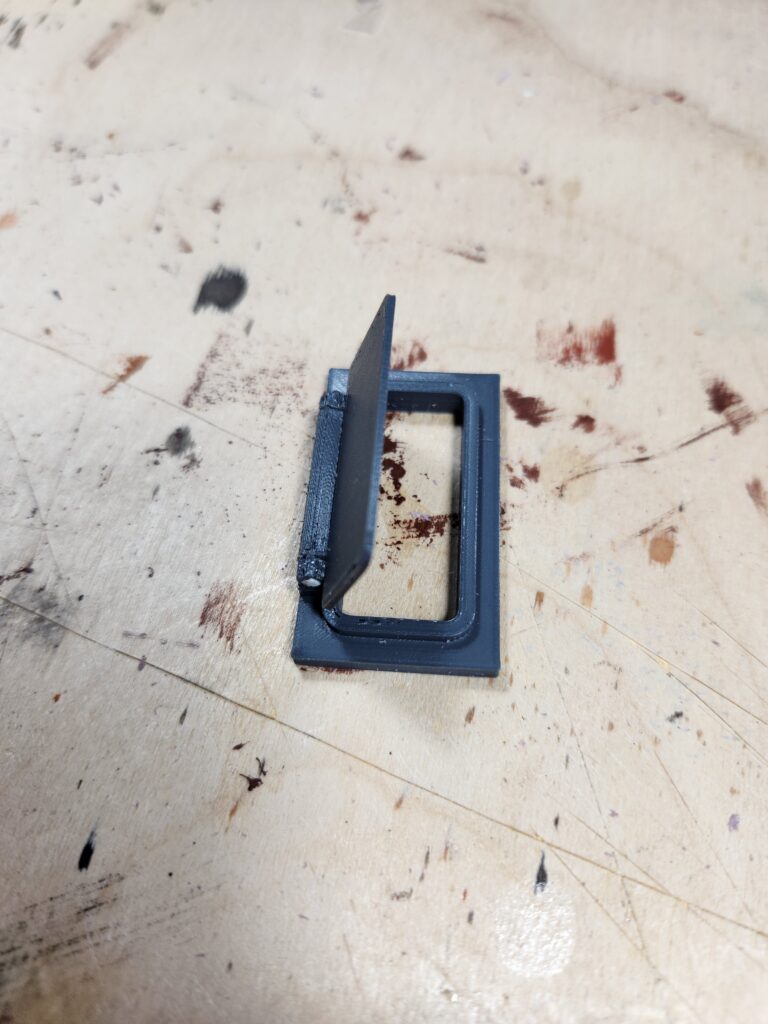
…and the small door. I first did a test with it printed flat to the bed, which worked. Once I designed the door itself, I tried it vertical. That failed, so I switched back to horizontal and printed it at 0.12 layer height. The white you see on the final image a piece of styrene rod which acts as the hinge.

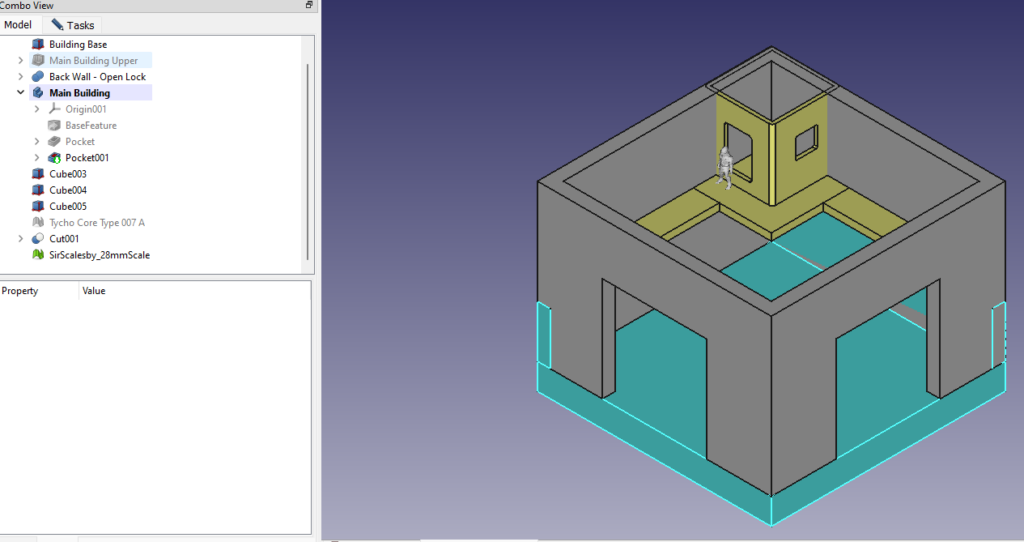
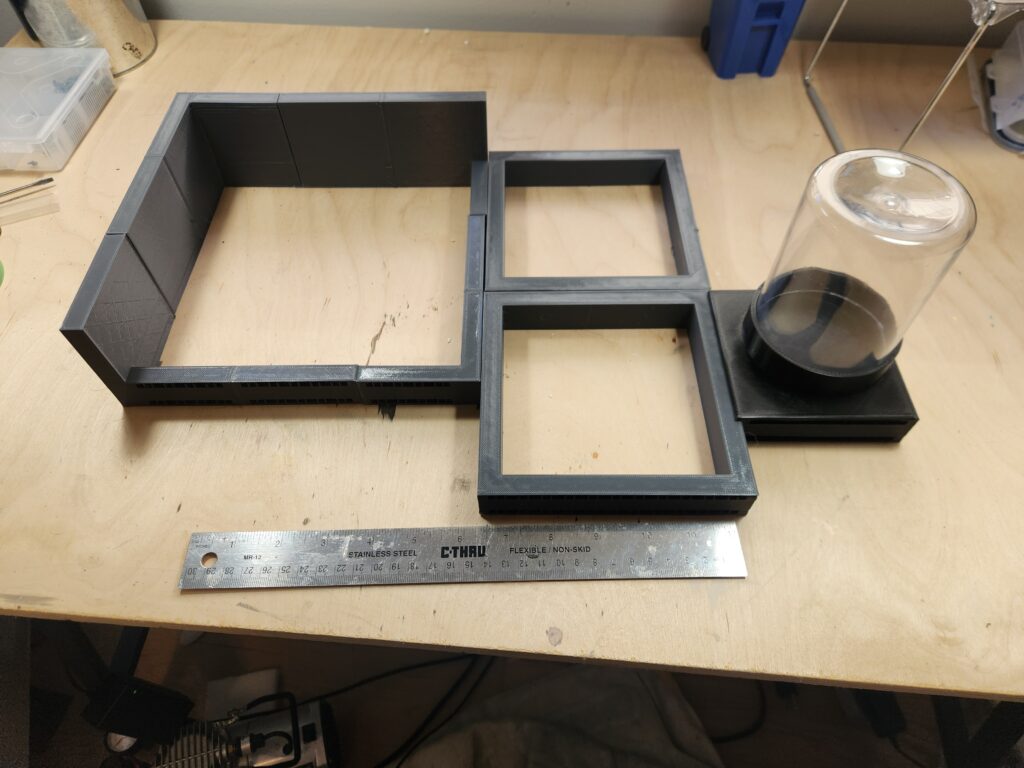
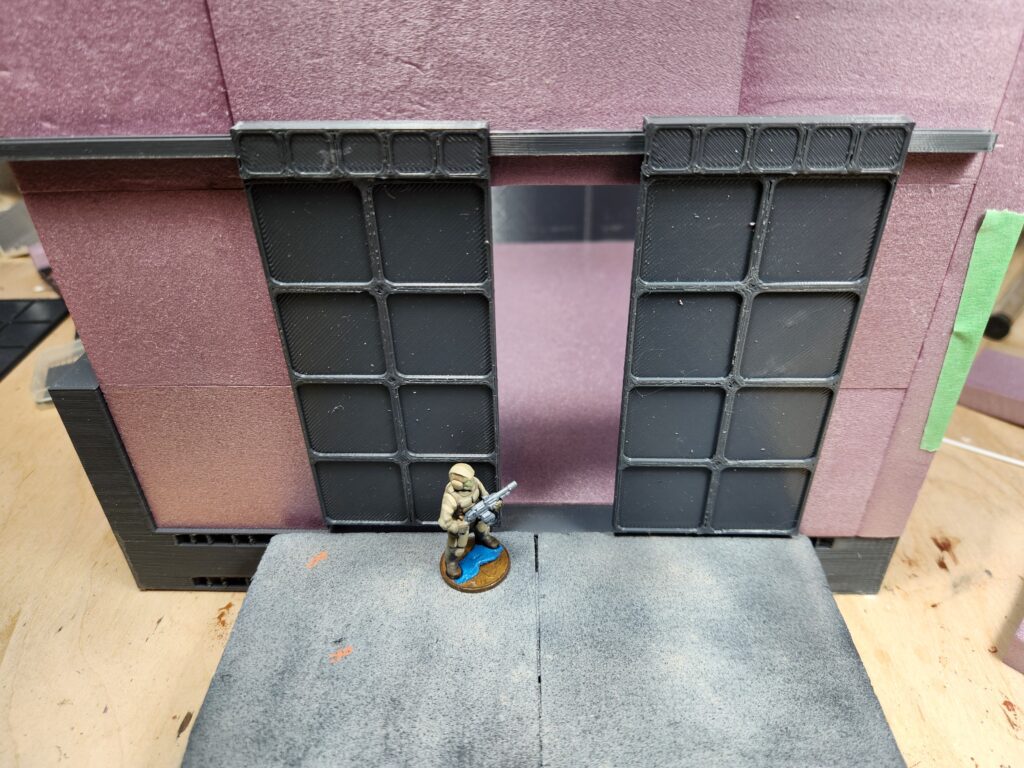
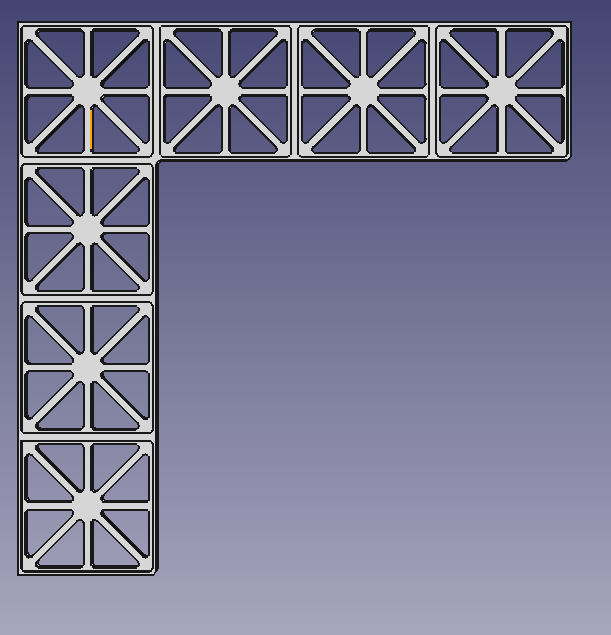
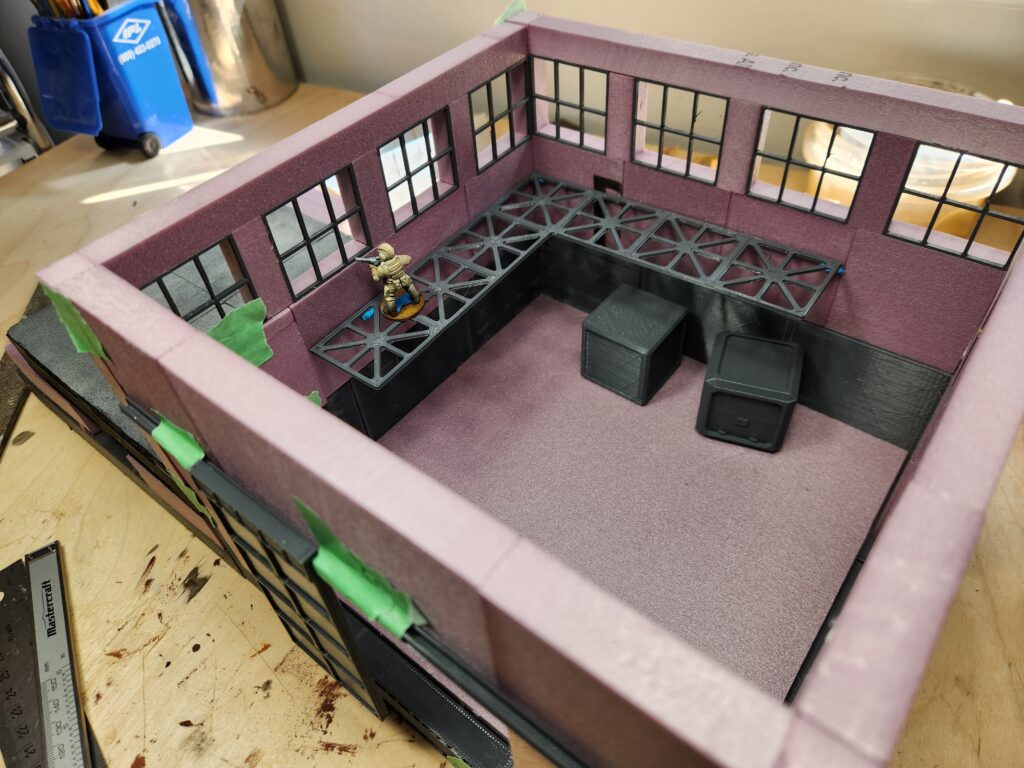
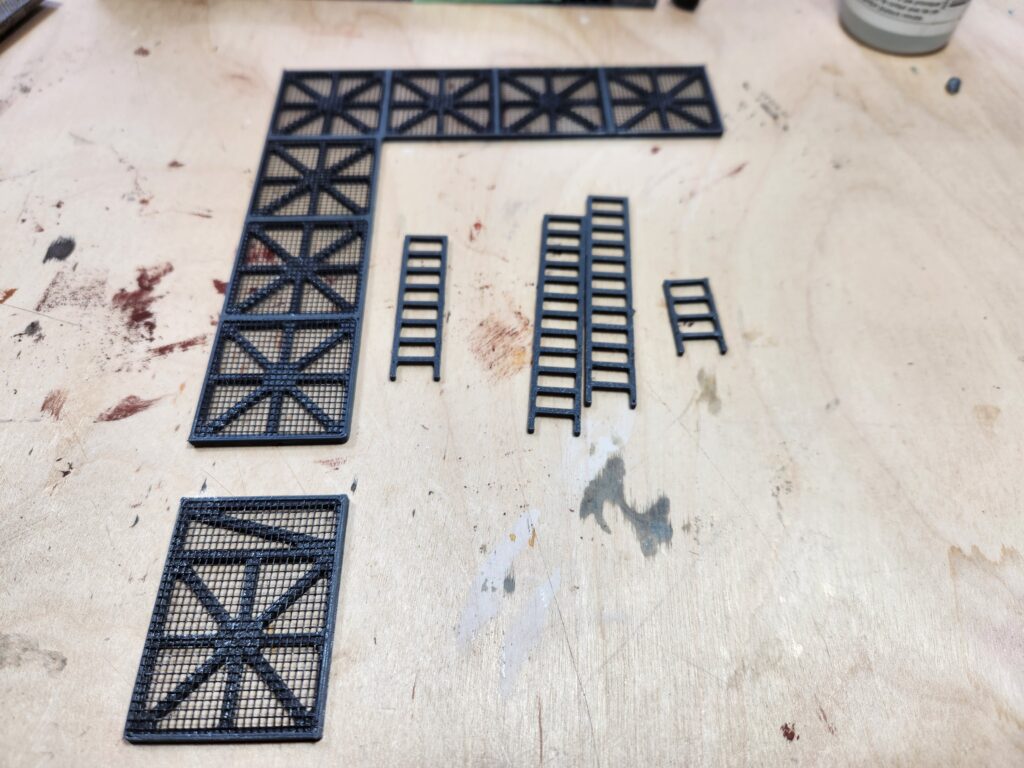
After the doors were printed, I moved onto the interior walkway, which by pure accident ended up being perfect height for a figure to shoot out of. I really didn’t plan that at all, but it was awesome. There are two levels of walkway – one at 3″ where the small door opens and the main walkway at 4″.

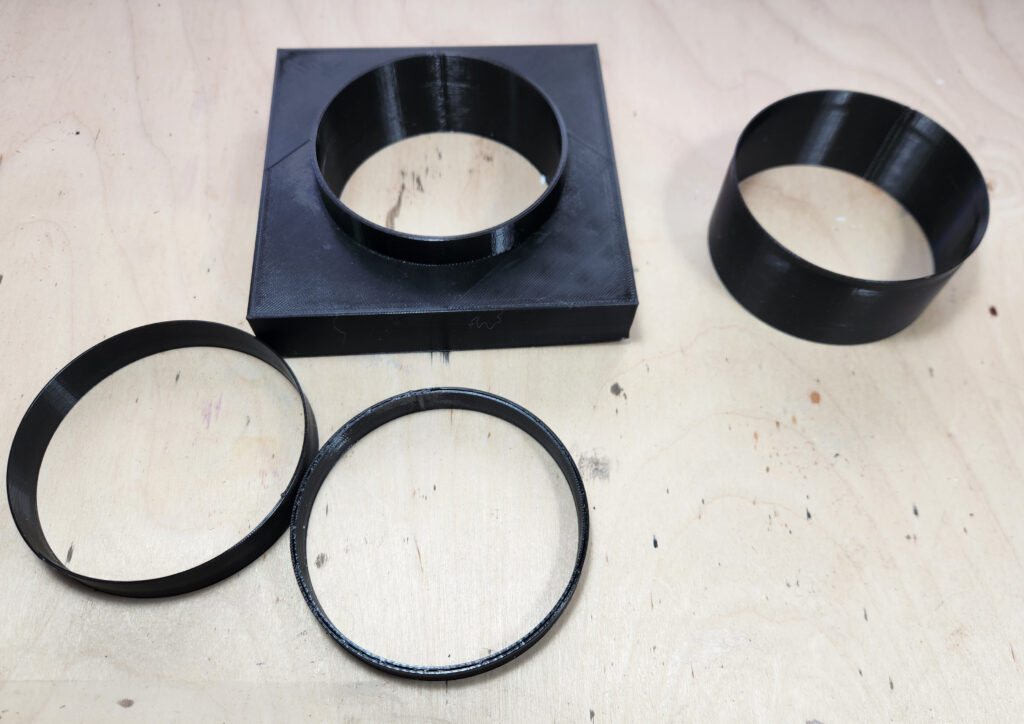
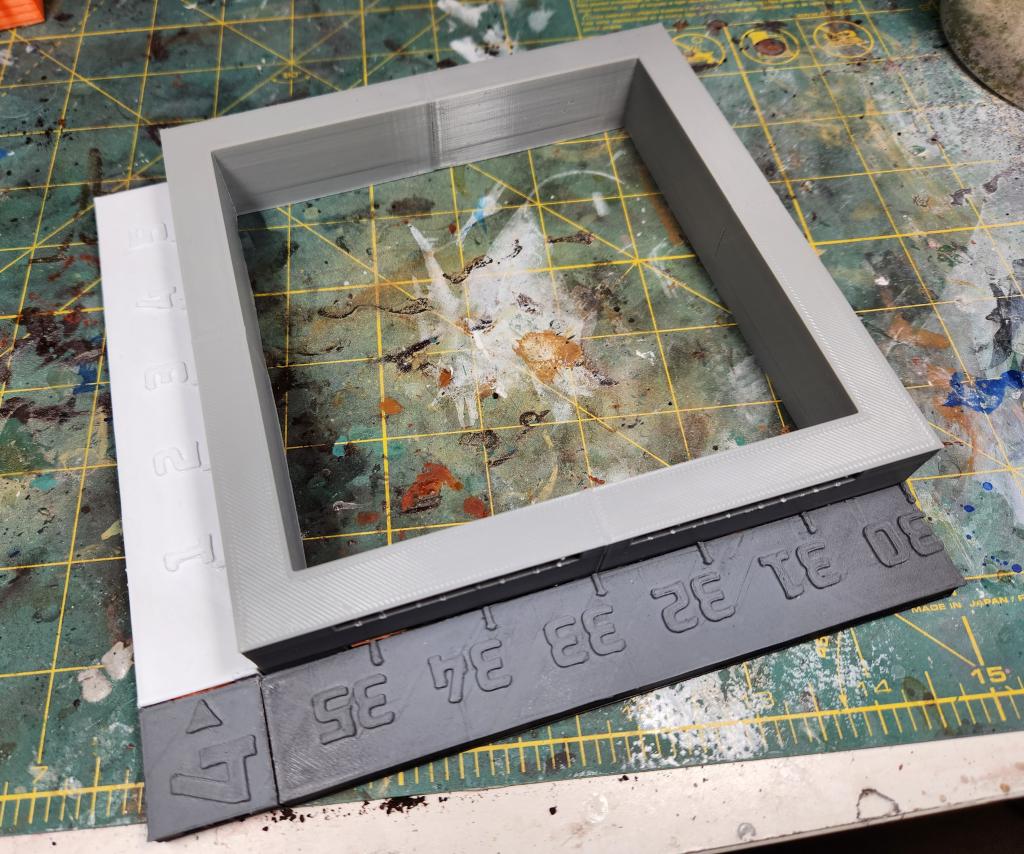
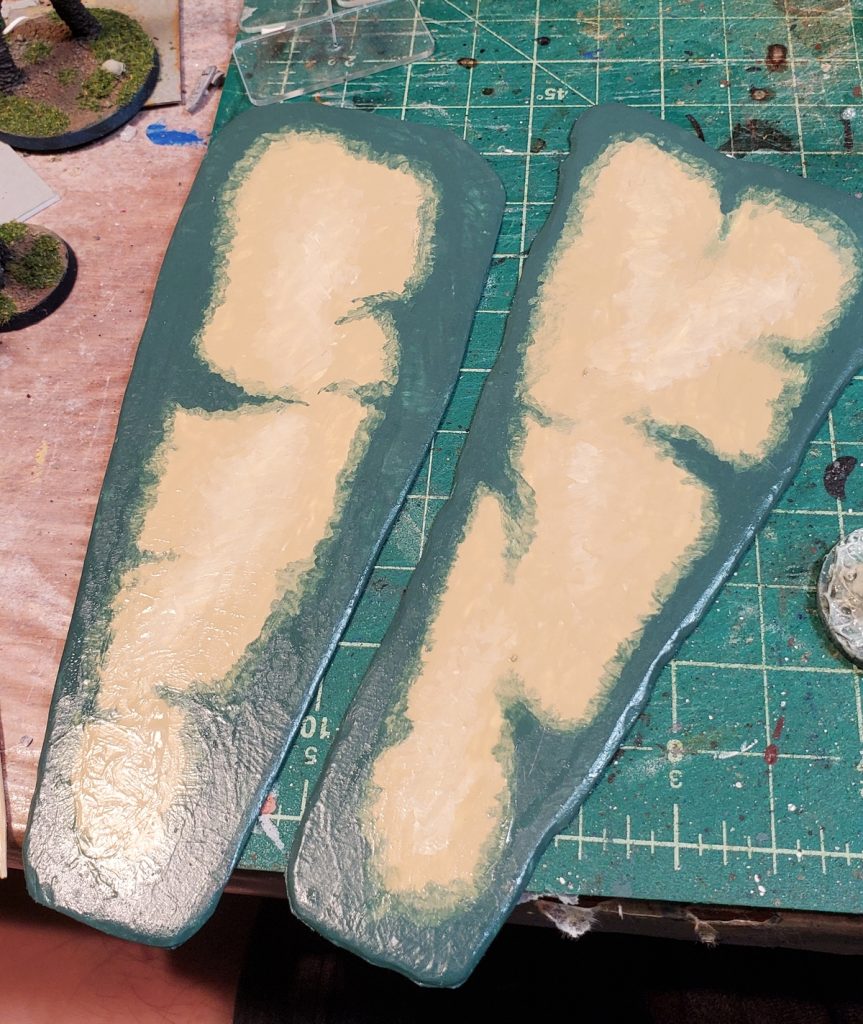
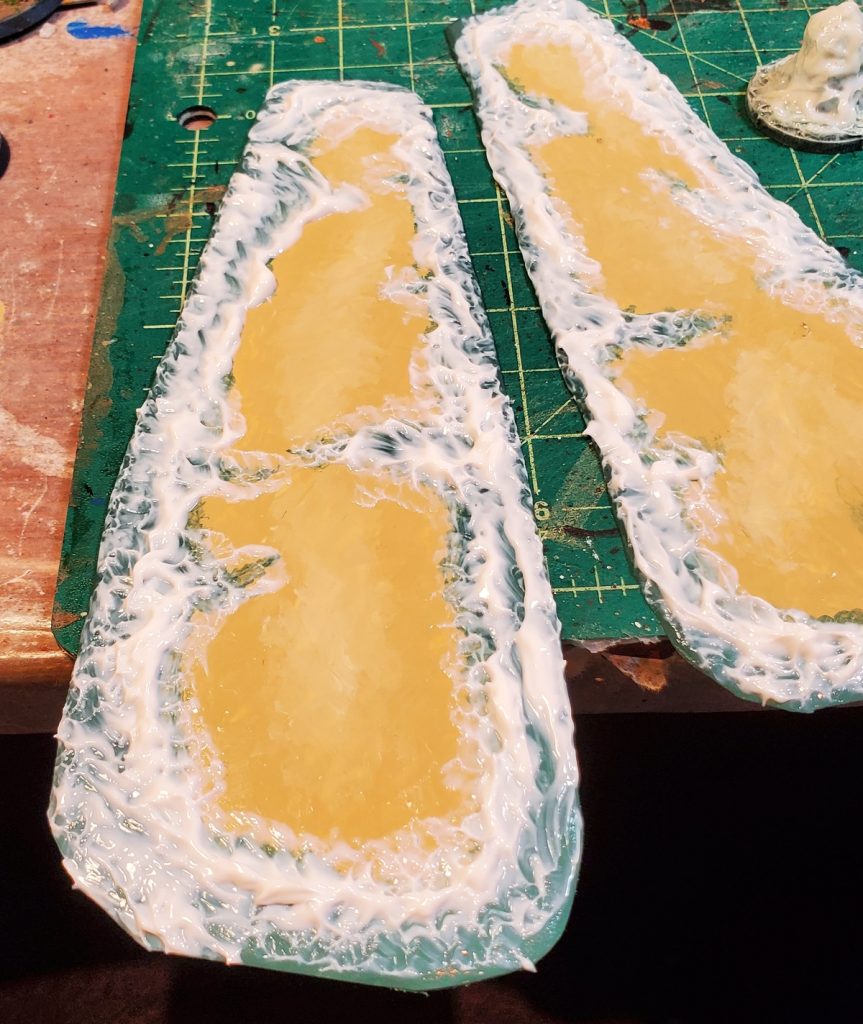
And then onto the windows. I ended up printing them twice – the first round I didn’t think were thick enough, so I ended up printing them a second time at double the thickness. I decided to keep the first round windows and used them as external frames, to which I glued clear PETG and styrene too to make broken and boarded up windows.

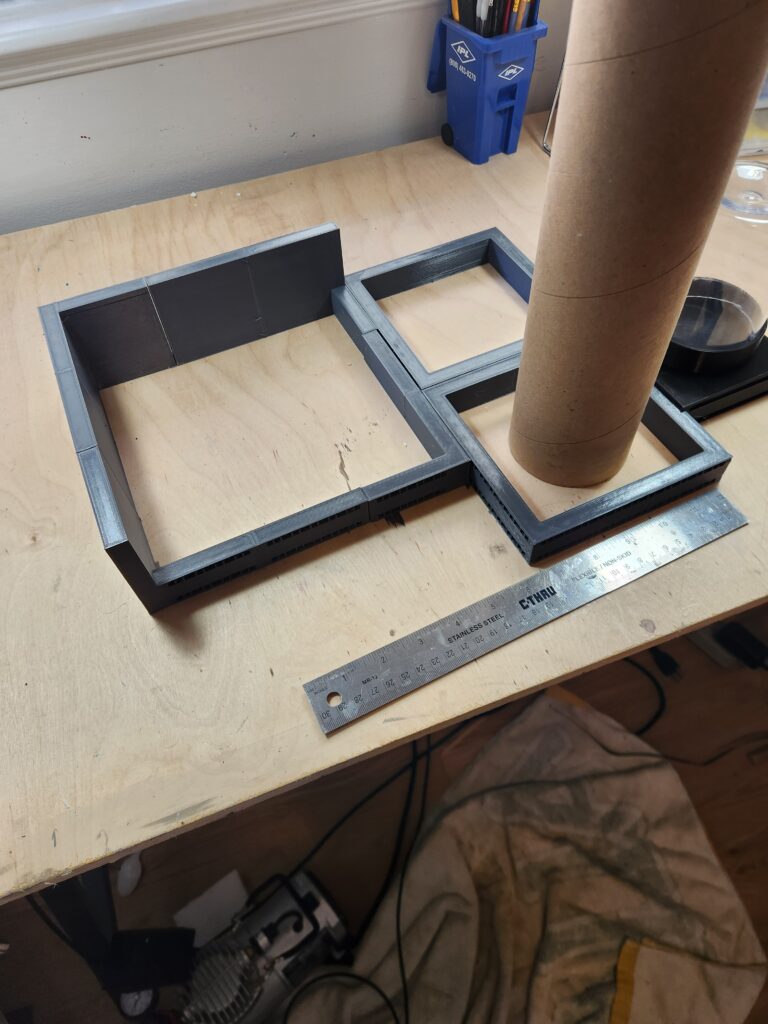
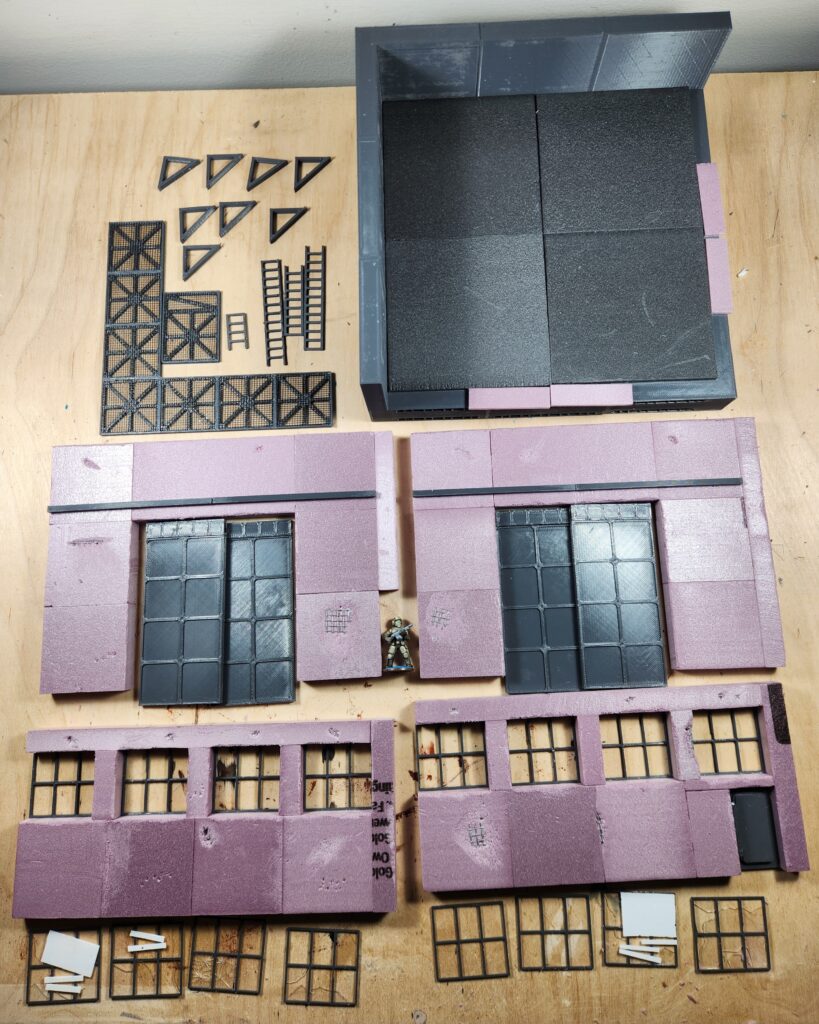
And with all those pieces, the design was basically done! I decided to assemble as a I painted, so this is the final shot before painting:

All the final pieces of the building, not yet assembled.

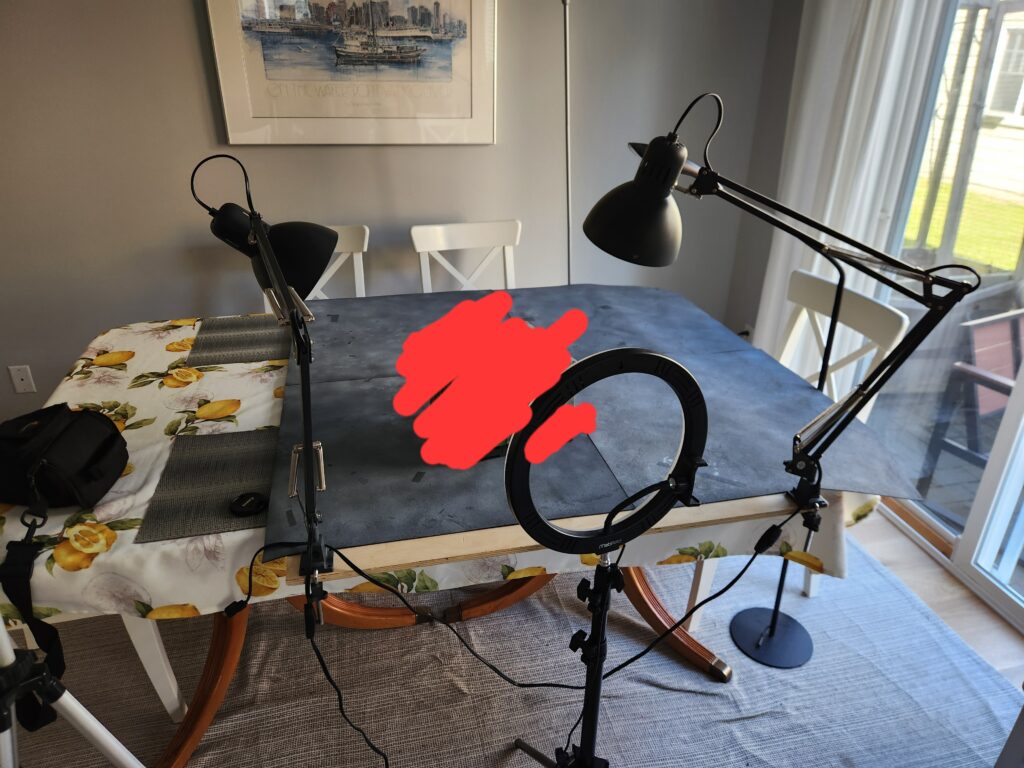
Onwards to painting, which I can’t show you yet, but here’s a photo of my photo setup. Good photos needs lots of light, so I did just that.

Other photos and notes on my forum thread and voting will start fairly soon on the Build Something Competition subforum here.

Still Around, I Promise!

Been doing gaming fairly regularly, had a good weekend at Trumpter Salute 2024 in Vancouver early in March, but apparently haven’t managed to blog a thing in ages.

Here, have a chill painting video in lieu of original content.

Bunch of stuff in progress including a gloriously over the top Gaslands war-bus based on a city busy chassis, which I have been taking a bunch of progress photos of and will try to assemble into a gallery here to show off sometime soon.

Speaking of Gaslands, and somewhat time-sensitive as the Kickstarter closes in 3 days, Fogou Models are running a KS for various Gaslands-scale scenery items. These aren’t STLs but actually physical cast resin pieces. Rad Trax Toy Car Scale Terrain on Kickstarter. The items will likely be available on Fogou’s webstore post-KS, useful for those of us who (say) just had to cough up a home insurance deductible after a plumbing leak and are a bit short on cash…

Note to self, remember you have a blog, dude.

Build Something 2024: A starport

I’ve had various (ed: poor) success with building things competitions in the past. I’ve singularly failed to finish a single one I’ve entered, even the Build Something Small and Encounter Terrain 10×10, both of which were small things. So the natural thing to do was to organize the next round of Building Something Competition (BSC) on Lead Adventure!

If you’re not familiar with BSC, it is a friendly competition on the Lead Adventure Forum, running for more than a decade. Both Brian and I have entered at various times, he’s even finished something:

Concepts

I wasn’t sure what I wanted to build this year – either a spaceport or a vertical mill thing for my hellscape terrain. As you can probably gather from the title, I decided on a spaceport. I’ve been doodling a few different options for a little bit, starting with one giant 12″x18″ piece, but nothing was really gelling for me.

So I decided to try a few different layouts in FreeCAD, see what I liked. I found this cardboard tube from something paper that I wanted to use as the main upright. And I knew I wanted a 9″x9″ building for the main warehouse building. I initially tried a single larger building on a 12″x12″ base, but that didn’t work either. I also tried the landing pad on a big 12″x12″ base. I also didn’t like that

So I decided to split it into multiple bases, the building and starport each on one. And I knew I needed a way to have pads lift up into the sky, so I decided on magnets and printed pads. That is what the orange vertical pieces are – holders for either magnets or metal strips. Those pads will land on a yet another 6″x”6 base.

Printing things!

I’ve been fighting off some sort of stomach issue for the past few weeks, so progress has been slow, but I finally have printed pieces ready to show at least. But first, a whole lot of failures. I needed to find out if I’d measured the tube correctly (which I hadn’t) and then I decided to use an empty pill bottle as a fuel tank to add on. So several failed prints for those look like this:

And finally, the printed pieces (mostly). I haven’t been able to print the holder fully successfully yet, but that is next to go on the printer again tonight. But I have the borders at least done – base, starport base, landing pad base and fuel tank.

You can find all the current entries on the Lead Adventure Forum BSC subforum, including my own.

Links of Interest, 4 January 2024

First Links of Interest of 2024!

Messing about with photo-etch (PE) parts? A bender seems like a useful thing, and happily there’s a Youtube build of a home-made PE parts bender from fairly common parts.

North Star are an awesome miniatures company who do all sorts of cool stuff, and among them is their North Star Magazine which is completely free and stuffed with awesomely well photographed painting articles by Kev Dallimore, an amazing and awesomely experienced pro painter.

In the tutorials line, Handiwork Games out of the UK have a nice pair of articles on making a simple terrain plinth for miniature photography. Part One is here, and Part Two goes into flocking and detailing.

Finally, for fun and for some period colour in our coastal naval games, this short British Pathe clip from 1943 on the RN’s Motor Torpedo Boats, also embedded below.

MTB in 1943 courtesy of British Pathe footage. Their channel has a bunch of clips like this, well worth looking up!

Another Coastal Module

I’ve finally finished another module for my 1/1200 scale coastal naval terrain. This is another 12″ long by 4″ deep piece with part of a reasonable size town on it, and has been sitting around for two years or possibly a bit longer, so it’s nice to get it finished and out of the way!

New coast module from one end, looking into the industrial part of town toward the church. Click for larger.

The buildings are all from Brigade Models’ Small Scale Scenics line, as always, and the boats and vehicles are 3d prints from Shapeways.

The other end, looking into the harbour & bridge and down the main street. The breakwater is a bit of sprue from plastic figures, which got me that nice round end and curve. Click for larger.

The construction is my standard setup, written about previously (see other related posts at the bottom or my naval scenery summary post) with a base of 1mm styrene sheet, a mix of materials for the basic ground forms, and a lot of different flocks for ground cover.

The one thing I might still add is some more of the marvelous Shapeways vehicles here and there…

I don’t have any immediate plans for more coastal modules… but I do have a lot more buildings and vehicles to put to use, and I was thinking that a coastal gun battery would be an interesting addition – the British coastal batteries seem to have had a pretty quiet war, mostly engaging aircraft, but the Allies reported regular engagements with German batteries especially along the occupied French coast… so maybe a half-length 6″ module with a bit of a headland, some gun pits, and a couple bunkers? We shall see…

Where does it go? Painted board edges for Sellswords (and other games)

Sellswords & Spellslingers, like a lot of similar games, often has bad guys (foes in Sellsword parlance) appear at random locations or randomly along the board edge. This process can slow down the game, so I’ve been dreaming up ways to speed it up for a while now. Given I own a 3D printer, I decided to do some designing FreeCAD to create some board edges for Sellswords, Warcry and the upcoming scifi Sellswords variant I’m working on.

Screenshot of the edges in FreeCAD

As I knew I was designing these once, I took some short cuts with my FreeCAD and just bodged it together. The base is a pair of 3″ Openlock templates, with Oxanium font and some ticks extruded onto them. Once printed and with the border corners designed and printed, I got a finished product, numbers from 1 to 35, as a Sellswords board is usually 36″x36″.

Printed but unpainted board edges and corner piece, with an empty 6″x6″ tile

And that is how they sat for many months with little action. I had a convention (BottosCon 2022) in November, so I spent a bunch of time painting up buildings but didn’t get to the edges. So they were black for that first con. Only after the con did I get a base coat of rust on them.

The rust is mostly Liquitex Burnt Sienna Acrylic, with some Liquitex Raw Sienna and Red Oxide, all sponged on to provide texture.

Which brings us to this week, where I finally got the paint job finished. I gloss coated the edges, then put down Vallejo chipping medium with an airbrush. After that was dry, I added blues – mostly Reaper’s True Blue, but also some Sky Blue and Brilliant Blue for accents – all by airbrush

All the many colours of blue!

After the blues were down, I chipped them using a tooth brush, then hand painted on some a cheap craft titanium white and rechipped them. The white nicely toned down as the chipping medium + water means the paint runs a bit.

Just before I finished, I also added some 18 to 21 edges, as we also play Warcry, which has the very strange board size of 30″ by 22″.

Where can you find the files?

I haven’t uploaded them anywhere yet, but will get them on Thingiverse shortly!

Naval Scenery Articles To Date

Last Update: Shapeways being dead, I’ve disabled those links. I’ve tried tracking a few of the artists who posted their microscale stuff on Shapeways but haven’t actually had any success. If you find microscale 3d prints or STLs out there, please comment below!
Prior: 29 December 2023, Resources section with Shapeways link.

Here’s all of my posts on 1/1200 coastal naval scenery so far… I’ll try to remember to add to this post as I create future articles!

Sandbars, Sandbanks, etc

Rocks vs Boats

Actual Islands

…and from 2020 when I started doing coastal naval as a scale and genre, the posts on my 12″ x 4″ coast modules, and painting Brigade’s Small Scale Scenery buildings.

Small Buildings & Tiny Ships (Part One)

Small Buildings & Tiny Ships (Part Two)

Small Buildings & Tiny Ships (Part Three)

A Headland for Tiny Ships

Coastline Complete

Fifty (or so) Tiny Buildings

One more coastal module, this one featuring part of a larger town, finished December 2023.

Another Coastal Module

The December 2023 coastal module. Click for larger.

Resources

All my buildings so far are from Brigade Models Small Scale Scenery range.

I did a Shapeways order in August 2020 for a whole bunch of 3d printed 1/1200 scale stuff and am slowly using up those vehicles and such in various projects. I maintained a Shapeways list, but of course that died when Shapeways went into receivership. Pity.

If you have links to the current web stores of some of the folks who used to use Shapeways for their microscale scenery and ships, please leave a comment below!

Small Scale Islands

To round out the current run of small scale scenery for coastal naval games I decided on a trio of islands, one of them with a lighthouse.

As with the rest of these small scale naval terrain pieces the base is .040/1mm styrene plastic card, bought in bulk from my local plastic supplier, with the edges shaped and sanded.

I forgot to take an unpainted/unplastered photo, and this one is blurry, but you get the idea. Cork for the island shapes on plastic card bases, then premix plaster for the beaches and to provide a bit of variety on some of the flat areas.

The basic structure was more quarter inch cork board, in larger pieces than I used for the rocks. I broke pieces of cork by hand and shaped the edges mostly with my fingernails.

The beaches are premixed patching plaster, applied with a wet sculpting tool and mostly smoothed with a wet fingertip. The concrete jetty on the mid-sized island is a little sliver of styrene plastic square rod.

Basecoats in progress – my usual blue-green ocean colour, black on the islands, sandy on the beaches.

The paint is my usual ocean scenery set – a blue-green for the water, Camel and Parchment for dark and light sand, and the rocks were drybrushed up from black with a dark grey, a pale grey, and finally pure white. The flattish areas of the islands that will eventually be flocked green were painted brown.

Painting all done. The largest island (lower right) is about 4″ x 3.5″, the midsize one (left) is about 3″ x 2.5″ max, and the small one (background) is about 2″ x 2.5″.

For drybrushing, incidentally, I highly recommend heading to your local dollar store/pound shop/etc and getting a set of cheap makeup brushes. They’re fantastic for drybrushing and available in a variety of sizes.

First coat of gloss varnish on the water parts. These wound up with three coats of gloss varnish before I was happy with the look, and then the usual treatment with gloss gel for waves and water texture.

The water got the usual treatment, several coats of gloss varnish with a minimum of 24hrs drying time between each coat, and then acrylic gloss gel for waves and water texture, as detailed in the previous articles in this series. After all the water stuff was thoroughly dry I attached the lighthouse with superglue and did a quick flocking job with two or three different flock mixes.

All three islands finished, flocked, and ready for the table. Really pleased with the wave patterns in the large bay of the largest island on the left.

The lighthouse on the middle sized island is Brigade Model’s Small Scale Scenics Beachy Head lighthouse. The real thing sits directly in the water, not on an island, but it’s a nice generic looking large lighthouse, regardless!

A bit of a closeup of the large and lighthouse islands. Broken cork makes great rock formations and cliffs.
All three islands from overhead. For scale, that wraith is on a 25m wide base and the 1/1200 RAF Beaufighter is on a 20mm W x 40mm L base.

These took a bit longer than I’d planned, due mostly to drying times of all the paint, water effects, and such, but they came out great and I look forward to them being a damned nuisance during 1/1200 naval games for many years to come!

Rocks vs Boats

After doing a pair of new sandbanks, I wanted to do something slightly different but still on the theme of “stuff to crash boats and ships into” and decided on a trio of rocky reef pieces.

As with the sandbars I started with a chunk of .040/1mm plastic sheet, cut it up into three roughly triangular pieces, and carved and sanded the edges down so they met the table smoothly. Then I took some scrap quarter inch cork board, the stuff cheap bulletin boards are made of, and broke it up into crumbs and small pieces for rocks.

Cork rocks glued down to plastic card. I just used ordinary white glue, nothing fancy.

It helps to remember that 1″ = 100 feet in 1/1200 scale, or 1mm = 4 feet in scale – so a rock big enough to seriously inconvenience a ship can still be just a few millimeters high! I wanted rocks and islets, not proper islands (those are coming!) so I kept most of the cork bits small, breaking it up with my fingernails as needed.

The bases got my usual blue-green ocean colour while the cork rocks got a black basecoat, and then successive drybrushes of grey-brown, pale grey, and finally just a bit of pure white.

Rocks after painting and drybrushing and a second coat of ocean colour. All ready for water effects!

As with the sandbars, I did two coats of gloss varnish over the water parts and then a thick layer of gloss gel for waves, pushed around with a really old brush.

Gloss varnish down.
Gloss gel down and pushed around to make some lines of breakers and waves around the bases of the rocks.
Finished rocks after the gloss gel has dried for several days, all ready to ruin the cunning plans of 1/1200 scale captains!

These were almost as quick to create as the sandbars, you use literally crumbs of cork for the rocks so one small piece of cork will go a long, long way, and they look good. I’m looking forward to seeing them on the table menacing players who forget that no matter how dangerous the enemy is, the sea is even more deadly and far, far more unforgiving!

Sandbars for Naval Gaming

As mentioned in the last post, I recently made a pair of new sandbars to give our boats and ships more stuff to run into during our games. I’ve done some before but this time I actually managed to get photos all the way through the process. So here’s my simple way of making sandbars or sand banks for naval gaming.

You will need:

  • card or plastic card. I’ve used 1mm/.040 sheet styrene/plastic card, which I buy in bulk 2’x3′ sheets from our local industrial plastic shop.
  • paint in your preferred sea colour. Mine is a blue-green.
  • a darker and lighter shade of sand for the actual sandbanks. I use Camel for the darker and Parchment for the lighter. If you wanted mudbanks instead of sand, you might want browner shades instead of tan colours.
  • (optional, see text) acrylic glaze medium. Gets a better gradient between sand and water than you’d otherwise get.
  • acrylic gloss varnish, for the wet look.
  • (optional) acrylic gloss gel for waves.
The paints and mediums I use. Salem Green for ocean, Camel for dark sand, Parchment for paler sand, acrylic gloss varnish and acrylic gloss gel for water effects. Not shown here, acrylic glaze medium for the beach/ocean transition painting.

I started by cutting two fairly random shapes out of an offcut of styrene plastic card I had around. Both these sandbars are about 6″ long and 3″ wide at the widest point. Carve the edges slightly irregular and sand them so they taper nicely down to table level. This is mostly why I use styrene plastic card so much, because unlike cardstock you can sand it.

I block out the sandbar shape with the darker sand paint, feathering the outer edges toward the water as I go. While that paint is still wet I laid down and blended in the brighter central paint to show the central, slightly higher, slightly drier parts of the sandbar. This is just quick and dirty wet blending with a wet brush, nothing fancy.

Sandbars with base colours all done, including wet blending paler sand into the centres of the sandbars where they’re higher and drier.

Adding the water colour around the edges, I also made sure to feather that into the sand to keep the edges irregular and natural looking.

After the base colours were dry I came back with the blue-green water colour, mixed 1:1:1 with glaze medium and water and went around the shoreline again to get more graduated colours where the water and sand meet. You can do this with thin washes without needing glaze medium, but the glaze medium gives you much more control and also slows down drying time so you have a bit more time to adjust things.

Thin glaze coat of blue-green water around the edges of the sandbars.

After this was all dry, it was time for a coat of gloss varnish over the whole thing. A word of warning about gloss varnish: make sure everything you’re putting varnish over is perfectly dry, and that includes the first coat if you’re doing multiple coats. Gloss varnish will crack and craze paint under it that is not yet perfectly dry and you’ll have to redo all your base coats and start from scratch – been there, done that, done the swearing!

First coat of gloss varnish down.

After the first coat of gloss was perfectly dry (see warning above!) I did a second coat mostly on the water and darker sand areas and then let that dry.

Second coat of gloss varnish down. Not a lot of difference in these photos, but the second coat looks dramatically glossier and more even in person than the first coat alone.

Finally, to add some waves and water texture I went round the edges of each piece with acrylic gloss gel. This goes on white but dries clear eventually. This stuff shrinks quite a lot so the trick is to build it up higher than you think is reasonable and then let it dry for a day or several. I use a really old paintbrush to shove it around, build up lines of waves, and otherwise manipulate it. In a larger scale than 1/1200 you might want to use clear acrylic caulk or something else to build up waves.

Gloss gel worked in around the edges for waves, applied thick as it will shrink down as it dries.

Gloss gel is easy to work with and makes great water textures, but it takes days and days and days to dry. Skip it for now if you need to get your scenery on the table in the next several days and come back to it later!

Once gloss gel finally dries, you get nice breakers and areas of disturbed water.

Two sandbars done and ready to complicate the lives and decision making processes of captains in future small boat games!

Coming soon, rocky reef hazards, small islands, and more shell bursts!