For the past year I’ve been building some modular fantasy/medieval city tiles for our Sellswords and Guilders games. It has been a long process of building as I’ve chosen the hardest method possible – laying the cut foam stones individually. But I finally have a full 2′ x 2′ square of them done. The impetus this time was our local move into Mordheim and yet another competition – this time the quarterly painting competition on Bloodbeard’s Garage Discord, which had a theme of “unfinished”. Talk about the ultimate un never finished project!
Building the tiles
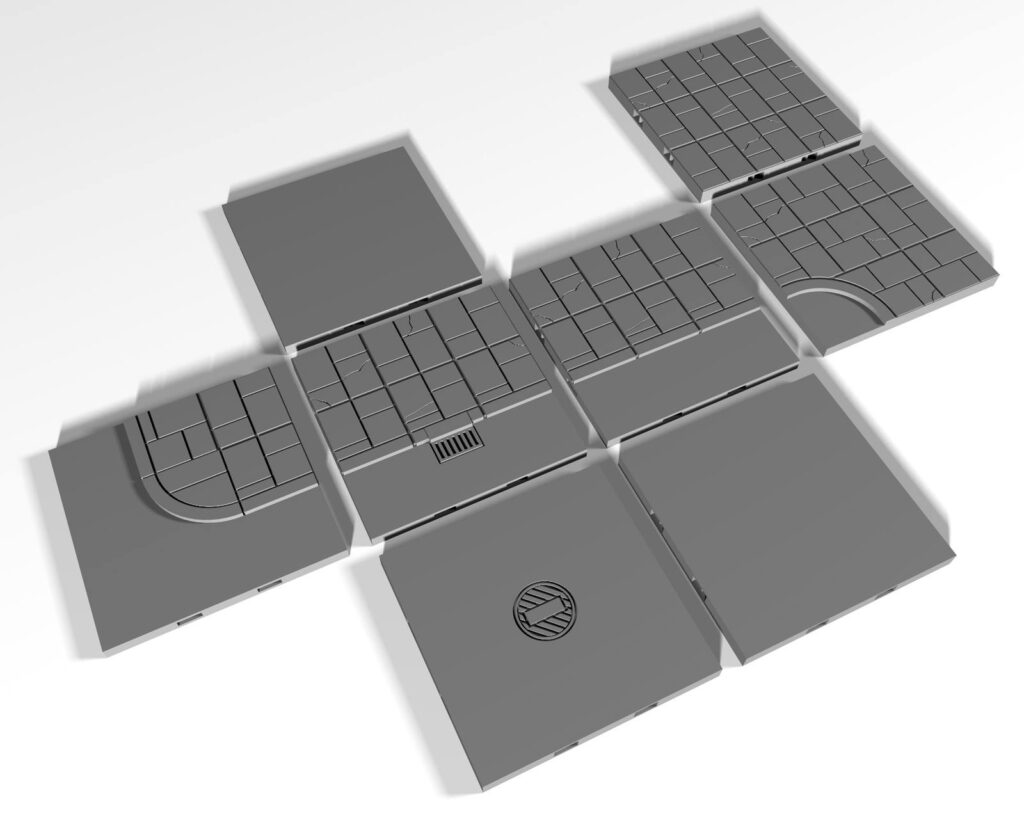
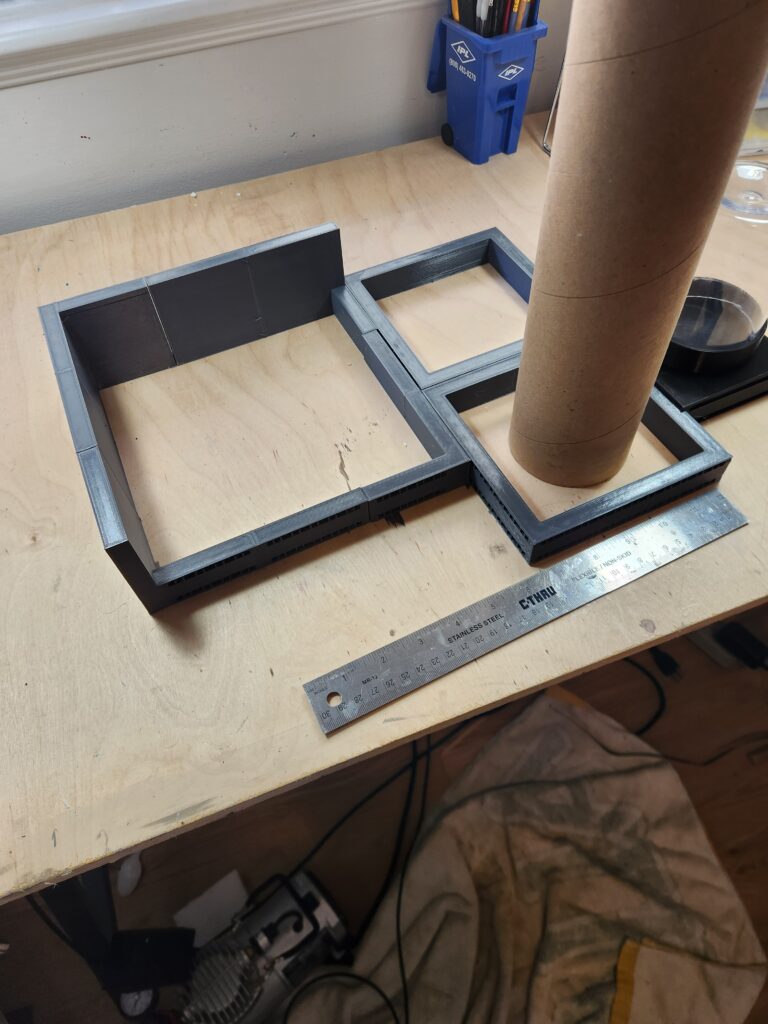
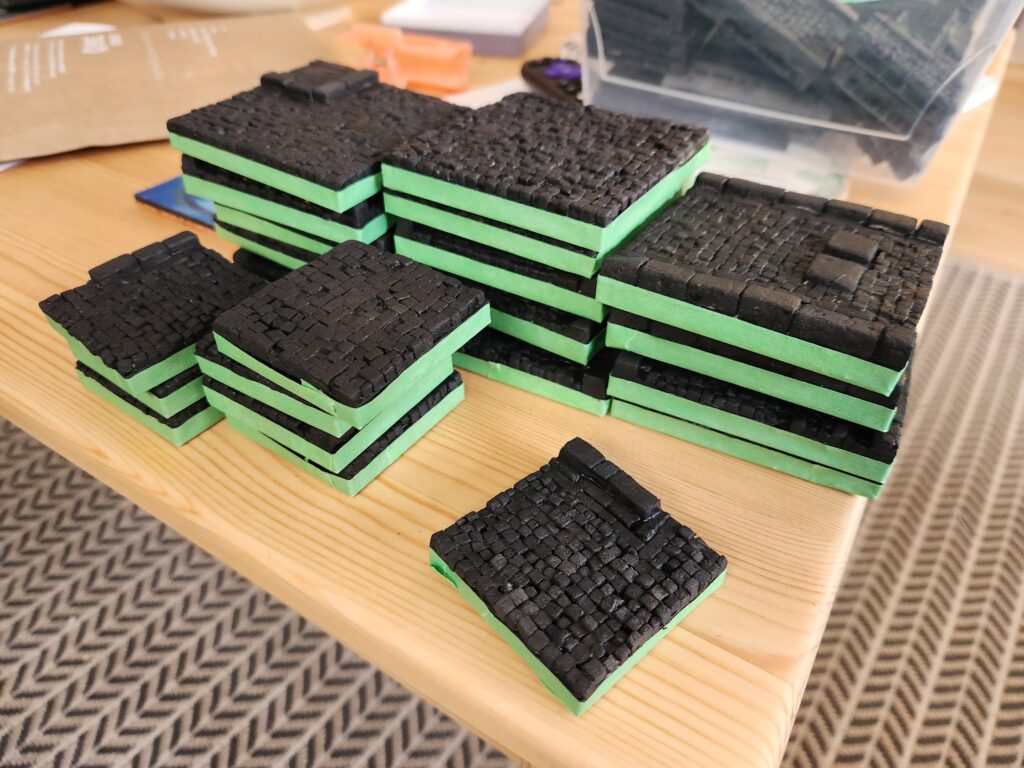
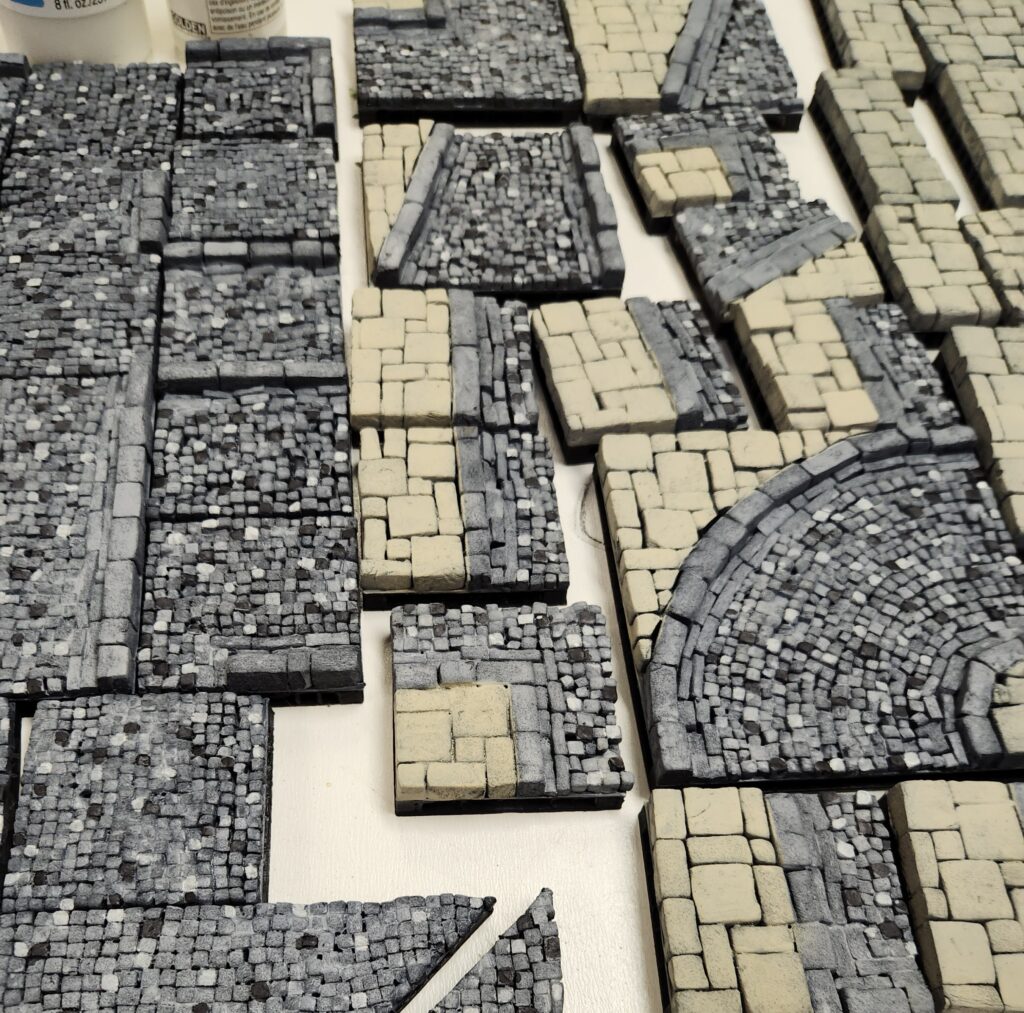
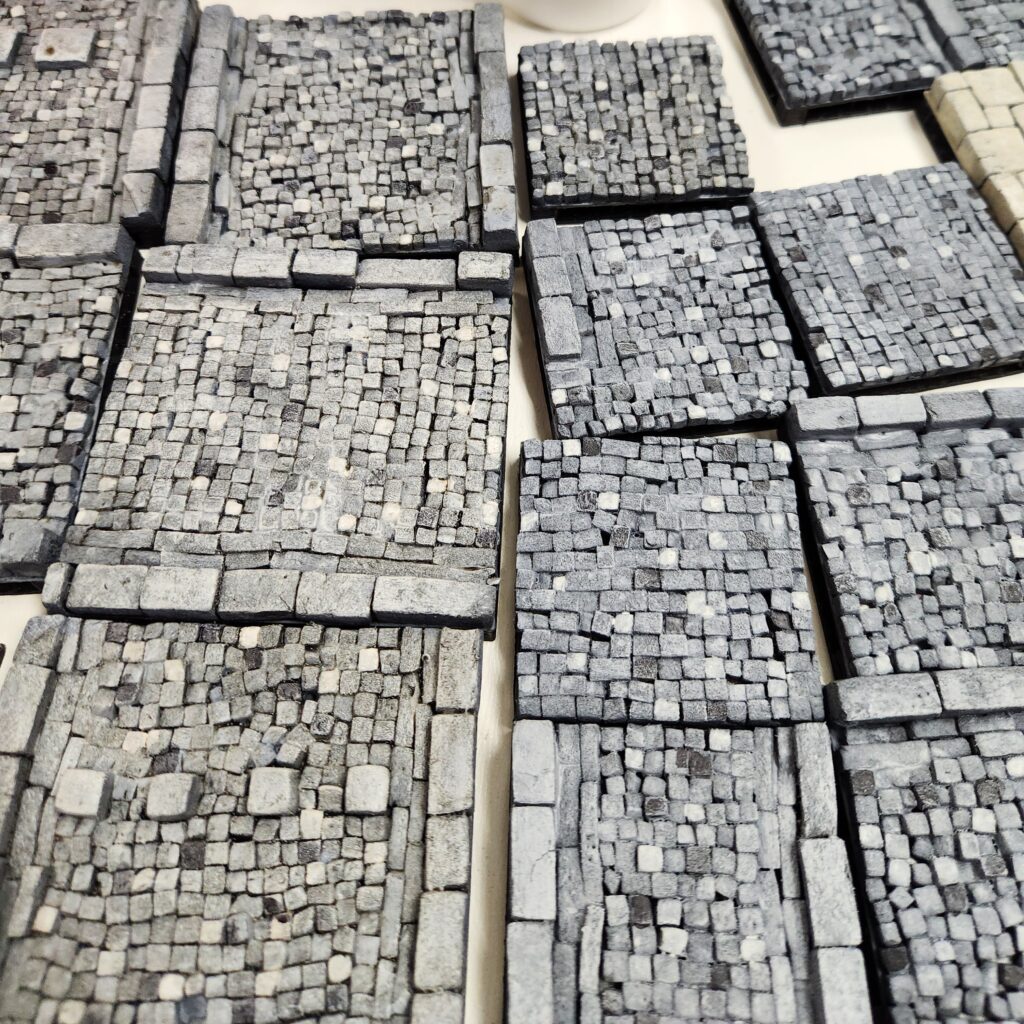
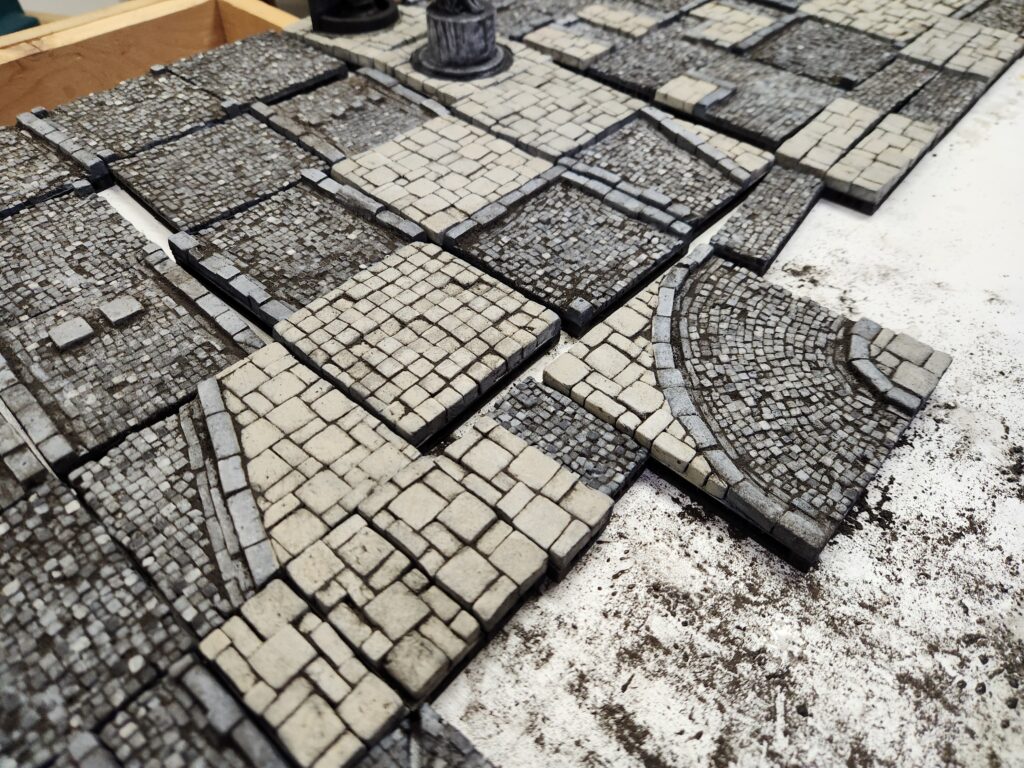
As with my other modular boards, these are all based on 3D printed Open Lock tiles. I then used my Proxxon hot wire cutter to cut a few different sizes of tiles. I tested two initially: 1/8″ and 1/4″. Ultimately, I liked the look of 1/8″ (as did my wife, but she thought it was nuts).
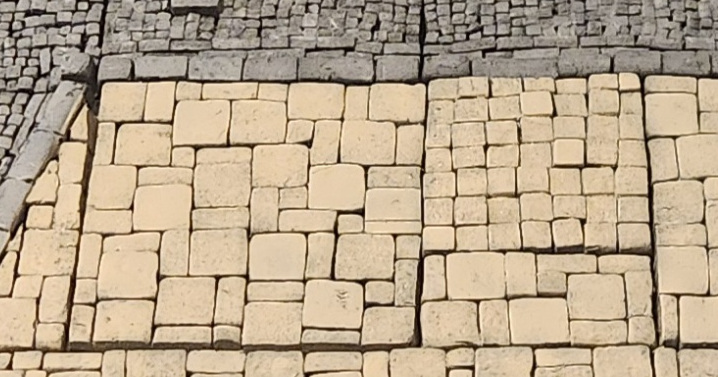
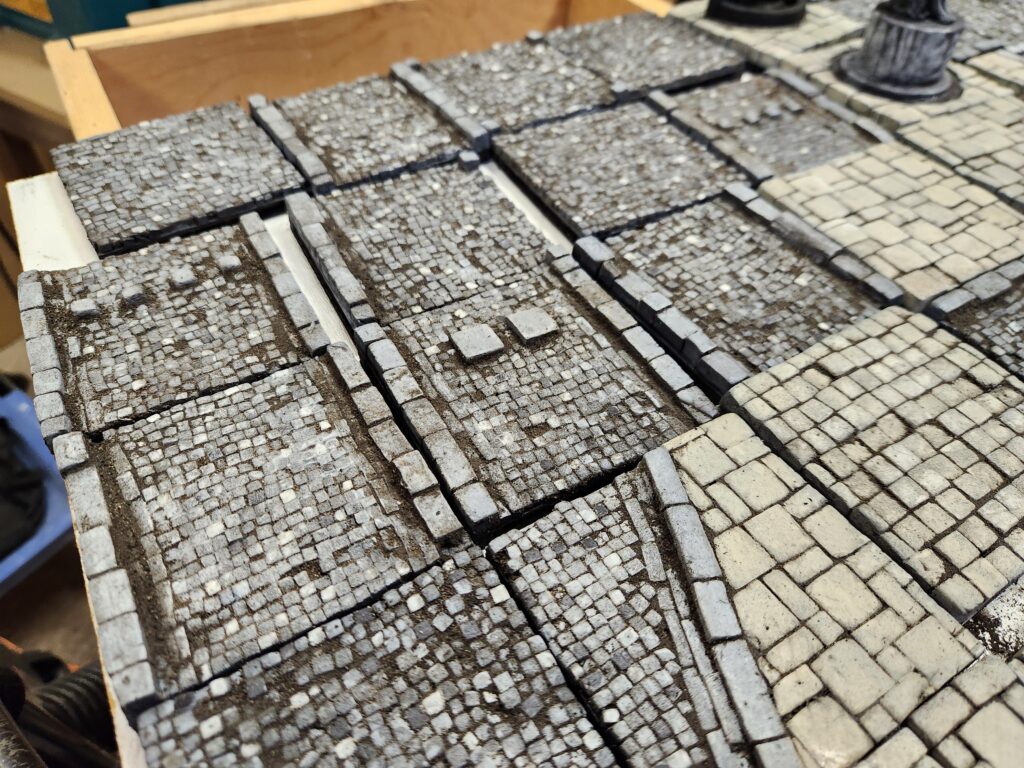
I also made a 2nd change early on – for the sidewalk I moved from just 1/4″ cubes to a mixture of 1/2″ squares, 1/2″ by 1/4″ rectangles and 1/4″ cubes, always tessalated so that no two of the same touched fully on their long side.
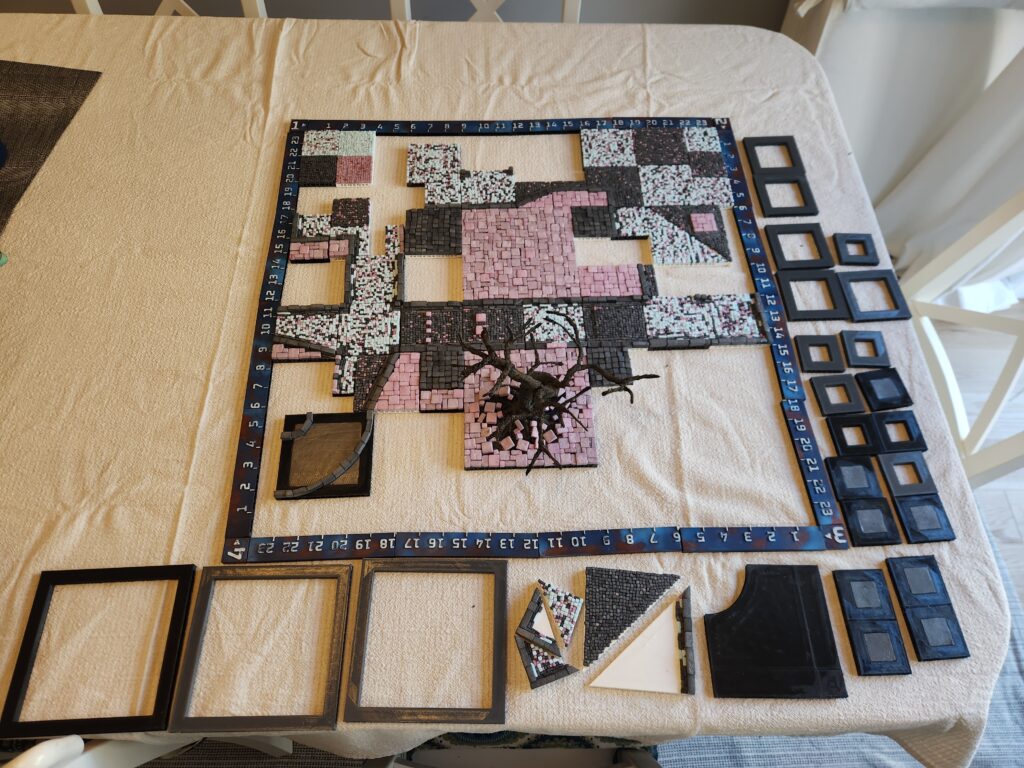
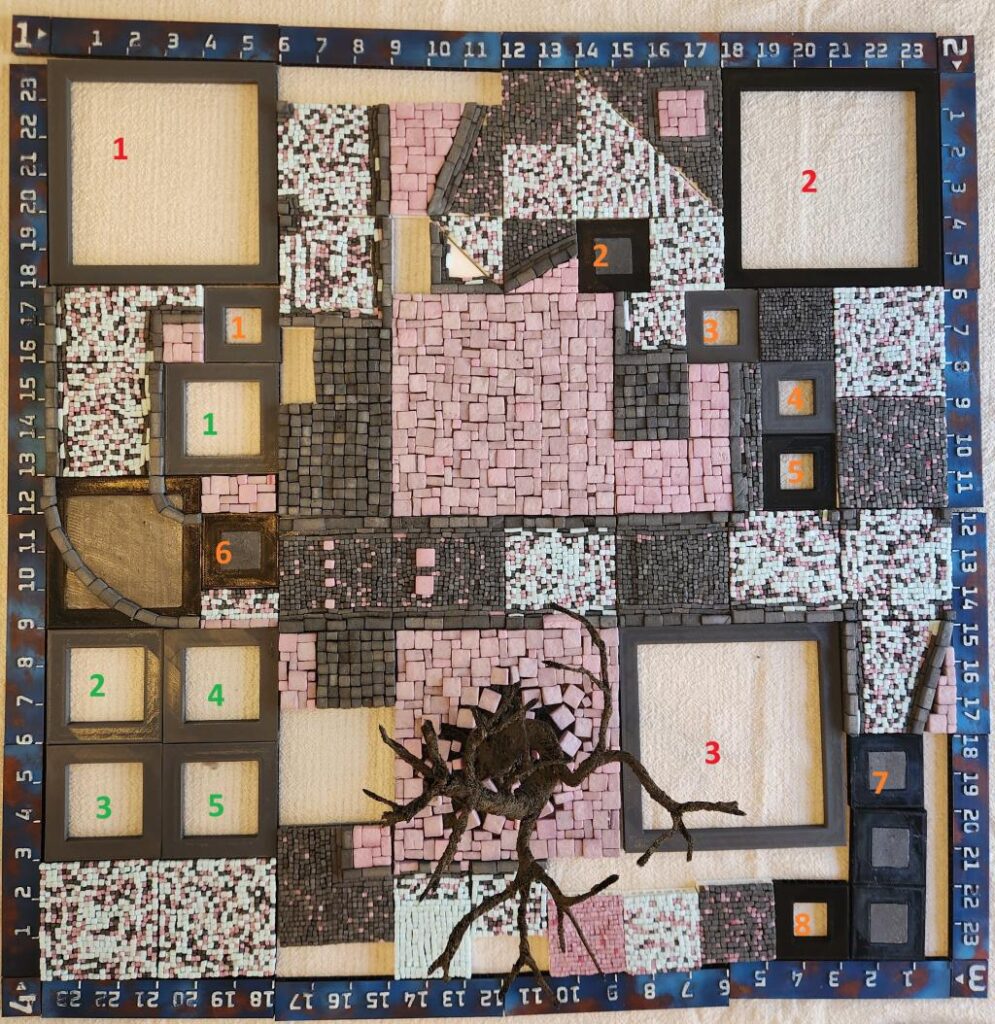
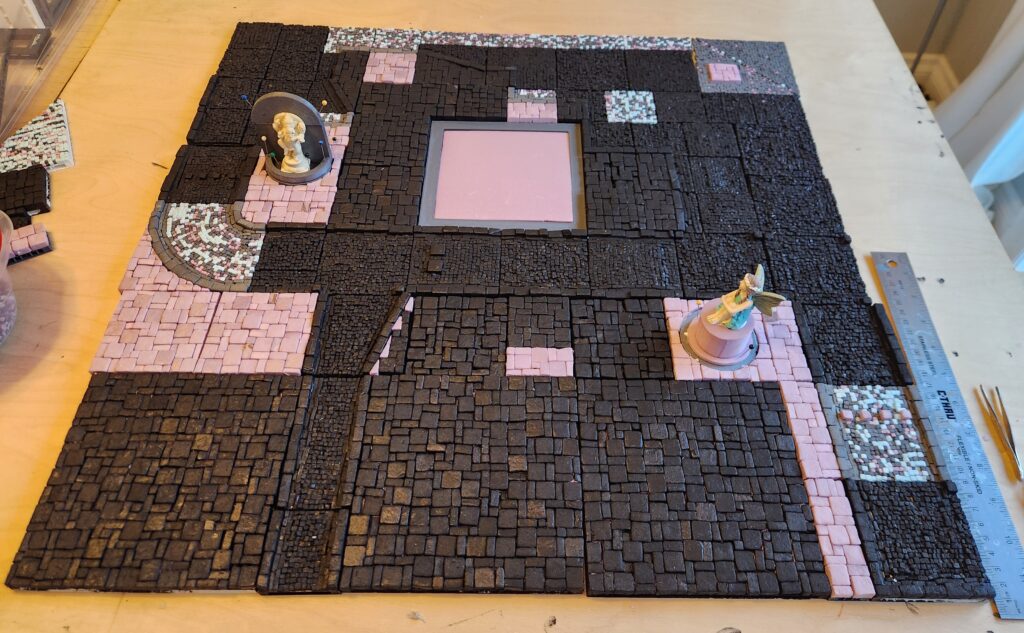
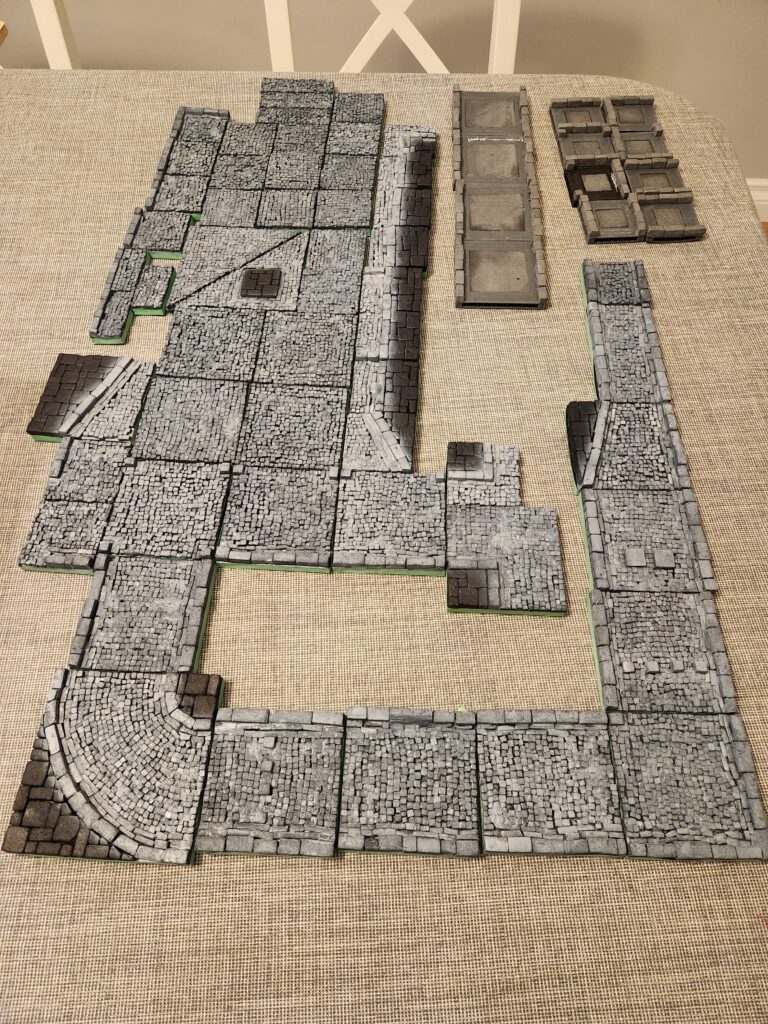
After a lot of work, I had bits and pieces of a table, but certainly nothing enough for even a 3’x3′ (our standard board size). After a hiatus, I got moving again. I also switched glues – from standard PVA to Aleene’s Tacky, which sped up production. So I planned out my initial 2′ x 2′ planned out (well, sort of, I tweaked it almost immediately):
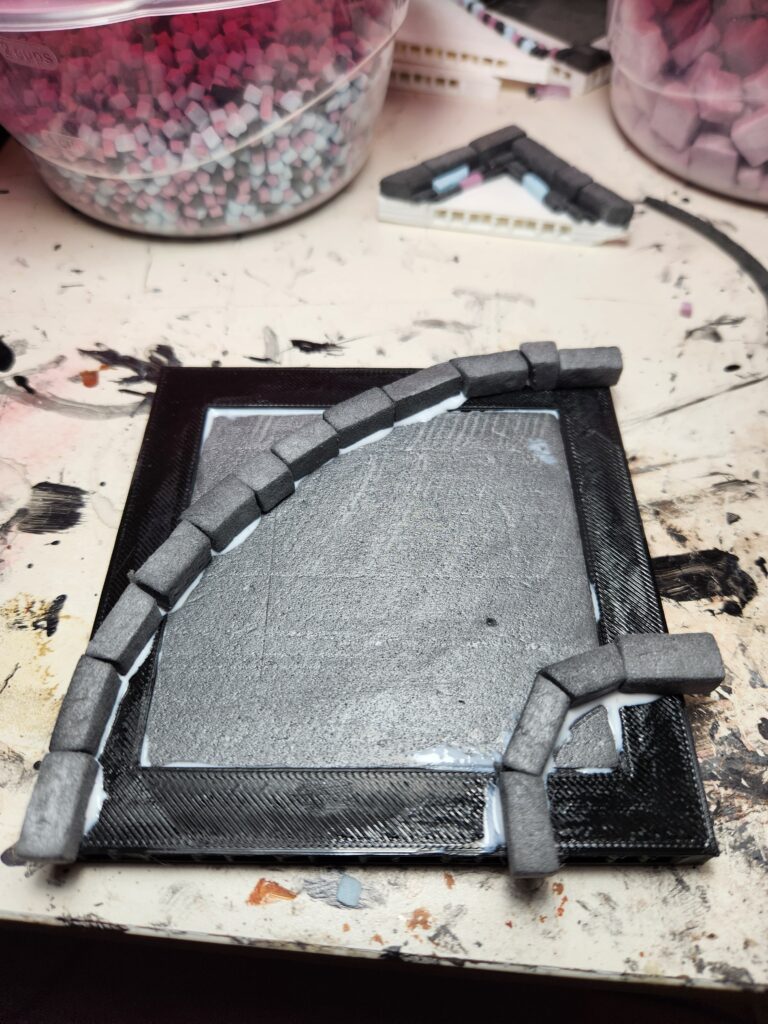
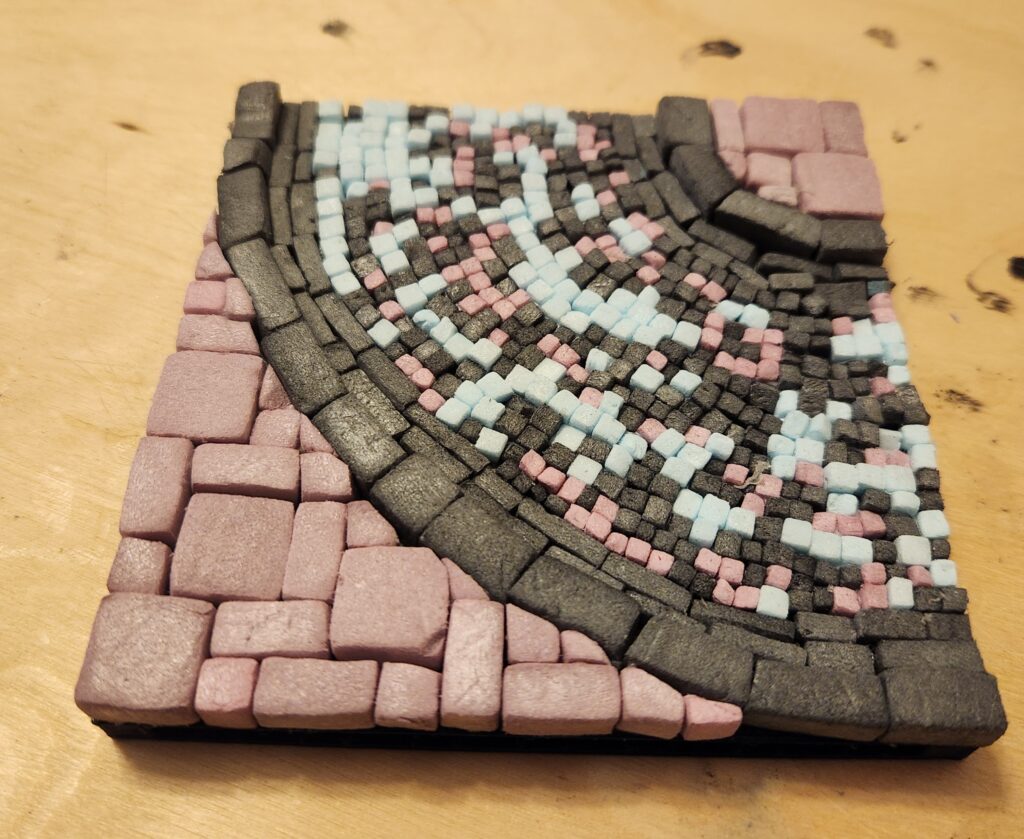
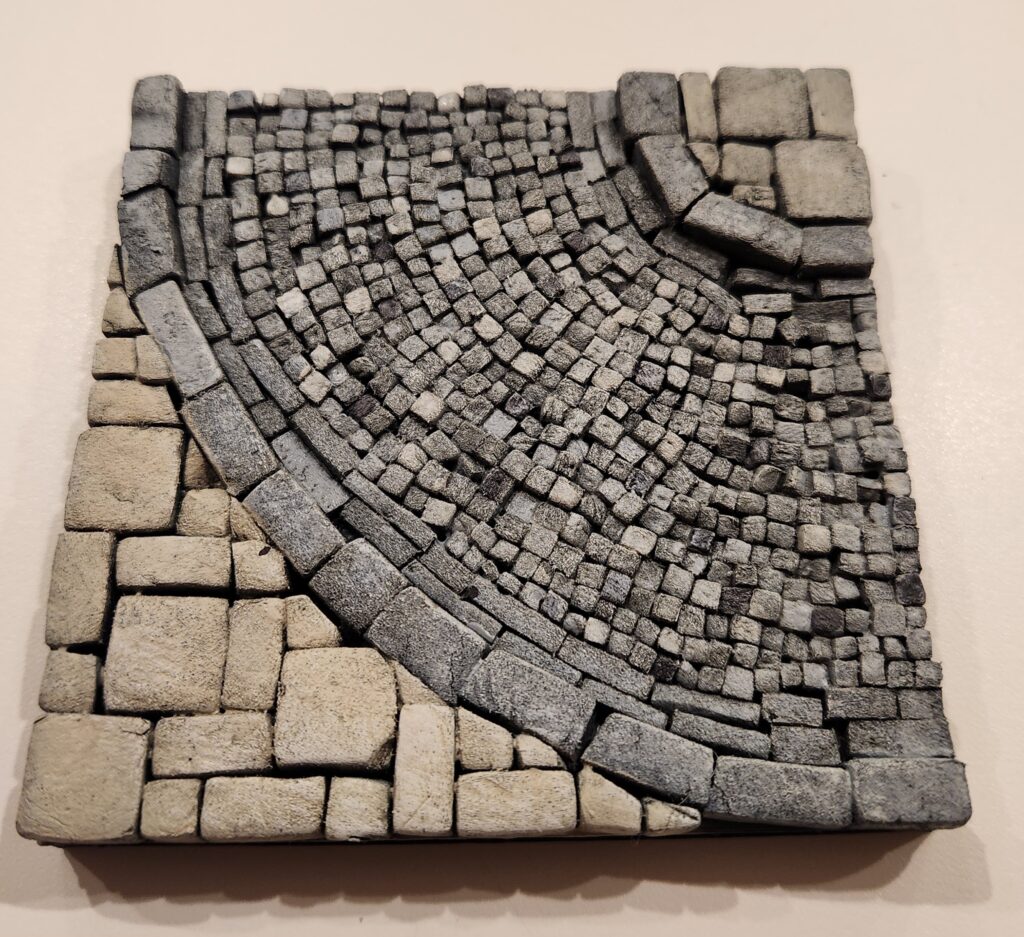
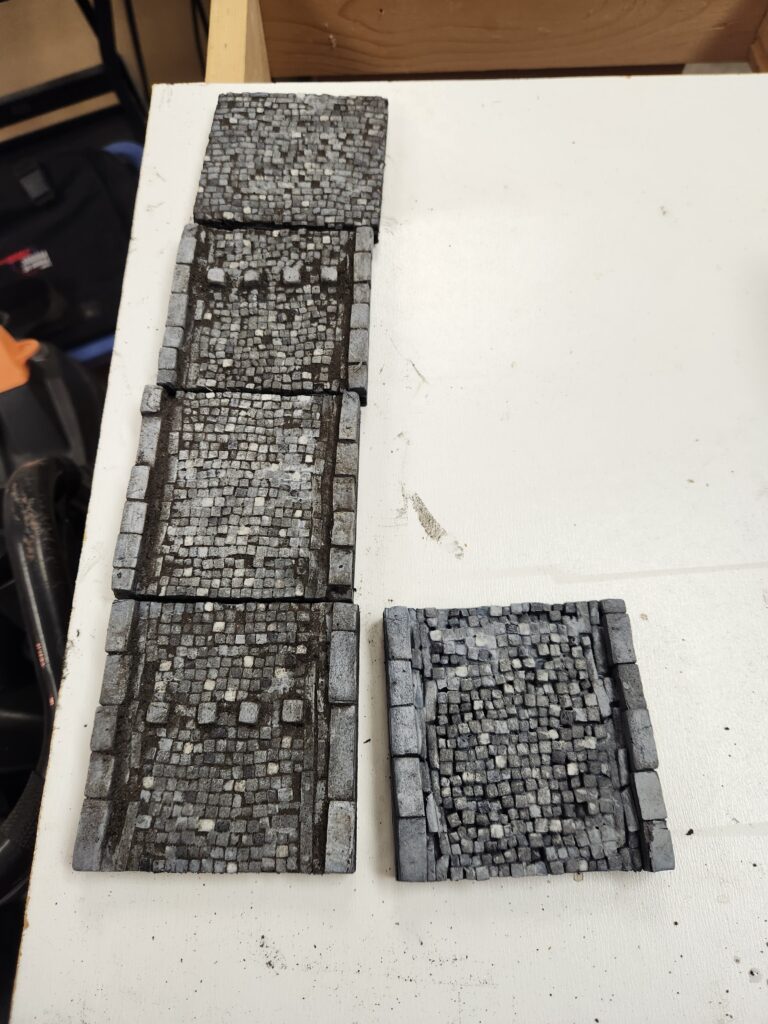
One of the pieces I’m most proud of is the curved road section. I was (w)racking my brain to figure out how to make it look good, thinking I was going to have draw lines at angles, but then I realized I could just lay the stones outward from the inner curve.
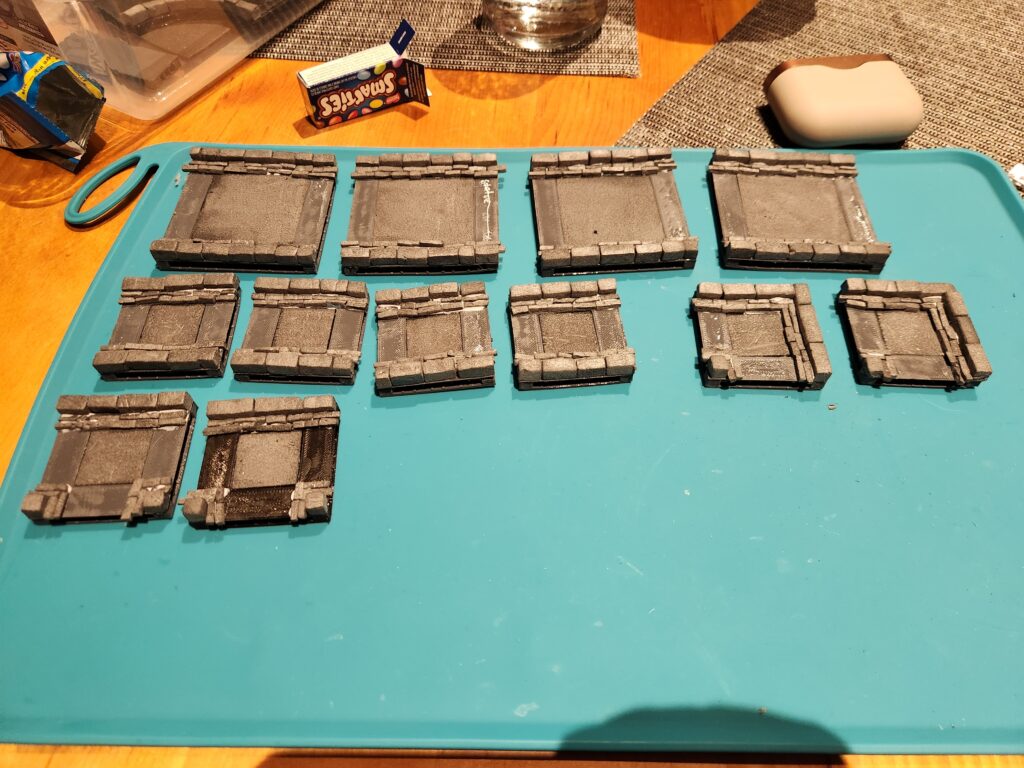
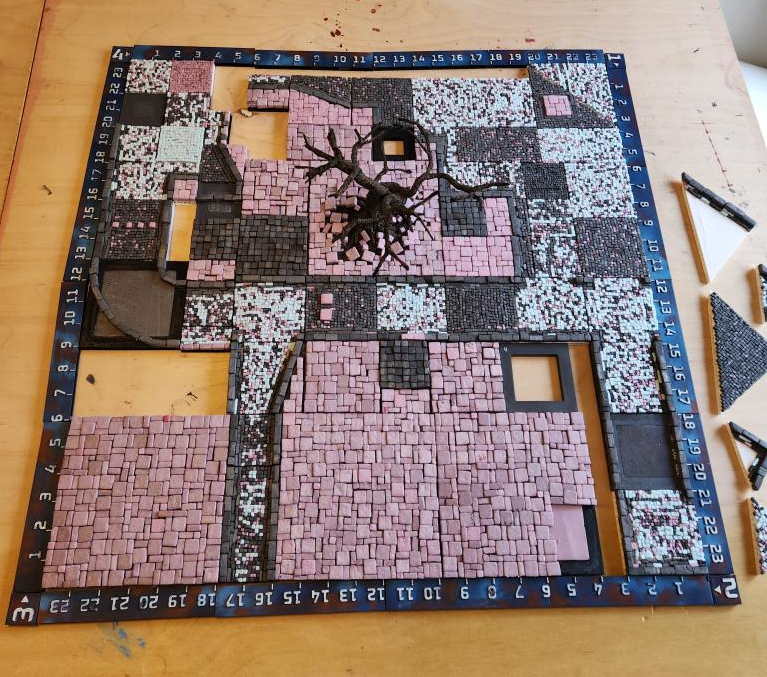
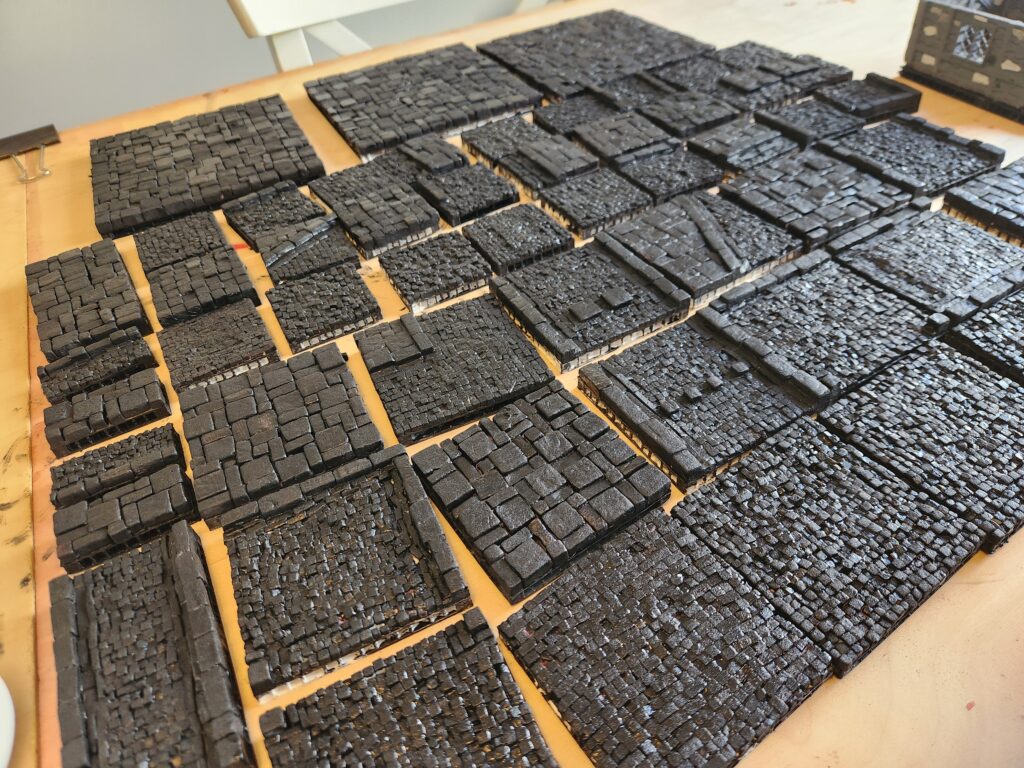
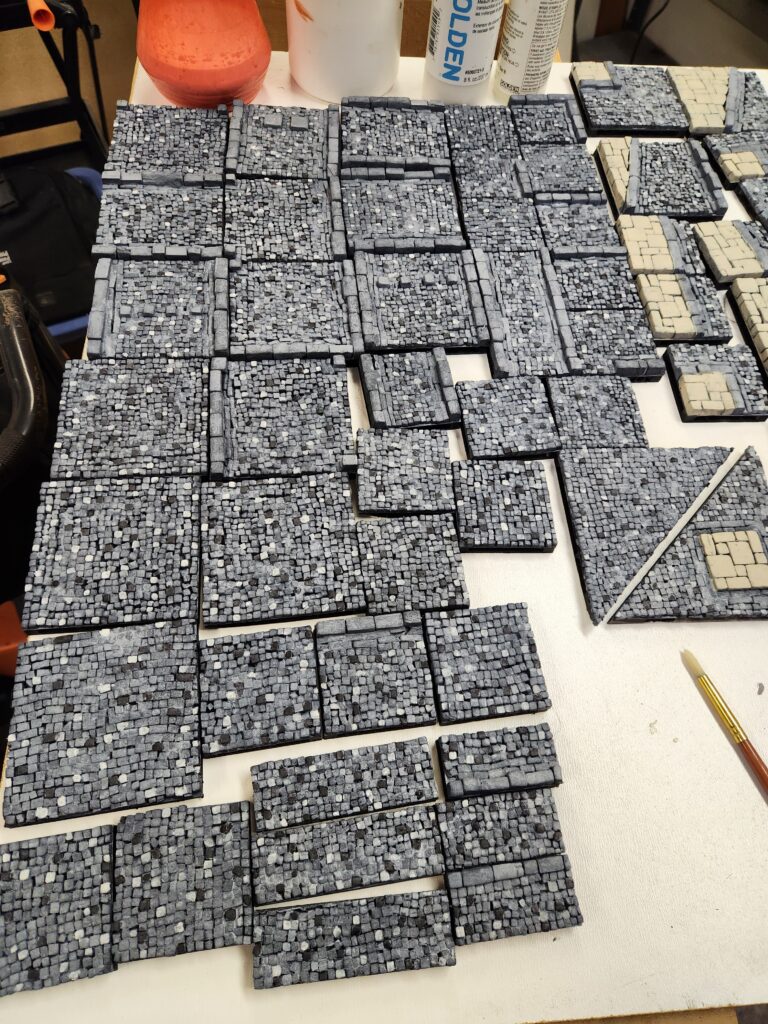
And then, a few (a small number, really) of hours later, I was finished tiling:
Painting
For painting, I started simple – a coat of craft black paint mixed with white glue (and a bit of wetting agent to make it flow better), and then airbrushed on some thinned Vallejo Black Surface Primer (a hateful paint if I’ve ever used one).
I then re-watched RP Archive’s inspiring city tile video again and decided to follow his painting and weathering method as much as possible. I highly recommend it – it certainly inspired me in my project.
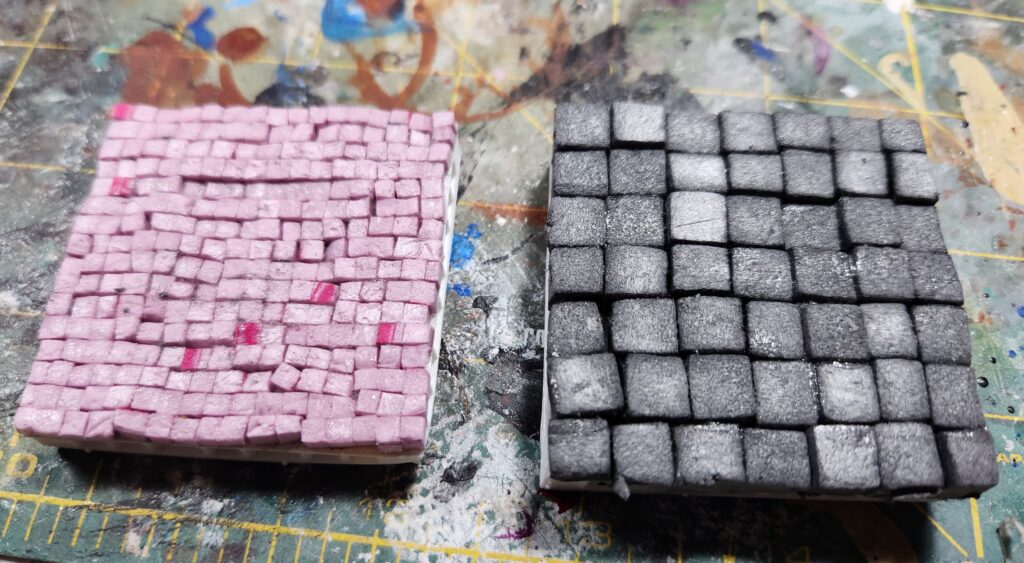
To start the colour, I airbrushed a neutral grey (Demco Artist acrylic) onto the cobblestones and linen (Folkart craft paint) onto the sidewalks. This is also when I noticed I’d left one 1″ x 3″ piece in the painting box. Oops.
Next up I highlighted some of the cobblestones with a dark grey (Army Painter Gravelord Grey Speed Paint) and light grey (Reaper Paint Misty Grey mixed with a satin glazing medium). I wasn’t too fussed about painting exactly here – there were multiple additional layers of paint and weathering coming to hide any issues.
And then a white dry brush across the whole thing:


To finish off painting, I did a black-brown wash. Unlike RP Archive, I did it a bit heavier in pigment – 6 drops of carbon black, 3-4 of burnt umber and 3-4 of sepia in 50ml (all were Liquitex acrylic Inks). It took ~100ml to coat the full 2′ x 2′ board.
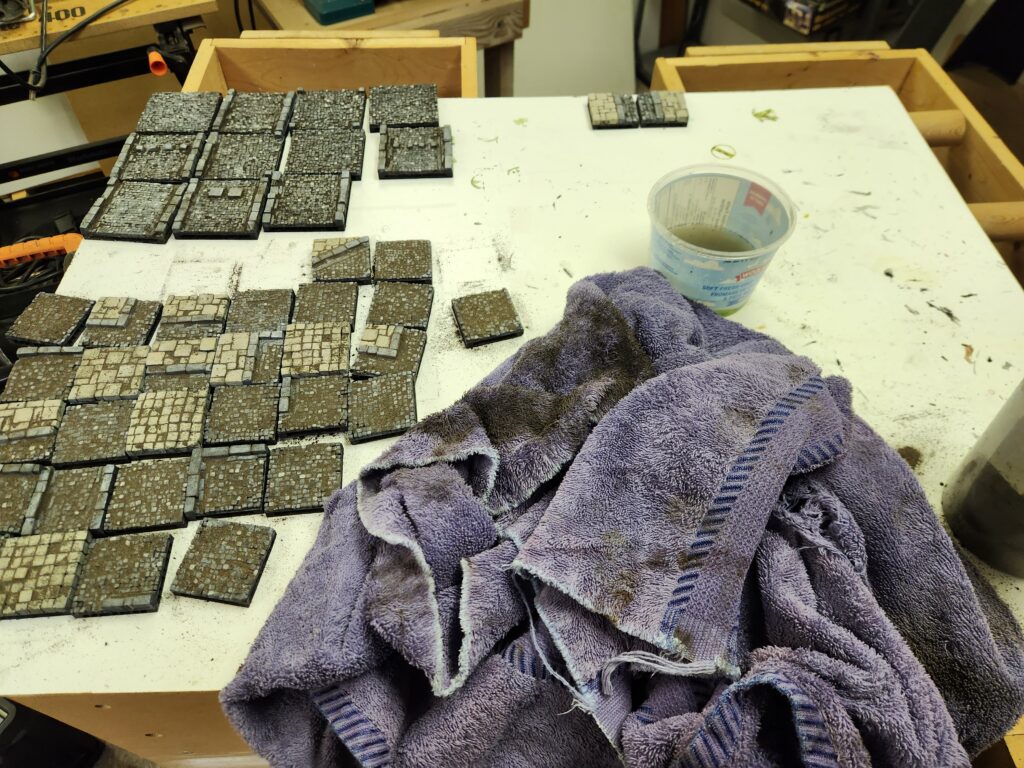
And then we get onto dirt. Here I also differed slightly from RP Archive. I had a dark brown grout, so I mixed it 50/50 with dirt, which I sieved with a 1/4″ chicken wire, then baked for a few hours and then sieved a second time in an old tea strainer. This left me with a very fine powder mixture of dirt/grout.
To apply the dirt, I tried the method he suggested in his video but found it didn’t work for me. So I changed it up:
- Sprinkle on dry
- Spray lightly with watered PVA + wetting agent
- Use my fingers to smear the damp mixture around the tile
- Dip my hand in water, thoroughly soak the tile
- Use a towel to clean off the tile
- Repeat 4 and 5 until I was happy with the level of dirt
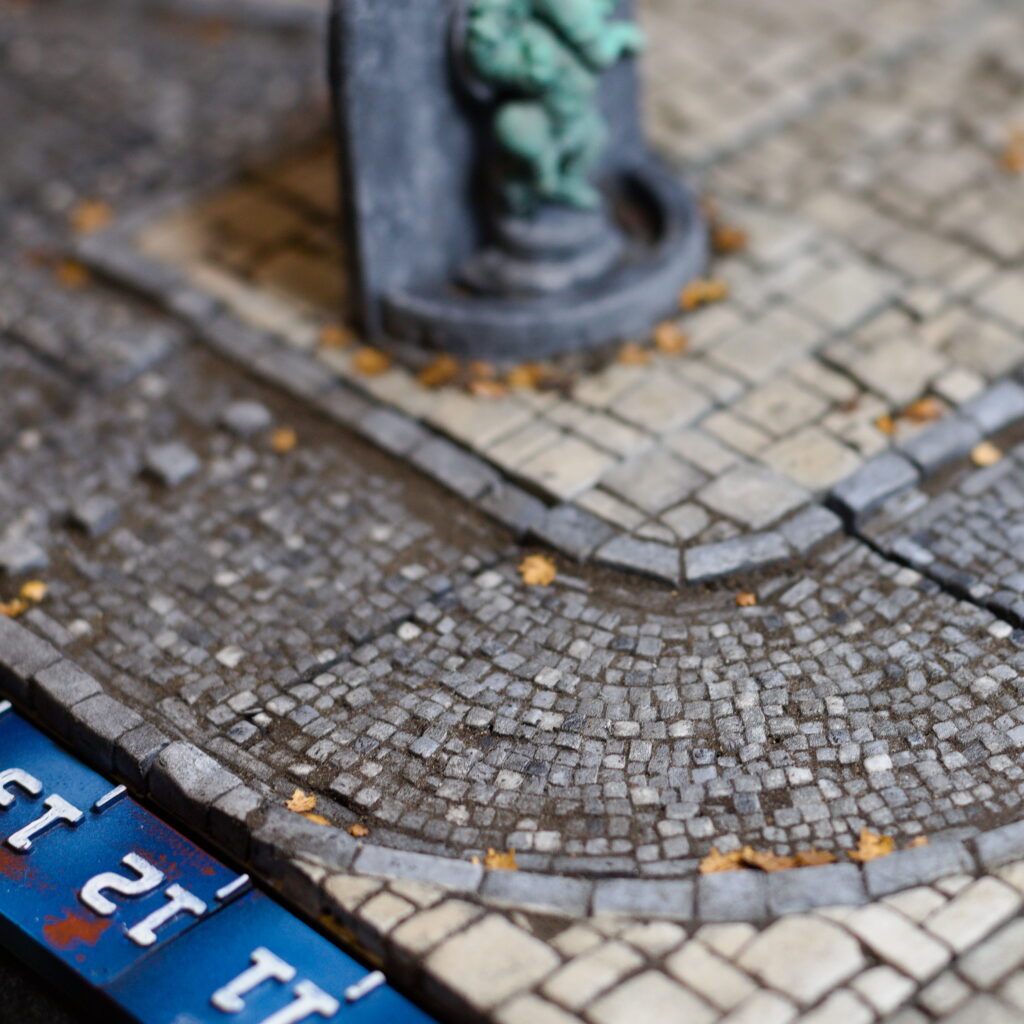
I left a fair amount of dirt on the cobblestones, especially in the corners and in deeper pockets, and almost none on the sidewalk pieces. I found the grout and dirt dried almost instantly, so by the time I was finished all the tiles, they were dry enough to take outside and soak in watered PVA to seal them in. I’m going to have to do a 2nd coat, as some of the dirt is still a bit loose.
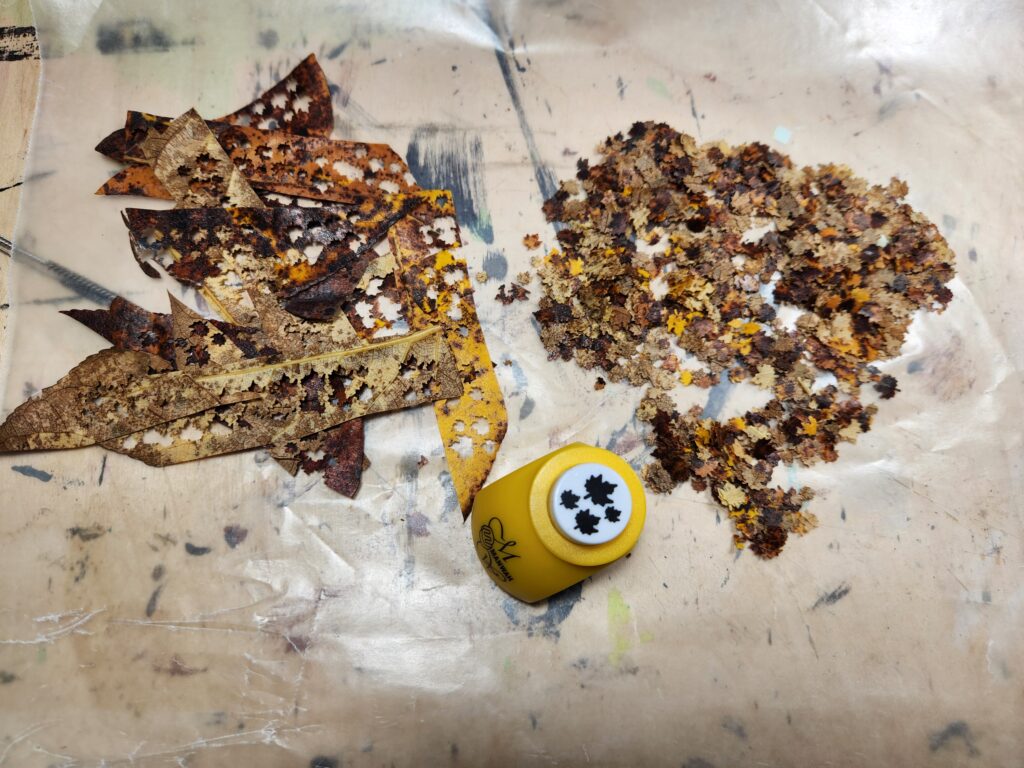
Lastly, I had punched a bunch of leaves using an AliExpress leaf punch (non-affiliate link – I used the 05 colour). I dried some straight and soaked some in glycerin first, then dried. I found the glycerin ones were slightly translucent and showed the tile through them, so I’ll use them for something else (I’m going to try dyeing with inks and fabric dye next). Note that some of the colours were lost as they were dried, which was a bit unfortunate but expected.
I glued them down on the edges where leaves would naturally blow to, a truly finnicky process as the dried leaves were quite stiff. I tried soaking them in watered down PVA, but that didn’t seem to help – although I suspect I could rehydrate them by soaking them overnight. Some definitely will still lift (and have), but they are trivial to replace.
Painting the Statues
For the statues, I painted them fairly simply. They were both on foam plinths or backgrounds. They were base-coated along with the tiles.
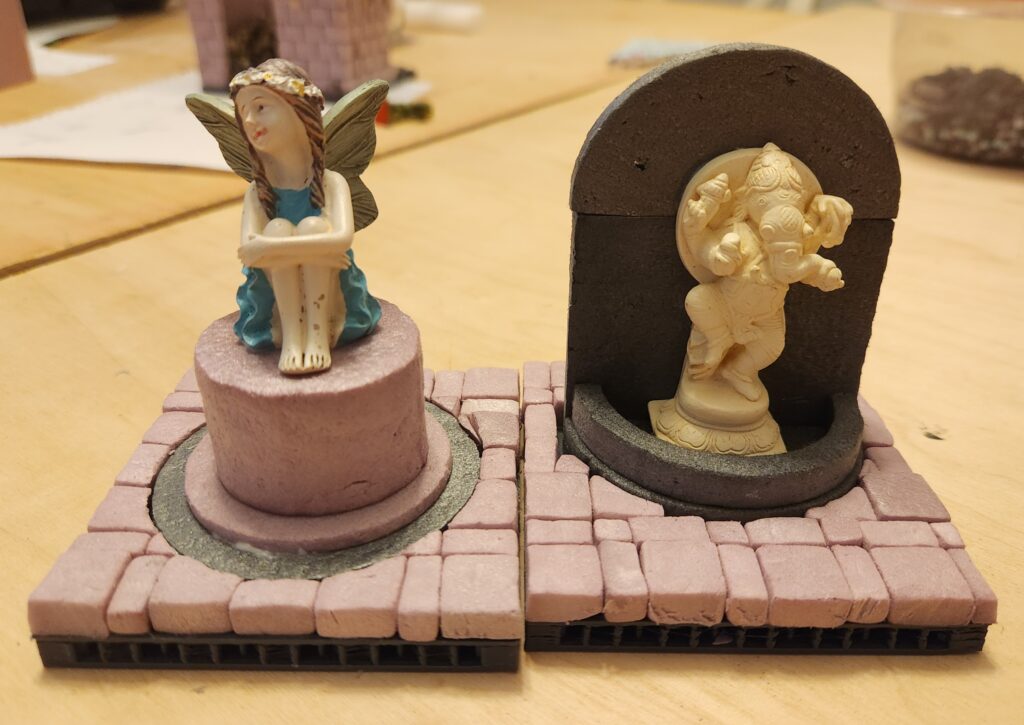
The bleeding eyes girl was quite simple – dry brush various greys on her and her plinth, along with some thinned greys for the streaks. Her eyes are painted with Reaper Fresh Blood.

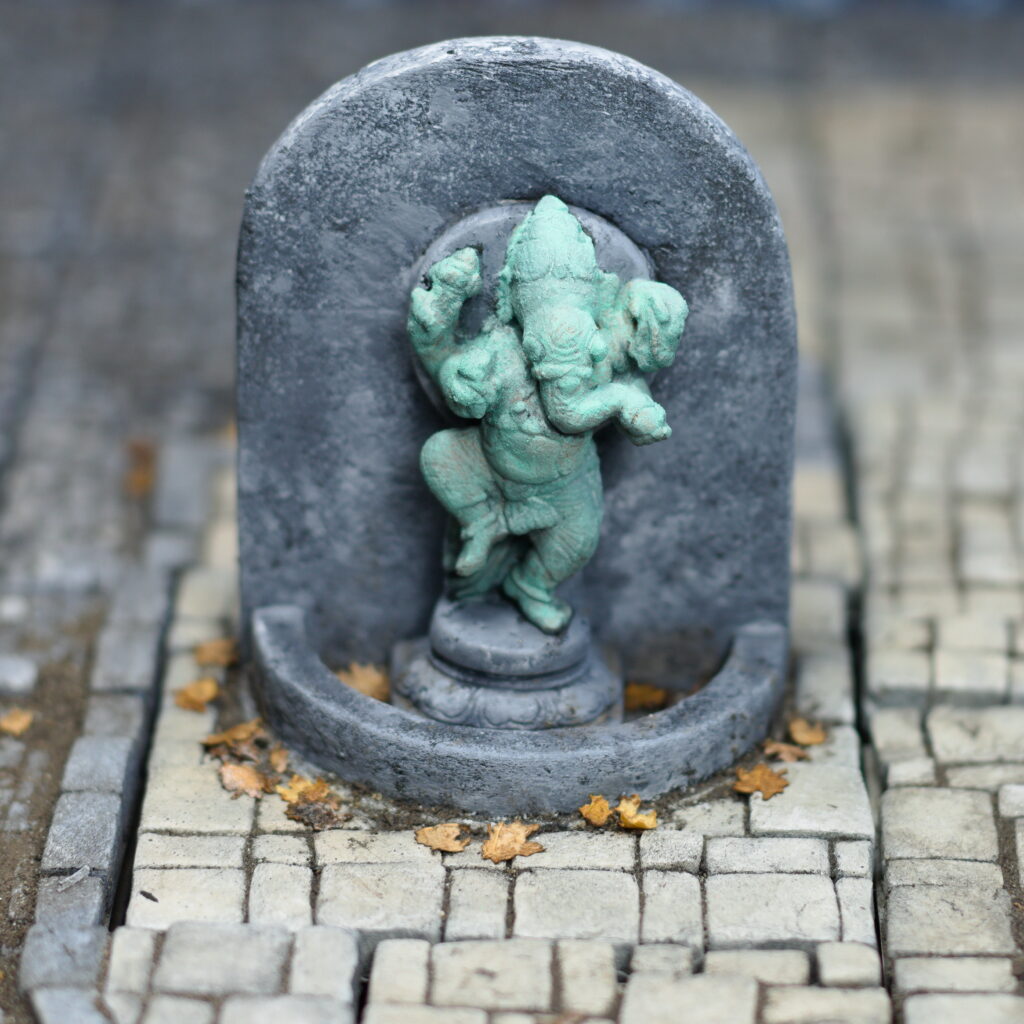
For the Ganesh statue, I painted the statue itself with Reaper Old Bronze and then found Army Painter’s Verdigris Technical Paint, which I applied in a couple of coats. It works, but honestly this paint job is a bit simple and for larger statues I’d want to follow something like Garden of Hecate’s excellent tutorial. For the stone backing, I tried some stippling and washes, but ultimately went with sponged on greys and whites.
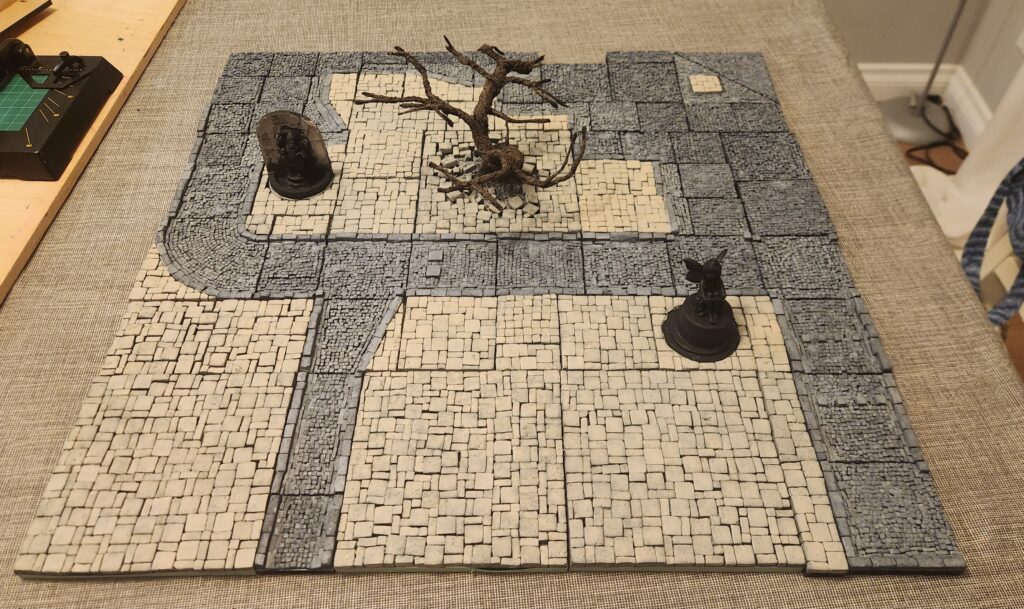
The Tree
The tree is fairly simple – a bunch of pipe-cleaners twisted up and then melted, with a texture paint (in my case, a DIY texture paste of brown paint + sawdust). It isn’t done, but eventually am going to try and match some of the look here:
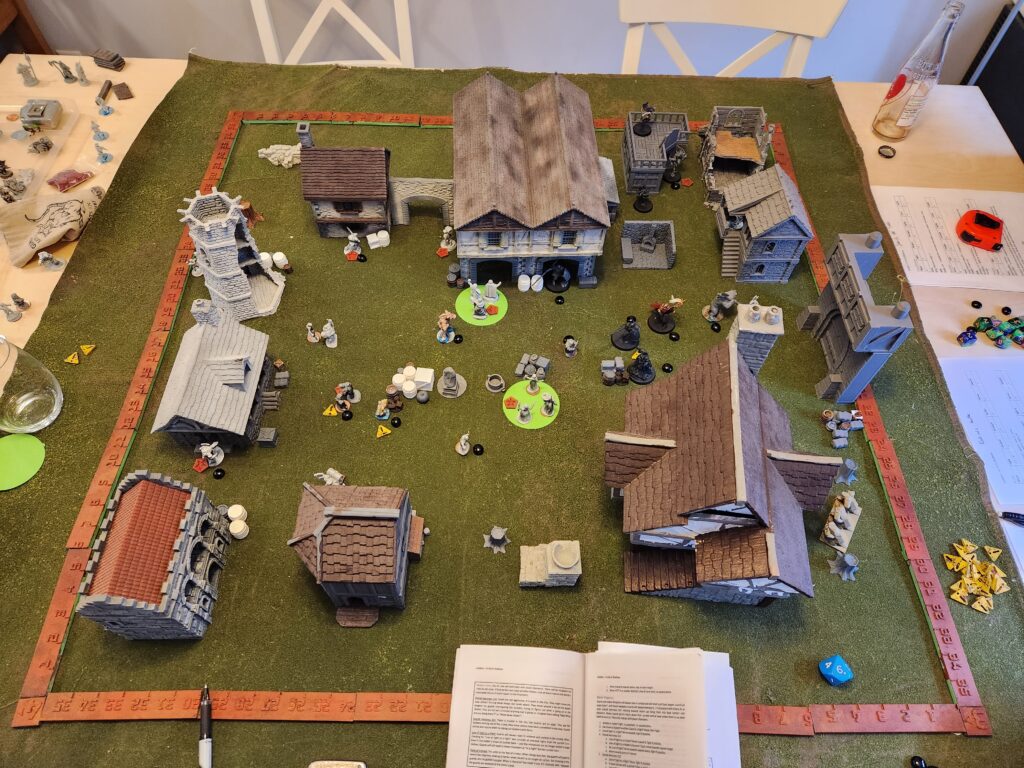
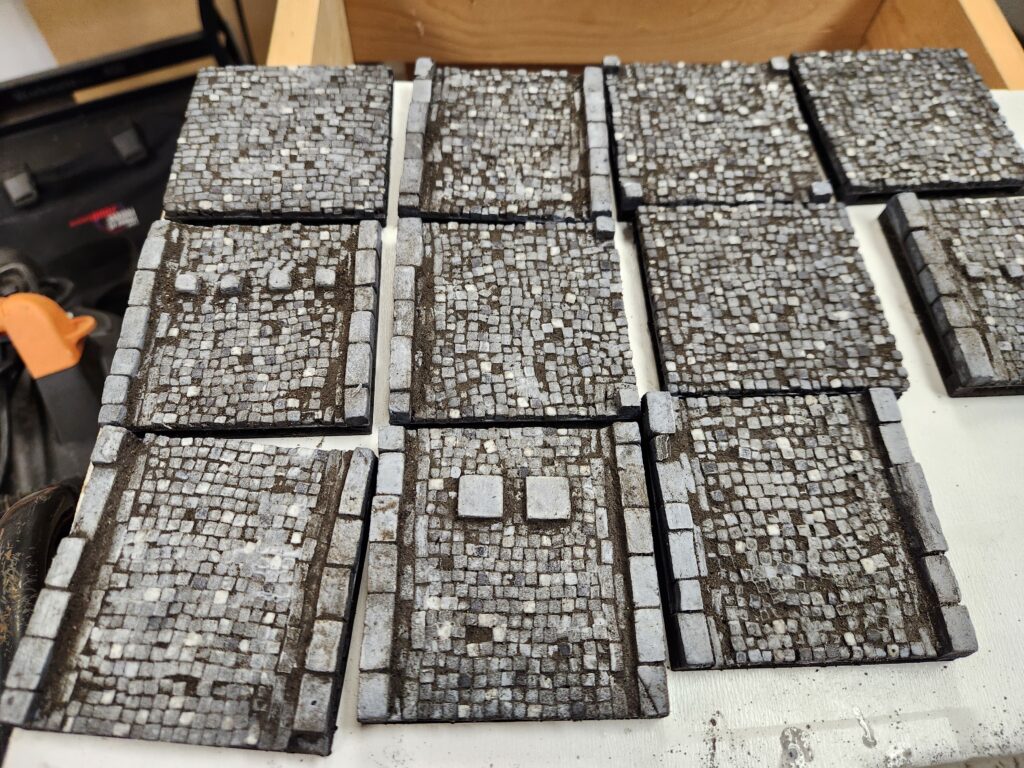
Finished Look
And just like that, this 2′ x 2′ set of tiles was done.
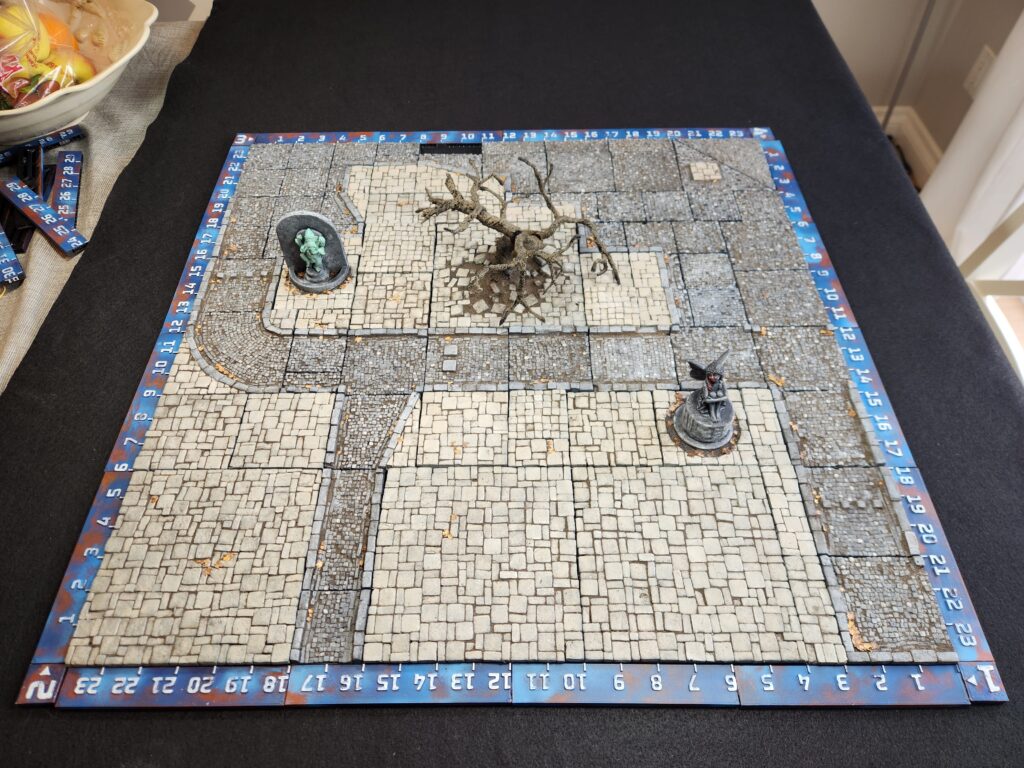
But of course, I need a lot more, especially if I want to get a full 4′ x 4′ Mordheim table done. So the next set is already underway: