I’ve got the week between Christmas and New Years off entirely this year, so there’s been a bit of painting going on. Mostly I’ve been working on the 3d printed WW2 ships from Antics, as well as a few fantasy bits just for fun.
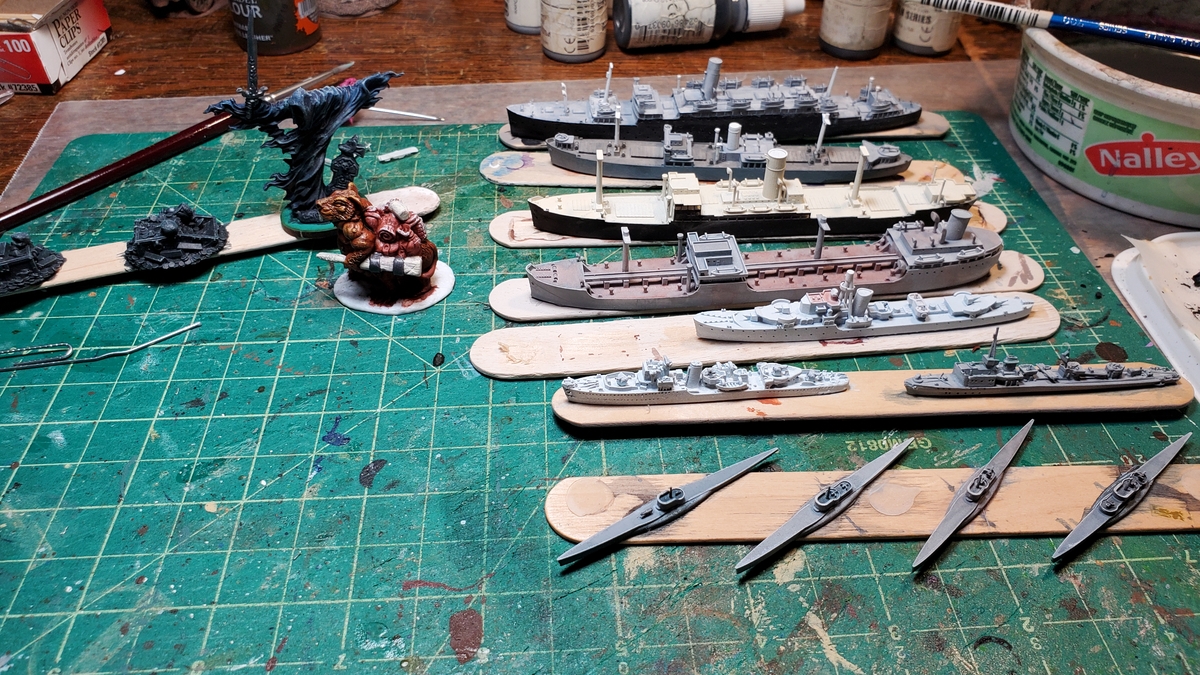
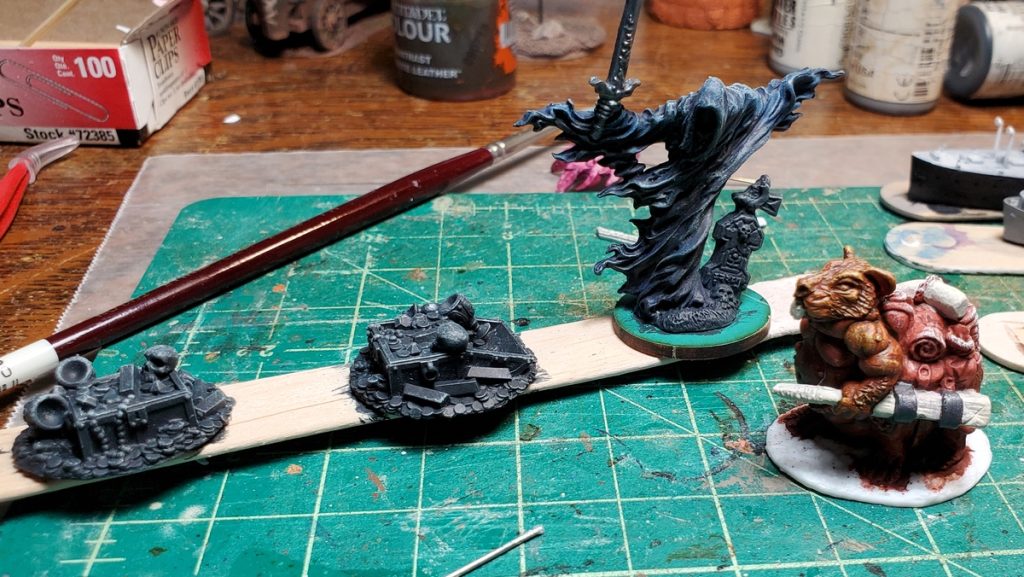
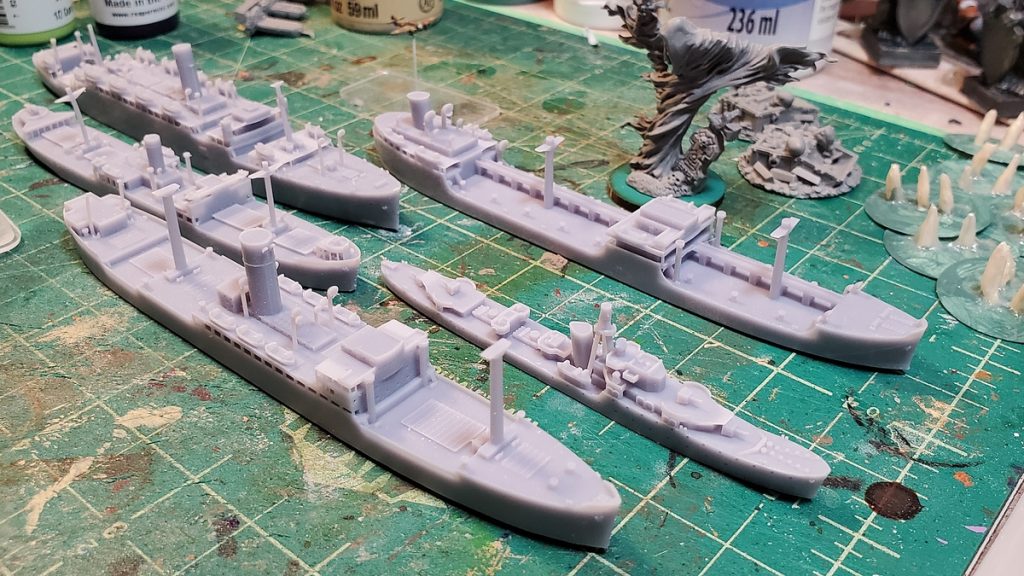
The workbench this holiday week. Naval stuff on the right, random Reaper fantasy stuff on the left!
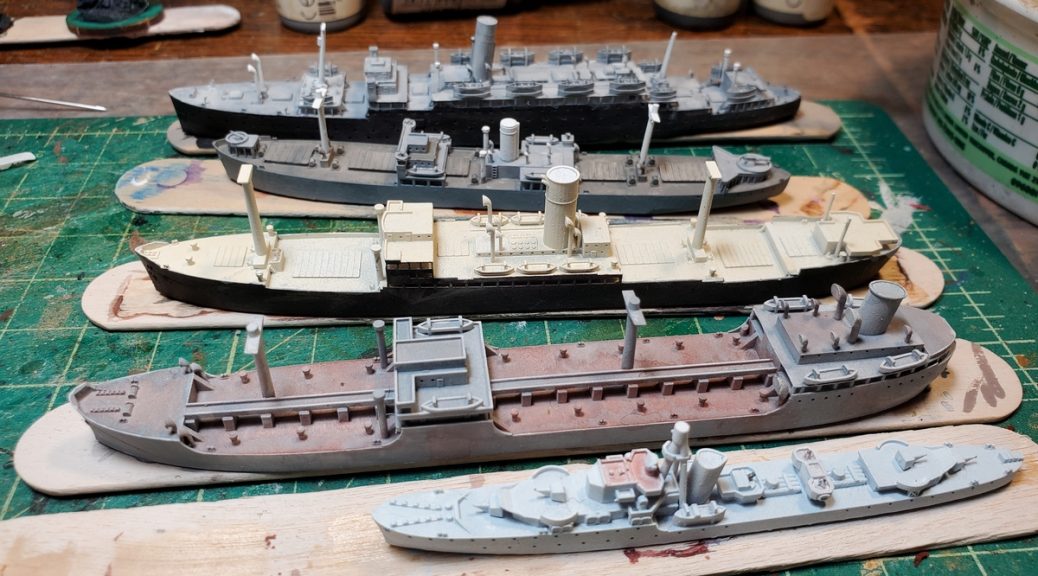
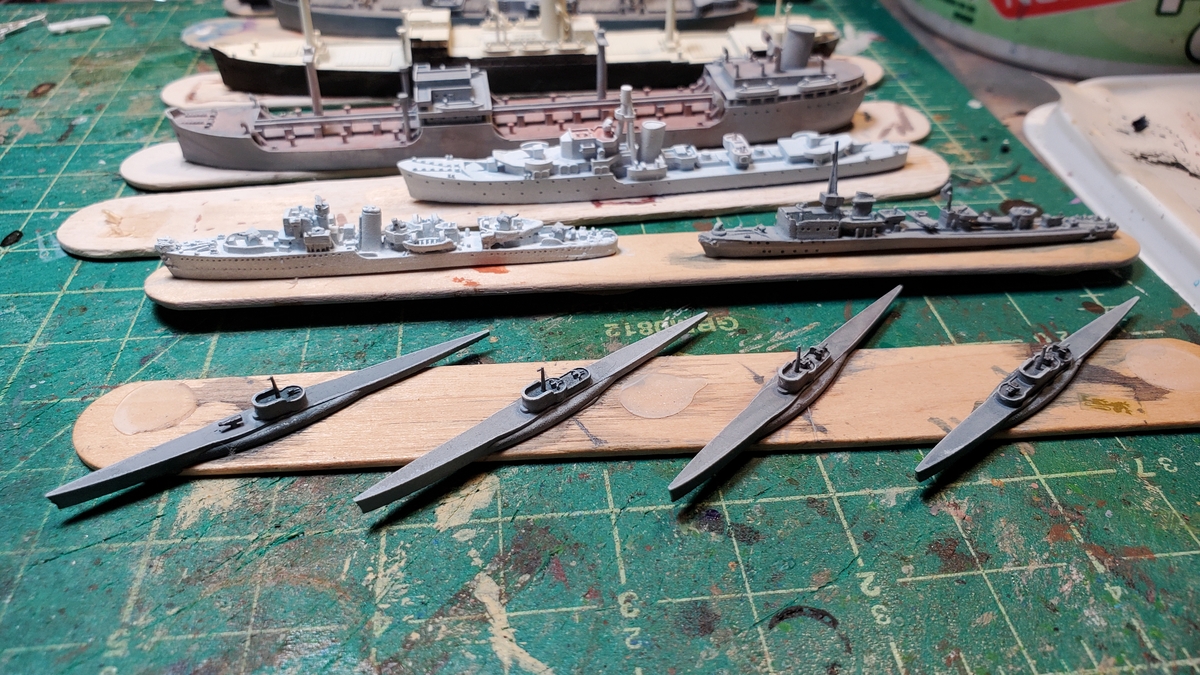
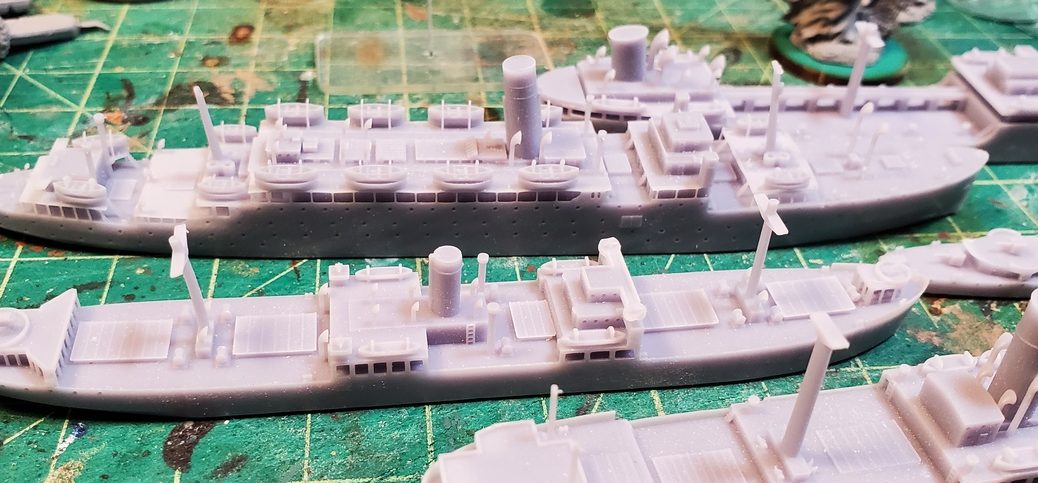
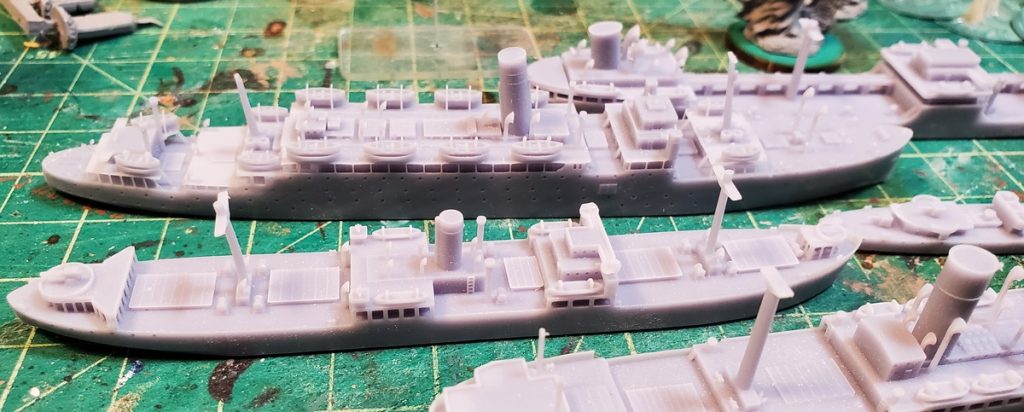
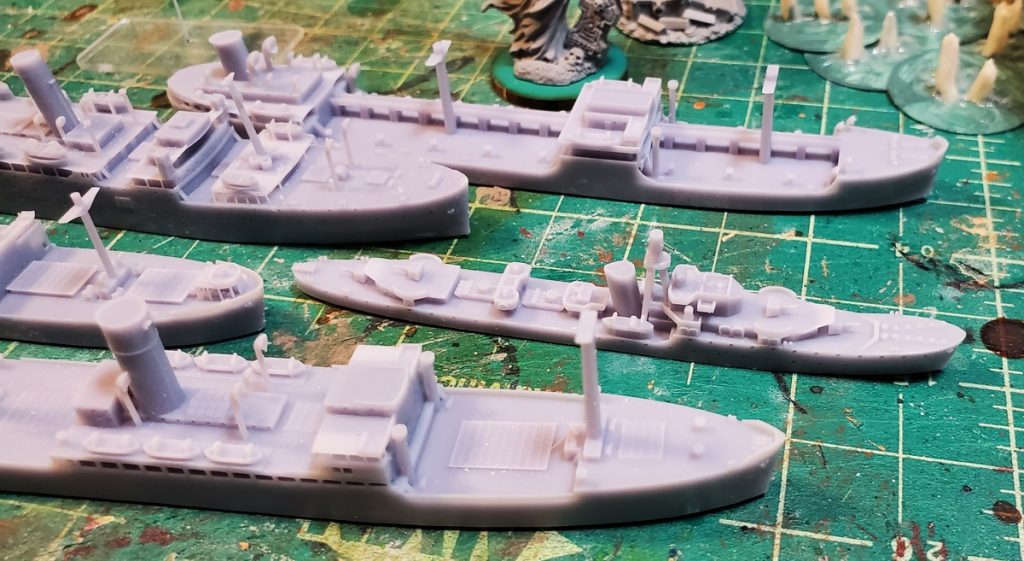
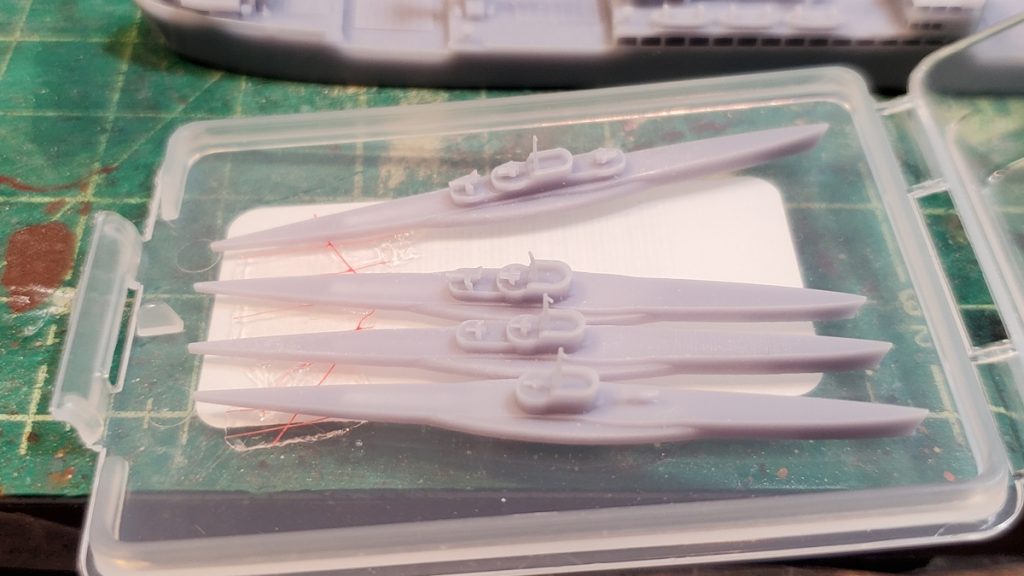
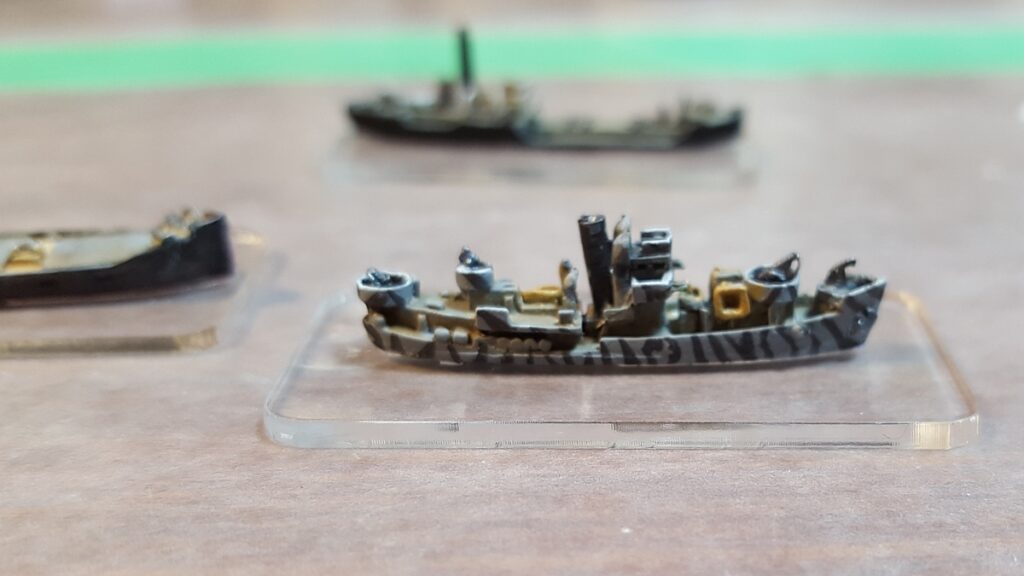
The ships are coming along nicely, although the larger ones are slow going – so many details to paint around! The four U-boats in the foreground are basically done, unless I decide to do a bit of pin washes to pop the few details a bit more.
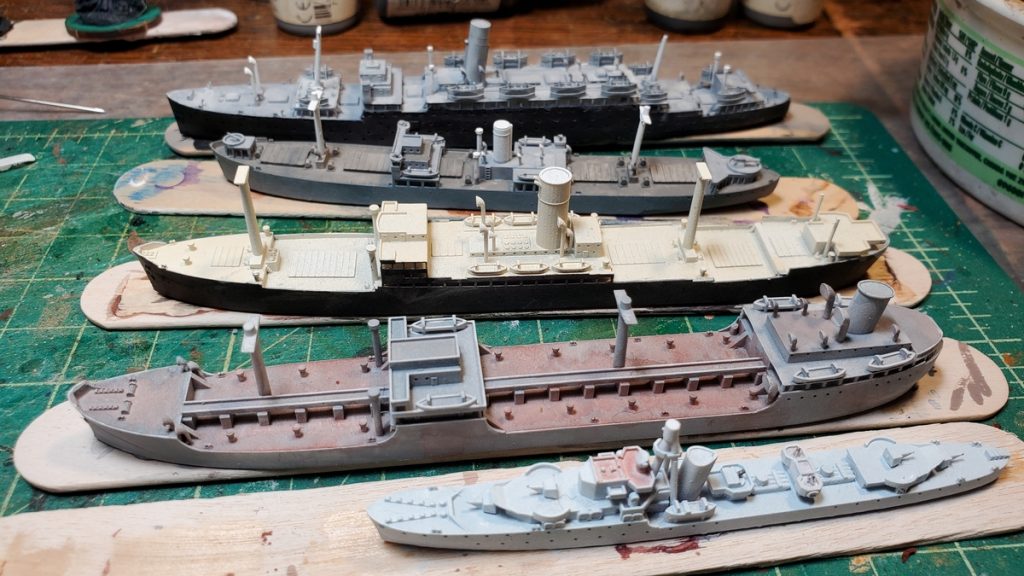
The larger vessels are all at least basecoated, although several are going to need a second pass as I realize I missed bits on the first pass. The two Royal Naval vessels (a Hunt DE foreground and “O” Class Destroyer behind) will get some sort of camo paint and the German KM T13-class torpedoboat might also get some, although it’s unclear to me if the Kreigsmarine ever actually did anything other than plain grey on most of their torpedoboats and destroyers.
From the front, U-boats times four, the RN Hunt DE and KM T13 torpedoboat, “O” Class RN destroyer, T2 tanker.The back half of the naval dockyard. O Class DE forward, T2 tanker again, Ehrenfals freighter, Lake class freighter (armed), and finally the Athenia passenger liner at the back.
On the non-naval side, I’ve got little group of Reaper fantasy figures. An armed ghast/ghost/haunt, a pack rat, and a pair of treasure markers. Not much to see here yet, but for those of you not into ships, here you go!
Various Reaper figures, very early stages yet. Two treasure markers, a ghast/ghost/haunt thing, and a pack rat who’s both a travelling merchant and his own pack animal. Reaper has a gloriously broad range of fantasy figures, if you’re not familiar with their offerings!
Happy Holidays, everyone, and hope the tail end of 2022 and the start of 2023 are good to you and yours.
Antics, a UK model/toy shop, carry a small range of resin 3d printed 1/1200 WW2 ships under the John’s Model Shipyard name. There are a lot of pre-painted very expensive 1/1200 or 1/1250 model ships out there (Antic stock a lot, just for starters!), a couple of ranges of pewter kits, but big gaps in the market for kits for this scale.
The JMS line goes all the way up to aircraft carriers, battleships, and battlecruisers, wildly beyond ships suitable for typical coastal forces engagements as we’ve been doing here (although Italian MAS boats did engage RN cruisers in the Med, and the Channel Dash saw RN MTBs attempt attacks on Scharnhorst and company…), but there are destroyers for multiple navies and some very useful freighters, tankers, and such.
Unfortunately the Antic’s site search function doesn’t seem to have a way to bring up all the JMS products all at once – even searching for “model shipyard” only gets you a few of them, so you have to pick through each WW2 ship collection.
Shipping cost was reasonable and took about two weeks from the UK to Western Canada, which is pretty typical. UK companies are good at mail order and the Royal Mail->Canada Post trans-Atlantic pipeline is still pretty efficient!
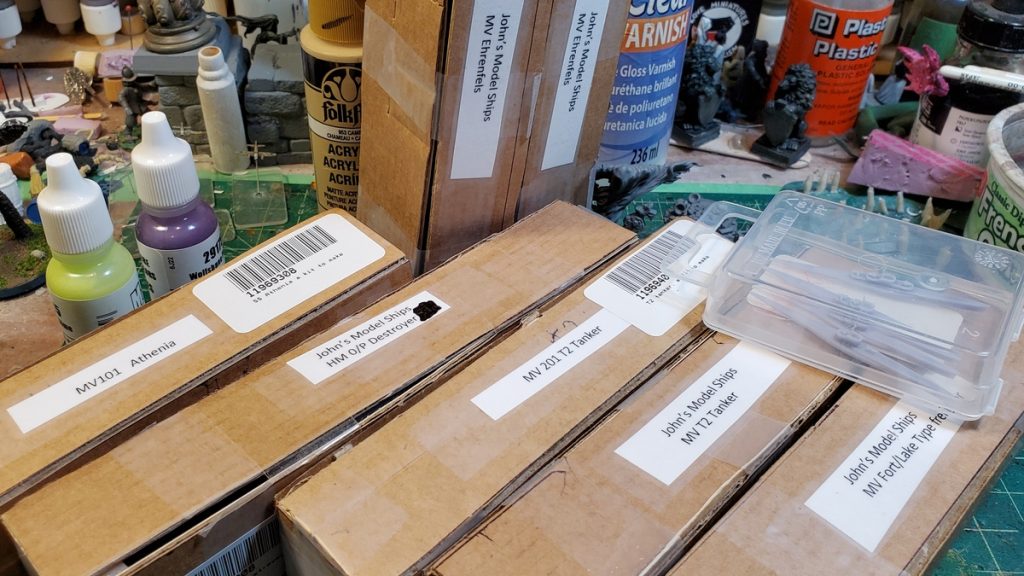
Seven ships and four submarines all neatly packaged.
Everything arrived nicely packaged, with each ship in a small custom-cut cardboard box/wrapper, all of those bundled in bubble wrap inside another cardboard box. Each hull was taped to one side of their box with a bit of double-sided tape on the hull bottom and there was no damage in shipping, despite some of the 3d printed resin details like masts, vents, and lifeboat davits being very, very tiny indeed.
The four U-boats came in a little hard plastic case, held down by another bit of double-sided tape.
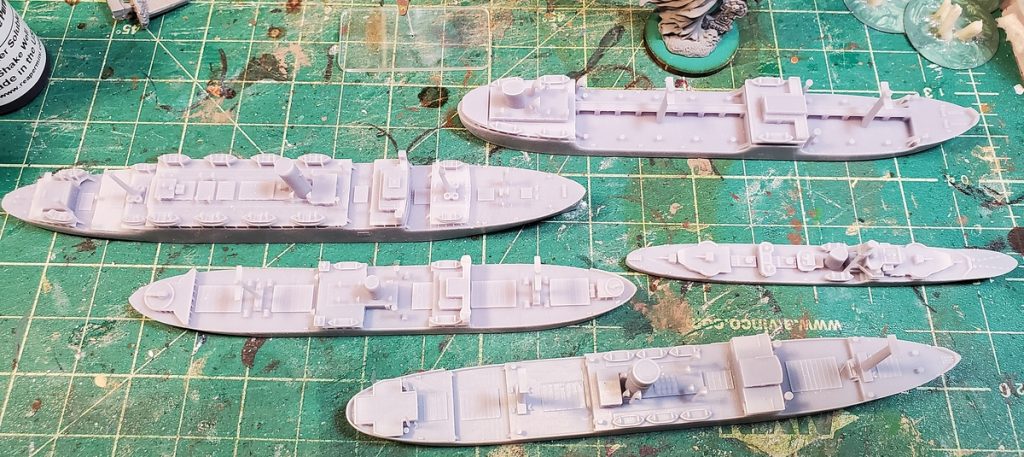
All five ships top down. Clockwise from top right: T2 tanker, O/P-class RN destroyer, MV Ehrenfels, Fort/Lake freighter (with gun tubs at bow and stern), and the liner Athenia.
These are very nice crisp 3d resin prints, with details like gun barrels, lifeboat davits, and vent stacks printed incredibly fine – much finer than you could get with pewter or resin casting.
Lower angle shot, same arrangement as the first photo, MV Ehrenfels in the foreground, O/P RN destroyer and Fort/Lake freighter, Athenia liner, and T2 tanker.
Of the four merchants, only the Fort/Lake freighter is armed, with a gun tub on a raised platform on the bow and another on the roof of the stern deckhouse. I’ve never been terribly strict about WYSIWYG on miniatures but someone on Shapeways does do 1/1200 gun tubs if you wanted to arm up some of these ships…
Athenia (behind) and Fort/Lake freighter. Look how fine the lifeboat davits and other bits are, especially on Athenia.
The liner Athenia is a fun addition to the fleet – not likely to be on the table much compared to the freighters and warships but there’s basically zero other tabletop quality passenger liners out there that I’ve found.
In 1/1200 scale 1 real world inch is 100 scale feet (1200 inches), which is a nice easy conversion to remember. Accordingly, a 400ft long ship would be 4″ long. Athenia comes out to about 5.25″ long, Ehrenfels slightly shorter at almost exactly 5″, the T2 tanker just under that, the Lake/Fort freighter at about 4.25″, the RN O/P-class destroyer at just under 3.5″, and finally the four Type VII U-boote at around 2.25″. Far as I can tell these are all correctly scaled, or close enough for jazz!
MV Ehrenfels in the foreground, Royal Navy O/P class destroyer, and in the back the T2 tanker, plus a nice look at the bows of Athenia and the Lake/Fort freighter.
In theory all of the ships need additional topmasts, cargo booms, and such added. If I do add them, I’ll use plastic broom bristle as that should be far more gamer-friendly (and more resilient to damage!) than plastic rod or fine stiff wire. I might well leave them with just the 3d printed mast they came with, to be honest. They’re gaming models, not static showpieces.
The four U-boats. I think they’re original conning tower, No. II style, No. IV style, and “flak” version in order from front to back. Just under 40mm long bow to stern.
I threw the U-boats into the order just for the heck of it, but they’re neat little models. You get four slightly different versions of the Type VII Uboote, with original conning tower, with No. II style conning tower, with No. IV style conning tower, and “Flak” with the extra AA gun platform. The 3d printed periscopes are incredibly fine and even if I don’t add cargo booms and such to the ships, I might well swap out the periscopes with broom bristle or superfine brass wire as being more resilient than the 3d printed resin will be!
The prices were comparable to or cheaper than pewter models of similar size (the pewter Liberty freighter from Last Square, for example) and less expensive than similarly detailed 3d prints from Shapeways. As mentioned above about the Athenia, JMS cover some vessels not commonly found elsewhere, so I was happy with these and might well order some more in the future. There’s a decent variety of Royal Navy WW2 vessels in the John’s Model Shipyards line (search here for ‘kit’ or ‘John’), a few German WW2, another few Japanese (mostly cruisers or battlecruisers for the two Axis navies), and a Liberty freighter to round things out. Nothing yet for the French, Italians, or (the biggest surprise) the Americans, but hopefully the range keeps expanding in the future. Personally I’d love to see more destroyers, corvettes, frigates, and similar, as those ships worked alongside coastal forces boats fairly regularly and that’s going to stay my main focus. Whoever is doing the 3d design work at JMS seems to know their stuff, know the limits of the 3d printer they’re using, and get a really nice level of detail on their ships!
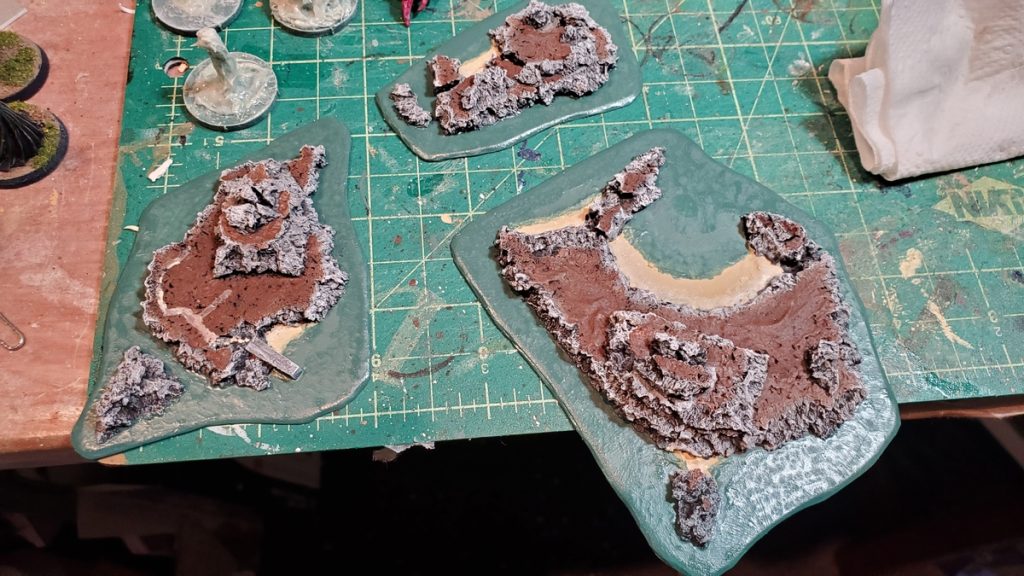
To round out the current run of small scale scenery for coastal naval games I decided on a trio of islands, one of them with a lighthouse.
As with the rest of these small scale naval terrain pieces the base is .040/1mm styrene plastic card, bought in bulk from my local plastic supplier, with the edges shaped and sanded.
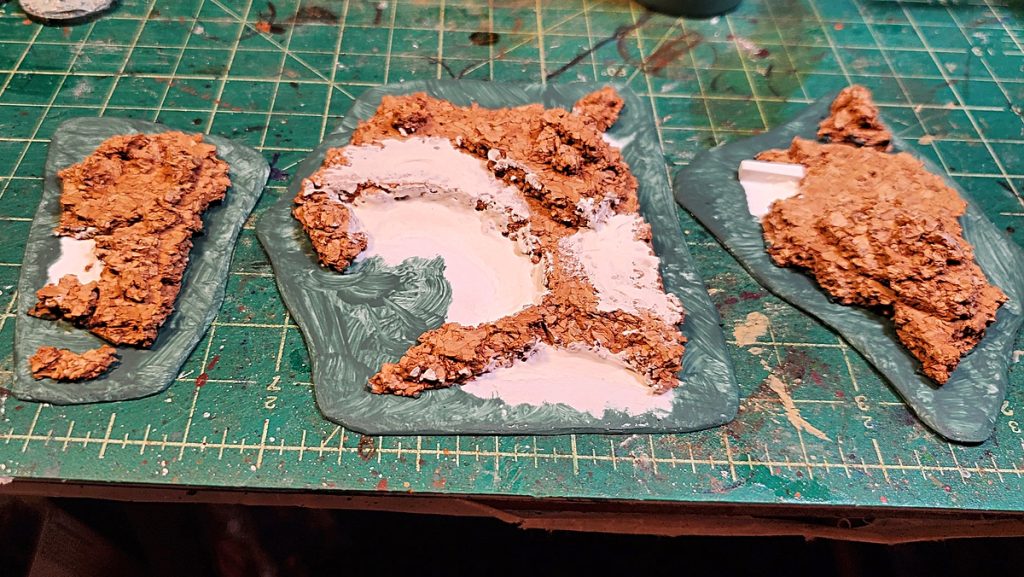
I forgot to take an unpainted/unplastered photo, and this one is blurry, but you get the idea. Cork for the island shapes on plastic card bases, then premix plaster for the beaches and to provide a bit of variety on some of the flat areas.
The basic structure was more quarter inch cork board, in larger pieces than I used for the rocks. I broke pieces of cork by hand and shaped the edges mostly with my fingernails.
The beaches are premixed patching plaster, applied with a wet sculpting tool and mostly smoothed with a wet fingertip. The concrete jetty on the mid-sized island is a little sliver of styrene plastic square rod.
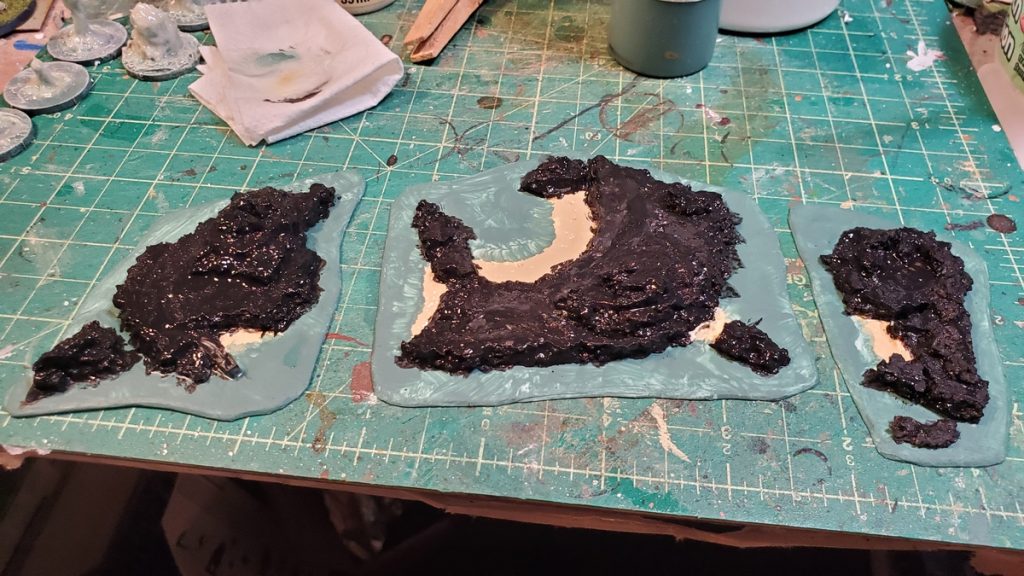
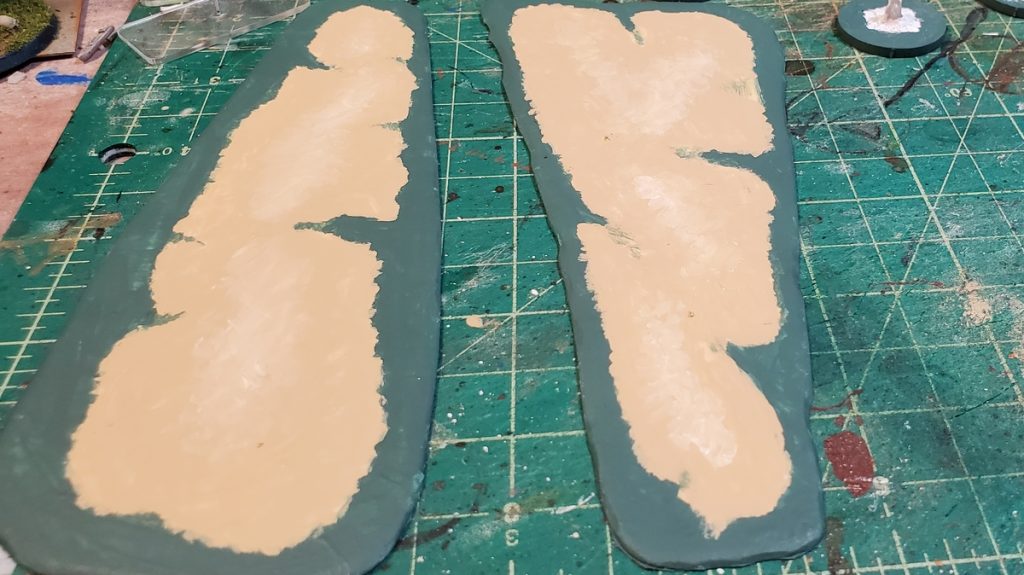
Basecoats in progress – my usual blue-green ocean colour, black on the islands, sandy on the beaches.
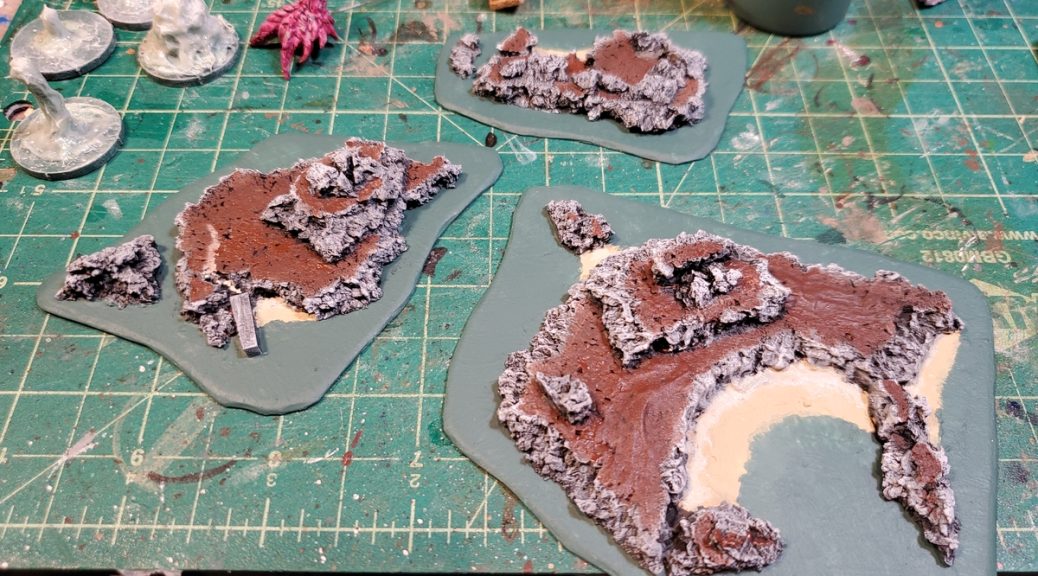
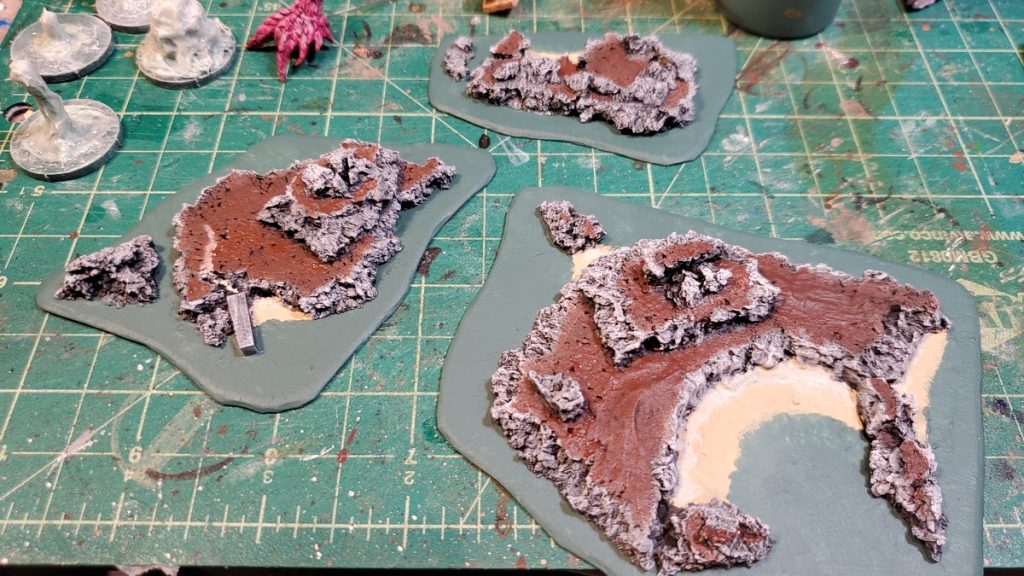
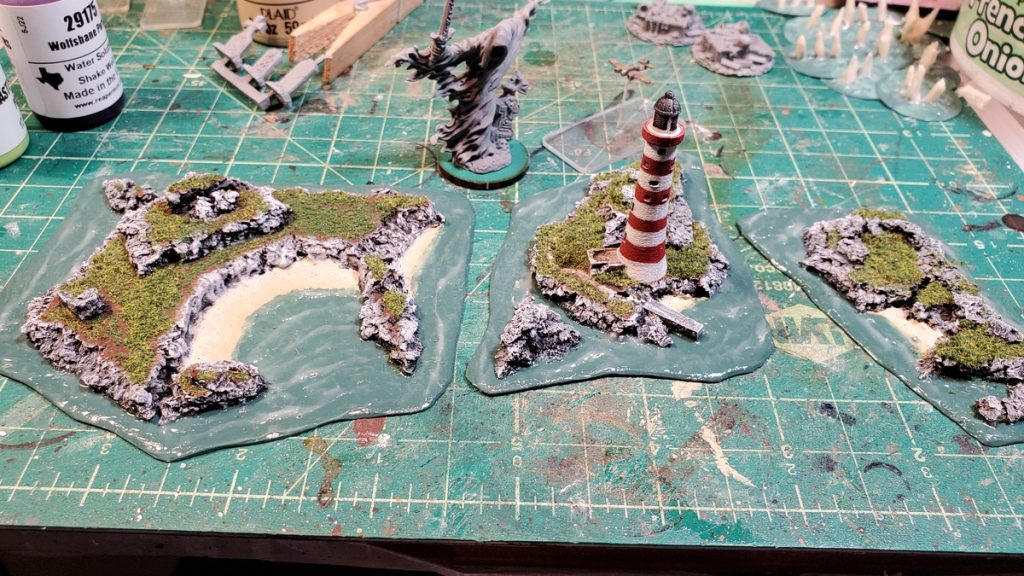
The paint is my usual ocean scenery set – a blue-green for the water, Camel and Parchment for dark and light sand, and the rocks were drybrushed up from black with a dark grey, a pale grey, and finally pure white. The flattish areas of the islands that will eventually be flocked green were painted brown.
Painting all done. The largest island (lower right) is about 4″ x 3.5″, the midsize one (left) is about 3″ x 2.5″ max, and the small one (background) is about 2″ x 2.5″.
For drybrushing, incidentally, I highly recommend heading to your local dollar store/pound shop/etc and getting a set of cheap makeup brushes. They’re fantastic for drybrushing and available in a variety of sizes.
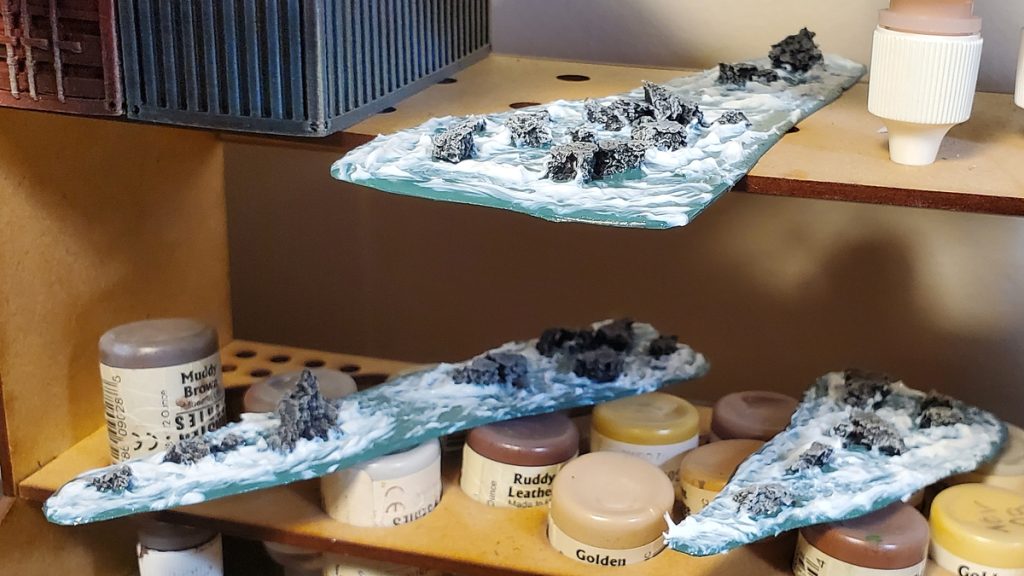
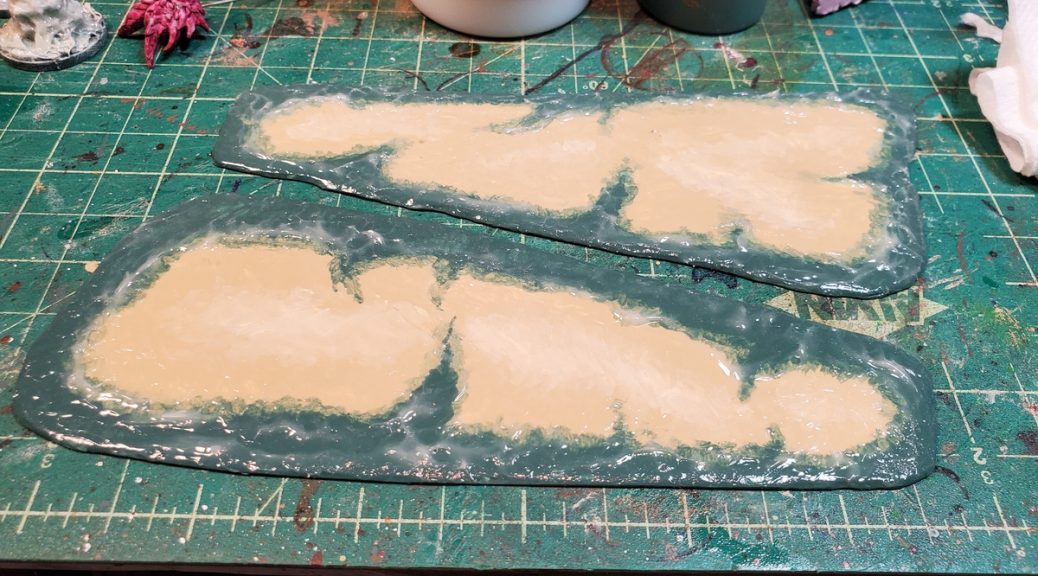
First coat of gloss varnish on the water parts. These wound up with three coats of gloss varnish before I was happy with the look, and then the usual treatment with gloss gel for waves and water texture.
The water got the usual treatment, several coats of gloss varnish with a minimum of 24hrs drying time between each coat, and then acrylic gloss gel for waves and water texture, as detailed in the previous articles in this series. After all the water stuff was thoroughly dry I attached the lighthouse with superglue and did a quick flocking job with two or three different flock mixes.
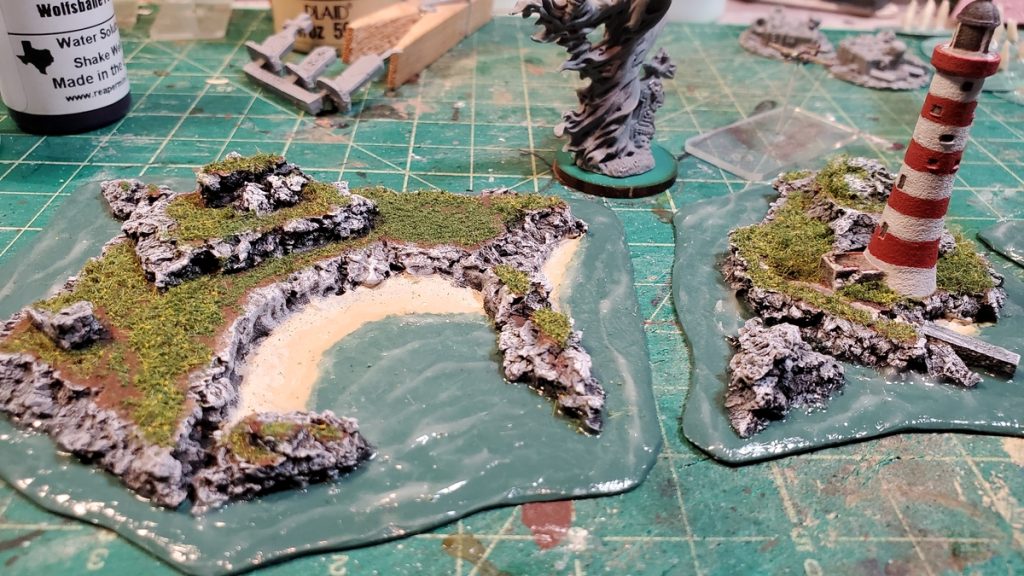
All three islands finished, flocked, and ready for the table. Really pleased with the wave patterns in the large bay of the largest island on the left.
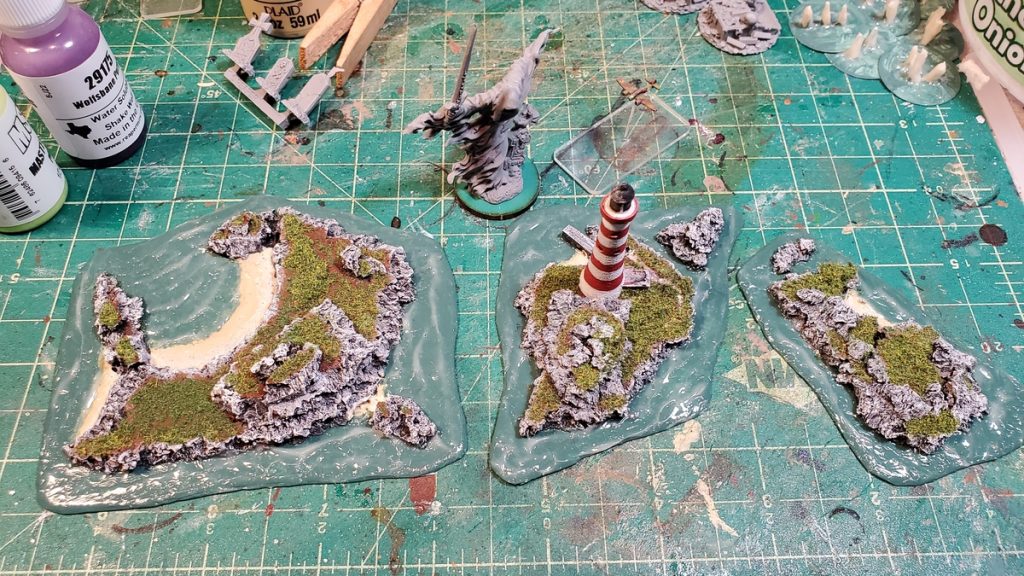
A bit of a closeup of the large and lighthouse islands. Broken cork makes great rock formations and cliffs.All three islands from overhead. For scale, that wraith is on a 25m wide base and the 1/1200 RAF Beaufighter is on a 20mm W x 40mm L base.
These took a bit longer than I’d planned, due mostly to drying times of all the paint, water effects, and such, but they came out great and I look forward to them being a damned nuisance during 1/1200 naval games for many years to come!
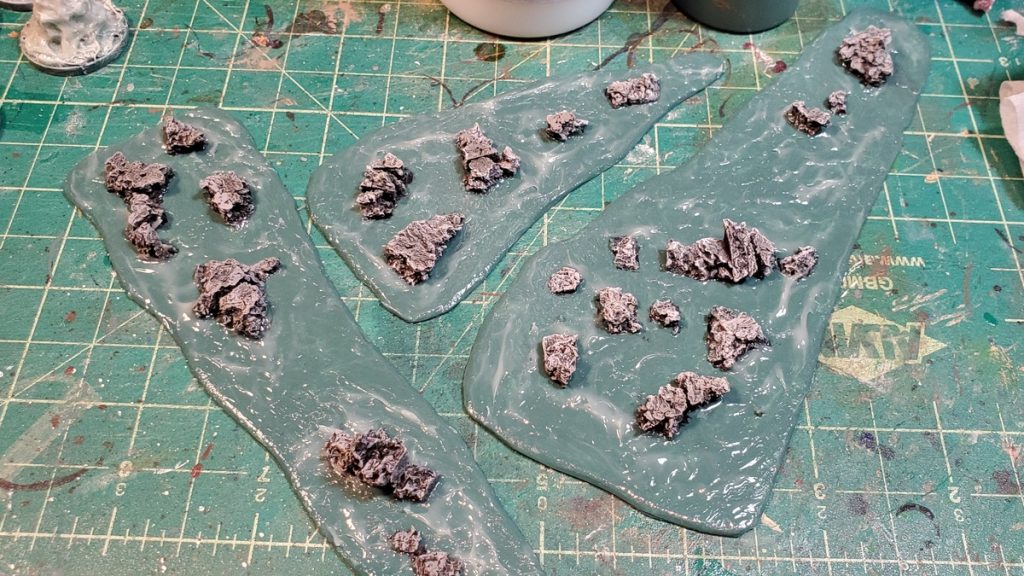
After doing a pair of new sandbanks, I wanted to do something slightly different but still on the theme of “stuff to crash boats and ships into” and decided on a trio of rocky reef pieces.
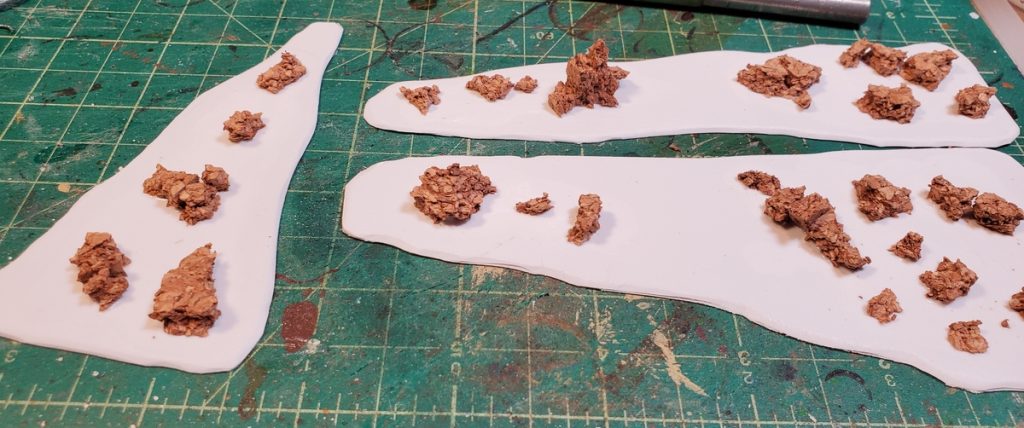
As with the sandbars I started with a chunk of .040/1mm plastic sheet, cut it up into three roughly triangular pieces, and carved and sanded the edges down so they met the table smoothly. Then I took some scrap quarter inch cork board, the stuff cheap bulletin boards are made of, and broke it up into crumbs and small pieces for rocks.
Cork rocks glued down to plastic card. I just used ordinary white glue, nothing fancy.
It helps to remember that 1″ = 100 feet in 1/1200 scale, or 1mm = 4 feet in scale – so a rock big enough to seriously inconvenience a ship can still be just a few millimeters high! I wanted rocks and islets, not proper islands (those are coming!) so I kept most of the cork bits small, breaking it up with my fingernails as needed.
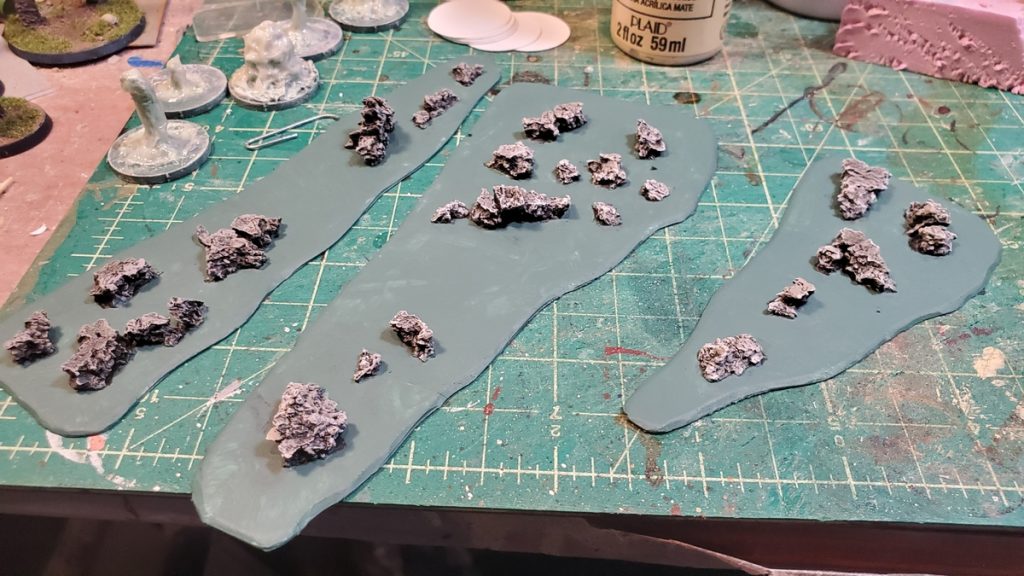
The bases got my usual blue-green ocean colour while the cork rocks got a black basecoat, and then successive drybrushes of grey-brown, pale grey, and finally just a bit of pure white.
Rocks after painting and drybrushing and a second coat of ocean colour. All ready for water effects!
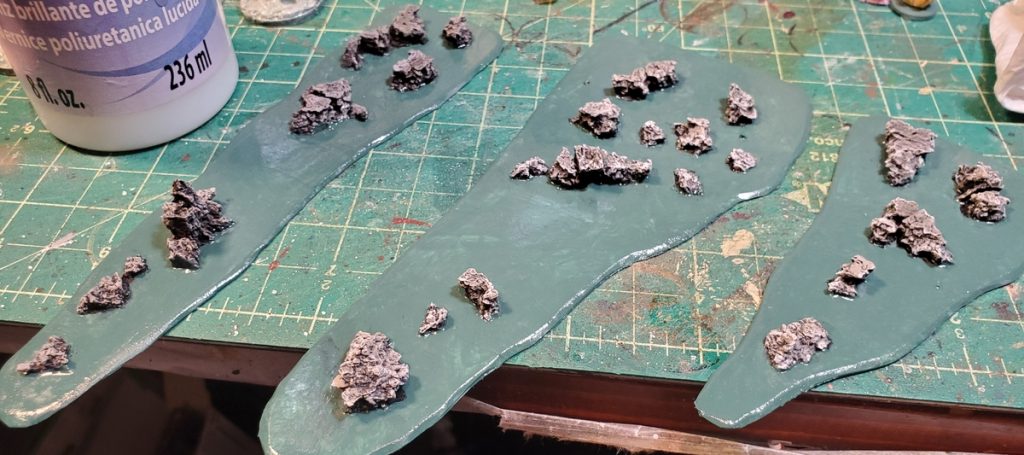
As with the sandbars, I did two coats of gloss varnish over the water parts and then a thick layer of gloss gel for waves, pushed around with a really old brush.
Gloss varnish down.Gloss gel down and pushed around to make some lines of breakers and waves around the bases of the rocks.Finished rocks after the gloss gel has dried for several days, all ready to ruin the cunning plans of 1/1200 scale captains!
These were almost as quick to create as the sandbars, you use literally crumbs of cork for the rocks so one small piece of cork will go a long, long way, and they look good. I’m looking forward to seeing them on the table menacing players who forget that no matter how dangerous the enemy is, the sea is even more deadly and far, far more unforgiving!
As mentioned in the last post, I recently made a pair of new sandbars to give our boats and ships more stuff to run into during our games. I’ve done some before but this time I actually managed to get photos all the way through the process. So here’s my simple way of making sandbars or sand banks for naval gaming.
You will need:
card or plastic card. I’ve used 1mm/.040 sheet styrene/plastic card, which I buy in bulk 2’x3′ sheets from our local industrial plastic shop.
paint in your preferred sea colour. Mine is a blue-green.
a darker and lighter shade of sand for the actual sandbanks. I use Camel for the darker and Parchment for the lighter. If you wanted mudbanks instead of sand, you might want browner shades instead of tan colours.
(optional, see text) acrylic glaze medium. Gets a better gradient between sand and water than you’d otherwise get.
acrylic gloss varnish, for the wet look.
(optional) acrylic gloss gel for waves.
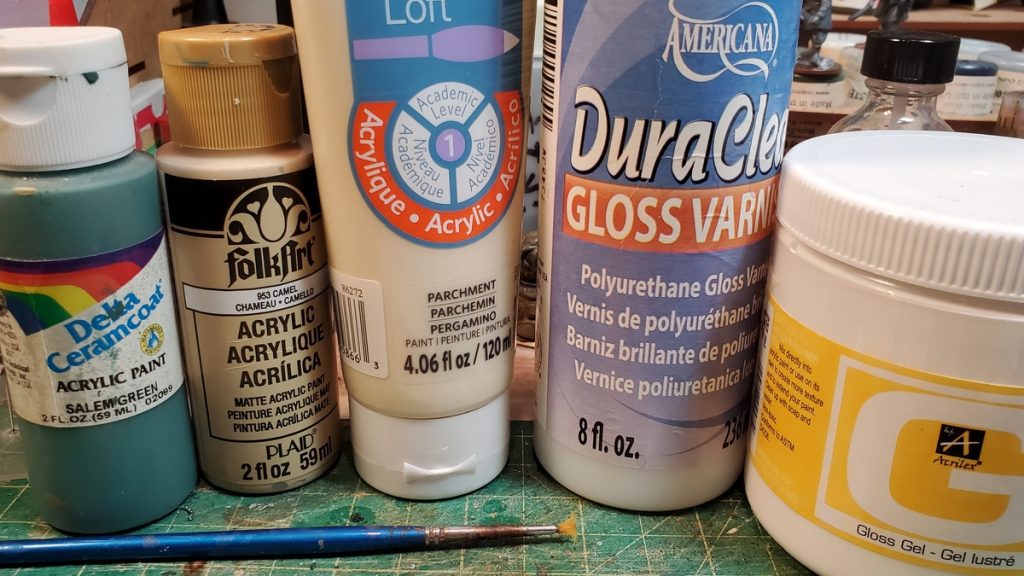
The paints and mediums I use. Salem Green for ocean, Camel for dark sand, Parchment for paler sand, acrylic gloss varnish and acrylic gloss gel for water effects. Not shown here, acrylic glaze medium for the beach/ocean transition painting.
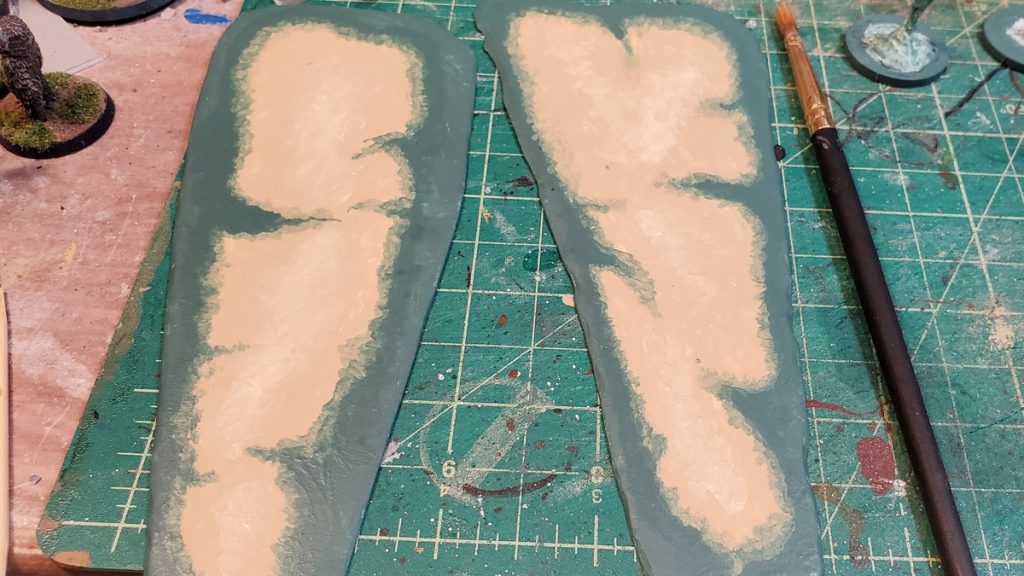
I started by cutting two fairly random shapes out of an offcut of styrene plastic card I had around. Both these sandbars are about 6″ long and 3″ wide at the widest point. Carve the edges slightly irregular and sand them so they taper nicely down to table level. This is mostly why I use styrene plastic card so much, because unlike cardstock you can sand it.
I block out the sandbar shape with the darker sand paint, feathering the outer edges toward the water as I go. While that paint is still wet I laid down and blended in the brighter central paint to show the central, slightly higher, slightly drier parts of the sandbar. This is just quick and dirty wet blending with a wet brush, nothing fancy.
Sandbars with base colours all done, including wet blending paler sand into the centres of the sandbars where they’re higher and drier.
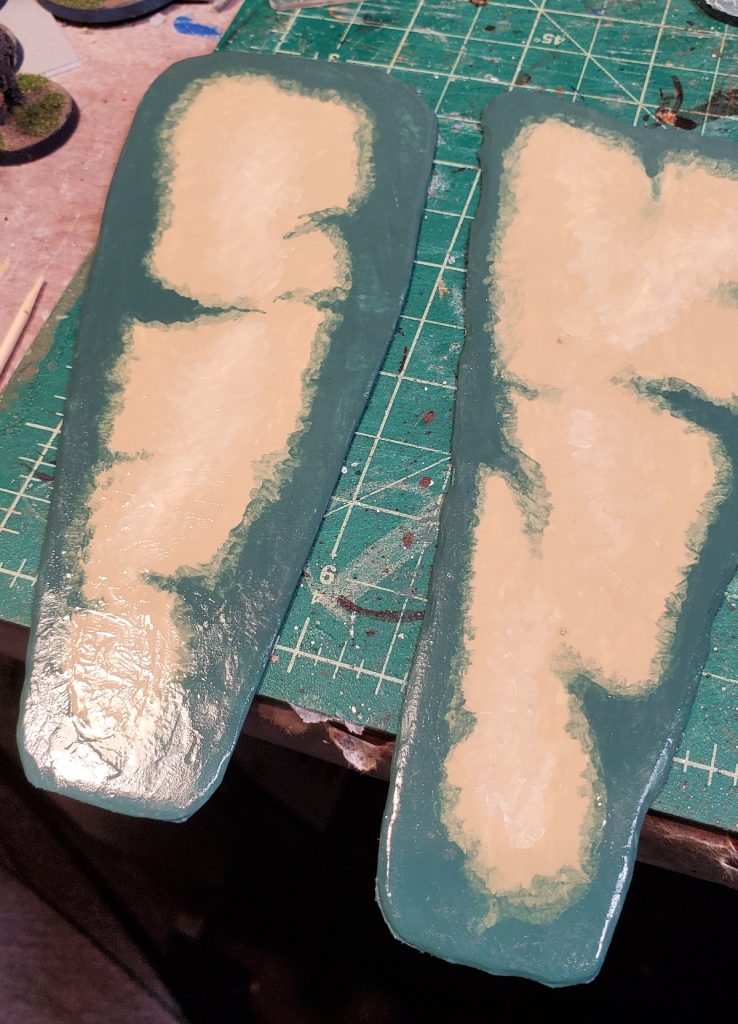
Adding the water colour around the edges, I also made sure to feather that into the sand to keep the edges irregular and natural looking.
After the base colours were dry I came back with the blue-green water colour, mixed 1:1:1 with glaze medium and water and went around the shoreline again to get more graduated colours where the water and sand meet. You can do this with thin washes without needing glaze medium, but the glaze medium gives you much more control and also slows down drying time so you have a bit more time to adjust things.
Thin glaze coat of blue-green water around the edges of the sandbars.
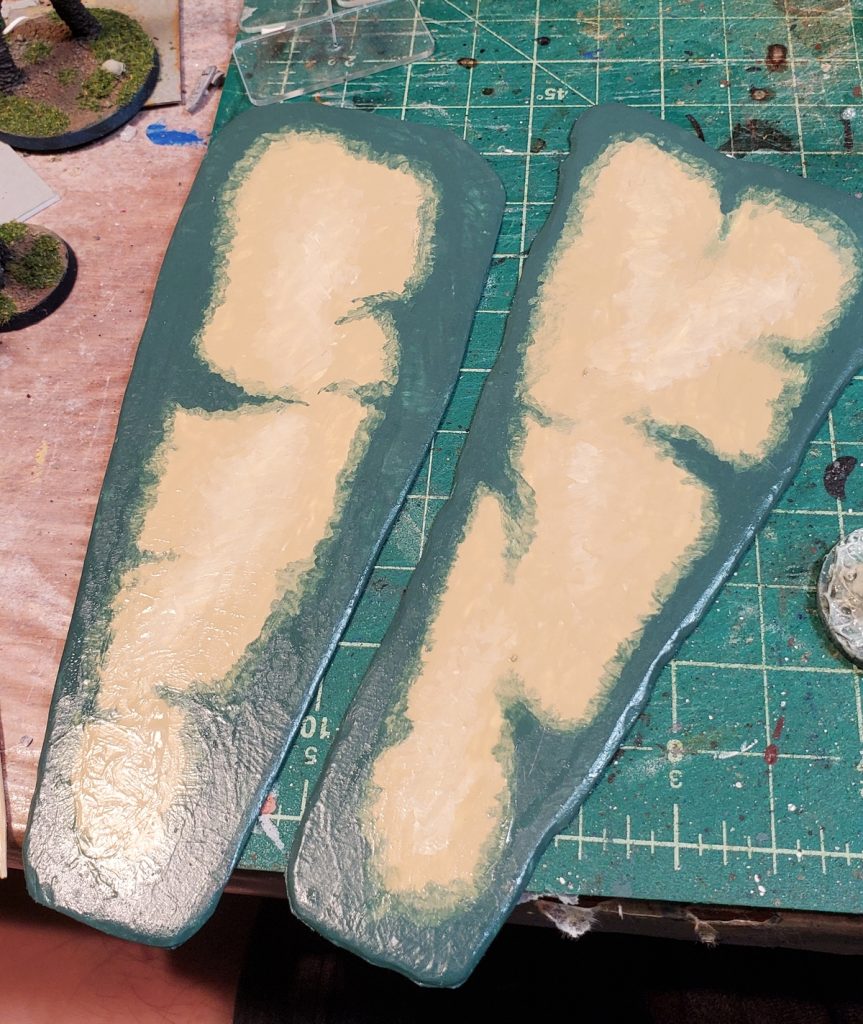
After this was all dry, it was time for a coat of gloss varnish over the whole thing. A word of warning about gloss varnish: make sure everything you’re putting varnish over is perfectly dry, and that includes the first coat if you’re doing multiple coats. Gloss varnish will crack and craze paint under it that is not yet perfectly dry and you’ll have to redo all your base coats and start from scratch – been there, done that, done the swearing!
First coat of gloss varnish down.
After the first coat of gloss was perfectly dry (see warning above!) I did a second coat mostly on the water and darker sand areas and then let that dry.
Second coat of gloss varnish down. Not a lot of difference in these photos, but the second coat looks dramatically glossier and more even in person than the first coat alone.
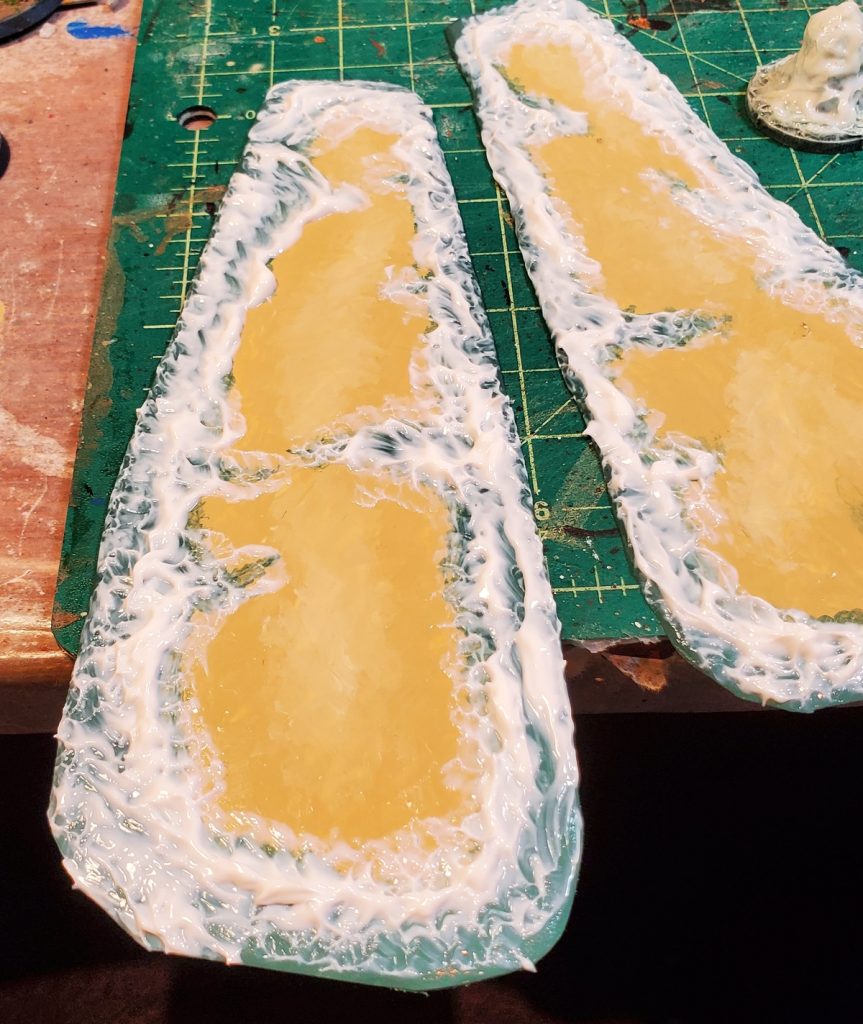
Finally, to add some waves and water texture I went round the edges of each piece with acrylic gloss gel. This goes on white but dries clear eventually. This stuff shrinks quite a lot so the trick is to build it up higher than you think is reasonable and then let it dry for a day or several. I use a really old paintbrush to shove it around, build up lines of waves, and otherwise manipulate it. In a larger scale than 1/1200 you might want to use clear acrylic caulk or something else to build up waves.
Gloss gel worked in around the edges for waves, applied thick as it will shrink down as it dries.
Gloss gel is easy to work with and makes great water textures, but it takes days and days and days to dry. Skip it for now if you need to get your scenery on the table in the next several days and come back to it later!
Once gloss gel finally dries, you get nice breakers and areas of disturbed water.
Two sandbars done and ready to complicate the lives and decision making processes of captains in future small boat games!
Coming soon, rocky reef hazards, small islands, and more shell bursts!
Getting back into the 1/1200 WW2 boats a bit, had a refresher game of Germans attacking a British coastal convoy last week and I’m running a large-ish game in a couple of weeks at a convention over in Vancouver.
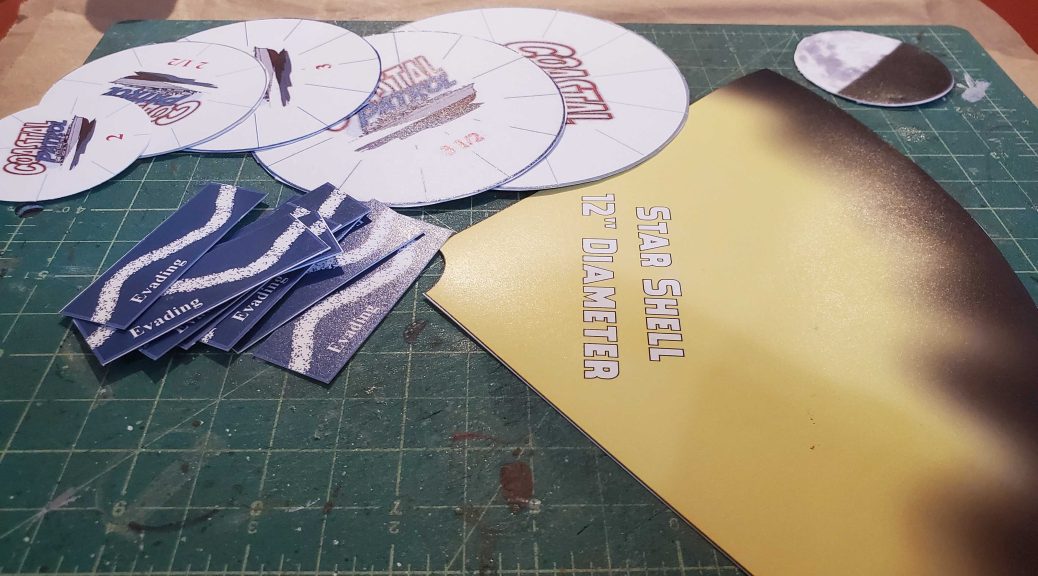
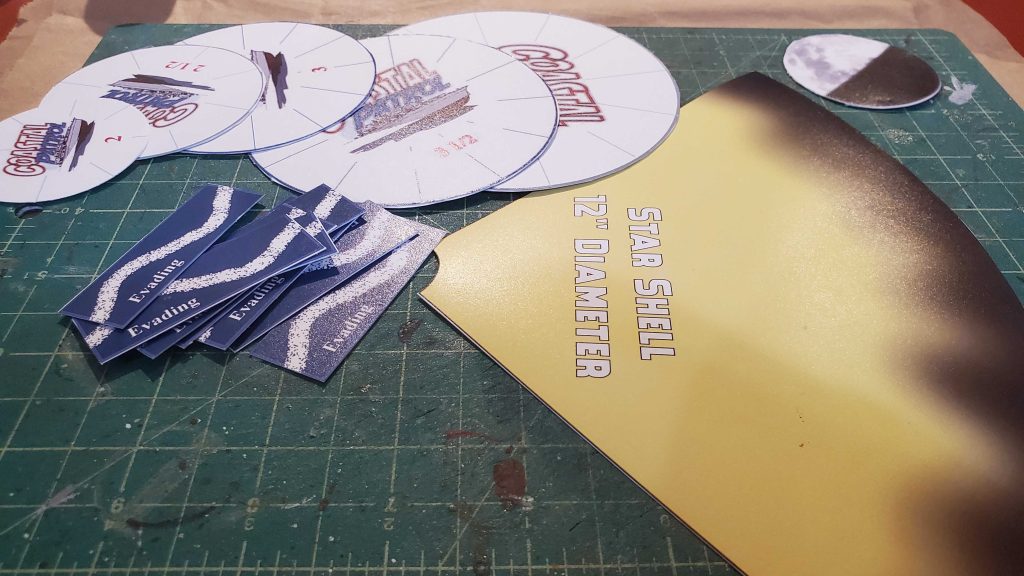
Reprinted turning arcs, Evading markers, moon markers (top right) and star shell diameter gauge for Coastal Patrol, all double sided for ease of use.
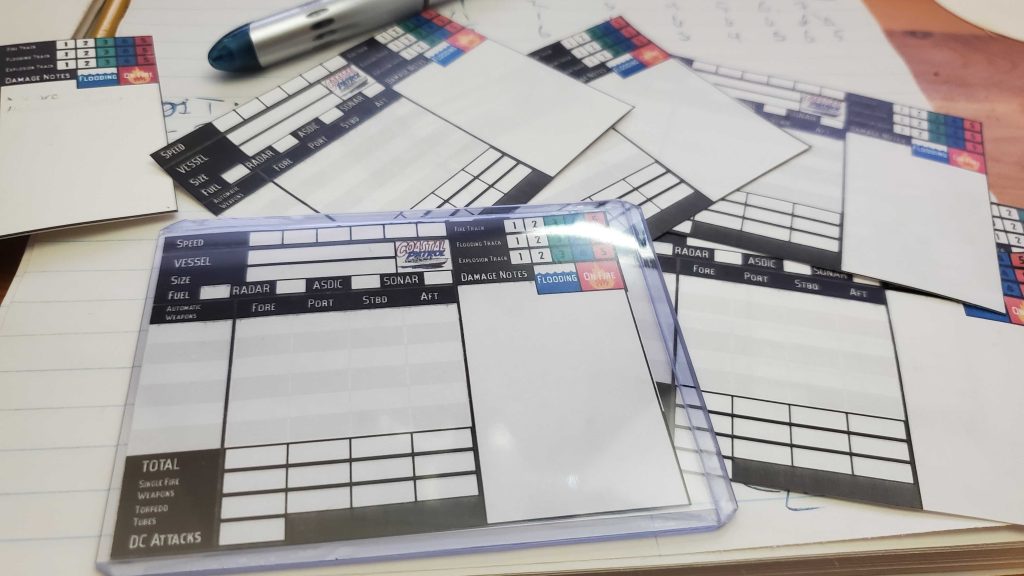
Naturally the prospect of a public game has me back at creating and upgrading my play aids. I’ve printed new turning circles for Coastal Patrol, tweaked my existing vessel status cards so they fit in plastic 3×4 card protectors, and have some new status tokens underway to make some things easier to track.
Turns out that 3″x4″ card protectors are actually designed for cards under 2.75″ tall, so I had to tweak my Coastal Patrol vessel info cards slightly to fit. Fully reusable status cards at long last!
The older naval markers, vessel cards, and such are all available in older posts here on my blog, and sometime in the next couple weeks I’ll clean up all the new and updated files and make them available here too.
There aren’t a lot of small scale scenery tutorials out there, either as videos or traditional blog post writeups. Viv on RubbishInRubbishOut, though, did some YouTube videos of Dystopian Wars scenery a few years ago, and it turns out that DW is in something approximating 1/1200 scale, more or less.
Also, Dispatches from the Front has been working on some fantasy naval scenery for Man’O’War using the Brigade Models buildings and it looks fantastic. Fantasy microscale terrain has a definite appeal, you can get grandiose epic terrain on the table that wouldn’t work at all in any larger scale!
When I did my first WW2 coastal order to Last Square back in November 2019, well over six months ago now, I added a pack of British Beaufighter/Beaufort and a pack of German Ju88 for the heck of it, chosen because both types of aircraft show up in the maritime strike role for most of the war with various loadouts.
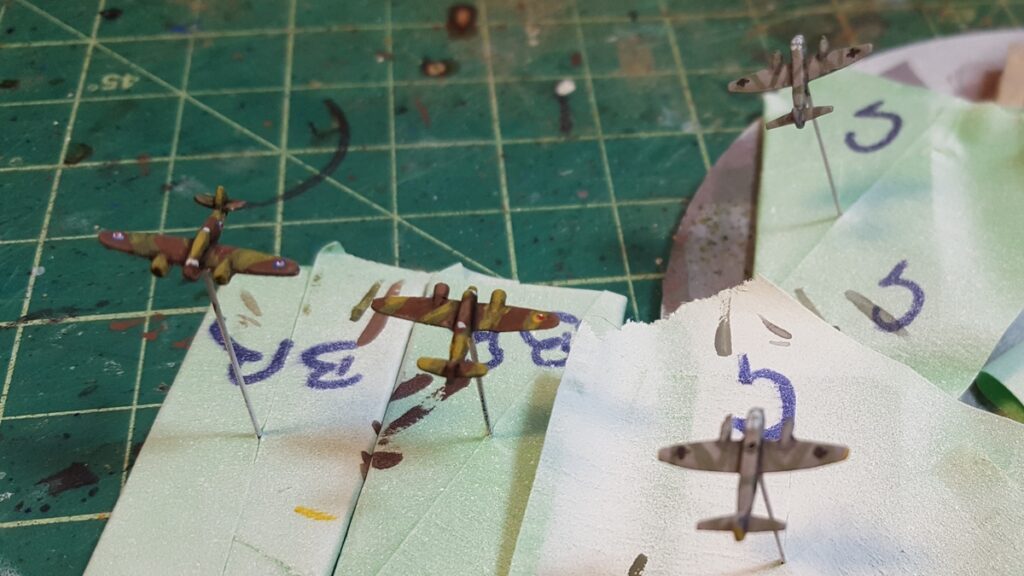
I got them, looked at them, was dumbstruck by the insanely minute size of the things, and put them aside to paint the boats up instead. Having just finished (most of) the second order of Last Square coastal naval boats and being in a get-stuff-finished mood, I decided to have another look at the tiny tiny planes and figure out how to mount and paint them.
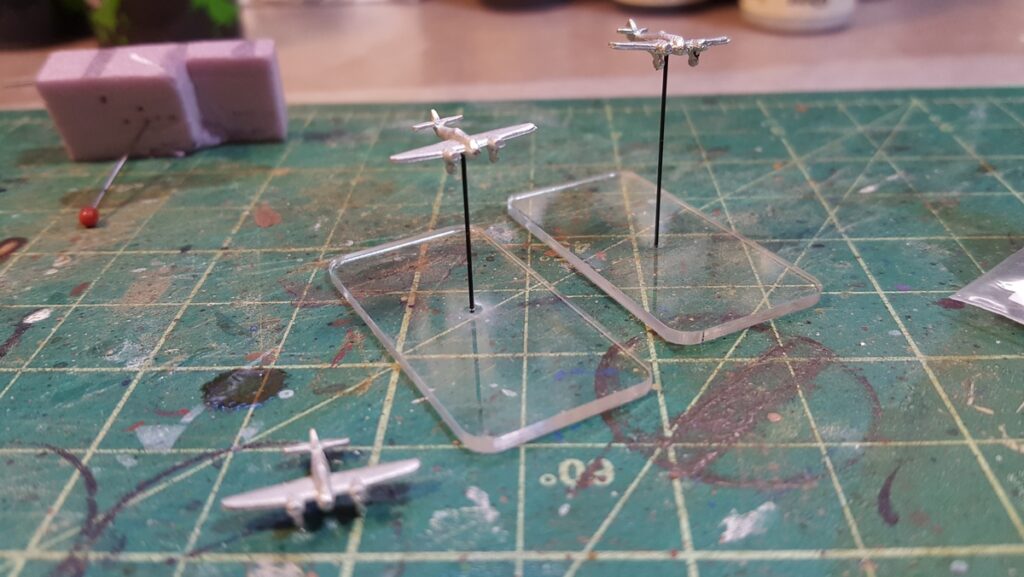
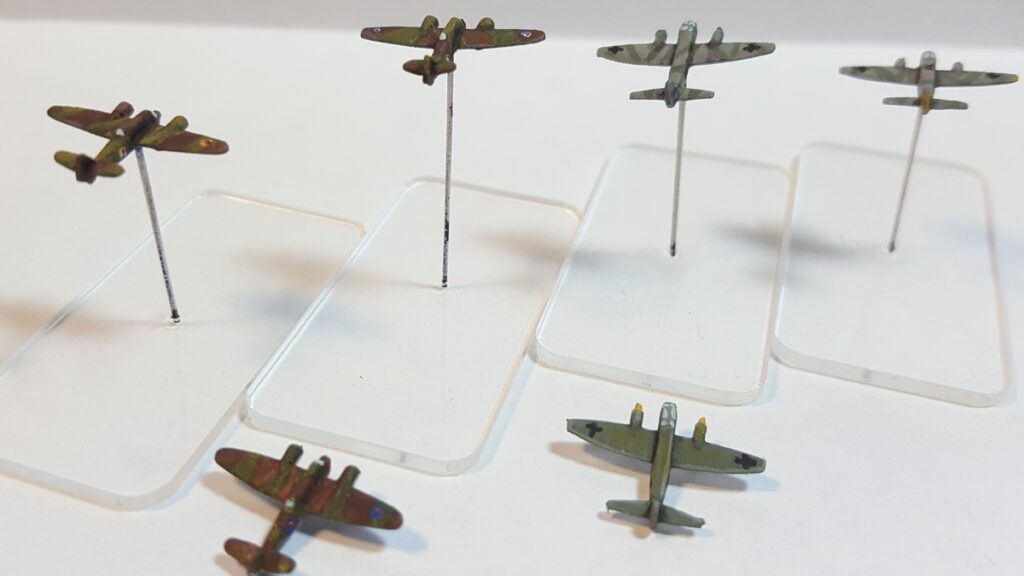
I recalled reading about using plastic broom bristles for masts and antenna previously, so I decided to test this out for creating flying stands suitable for tiny planes. I used the same 40mmx20mm thin acrylic bases I’m using for most of my boats, because I’ve got them, and I happened to have a micro-drill-bit in my tool stash almost perfectly the same size as the bristles I harvested off our household broom.
RAF Bristol Beauforts/Beaufighters, two mounted and one left loose. Click for larger.
I kept the flying heights fairly short, about one inch maximum, which means these planes are all coming in at wavetop height, pretty much, which seems to make sense when attacking small coastal vessels and is way, way easier to store than taller possibly more realistic height stands!
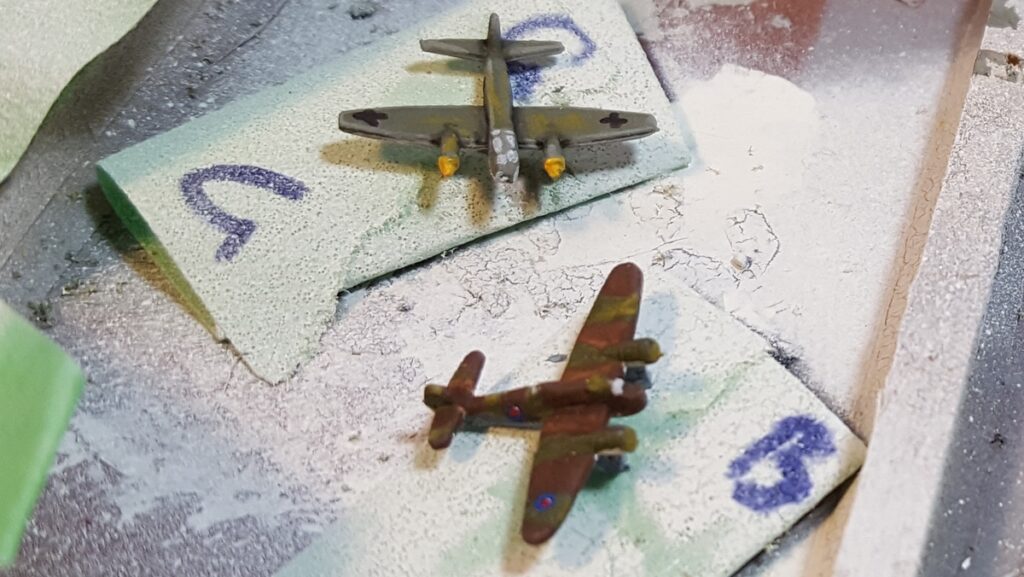
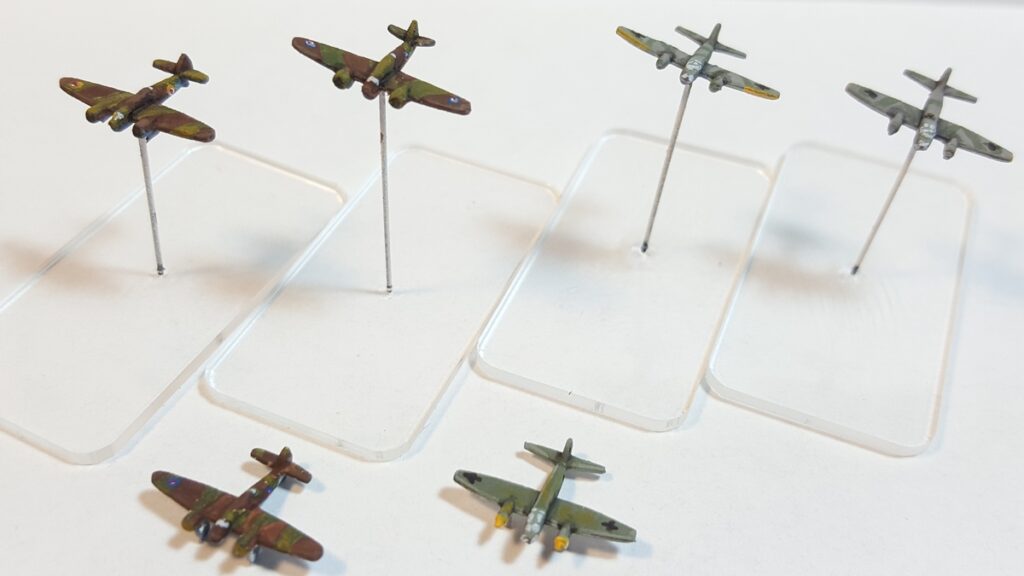
Two Beaufighters and two Ju88 mostly done, including recognizable national insignia on these tiny, tiny planes. Click for larger.Extreme closeup of the unmounted Beaufighter and Ju88. I’m pleased with the look of the canopies, especially on the German Ju88 with their big “greenhouse” canopies covering most of the front end. Click for larger.
Painting Notes
All my current paints are from the Reaper Master Paints series. All six planes got a white primer, and then for the RAF I used Muddy Brown and Military Green for the topside camo; the underside is Heather Blue mixed with Rainy Grey which seems like a good match for the RAF “sky blue” grey-blue underside paint.
The Germans were a mix of Rainy Grey and Muddy Olive 1:1 for the all-over base coat, with two of the Ju88s getting slightly darker grey-green camo added with some additional Stone Grey added to the Rainy Grey/Muddy Olive mix.
I adding some highlighting along edges mostly by mixing a bit of Rainy Grey into the relevant base colour, and the Germans got some yellow recognition patches with Marigold Yellow. I also used some Games Workshop Nuln Oil (black) and Agrax Earthshade (brown) washes, especially along the roots of the wings.
The German iron crosses are Walnut Brown, a lovely almost-black that I use all the time instead of actual Pure Black.
The RAF roundels are Marigold Yellow, Sapphire Blue, Pure White, and Carnage Red.
Windows and cockpit canopies were picked out with Ghost White, a blue-tinted off-white.
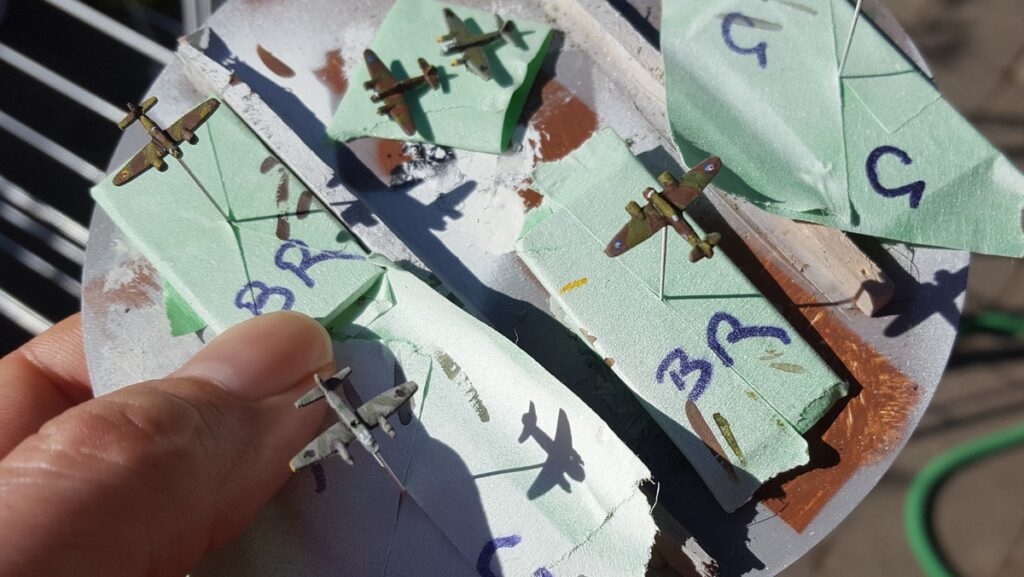
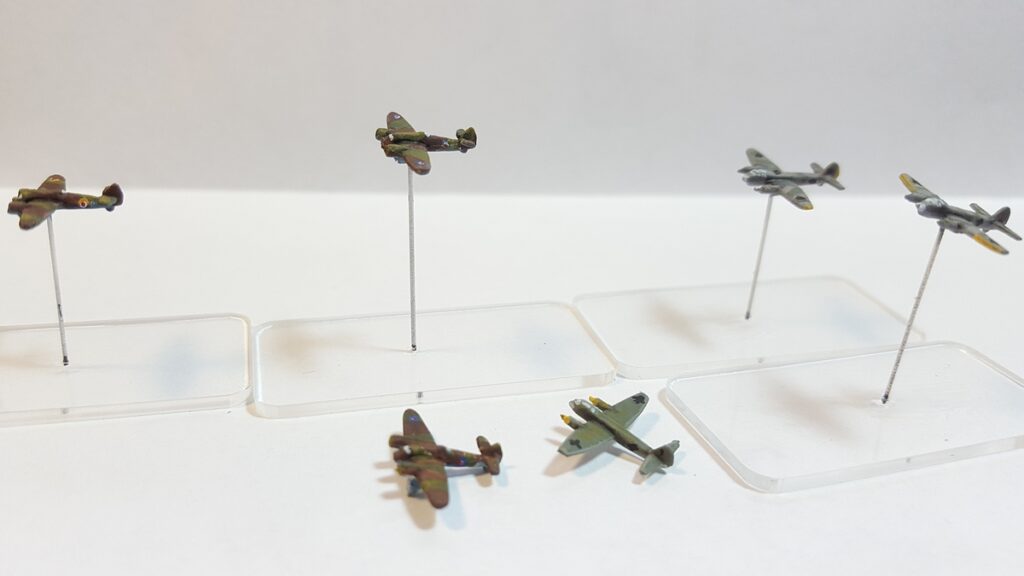
For scale, I made sure to take this photo with my thumb “in the way”. That’s a standard CD I’m using to hold the planes, just for additional scale. These things are seriously tiny. Click for larger.Side views, RAF Beauforts/Beaufighters on the left and Luftwaffe Ju88 on the right. Click for larger.Tail end view, Beaufort/Beaufighter left, Ju88 to the right. Click for larger.Forward view, same arrangement as previous. Click for larger.
Aircraft don’t actually play a huge role in most of the engagements coastal naval vessels find themselves involved in, so I don’t think I’ll be adding to my collection of tiny aircraft anytime particularly soon, but these turned out to be fun to paint and they ended up way better looking than I was thinking they would, given the diminutive size of the things!
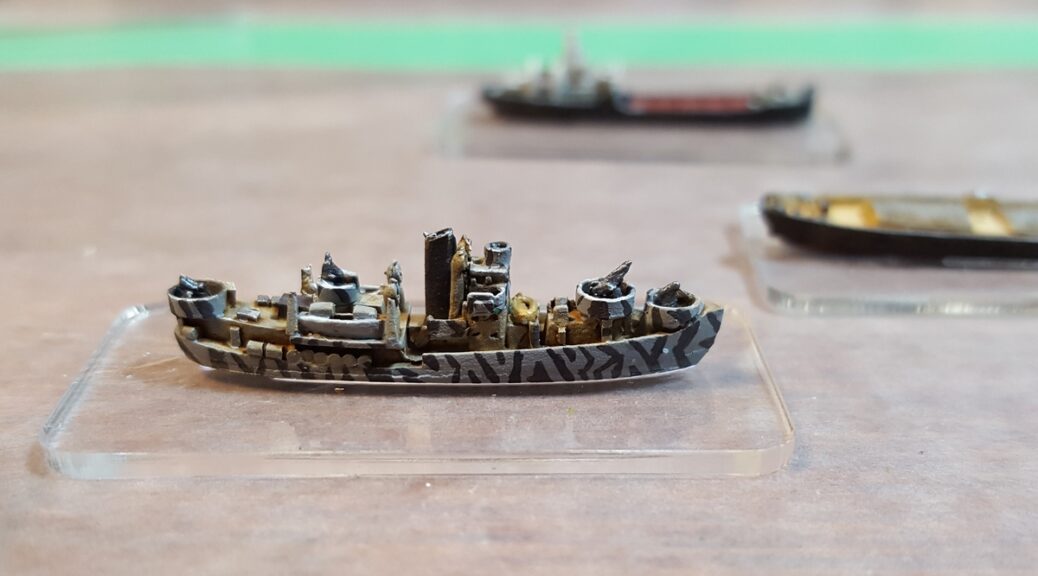
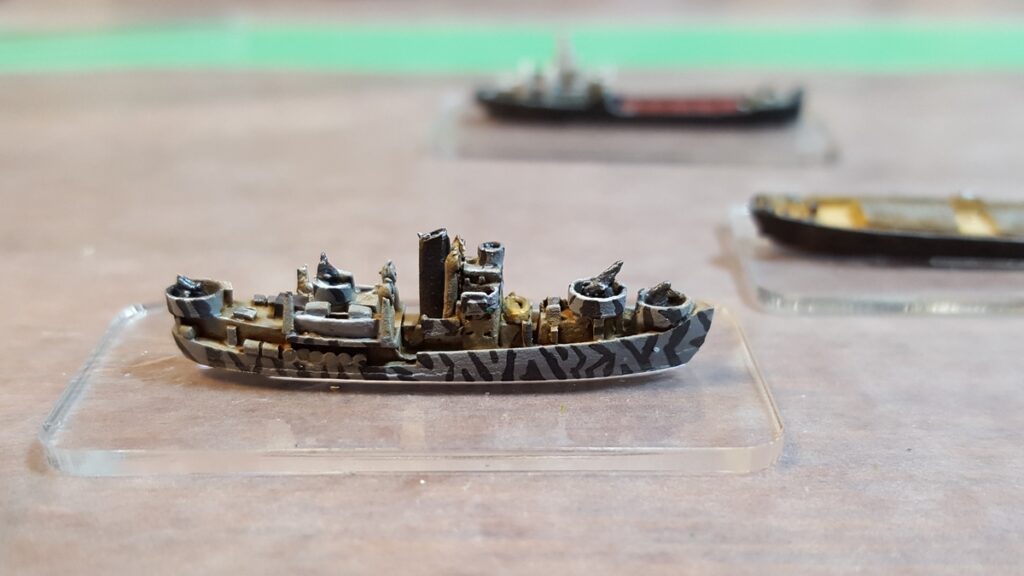
Latest batch of World War Two coastal naval vessels in 1/1200 scale is done and based. As with the previous vessels, these are all Figurehead from Last Square in the States. I’m especially pleased with the two German patrol trawlers (Vorpostenboote) with their dazzle/disruption camo scheme.
First of two Vorpostenboot. Click for larger.Second Vorpostenboot. The two models are actually different, which is cool when representing these notably heterogeneous craft (almost all requisitioned trawlers pressed into service as escorts) on the table. Click for larger.
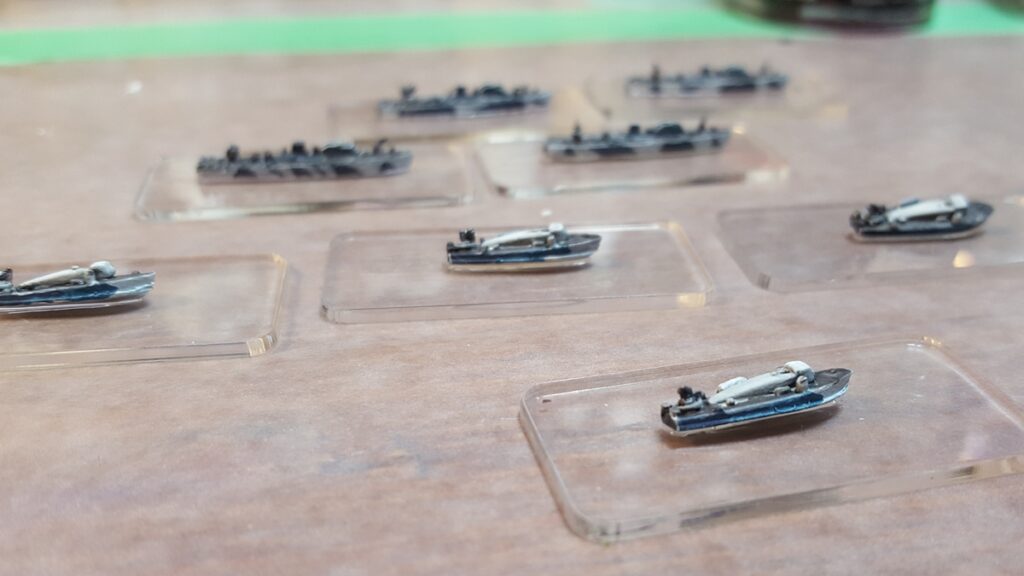
I also did up a few more Royal Navy Coastal Command craft, four Fairmile B Motor Launches and four 70′ British Power Boat (BPB) Motor Gun Boats. The BPBs are really tiny at 1/1200 scale, under 20mm long!
Four BPB Motor Gun Boats in the foreground and four Fairmile B Motor Launches in the background, all on 40mm long acrylic bases. Click for larger.
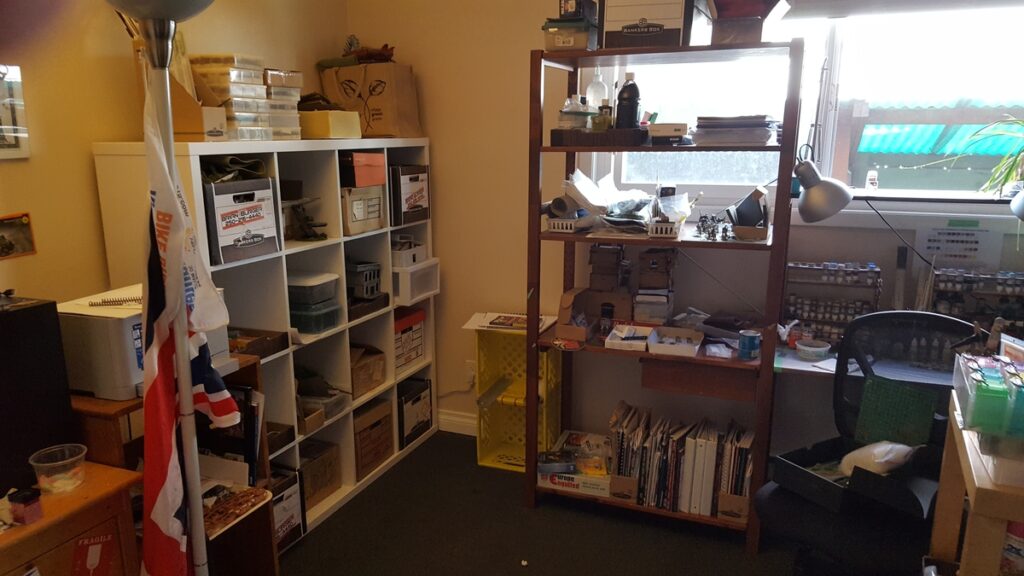
And the reason it’s been quiet here on the blog for the last couple of weeks is that I’ve been completely pulling my hobby/painting area apart and have finally mostly put it together again, all with the aim of installing a big Ikea shelving unit in one corner, a Kallax 57′ x 57′ monster.
The partially-rebuilt painting/hobby/game storage area! Click, as always, for larger.
The cubicles of the Kallax will fit a banker’s box (there’s a couple in there already) which is already my standard method of storing and transporting scenery. I’m still planning a massive sort of my scenery stockpile, which will (to be honest) probably take another couple of months in bits and pieces. There’s stuff in the stash that hasn’t hit the table in years and year because it’s buried under other things or just straight up been misplaced and I don’t actually know where it is!
Both Narrow Seas and Coastal Patrol (and probably other naval games, I’m guessing) include rules for the moon being full or partial in their sighting and visibility rules, and a difference if your target is silhouetted against the moon or “down-moon”. They’ve also got rules for star shells and flares, with a different diameter in each game – 12″ diameter in Coastal Patrol, 8″ in Narrow Seas.
Accordingly I decided to crank out full moon, partial moon, and star shell illuminated area markers suitable for both games.
Thumbnail of the full and partial moon markers.
The star shell markers are quarter-circles; you could print four and tape them together, I guess, or just do what I intend to, use the quarter circle as a quick flexible marker for the extent of the illuminated area around a marker denoting the centre of it.
The moon graphic was originally from OpenClipArt.org, still a useful site but much, much messier than it used to be. I suspect the moon in that image was pulled in from elsewhere on OpenClipArt, but searching that site has become harder and harder. I cut mine out separately with a circle cutter then glued them back to back for ease of use.
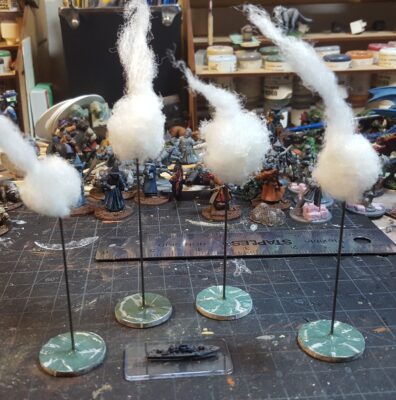
I’ve done four simple 3d starshell/flare markers for use on the tabletop to mark the centre of an illuminated area and the actual star shell location, each a length of wire on a 25mm MDF base with tufts of cotton wool for the characteristic smoke/light effect you see in photos of starshells. They’re a bit rough but they work, I think.
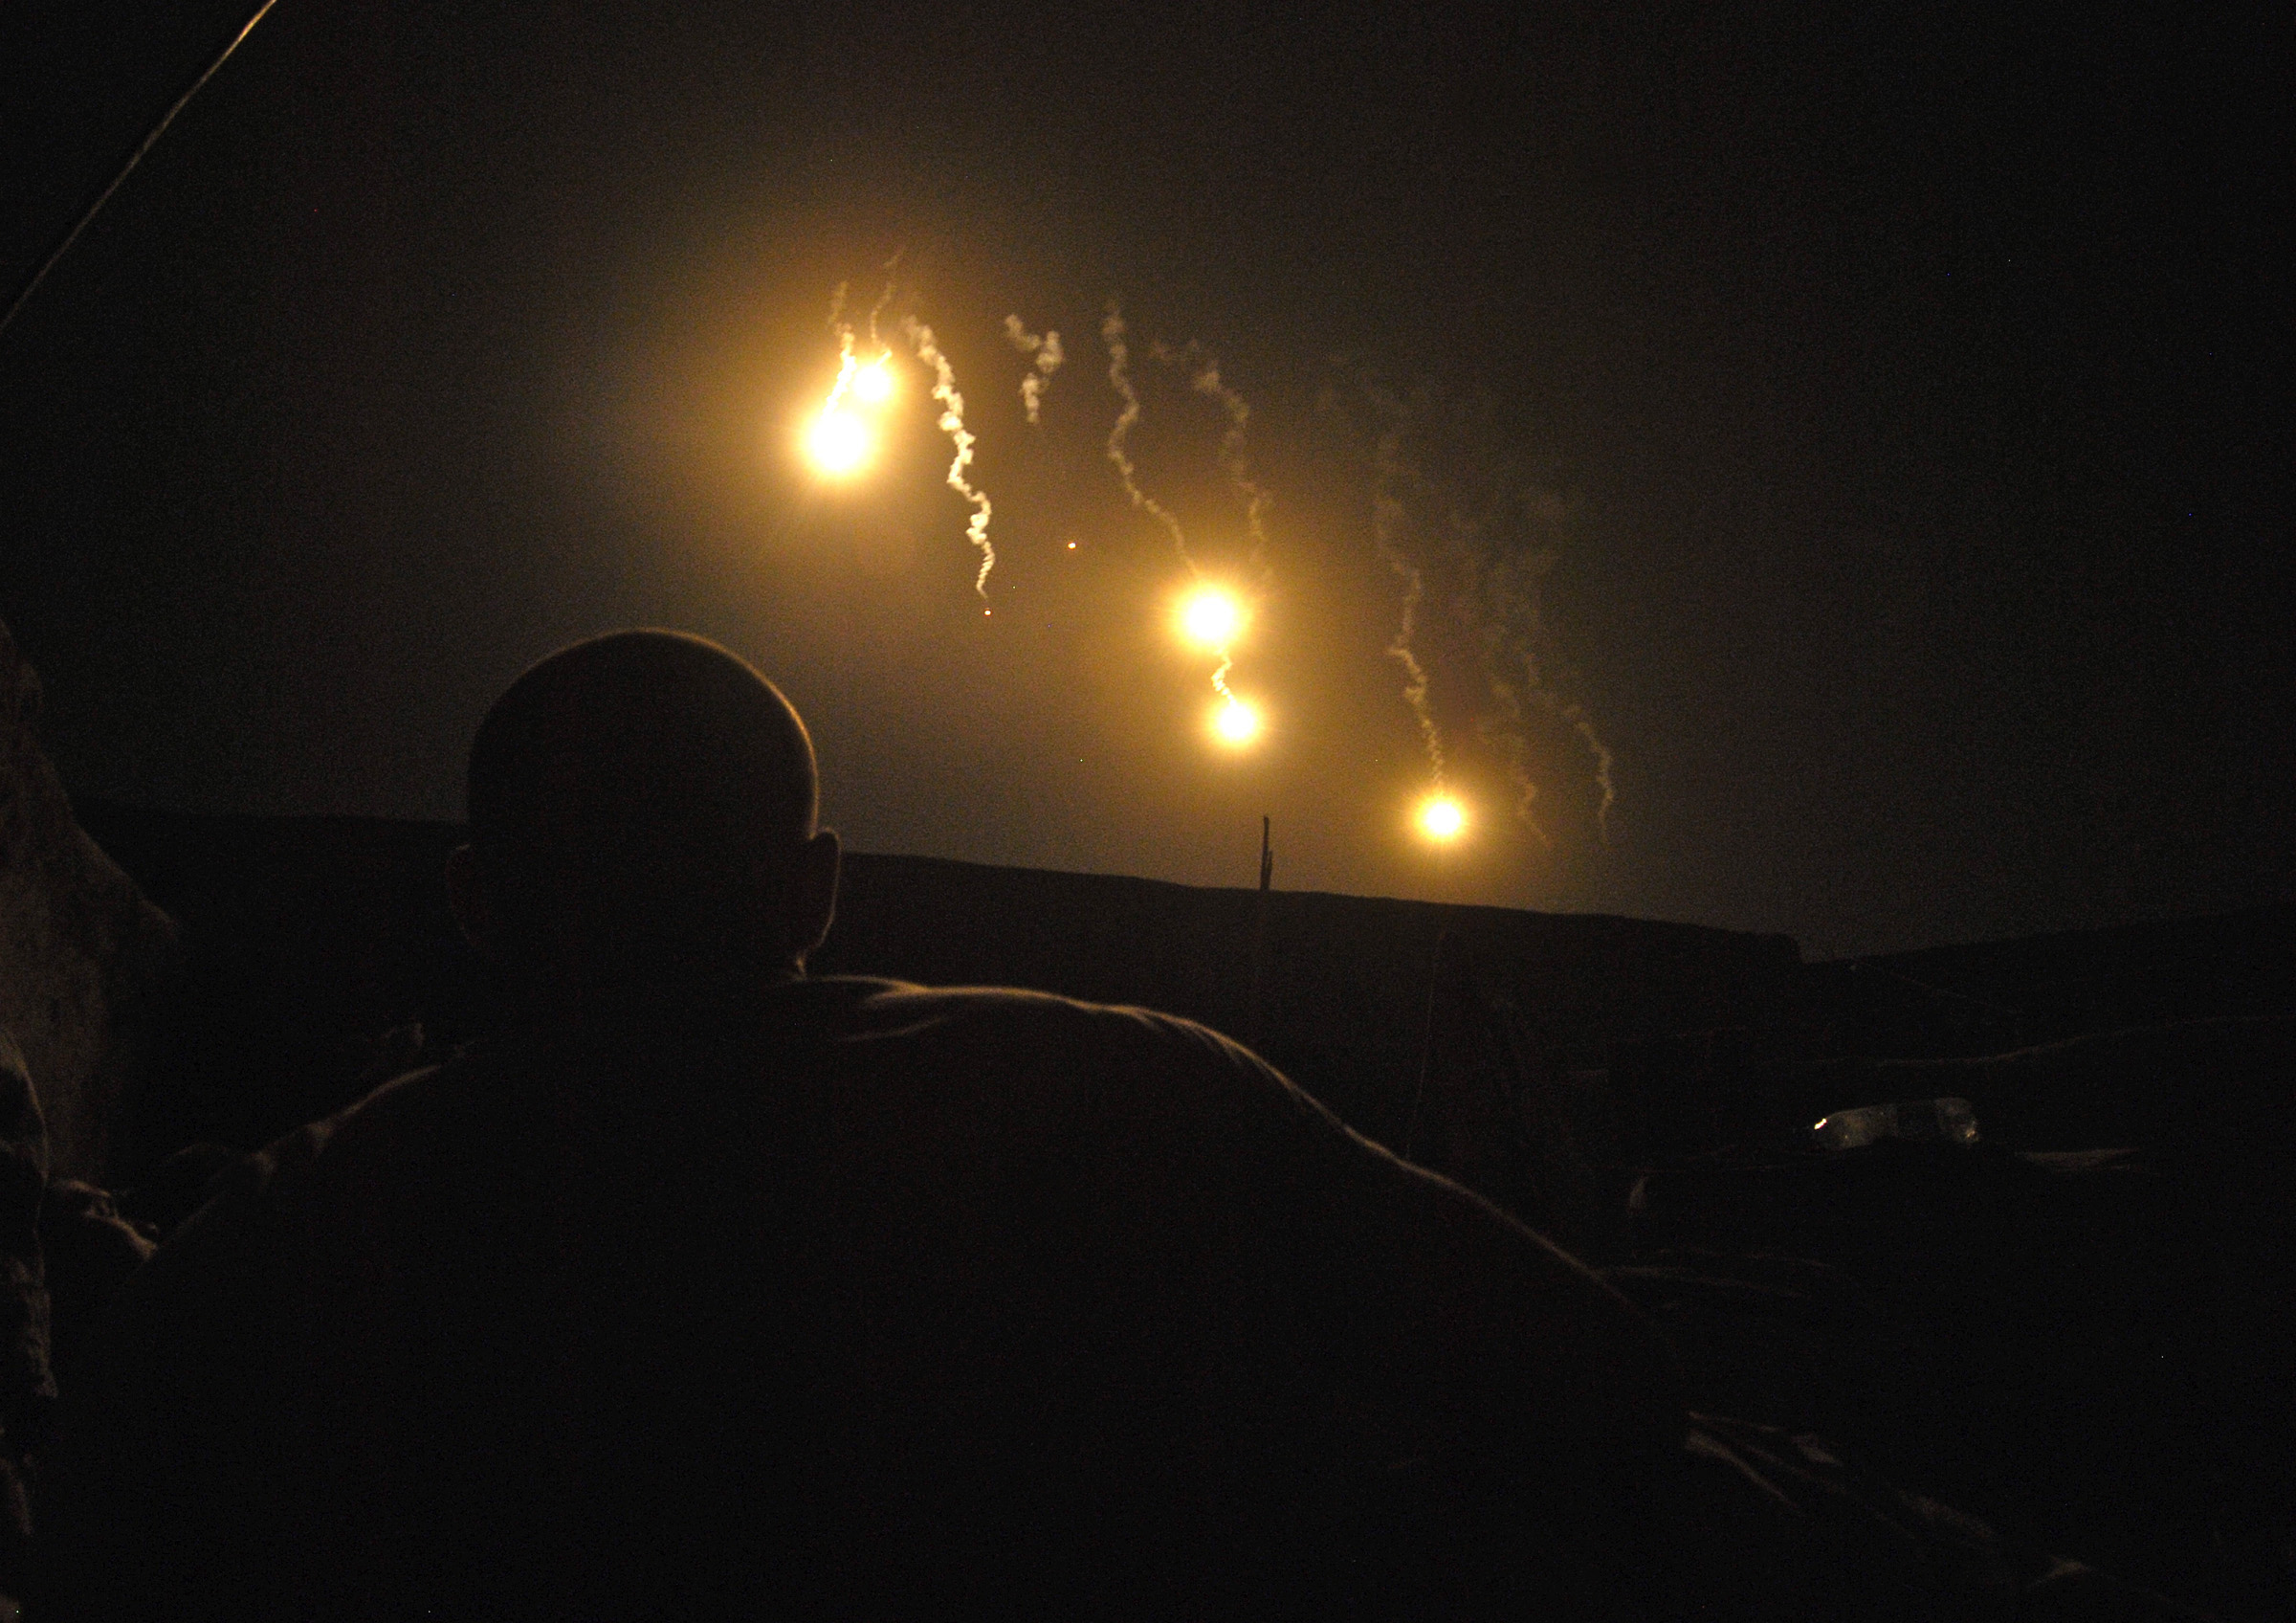
Star shells over Iraq. Image via Wikipedia, originally taken by USAF personnel.
The bases are 2mm thick MDF and 25mm wide; I used the same water effects with gloss gel that I use on terrain for this naval projects then did some basic highlighting with white paint to kind of give the effect of light glaring off the water.
Four star shells bracket a really, really unfortunate Royal Navy Fairmile D motor gun boat. Click for larger.
I worked a bit of white glue into the cotton wool so the whole thing was more wargamer-proof and the plumes stand up better.
We’ve only done two games since actually introducing the illumination rules to Coastal Patrol, and it’s fascinating to watch how the illuminated areas are treated like “terrain” to be avoided while maneuvering around the table. They definitely add tactical complexity to the small unit naval game!