Tag Archives: navy

Sandbars for Naval Gaming

As mentioned in the last post, I recently made a pair of new sandbars to give our boats and ships more stuff to run into during our games. I’ve done some before but this time I actually managed to get photos all the way through the process. So here’s my simple way of making sandbars or sand banks for naval gaming.

You will need:

  • card or plastic card. I’ve used 1mm/.040 sheet styrene/plastic card, which I buy in bulk 2’x3′ sheets from our local industrial plastic shop.
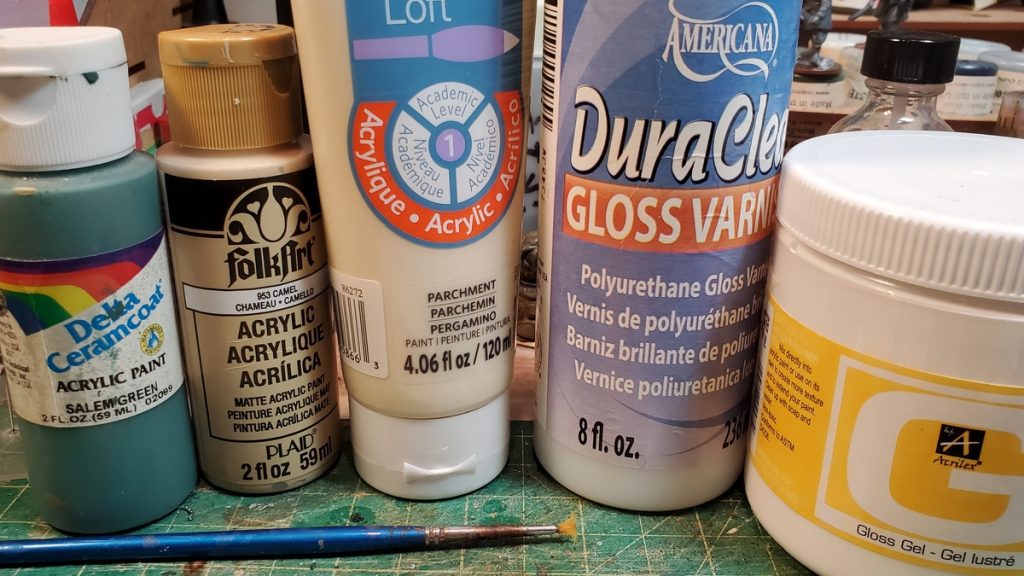
  • paint in your preferred sea colour. Mine is a blue-green.
  • a darker and lighter shade of sand for the actual sandbanks. I use Camel for the darker and Parchment for the lighter. If you wanted mudbanks instead of sand, you might want browner shades instead of tan colours.
  • (optional, see text) acrylic glaze medium. Gets a better gradient between sand and water than you’d otherwise get.
  • acrylic gloss varnish, for the wet look.
  • (optional) acrylic gloss gel for waves.
The paints and mediums I use. Salem Green for ocean, Camel for dark sand, Parchment for paler sand, acrylic gloss varnish and acrylic gloss gel for water effects. Not shown here, acrylic glaze medium for the beach/ocean transition painting.

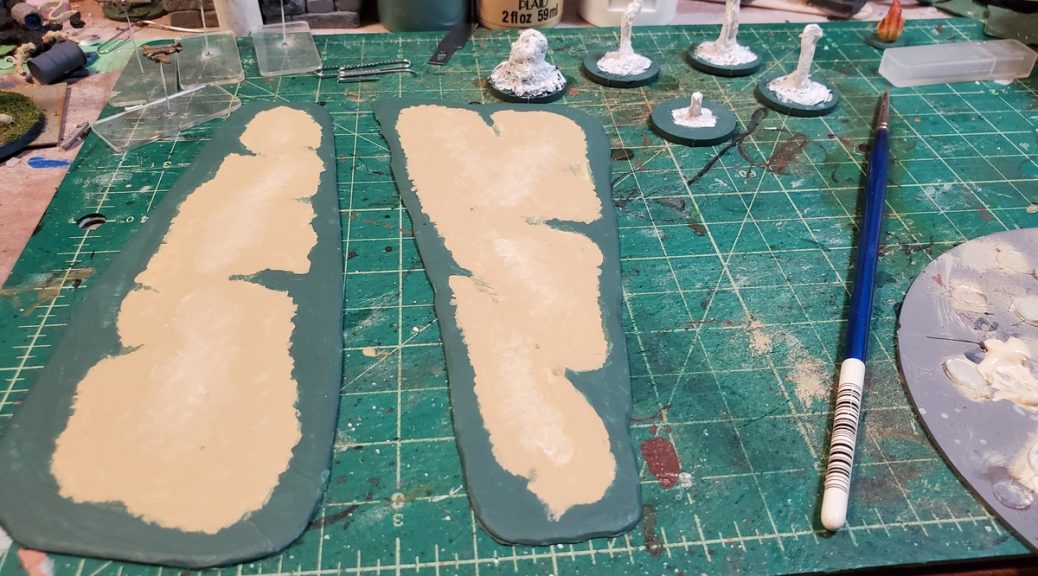
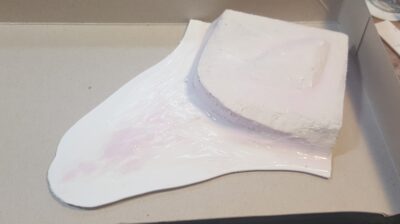
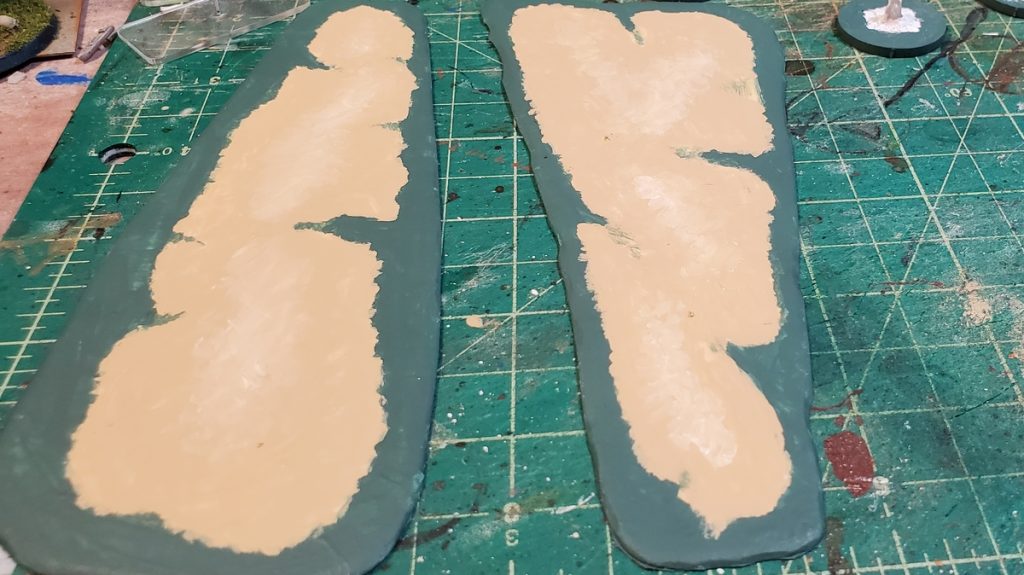
I started by cutting two fairly random shapes out of an offcut of styrene plastic card I had around. Both these sandbars are about 6″ long and 3″ wide at the widest point. Carve the edges slightly irregular and sand them so they taper nicely down to table level. This is mostly why I use styrene plastic card so much, because unlike cardstock you can sand it.

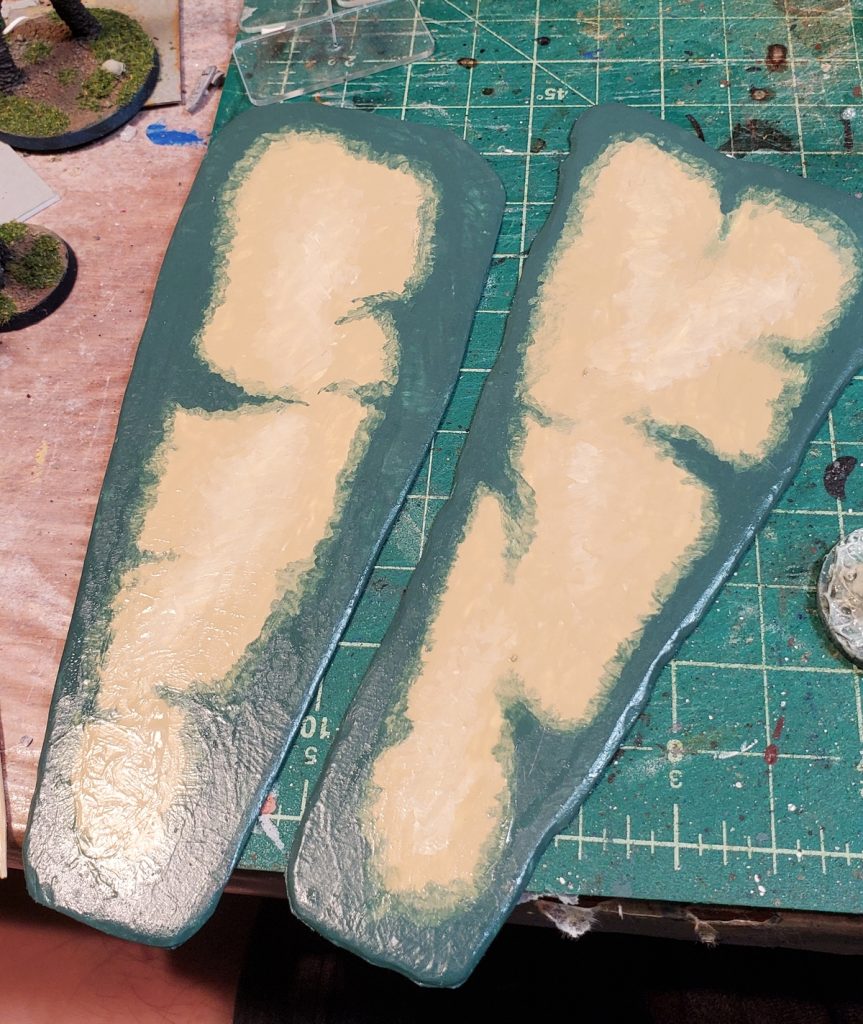
I block out the sandbar shape with the darker sand paint, feathering the outer edges toward the water as I go. While that paint is still wet I laid down and blended in the brighter central paint to show the central, slightly higher, slightly drier parts of the sandbar. This is just quick and dirty wet blending with a wet brush, nothing fancy.

Sandbars with base colours all done, including wet blending paler sand into the centres of the sandbars where they’re higher and drier.

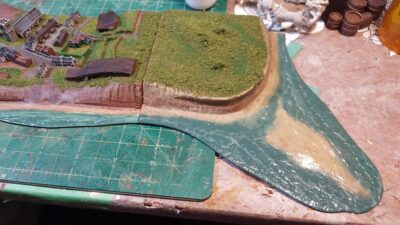
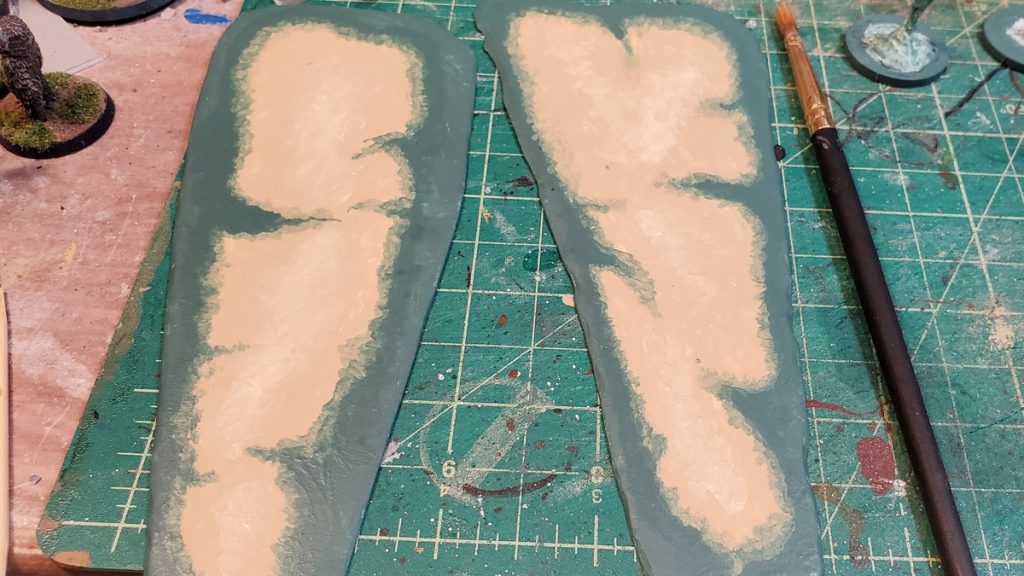
Adding the water colour around the edges, I also made sure to feather that into the sand to keep the edges irregular and natural looking.

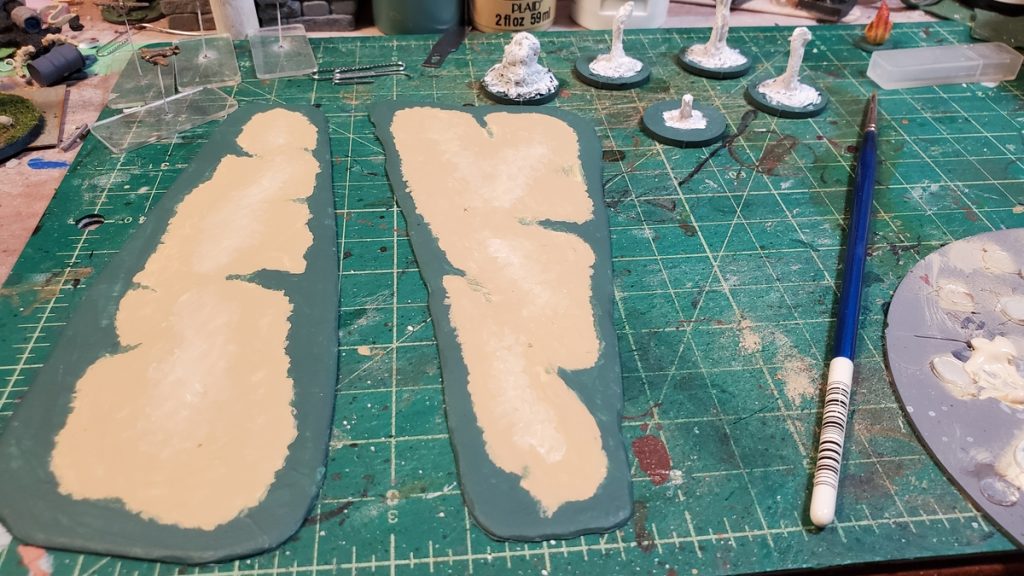
After the base colours were dry I came back with the blue-green water colour, mixed 1:1:1 with glaze medium and water and went around the shoreline again to get more graduated colours where the water and sand meet. You can do this with thin washes without needing glaze medium, but the glaze medium gives you much more control and also slows down drying time so you have a bit more time to adjust things.

Thin glaze coat of blue-green water around the edges of the sandbars.

After this was all dry, it was time for a coat of gloss varnish over the whole thing. A word of warning about gloss varnish: make sure everything you’re putting varnish over is perfectly dry, and that includes the first coat if you’re doing multiple coats. Gloss varnish will crack and craze paint under it that is not yet perfectly dry and you’ll have to redo all your base coats and start from scratch – been there, done that, done the swearing!

First coat of gloss varnish down.

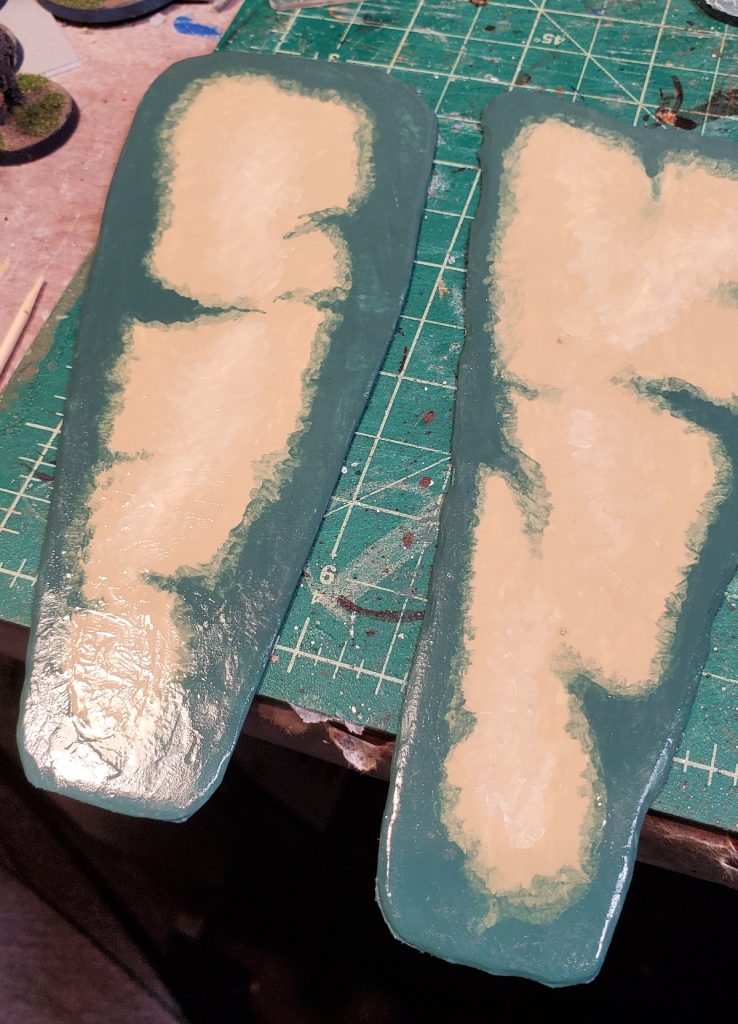
After the first coat of gloss was perfectly dry (see warning above!) I did a second coat mostly on the water and darker sand areas and then let that dry.

Second coat of gloss varnish down. Not a lot of difference in these photos, but the second coat looks dramatically glossier and more even in person than the first coat alone.

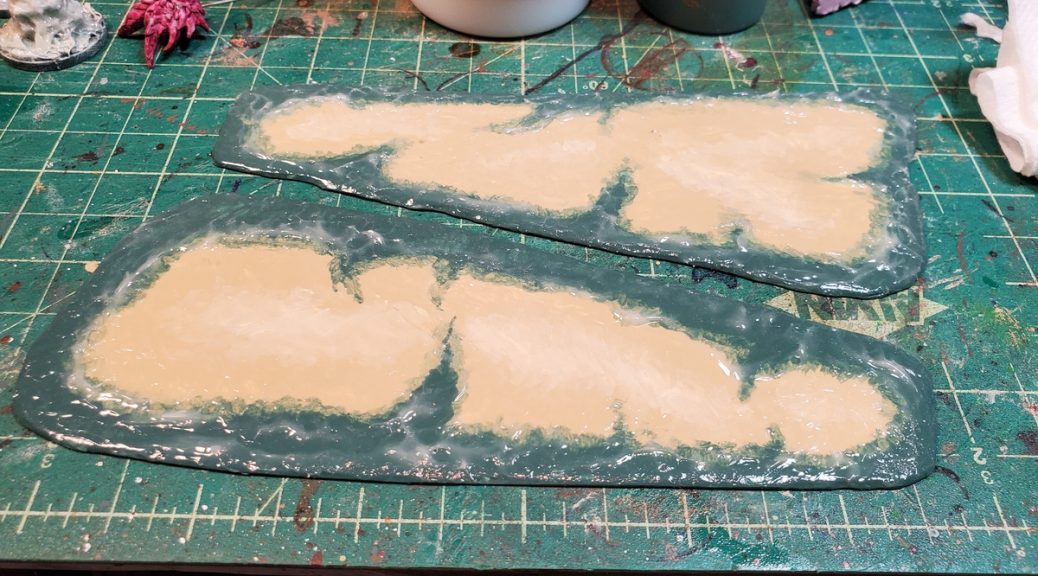
Finally, to add some waves and water texture I went round the edges of each piece with acrylic gloss gel. This goes on white but dries clear eventually. This stuff shrinks quite a lot so the trick is to build it up higher than you think is reasonable and then let it dry for a day or several. I use a really old paintbrush to shove it around, build up lines of waves, and otherwise manipulate it. In a larger scale than 1/1200 you might want to use clear acrylic caulk or something else to build up waves.

Gloss gel worked in around the edges for waves, applied thick as it will shrink down as it dries.

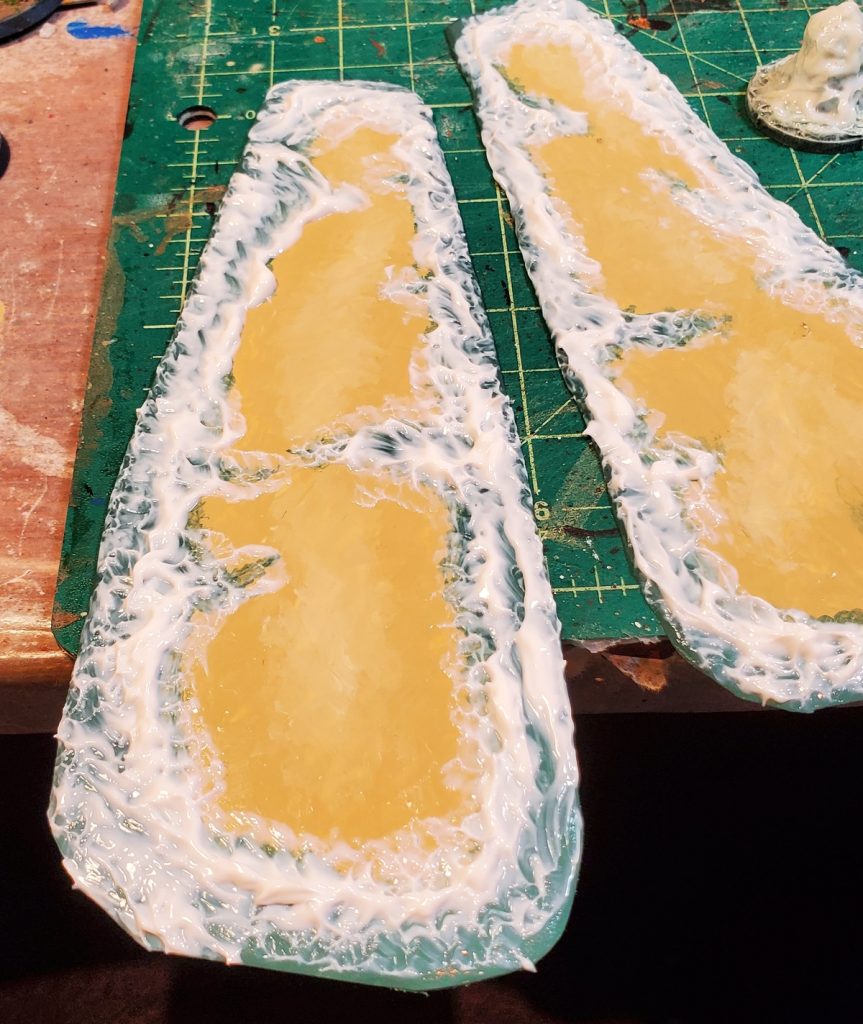
Gloss gel is easy to work with and makes great water textures, but it takes days and days and days to dry. Skip it for now if you need to get your scenery on the table in the next several days and come back to it later!

Once gloss gel finally dries, you get nice breakers and areas of disturbed water.

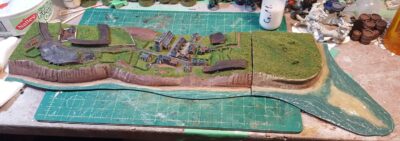
Two sandbars done and ready to complicate the lives and decision making processes of captains in future small boat games!

Coming soon, rocky reef hazards, small islands, and more shell bursts!

Remembrance Day Weekend, November 2022

Went to our local municipal Remembrance Day ceremony in person this year, after two years of live streamed ceremonies watched from my computer, which was nice.

Also making time for some hobby this long weekend, starting with some scenery and bits to add interest to our 1/1200 coastal naval games. It is a truism of naval games that if you put any piece of scenery on the table, no matter how minor, some intrepid player will attempt to run their boat into it. Therefore, a new pair of sandbanks in progress to give players new stuff to run into!

Base colours done on a pair of sandbanks. Each is about 6″ long by 3″ wide at the maximum extent.

These are just simple shapes of .040″ (~1mm) plastic card with paint on them, two sand colours and the blue-green sea colour I’ve used on earlier naval scenery bits, and a bit of mindful brushwork and wet blending. I’ll do some glaze coats to blend the edges a bit more, then a couple of coats of gloss varnish and some gloss gel for waves and done.

In the background are some in-progress shell splashes. I’m not entirely happy with them at present but will put some more effort into them before making up my mind one way or another.

The shell splashes were directly inspired by Yarkshire Gamer’s rather nice photo/video tutorial over on their blog. He’s working in a larger scale (1/700 to my 1/1200) and with larger ships, but the basic technique is solid. I’m working with hot glue instead of clear caulking and of course wanting smaller shell splashes in a smaller scale, so adapting as I go. I have some ideas for making them work still, so we’ll see how that goes over the next few days.

More Small Scale Scenery Inspiration

There aren’t a lot of small scale scenery tutorials out there, either as videos or traditional blog post writeups. Viv on RubbishInRubbishOut, though, did some YouTube videos of Dystopian Wars scenery a few years ago, and it turns out that DW is in something approximating 1/1200 scale, more or less.

Table intro, part one of four.

Dystopian Wars table intro, painting & finishing the table, islands part one, and finally islands part two.

Also, Dispatches from the Front has been working on some fantasy naval scenery for Man’O’War using the Brigade Models buildings and it looks fantastic. Fantasy microscale terrain has a definite appeal, you can get grandiose epic terrain on the table that wouldn’t work at all in any larger scale!

Blinds & Markers for WW2 Naval Gaming

Most naval rules have spotting and target ID rules of some sort or another, often with various stages of “we think something’s out there” through “there’s probably a ship over there” to “It’s a German S-boat and it has started shooting at us!” or similar.

For example, Coastal Patrol published by TwoFatLardies uses both Blinds (for small groups of ships or dummies) and Markers (for possible individual ships, or dummies) so I’ve done up both 2″ and 1″ numbered tokens, designed to be printed on light card and then punched out or cut out for tabletop use.

The current PDF covers all the major combatants – the British Royal Navy, German Kriegsmarine, Italian Regia Marina, United States Navy, and Imperial Japanese Navy, and also includes generic Red Force & Blue Force markers, all numbered 1 through 12 in both 2″ and 1″ sizes. It’s available in both Letter (for those of us in North America) and A4 (for the rest of the world) for easy printing.

I might do up a second set of extra markers numbered 13 through 24 for larger scenarios; that would be straightforward enough.

Earlier this year I also did up a simple set of printable Star Shell & Moon Markers for naval gaming that you might also find useful.

If there’s any other combatants you’d like to see added to a future set, please let me know in the comments. Some of the larger Commonwealth navies, the Soviets, the smaller European nations?

Tiny Boats and Even Tinier Planes

When I did my first WW2 coastal order to Last Square back in November 2019, well over six months ago now, I added a pack of British Beaufighter/Beaufort and a pack of German Ju88 for the heck of it, chosen because both types of aircraft show up in the maritime strike role for most of the war with various loadouts.

I got them, looked at them, was dumbstruck by the insanely minute size of the things, and put them aside to paint the boats up instead. Having just finished (most of) the second order of Last Square coastal naval boats and being in a get-stuff-finished mood, I decided to have another look at the tiny tiny planes and figure out how to mount and paint them.

I recalled reading about using plastic broom bristles for masts and antenna previously, so I decided to test this out for creating flying stands suitable for tiny planes. I used the same 40mmx20mm thin acrylic bases I’m using for most of my boats, because I’ve got them, and I happened to have a micro-drill-bit in my tool stash almost perfectly the same size as the bristles I harvested off our household broom.

RAF Bristol Beauforts/Beaufighters, two mounted and one left loose. Click for larger.

I kept the flying heights fairly short, about one inch maximum, which means these planes are all coming in at wavetop height, pretty much, which seems to make sense when attacking small coastal vessels and is way, way easier to store than taller possibly more realistic height stands!

Two Beaufighters and two Ju88 mostly done, including recognizable national insignia on these tiny, tiny planes. Click for larger.
Extreme closeup of the unmounted Beaufighter and Ju88. I’m pleased with the look of the canopies, especially on the German Ju88 with their big “greenhouse” canopies covering most of the front end. Click for larger.

Painting Notes

All my current paints are from the Reaper Master Paints series. All six planes got a white primer, and then for the RAF I used Muddy Brown and Military Green for the topside camo; the underside is Heather Blue mixed with Rainy Grey which seems like a good match for the RAF “sky blue” grey-blue underside paint.

The Germans were a mix of Rainy Grey and Muddy Olive 1:1 for the all-over base coat, with two of the Ju88s getting slightly darker grey-green camo added with some additional Stone Grey added to the Rainy Grey/Muddy Olive mix.

I adding some highlighting along edges mostly by mixing a bit of Rainy Grey into the relevant base colour, and the Germans got some yellow recognition patches with Marigold Yellow. I also used some Games Workshop Nuln Oil (black) and Agrax Earthshade (brown) washes, especially along the roots of the wings.

The German iron crosses are Walnut Brown, a lovely almost-black that I use all the time instead of actual Pure Black.

The RAF roundels are Marigold Yellow, Sapphire Blue, Pure White, and Carnage Red.

Windows and cockpit canopies were picked out with Ghost White, a blue-tinted off-white.

For scale, I made sure to take this photo with my thumb “in the way”. That’s a standard CD I’m using to hold the planes, just for additional scale. These things are seriously tiny. Click for larger.
Side views, RAF Beauforts/Beaufighters on the left and Luftwaffe Ju88 on the right. Click for larger.
Tail end view, Beaufort/Beaufighter left, Ju88 to the right. Click for larger.
Forward view, same arrangement as previous. Click for larger.

Aircraft don’t actually play a huge role in most of the engagements coastal naval vessels find themselves involved in, so I don’t think I’ll be adding to my collection of tiny aircraft anytime particularly soon, but these turned out to be fun to paint and they ended up way better looking than I was thinking they would, given the diminutive size of the things!

New WW2 Tiny Boats

Latest batch of World War Two coastal naval vessels in 1/1200 scale is done and based. As with the previous vessels, these are all Figurehead from Last Square in the States. I’m especially pleased with the two German patrol trawlers (Vorpostenboote) with their dazzle/disruption camo scheme.

First of two Vorpostenboot. Click for larger.
Second Vorpostenboot. The two models are actually different, which is cool when representing these notably heterogeneous craft (almost all requisitioned trawlers pressed into service as escorts) on the table. Click for larger.

I also did up a few more Royal Navy Coastal Command craft, four Fairmile B Motor Launches and four 70′ British Power Boat (BPB) Motor Gun Boats. The BPBs are really tiny at 1/1200 scale, under 20mm long!

Four BPB Motor Gun Boats in the foreground and four Fairmile B Motor Launches in the background, all on 40mm long acrylic bases. Click for larger.

And the reason it’s been quiet here on the blog for the last couple of weeks is that I’ve been completely pulling my hobby/painting area apart and have finally mostly put it together again, all with the aim of installing a big Ikea shelving unit in one corner, a Kallax 57′ x 57′ monster.

The partially-rebuilt painting/hobby/game storage area! Click, as always, for larger.

The cubicles of the Kallax will fit a banker’s box (there’s a couple in there already) which is already my standard method of storing and transporting scenery. I’m still planning a massive sort of my scenery stockpile, which will (to be honest) probably take another couple of months in bits and pieces. There’s stuff in the stash that hasn’t hit the table in years and year because it’s buried under other things or just straight up been misplaced and I don’t actually know where it is!

Tiny Ships: A Game of Coastal Patrol

As mentioned last weekend after our game of Narrow Seas, we also wanted to try out Coastal Patrol, available in the Summer 2011 Special from TooFatLardies.

I managed not to take a single photo during either of the two games Corey and I ran today, but nothing about the visible setup we’ve got has changed in a week except that all my 1:1200 scale boats are properly based, on 20mm wide by 40mm long by 1.5mm high clear acrylic bases ordered from Litko.

tiny ships on bases
Tiny ships all based on 20mm wide by 40mm long 1.5mm tall acrylic bases from Litko. Gloss varnish makes great glue for this sort of thing and won’t fog the acrylic the way superglue can. Click for larger.

The first game we ran was very small, a pair of Royal Navy Fairmile D MGBs (Motor Gun Boats) escorting a coastal freighter, under attack by a pair of S-38 mid-war Schnellboote. The S-boats roared in, fired all four of their ready torpedoes at the freighter while taking scattered gunfire from the MGBs, blew up the freighter, and roared off. As they were exiting the board one of the pursuing MGBs ran head-on into a stray mine (Coastal Patrol has a random events table that can be pretty lethally random!) and was blown out of the water.

For the second game we gave the Germans a convoy to escort, a freighter and a tanker somewhere along the coast of France early in the war. They had an armed trawler and two Raumsboote (R-Boats) escorting and were under attack by a quartet of tiny, lightly armed Vosper 73′ MTBs. This game ended in an absolute draw, as nobody lost any ships, although part of this was because we were messing with the Coastal Patrol torpedo rules and concluded that we’d taken them from massively powerful (any vessel struck by a torpedo is considered sunk automatically) down to nowhere near powerful enough because although the trawler and the freighter got hit neither took any serious damage. The Vospers all roared off into the night again, although one of them was taking on water quite badly, pumps just barely keeping up.

For both games we were (just like last weekend’s Coastal Patrol games) ignoring the rules for spotting, target ID, blinds/dummy markers, and all that stuff. I’ll be making some blinds and markers before our next games (of either system) so we can incorporate those rules, which are sure to change the on-table dynamic again.

Narrow Seas vs Coastal Patrol

So, compared to Narrow Seas, what are the rough similarities and differences? CP uses a TFL-style actions-per-activation system, with vessels getting between zero and three actions (diced for) every time their card comes up in the activation deck. This leads to some tense decision making, which I like. Do you maneuver your ship, run damage control, or fire, and at who?

One thing we definitely liked about CP vs NS is that CP’s turning circles are considerably smaller than the NS turning arcs. This makes the vessels feel more agile, and increases the effective size of the table.

CP’s firing is much simpler than the NS system, and involves much less dice rolling. We did seem to miss a lot more with CP than with NS, though, which isn’t really unrealistic with small vessels moving quickly over the water!

There are definitely a few rough spots and gaps in the Coastal Patrol rules. Some of the game mechanics don’t seem to be fully explained (damage from collision/ramming, for example) and although Making Smoke is an available order and Smoke Generators are listed as shipboard equipment on some of the damage tables, there are not in fact any rules for how smoke is intended to work… That said, there is a file of Coastal Patrol house rules out there that fill most of the gaps easily enough, but which I can’t currently find online to provide a link to!

We will be coming back to Coastal Patrol, and might stick with it as our main coastal naval rules, but we’ll have at least one more bash at Narrow Seas as there are definitely some things it does better than Coastal Patrol.

An Actual Game of Tiny Ships!

This afternoon we actually got the tiny ships onto the table and had a game using the Narrow Seas rules.

First, of course, I had to use blue-tac and scrap card to base up my tiny ships.

all based up
The Brits and Jerries all based up, for now. Click for larger.

We ran two British coastal merchant ships escorted by a quartet of RN Fairmile D MGB gunboats, being menaced by a quartet of S-boats somewhere along the coast of England. We ignored all the visibility, spotting, and illumination rules for this game, it was purely run-and-gun.

early game
Early in the game, two merchants hugging the coast, British Fairmile D boats maneuvering to intercept the approaching S-boats at the top of the photo. Click for larger.

The Germans kicked up to high speed to maneuver toward the sluggish merchantmen, while the MGBs tried to intercept.

Late in the game. The tape strips are German torpedoes in the water, heading toward the merchants off the top of the photo. Click for larger.

The game ended with three of the four S-boats getting away at high speed, while one S-boat was being scuttled by it’s crew close to shore after taking massive amounts of damage. The Germans fired seven torpedoes, only one of which hit, but that was enough to send one of the merchants to the bottom almost instantly, while gunfire also sank one of the MGBs.

I’m honestly not sure how much of the Narrow Seas rules we were doing correctly, but the basic system seemed to work. Consensus was that damage was awfully dice-intensive to resolve, especially if a ship got hit hard and was up to the Heavy/Wrecked end of the damage table. We also realized we were doing the cascading damage wrong partway through the game, however, so a careful re-read of the firing and damage rules is clearly in order.

As a scenario balance thing, Fairmile D MGBs are scary, scary beasts, each of them having significantly more firepower than an individual S-boat. More S-boats or fewer “Dog” boats, perhaps swapping an armed trawler in for one or two of the Dogs, would probably make the game “fairer”. On the other hand, the Kreigsmarine did manage a minor victory, and trading one S-boat for a coastal freighter and an MGB is more than fair.

We had a good game overall and will definitely be back to Narrow Seas sometime soon; we also want to try out “Coastal Patrol” from the Summer 2011 TFL Special as TFL rules are much liked in these parts. My proper bases are enroute from Litko, and I’ve now got a list of counters I need to produce to make the game run more smoothly.

A Headland for Tiny Ships

Cranked out a headland for my coastal terrain, so we can have the coastline end on-table without looking super-weird. It’s designed to go on either end of the modules, so that constrained the design considerably, but I like how it worked out.

headland in bare plaster
Basic headland before painting. See text for details, click for larger.


As with the larger coastal sections, the base is 1mm (.040″) plastic card cut down and sanded, with a chunk of half-inch styrofoam insulation for the land. I used a couple of different grades of sandpaper to shape the landform, including the slightly undercut eroding cliff faces, which I really like the look of.

After that I covered the whole thing with a 1:1 mix of premixed drywall plaster (the pink stuff) and white glue, smoothing and shaping it with my fingers to cover the styrofoam, smooth out the sanding marks on the cliffs, and shape the sandbank in front of the point.

painted finished point
The headland basically finished. Click for larger.

Painting and gloss gel for wave effects went fairly quickly, with a dose of my usual flock mixes on the land side. Because this headland section has to connect to any end of the other coastal sections, and I (deliberately) didn’t run roads off the ends that limited what I could realistically put on this piece. So it’s just scrub, cliffs, and ocean.

headland in context with village
The headland next to the village module. Click for larger.

Finally, a quick shot of the new headland next to the village module, which is still awaiting woodland sections. I can see I need to do a little bit more drybrushing on all the cliff sections together to match them up, but otherwise everything looks good together. The gap between the modules is less obvious when they’re properly in place; here the headland is tipping off the edge of my cutting mat and making the gap look giant!

I’ve had a bit of setback with the river section – glue accident while putting flock down – so it’s back to finishing that off in the next few days then I need to actually do the wood canopy sections to call this round of tiny naval terrain finished!

I have to admit to being straight-up intimidated to start painting the 1:1200 Last Square coastal naval boats. They’re tinier than anything I’ve painted in years and incredibly detailed. I’m not kidding when I say I own 28mm figures with cruder details than these tiny, tiny ships, most of which can balance on a fingertip.