Historical and quasi-historical gaming of various sorts. English Civil War and Thirty Years War, the Great War (World War One), the Russian Civil War and other interwar conflicts, and whatever else we wander into!
My first gaming weekend since 2019 has come and gone and it was good. And as is often the case, I took far too few photos, including exactly none during my own game!
Friday evening Corey ran the sci-fi co-op game based on Sellswords he’s mentioned here a few times, while I played a mid-war What a Tanker game and traded my Sherman for a MkIV panzer.
Saturday morning I got a sturdy crew of Norsemen wiped out to a man by Saxons who were somewhat offended that we’d looted and burned the local monastery.
Saturday afternoon I ran a Coastal Patrol game, four German schnellboote attacking a British coastal convoy defended by a Hunt-class Destroyer Escort and a couple of plucky trawlers. The Hunt crippled one of the S-boats but then got shattered by a pair of torpedoes, and the big ocean-going freighter the Brits where shepherding down the coast also ate a pair of German torps before the S-boats roared off into the night.
Saturday evening we wound up doing a scratch game of Gaslands for eight players, a gloriously chaotic Death Race with lots of wrecks and some amazing driving – both amazingly bad and amazingly good!
Sunday morning I defended the shores of England from the German’s Operation Sealion, which was interesting (I’m not the biggest fan of Bolt Action, it’s a very cartoony rule set…), and then because we had time to kill before we headed off to the ferry, we ran another Gaslands game, this time a Flag Tag game for six players. Explosions, mayhem, and lunatic driving ensued!
I think I have a few photos on my phone, will pull them out. It’s been a weird and complicated week since then, hence the delay in this after-action post!
In all of the coastal naval rules sets that we’ve played, spotting and situational awareness are among the most important factors. Doesn’t matter how many guns you have or how good you are at shooting them if you can’t accurately spot and ID the enemy!
With a bunch of fast-moving boats on the table and a lot going on, it can be hard to keep track of who’s got a proper target spot on who, though, especially with things like the rule in Coastal Patrol that means if you fire automatic weaponry, the tracer glare off your own guns causes you to lose all your spotted targets.
We bounced a few options around, and among the simplest is that each ship or boat has a “Spot Card” and a dry erase pen – just mark the ID of who you spot down on it, if you lose spot on them, wipe their ID off.
I already use 3×4 plastic card protectors for ship record cards, so it was easy to take the same template and whip up a Spot Card to fit a 3×4 card sleeve. With that done, saving in both Letter (for North America) and A4 (for the rest of the world) PDF was trivial.
Way back at the very end of 2020 I contacted Misc Minis about decals suitable for 1/1200 ship and aircraft miniatures. After a couple of rounds of email, Kevin sent me a PDF proof sheet with a mix of 1mm and 1.5mm insignia for the Luftwaffe, RAF, and USAAF, as well as some hull numbers as used by the Royal Navy. He’d started with the smallest size of decals for his standard 1/600 ranges, done some tests, and figured out what would work (and what wouldn’t!) when taken down that tiny.
I mentioned the decals in passing in an April 2021 post here, then tucked them away in the dreaded ‘safe place’ and did absolutely nothing with them until this Easter long weekend, two full years later!
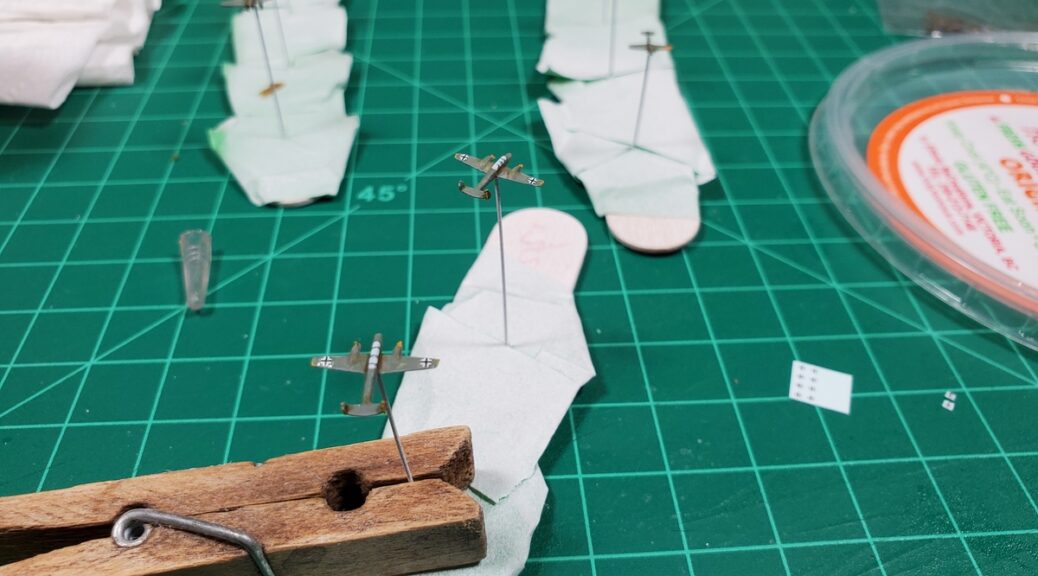
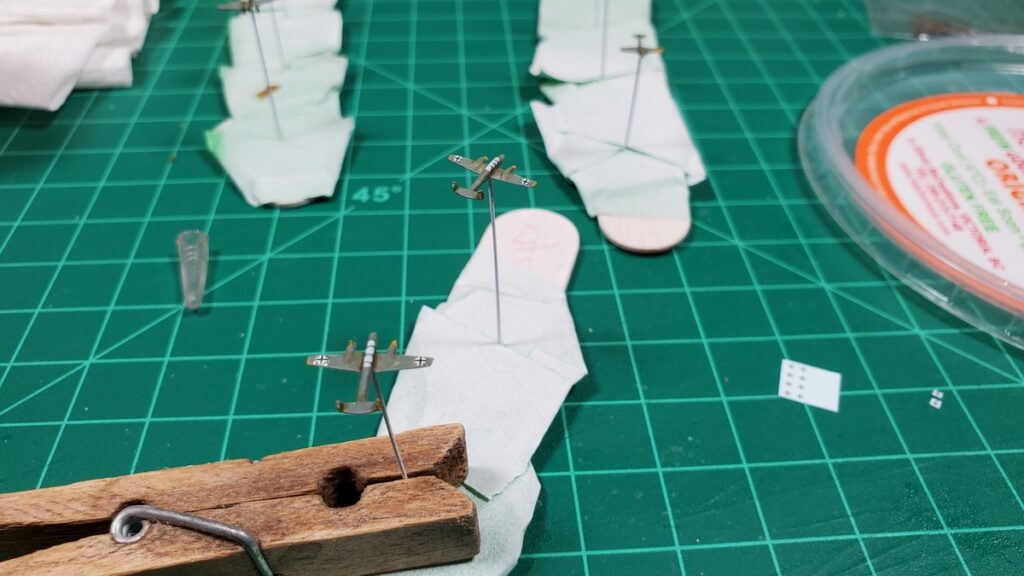
With the various Luftwaffe aircraft seen on my last Workbench post based and painted, I sat down with the tiny 4″x2.5″ decal sheet, carefully cut out even tinier individual crosses, and began putting them on the wings of the Me110 heavy fighters and Ju88 Stuka divebombers.
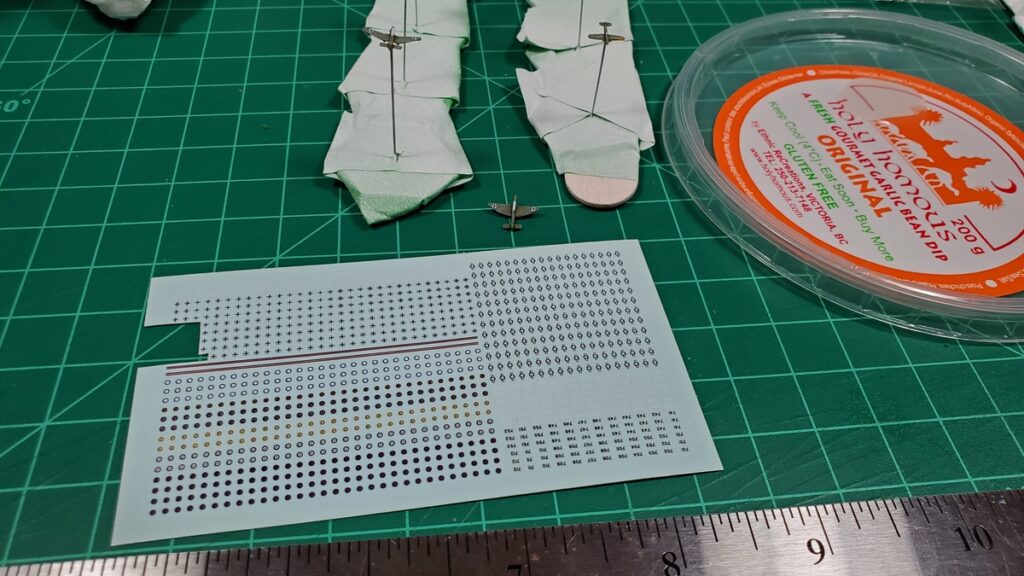
The full decal sheet, with finished Stukas behind and Me109s still waiting for their turn. Click for larger.
The bulk of the Luftwaffe crosses on the sheet are the black outline/white fill style; there’s also a row of pure white crosses as used (I think?) primarily on night fighters. The lower left has no fewer than six different RAF roundel variants, upper right has a bunch of US Army Air Force winged star roundels, and the lower right has RN hull numbers in both white and black. There aren’t any pure black outline Luftwaffe crosses, but honestly I’m OK with that as the black/white ones stand out a bit better and help ID these tiny, tiny airplanes more clearly!
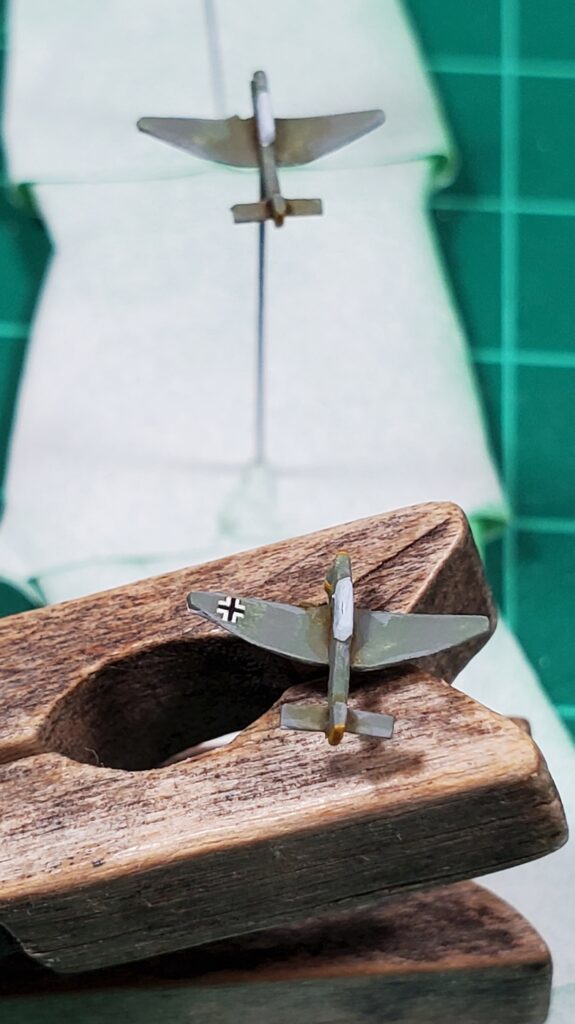
The best closeup I could manage with my cell phone camera. That’s a Stuka with one wing done and the other waiting to be done. Keep in mind that wingtip to wingtip, that entire airplane is about 12mm across! Click for larger.
The Misc Mini decal sheet is full-film so each roundel needs to be cut fairly close to the printed outline. I worked with fine-tip tweezers, a sewing pin, and MicroSet decal solution to get each cross in place. They’ll get MicroSol decal conforming solution next and then matt spray varnish to seal everything in place.
Two Me110 heavy fighters with their roundels in place. Not sure if I’m going to bother doing the insignia on the sides of the fuslage or not – I might just do them with a fine-tip paintbrush as on the Ju88s I painted a couple of years ago for this project. Click for larger.
If you’re in need of tiny decals for tiny aircraft, drop Kevin at Misc Minis a note and ask! This little sheet was thoroughly reasonable for a custom one-off print run (under $10 including shipping) and will last a good long time at the rate I’m using it up. Misc is an American outfit but regular envelope mail for decal sheets is still cheap over the border to Canada at this point!
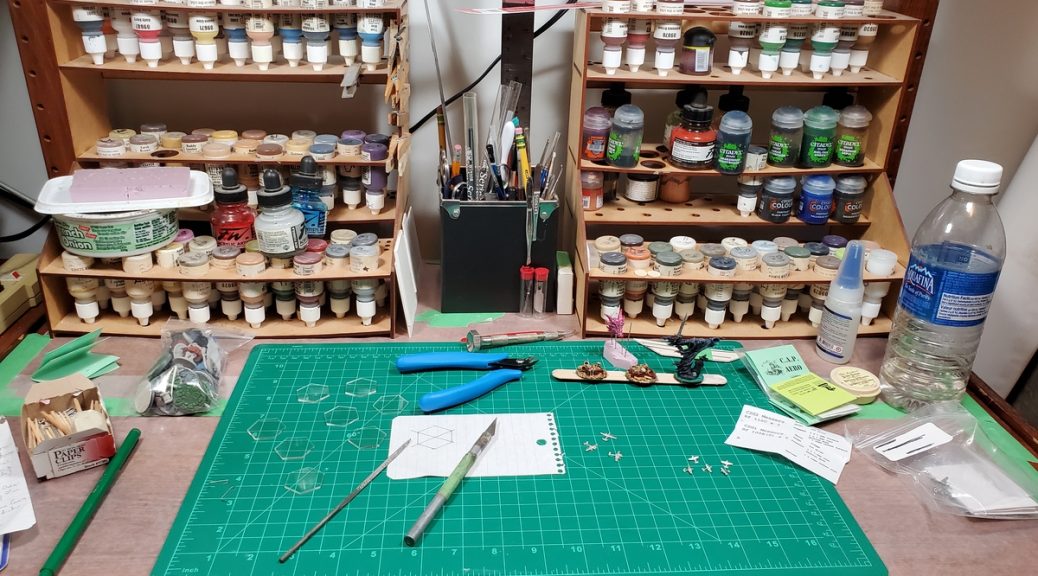
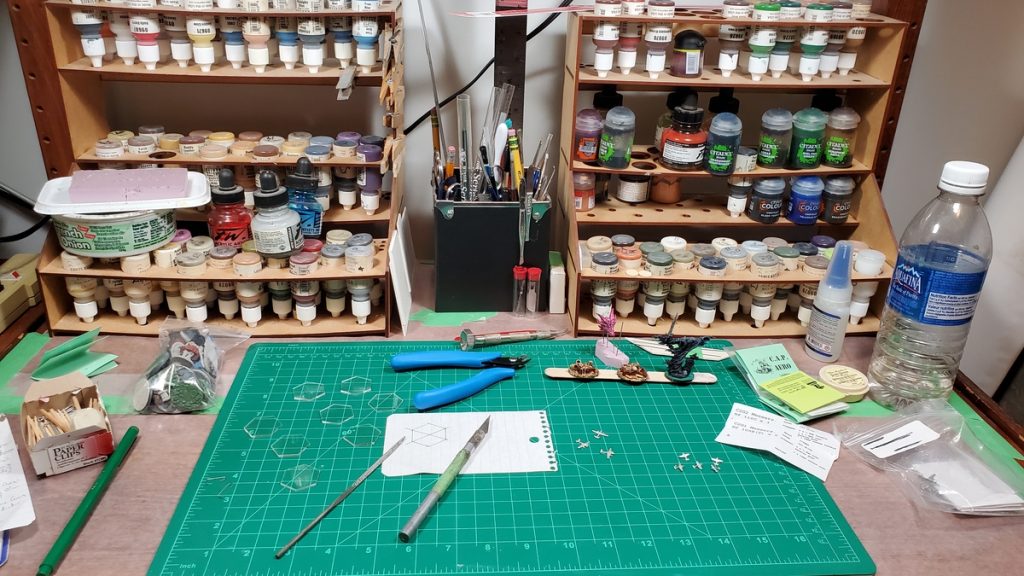
The workbench this week… is up and running in our new condo! We had an offer accepted at the beginning of February, got the keys ten days ago in mid-March, and are largely settled, set up, and getting on with things.
Set up in my new office/hobby lair but still looking fairly familiar. New larger cutting mat, though.
Gradually getting the painting and hobby stuff sorted and functional; the new room isn’t as large as the one at our rented place but forcing me to organize and stay de-cluttered is not actually a bad thing…
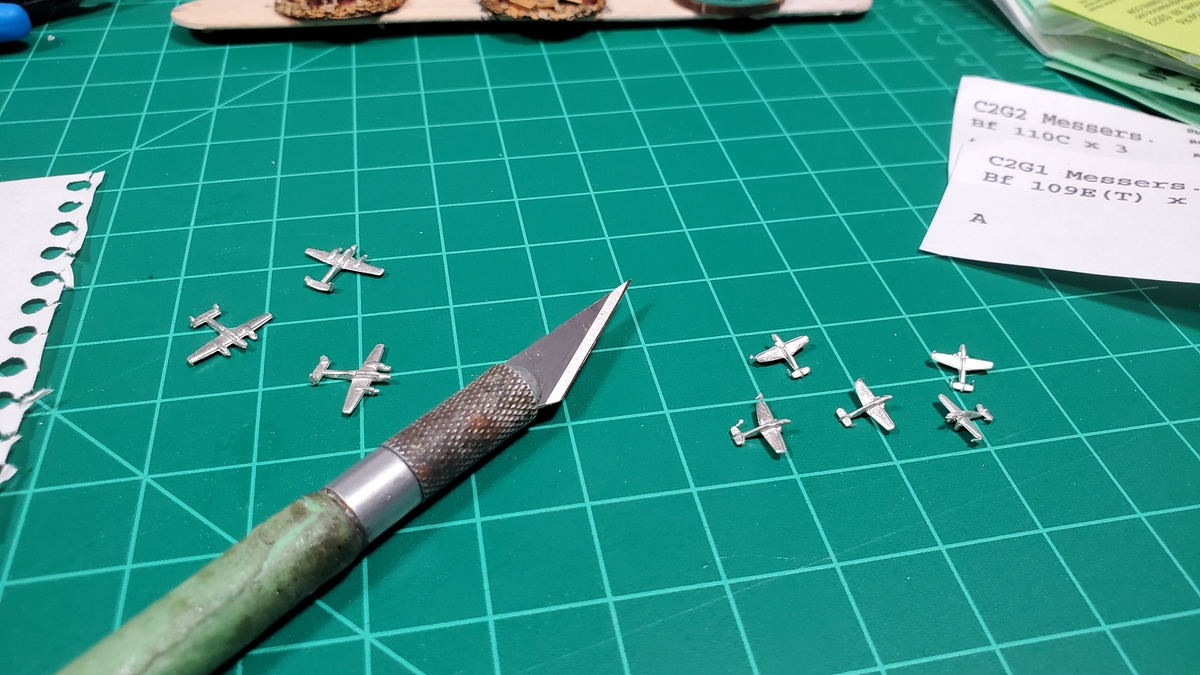
Tiny Messerschmidts for some fokkers to fly around in. (credit for that joke apparently goes to Douglas Bader…)
Decided to work through the stash of 1/1200 WW2 aircraft I got from Last Square a few months ago, starting with a trio of Bf110s and five Bf109s for the Luftwaffe to cause trouble in.
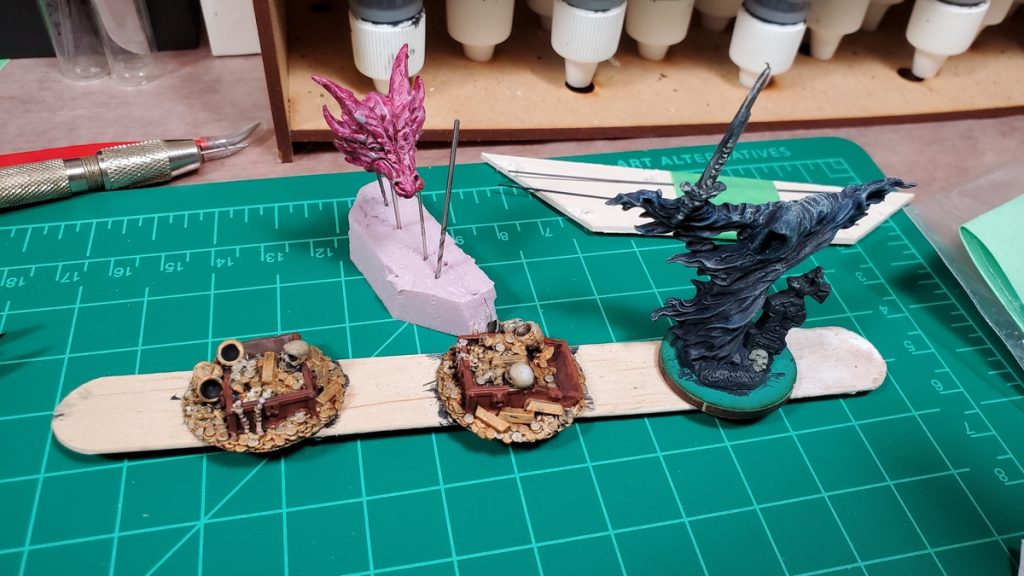
Always the random Reaper figures. Need to add some details to one or both treasure piles so they aren’t so obviously identical, but they’re neat sculpts!
I’ll be at Trumpeter Salute 2023 in Vancouver in about three weeks running a 1/1200 naval game of some sort, probably KM Schnellboote attacking an RN-defended British coastal convoy this time. This’ll be the first Trumpeter Salute since 2019 (a smaller event happened in 2022 but I didn’t get to it) so it’ll be fantastic to be back!
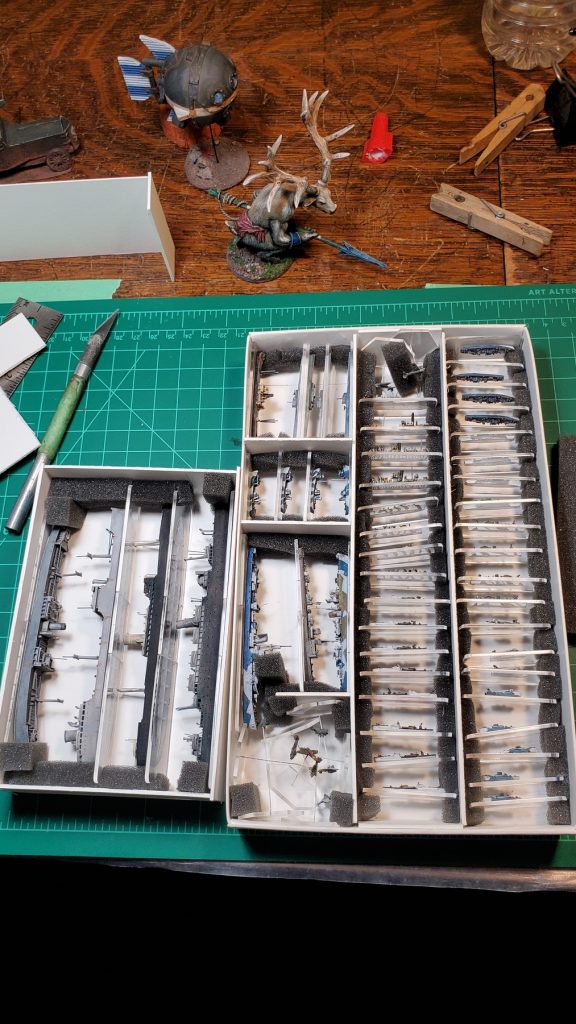
When talking about masts on tiny ships recently I mentioned that my current storage solution for my fleets was, frankly, bad. This last weekend I sat down to fix that, and came up with a solution that will should preserve paint jobs and masts on all my boats and ships (and airplanes, too).
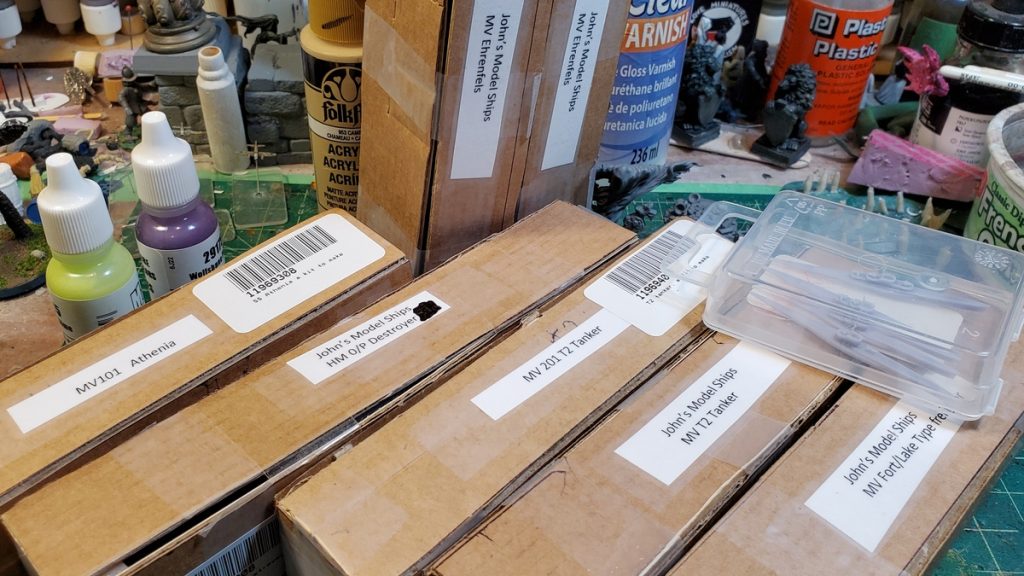
I started with a flat cardboard box which one of my Last Square orders came in, added 25mm high dividers of mat board with strips of foam glued to them, then slit the foam to allow the ends of the acrylic bases I use for all my vessels to slip in.
The first box is full, so I built a smaller box out of more mat board to hold a few of my larger merchant ships. After we move (ten days!) I’ve got a second identical Last Square box somewhere around to create a second larger fleet holder, and two of them should comfortably hold everything I’m likely to own for the next while!
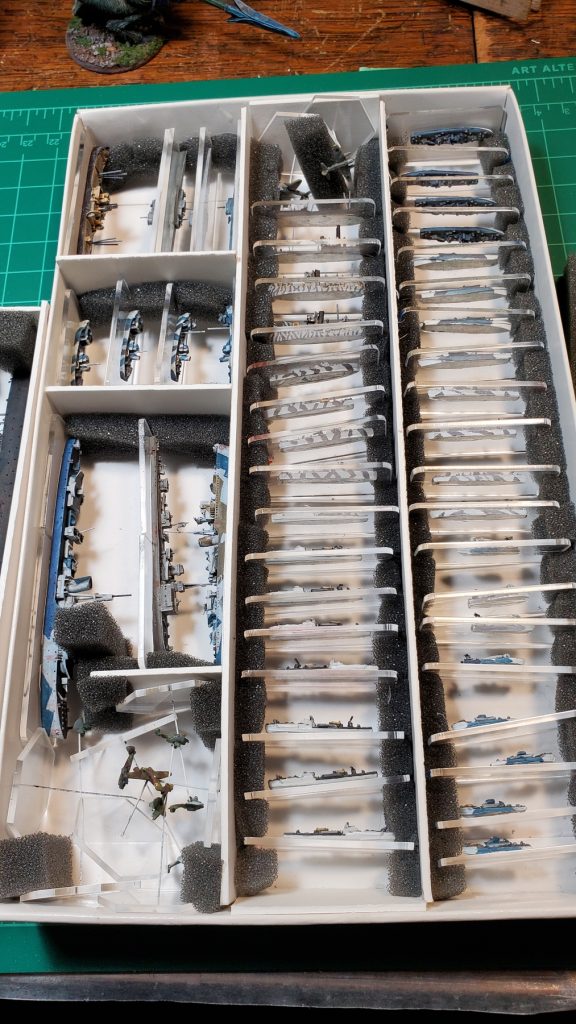
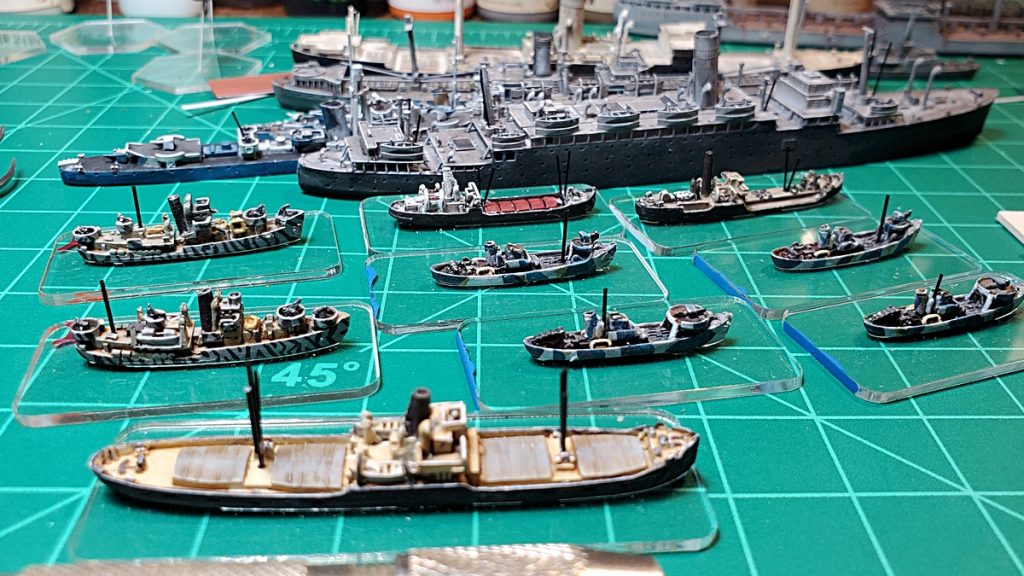
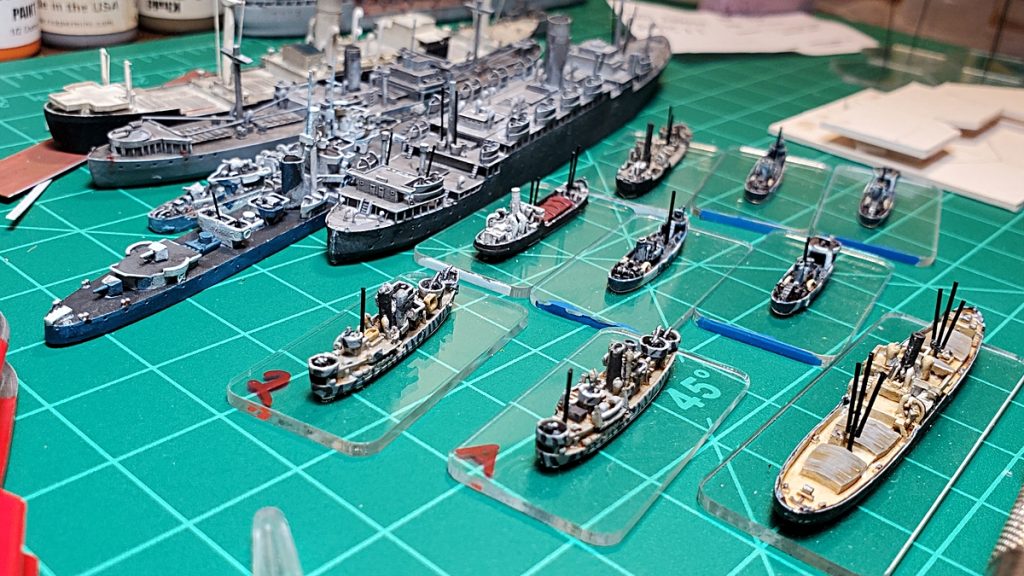
Under construction.Both current boxes finished and full.Larger box. Royal Navy small craft on the far right, Kriegsmarine in the centre, various larger ships on the left – KM U-boats, RN trawlers, and a mix of larger vessels.Four 3d print merchants all tucked away.
The two batches of 1/1200 airplanes I’ve currently got painted and mounted are kind of tucked into the corners around the ships, and they’ll eventually need their own storage, but given that 1/1200 aircraft weigh basically nothing, I’m not concerned for now about having them a bit tangled with each other in the lower left corner of the larger box for now.
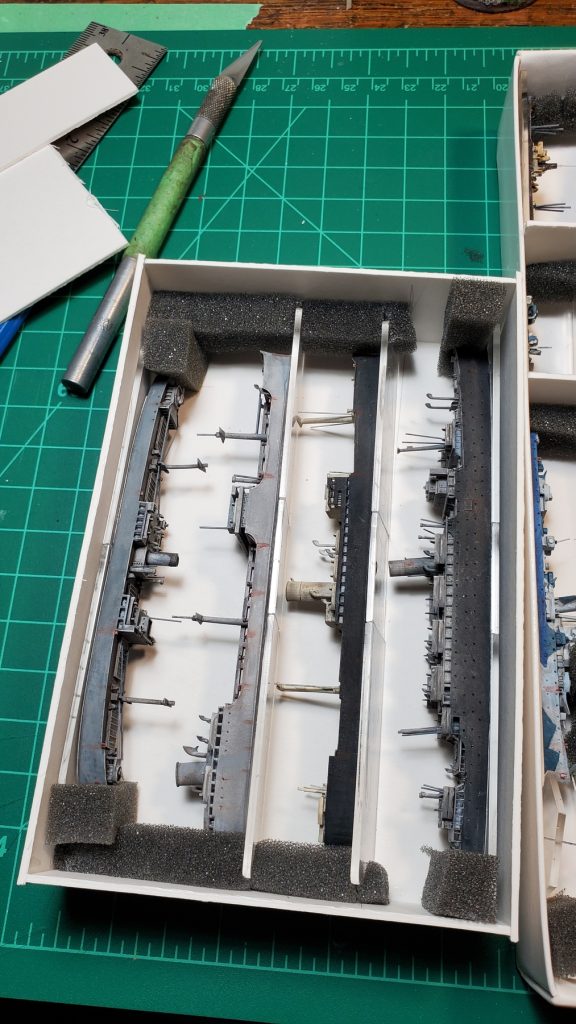
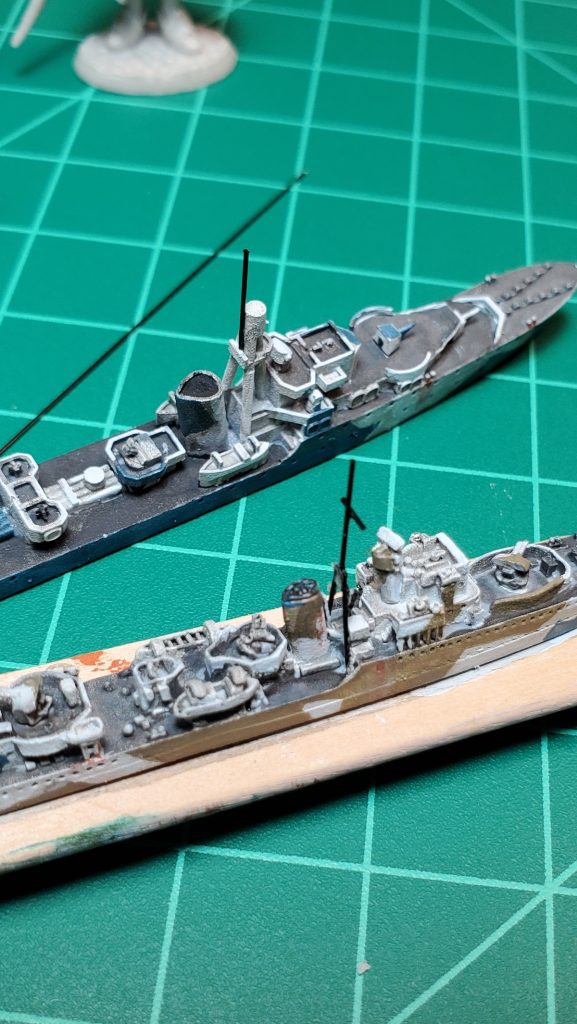
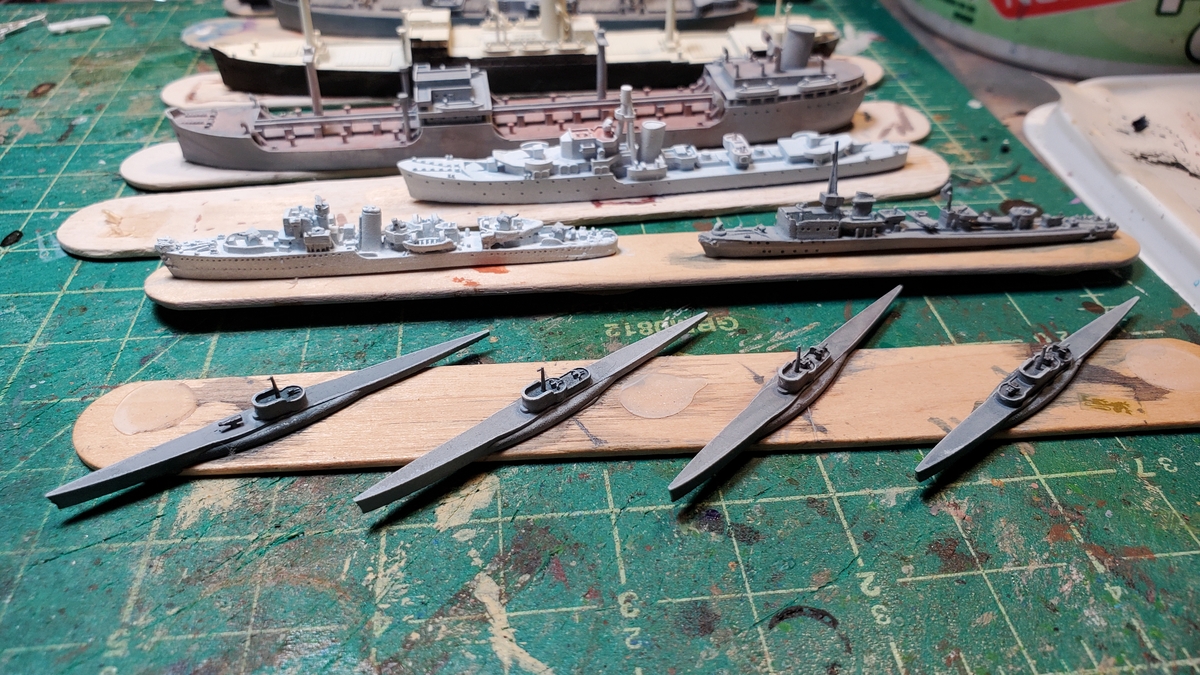
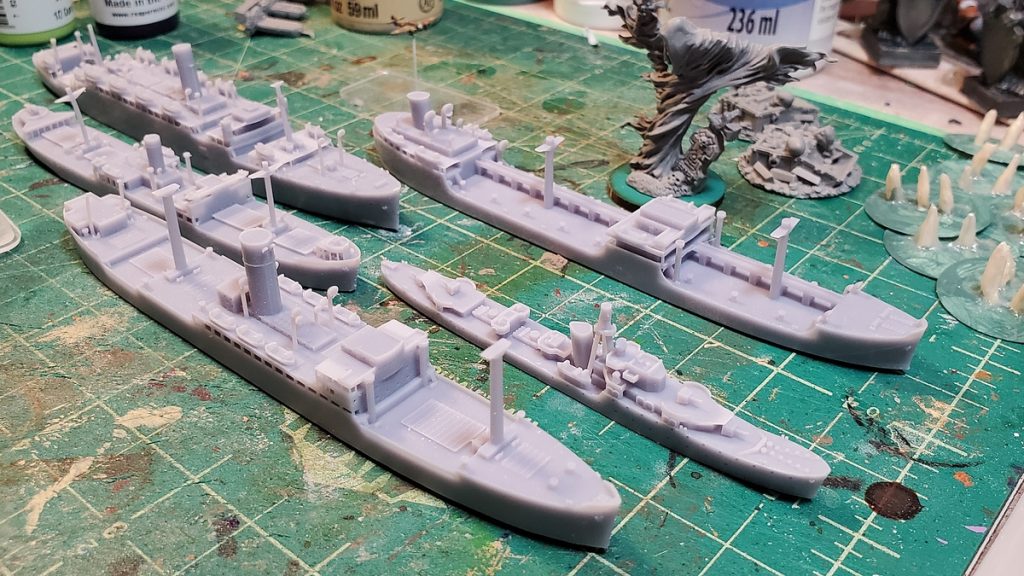
After doing the detailing of the JMS 3d printed ships, I pulled out the rest of my 1/1200 WW2 ships, all pewter from Figurehead, and added masts to all of those ships that needed them. Most of these came with pewter cast masts that I had deliberately left off while assembling and painting these ships over the last few years as they’re incredibly fragile and my slightly ad-hoc (ie, bad) storage and transportation solution would have destroyed pewter masts in short order.
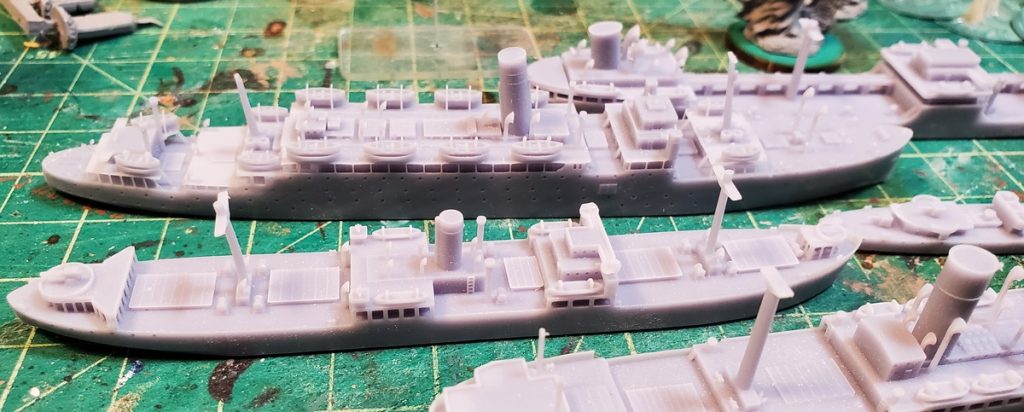
Masts all over, still needing paint. Various Figurehead pewter coastal vessels in the foreground, the JMS/Antics 3d printed larger ships background.Stern-on view of the mast-installing session’s end. Very pleased with the masts and booms on the large coastal freighter on the right there.
Nothing special about the techniques here, just a tiny drillbit, fine tweezers, bits of plastic broom bristle, and superglue. Oh, and patience and a certain amount of bad language… The various coastal freighters all have booms alongside their masts as needed.
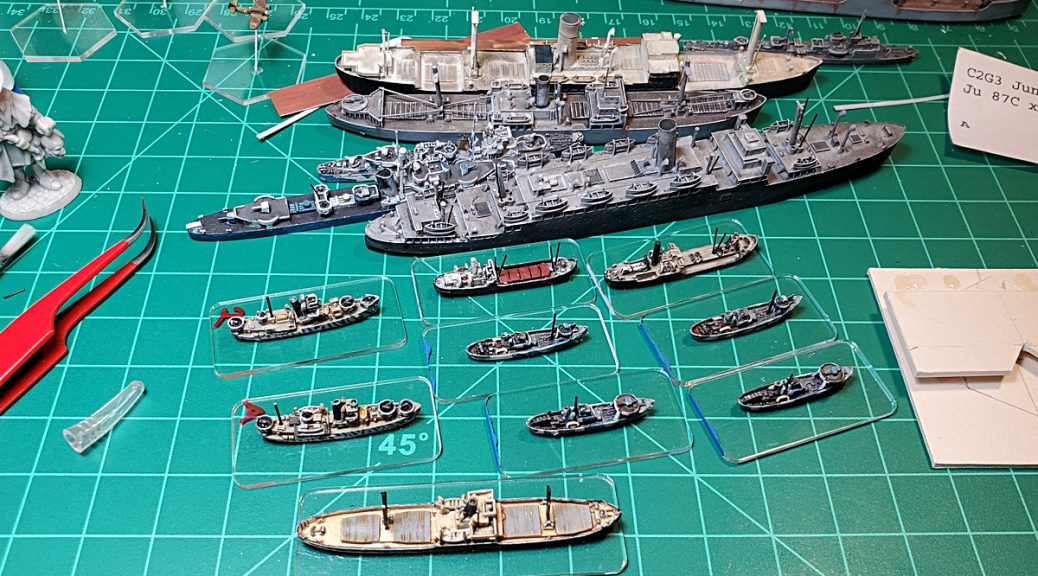
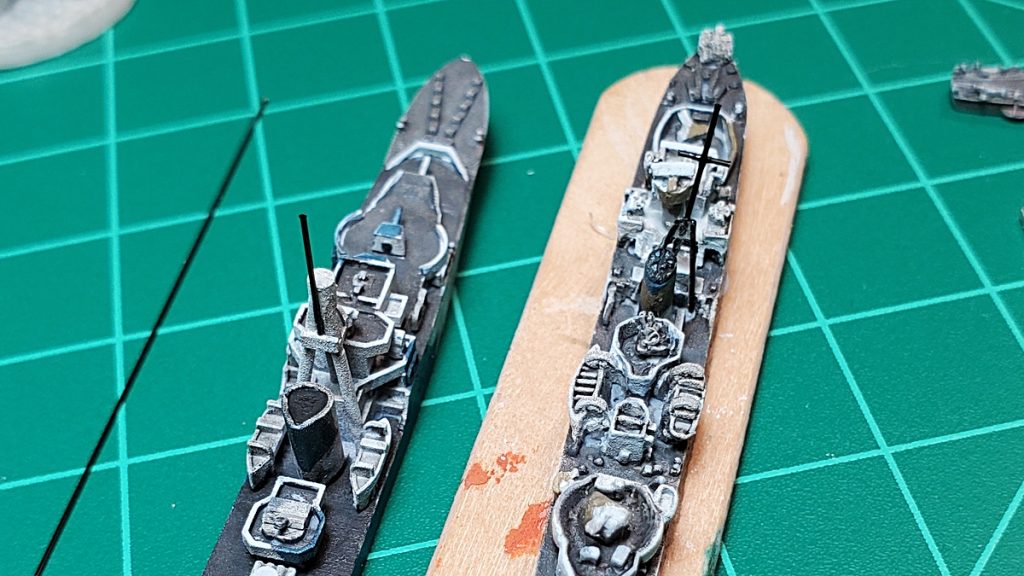
Overhead view. You can see the masts & booms on the two rear coastal freighters nicely here. Just for scale, the eight vessels in the center block there are all on 20mm by 40mm plexi bases. I still need to base up the JMS/Antics ships to match…
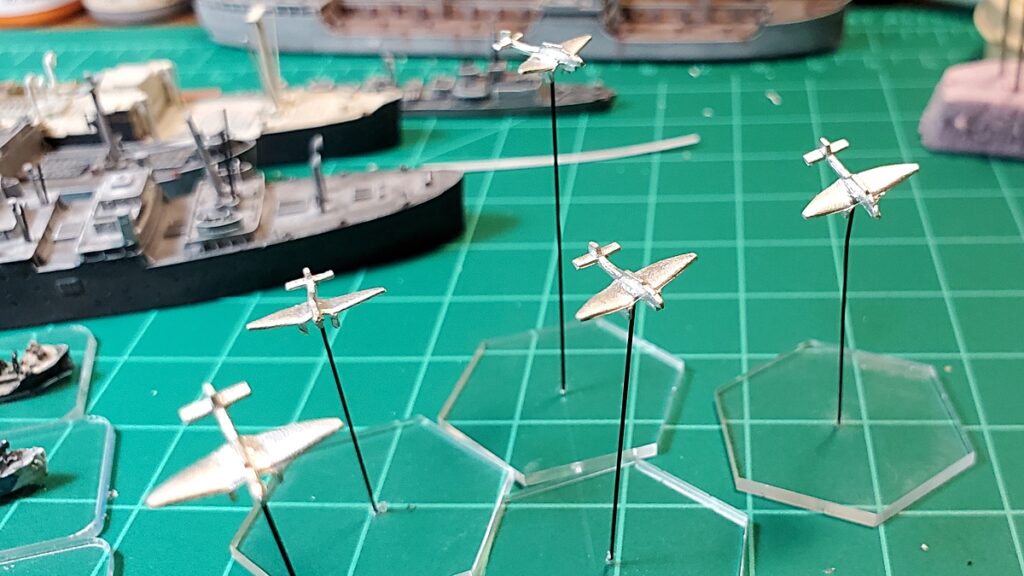
Finally, just for something else to do, I’ve got some more impossibly tiny airplanes based up! In this case, that scourge of surface targets including shipping, the Luftwaffe’s dreaded Ju87 Stuka, five of them all on 25mm wide plexi hexes, more broom bristle for their flying stands. Primer and paint on them in the next week or so, hopefully.
Stuka! Wee tiny little Stuka, anyway. A 1/1200 scale Stuka has a wingspan somewhere around 12mm across.
We are moving in the second half of March, however, so there might be a temporary slowdown of production and posting as our lives get packed up and moved across town to our new condo!
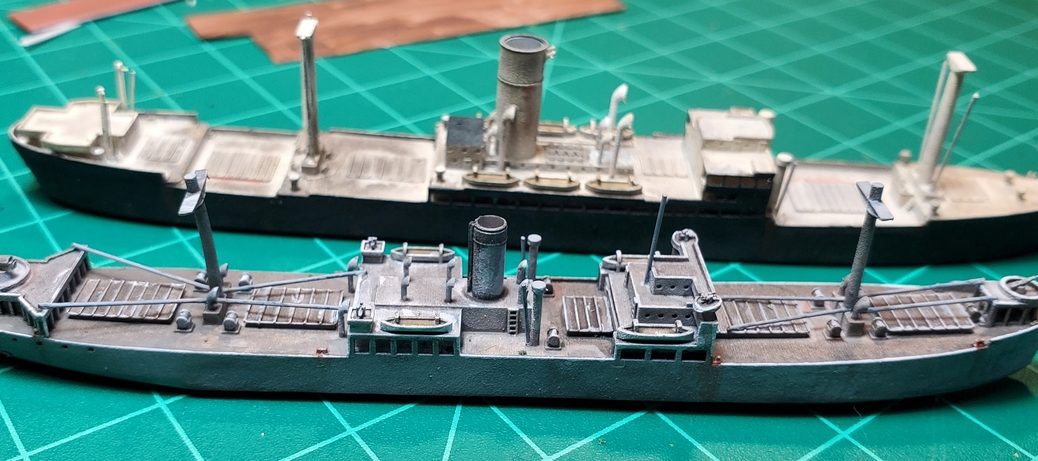
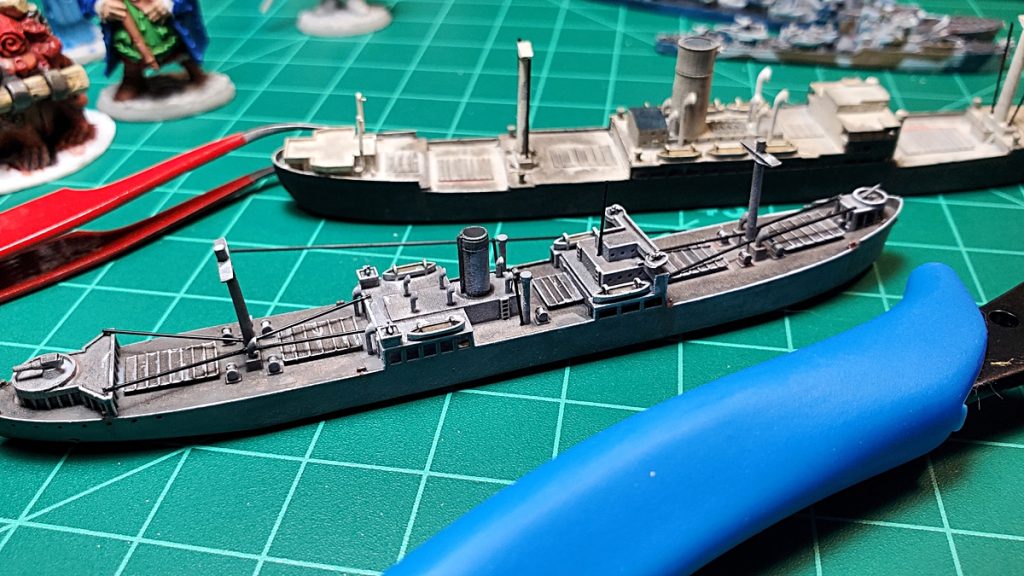
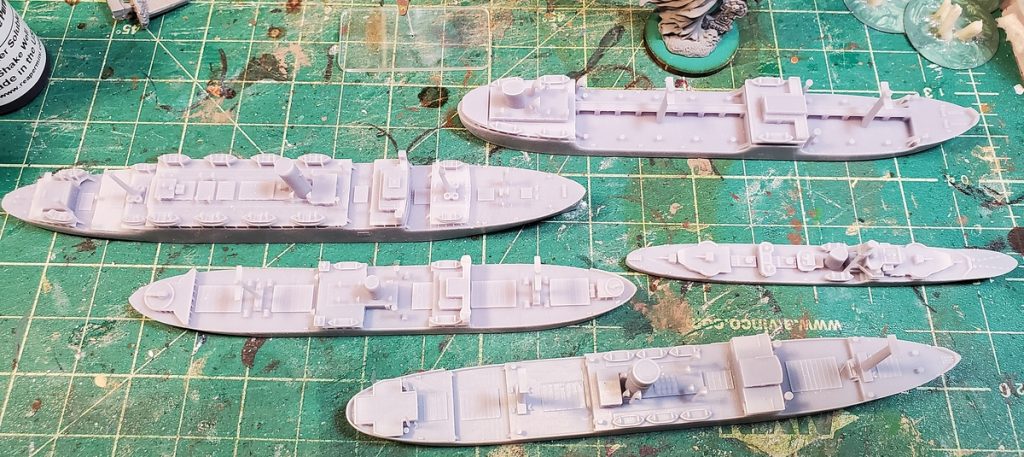
More detailing on 1/1200 scale ships with plastic broom bristle. I’ve added cargo handling booms to the masts and kingposts of two of the Antics 3d printed merchant ships.
Booms in progress, the Fort-type freighter foreground has four booms on each large mast and a boom at each kingpost midships. The Ehrenfels freighter in the back has one boom per main mast and I haven’t done the booms at either bow or stern kingposts yet.
For the mostly vertical booms at the kingposts and on the Ehrenfels I drilled holes into the deck with an absurdly tiny drill bit; the horizontal booms on the front and back decks of the Fort are just held in place with a dab of superglue at each end. On the Fort freighter I also put a radio mast immediately aft of the bridge.
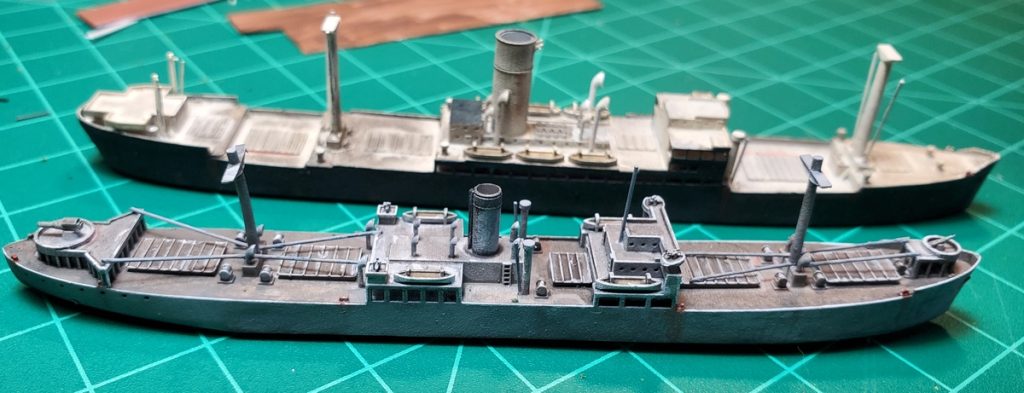
The new detail all painted up.
I did the Fort freighter’s booms the same base grey as most of the ship, and the Ehrenfel’s the same ivory/off-white as her upperworks and deck. The plastic broom bristle takes ordinary acrylic hobby paint just fine.
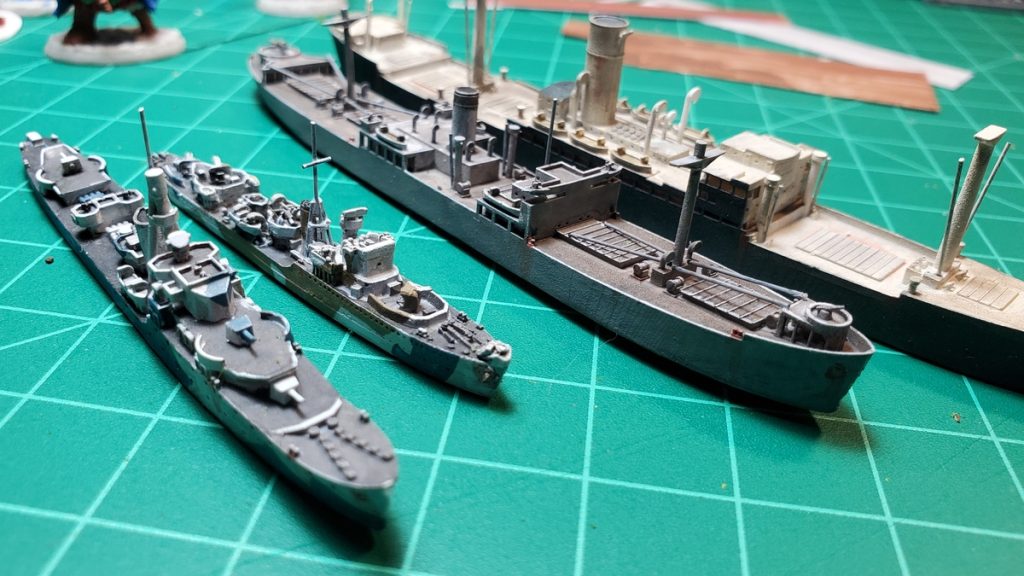
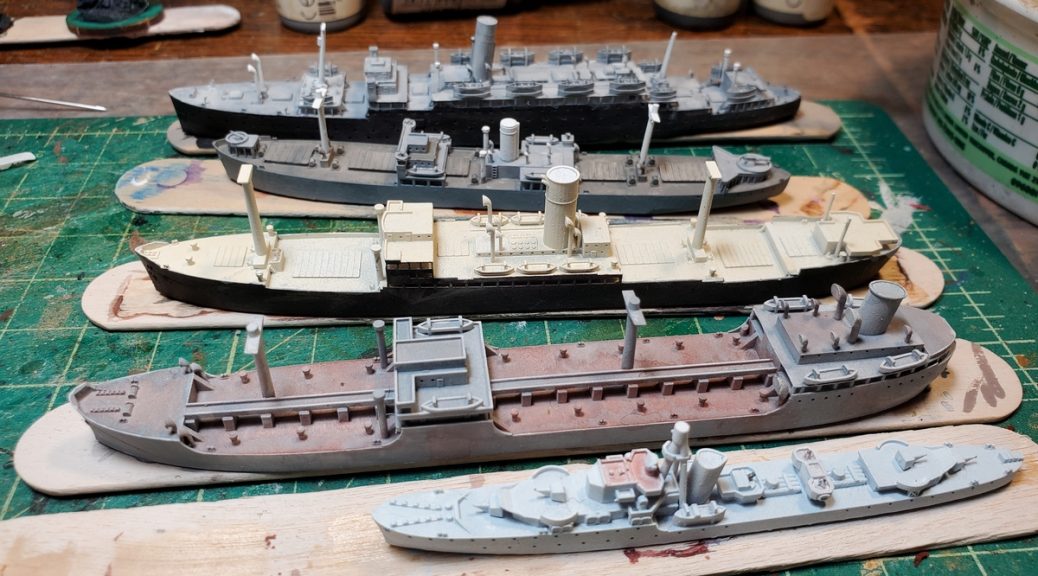
Family portrait of the four ships I’ve added detail to so far. Left to right, we have an Antics 3d print O-class RN Destroyer, a Figurehead pewter RN Hunt II-class escort destroyer, Antics 3d print Fort/Lake type freighter, and finally the Antics 3d print Ehrenfels, a German blockade runner of early WW2 fame, all with their various topmasts, tripod masts, booms, and such done in broom bristle.
The other three Antics 3d ships will all get at least a few cargo booms, and at some point I need to pull out my main collection of Figurehead pewter ships and do the masts on those as well. The Figurehead ships come with pewter masts, but they’re terrifyingly fragile and I’ve mounted exactly none of them so far to any of my Figurehead collection!
A Word on Tools
All of this detail work was made much, much easier (really, was made possible, full stop) by an off-the-cuff purchase I made just before Christmas – a pair of inexpensive Excel brand “Slant Pointed Tweezer” superfine curved tip tweezers. Far finer than the even cheaper drugstore tweezers and well worth it if you want to do this sort of detail nonsense at 1/1200 scale!
Fine curved point tweezers. Well worth the $12 CAN at my awesome local hobby store.
Handling the super thin plastic broom bristle by hand is awkward and frustrating; the stuff is hard to even pick up off a cutting mat. I’m fairly sure I’d have given up on this detailing very early if I hadn’t snagged these at my friendly local hobby store.
A bit of experimenting today with plastic broom bristle for masts on 1/1200 WW2 ships. I’m happy to say it works well, although as expected at this tiny scale, it’s more than a little bit fiddly!
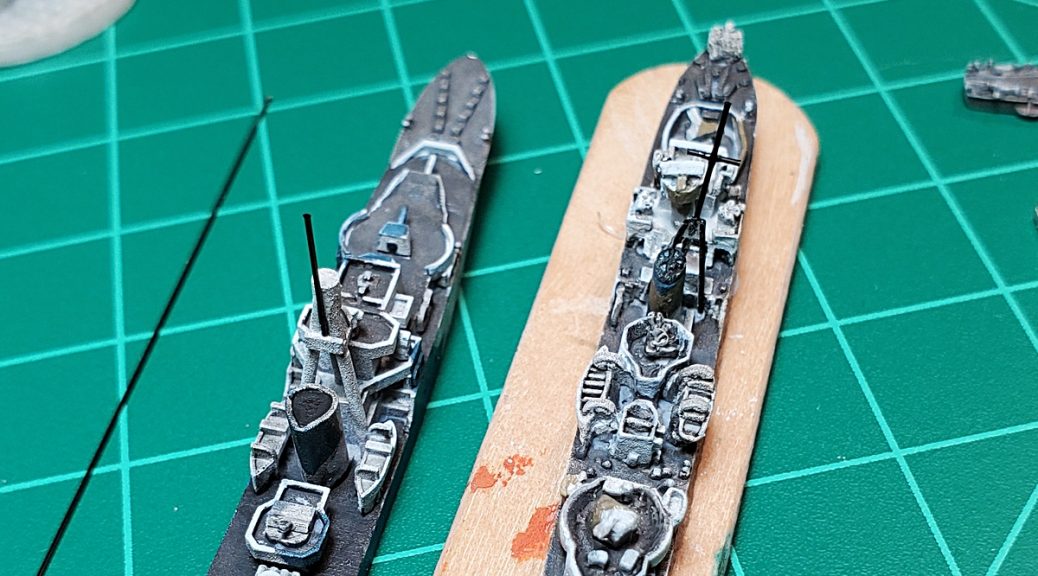
Side view. Foreground is the tripod mast on the Figurehead Hunt II destroyer escort, behind that is the Antics O-class destroyer with new topmast, and a piece of unused plastic bristle on behind that. Click for larger.
The bristles are harvested off our very ordinary kitchen broom and are some sort of black plastic. I’ve used them to mount 1/1200 airplanes and for 15mm and 28mm vehicle radio aerials in the past, and the thought of using them for more gamer-resistant ship’s masts than white metal or 3d printing would allow for was, I felt, worth exploring.
It seems to work quite well! The plastic broom bristle takes superglue nicely and is easy to work with. You can put a bend in it easily, which I had to do for the tripod mast on the Figurehead Hunt II destroyer escort, it cuts easily with a razor knife or precision hobby nippers, and I already know from previous uses that it’ll take paint just fine.
Rear view. The tripod mast on the Hunt II (right, on the craft stick) is very slightly cockeyed. I haven’t yet decided if I pull it off and trim it (or build a new one, if yanking this one off the ship ruins it…) or just live with it. Nevertheless, the basic idea works! Click, as usual, for larger.
I’ve got the week between Christmas and New Years off entirely this year, so there’s been a bit of painting going on. Mostly I’ve been working on the 3d printed WW2 ships from Antics, as well as a few fantasy bits just for fun.
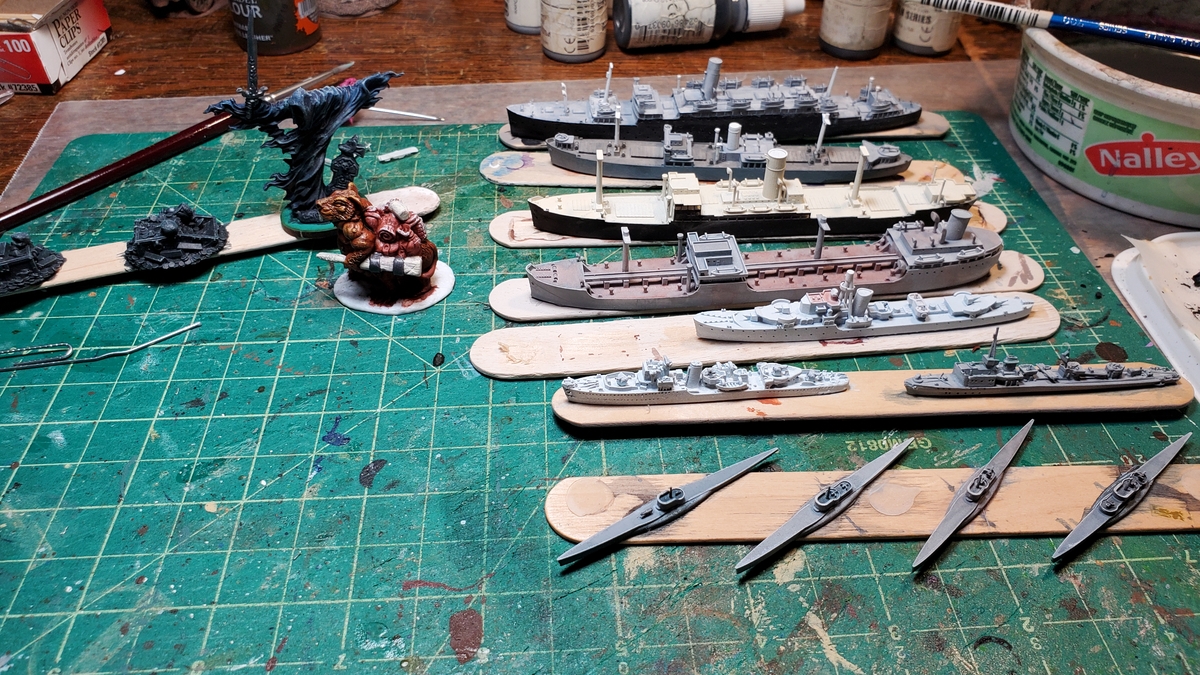
The workbench this holiday week. Naval stuff on the right, random Reaper fantasy stuff on the left!
The ships are coming along nicely, although the larger ones are slow going – so many details to paint around! The four U-boats in the foreground are basically done, unless I decide to do a bit of pin washes to pop the few details a bit more.
The larger vessels are all at least basecoated, although several are going to need a second pass as I realize I missed bits on the first pass. The two Royal Naval vessels (a Hunt DE foreground and “O” Class Destroyer behind) will get some sort of camo paint and the German KM T13-class torpedoboat might also get some, although it’s unclear to me if the Kreigsmarine ever actually did anything other than plain grey on most of their torpedoboats and destroyers.
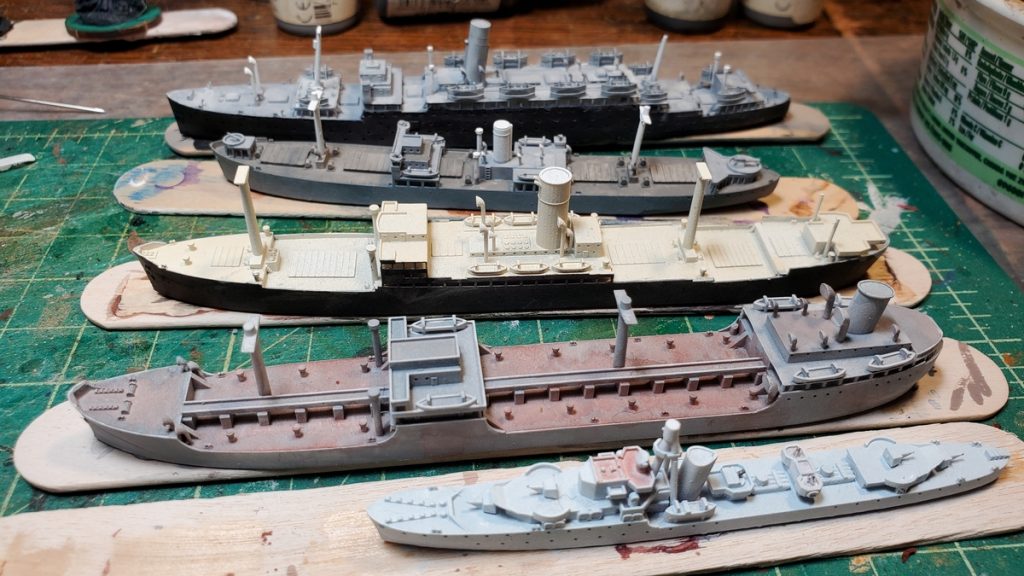
From the front, U-boats times four, the RN Hunt DE and KM T13 torpedoboat, “O” Class RN destroyer, T2 tanker.The back half of the naval dockyard. O Class DE forward, T2 tanker again, Ehrenfals freighter, Lake class freighter (armed), and finally the Athenia passenger liner at the back.
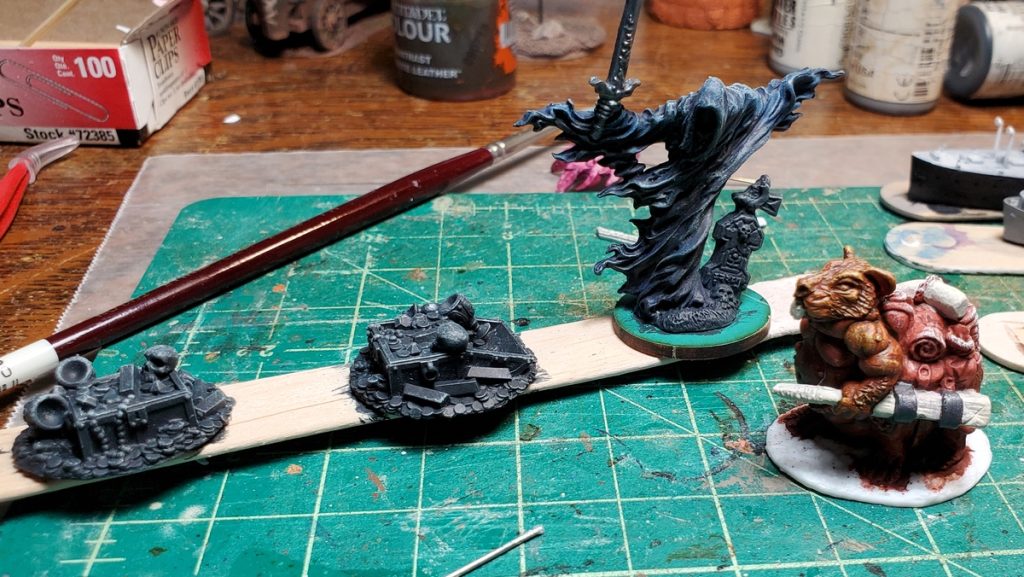
On the non-naval side, I’ve got little group of Reaper fantasy figures. An armed ghast/ghost/haunt, a pack rat, and a pair of treasure markers. Not much to see here yet, but for those of you not into ships, here you go!
Various Reaper figures, very early stages yet. Two treasure markers, a ghast/ghost/haunt thing, and a pack rat who’s both a travelling merchant and his own pack animal. Reaper has a gloriously broad range of fantasy figures, if you’re not familiar with their offerings!
Happy Holidays, everyone, and hope the tail end of 2022 and the start of 2023 are good to you and yours.
Antics, a UK model/toy shop, carry a small range of resin 3d printed 1/1200 WW2 ships under the John’s Model Shipyard name. There are a lot of pre-painted very expensive 1/1200 or 1/1250 model ships out there (Antic stock a lot, just for starters!), a couple of ranges of pewter kits, but big gaps in the market for kits for this scale.
The JMS line goes all the way up to aircraft carriers, battleships, and battlecruisers, wildly beyond ships suitable for typical coastal forces engagements as we’ve been doing here (although Italian MAS boats did engage RN cruisers in the Med, and the Channel Dash saw RN MTBs attempt attacks on Scharnhorst and company…), but there are destroyers for multiple navies and some very useful freighters, tankers, and such.
Unfortunately the Antic’s site search function doesn’t seem to have a way to bring up all the JMS products all at once – even searching for “model shipyard” only gets you a few of them, so you have to pick through each WW2 ship collection.
Shipping cost was reasonable and took about two weeks from the UK to Western Canada, which is pretty typical. UK companies are good at mail order and the Royal Mail->Canada Post trans-Atlantic pipeline is still pretty efficient!
Seven ships and four submarines all neatly packaged.
Everything arrived nicely packaged, with each ship in a small custom-cut cardboard box/wrapper, all of those bundled in bubble wrap inside another cardboard box. Each hull was taped to one side of their box with a bit of double-sided tape on the hull bottom and there was no damage in shipping, despite some of the 3d printed resin details like masts, vents, and lifeboat davits being very, very tiny indeed.
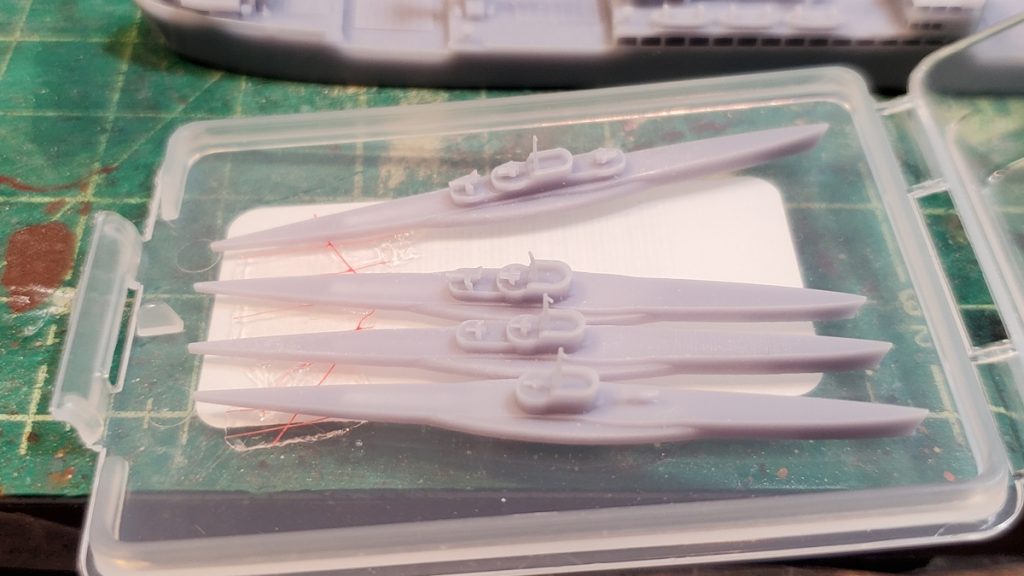
The four U-boats came in a little hard plastic case, held down by another bit of double-sided tape.
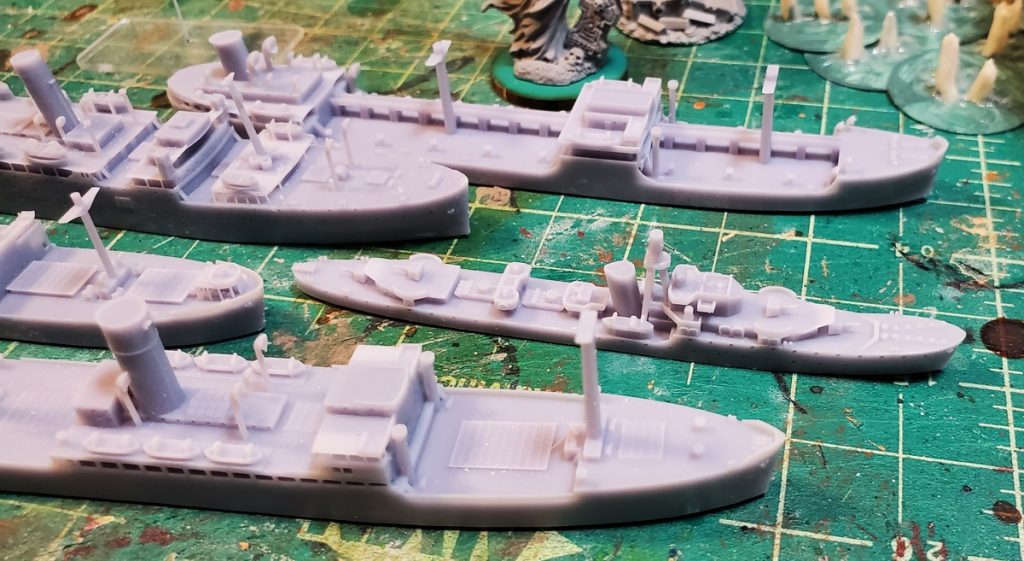
All five ships top down. Clockwise from top right: T2 tanker, O/P-class RN destroyer, MV Ehrenfels, Fort/Lake freighter (with gun tubs at bow and stern), and the liner Athenia.
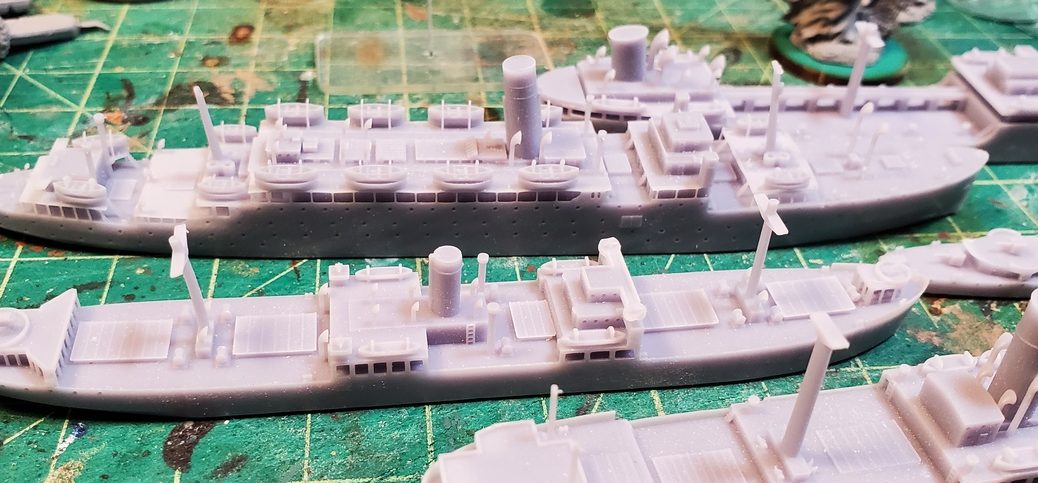
These are very nice crisp 3d resin prints, with details like gun barrels, lifeboat davits, and vent stacks printed incredibly fine – much finer than you could get with pewter or resin casting.
Lower angle shot, same arrangement as the first photo, MV Ehrenfels in the foreground, O/P RN destroyer and Fort/Lake freighter, Athenia liner, and T2 tanker.
Of the four merchants, only the Fort/Lake freighter is armed, with a gun tub on a raised platform on the bow and another on the roof of the stern deckhouse. I’ve never been terribly strict about WYSIWYG on miniatures but someone on Shapeways does do 1/1200 gun tubs if you wanted to arm up some of these ships…
Athenia (behind) and Fort/Lake freighter. Look how fine the lifeboat davits and other bits are, especially on Athenia.
The liner Athenia is a fun addition to the fleet – not likely to be on the table much compared to the freighters and warships but there’s basically zero other tabletop quality passenger liners out there that I’ve found.
In 1/1200 scale 1 real world inch is 100 scale feet (1200 inches), which is a nice easy conversion to remember. Accordingly, a 400ft long ship would be 4″ long. Athenia comes out to about 5.25″ long, Ehrenfels slightly shorter at almost exactly 5″, the T2 tanker just under that, the Lake/Fort freighter at about 4.25″, the RN O/P-class destroyer at just under 3.5″, and finally the four Type VII U-boote at around 2.25″. Far as I can tell these are all correctly scaled, or close enough for jazz!
MV Ehrenfels in the foreground, Royal Navy O/P class destroyer, and in the back the T2 tanker, plus a nice look at the bows of Athenia and the Lake/Fort freighter.
In theory all of the ships need additional topmasts, cargo booms, and such added. If I do add them, I’ll use plastic broom bristle as that should be far more gamer-friendly (and more resilient to damage!) than plastic rod or fine stiff wire. I might well leave them with just the 3d printed mast they came with, to be honest. They’re gaming models, not static showpieces.
The four U-boats. I think they’re original conning tower, No. II style, No. IV style, and “flak” version in order from front to back. Just under 40mm long bow to stern.
I threw the U-boats into the order just for the heck of it, but they’re neat little models. You get four slightly different versions of the Type VII Uboote, with original conning tower, with No. II style conning tower, with No. IV style conning tower, and “Flak” with the extra AA gun platform. The 3d printed periscopes are incredibly fine and even if I don’t add cargo booms and such to the ships, I might well swap out the periscopes with broom bristle or superfine brass wire as being more resilient than the 3d printed resin will be!
The prices were comparable to or cheaper than pewter models of similar size (the pewter Liberty freighter from Last Square, for example) and less expensive than similarly detailed 3d prints from Shapeways. As mentioned above about the Athenia, JMS cover some vessels not commonly found elsewhere, so I was happy with these and might well order some more in the future. There’s a decent variety of Royal Navy WW2 vessels in the John’s Model Shipyards line (search here for ‘kit’ or ‘John’), a few German WW2, another few Japanese (mostly cruisers or battlecruisers for the two Axis navies), and a Liberty freighter to round things out. Nothing yet for the French, Italians, or (the biggest surprise) the Americans, but hopefully the range keeps expanding in the future. Personally I’d love to see more destroyers, corvettes, frigates, and similar, as those ships worked alongside coastal forces boats fairly regularly and that’s going to stay my main focus. Whoever is doing the 3d design work at JMS seems to know their stuff, know the limits of the 3d printer they’re using, and get a really nice level of detail on their ships!