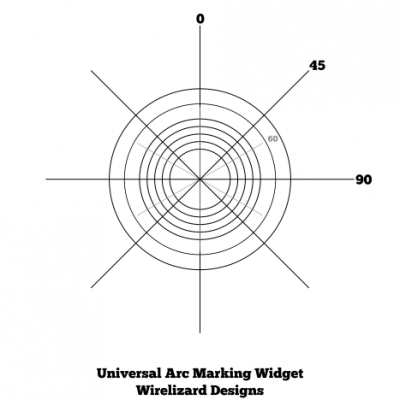
Infinity has, for most troops, a 180° front arc for Line of Fire and almost all actions. Other games have similar arc requirements – Full Thrust uses six 60° arcs on it’s starships, for example. To help me do the 180° arcs on my Infinity bases, I’ve whipped up a simple little measuring widget in Inkscape.
The two PDFs below (one Letter, one A4) are designed to be printed out to help with marking arcs on the bases of figures; there’s four quadrants for 90° or 180° marks and Full Thrust/hex-side 60° lines as well. The rings are to help centre your bases accurately; they start at 20mm and go up by 5mm then 10mm all the way to 60mm; the rings are 20mm, 25mm, 30mm, 35mm, 40mm, 50mm, and finally 60mm.
Something quick and silly to break the month-long dry spell in posting!
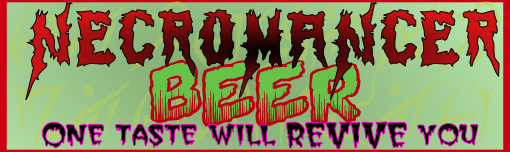
On our local Blood Bowl league’s Facebook page one of the guys made a joke about “Necromancer Beer – one taste will revive you” and while I was waiting for dinner to finish I fired Inkscape up and cranked out the following bit of fluff.
Necromancer Beer – one taste will revive you! Feel free to print this for personal use!
This is the same height as a number of other BB sideline ads already floating around the internet, so should mix nicely with them.
Enjoy, and if you do use this, please send me photos of your pitchside scenery with the Necromancer Beer banner on it!
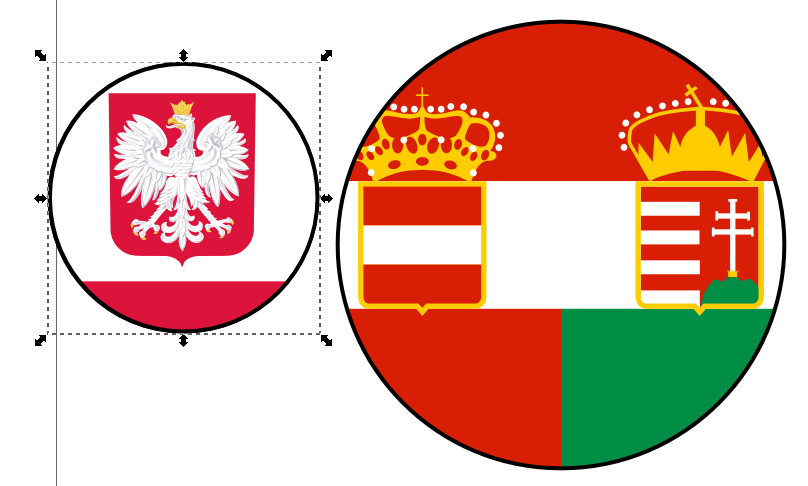
As I was finishing up that first set I realized that I was pretty close to actually having a full set of markers for everything that happened in and around (western) Russia between 1914 and 1921 or so, with German, Imperial Russian, Red, and White markers. All I was missing was the Poles for the Russo-Polish War and the Austro-Hungarians for their front against the Russians in WW1.
Polish and Austro-Hungarian markers (in draft form) for expanded Eastern Front/Russian theatre action.
The Polish eagle works nicely as a symbol, with red and white from the Polish flag in the background. The Austro-Hungarian symbol, like that Empire itself, is a bit of a colourful mess which incorporates a circular slice from the A-H Imperial Flag.
After I put the original markers up on Lead Adventure one of the other members posted some splendid but rough versions of his visions for alternate and extra markers. I especially liked his alternate Red marker, which used the hammer-and-plough symbol of the very early Russian Revolution, before widespread adoption of the hammer-and-sickle. I can easily see why the plough lost out to the sickle, it’s a difficult thing to draw well and tends to turn into a lumpy blob at the best of times!
Nevertheless, I sat down with Inkscape last night and finally produced a hammer-and-plough I’m happy with. Here’s an oversized version.
The hammer-and-plough, as used early in the Russian Revolution by the Bolsheviks.
I’ve got a few more ideas for additional markers, and I’d like to add markers for the various international intervention forces (Britain, France, the Americans, maybe even Japan), especially as doing the intervention forces would pretty much also finish the Western Front marker set I’ve been considering making!
In the run-up to this weekend’s GottaCon convention, I’ve finally gotten around to finishing the patrol markers I need to properly run Chain of Command-powered Russian Civil War games.
I’d done status markers back in January, and now I’ve got a set of the Patrol and Jump Off Point markers you need for each side in Chain of Command.
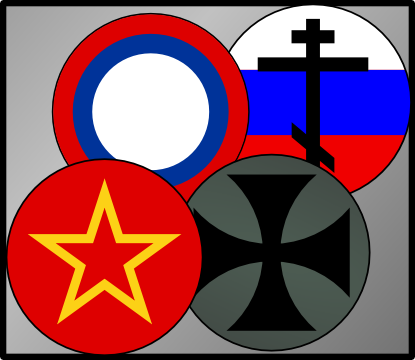
Imperial Russia, White Russian, Red Russian and German markers – see below for PDF link.
Even better, I’ve done up German and Imperial Russian markers as well as White Russian and Red (Bolshevik) markers, so Eastern Front World War One is covered as well as the RCW. The Russian markers are based on the roundel used by the Imperial Air Force; the White marker is the Russian tricolour defaced with an Orthodox cross; the Reds get a yellow star on red background; and the Germans get the classic cross on a feldgrau background.
Recently we’ve tried out TooFatLardie‘s Chain of Command/Through the Mud & the Blood hybrid rules with my Russian Civil War figures, and found them good, although with a bit of a learning curve.
Chain has a few persistent conditions or stances that can apply to troops for multiple Phases, either voluntarily (Overwatch, the Tactical stance and some others) or involuntarily (Pinned and Broken, mostly). There are Chain markers available for download over on the TFL Yahoo Files site but they’re WW2-specific (Allied vs German) and I also wanted markers with a bit of a period feel that matched a set of status markers I did a while back for M&B games and some of the other graphical stuff I’ve produced over the years.
So I did what I usually do, which is break out Inkscape, pour myself a drink, and spend an hour or two noodling away.
The resulting PDF has a full set of standard markers for Chain games, with or without a WW1-flavoured M&B infusion, and might also be of interest to anyone using Chain for Very British Civil War alternate-1930s games. They’re colourful, large enough to handle, but not large enough (I think, anyway) to really disrupt the game visually.
Both PDFs are single pages and tiny, 9.4Kb each. Permission is granted to copy or print these files for personal use only.
Letter size for those of us used to that size of paper: CoC_markers_letter
A4 for the rest of the world who use rational systems for their paper sizes: CoC_markers_A4
Feedback welcome, as always!
I’m working up a batch of Patrol & Jump-off Point markers for Chain/M&B World War One and Russian Civil War action, planning on a multi-page PDF with markers for all of the major combatants. That should be out soon, hopefully next week.
It’s been a quiet stretch here mostly because I was away from home for just over a week housesitting for a family member on the other side of town, but the Blood Bowl pitch setup has been progressing slowly.
I posted my stencil tests recently and have since finished the full set of field lines and a logo on the fabric pitch.
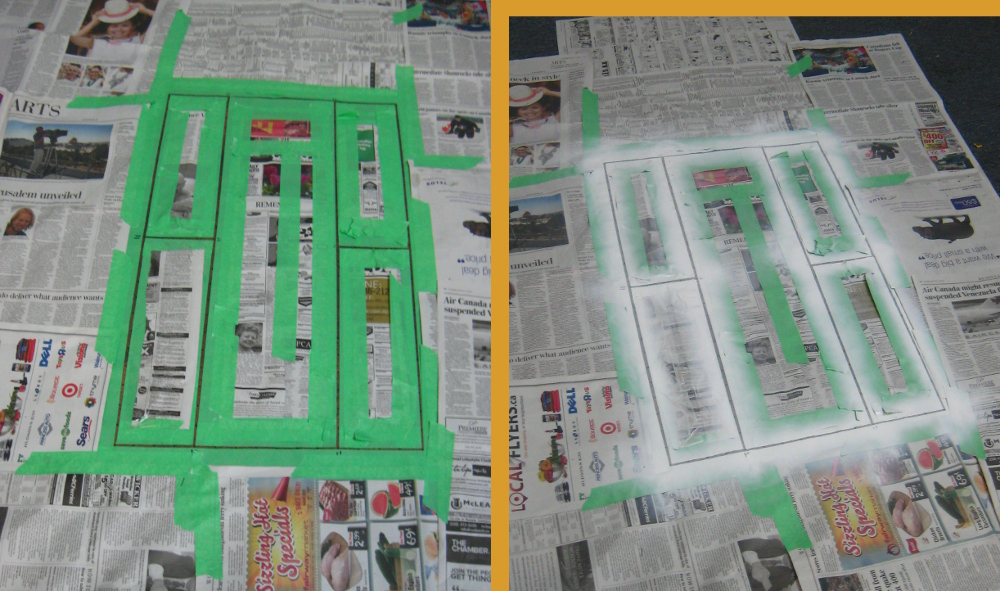
Masking the field off for most of the field lines. Newsprint and lots of masking tape! Click for larger
For the field lines, I used masking tape over the fabric to mask off the edges of each line. Because of the width of the tape I had, I wound up doing the outer lines of each endzone separately. The photo above has the centre line (Line of Scrimmage), wide zone and long edge lines masked off, as well as the inside edge of each end zone. After masking it off I sprayed along each line with white spraypaint, making two or three passes down each line.
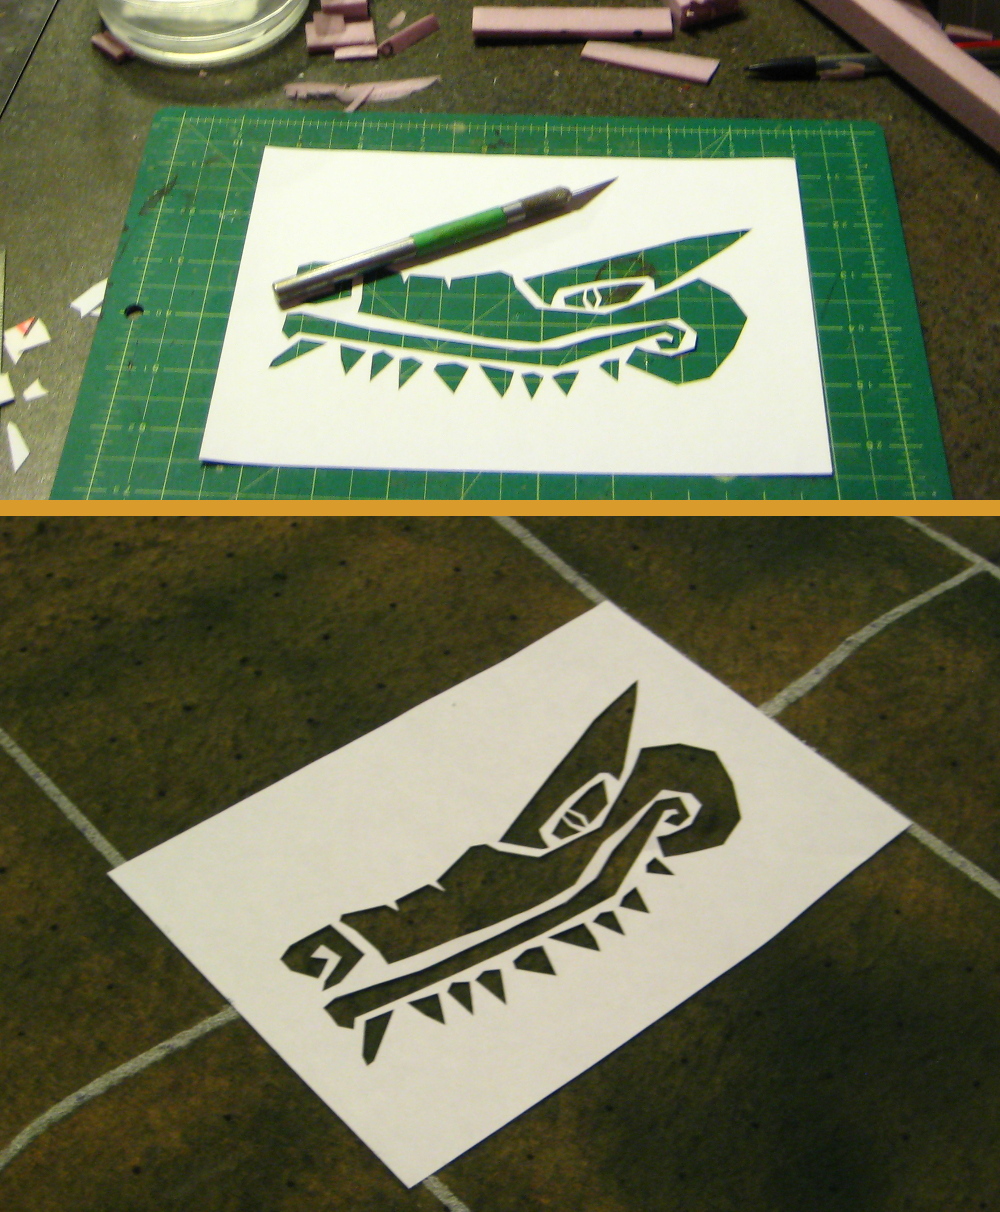
The red crocodile head logo in the centre of the pitch I did differently. I laid out the image in the size I wanted in Inkscape on my computer, then printed it on a sheet of full-sheet label paper — the sort of paper where the entire sheet is one giant sticker. After printing it I used an Xacto to cut the stencil out, mostly freehand but using a small steel ruler where needed. Once cut I peeled the backing paper off and stuck the stencil down to the fabric.
You could do this step with ordinary printer paper (ideally a good quality slightly heavier-weight sheet) and secure it in place with masking tape around the edges, but I happen to have a stockpile of the full-sheet label paper around and it does work better than ordinary paper for things like the spirals in this stencil and some of the smaller details — see around the nostrils and eyes, for example.
Cutting out and placing the stencil on the felt. Click for larger, see text for details.
After it was carefully pressed into place on the felt I loaded up a regular 1.5″ wide housepainter’s brush with red craft paint and went at the stencil in the classic Martha Stewart-approved way of painting a stencil without getting paint under the edges of it and ruining the outline, namely short vertical stabby strokes down onto the surface, working slowly and being careful not to disturb the stencil as you work. It works on Blood Bowl pitches just as well as it works on bedside tables or whatever crafty random thing Martha does!
Logo done in the background and stencil lifted off in the foreground. Click for larger.
After getting a reasonable layer of paint into the stencil I lifted it carefully off while the paint was still wet, to keep the stencil from getting stuck to the fabric. It came out very clean, no fuzzy edges or paint bleeding under, especially given it was painted onto fabric!
Later I went back and masked off the last field lines around the outer edges of the endzones, same tape-and-newsprint method I used on the main field lines.
If (when!) I do another fabric pitch, I’m going to seriously consider just doing all the field lines and other decorations with a brush instead of spraypaint; protecting the rest of the project (and the rest of the room!) from overspray is a massive pain when using spraypaint. All the masking seen in the first photos of this post took most of an hour to do, while the spraypainting itself only took a couple of minutes after the masking was complete. Brush painting stencils produce no overspray and don’t generally put the rest of the room at risk of being repainted…
The felt pitch is done at this point, except that I might eventually go back and add some colour to the endzone areas, or a team name across one or both endzones if I get really ambitious.
Work on the various sideline temples (last seen here) is also progressing, although taking pictures of black-primered buildings is fairly pointless so a proper progress report from that segment of the project will be a couple of days from now.
I’ve got a felt Blood Bowl pitch that I have marked the standard grid on (15×29 30mm squares) but after months of using it I hadn’t gotten any further than that in transforming it from a useful but plain piece of fabric into a proper, good looking BB pitch!
Toward that end, I used some full-sheet self adhesive label paper to create a couple of test templates for stencils, cut them out with an Xacto knife, and stuck them down to a scrap piece of felt.
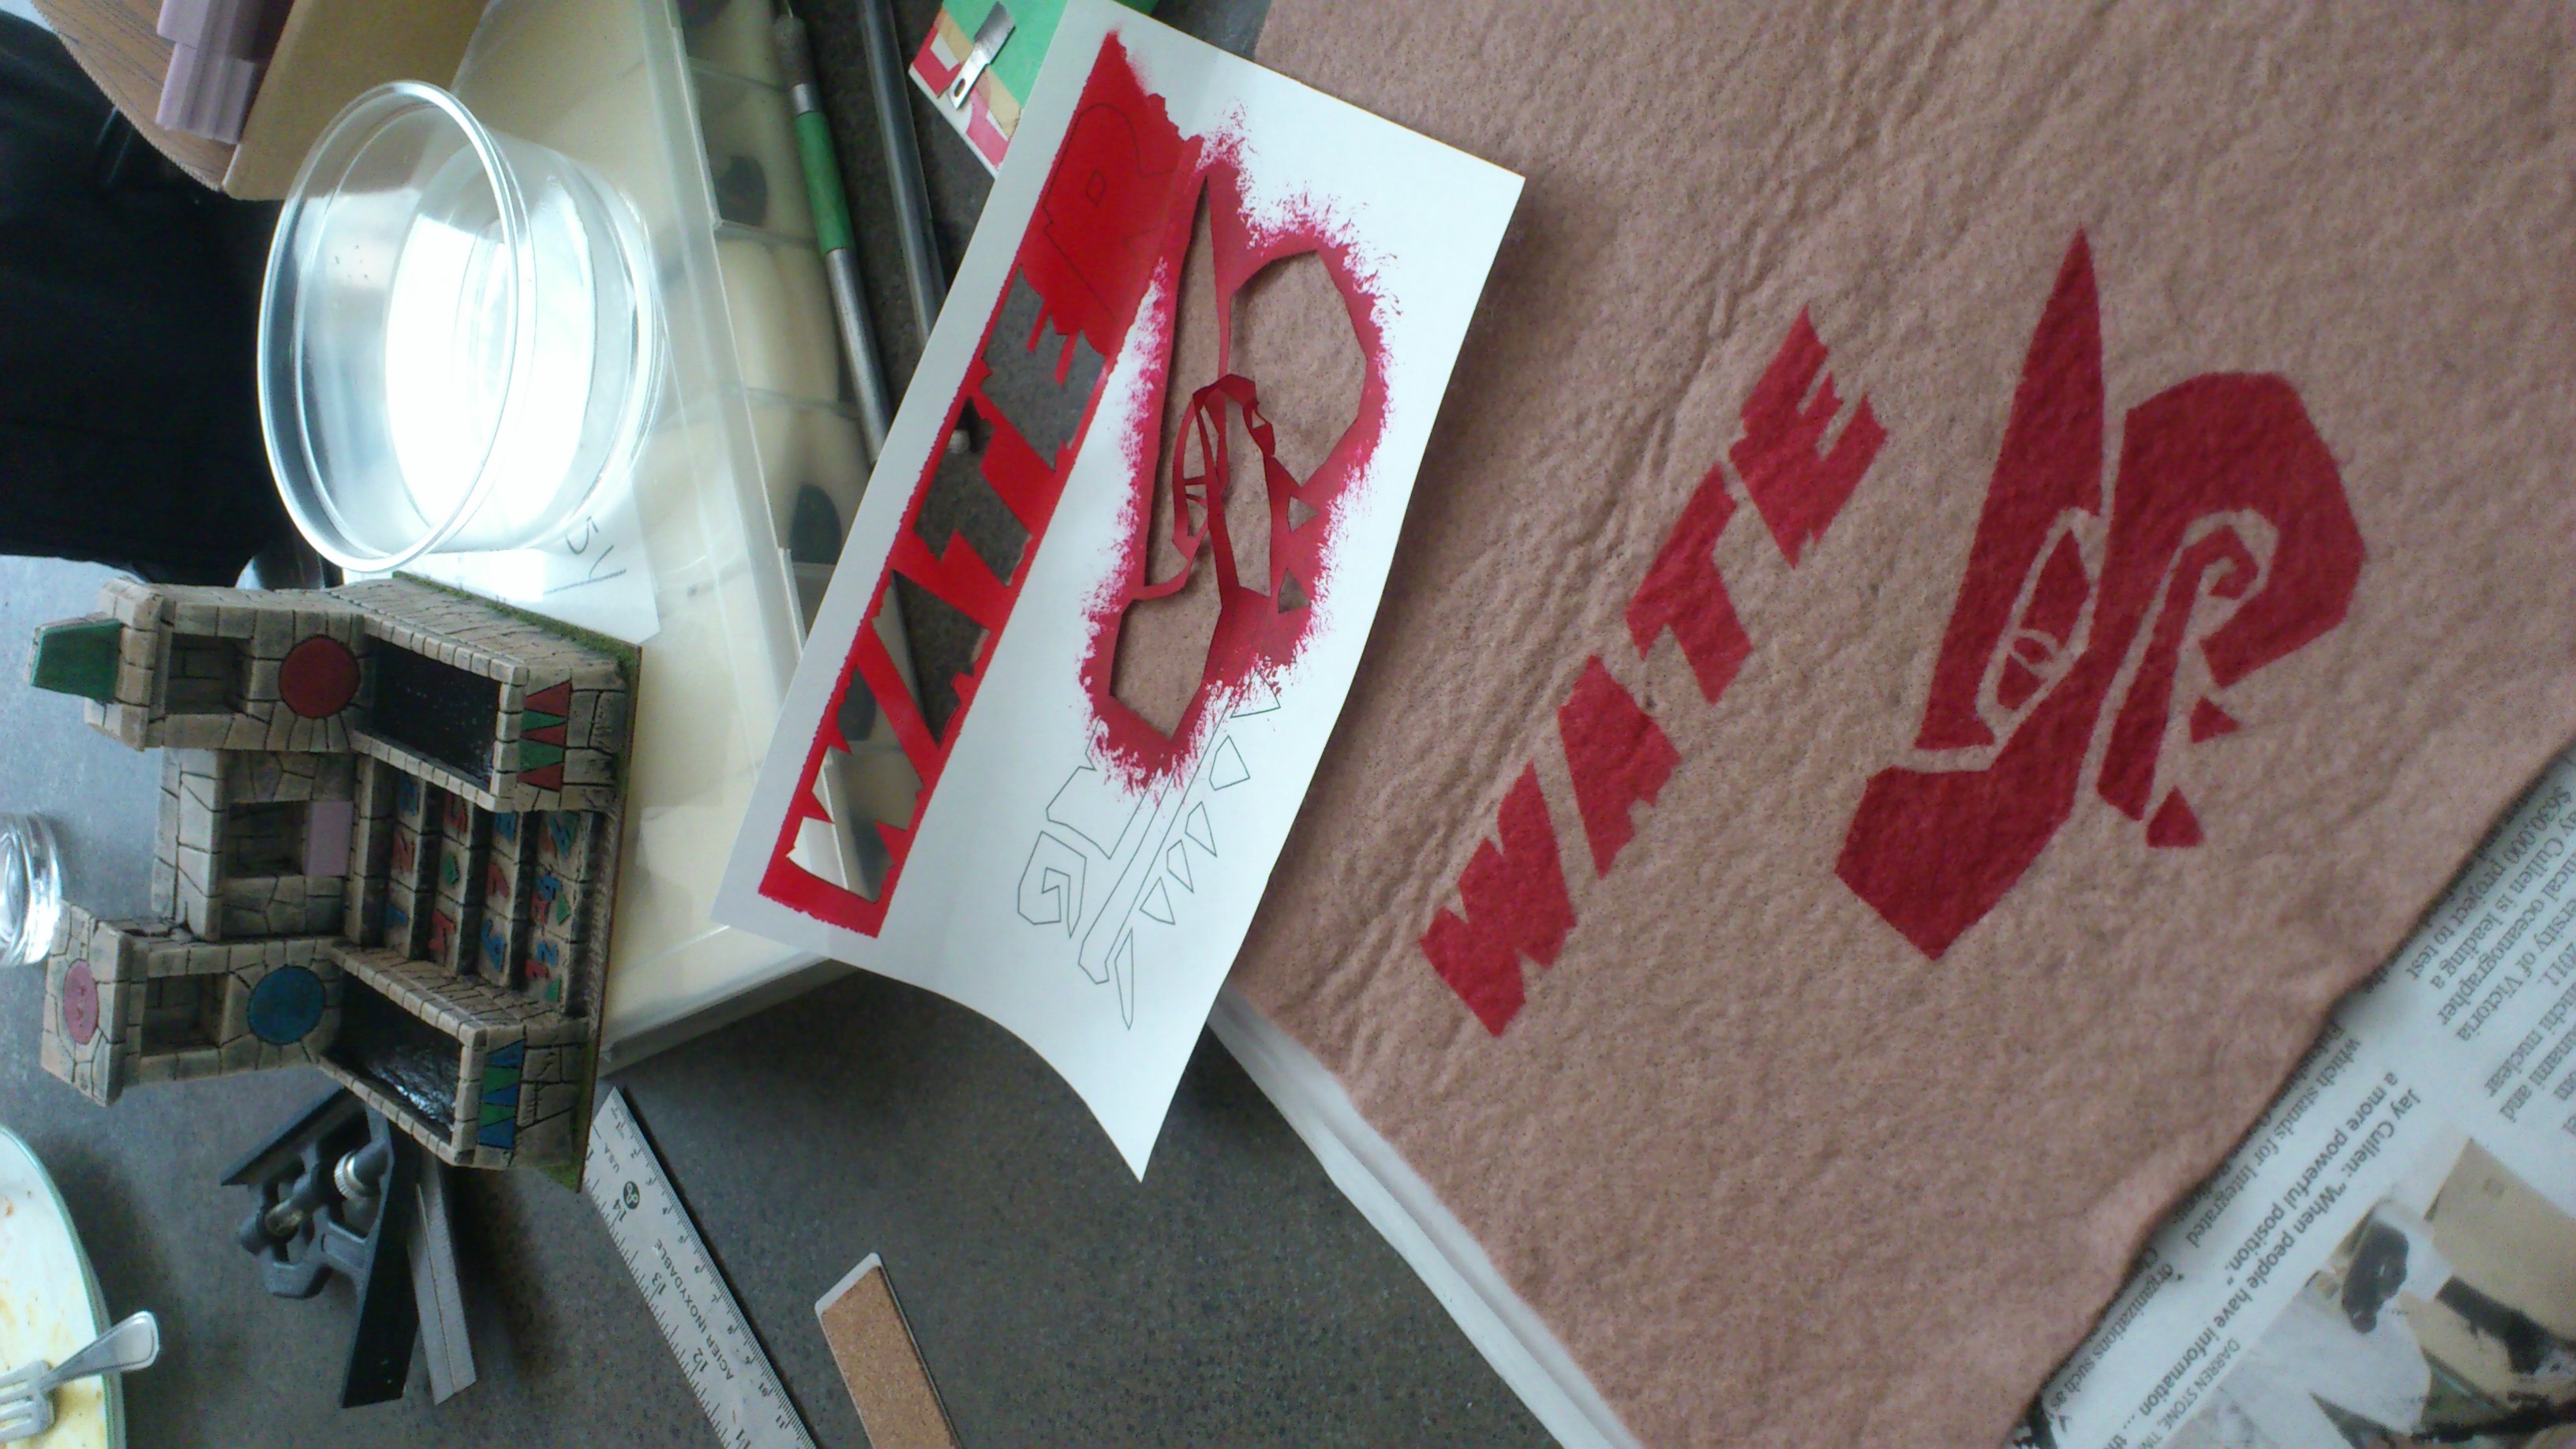
Phone photo of my test stencilling – the top lettering is with spraypaint, the bottom partial logo is with craft paint and a paintbrush. The stencil I used is just above the felt piece. Click for larger.
I tried red spraypaint on one part of the stencil, then used red craft paint and 1.5″ brush on the other part of the stencil, with the classic crafter’s method of brush painting a stencil – vertical stabbing of the brush down onto the stencil, so as not to get paint under the stencil or dislodge it while working.
Both methods worked just fine, and I’m not sure which I’ll ultimately use for the logo and lettering stencils I want on the actual pitch.
The pitch itself finally has a light spray of green spraypaint over it to make it look grassy (the felt itself is tan) and tomorrow I’ll mask off and spray the field lines a Blood Bowl pitch needs – centre line, wide zone and end (touchdown) zone lines being the most important, although I’ll probably do the field edge lines on all four sides as well, eventually, just to properly finish the pitch.
In the local Bloodbowl league I’m currently involved in, there’s a pair of Lizardman teams, one using the regular GW figures for the team and my crocodile dudes from Impact Miniatures. Our League Commissioner is also playing with an Orc team, and will occasionally write a game report in the persona of his Orcish coaching counterpart. After thumping on the league’s other Lizard team 2-0, the Orcish coach was heard to say, “Herd der is some dat look like those Crocodiles on dem Golf shirts everyone is wearing dees days; CHOMP!!! CHOMP!!!!”
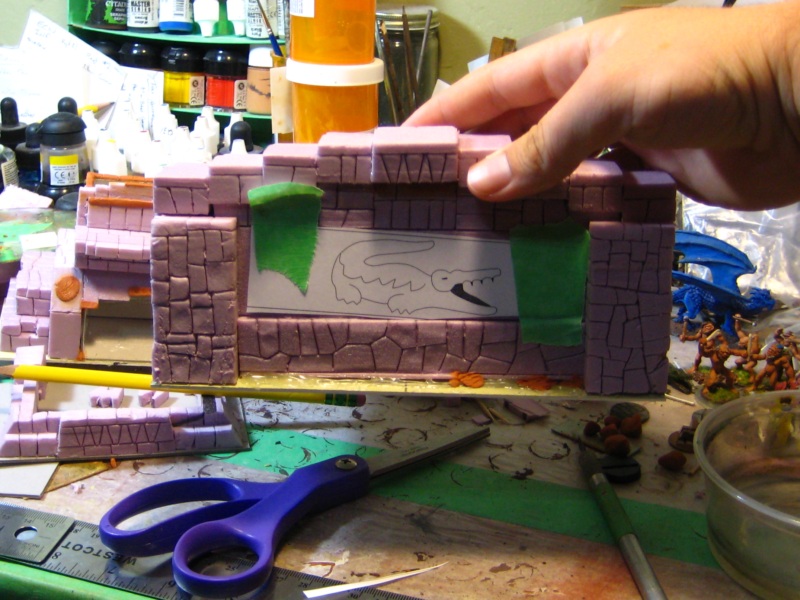
I was, at about the same time, wondering what to do for decoration on the dugout temple. A little bit of Google Image Searching and a little bit of Inkscape fiddling later to produce a basic image to guide my carving, I sat down with the completed temple, a very sharp Xacto blade, and this resulted.
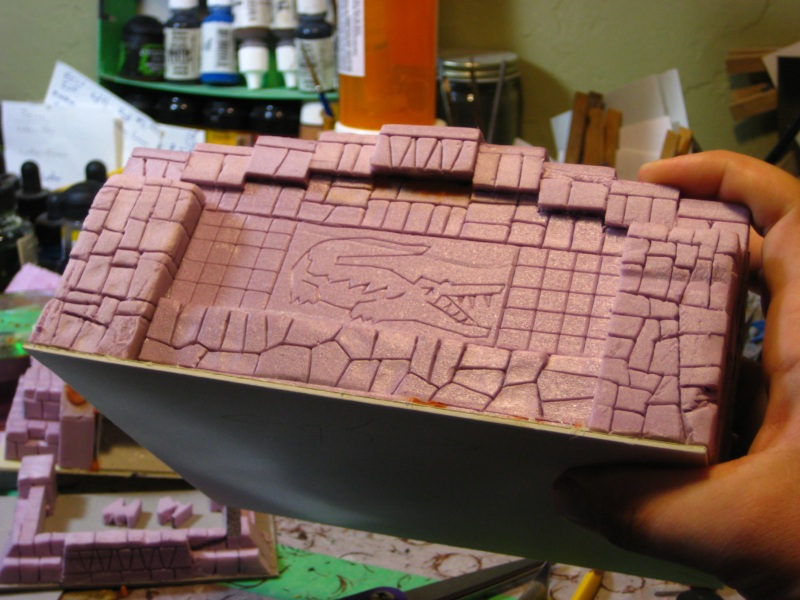
Shirt pocket crocs? Sure! Still needs a fair bit of cleaning up and then of course paint! Click for larger.
I printed out a simple line-art version of the relevant logo, taped it down across the foam, and went at it carefully with the brand-new very sharp Xacto blade.
The logo in place waiting for carving. Click for larger.
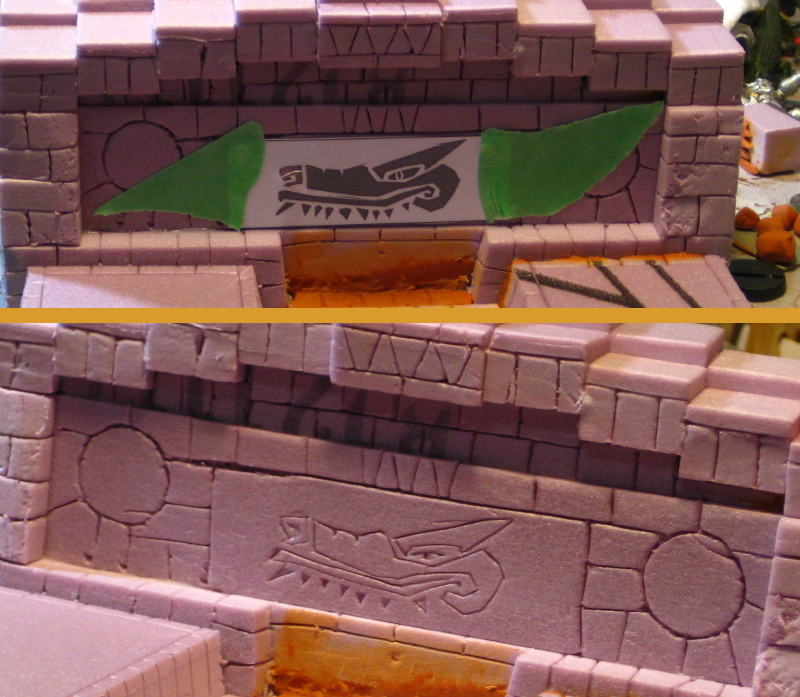
On the front of the dugout above the three actual dugout areas, I put the logo of my lizardman team, as seen in earlier in the year. Same procedure, taped the printout down and carefully went at it with an Xacto.
Saltwater Slaughter team logo on the front face of the dugout. Or a generic crocodile head, as you will. Click for larger, as usual.
I spent some time messing around on Google Image Search, and tried another jaw/tooth-based logo out for a bit before tripping over the Aztec “cipactli” glyph, which is a cayman/crocodile and also “e;a primeval sea monster, part crocodile, part fish and part toad, of indefinite gender”e; (from this Wikipedia article) which sounded cool enough as a concept, fit the jungle/tribal/vaguely-Central American theme usually found with Lizardman teams and looked easily reproducible and scalable as a team logo. I found a couple of versions of the cipactli glyph I liked, redrew them in Inkscape so I could work in SVG vector format, then started messing around.
One of my favourite things about Inkscape is that the canvas is infinite. Unlike GIMP or Photoshop where you define an image size and usually have to fiddle around to expand it, Inkscape will show you your defined page size, but the canvas around that page has no boundaries. Want to grab a copy of some part of your image, drag it to one side and fiddle with it separately or create different versions of it? Copy or duplicate the objects you want, and go right ahead and drag them somewhere out of the way to play with them!
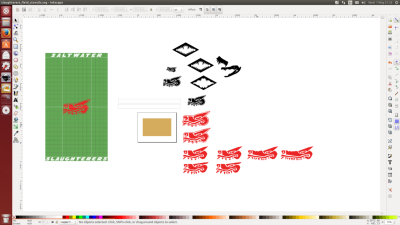
Inkscape working file screenshot. See text for details of what you’re actually looking at!
Above is a quick screenshot I took of Inkscape and the working file I’ve got for Croc team logos and related graphics. See the tan rectangle in the centre? The grey box surrounding it is a North American-standard Letter-sized sheet of paper (roughly A4 for the rest of the world) so the “real” size of this working area is theoretically huge.
The green box on the left is an entire standard-size Blood Bowl pitch with 30mm squares (a 26 x 15 square pitch, for non-BB players!) that I set up to check scale and sizes. The collection of black toothy shapes were an earlier, now abandoned idea for a team logo; the various red things are interations of a possible cipatcli logo.
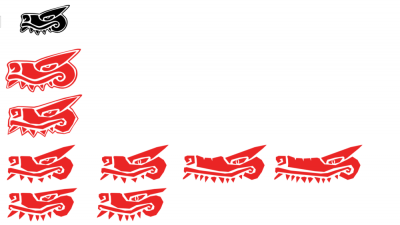
Variations on a cipactli theme. See text for details and click for larger.
The closeup screenshot of possible cipactli logos above shows where Inkscape really shines. Rather than work on just the one image and rely on undo/redo to track changes, or creating lots of versions of a single file and having to have them all open at once, if I want to tweak an object in Inkscape I can just grab a copy (Ctrl+D for Duplicate is useful, it’s Copy+Paste right over the existing object) then drag it off a bit on that infinite canvas. Rinse and repeat until you have a version you’re happy with!
Oh, and the cipactli varient I’m most likely to use, at least at this point, is the third down and third along. The slightly longer snout makes it look more croc-like, but for some reason the even longer nose of the rightmost one doesn’t work for me. I might well try another few variants, there’s no shortage of room!
I’m in the middle of the five-week field assignment for work, so away from most of my usual gaming habits and my workbench. All is not lost, however, because the co-worker I’m on this thing with is also a miniature gamer and we decided to bring our Blood Bowl teams along and have an “Exiles Micro League” of two players and four teams while we’re away. It’s something to do other than watch terrible TV during evenings in the hotel suite!
I brought a new 30mm fabric BB pitch along, made with felt. This isn’t the dark brown one seen here previously, this one is tan felt and a significant improvement over my first attempt at a BB pitch. I’ll get photos of it at some point, probably after I get home at the end of February.
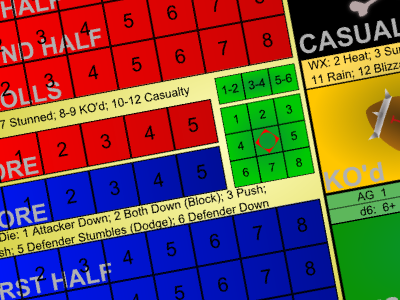
Along with the pitch and teams, I realized we needed a tracking sheet, as I haven’t brought along my tracking scenery due to lack of luggage space. I broke out the ever-reliable Inkscape and worked up a basic tracker – space for two sides to track phases for two halves, re-rolls and score, as well as the two scatter templates.
Thumbnail of my Blood Bowl tracking sheet. Full PDF file below!
As we played we added a few things with pencil – quick reference notes, mostly, as well as a shared dugout space for players in Reserve, KO’d or Casualties. I’ve gone back into Inkscape to add those to the tracker sheet, and added some colour and graphic flourishes as well. Hopefully someone else finds this useful!